
Search Divi Plus Documentation
Search for answers or browse our knowledge base.
Installation
Installation
Divi Plus can be installed using 2 methods.
1. From WordPress Dashboard
Go to WordPress Dashboard >> Plugins >> Add New >> Upload Plugin >> Choose File >> Browse divi-plus.zip and click Install Now >> Activate Plugin.
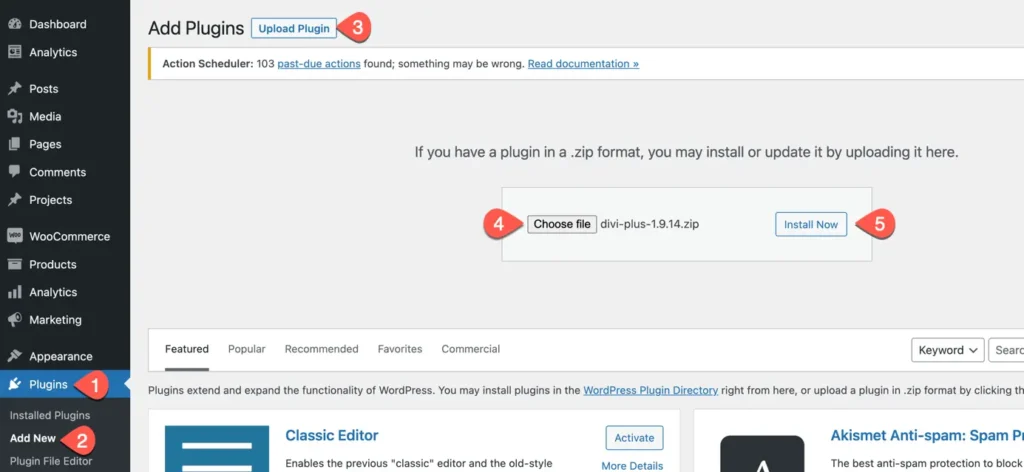
- Go to Plugins.
- Select Add New Option.
- Click on button named Upload Plugin.
- Browse for file divi-plus.zip
- Install the plugin.
2. Manually uploading via FTP
- Extract divi-plus.zip.
- Connect to your server using an FTP application.
- Navigate to wp-content/plugins/.
- Upload the divi-plus directory in the plugins directory of your server.
- Go to WordPress Dashboard >> All Plugins > > Activate Divi Plus.
Activating and Managing Modules in Divi Plus Plugin
Once the plugin gets activated, make sure all the modules are active. To do that, go to WordPress Dashboard >> Settings >> Divi Plus >> Here, you find all the modules available in the Divi Plus plugin. By default, all modules are active, but if you want to use any specific, then you can easily disable others by unchecking the checkbox adjacent to the module name.
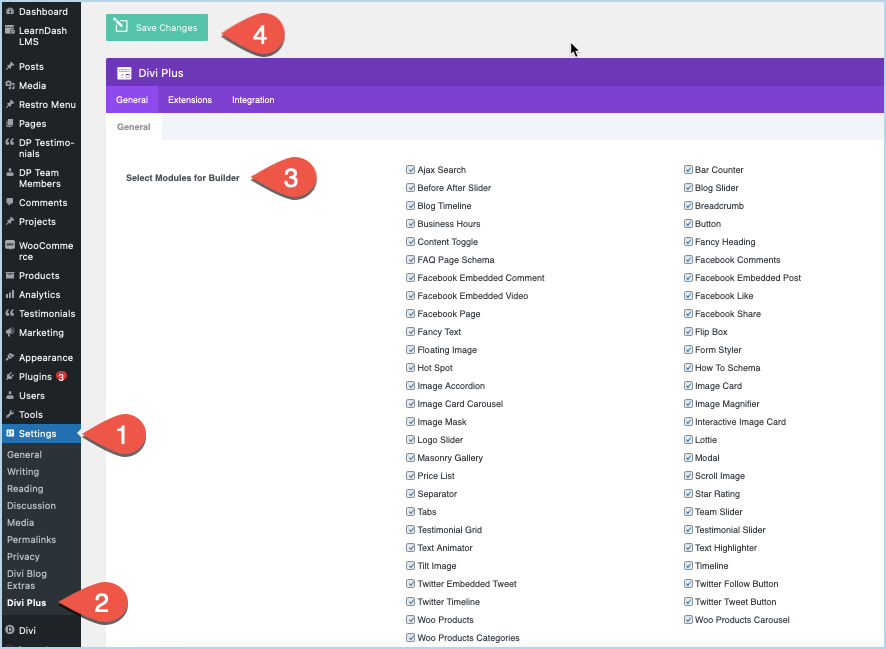
Once done, Save Changes, and you’re ready to use the Divi Plus modules.
Note: If you encounter issues during plugin installation, ensure you’ve updated Divi theme and have adequate system resources.
If you continue to experience the issue, please don’t hesitate to contact our support portal.
Our dedicated support team is here to assist you further and resolve any ongoing problems you may encounter. Click on the below link.
https://diviextended.atlassian.net/servicedesk/customer/portals