
Search Divi Plus Documentation
Search for answers or browse our knowledge base.
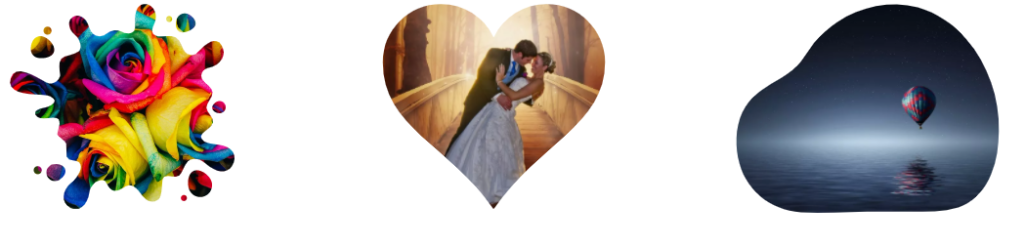
Image Mask
Using the Divi Plus Image Mask module can easily create masked images by applying one of 11 mask types. Moreover, each mask has some associated mask style that makes this module more artistic & your page more eye-catching.
How to add module on page
Once Divi Plus is activated, it adds several modules to the Divi builder. To add a module on the page, use the following steps:
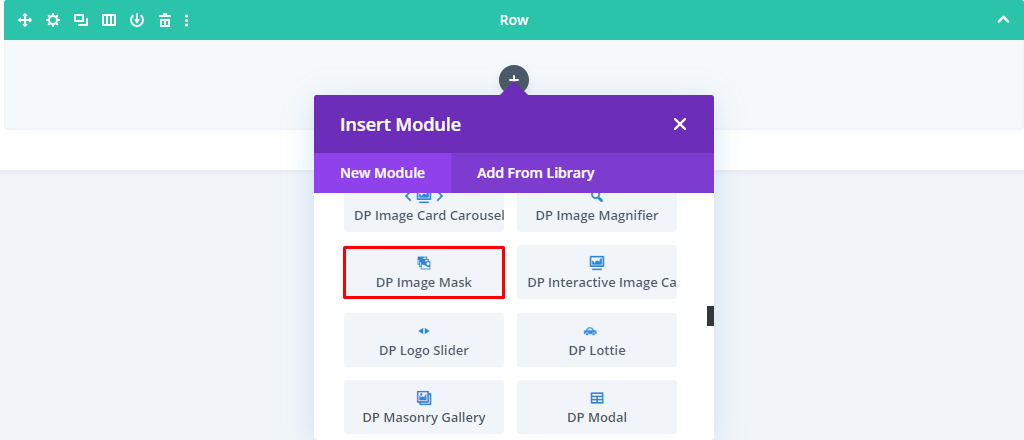
- Create/Edit a Page/Post that uses Divi builder.
- Create/Edit a row.
- Click on Add New Module option; choose the DP Image Mask module.
Content Tab
- How to select masked image content-type: Go to the Content settings >> Mask On >> select Image / Background.
- How to select Mask Type: Go to the Content >> Mask Type >> select your preferred mask type >> Arrow / Circle / Fluid / Heart / Leaf / Music / Shield / Speech Bubble / Splodge / Star / Square.
- Select mask style: Go to the Content >> under Mask Type settings >> * Style >> select your preferred mask style associated with the mask type.

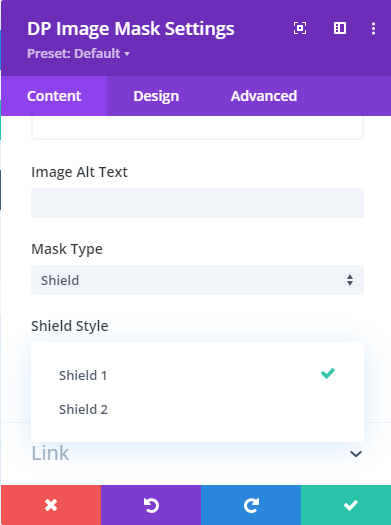
(*) represents Mask Type’s style name.
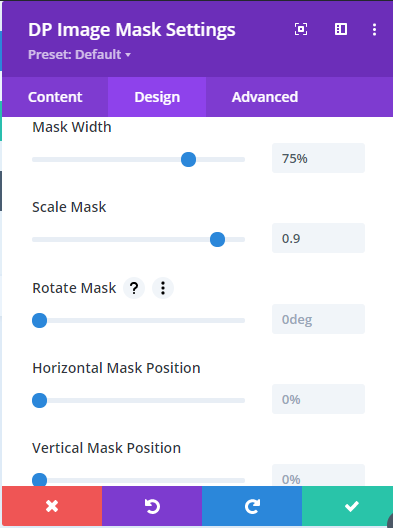
Design Customizations for Image Mask
- How to Adjust Mask Width: Go to the Design tab >> Mask Settings >> Mask Width >> input the value, or move the slider.
- Increase or decrease mask size: Go to the Mask Settings >> Scale Mask >> input the value, or move the slider.
- How to Rotate Mask: Go to the Mask Settings >> Rotate Mask >> input the value, or move the slider.
- Adjust Mask Horizontal Position: Go to the Mask Settings >> Horizontal Mask Position >> input the value or move the slider.
- Adjust Mask Vertical Position: Go to the Mask Settings >> Vertical Mask Position >> input the value, or move the slider.
Add Image Mask Element
- How to insert an element on the image mask: On Content tab >> click Add Element. It opens the Content tab for the element with Content, Link, and Background settings.
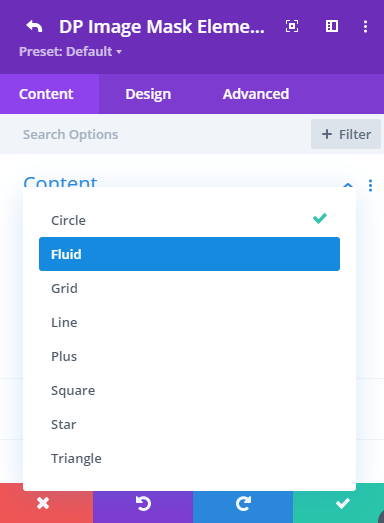
- How to Select Element type: In the element settings, go to the Content >> Select Element >> select the element type from the available options >> Circle / Fluid / Grid / Line / Plus / Square / Star / Triangle.
- Select Element Style: Go to the Content >> Select * >> choose available element style.
- How to Link elements: Go to the Link >> insert a URL for the Element.
- Customize Background: Go to the Background >> adjust the element’s background with color, gradient, and image.
(*) represents Element’s Style name. If you select the Circle element in the Content, then the title of the element style field will be Select Circle.
Design Customizations for Image Mask Element
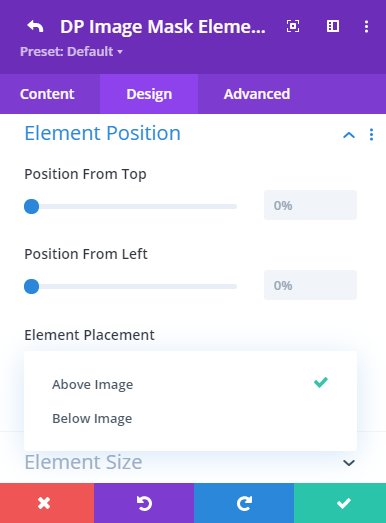
- Change element position from the top: In element’s Design tab >> go to Element Position >> Position From Top >> move the slider or input the value.
- Change element position from the left: Go to Element Position >> Position From Left >> move the slider or input the value.
- Select element placement: Go to Element Position >> Element Placement >> select >> Above Image / Below Image.
- How to change Element Size: Go to the Element Size >> Element Sizing >> move the slider or input the value to increase or decrease the element’s size.
- Apply Color to the Element: Go to the Element Color >> Element Color >> select any color as required.
- Apply Gradient to the Element: Go to the Element Color >> Enable Gradient >> YES >> apply gradient as required.