
Search Divi Plus Documentation
Search for answers or browse our knowledge base.
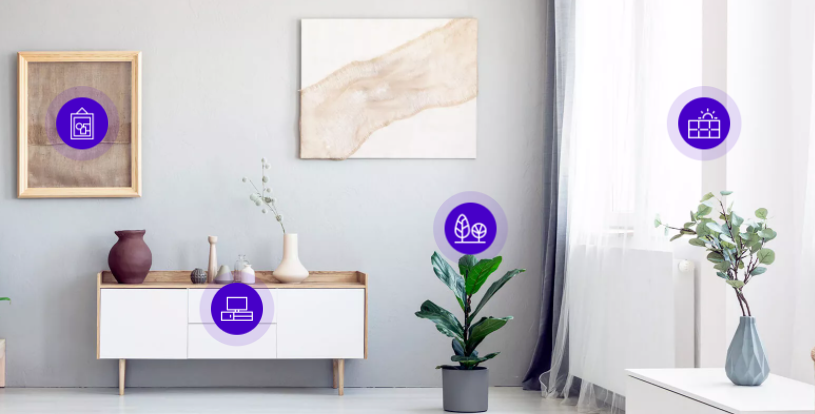
Image Hotspot
Divi Plus Hotspot Module adds self-explanatory images on site. It easily conveys information about the images to the audience.
How to add Image Hotspot module to your webpage
Once Divi Plus is activated, it adds several modules to the Divi builder. To add a module on the page, use the following steps:
- Create/Edit a Page/Post that uses Divi builder.
- Create/Edit a row.
- Click on Add New Module option; choose the DP Hotspot module.

Content Options
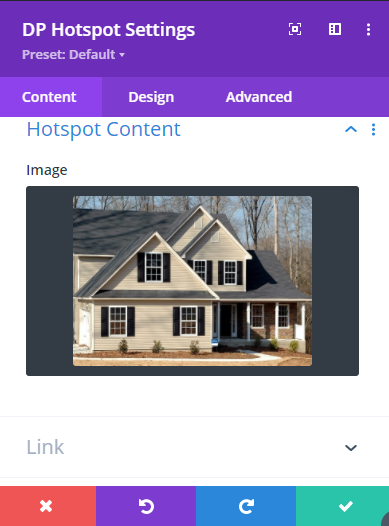
- Add Image: On the Content tab, add the image by using the upload image setting located under the Hotspot Content section.
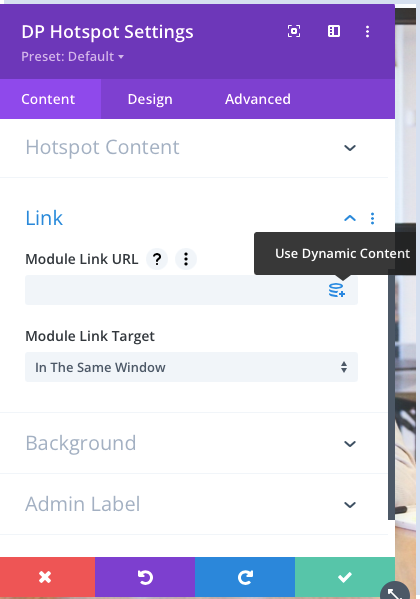
Link: Here you can input the module link url, it can be a dynamic content. In the next option you can choose the link target.
Design Options
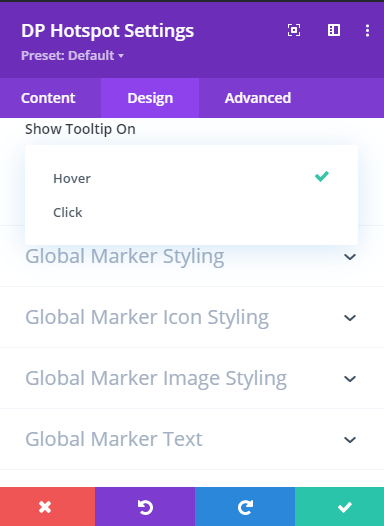
- Tooltip: Go to the Design tab and under the Hotspot section, select the option when to display the tooltip (Hover, Click).
- Pulse Animation: The setting is available under the Design tab. Go to the Global Marker Styling and enable the toggle that says Use Pulse Animation.
- Marker Shape: You could specify a shape to the hotspot icon. To enable it, look for the setting located under the Design Tab, Global Marker Styling, and then marker Shape. Select Square or Circle and customize the color and other design settings. The default setting for Marker shape is none.

How to add Hotspot Markers
To add hotspot markers on the image, click on Add New Hotspot Marker under the Content tab. There can be multiple hotspot markers added.
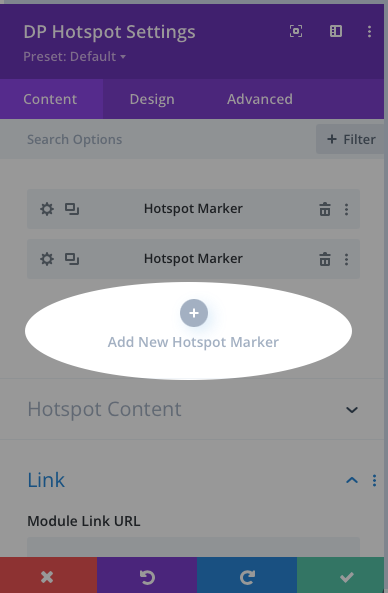
Click the settings icon to customize the hotspot marker.
On the Content tab, select the type of marker. Options include Icon, Text, and Image.

If Icon is selected, the icon panel will open up. Pick the icon you want to use as a marker. Specify the text in the next field labeled as Tooltip Content.
If Text is selected, the input field for the marker text will appear. Enter the marker text. Specify the text in the next field labeled as Tooltip Content.
If the Image is selected as Marker Content, the image upload box will open up. Upload the image that you want to use as a hotspot marker. Specify the text in the next field labeled as Tooltip Content.
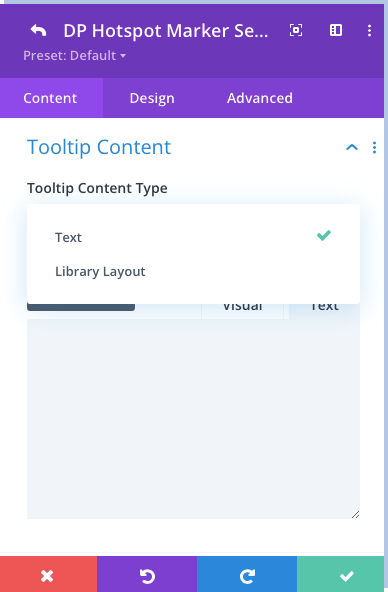
Tooltip Content: Tooltip content type can be a text or a library layout. Here you can choose the option.
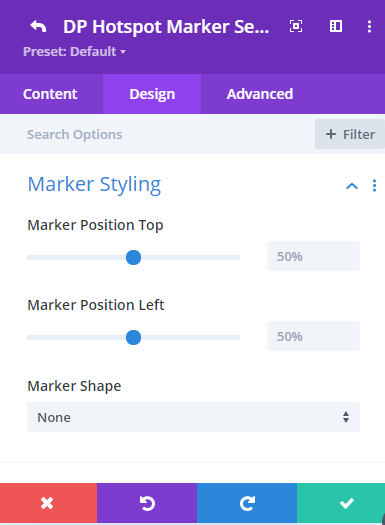
Marker Placement and styling
Go to the Design tab of the marker. Specify the position from the top and left in percentage relative to the image. This will define where the hotspot marker is placed.
Adjust the formatting using the available settings for the various elements of the marker.
Here is a blog post that covers the setup process, and working of the Divi Plus Hotspot module.