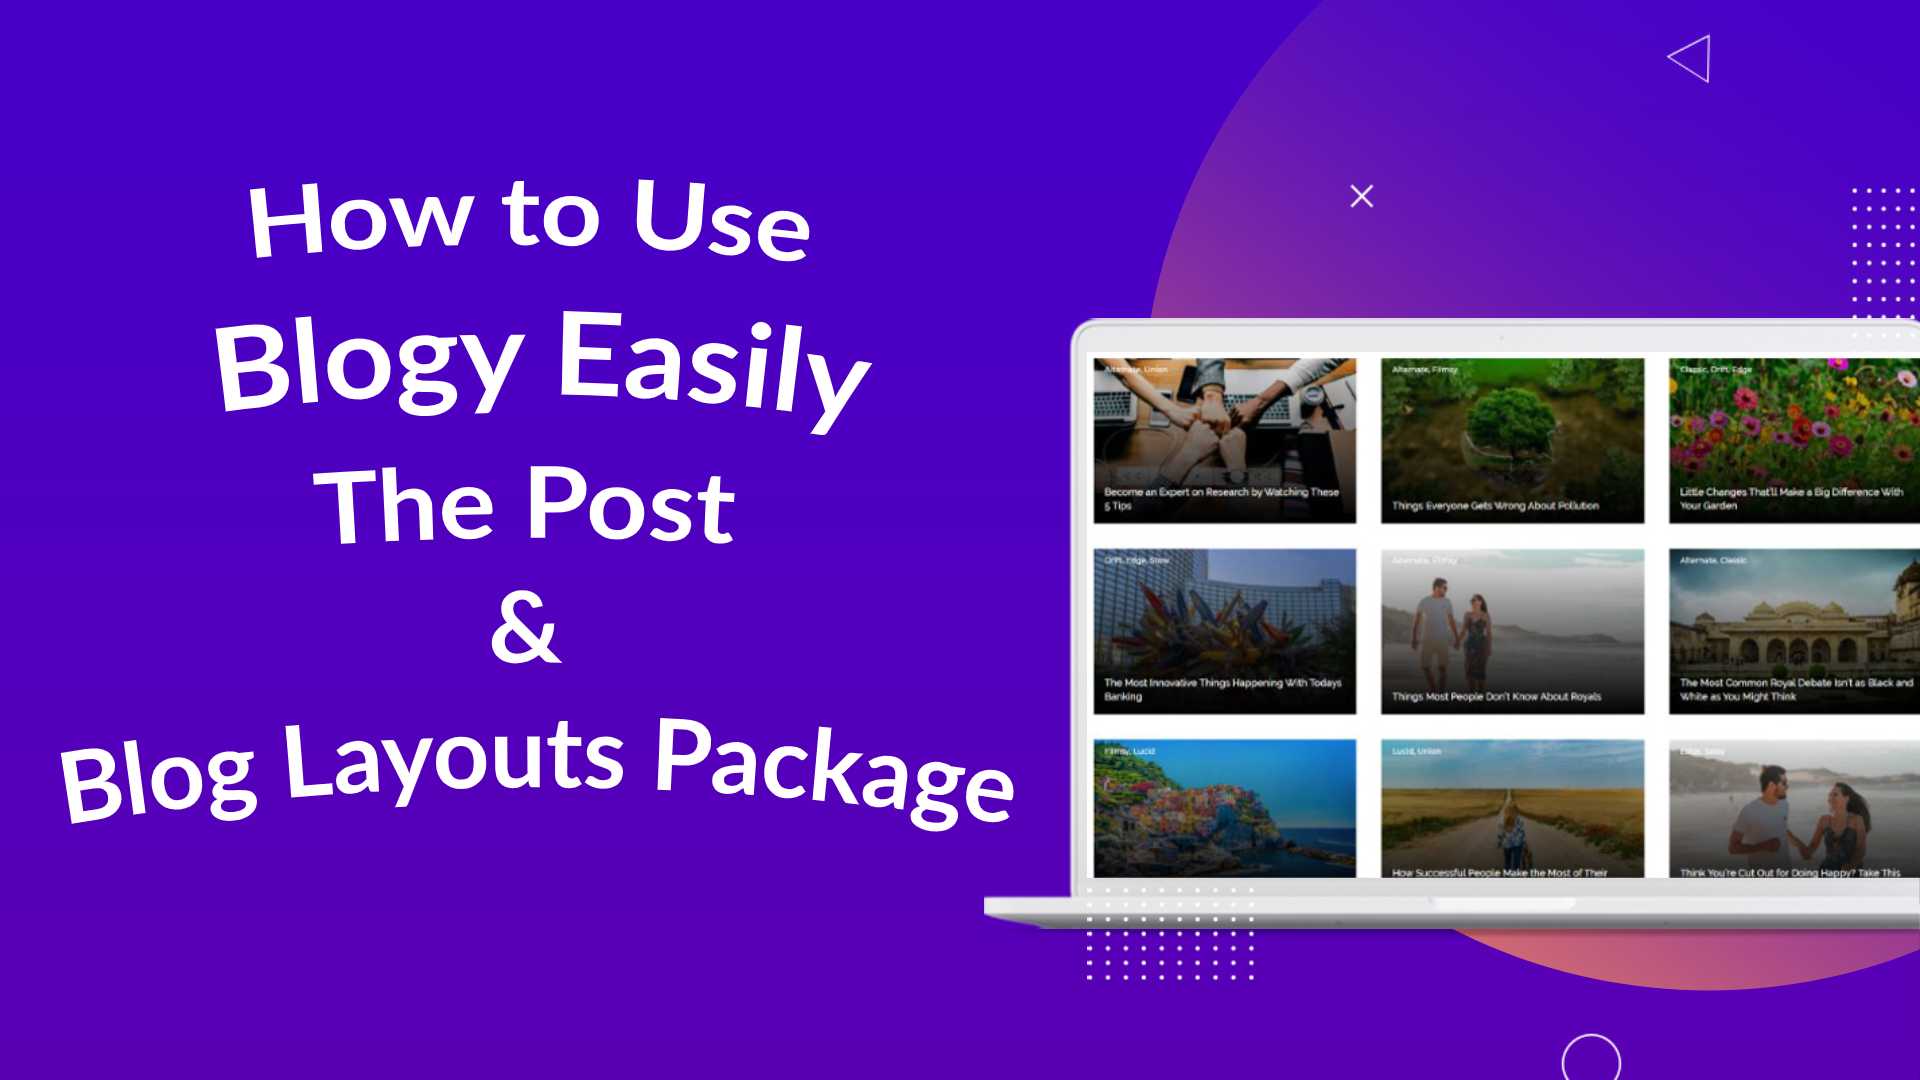
We’re recently receiving a number of tickets from our users that they are unable to use layouts available in the Blogy package. And if you’re one of them, this tutorial will help you successfully unpack, import, and use the layouts effortlessly.
So, without taking any time further, let’s get started.
Take a look at the default Post and Blog page Layout
Before we start the process to use layouts available in the Blogy package, we should take a look at default posts and Divi archives. In this way, we’d be able to know what changes the layouts will reflect after using them.
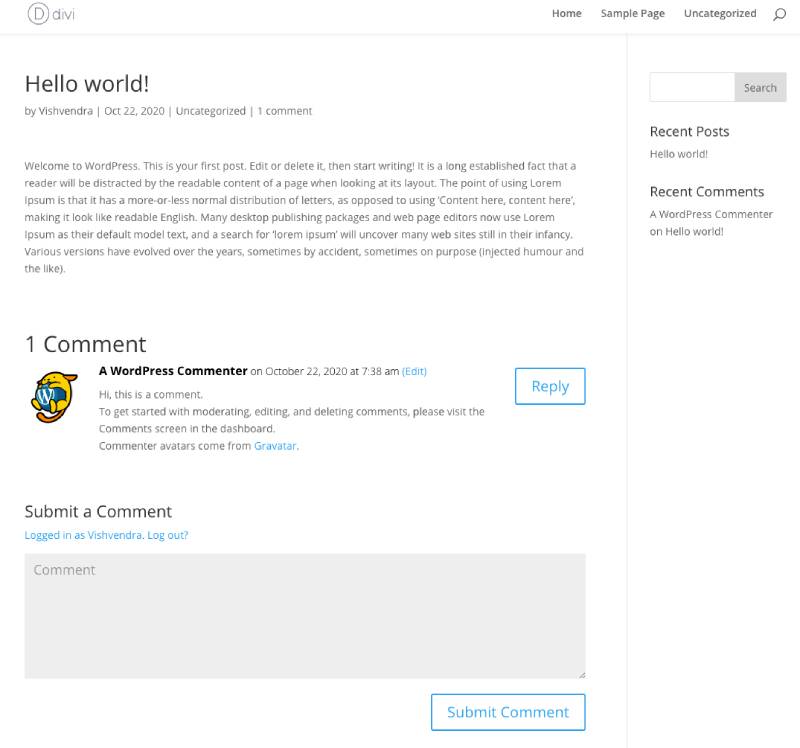
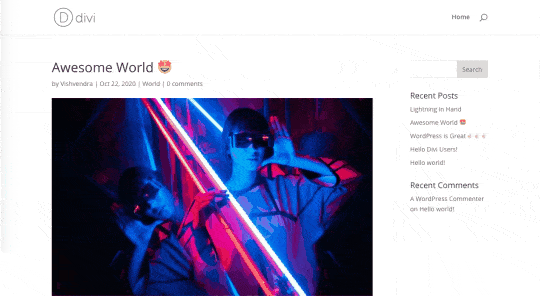
Default Divi Post Layout
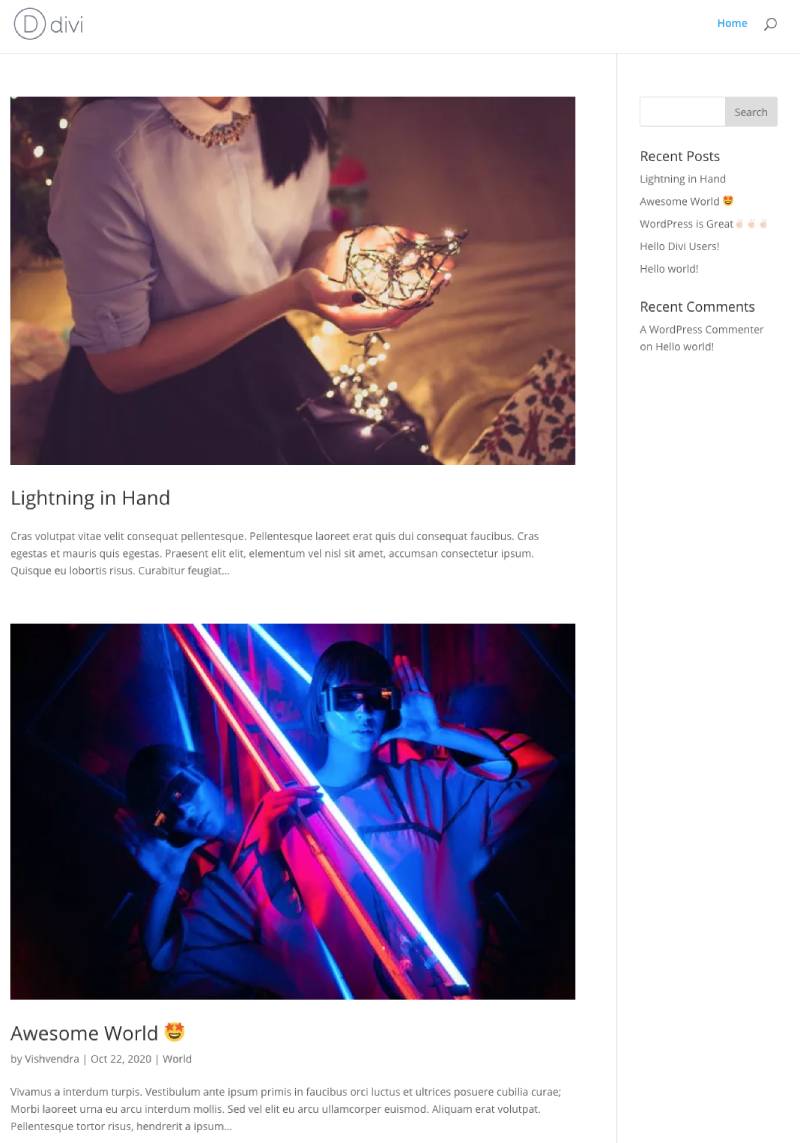
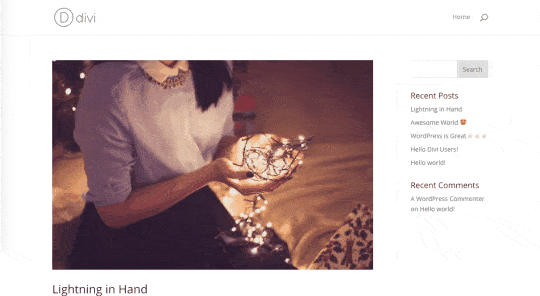
Default Divi Blog Page Layout
Unpack Blogy
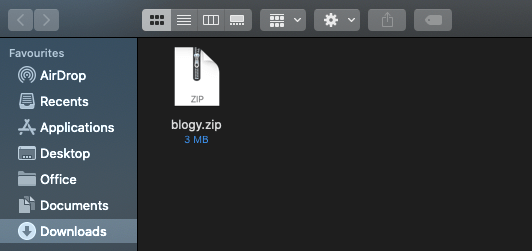
Assuming, you’ve successfully downloaded the Blogy package either from the Elegant Themes Divi Marketplace, Or Divi Extended. The following single file you get when you download it.
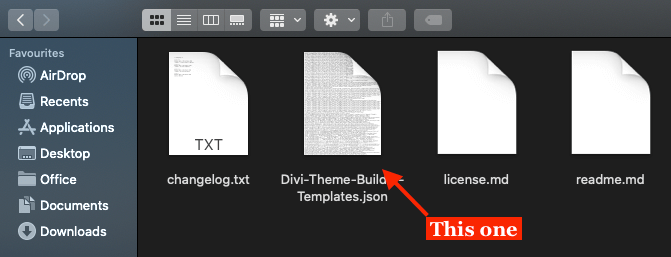
When we extracted the package, we get the following files.
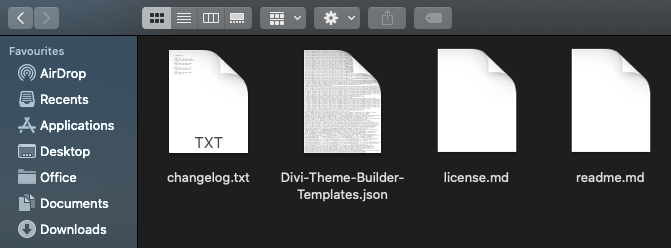
- changelog.txt – To give detailed information about the updates.
- Divi-Theme-Builder-Templates.json – This is the layout file that includes the Blog & Post templates. It is required to import the layouts.
- license.md – To provide information about the author of the package.
- readme.md – It includes the instruction or links to the instruction and support page.
Import the layout
Before you import the Blogy layouts, if you’re not aware how the Divi Theme Builder works, then you can read this post.
Now to import the Blog and Post templates to your Divi theme website, go to the Divi Theme Builder. The following steps would help you successfully import the layouts.
On your WordPress Dashboard → Go to Divi → then Theme Builder.
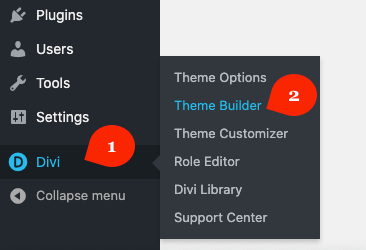
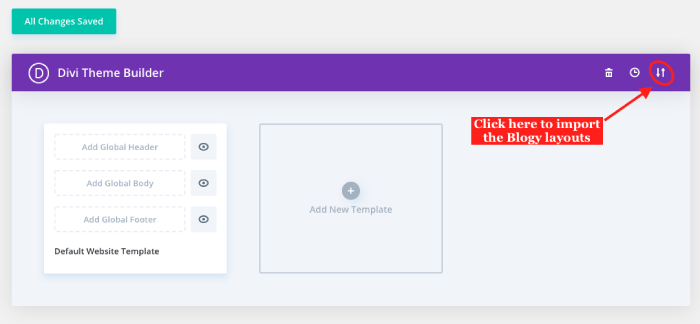
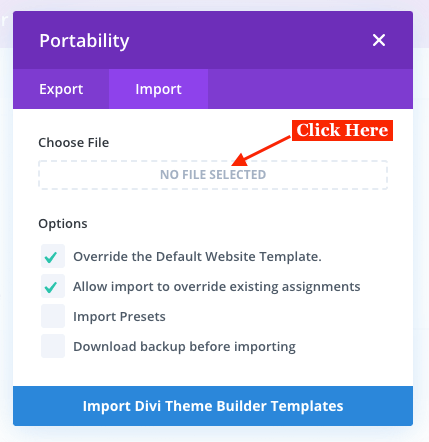
It will open the following window, where you need to click the (⇅) Portability icon to open the options to import the layouts.
When you click the portability icon, it will open the following options. Choose import.
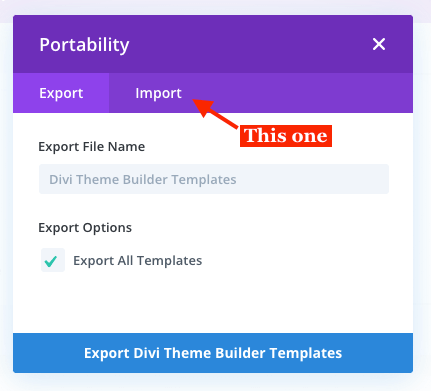
And in the import option, click No File Selected, to locate the layouts file and import it.
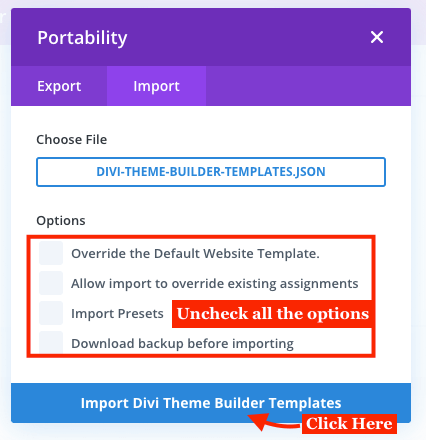
Choose the Divi-Theme-Builder-Templates.json to import the layout files.
After uploading your layouts file, uncheck all the additional options avaialbe in the import menu. And click, Import Divi Theme Builder Templates.
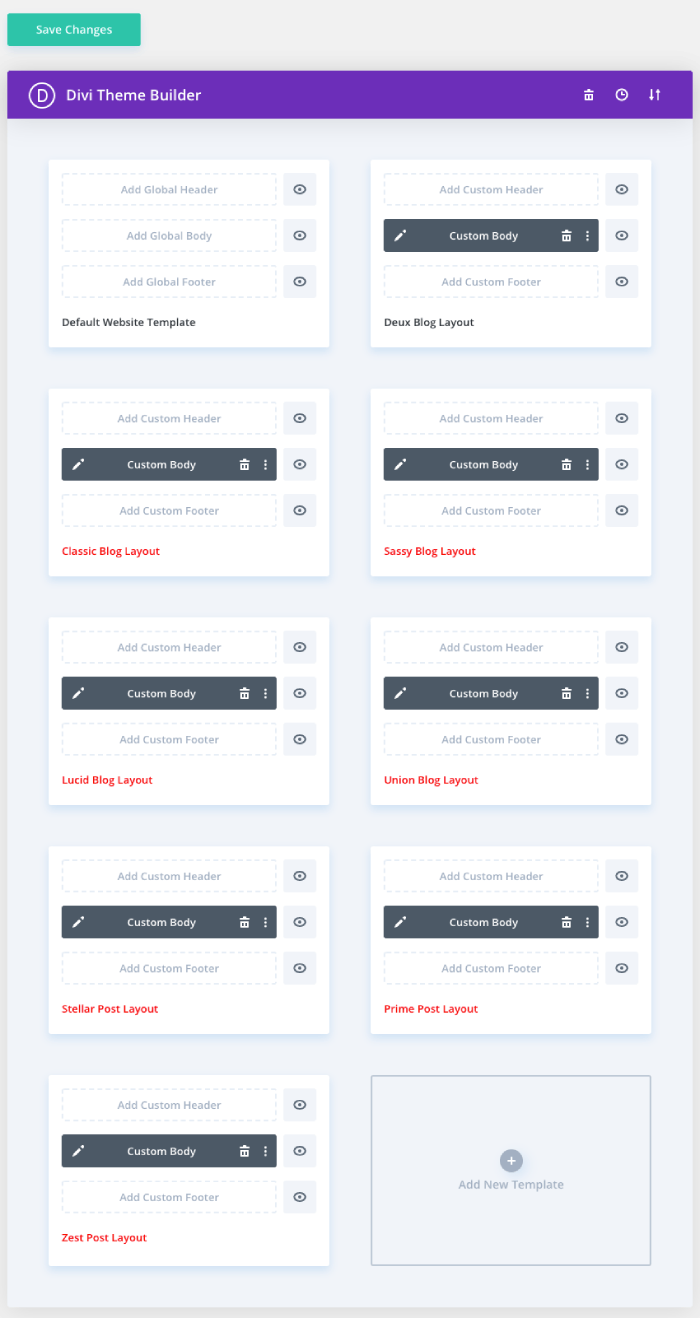
The import process will take some time, depending upon the hosting you’re using. Once the import gets successful, you’ll get all the templates shown in the below screenshot.
The layouts have imported, let’s assign them on your Blog and Posts.
Assign the layout
Before we assign the layout to our blog page and posts, it’s important to know that layouts are meant to reflect the design. Meaning, whatever content we’ll publish, it will render or appear in the layout’s design. We cannot edit templates for the sole purpose of publishing our content through it. However, we can make changes to the design the custom templates have. But they can’t be used to publish the content. You have to publish the content separately, and the template will display them in their design.
Feels like advanced user info ☺️. Don’t worry, the following steps will guide you on how to efficiently use the custom templates that come with the Blogy.
Go to a particular template and click the (⚙️) Settings icon.
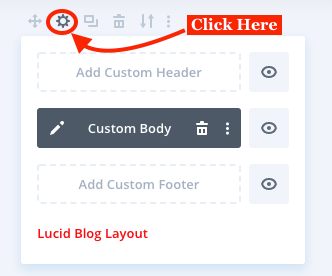
It will open the following Template Settings menu with template assignment options.
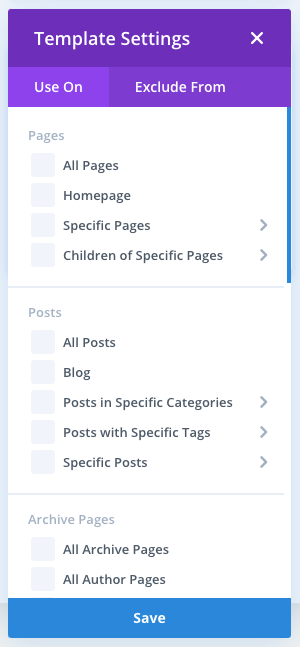
Assign Blog template
First, assign your desired blog template to the blog.
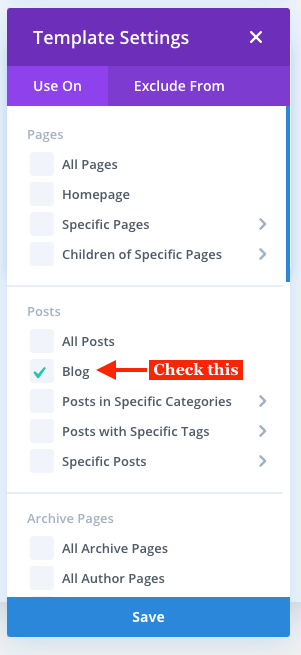
If you’re using the homepage as the blog of your website, then select it, too.
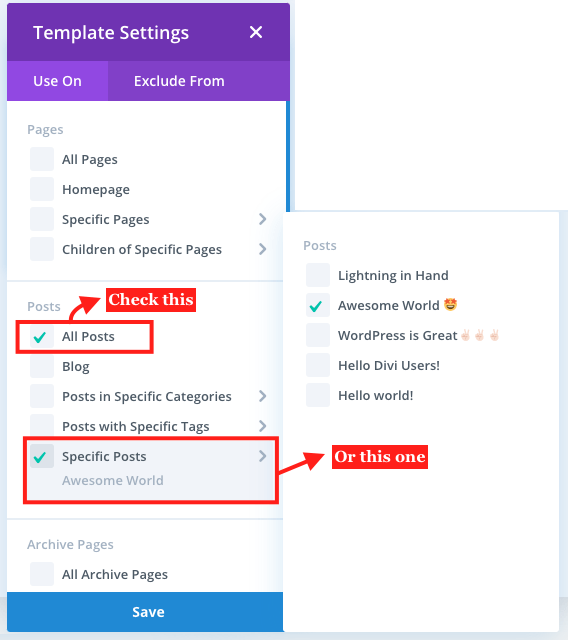
Assign Post template
Then, assign your desired post layout to the posts. If you want to apply the layout for a specific post, then select that post in the specific post option.
After assigning the layouts, click Save Changes. We’ve successfully assigned our custom templates to the post and blog. Let’s see how they look like.
Create a post and refresh blog page
Go to your blog page and see how it looks. Refresh it, if you don’t see the layout applied to your blog page. In my case this is how the blog page looked like.
Note: Make sure you’ve created a blog earlier or assigned a blog page in WordPress’ Reading Settings.
The below is how my post looked after I assigned a custom template for the post in the Theme Builder.
In a Nutshell
Using the templates available in the Blogy custom layouts package is very straightforward. And if you want to remember the process for a longer period, then you can go through the below points.
- Unpack Blogy
- Import the layout
- Go to the Divi Theme Builder
- Use Portability option
- Choose Divi Theme Builder Templates JSON file
- Assign the layout
- Click the settings icon on the template
- Manage template assignment
- Assign it to the locations from the list
- Save Changes
- Refresh Blog or Post page
By following the above steps, you’d be able to easily assign your custom post and blog templates available in the Blogy package. And they’ll start reflecting their design on your content.


0 Comments