Just like any other WordPress theme, the Divi theme, too, receives automatic updates to lower the task of manually updating it. And keeping a super busy web designer focused on essential tasks.
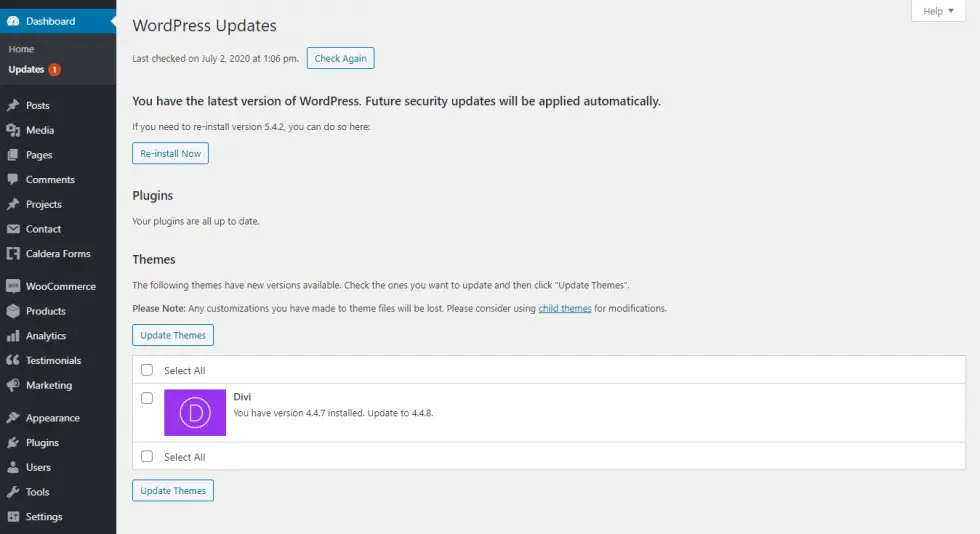
However, there are many times when a manual update is required. Like, if someone wants to make sure that a new update won’t break their website’s elements. To keep many things as they are. To update the website’s theme without losing its customization. An update won’t carry custom code you’ve written in the old file. And if a new update breaks the live website’s design orientation, it could cause much loss to business or affect SEO results.
In this article, we’re going to see, how we can update the Divi theme manually. So, whenever you want to make sure that a new update won’t break your site’s design, you could do it correctly.
Without any further due, let’s get started!
Using an FTP agent or File Manager
Step 1: Access theme files
The first thing you need to do is access your root directory in order to update your Divi theme manually. For that, you can use an FTP client or your WordPress hosting file manager.
FTP client you can use for free in this process are,
- FileZilla, works on Windows, Mac, and Linux
- Cyberduck, works on both Windows and Mac
- WinSCP, works on Windows only
- CrossFTP, works on Windows, Mac, and Linux
- Free FTP, works on Windows.
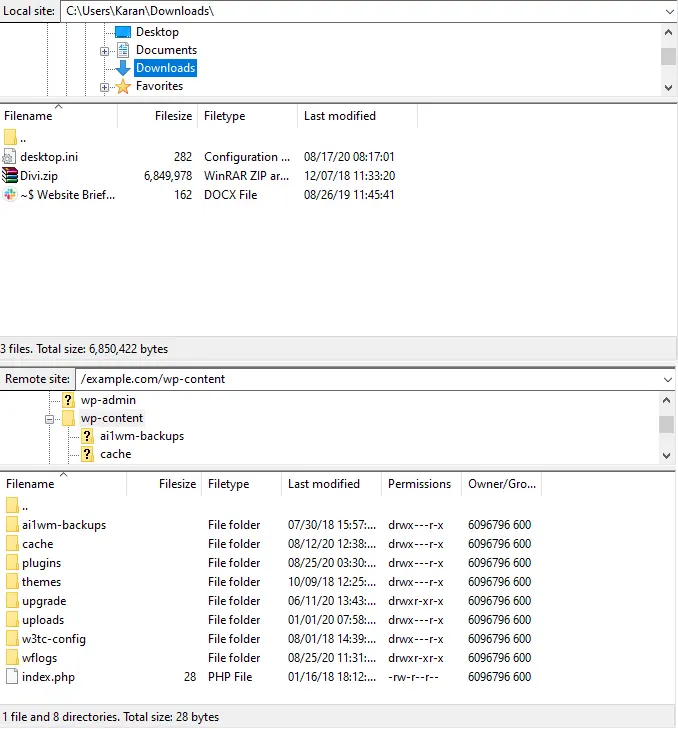
Step 2: Create Backup before everything
Once you’ve connected to your root directory, make a complete backup of your website as well as theme file. So, in case when updating your Divi theme manually we might wear or tear something, can be brought back using the backup.
Therefore, creating a backup before updating the theme is essential. And to do so, you have to first go to the /wp-content/themes/ folder.
And then download your theme folder to your system, laptop or computer, whichever it might be.
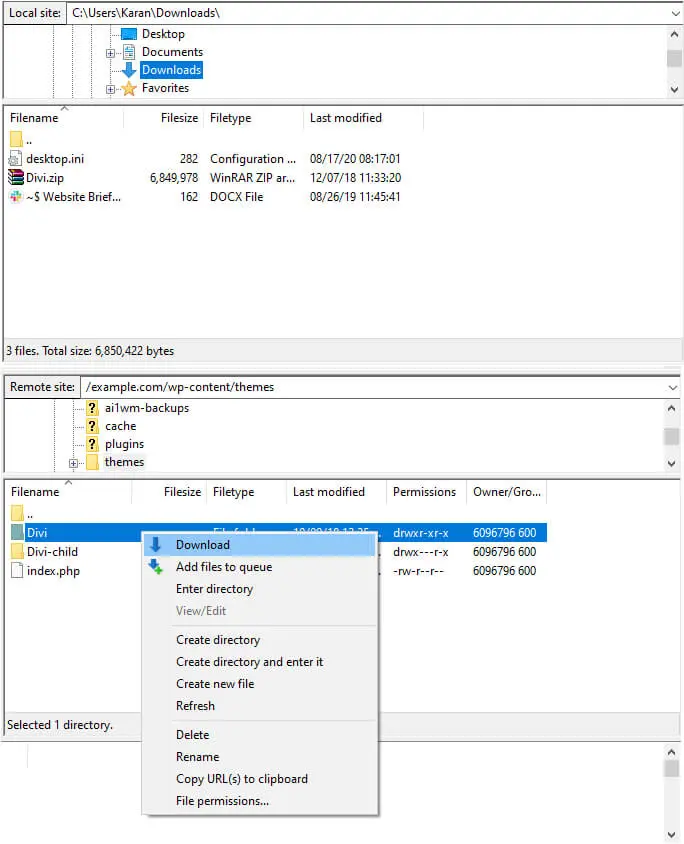
Step 3: Download updated theme file
Once you’ve successfully downloaded the old theme file which would later serve as backup, it’s time to download updated theme.
For that, all you have to do is visit your theme provider’s website, and download the latest version of it.
Step 4: Save your customization
Before we update the new theme file, make sure you have saved your old customization on your system.
For that, you can also create a child theme and save your customization in that. Doing so, you’d save yourself from this type of issue whenever you go for the update.
You can get Divi child theme from here, and whatever changes you want to do, apply in it.
Step 5: Upload the updated theme folder
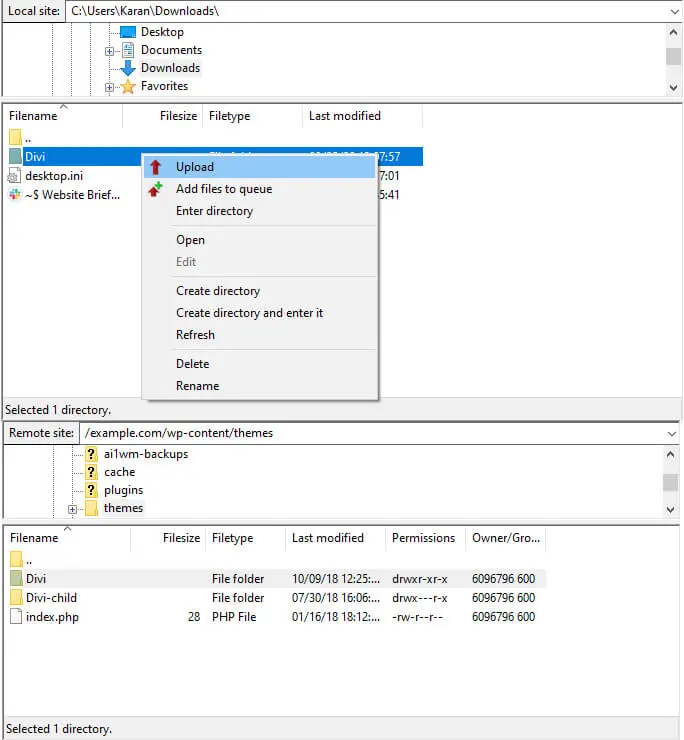
Once you’ve saved your old customization either in the child theme or on your system, it’s time to upload the updated theme folder.
To do this, access your WordPress hosting database, using file manager or an FTP client.
Then go to the /wp-content/themes/ folder and upload the updated theme folder. After this, move your old customization from the child theme into the new theme folder.
That’s it, you’ve successfully updated your Divi theme manually without losing the customization.
Update Divi manually with a Zip file
Another easiest way to update the Divi theme manually is by using the new feature of WordPress. The recent update in WordPress now allows you to update your theme without deleting the existing theme files. All you need to do is upload the theme zip file and choose some options and it’s done. Let’s know how you can do it.
Note: Before you manually upload the Divi theme using the WordPress zip upload option, make sure you create your website’s backup. This feature would replace existing files, so if you have some custom code in your parent theme, it can be lost. However, if you’re using a child theme, you can proceed without backup, but backup is always recommended.
Step 1: Upload theme file
On your WordPress Dashboard, go to the Appearance → Themes → Add New → Upload Theme → click choose file to upload the theme zip file. After uploading the zip file, click Install Now.

Step 2: Replace files
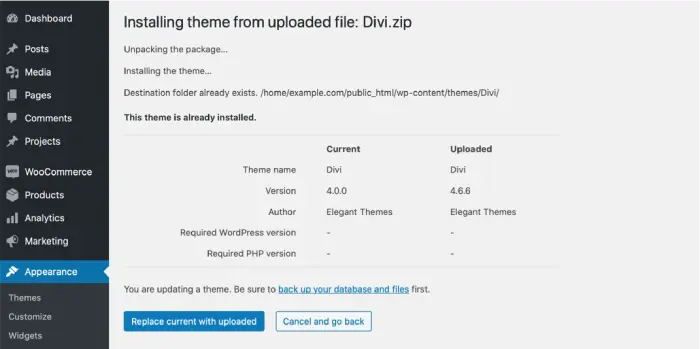
Because there’s already theme files available in the website’s directory, the update process will ask you to replace the existing files. So, to replace the old version of the Divi theme files, click Replace current with uploaded.
Step 3: Preview your website
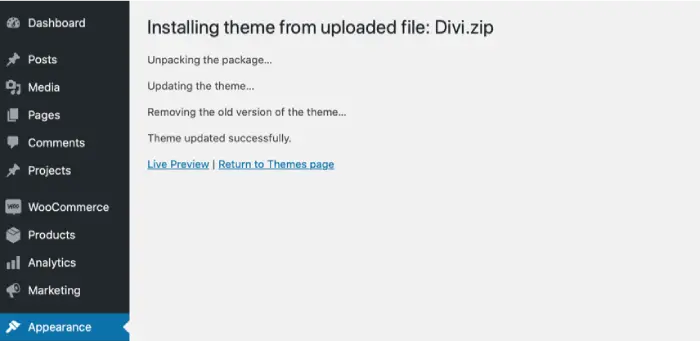
After the successful update of the Divi theme manually, WordPress would return the following message. You can check the live preview or return to the themes page.
That’s it; you’ve successfully updated the Divi theme manually using WordPress’ upload zip file option.
I hope this tutorial helped you update your Divi theme manually without losing customization. If you still face any issues, you can contact us; we’d be happy to help you.




0 Comments