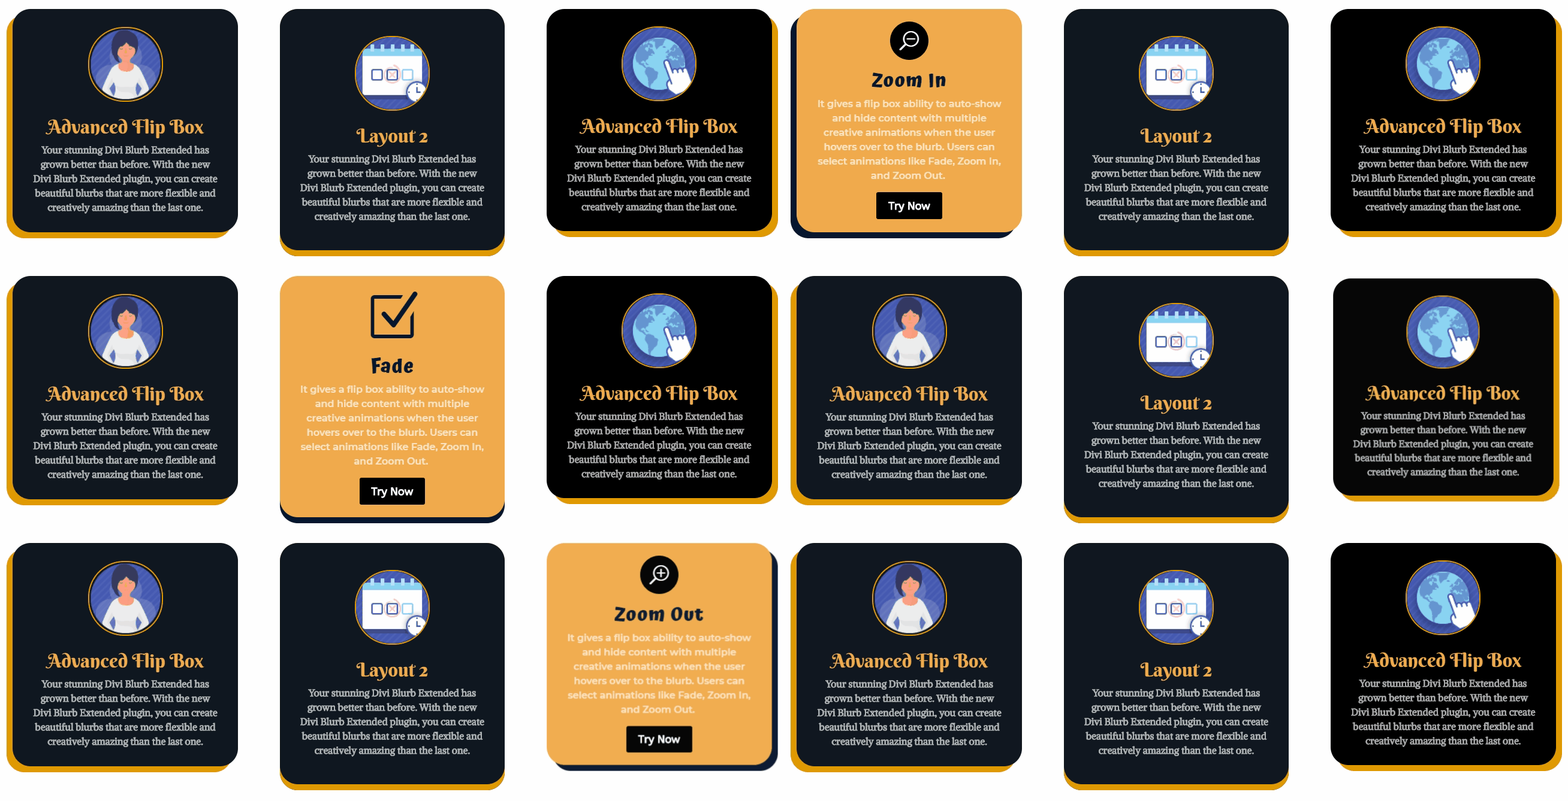
In this blog post, we’ll look at how to create flip boxes from the Advanced Flip Box module. We will use the layout 2 of the module to create interactive and appealing flip boxes. In the earlier post, we used the layout 1 to create some attractive flip box examples. If you want to learn how to use layout 1, then check out that post.
Now, without further, let’s make some exciting flip boxes.
Preview
Before you start!
There are couple of things you need to do, to create flip boxes using the layout 2 of the Advanced Flip Box module.
- If you haven’t yet, purchase, install, and activate the Divi Blurb Extended plugin.
- Then, create a new page or edit an existing one where you want to display Divi blurbs.
- Deploy Divi Visual Builder
- And then choose the option “Build From Scratch”
After that, you will have a blank canvas to start designing in Divi.
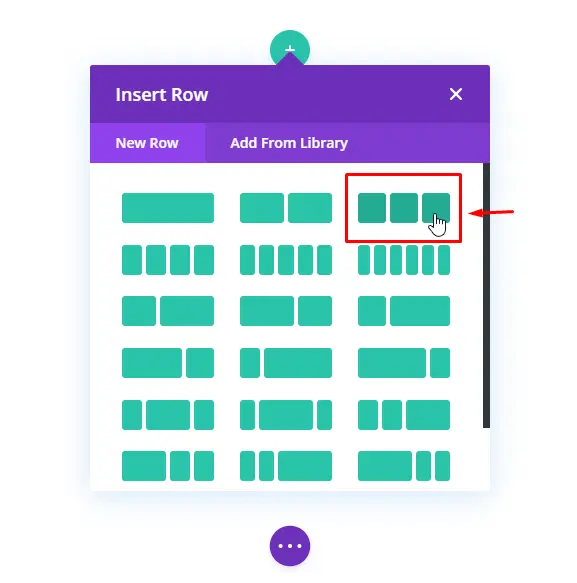
Insert Row
This is the basic step required every time you want to create something in Divi Builder. For above flip box example, insert a 3 column row.
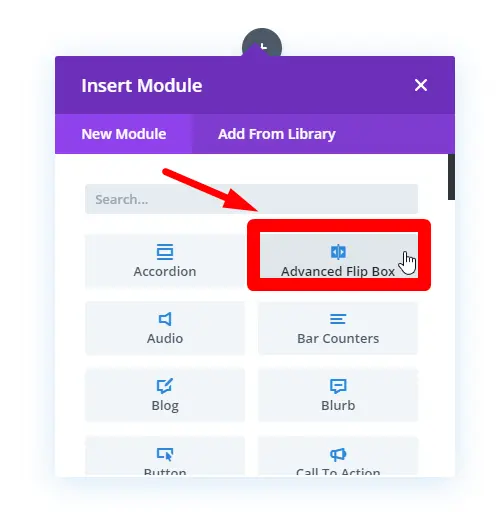
Insert the module
Now add the Advanced Flip Box module in the first column of the row.
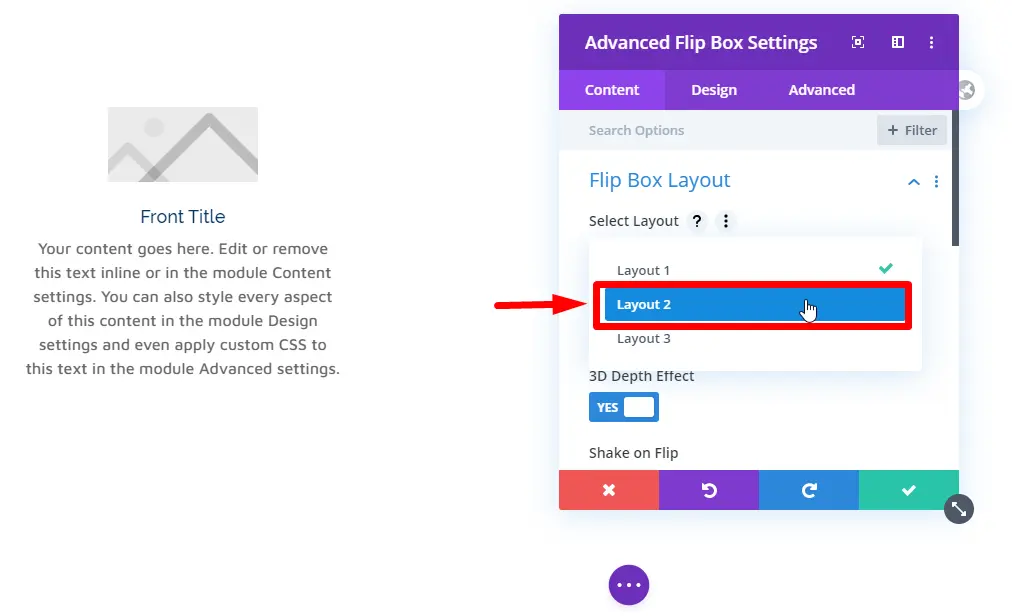
Content
From the Flip Box Layout settings of the Content tab, chose layout 2.
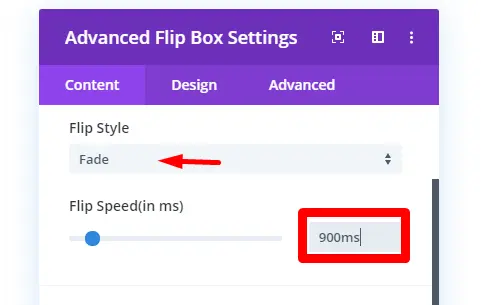
After choosing the layout, keep Flip Style as Fade, and input 900ms inside the Flip Speed input field.
Flip Box Content
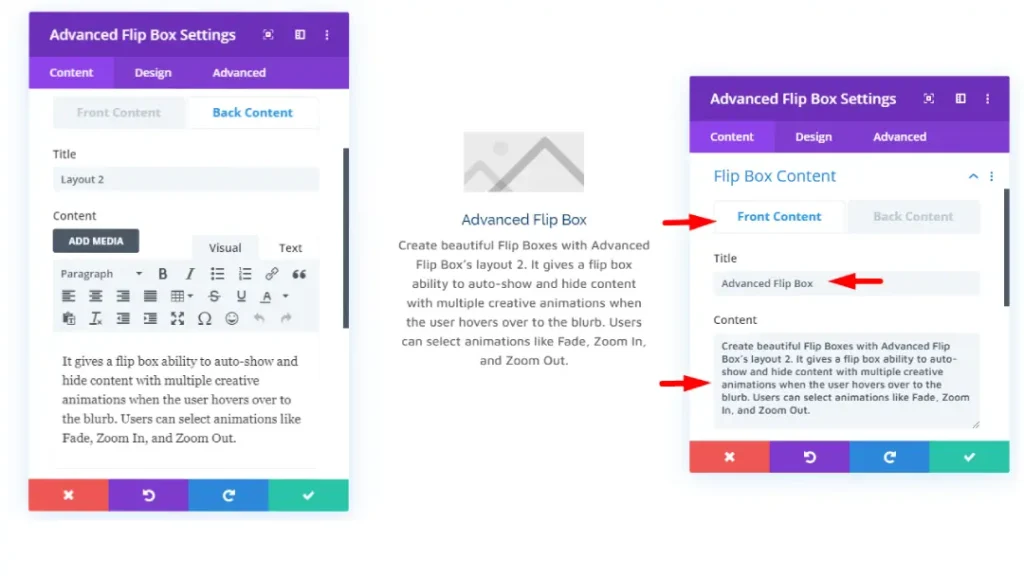
Then, add front and back content of the flip box.
Choose Box Elements
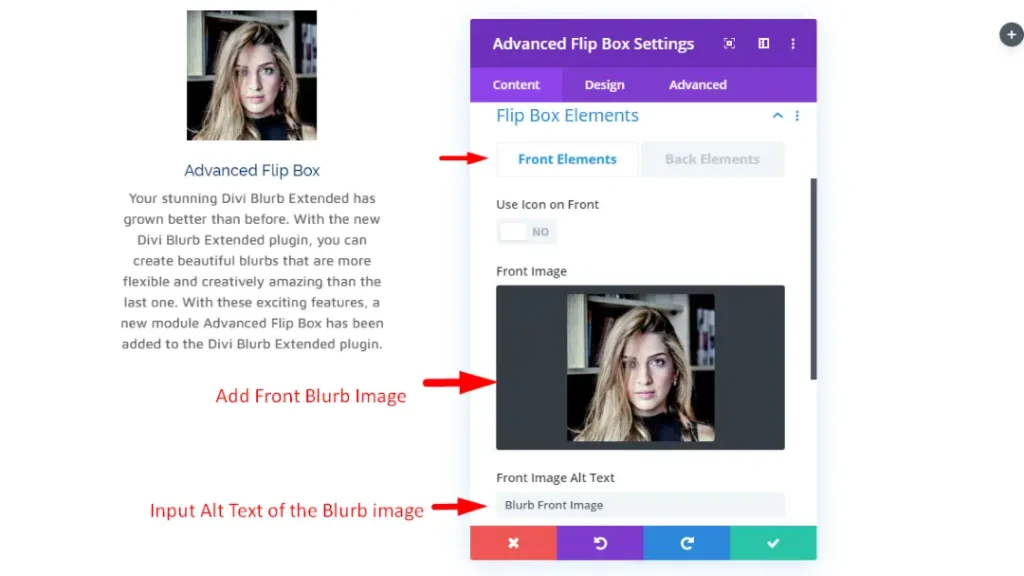
After entering flip box content, choose what elements you want to display for your flip box on both the sides, front and back.
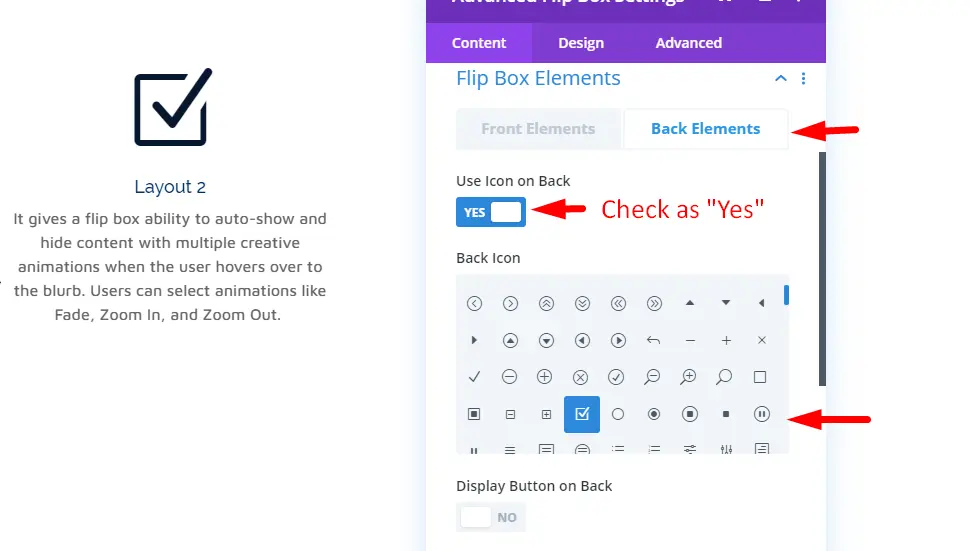
Switch to Back Elements, and Check “Use Icon on Back” as “Yes,” and select one of the icon available.
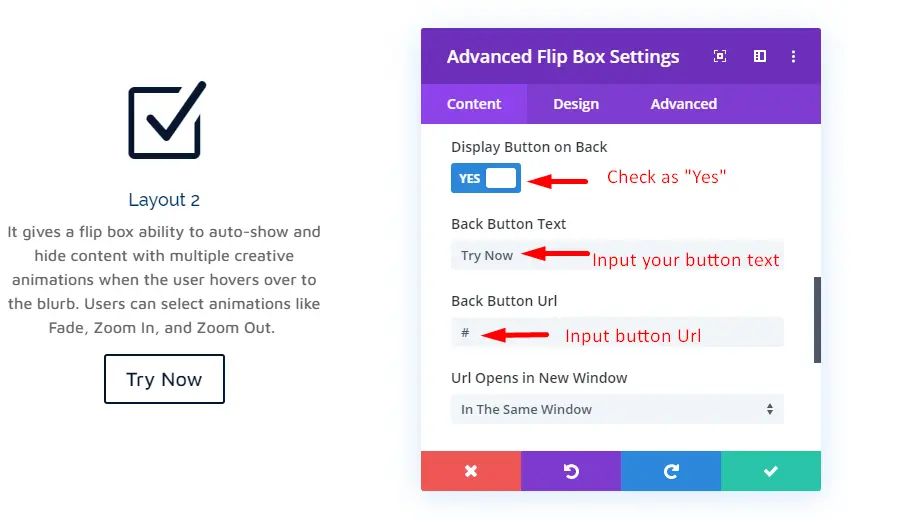
Then, to enable button on the back side of the flip box, check “Display Button on Back” as “Yes,” and input details as mentioned.
Add Flip Box Background
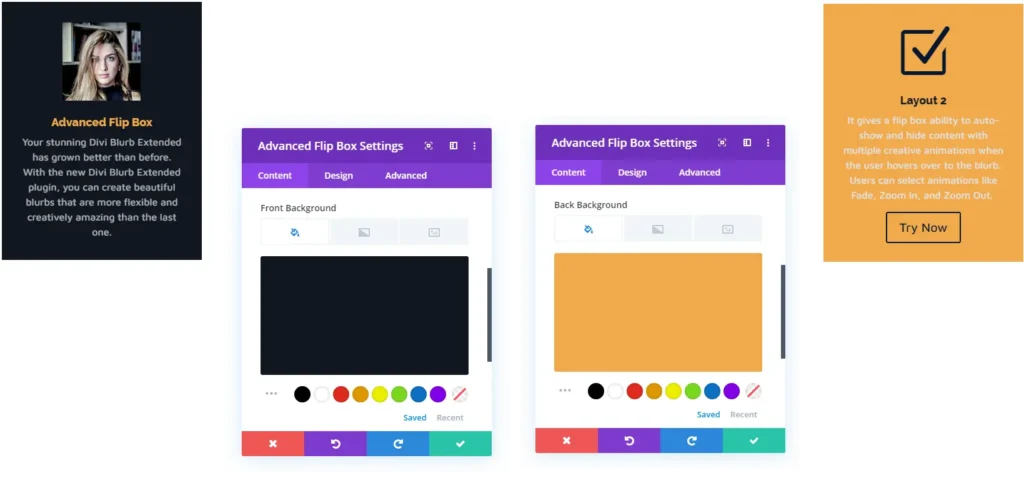
Background customizations of the flip box allows users to add color, gradient and an image behind content as well as other segments. In this case I’ve added color for both front and back of the flip box background.
Front Background Color: #101820FF
Back Background Color: #F2AA4CFF
Design
Inside design tab of the flip box module, you get multiple options that make flip box even more beautiful and responsive.
Front Image/Icon Style
Here, you can customize your image or icon that you’ve used for the front flip box. This allows you to change placement of the image. Curve image corners, choose border styles, set image border width. And couple more options that brings charisma in presenting the image. Now, apply customization as mentioned.
Image/Icon Placement: Top
Front Image Rounded Corners: 60px
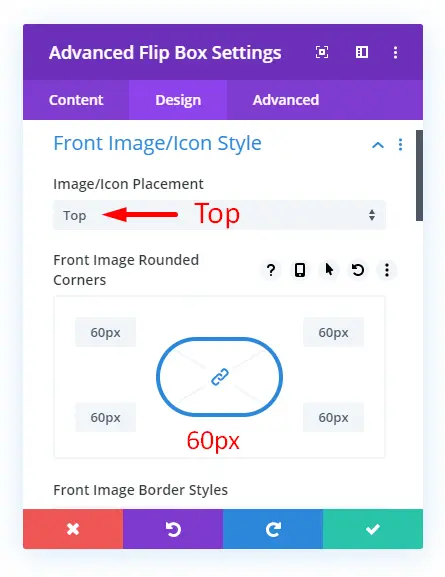
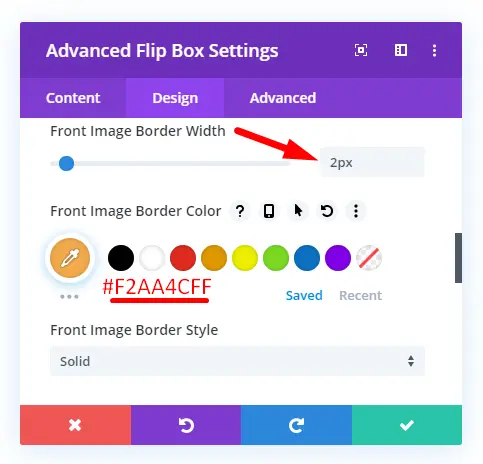
Image Border Width: 2px
Front Image Border Color: #F2AA4CFF
Leave other settings as they are.
Back Image/Icon Style
This settings do exactly the same as above but for the back side of the flip box. For Back Image or Icon Style, perform customizations as follows,
Image/Icon Placement: Top
Icon Color: #06162F
And keep other settings untouched.
Front Text Style
This will allow you to make changes in the appearance of the text on the front side of the flip box.
General Text Alignment: Center
Title Heading Level: H4
Font: Berkshire Swash
Title Text Color: #F2AA4CFF
Body Font: Alike Angular
Font Weight: Bold
Body Text Color: rgba(255,255,255,0.67)
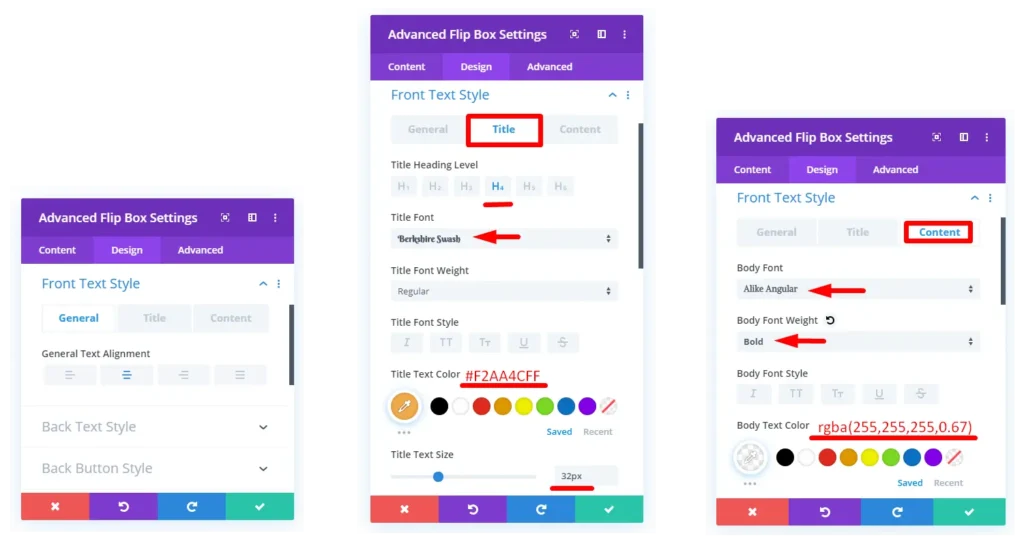
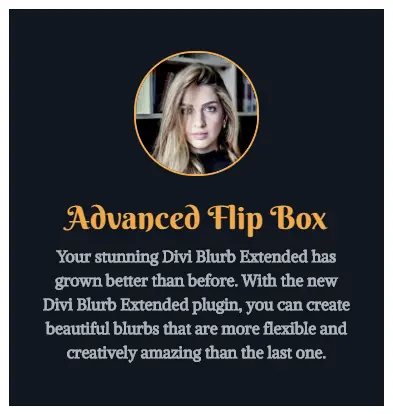
After applying these settings, your flip box would start to appear like the below screenshot.
Back Text Style
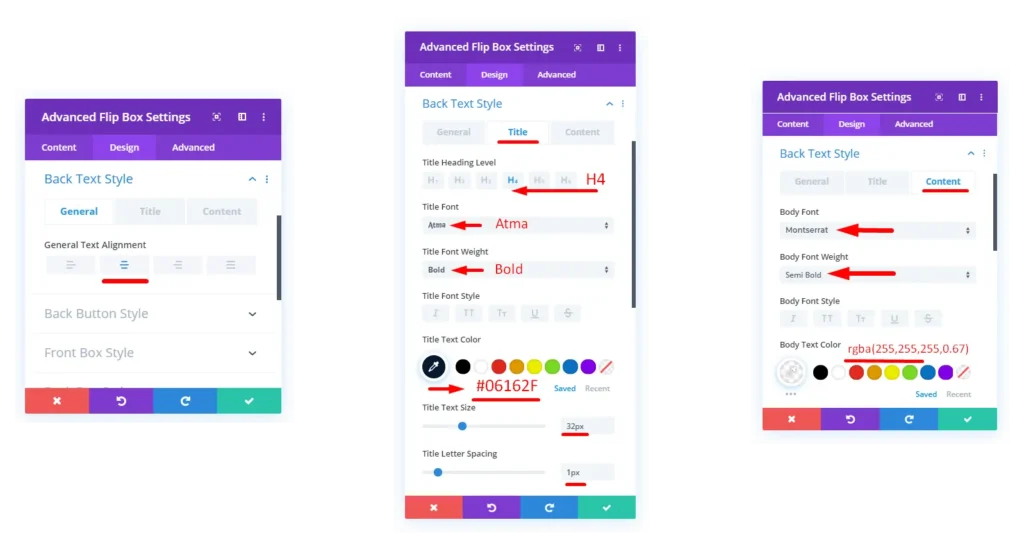
We’ve already customized our front text style. Now, it’s time tweak back side text style of the flip box. And to do that, go to Back Text Style of the design tab, and perform following customization.
General Text Alignment: Center
Title Heading Level: H4
Font: Atma
Font Weight: Bold
Title Text Color: #06162F
Title Text Size: 32px
Letter Spacing: 1px
Body Font: Montserrat
Font Weight: Semi Bold
Body Text Color: rgba(255,255,255,0.67)
Back Button Style
Apply the following customization for the back button.
Use Custom Styles For Button: Check as “Yes“
Button Text Size: 18px
Text Color: #FFFFFF
Button Background: #000000
Button Border Color: #000000
Font: ABeeZee
Font Weight: Bold
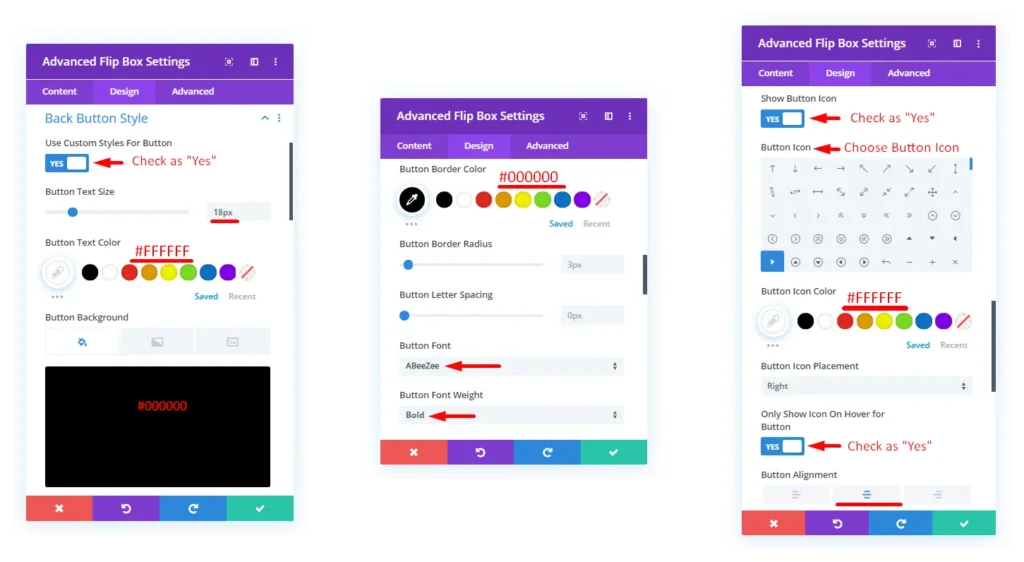
Show Button Icon: Check as “Yes“
Select your desired button icon or look at the screenshot
Button Icon Color: #FFFFFF
Icon Placement: Right
Only Show Icon On Hover for Button: Check as “Yes“
Button Alignment: Center
Left and Right Button Padding: 20px

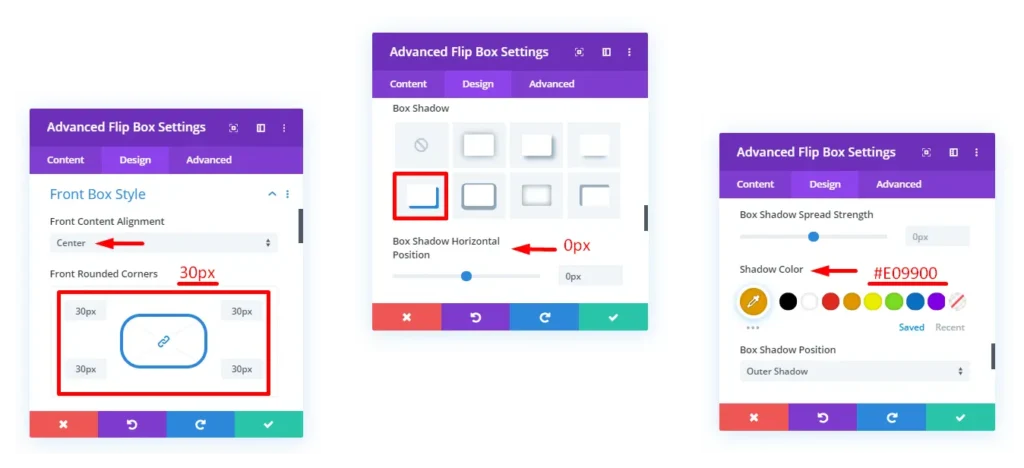
Front Box Style
To make flip box look even more attractive and interactive, we need to apply some more customization.
Front Content Alignment: Center
Front Rounded Corners: 30px
Box Shadow: Look at the screenshot
Shadow Horizontal Position: 0px
Shadow Color: #E09900
Back Box Style
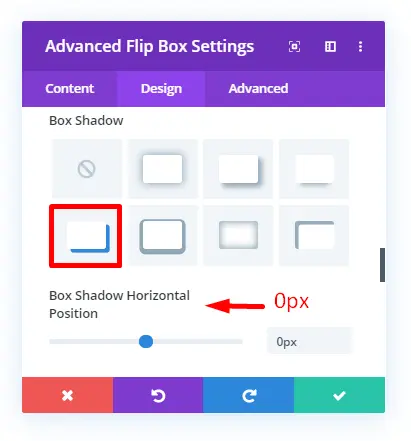
Just like the Front Box Style, we need to tweak back-side of the flip box. This will make our flip box interactive from both angles. Therefore, apply the following tweaks as they are.
Front Content Alignment: Center
Front Rounded Corners: 30px
Box Shadow: Look at the screenshot
Shadow Horizontal Position: 0px
Shadow Color: #06162F
After applying all these customization one by one, you’ll get the following flip box style.
Copy the layout to get preview design
To design similar flip box that shown in the preview, we have to copy the above flip box. You have to do it twice, then put it either side of the above flip box. Similarly to the following screenshot.

Now, apply following customization to achieve preview Divi flip box design. Similarly, as you did in the first place.
Left Flip Box Design
Flip Style: Zoom In
Flip Speed(in ms): 1100ms
Adjust Flip Box Front & Back Content. Such as title and content.
Adjust Flip Box Elements.
Back Image / Icon Style
Icon Color: #FFFFFF
Use Icon Font Size: Yes
Icon Font Size: 32px
Style Icon: Yes
Shape: Circle
Shape Background: #000000
Front Box Shadow Horizontal Position: -10px
Back Box Shadow Horizontal Position: -10px
Right Flip Box Design
Flip Style: Zoom Out
Flip Speed(in ms): 1100ms
Back Image / Icon Style
Icon Color: #FFFFFF
Use Icon Font Size: Yes
Icon Font Size: 32px
Style Icon: Yes
Shape: Circle
Shape Background: #000000
Front Box Shadow Horizontal Position: 10px
Back Box Shadow Horizontal Position: 10px
Now after these customization, you’ll get the final result of the flip box preview . Though, I’ve applied some customization to the center example of the layout.

Summary
Above, I’ve shown you how you can create Divi flip box using the layout 2 of the Advanced Flip Box module. It’s part of the Divi Blurb Extended plugin that has options and layout to create flip box. And not only flip box, using this plugin you can also create custom Divi blurbs. So, if you want to design interactive and attractive blurbs and flip box for your Divi theme site, then go and try this plugin now!
Before you go, we want to know your views about this blog post. We also want to know that if you tried this plugin already, then what was your experience. Please share your thoughts in the comment section.





0 Comments