In times of modern web design trends, there are multiple times when a designer needs to add fancy texts. And a text over an image is one of them. However, most of the time, users find it very confusing, which requires them to go through multiple steps to accomplish this design need. Therefore, in this blog post, I am going to share with you some simple steps to display text over an image. Plus, I’ll also share how you can add a background color to it.
So, without any delay, let’s see how we can display text over an image.
Divi Text Over an Image on hover
Step 1: Insert text module
To start creating the text over an image, we need to insert the Text module in the builder.
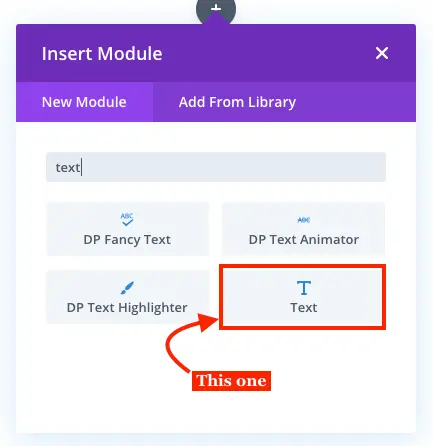
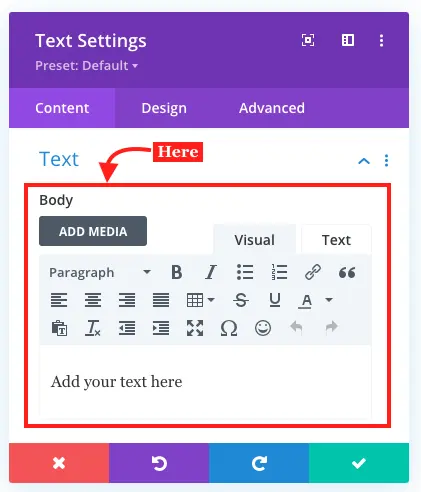
After inserting the module, add the text you want to display over an image.
Step 2: Style text
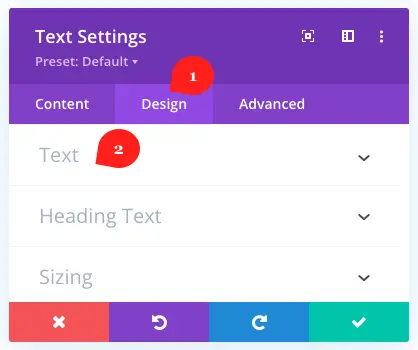
Now, once added the text, move to the Design tab, and inside Text settings, style the text as required.
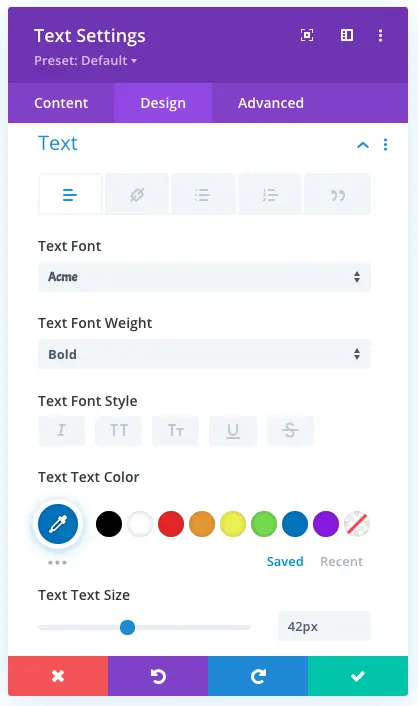
For this tutorial, I’ve made the following customizations,
Text Font: Acme
Text Font Weight: Bold
Color: #0c71c3
Text Size: 42px
Text Letter Spacing: 4px
Line Height: 1.8em
Shadow: Look in the screenshot
Text Shadow Horizontal Length: 0em
Text Shadow Vertical Length: 0.04em
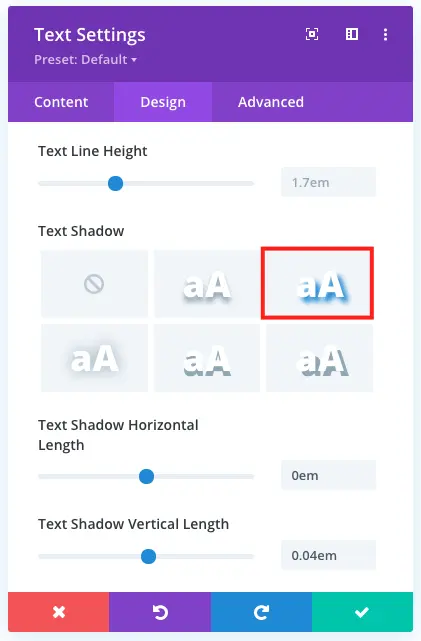
The text will look same as the below screenshot after applying the customizations.

Step 3: Assign CSS ID
Once you made the text customizations, move to the Advanced tab, and in the CSS ID & Classes.
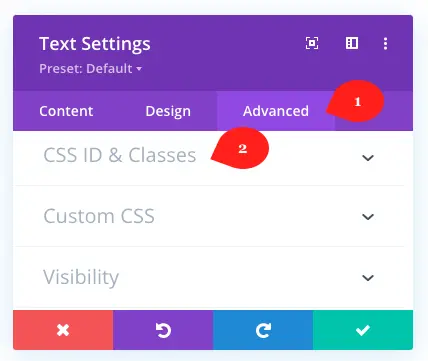
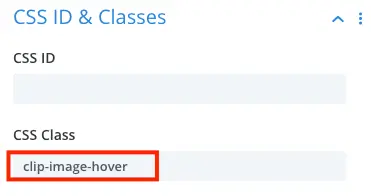
Here, in the CSS Class, input clip-image-hover CSS class name, and Save Changes
Step 4: Add CSS
Now, click three dots at the center and then settings (⚙️) icon to open the page’s settings.

Then, move to the Advanced tab of the page settings, and the Custom CSS, input the below CSS.
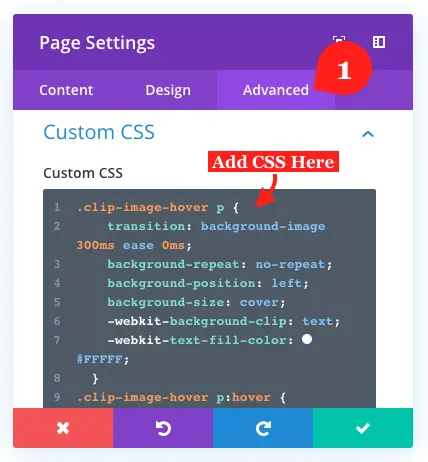
.clip-image-hover p {
    transition: background-image 300ms ease 0ms;
    background-repeat: no-repeat;
    background-position: left;
    background-size: cover;
    -webkit-background-clip: text;
    -webkit-text-fill-color: #FFFFF;
}

.clip-image-hover p:hover {
    background-repeat: no-repeat;
    background-position: center;
    background-size: cover;
    background-image: url('Input Image URL');
    -webkit-background-clip: text;
    -webkit-text-fill-color: transparent;
}
Step 5: Input image URL
Upon inserting the CSS, make sure you input your image URL in the CSS, which you want to be seen when users hover over the text.
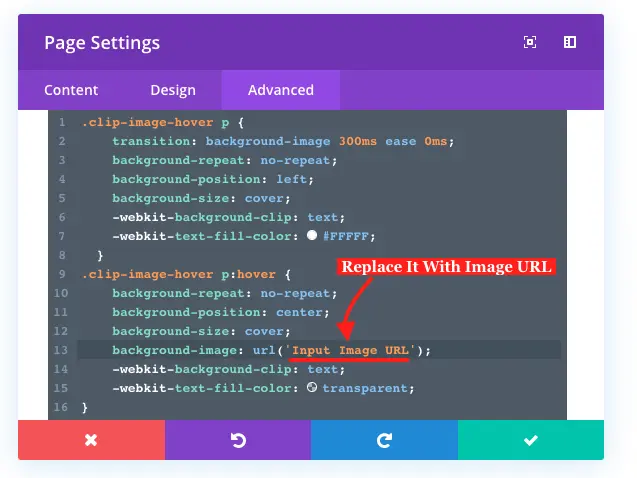
Step 6: Adjust width of the Text
After image URL insertion, we need to adjust the width of the text. So, when users hover over the text, it doesn’t show below image from a distance. To adjust the width of the text, you need to go to the Design tab of the module >> Sizing >> Width >> and adjust text width according to the requirement.

That’s it; we’ve successfully created our text over an image on hover in Divi. Now, let’s see how we can create text over an image by default.
Divi Text Over an Image
Step 1: Insert DP Fancy Text module on a page
To display text over an image in a Divi website, first, we need to insert the Divi Plus Fancy Text module on a page.
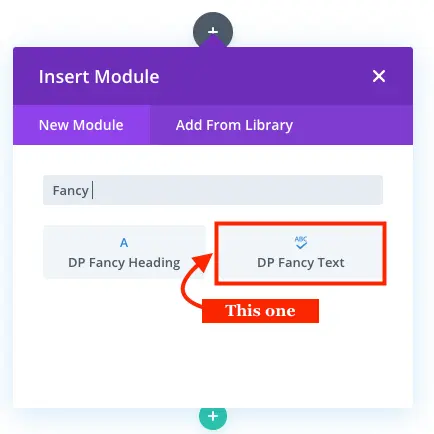
Step 2: Select Text Style
After inserting the module, it asks you to choose fancy text’s style in the Fancy Text Content settings of the Content tab. Here, from the available options, select Background Clipping.
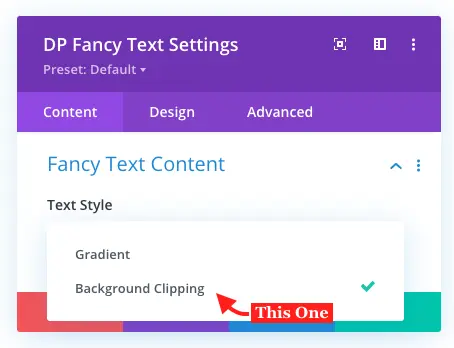
Step 3: Input Text
Now, after choosing the Text Style, input your fancy text in the Fancy Text field.
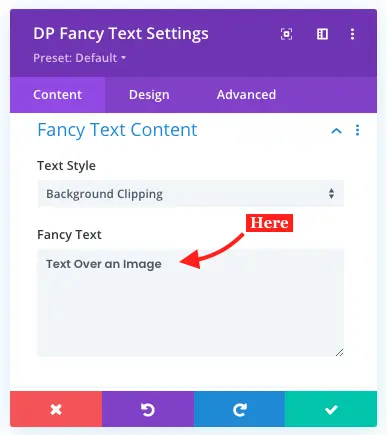
Step 4: Choose Image to create text Over an Image
To apply text over an image, we need to move to the Design Tab of the module. Then in the Fancy Text Styling settings, choose the image you want below the text.
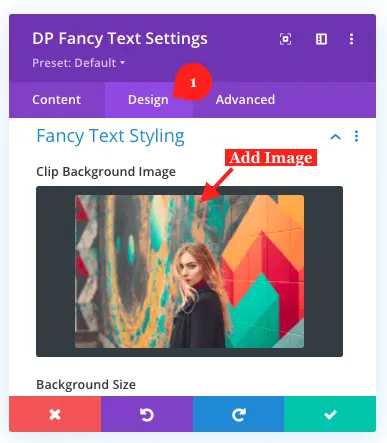
Step 5: Apply Text Styling
We’re not done yet, to make the Fancy Text look more engaging, it’s good we apply some text customzation. So, to do that, go to the Text Settings, in the Design tab, and apply appropriate changes.
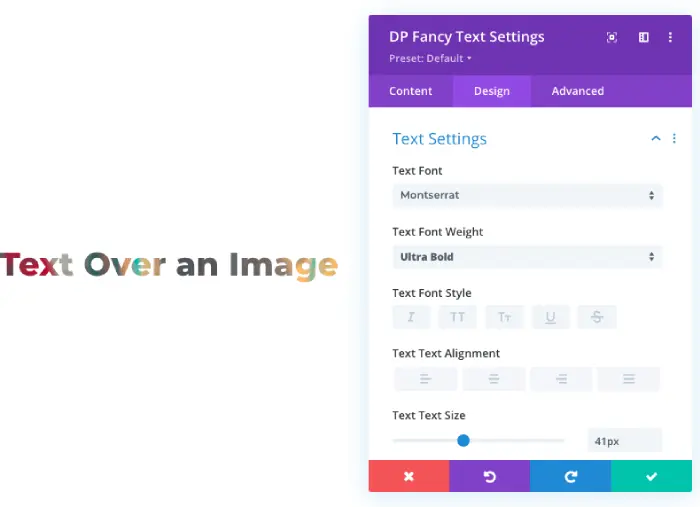
That’s it; we’ve successfully created text over an image using the Fancy Text module. After applying the text styling, the text would look like the below image.
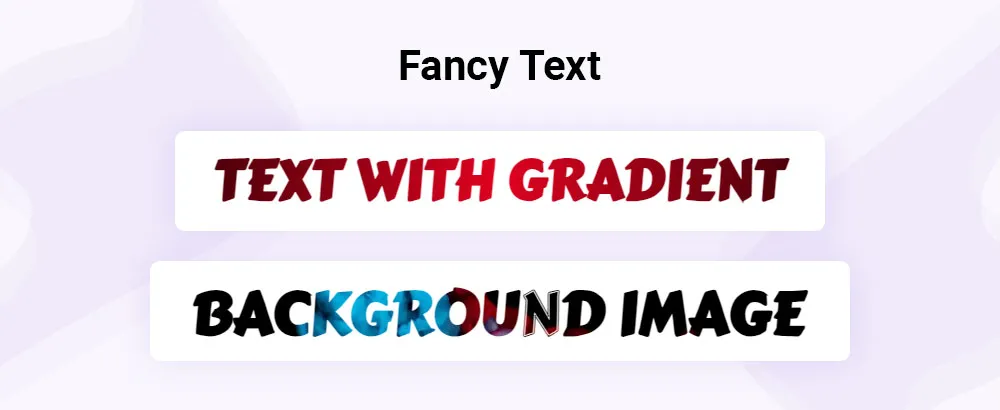
If you want to create Text over an image easily, then try the Fancy Text module of the Divi Plus plugin. Apart from adding an image behind a text, you can customize the text in multiple ways using this module. Get it today, and let me know your experiences in the comment box below.




As I learned Divi over the years, I ve searched for a solution to add a button over an image. Most of them required adding a separate button module or using the call-to-action module, but that doesn t work because the image is a background image, which crops weird and is not reliable and background images don t help SEO. So I had to come up with my own hack. It s not perfect, but it does work.