In the previous tutorial, we setup development environment for Divi module creation. In this tutorial, we will create the Divi extension and will set up a necessary custom Divi module. If you’re getting confused between Divi extension and Divi modules than I would like to clarify that Divi extension is nothing less than a plugin which extends the functionality of Divi theme in some way by adding some new features or by changing the theme behavior while Divi module is the content creation block. Single Divi Extension could have more than one Divi Module.
Before moving further, I assume you have already installed all dependencies, the latest version of WordPress & Divi theme on your local machine.
Running Create Divi Extension Command:
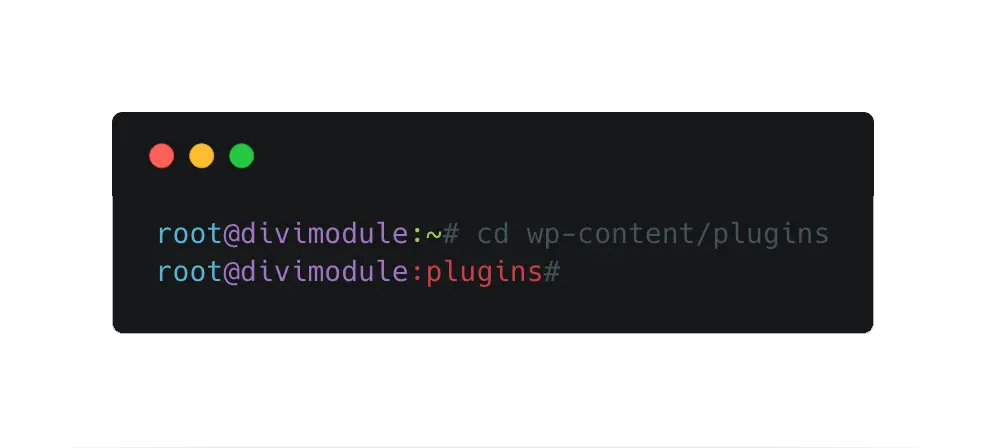
Divi provided the create-divi-extension command to set up a basic module structure. We need to navigate through our plugin directory using the command line(cmd for Windows) or Terminal(for Mac).
cd wp-content/plugins

When you’re in plugin folder your prompt will look like this:
Now run the below command to create Divi extension:


npx create-divi-extension divi-extension-tutorial
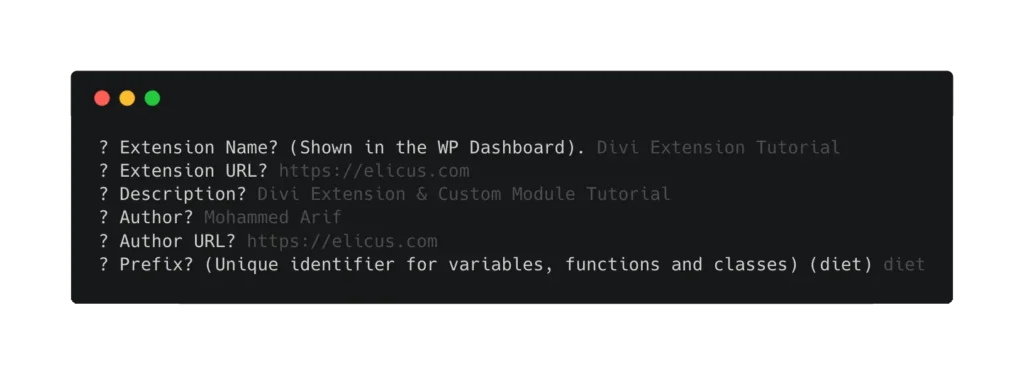
This command will install divi-scripts, react & react-dom in your extension folder after that It will ask for few more details which include extension name shown on the WordPress dashboard, extension URL, extension description, author name, author URL, a prefix which is the unique identifier for variables, functions & classes.
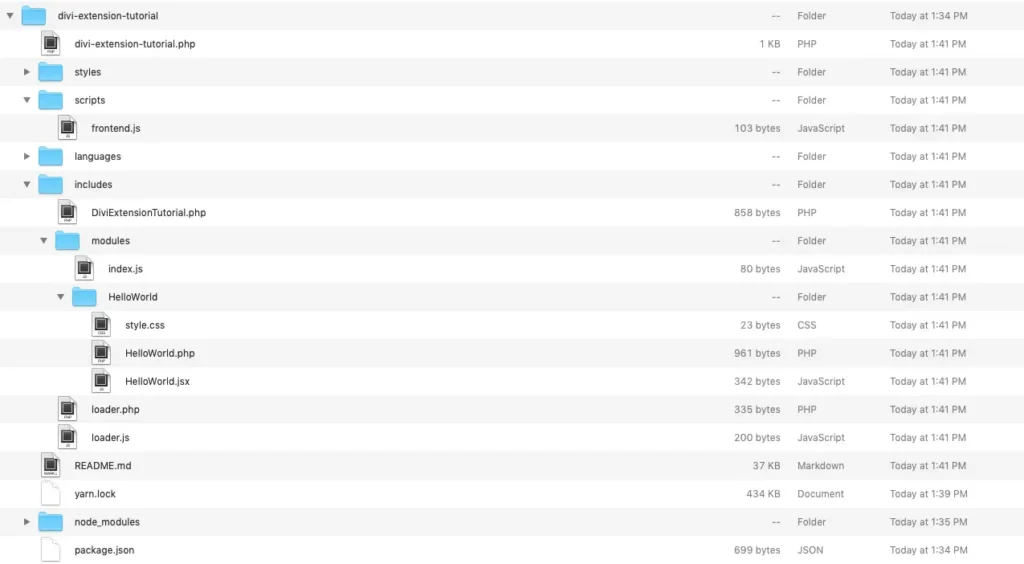
Once done, you can see your extension in the plugin directory. Your module file structure looks like:

Let’s navigate through folders, files & their usability
After setting up Divi extension, you can locate several files & folders inside your extension folder. I’m explaining the functionality of some files which we’re playing with during the phase of development.
Folder: divi-extension-tutorial
This is the parent folder where our extension files reside. This folder has the same name we have chosen while running the create-divi-extension command on terminal.
- File: divi-extension-tutorial/divi-extension-tutorial.php
This file has the same name as our extension folder. This is the traditional WordPress approach that there must be a file which should the exactly similar name to the plugin folder. We could define or alter plugin header information in this file. Like the author, description and other things. - File: divi-extension-tutorial/package.json
We will include all the dependencies in this file. If we would like to add any other dependency other than pre-installed one, like jQuery, owlCarousel, we need to define those dependencies in this file, and later we can install them by running the commandnpm install.
Folder: divi-extension-tutorial/scripts
This is the folder where we place JavaScript files. frontend.js is the default one we can add some other external JS files as well and later on can enqueue them.
- File: divi-extension-tutorial/scripts/frontend.js
This is where you can write your custom JavaScript. You need not enqueue this file in the traditional way. This file will be included automatically after compilation.
Folder: divi-extension-tutorial/includes
This folder contains our module files.
- File: divi-extension-tutorial/includes/loader.php
This file loads all the module on the backend. - File: divi-extension-tutorial/includes/loader.js
This file load all the modules on the frontend. - File: divi-extension-tutorial/includes/DiviExtensionTutorial.php
This file is responsible for initializing our module. This file also controls the text domain for translation.
Folder: divi-extension-tutorial/includes/modules
- File: divi-extension-tutorial/includes/modules/index.js
Folder: divi-extension-tutorial/includes/modules/HelloWorld
This is the core file of our module. We’re going to define the setting fields and all the custom functionality of our module in this file.
- File: divi-extension-tutorial/includes/modules/HelloWorld/HelloWorld.php
This file is responsible for displaying our module on the visual builder. Divi is using the combination of React & JSX to set up the module on the frontend. - File: divi-extension-tutorial/includes/modules/HelloWorld/HelloWorld.jsx
This file is responsible for displaying our module on the visual builder. Divi is using the combination of React & JSX to set up the module on the frontend. - File: divi-extension-tutorial/includes/modules/HelloWorld/style.css
This file is located under the module folder. You can write each module specific CSS in their respective style.css file.
These are the primary files we’re going to use in the next tutorial to create custom Divi modules. Other files are useful, but the are only used for the compilation purpose you need not worry about those files. In the next tutorial, we will learn about some yarn commands followed by adding setting fields in Divi module and how to display them on jsx side for the visual builder.


You wrote:
”
Folder: divi-extension-tutorial/includes/modules/HelloWorld
This is the core file of our module. We’re going to define the setting fields and all the custom functionality of our module in this file.
File: divi-extension-tutorial/includes/modules/HelloWorld/HelloWorld.php
This file is responsible for displaying our module on the visual builder. Divi is using the combination of React & JSX to set up the module on the frontend.
File: divi-extension-tutorial/includes/modules/HelloWorld/HelloWorld.jsx
This file is responsible for displaying our module on the visual builder. Divi is using the combination of React & JSX to set up the module on the frontend.
”
But I think you meant the HelloWorld.php description to be different than the HelloWorld.jsx one. I think the first para is meant to be fore the .php file, no?
Thanks for this, Mohd.
Looking forward to Part 3 🙂
Hi Daniel,
Here is the next part of the series: https://diviextended.com/how-to-create-custom-divi-module-part-3-understanding-yarn-commands/