
The Divi 4.6 update brought an impressive feature to the theme, which was missing for a very long time. The Divi sticky element option for every module. Using this particular option, you can now stick any module of the builder on the edge of the browser. Furthermore, it’s the powerful sticky feature any WordPress theme ever got. It hosts lots of features that make the Divi sticky option the one sticky feature every web designer wanted to use and waiting for.
And in this blog post, we’re going to try this new feature of the Divi theme, and we’ll see what great sticky elements we can create. Therefore, let’s make our outstanding sticky elements for Divi inside the Divi without any further intro text.
An overview to the new Divi Sticky feature
As I already mentioned above, using this new Divi feature, you can literally stick any module or section of the page builder to the edge of the browser. And whenever you scroll that page, it will remain sticky to that location, which you’ve assigned it to.
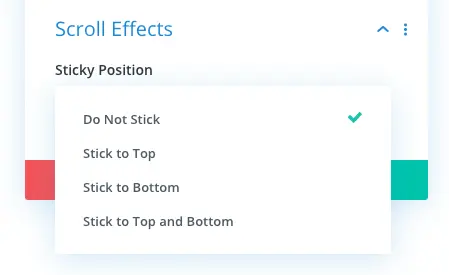
Currently, there are three sticky elements position Stick to Top, Stick to Bottom, and Stick to Top and Bottom. Each position has its own set of options and how it works when you choose it.
Stick to Top
When you select this sticky position for the page element, then it would affix to the top of the site when you scroll the page downwards. For example, you can look at the button in the below illustration.
Stick to Bottom
Using this sticky position in the Divi theme, you’d be able to fix your page elements at the bottom of the page when you scroll.
Stick to Top and Bottom
When you select this position for the sticky element, it will combine the previous options’ sticky behavior. Meaning, your sticky element would remain sticky for both the top and bottom positions. Look at the below illustration to understand it better.
And each sticky position includes the following options to make the sticky element more functional.
Let’s have a closer look at each option available in the Divi Sticky feature.
Sticky Offset Options
The Sticky Offset option in the Divi Sticky feature enables you to provide space between a sticky element and the edge of the position where it is made to stick. Meaning if you stick an element to the top, it will maintain a gap from the top section’s edge. To understand this clearly, play the below video.
In the above illustration, the orange button module is maintaining a gap from the top area as I slide the Sticky Top Offset option. There are 2 offset options available, one is the Sticky Top Offset which you get when you choose the Stick to Top, and the Stick to Top and Bottom, sticky position. It will place your sticky element at some distance vertically from the top area. And it will work like the below illustration when you scroll the webpage.
Another offset option you get is the Sticky Bottom Offset when you select Stick to Bottom and Stick to Top and Bottom, sticky position. It enables you to maintain a gap between the sticky element and the bottom sticky position. Play the below video to understand it clearly.
In the above video as I slide the option, it will distance the sticky element from the bottom. And it will work just like the below moving graphics when you scroll the page of the site.
Sticky Limit Options
As the name suggests, this particular option available in the Divi sticky feature will limit the sticky element to behave as sticky in the chosen area of the page. For now, there are a total of 2 limiting options that are as follows.
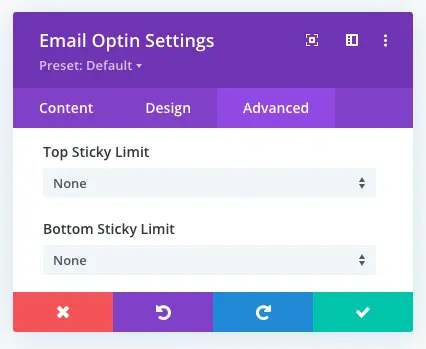
Top Sticky Limit: To limit the sticky element you’ve chosen for top sticky positions.
Bottom Sticky Limit: To limit the sticky element you’ve chosen for bottom sticky positions.
Furthermore, these two sticky limit options got 5 options to limit a sticky element that are as follows.
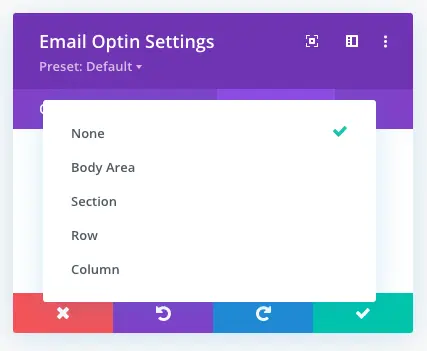
None: The sticky element would remain sticky throughout the webpage for the position you’ve made it stick to. And from the area where it is placed on the page.
Body Area: This will keep the sticky element sticky on the entire webpage; however, it will not pass the header and footer section. Whereas, in the None option, the sticky element would cross the header and footer sections as well.
Section: The sticky element would remain sticky within the section then whether it is FullWidth, Regular or Special.
Row: Your module will remain sticky in the row area.
Column: This would keep the element sticky in the column area.
Using all these sticky limits, you can easily create multiple sticky elements on your Divi theme website. Like CTAs, Newsletter forms, header-footer, etc.
Offset From Surrounding Sticky Elements
The need for this option is when when you have more than one sticky element on the page. And you don’t want to overlap each other. When you keep the Offset From Surrounding Sticky Elements as YES, then your selected sticky element would maintain a gap from another sticky element.
For instance, in the above video, when I enabled this option, the sticky element distances itself from the sticky button.
Transition Default and Sticky Styles
This feature of the new Divi Sticky option is pretty impressive. Look at the below illustration by Elegant Themes. In this, the “Get Tickets” CTA is changing its color and shape from black-to-green and green-to-black when scrolling the page.
The thing here to notice is that when it changes its shape and color, you’d also found a smooth animation that transits the change in the CTA. This transition works very well and makes a sticky element look more engaging and modern.
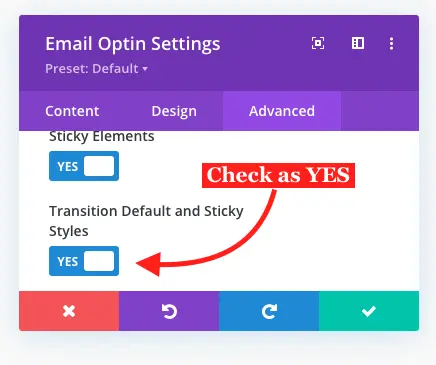
However, to get this feature work, first, you’ve to customize the design of the module or the element. (We’ll discuss the designing of the sticky element later on this article.) And then, check Transition Default and Sticky Styles as Yes.
As we’ve learned about all the features of the new Divi Sticky element option, now let us know, how we can create one.
How to use Divi Sticky option
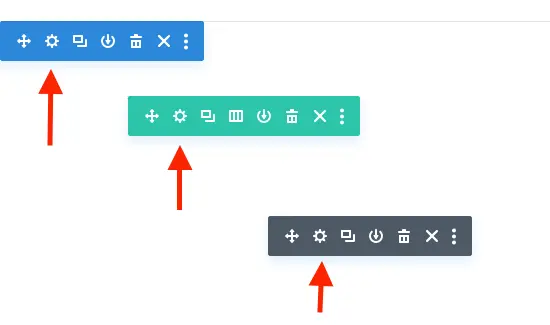
Whether you want to create a sticky CTA, popup, fly-in, subscribers form, or a floating menu. All you have to do is open the Settings of the section, row, column, or module, wherever you’ve added that element you want to make sticky.
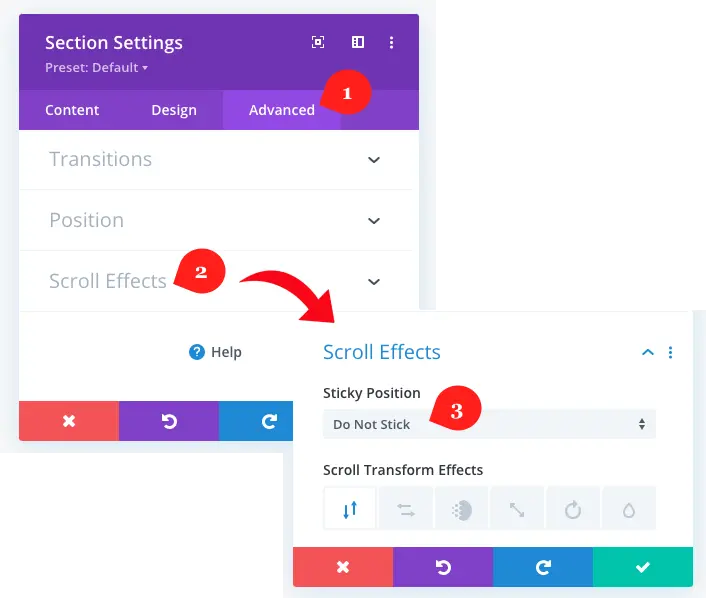
Then go to the Advanced tab, and inside the Scroll Effects click the Sticky Position and choose any sticky position from the available options.
Once, you’ve done making proper adjustment to the Divi sticky element, using all the sticky options we discussed earlier; you’re ready to customize its design further.
How to apply custom styling on a sticky element in Divi
For example, you’ve added a button and want it to behave like sticky. And whenever it behaves like a sticky element, it should change its style. Like, before it becomes sticky, it should have a black background, and when it becomes sticky, it should have a green background.
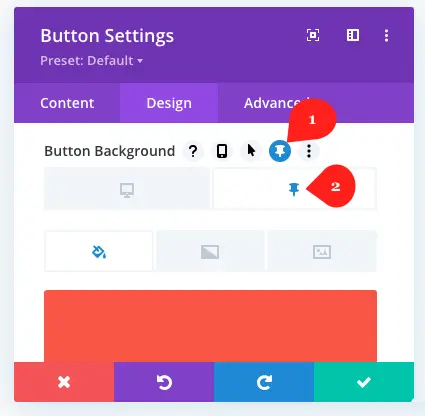
Now, what you need to do is, just go to the Design tab, open Button settings, and then check Use Custom Styles For Button as YES.
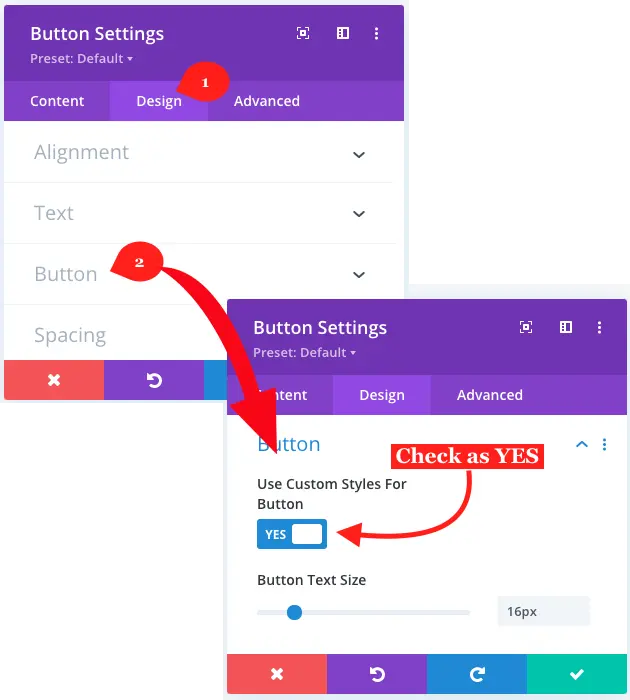
It will open sets of options for you to customize the button. Now, to have a different style when the button becomes sticky, hover your pointer in any settings. Here, you’d find a pin icon, just like the below screenshot. You need to click it to open settings to apply different styles for sticky elements. According to your requirements, you can apply anything to the element.
Conclusion
The Divi Sticky feature offers a handful of options that can help you create different sticky elements on your website. And not only different sticky elements, but you can also place them on and for different positions. In my opinion, this option is one of the ultimate features Divi has brought till now. And I can say for sure, this time they have done it pretty well. This Divi Sticky feature is going to solve many issues that Divi designers have been facing for a long time.
If you think this article can help other Divi users, then share it as much as you. Moreover, if you have any thoughts or suggestions about this new Divi feature, let me know in the comments.


Great explanation – thanks!