Over the last decade, Facebook has become one of the online platforms that can bring huge profits to any business. Nevertheless, Facebook alone doesn’t create the buzz about your business in the world, but the community behind it makes the difference. The comments you get on the posts, likes, and shares, everything makes Facebook a lot more than it is. And to use Facebook more efficiently, it provides some APIs that allow you to add a comment box, like and share button, news feed as well as embedded comments, videos, and posts on your website. However, adding those features can sometimes feel tricky, and for a user with no coding or HTML knowledge, it is like a nightmare. Sometimes we also need a WooCommerce Facebook plugin to manage out store through its Facebook page.
Therefore, in this article, I’ll share the easiest way to add Facebook Social Plugins on your Divi website. So, you can, without doing any extra work or coding, increase engagement on your web content from and to users’ Facebook account.
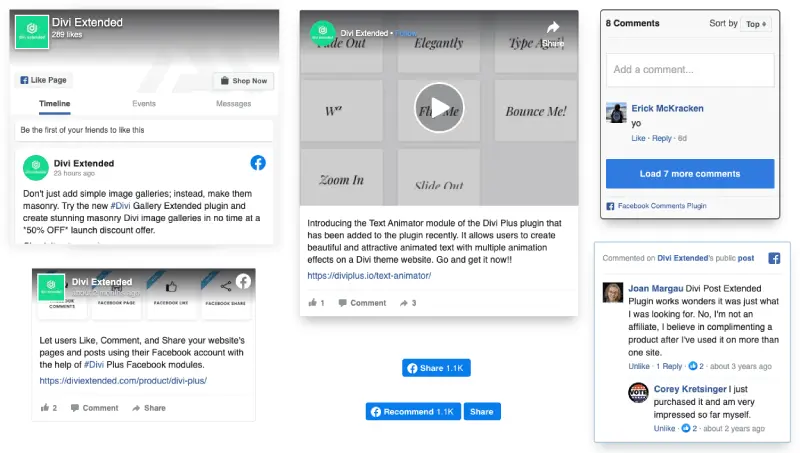
Check out the Facebook Social Plugins for Divi in the above screenshot. Looks good, right! Let’s explore them without any further time taking.
The Divi plugin we need?
The easiest and most suitable way to include Facebook Social Plugins on your Divi theme website is to get the Divi Plus plugin. It’s a multi-module plugin for the Divi theme, which also include Divi Facebook modules. To know how to install the plugin, check out the Divi Plus Documentation.
There are a total of 7 Facebook modules this plugin includes which are as follows.
1. Facebook Share Button – It allows you to add a Facebook Share Button to let website visitors share website content on their Facebook account.
2. Facebook Like Button – It allows you to add a Facebook Like button to let website visitors like your website content using their Facebook account.
3. Facebook Page – If you want to display timeline updates of your Facebook page, then using this module you can easily do that.
4. Facebook Comment Box – This module, provides you with the option to add a comment box on your site content that lets users leave comments using their Facebook account.
5. Facebook Embedded Video – It provides you with the option to display a Facebook video post on the site.
6. Facebook Embedded Post – Using this module, you can showcase Facebook posts and let users interact with them.
7. Facebook Embedded Comment – If your Facebook posts got amazing comments, then you can display them on your website.
But in this blog post, we’re not going to cover the embedded modules. However, there will be a separate article for those modules. But for now, let’s explore the remaining 4 Divi Facebook modules one by one.
Integrate Facebook APP ID
Before you start working with the Divi Facebook module, it’s important that you integrate it with the Facebook App ID. By doing so, you’ll have the information about users’ interaction with the modules. To do that, simply go to the Divi Plus modules panel.
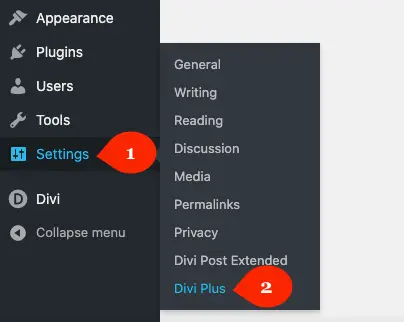
WordPress Dashboard → Settings → Divi Plus
Then, go to Integration → Facebook → and paste the Facebook APP ID.
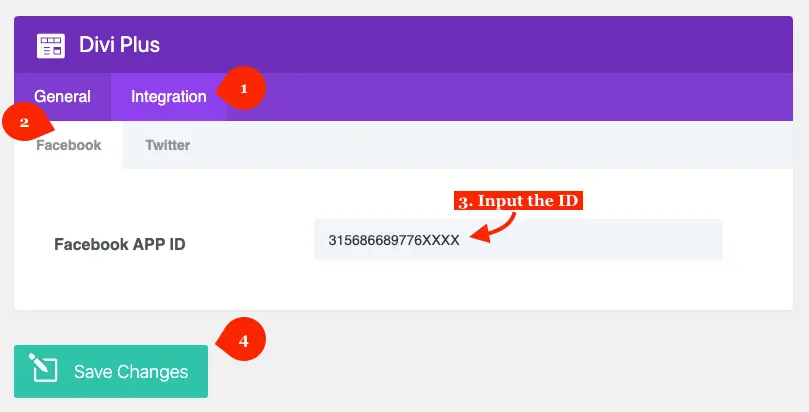
If you don’t any Facebook App ID, then you can create one from here. Once added the ID, Save Changes.
Facebook Share Button
The first Divi Facebook module you get with the plugin is the Share button. The following steps would help you easily insert the module on a page and then customize it according to the requirements.
Step 1: Insert the module
Create a page or edit an existing one where you want to display the Divi Facebook Share button. Then choose to Build On The Front End, so you can see the live changes you made to the module. Once the builder gets loaded, add a new row, and then insert the DP Facebook Share module.
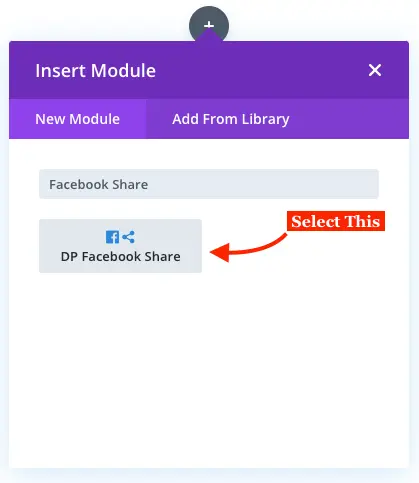
The module has been inserted, now we can make changes to its content.
Step 2: Configure Facebook Share Button
Upon inserting the module, the Content tab appears with Configuration and Design as the additional settings.
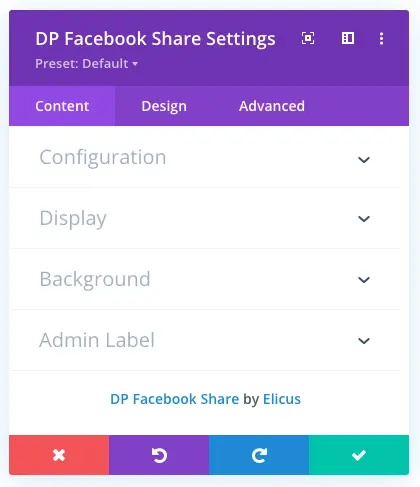
Let’s see what we can do with the Configuration settings.
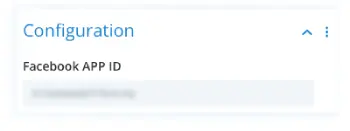
A: Facebook Custom APP ID
We’ve already inserted the Facebook APP ID in the Integration tab of the Divi Plus modules panel. However, in some cases, you might need a different app id. Therefore, using this option, you can easily add a different Facebook APP ID without disturbing the primary one you’ve used for the integration tab.
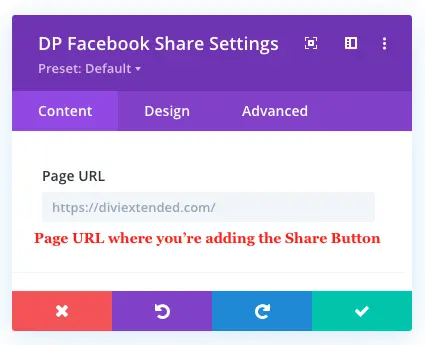
B: Page URL
This option is to input the page URL where you’re inserting a Facebook Share button. When users share the page, it will have the page URL which they are sharing and where you want Facebook users to land on.
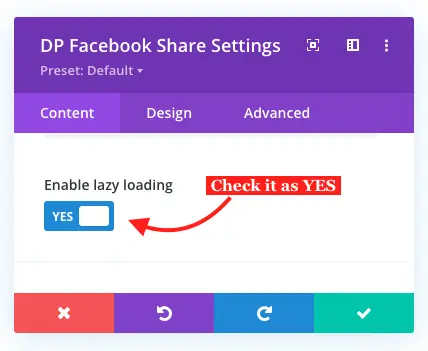
C: Enable Lazy Loading
To speed up the page and lower the time it takes to load the Share button, you can enable this option. Doing so, you’ll save the page from getting heavy and take time to become functional completely.
Step 3: Customize display options
After the Configuration settings, the option we get in the Content tab is the Display settings. Let’s see what we can do with it.
A: Layout Selection
The first option available in the Display setting is to select the available layout options for the Facebook Share button.
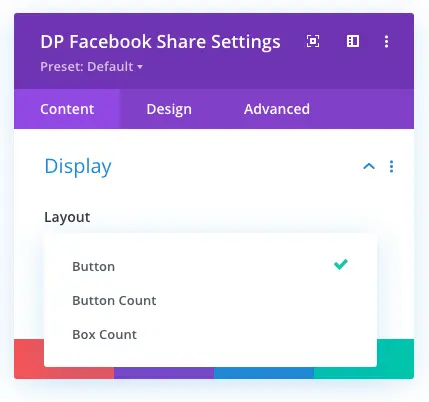
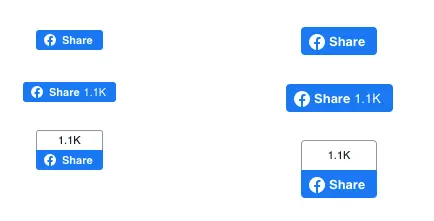
The Layout option provides 3 designs for the share button that are Button, Button Count, and Box Count.
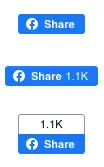
The above screenshot nicely depicts how the button looks with different layout options. Select any one from the available options according to the requirement.
B: Share Button Size
In addition to the layout options, the Display setting of the Facebook Share module also provides the Size option to change the button size.
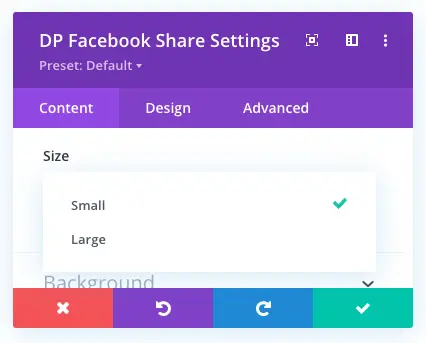
You can change the share button size, either Small or Large. The below screenshot presents the share button with both the sizes very well.
Step 4: Change Share button alignment
To change the button alignment, you need to go to the Design tab and then in the Alignment settings.
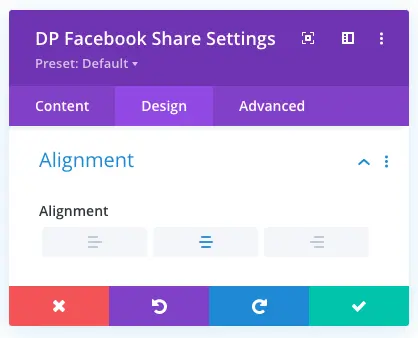
Here, you get three options to change the share button placement that are Left, Right, and Center.
Facebook Like Button
This Divi module enables you to add a button that would allow users to like the page using their Facebook account. Moreover, it includes no. of features that make it even more efficient and useful. Before we look at its features and how it works, first, insert the module.
Step 1: Insert the module
Likewise, the above steps, create a new page or edit an existing one. Then, follow the same steps to launch the Divi builder on the front-end. Once the builder becomes functional to design, insert the module DP Facebook Like.
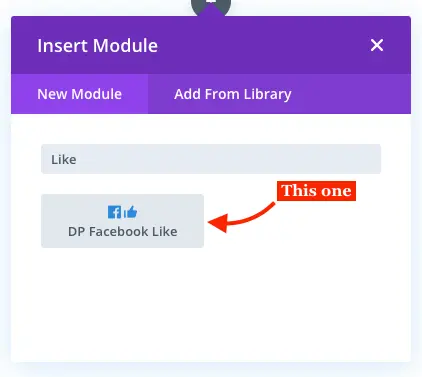
That’s it; let’s see how we can make the most out of it.
Step 2: Configure Facebook Like button
To make the module more functional, we need to configure it according to our website’s requirements. The below points would help you do it easily.
A: Facebook Custom APP ID
Like the Facebook Share module, the Like button can also use a custom Facebook APP ID. If you want to track user interaction on a different Facebook account, you can input the App Id.
B: Page URL
Here you need to enter the URL of the page where you’ve added the button. The Facebook Like button module also has a feature that enables you to add a Share button along with it. We’ll learn about this feature in later steps. Therefore, it’s recommended that you use the URL of the same page. So, whenever users share your page, it would use the right link.
C: Select Button Action Type
The Like button isn’t only about letting users like a page. It’s more than that. The Action Type option available in the module’s Configuration settings provides you the choice to change button type.
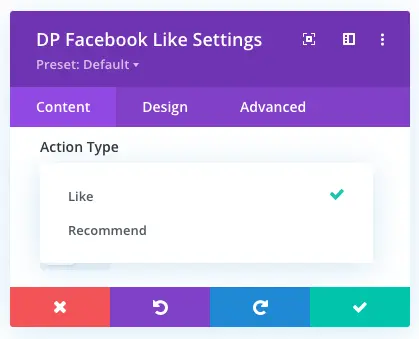
You can keep the Like button as a Like button or change its action type to the Recommend button. If you want people to like your webpage, then keep it on the Like button. Or if you want users to try your services and then suggest them to others, then choose the Recommended button type.

D: Enable Lazy Loading
Just like the Facebook Share module, you can apply lazy loading on Facebook Like button as well.
Step 2: Facebook Like Button Display Options
Similarly to the Facebook Share module, the option we get in the Facebook Like button’s Content tab after configuration settings is the Display settings. And it provides you with 3 options to apply on the button module: Layout, Size, and Display Share Button.
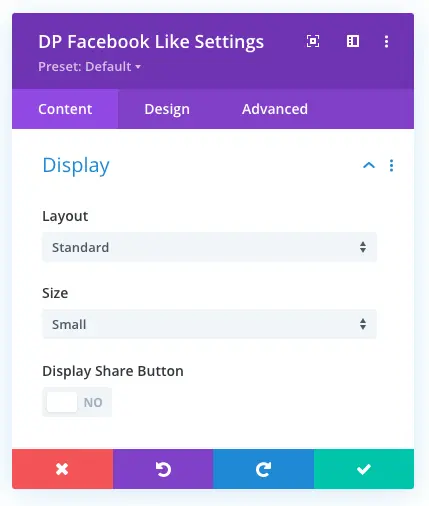
Let’s see what we can do with it.
A: Layout Selection
The Display settings of the Facebook Like module also provides the first option to select layout.
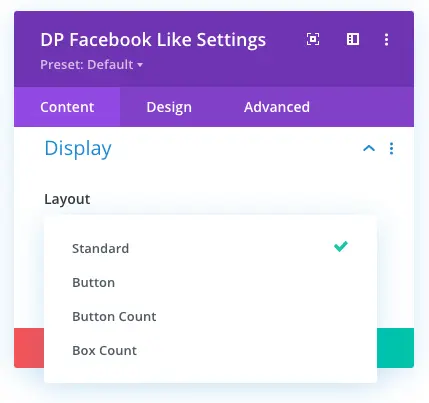
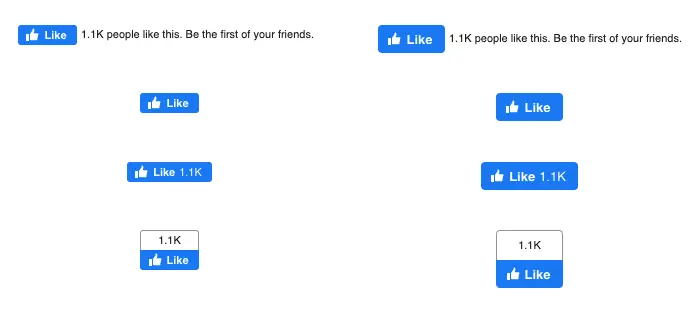
Unlike the Share module, the like button module has 4 layout options. To select one, go to the Layout in the Display settings, and select either Standard, Button, Button Count, or Box Count.
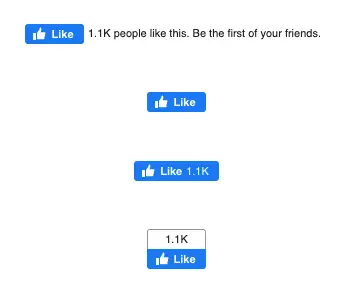
The above screenshot nicely depicts how the button looks with different layout options.
B: Like Button Size
Just like the Share module, the Display settings of the Facebook Like module also provides the Size option to change button size.
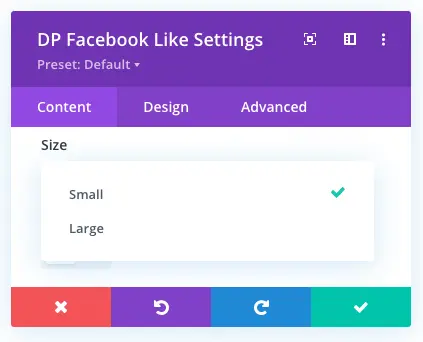
And the available button sizes are Small and Large. You can have an idea of how the like button looks in different sizes in the below screenshot.
C: Display Share Button
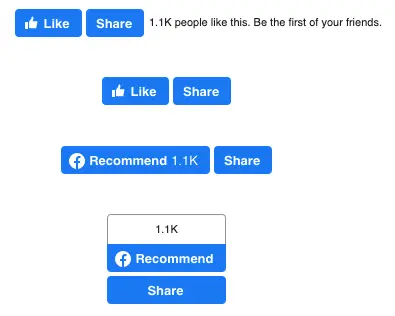
The last option available in the Display settings of the Facebook Like button module is the ability to display a share button with it. And this is what makes the like button special than the Share button because you can’t display a like button with share.
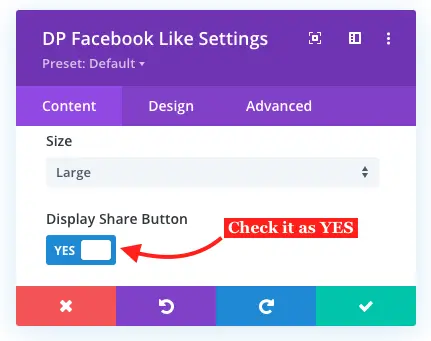
To enable showcasing Share button with the Like button as well, check the Display Share Button as Yes. And it will come right next to the Like button.
Step 3: Change Like button alignment
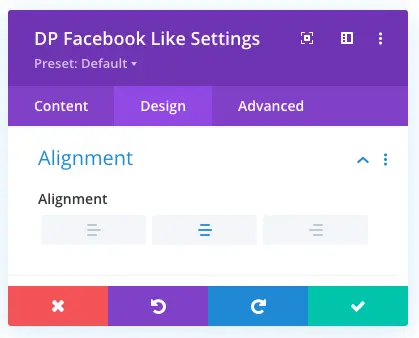
To change the button alignment you need to go to the Design tab, and then in the Alignment settings select button placement as Left, Right, or Center.
Facebook Page (News Feed)
So, you want to display updates from your Facebook page to the website? Then the Divi Plus Facebook Page module is the right tool to accomplish this design need. And not only updates from the page but multiple things you can do with it. Let’s see how we can insert this module on the page and configure it to use it at its fullest.
Step 1: Insert the module
To add the Facebook Page on your Divi theme, create a new page, or edit an existing one just like we did in the earlier module’s step. Then launch the builder and insert the DP Facebook Page module.
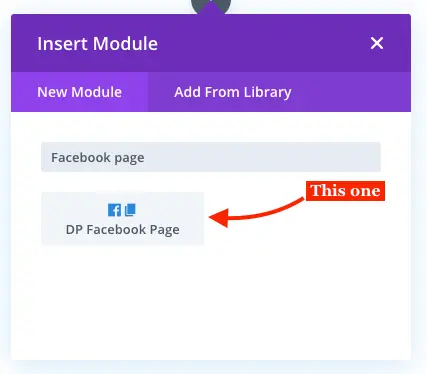
Step 2: Configure Facebook Page
Same as the other Divi Facebook module, as soon as the Page module is inserted, it will open the Configuration settings in the Content tab.
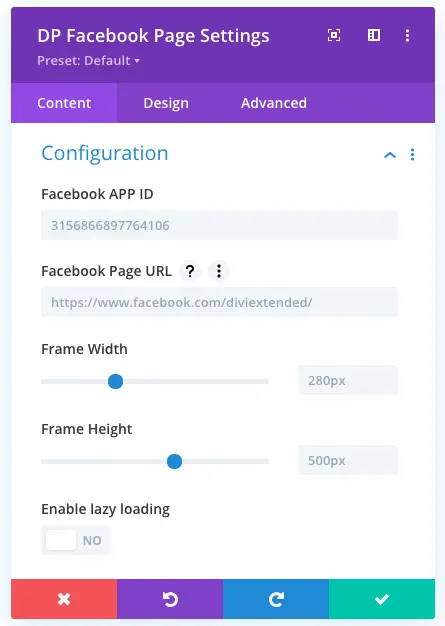
Let’s take a closer look at each Configuration options.
A: Facebook Custom APP ID
Same to the other Divi Facebook modules, the Facebook Page module also provides you with the option to track user interaction.
B: Facebook Page URL
The Facebook Page URL field allows you to input the URL of the Facebook page you want to display on your website.
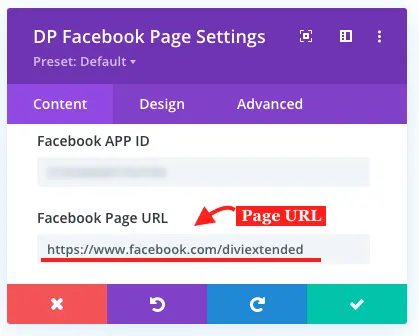
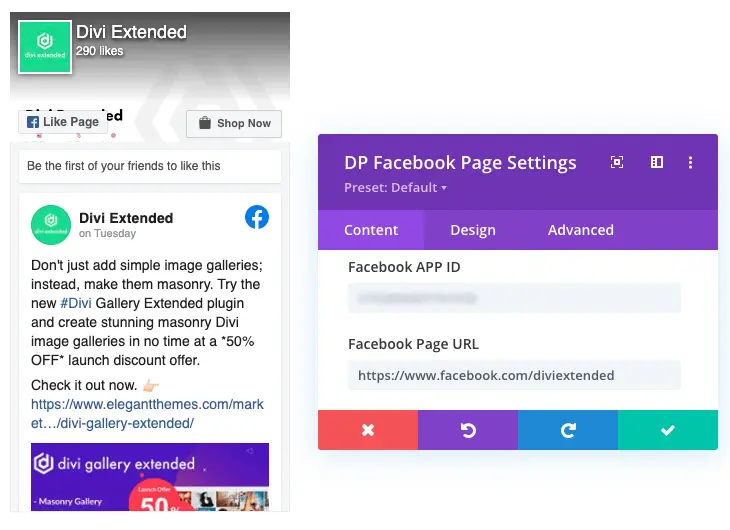
In the above screenshot, I’ve used the Divi Extended’s Facebook Page URL. Once we input the URL, the Facebook Page starts to appear, just like the below screenshot.
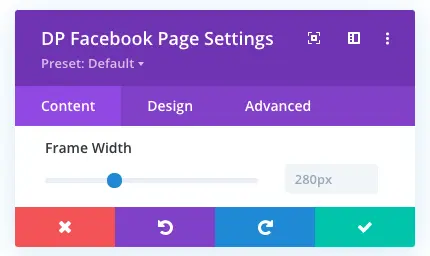
C: Frame Width
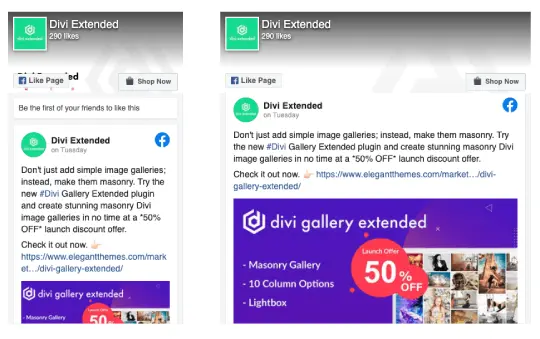
By default, the Facebook Page appears after inserting the URL is quite congested. For some users, it won’t fit in their website’s design. Therefore, using the Frame Width option, you can make changes to the space it covers horizontally.
You can look at the Facebook Page variation in the following screenshot.
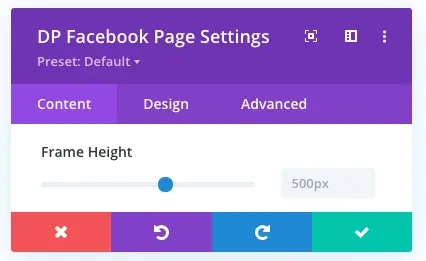
D: Frame Height
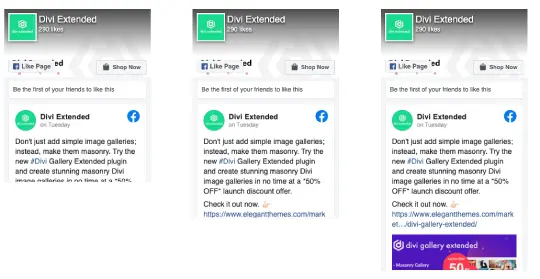
Same as the width, you can change the default height of the Facebook Page module. Go to the Frame Height and move the slider or input the value.
The below screenshot nicely showcases Facebook Page with different heights.
E: Enable Lazy Loading
If you want that the Facebook Page content won’t slow down the webpage, you need to enable lazy loading. To do that, check Enable Lazy Loading as YES.
Step 3: Facebook Page display options
The next setting available in the Facebook Page’s Content tab is the Display options. Using this particular setting’s options, you can make changes to the content you want to display on it.
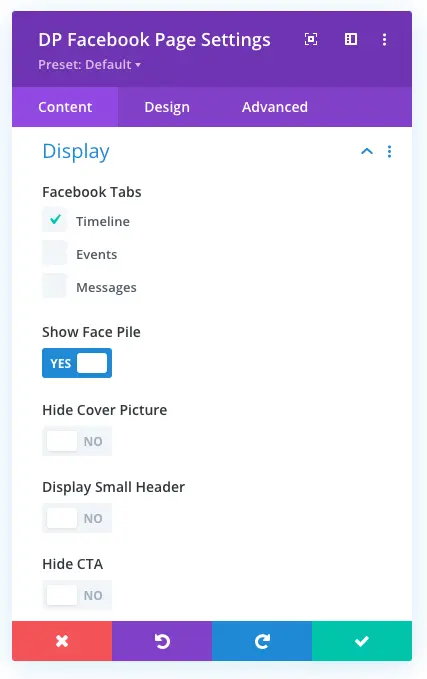
The following steps would help you utilize these options to a greater extent.
A: Select Facebook Page tabs
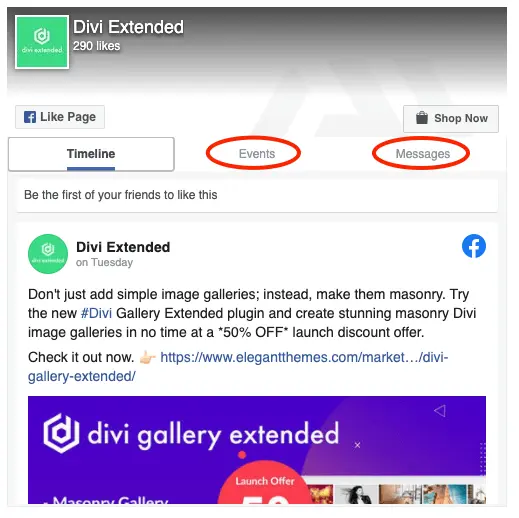
By default, the Facebook Page module display timeline updates on it. However, you’ve also got the option to display page events. Moreover, you can also allow users to send messages from the website directly into the page’s inbox.
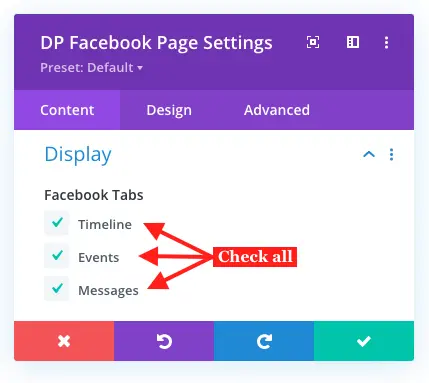
To display events and allow users to send messages, tick the Events & Messages checkboxes in the Facebook Tabs option. After this, the events and message option would appear on the page similar to the below screenshot.
B: Show followers profile picture
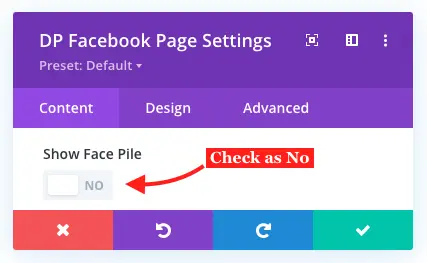
By default, the Facebook page module displays the page’s followers’ profile picture. However, if you don’t want to display them, check Show Face Pile as No. To show them again, simply check it as Yes.
C: Show Cover Picture
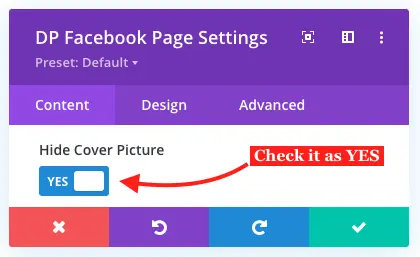
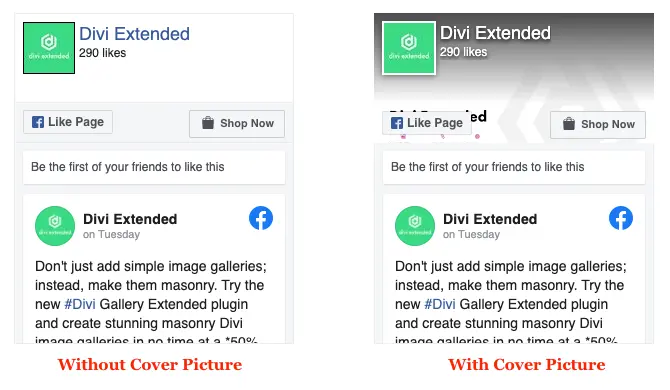
The Facebook Page module display page’s cover picture by default. However, if you want to hide it, check Hide Cover Picture as Yes.
This will hide the cover picture of the Facebook Page from the website as you can see in the below comparison image.
D: Show Small Header
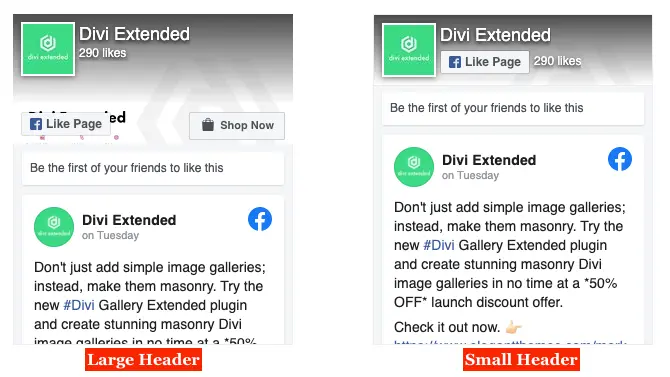
By default, the header of the Facebook Page is wide and contains a CTA such as Shop Now, Visit website, and other. But if you want to use a small header, then this module also provides that feature.
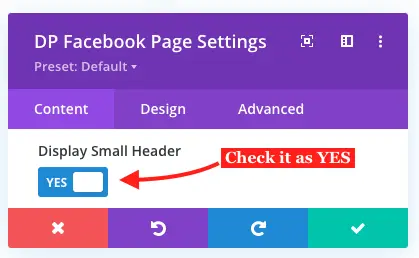
To display a small header all you need to do in the Display settings is that, check Display Small Header as Yes. And it will starts to show the header in compact form just like below screenshot.
E: Hide CTA (Shop Button)
By default the Facebook Page module shows CTA on the header, and if you want to hide it without using the small header, check Hide CTA as Yes.
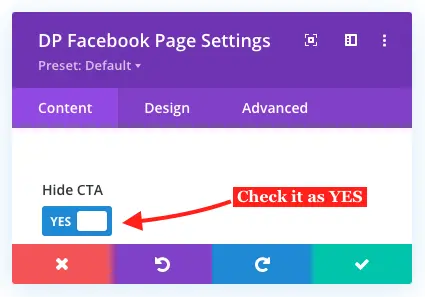
Once you enable this option, the CTA from the Facebook Page would disappear but it will start to show a Share button. So, if you want to make it completely go, then you’ve to use the small header option.
Step 4: Design Facebook Page
We’ve explored the settings available in the Content tab of the module. Now, let’s see what extra options Design tab provides.
A: Alignment
Go to the Alignment settings in the Design tab, and choose a position from the available options. Like the other modules, there are 3 alignment options available, Left, Right, and Center.
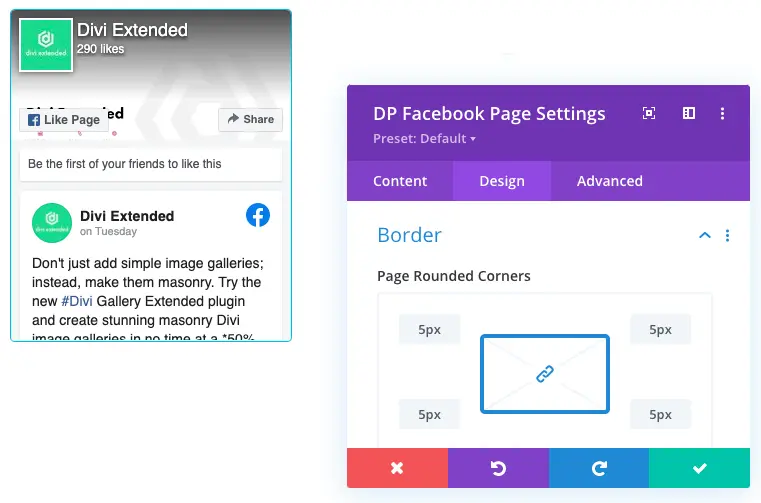
B: Border
The Border settings allows you add rounded corners and border styles to Facebook Page module.
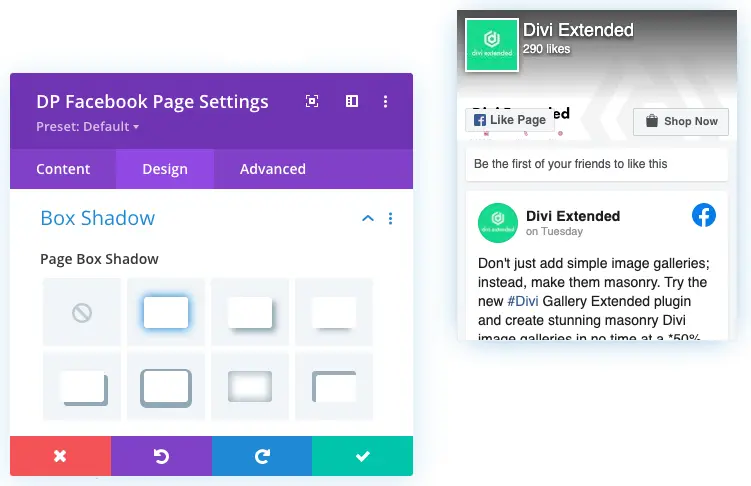
C: Box Shadow
The Box Shadow settings allows you add box shadows to the Facebook Page module.
Facebook Comment Box
Want website visitors to leave their views and thoughts on your site’s content using their Facebook account? Then Divi Plus Facebook Comments module is the tool you need in Divi.
Step 1: Insert Module
To start using the Facebook comments on your website, first, you need to insert the module. Just like we did for the previous ones, create a new page or edit an existing one. Then after the builder gets fully loaded, insert the DP Facebook Comments module.
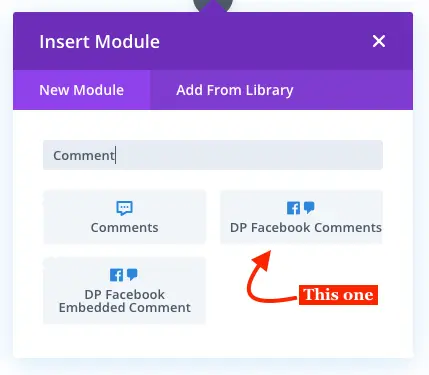
Step 2: Configure Facebook Comment Box
As soon as the module gets inserted on the page, you’ll start to see comment box just like below screenshot.
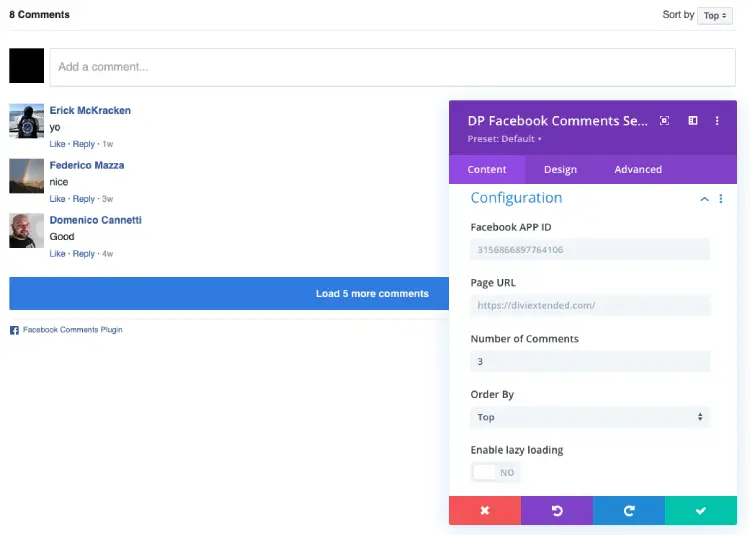
And Content tab of the module would open the Configuration settings. The below points would help you to configure this module for good.
A: Facebook Custom App Id
Similar to the previous module, the Facebook APP ID field, will help you add a custom app id for the comment box.
B: Page URL
The Facebook Comments module also provides users to share their comments on Facebook. Therefore, in this field, you can input the URL of the page where you’ve added the comment box. So, when users share their comments it would contain the page URL.
C: Number of Comments
By default the number of comments value is set to 10. However, you simply adjust it in the Number of Comments field.
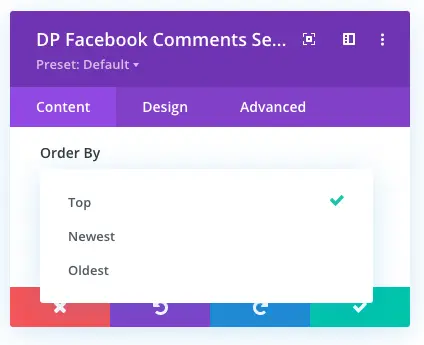
D: Order By
The order comments sorted by default is Top, but there are 2 more order types you can select for the comments. Go to the Order By dropdown menu, and select one from the available options that are Top, Newest, and Oldest.
E: Enable Lazy Loading
Check, Enable Lazy Loading as Yes, and the module won’t slow down the page load speed. The available comments will adopt the lazy loading.
Conclusion
To add Facebook page; Like and Share button, and Comment box to the Divi theme website, then using the Divi Plus Facebook modules is the fastest and easiest option you get. All the options available in these modules is super easy and you can customize them in accordance with your website’s styling. Overall, using these Facebook modules for Divi, you can create environment on your site for Facebook users.
Try these modules today, and let me know what was your experience using these modules in the comment section below. If you have any suggestions or ideas, then they are welcome too. Moreover, subscribe to our free newsletter to get these Divi tutorials right into your inbox.




0 Comments