Whether you’re a teacher or not, if you have experience in a particular field, selling your expertise online is one of the most profitable businesses. Further, with LearnDash and WooCommerce, this becomes seamless.
If you’re looking to sell online courses from your own website and need the best solution, this blog post will provide you with the one.
In this, we’ll discuss what’s WooCommerce and LearnDash and how they can help you. Further, we’ll follow the steps to utilize them. And lastly, we take a look at a Divi child theme that you can use if you’re building your LearnDash and WooCommerce site using Divi.
The child theme improves the website’s functionality and design by adding a customized design. Plus, new Divi shop layouts – Cart, Checkout, Product page and shop page.
What’s WooCommerce? A Brief Intro
To turn a simple WordPress site into a highly functional eCommerce store, you can use WooCommerce. It’s a free plugin for WordPress that allows you to build a digital shop using WordPress in no time.
Whether you want to sell physical products, digital products, or even subscriptions, WooCommerce can help you sell anything. It has many super-rich features and options that enable you to scale an online business worldwide.
For instance, WooCommerce provides you with,
- In-build Analytics to review the store’s performance.
- Easy inventory management for unlimited products.
- Various store themes.
- Various extensions.
- 70+ payment gateway extensions.
- 3rd-party integrations like Mailchimp, TaxJar, Stripe, etc.
- Mobile application.
- And much more.
In addition to these, WooCommerce is open-source and developer-friendly. It means that if you want to take WooCommerce beyond its level, you’re free to do that. Thus, making WooCommerce one of the best eCommerce platforms.
What’s LearnDash? Everything You Need to Know (Quickly)
LearnDash is a premium plugin that lets you sell online courses using WordPress. Whether you want to sell audio courses, video courses, or even text courses, it’s possible using LearnDash. And not only possible but more than that.
It was first released in 2013, and since then, it has helped hundreds of users successfully sell online courses from their own websites. It’s one of the best ways to host an online course.
No matter how good your experience with WordPress, with LearnDash, it will be seamless to sell online courses of any kind. There are no additional requirements and nothing, all you need is expertise in a particular field, and the rest will be taken care of by amazing LearnDash Features.
For easy course creation, this Learning Management System is what you need. It’s intuitive, takes less time to be configured, and seamlessly allows you to add unlimited courses with different options. For example, LearnDash will enable you to,
- Build courses using the Drag and Drop course builder.
- Teach learners in a distraction-free environment using Focus Mode.
- Create meaningful courses through the Advanced Quizzing system.
- Release courses through Dynamic Content Delivery such as Drip, Progress, etc.
- Send Automated Notifications.
- Award Certificates and Badges.
- Utilize in-build payment gateways like LearnDash PayPal.
- Create assessments and much more.
With these and additional options of LearnDash, you’d have an online teaching platform that will give more to both you and your learners.
How Can LearnDash and WooCommerce Help Together to Create Evergreen Courses?
With WooCommerce and LearnDash combined, you’d have more control over your course selling platform. Through LearnDash, it will be easier for you to streamline the evergreen course creation process.
On the other hand, WooCommerce will allow you to manage different aspects of selling online courses.
Like, you’d be able to review the performance of the courses sales reports. It will be easier to process the payment through different payment gateways. Straightforward management of the course inventory.
Further, with the integration of WooCommerce, your platform would be able to process automatic course enrollment, automatic refunds; support for physical courses, enhanced checkout process, etc.
And for all of these, there are no additional charges as WooCommerce is available for free.
Steps to Sell Online Courses From Your Own Website
Following, we’ll look at the steps on how you can install WooCommerce, and LearnDash and utilize them to sell online courses from your website.
#Step 1 – Install WooCommerce
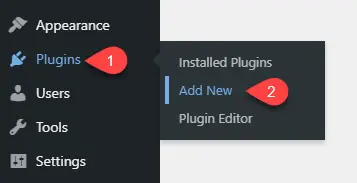
Installing WooCommerce on a WordPress site is simple and straightforward. First, access your WordPress Dashboard, then, go to Plugins → Add New.
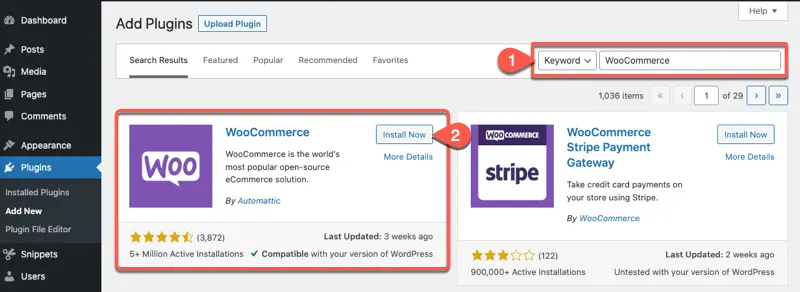
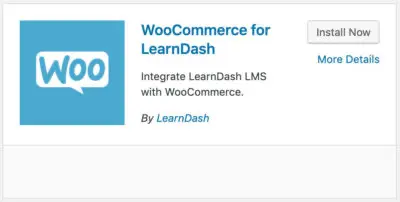
On the Plugin installation window, search “WooCommerce” and click Install Now for the following,
After the installation, Activate WooCommerce and make sure you perform the following processes to make it work properly.
- Configure WooCommerce Setup.
- Set up payment gateways.
- And set up shipping, if you’re planning to offer physical courses.
That’s it; you can now move to the next step to install the learning management system for WordPress, i.e., LearnDash.
#Step 2 – Install and Activate LearnDash LMS
After getting LearnDash, you need to download the product’s zip file, and upload it to your WordPress site. Go to Plugins, click Add New, and then Upload Plugin → Choose File,

Browse and select the file you’ve downloaded and click Install Now.
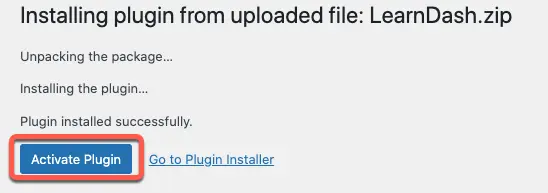
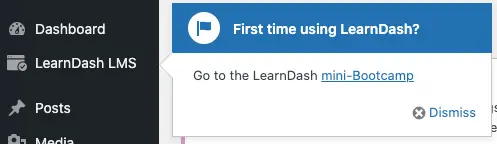
Once the plugin’s installed, click Activate Plugin. As soon as you activate the plugin, LearnDash will launch its onboarding process, min-Bootcamp. You can either continue or dismiss, based on your preferences.
The LearnDash Bootcamp has a long list of introductory content which if you watch, will allow you to learn LearnDash impressively. It teaches how you can create courses using the Course Builder; how you can add quizzes, lessons, and more.
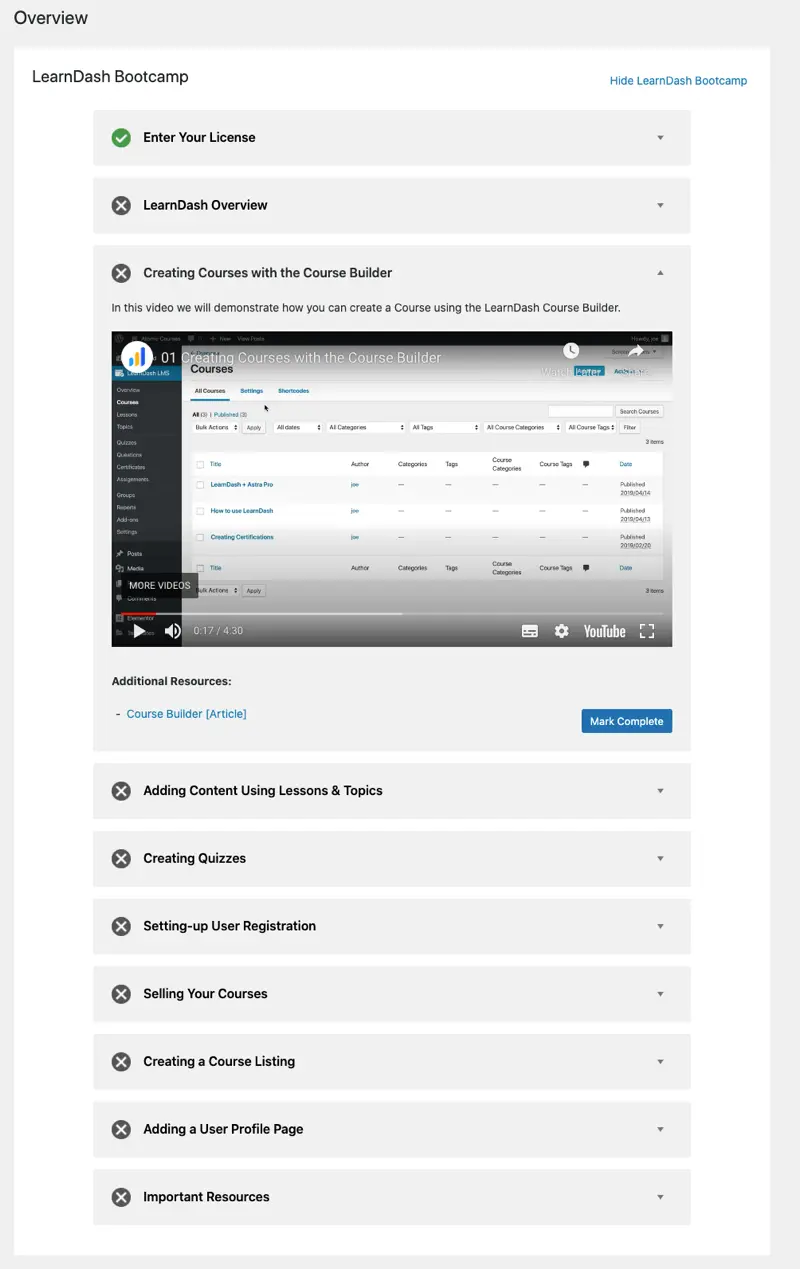
We recommend you give yourself a few moments to watch all of these introductory videos, then move to the next step.
#Step 3 – Configure LearnDash LMS
The LearnDash plugin, after installation, adds a new menu – LearnDash LMS – in the WordPress Dashboard. It consists of all options, from creating courses to viewing reports.
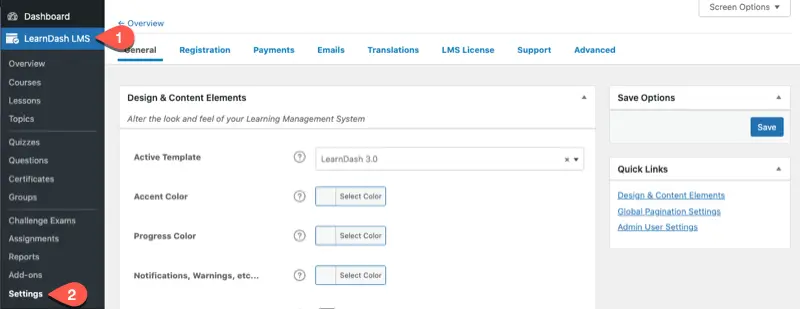
Here, click on the Settings option, and it will lead you to the above settings page that includes multiple configuration options.
LearnDash General Settings
In the General settings of the LearnDash plugin, you get options to enhance the user interface of your online learning platform. Here, you can select a coaching template, apply accent color, progress color, and notification color. Disable or enable Focus Mode, Login and Registration, set the platform’s logo, etc.
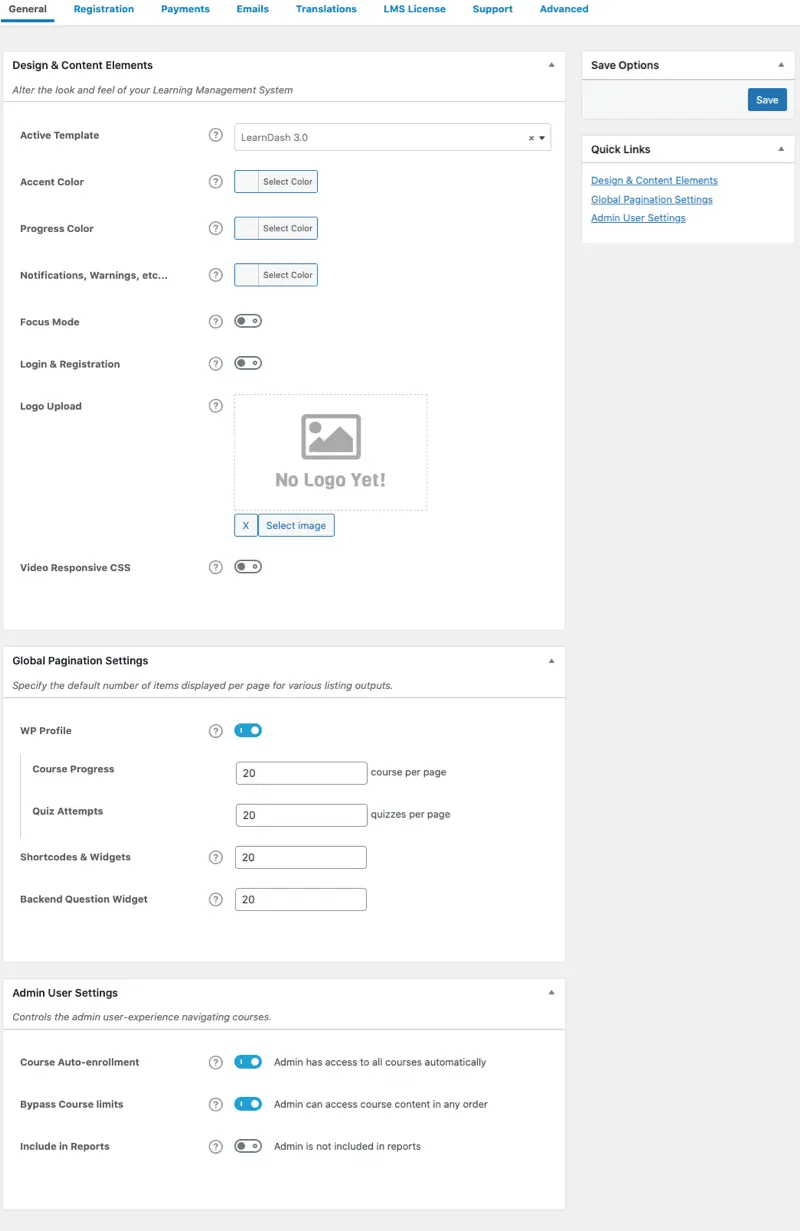
Furthermore, it provides you with the option to control the number of courses you want to display on a particular page. In addition, you can enable or disable reports, enrolment, and more.
Registration Options
The Registration settings of the LearnDash plugin allow you to configure fields of the registration page and the registration page itself.
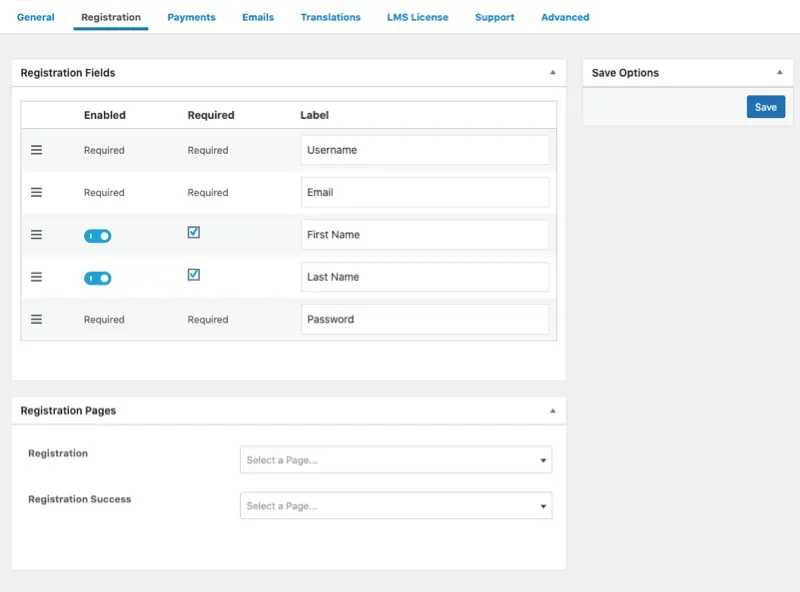
You can adjust the occurrence of the fields, change their label, and choose what page you want to use for the registration and its success message. Now making changes in WooCommerce checkout fields is not a big task.
LearnDash Payment Options
Here, you get the option to set up LearnDash’s in-build payment gateways, which are Stripe and Paypal. Plus, define the currency in which you want to charge your learners.

However, it’s not necessary as you’re using WooCommerce. Therefore, you can keep this particular setting as it is.
LearnDash Email Options
Just as WooCommerce provides you with automated emails to your customers, LearnDash also sends emails when there’s new registration and purchase. Plus, you can utilize this particular setting to change ‘”From” name’ and ‘”From” email.’
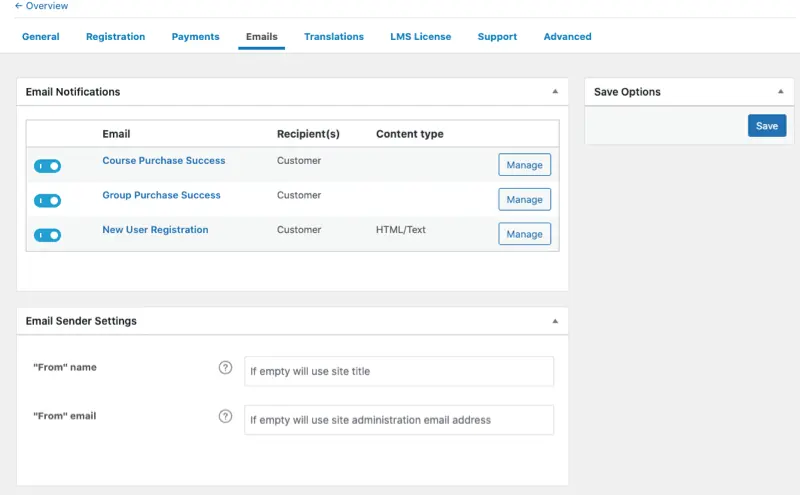
You can also keep this setting as it is because, with WooCommerce, you’ll take care of this area.
LearnDash Additional Settings
In addition to the above settings, LearnDash has more that you can utilize to enhance your online teaching platform. The additional settings are,
- Translations – It allows you to install translations for your courses.
- LMS License – Here, you can activate your LMS.
- Support – This gives you more information on how your platform is working.
- Advanced – Using this particular setting, you can change the label of LearnDash’s default aspects like Courses, Lessons, Topics, and more.
After utilizing all of these settings, move to the next step that allows you to finalize WooCommerce and LearnDash integration.
#Step 3.1 – Install WooCommerce for LearnDash
In order to connect WooCommerce products and LearnDash courses together, you’d need to install another plugin from LearnDash. With connection, it makes it easy for both platforms to communicate more seamlessly. The plugin we will install is WooCommerce for LearnDash. To install it, go to LearnDash LMS → Add-Ons, and click Install Now for the following,
After installation, activate the plugin and then head over to WooCommerce Settings → Accounts & Privacy, and uncheck “Allow customers to place orders without an account.”
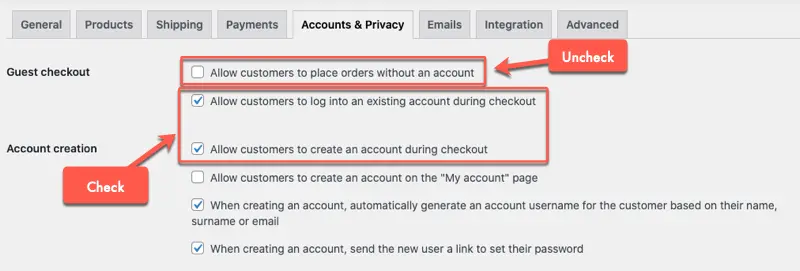
Further, make sure you check “Allow customers to create an account during checkout” in the Account creation section. Once done, click Save Changes.
Now, you’re ready to create courses and sell them online.
#Step 4 – Create Online Courses
You’d find course creation with LearnDash easy and quick. First, you need to go to LearnDash LMS → Courses → and then click, Add New or Add your first course.
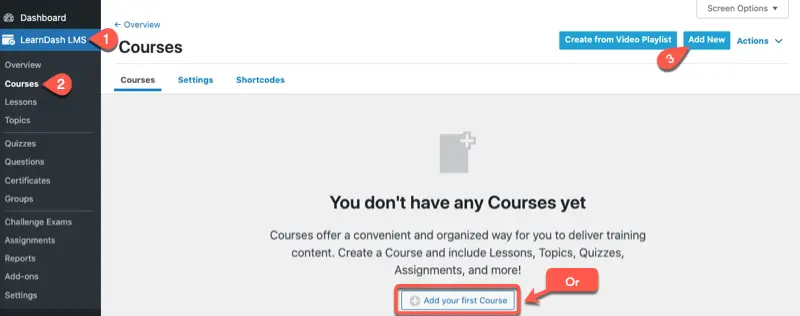
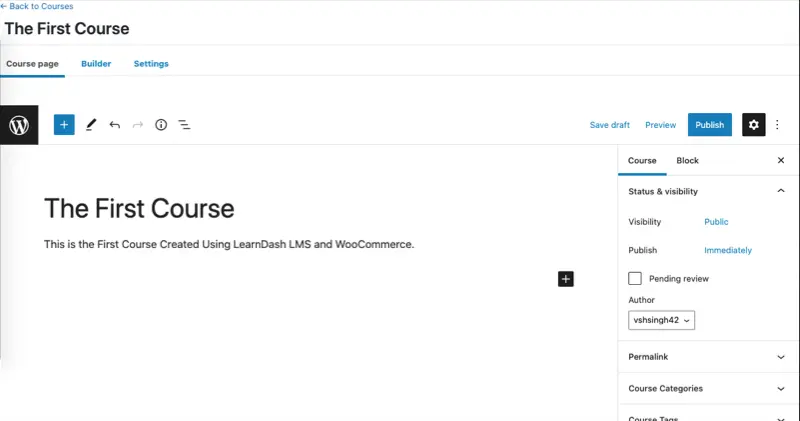
This will open the Course builder with the following look, where you can define your course’s Title and Description.
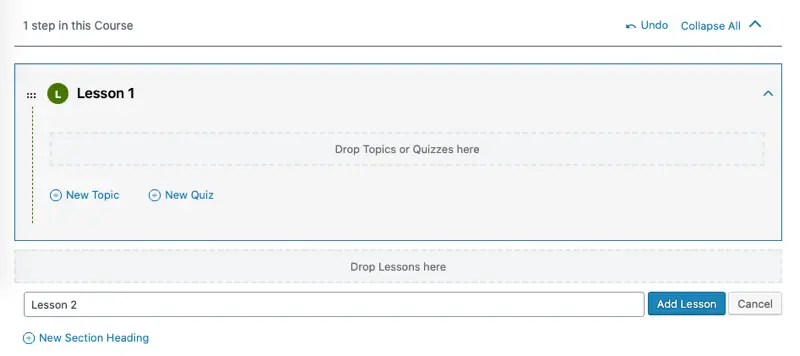
To add Lessons to your course and Quizzes, you need to go to the Builder option. Here, you can create Lessons or Quizzes for the course separately, which you can do by clicking the New Lesson or New Quiz.

As soon as you choose a particular option, a field will appear where you can define the Lesson or Quiz title. After adding the title, the Lesson will appear like the following, in which you can further add Topics or Quizzes.
With this, we’re still not done creating the course; we have to add content which you can do by clicking the Edit button or by following the next step. But, before you perform any of these, make sure you Save the Draft of the course.
Creating a Lesson in LearnDash
To separately create a Lesson in LearnDash, you need to go to the LearnDash LMS → Lessons → and click Add New.
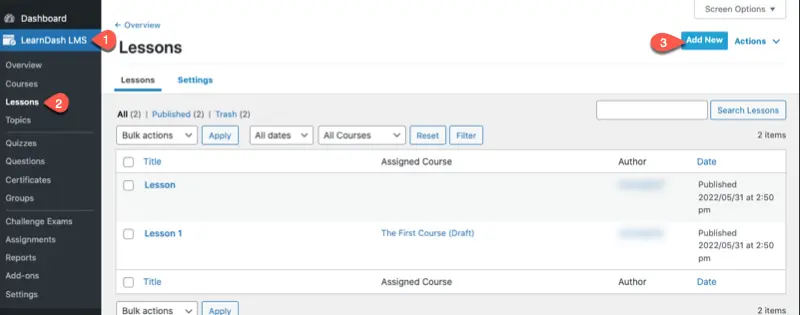
This will open the following lesson builder, where you can define the lesson title and insert your content – whether text, video, or any other attachment.
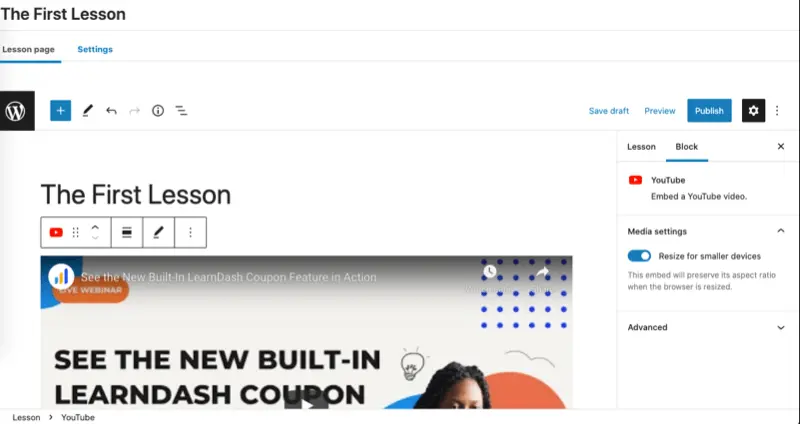
Once added the lesson material, go to Settings. Here, you can configure the lesson even further and add more details about it.
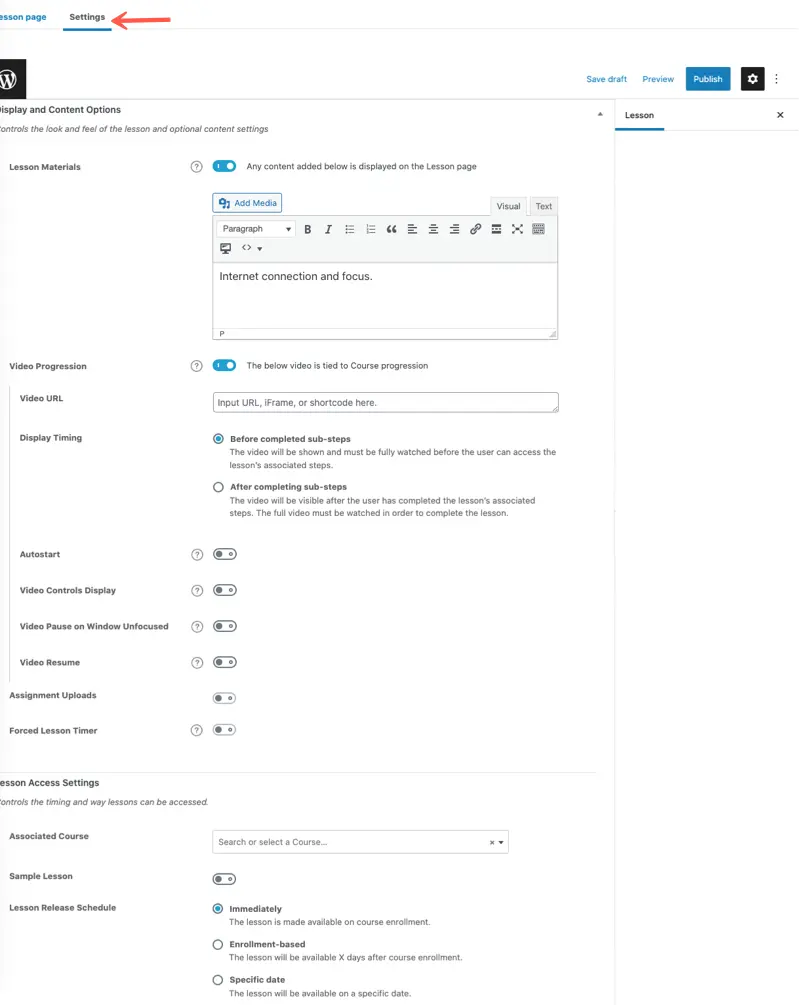
The Lesson’s Settings allow you to perform the following options,
- Add information about Lesson Materials.
- If a video is available, then make it necessary to watch it to complete the lesson.
- Define associated courses.
- Add lesson sample.
- Define lesson schedule and more.
Once you’ve configured all of these, click Publish and take exit from the Lesson builder.
Configure Lessons in the Course
To add the newly created lesson in the course or adjust topics (you can create Topics and Quizzes the same way you’ve created the Lesson,) you need to go to the Course Builder.
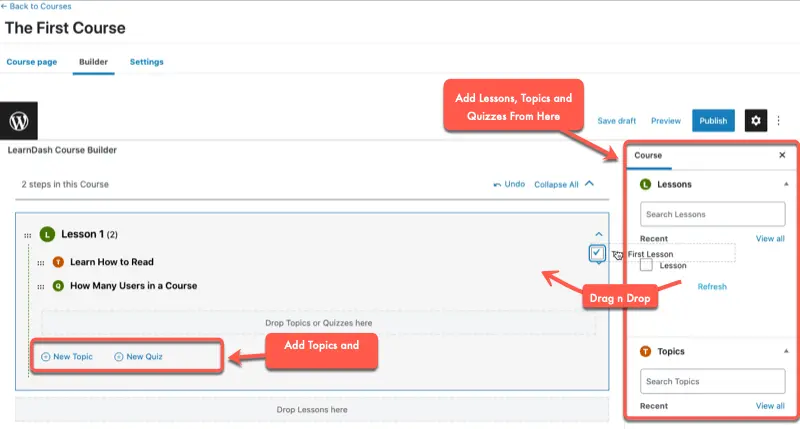
Here, you can either drag the lesson from the sidebar or select them one by one. Then, add Topics and Quizzes to your lesson and insert content directly from the Course Builder. Or you can create them separately from LearnDash’s menu.
Once added the lessons, Topics, and Quizzes, go to Settings of the Course.
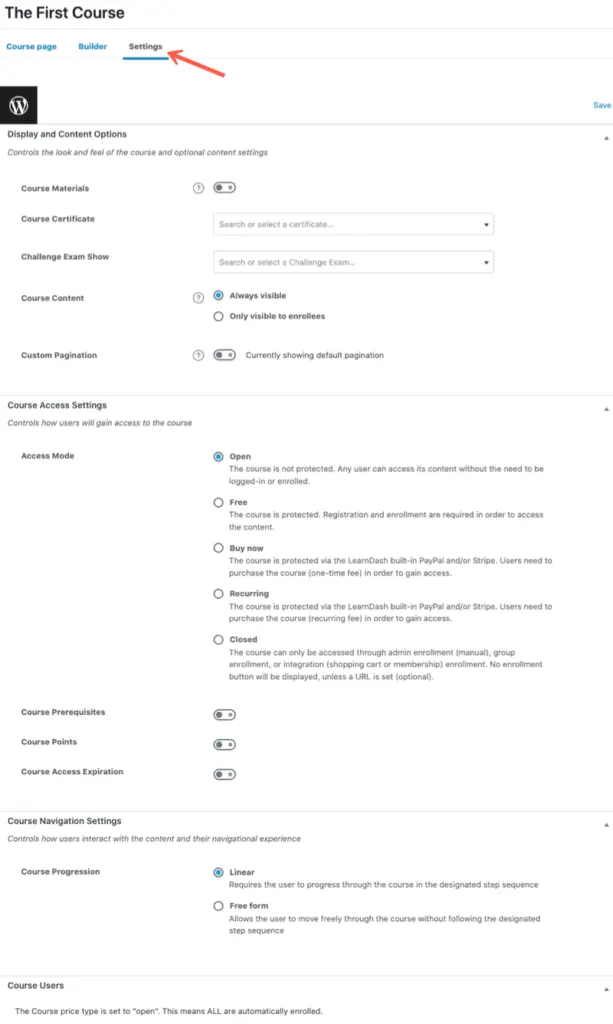
Here, similar to the Lesson, you can add more information about the Course. For example, it allows you to,
- Add details of Course Materials.
- Add Certificate.
- Make Course Content Visible to Enrolled Users.
- Add Custom Pagination.
- Define Access Mode: Open, Free, Buy Now, Recurring, and Closed.
- List Course Prerequisites.
- Define Course Points.
- Set Expiration date.
- Display Course Progression: Liner or Free Form.
Once you’ve configured the options, click Publish to make your course live. And that’s it; you’ve successfully created a course using LearnDash. Now, the only thing remaining is assigning it to a WooCommerce product.
But before you do that, take a look at how the course and its content would look.
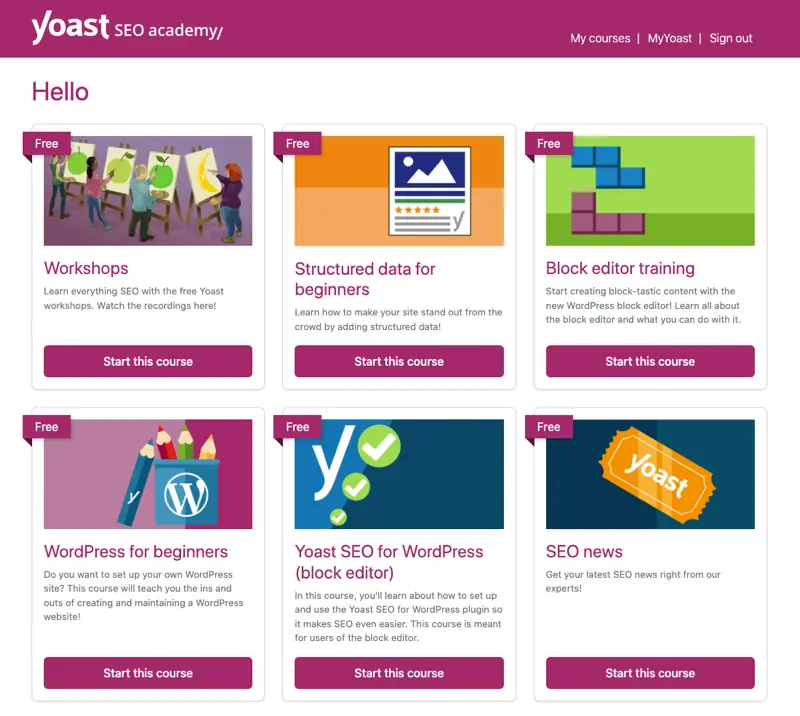
Yoast SEO Academy Courses List Created using LearnDash
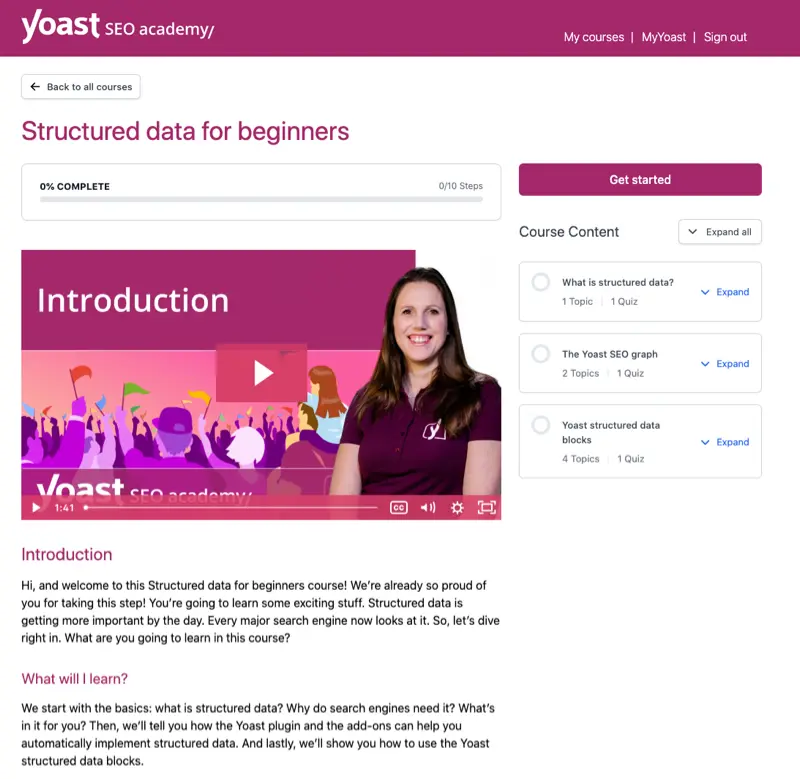
Individual Course page of Yoast SEO Academy created using LearnDash
#Step 5 – Sell Online Courses With WooCommerce and LearnDash
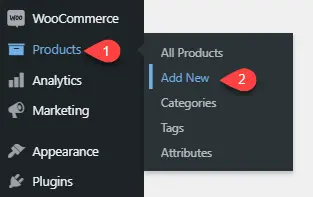
To sell online courses using WooCommerce and LearnDash, you need to create products and assign courses to them. For our course, you need to first go to Products → Add New.
Then in the product’s builder, head over to Product Data, check the Virtual option, and then, select Course → Related Courses → select the course you want to assign to this particular product.
Once done, you can Publish your product. Make sure you add details and everything about your product.
That’s it; you’ve created an online course using LearnDash and WooCommerce.
Using Divi? Then Enhance Your Courses Site’s Experience With Divi Foster
If you’re using Divi theme for your WordPress site and looking for the best Divi courses child theme, then you should check out Divi Foster. It’s a premium child theme for Divi that you can utilize for LearnDash.
With Divi Foster, you get multiple templates and resources that allow you to quickly build your online coaching or training platform in no time. It includes,
- 7 Course Layouts,
- Lesson pages,
- WooCommerce pages: Divi Cart Layout, Divi Checkout page layout, Divi WooCommerce Shop page layout and Product page layout.
- Multiple home pages,
- Blog page,
- And over 9 additional pages to complete the platform.
The theme is responsive and follows the latest design trends. Thus, you’d make a stunning impression on your visitors and allow them to enroll in your course material. The following are one of the Courses and Lesson layouts of Divi Foster.
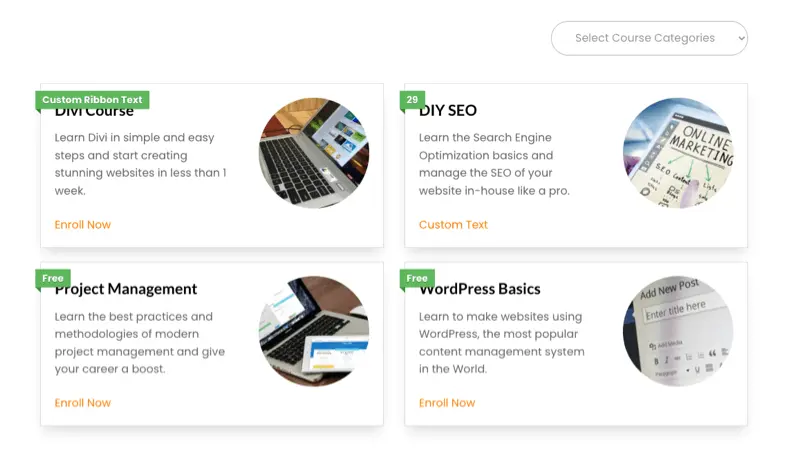
Courses Layout
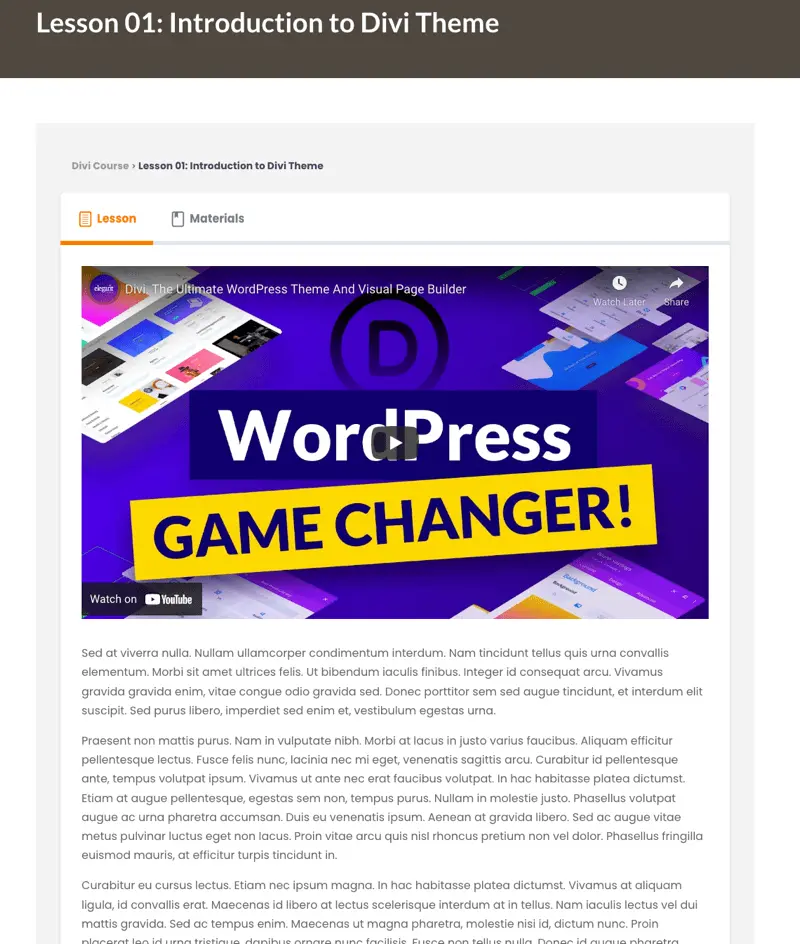
Lesson Layout
The Child theme is available at both marketplaces – Divi Extended and Elegant Themes. Therefore, get it at your convenience.
Conclusion
As most businesses are getting online, teaching isn’t behind as well. However, platforms like Udemy cuts a substantial amount of income from the creator’s hard work. Thus, what remains is selling online courses from one’s own website.
LearnDash, in that conquest, offers a robust system that makes it easy. And with WooCommerce integration, things become even more functional.
We hope the above information and steps will allow you to utilize LearnDash and WooCommerce in the best way possible. Plus, the Divi Foster will let you make a difference. The child theme adds new Divi WooCommerce checkout page, Divi WooCommerce shop page layout, and more to enhance the design and user experience. If you’ve Divi installed with LearnDash and WooCommerce, try the child theme today!


0 Comments