There are many occasions when a user is required to install or import Divi layouts on his website. But sometimes, things get a little complicated, especially in the case of the Divi theme builder. However, advanced users can install premade Divi layouts on their website, but beginners remain awestruck. Therefore, to help them easily install Premade Divi layouts on their website, I’ve written this post. Inside this, I will share different areas where you can import or install your saved Divi layouts.
Let’s see where and how we can install our layouts in a Divi theme website.
Table of Contents
- Install a Divi post layout (Individual post)
- Install a Divi post layout (All posts)
- Import and install a Divi blog layout (All archives)
- Import and install a Divi layout (Directly on a page)
- Install a Divi layout on a page (From Divi Library)
- Import and install Divi layout on a page (Using the Divi Theme Builder)
Install a Divi post layout for an individual post
To install a custom Divi post layout for a specific post or article, follow the below steps.
Step 1: Open the Divi Theme Builder
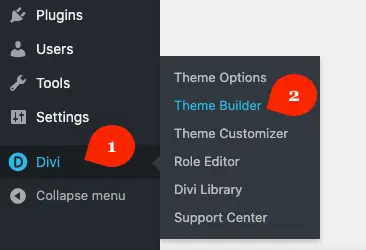
To access the Divi Theme Builder, first, go to Divi → Theme Builder
Step 2: Import the layout
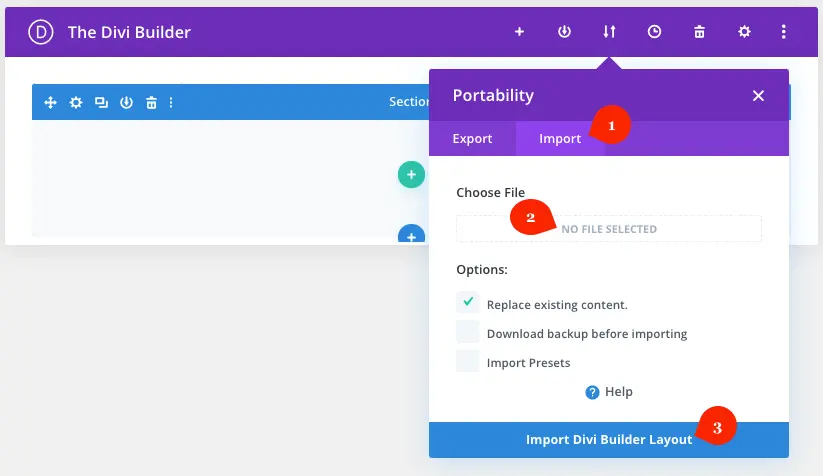
Once got into the Divi Theme Builder, click the Portability (⇅) icon to import the layout.
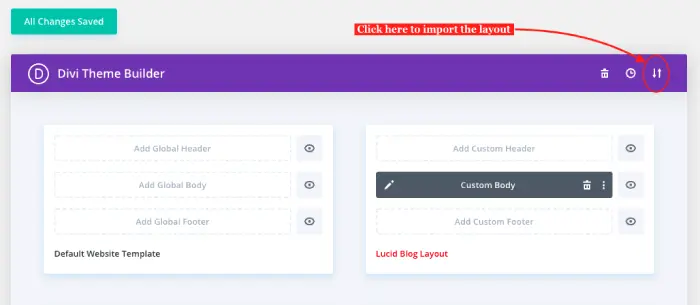
After you click the portability icon, it will display 2 options—one for Export and another for Import.
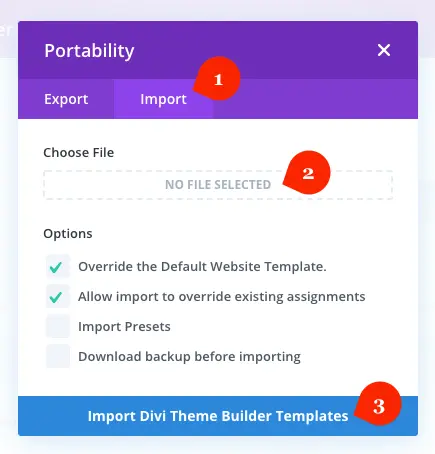
Click Import → No File Selected → browse the post layout file and select it → Import Divi Theme Builder Templates.
In the above screenshot, the additional options are selected; however, if you don’t want to make any changes right after the layout gets imported, you can uncheck them as well.
Step 3: Assign the layout
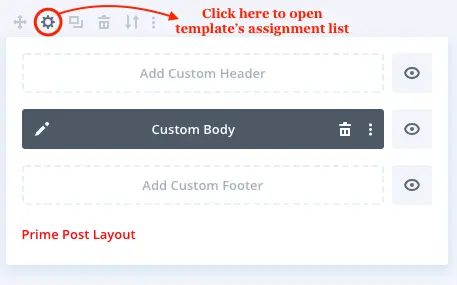
Once imported the layout, now, it’s time to assign it to a specific or an individual post. To do that, head over to the template and click the Settings (⚙️) icon.
Now, from the assignment list, go to Specific Posts → and choose a post on which you want to apply the custom template’s design.

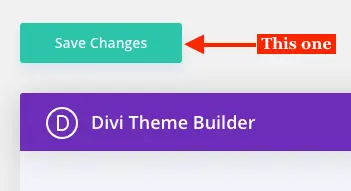
After selecting a post, click Save, and then to make changes in the Divi Theme Builder, click the green Save Changes button.
Install a Divi layout for all posts
If you haven’t uploaded the layout on your website and don’t want to use the previously imported layout, repeat the 1st and 2nd steps from above. Once, successfully followed the above steps, head over to the subsequent one.
Assign the layout
By following the above 2 steps, you’ve successfully imported the layout. Similarly to the above 3rd step, header over to the template and click the Settings (⚙️) icon. It will open the template’s settings with the assignment list.
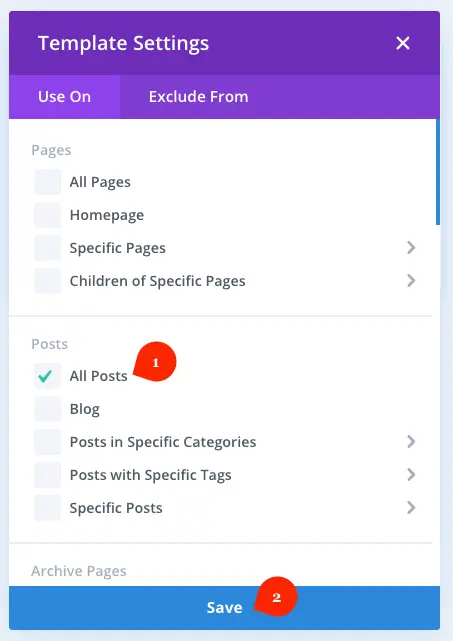
Once the Template Settings is open, go to the Posts → select All Posts → Save. That’s it; you’ve quickly applied a custom template for all the posts using Divi 4 theme builder.
Install and apply a Divi blog layout to all the archive pages
To import a custom Divi blog layout, follow the 1st and 2nd steps from above. Once successfully imported the layout, follow the subsequent step to apply a Divi blog layout to all the archive pages.
Assign the Blog layout
Go to the blog template, and click the Settings (⚙️) icon to open template settings.
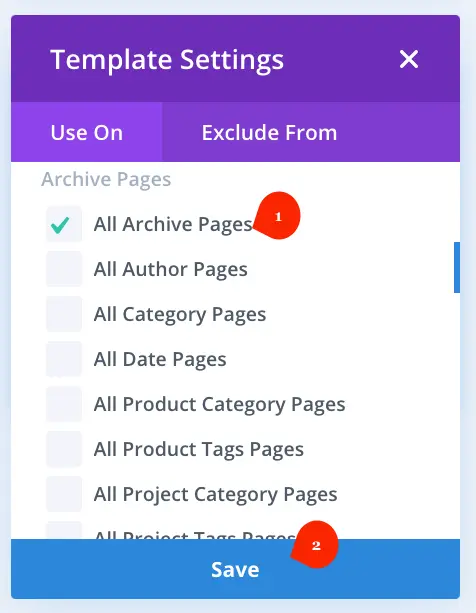
Once the template settings are opened, go to the Archive Pages → All Archive Pages → Save. That’s it; you’ve successfully applied a custom Divi blog layout to all the archive pages.
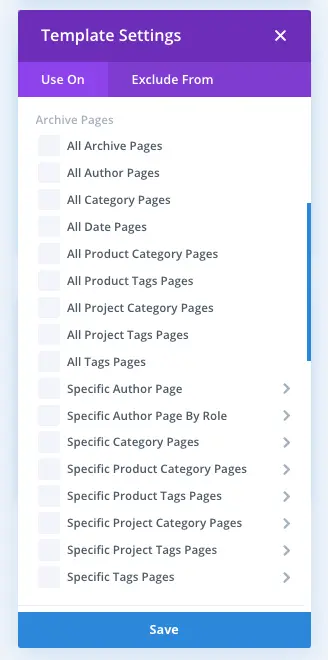
Similarly, you can also apply blog layout to author archives, category, date, tags, and more.
Install a Divi layout on a page
3 methods are widely used to install a Divi layout on a page. 1st directly on the page, second from the Divi Library, and third from the Divi theme builder if the layout file was created as a template using the Divi theme builder. We’ll see both the methods one by one.
Directly on a page
To install a Divi layout directly on a page, follow the below points.
Step 1: Create a page or edit an existing one
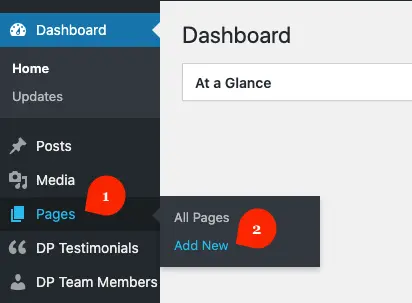
First, create a new page or edit an existing one where you want to install the layout. To do that, go to Pages → Add New (if you want to create a new).
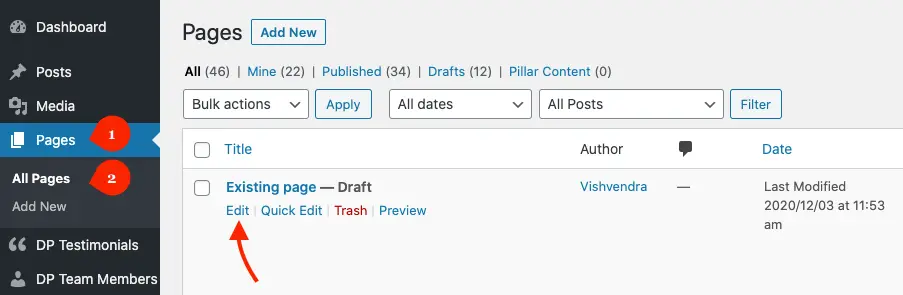
Or, go to Pages → All Pages → head over to the page which you want to edit → Edit.
Step 2: Use Divi Builder
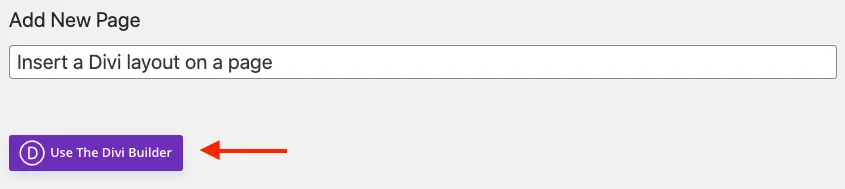
Once the page gets loaded, select “Use The Divi Builder.”
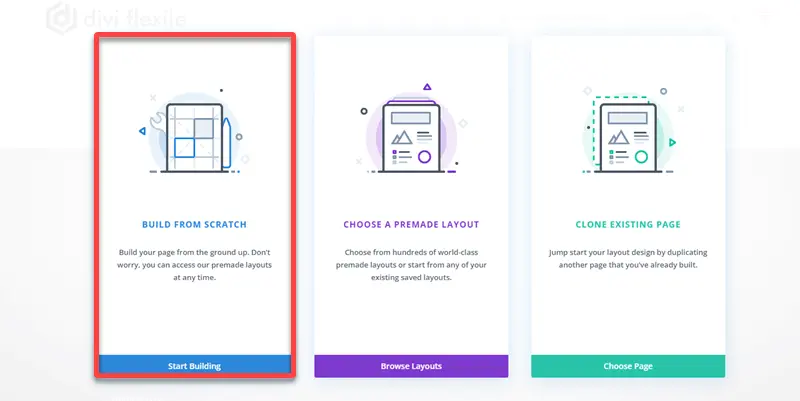
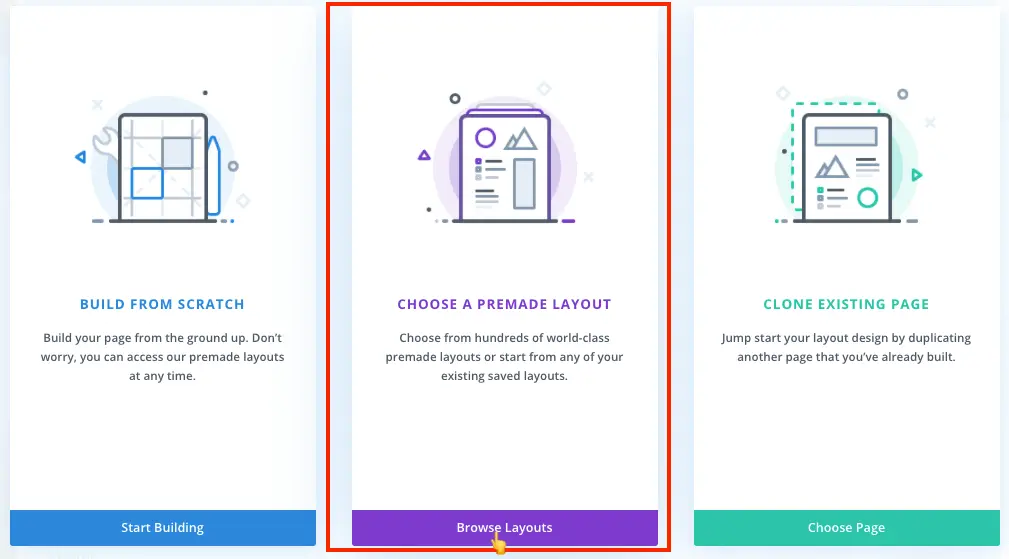
After choosing the option to use the Divi builder, it will display 3 choices from which select, “BUILD FROM SCRATCH.”
Step 3: Click portability icon & import the layout
The page is loaded with Divi builder. Now, go to the Portability (⇅) icon and click it to open the Export & Import menu.
Once the Export & Import menu is open, select Import → No File Selected → browse the page layout file → Import Divi Builder Layout.
That’s it; you’ve successfully installed a Divi layout directly on a page.
From the Divi Library
To install a Divi layout on a page from the Divi Library, follow the below points.
Note: The layout files that were first saved in the Divi Library will be used to upload back to the library. You cannot upload a layout file in the Divi Library, which was exported directly from the page.
Step 1: Open the Divi Library
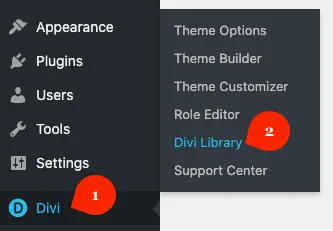
On your WordPress Dashboard → go to Divi → Divi Library
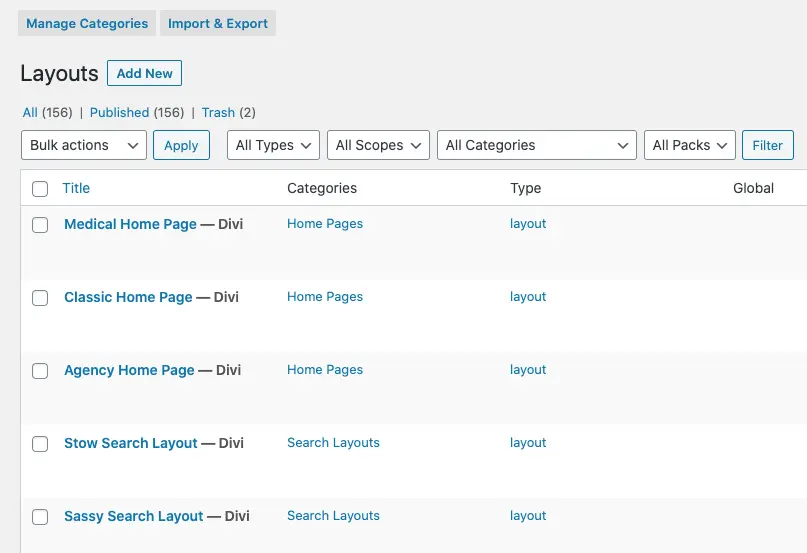
This will open the library with all the layouts you’ve uploaded or saved while designing a page using Divi builder.
Step 2: Import the layout
Now, go to the Import & Export menu and click it.
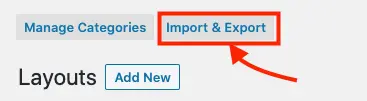
This will open the Portability menu with the Export and Import option.
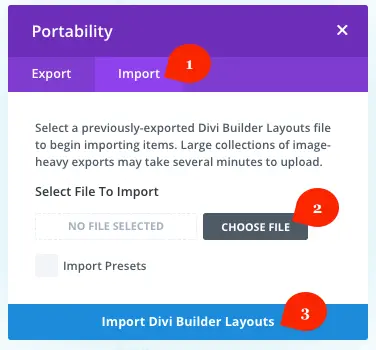
Choose Import → Select File To Import → Choose File → browse the file and select → Import Divi Builder Layouts. This will upload your layout file for the page.
Step 3: Go to a page
Go to all pages, create a new one, or edit an existing page. After that, deploy Divi Builder. And when the builder asks you to choose from the given three options, select CHOOSE A PREMADE LAYOUT.
Step 4: Select the layout
The premade layout option will open a window with all the layouts. Here, you need to go to the “Your Saved Layouts,” then choose your uploaded layout.
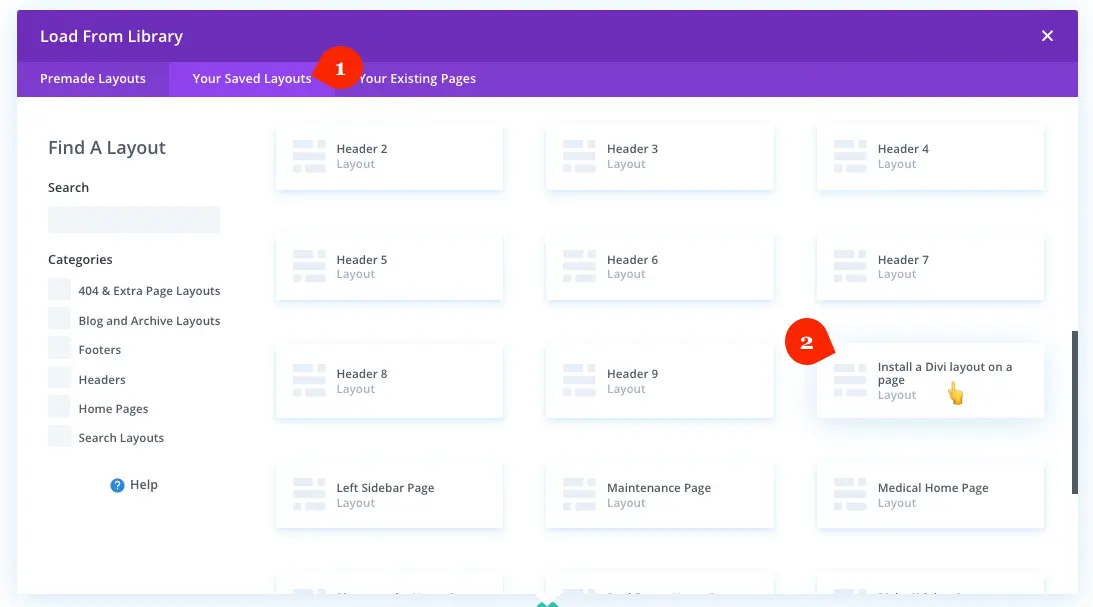
This is it, you’ve successfully installed a Divi layout on a page using the Divi Library.
From the Divi Theme Builder
If a Divi template was created for the page, then you can use it to reflect its design on any page. Let’s see how we can do it.
Step 1: Open the Divi Theme Builder
From above, follow the step 1 to open the Divi Theme Builder.
Step 2: Import the Template
Follow the above step number 2, to import the template file in the Divi Theme Builder to be used for the page.
Step 3: Assign the template to a page
After importing the template file, click its Settings (⚙️) icon to open the template settings with assignment list.

Now, go to Pages → select any available options, such as All Pages, Homepage, Specific Pages, or Children of Specific Pages → Save. After this, hit the green Save Changes button.
If you find this article helpful and can contribute to the Divi Community, feel free to share it. And if you like to read more tutorials like this one, subscribe to our free newsletter today. Each week we share awesome Divi tutorials to make the most out of the powerful and popular WordPress theme.


0 Comments