Are you looking for a way to display Allow/Deny notifications popup on your website when a new visitor arrives? Then, with no surprise, you’ve opened the right page. In this post, I am going to show you how you can enable web push notifications on WordPress websites.
In addition, I will share how they work, their types, and why one needs to have them.
Not only that, but we’ll also explore some general guidelines so that when you enable WordPress push notifications, you do it the right way without jeopardizing your website.
If you’re ready to display the push notifications, then let’s begin.
What Are Web Push Notifications?
In smartphones, an app sends you a notification whenever there’s an update. You see the notification bar/drawer full of updates from different apps you have.
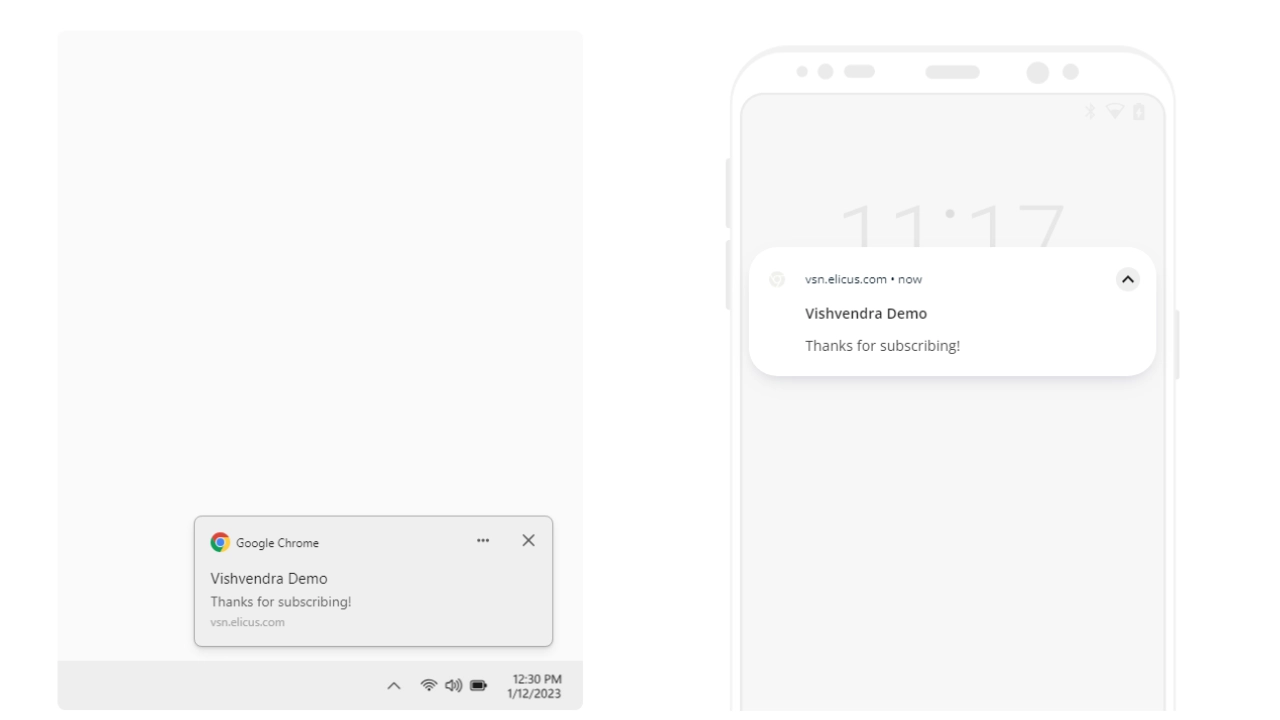
Web push notifications are related to updates released on a particular website and are delivered to visitors or subscribers who opt to receive them by checking the Allow button on the Show Notification popups.
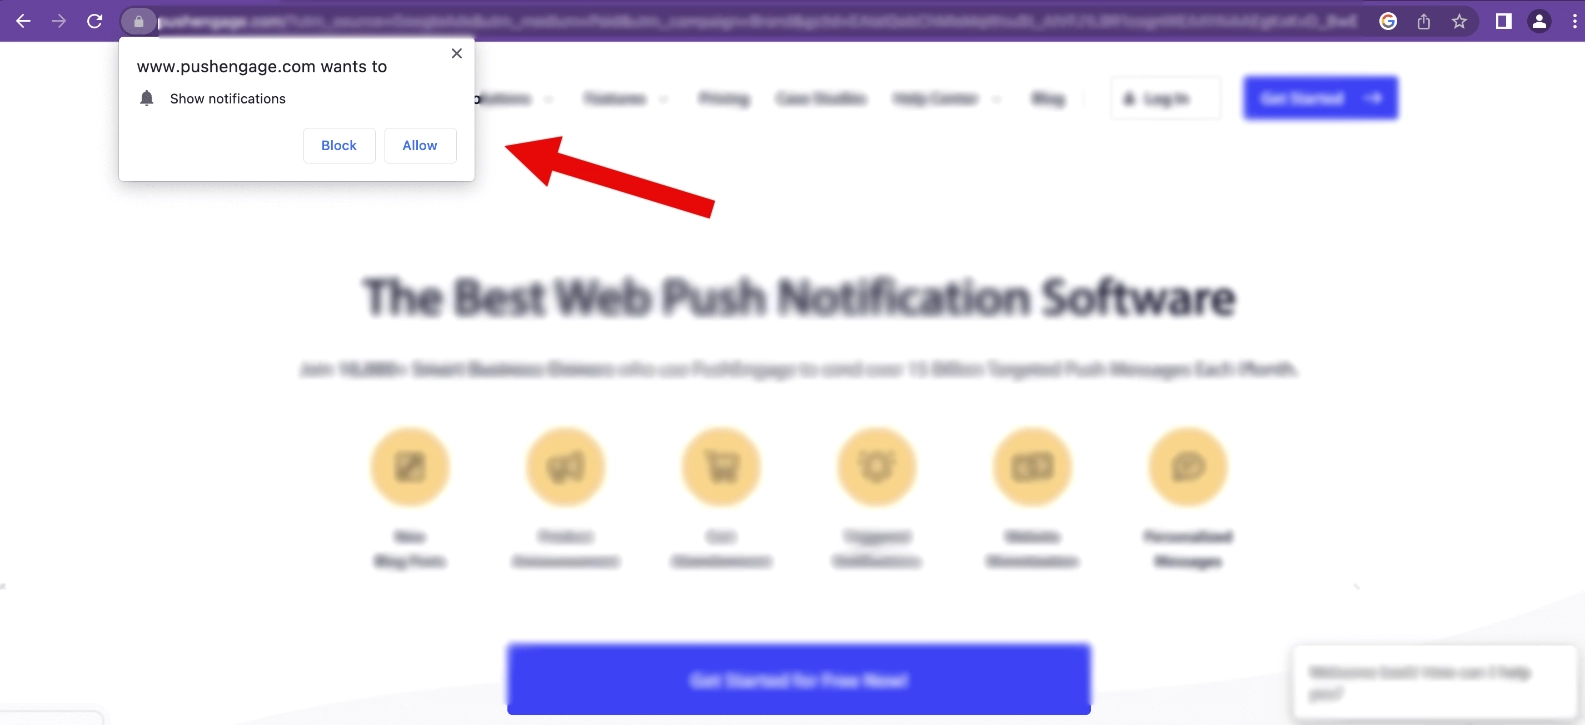
Unlike the general popups that appear when visiting a particular website, the web push notifications for websites and its allow/deny popups have different mechanisms of working.
General popups appear based on certain triggers set by the owner and met by the visitors.
For example, an exit popup appears when the visitor switches the browser tab. In the case of web push notifications, the process works like the following:
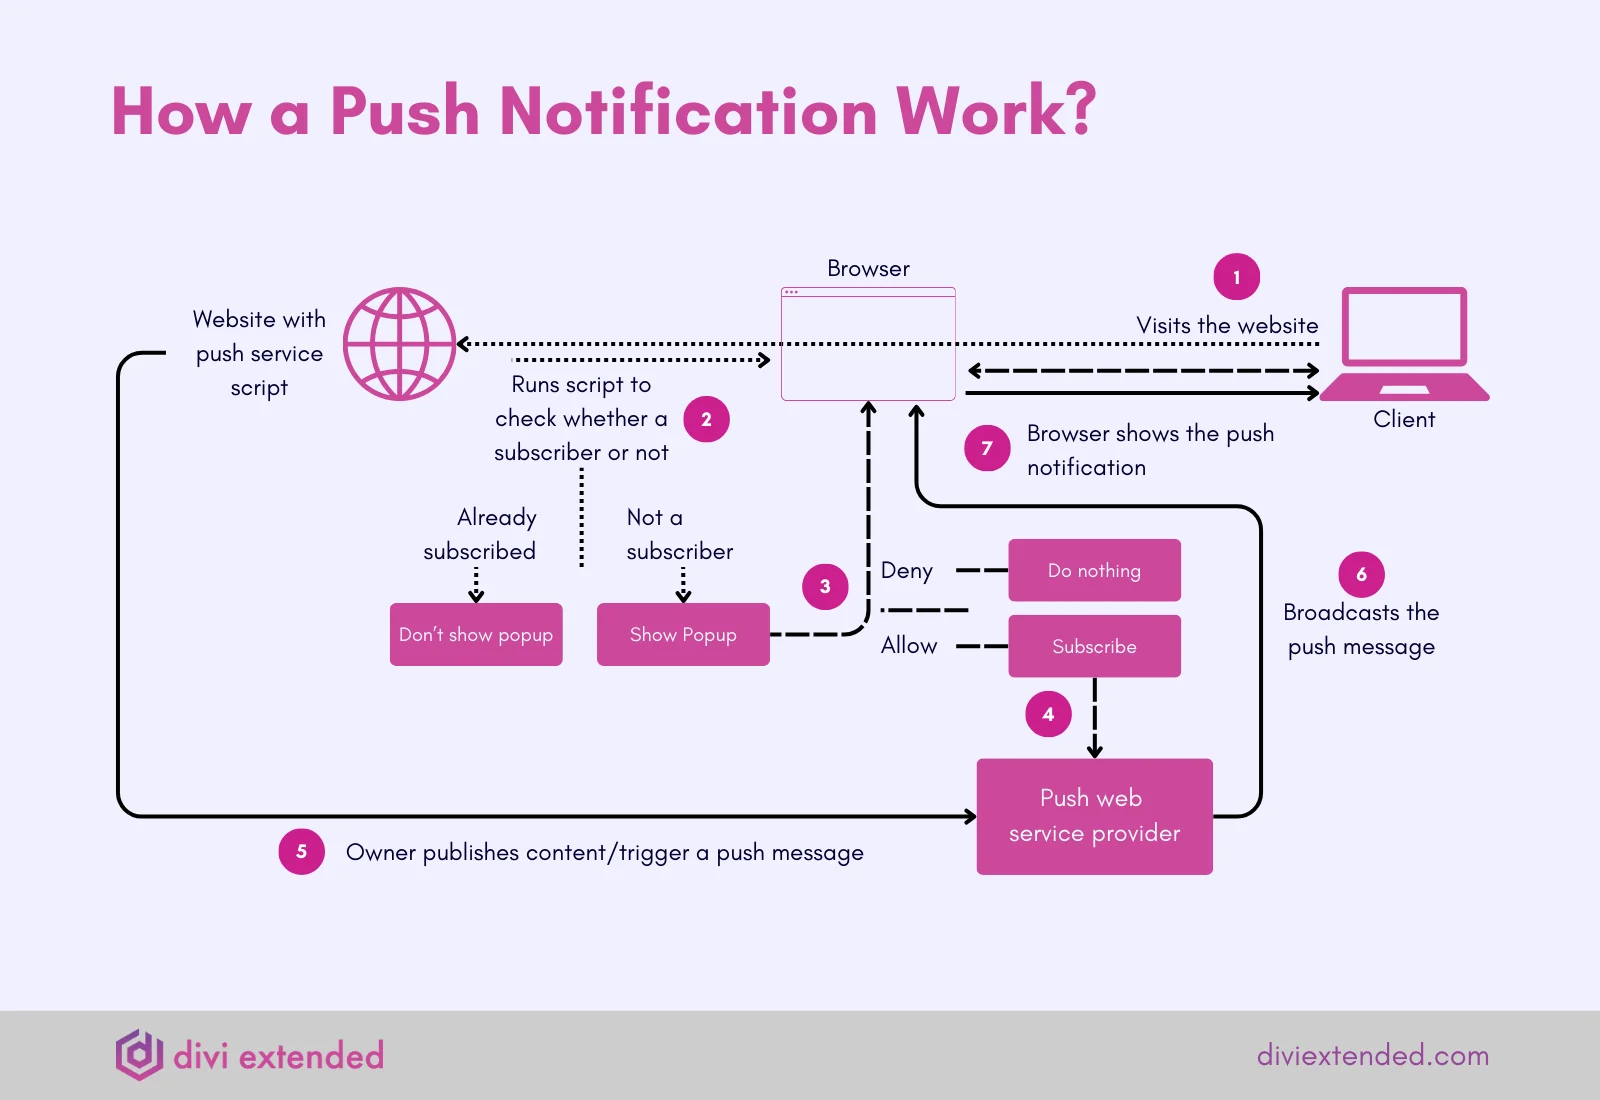
- The visitor opens a website.
- The web push service scripts check the browser to see whether the visitor is a subscriber or not.
- If not a subscriber, they will see the Allow/Deny Notification popup.
- If they allow the notification, the web push service registers their browser as a subscriber.
- Now, whenever the website releases an update, the web push service will broadcast it to all the subscribed browsers.
- When users connect to the internet or, in the case of macOS, open the browser, they will see a push notification like the following:

It’s a subtle approach to generating organic traffic without asking users for their email addresses and sending them newsletters.
Types of Web Push Notifications
Based on the data available, it is found that there are 12 types of push notifications. However, the most used and preferred ones are of two types:
- Automated notifications
- Time-based notifications
Automated Notifications
Automated web push notifications are somewhat like general popups that work based on user activity. They are highly personalized and work automatically based on the set parameters. For example, a customer adds a product to the cart and leaves the website without buying.
In this case, an automated web push notification will push a notification to the customer’s device, informing them that they have forgotten to complete the purchase.
For this, the website owner has to do nothing to carry out this action other than the initial setup of the notification.
Time-based Notifications
These types of web push notifications require activity from the website owner’s side.
These notifications aren’t based on an individual user’s behavior or activity. Instead, the web push service broadcasts the notification to all the subscribed clients when there’s an update on the website.
For example, you publish a blog post. So, in that case, the web push service will send a notification about it to all the users who opted for it.
Based on the activity on the website, these notifications can be sent at any hour or any day of the week. You can use them to send notifications about daily deals, events, new product announcements, and more.
Why Do You Need Push Notifications?
Well, there are countless reasons why one should display web push notifications, but the prominent ones are:
- To improve a particular campaign’s performance (events or product announcements.)
- To increase organic traffic through subscribed users.
If you are planning to run a sale and have push notifications enabled already, then whatever update you’ll release regarding it, it will reach directly to your subscribed users. Once they receive it, there is a chance they will explore the offers.
That way, you can expect a boost in sales.
In addition to this, with web push notifications enabled, you can expect the following:
- Enhanced customer retention
- High opt-in rates
- Real-time communication
- Visibility and reach
- Segmentation and targeting
Now, it’s up to you: why do you need web push notifications on your WordPress site?
Statistics Related to Push Notifications
Here are some statistics related to push notifications that make them an essential part of a website and marketing strategies.
- The push notifications can expect an average opt-in rate of 0.5% to 15% based on industry type.
- 90% of all push notifications come from mobile devices.
- Push notifications can enhance app retention rates by 3 to 10 times.
- The average CTR for push notifications is around 10.3%.
- The best times to send push notifications are between 12 PM and 1 PM and 7 PM and 8 PM.
- Android devices have more push notification subscribers than iOS.
The Role of Push Notifications on WordPress Websites
Whether a website is built on WordPress or some other CMS, it’s a website representing a business or a profession.
Therefore, the role of push notifications on WordPress websites is as crucial as on other websites built on different CMS. With push notifications on a WordPress website, one can efficiently expect the aforementioned benefits.
Furthermore, if a website is built on WordPress, then it becomes more probable to enable web push notifications because WordPress offers the easiest way to enable them.
On a WordPress website, you are not bound by one rule or regulation. Instead, you can use custom codes and plugins to carry out any needed task.
The same is true with web push notifications.
If you’re eager to enable push notifications on your WordPress website, then the following section will help you do that effectively.
How to Add Web Push Notifications on a WordPress Site
In order to enable WordPress push notifications, we are going to use a free notification plugin for WordPress.
Yes, it’s possible to send web push notifications without a plugin; however, that’s a long process, and if you are not a techy person, it can cause frustration. So, in that case, it’s better to use a plugin.
In our case, we are using OneSignal. You can download it from the WordPress repository or directly install it from the Add New Plugins menu on your WordPress dashboard.
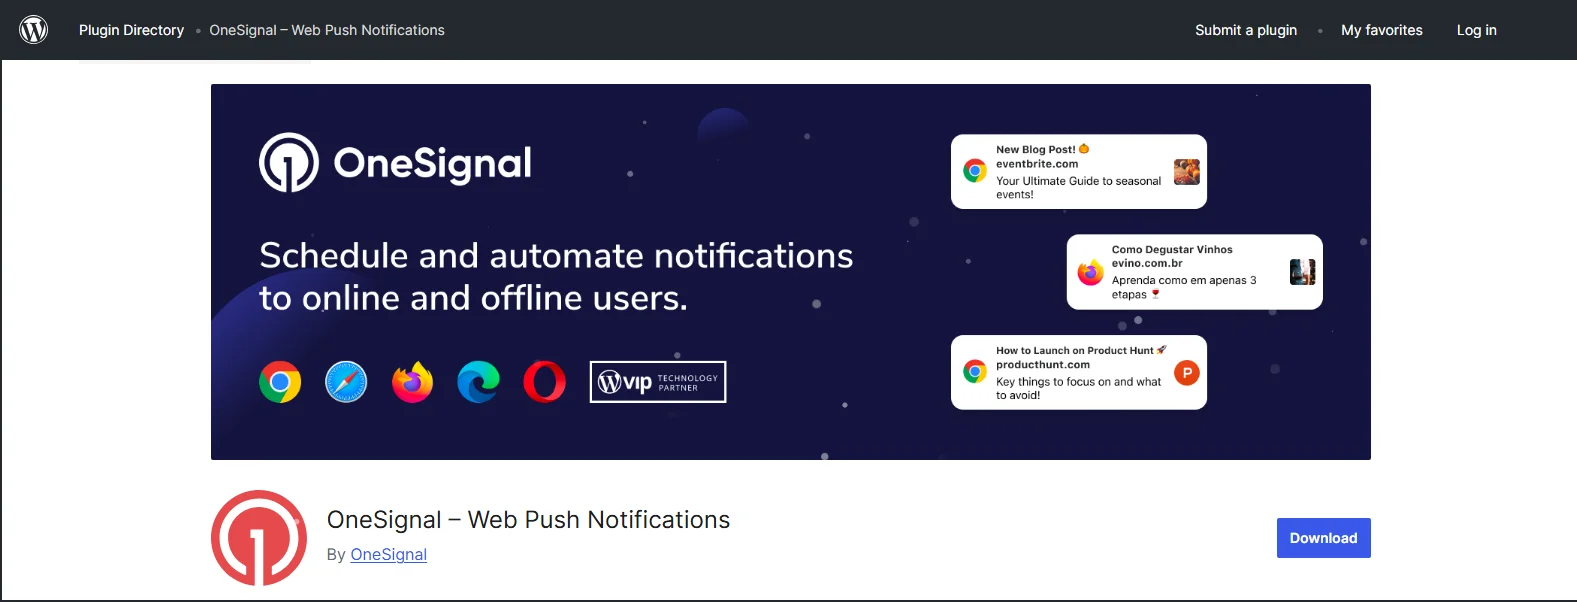
The plugin has great features that allow you to:
- Send unlimited mobile push notifications
- Free 10,000 subscribers’ web push notifications
- Create SMS, mobile, and web push notifications automation
- Set up webhooks
- Create notifications with the visual builder
With all these amazing options, it becomes easy to display the Allow/Deny Show Notifications popup for push notifications and send them as well. Follow the steps below to install, create, and send push notifications to your customers.
Step 1 – Install and Activate the Push Notifications Plugin
To install our free notification plugin for WordPress by OneSignal, go to the Plugins tab and click Add New Plugin. On the Add New Plugin window, search for OneSignal – Web Push Notifications, and install the following.
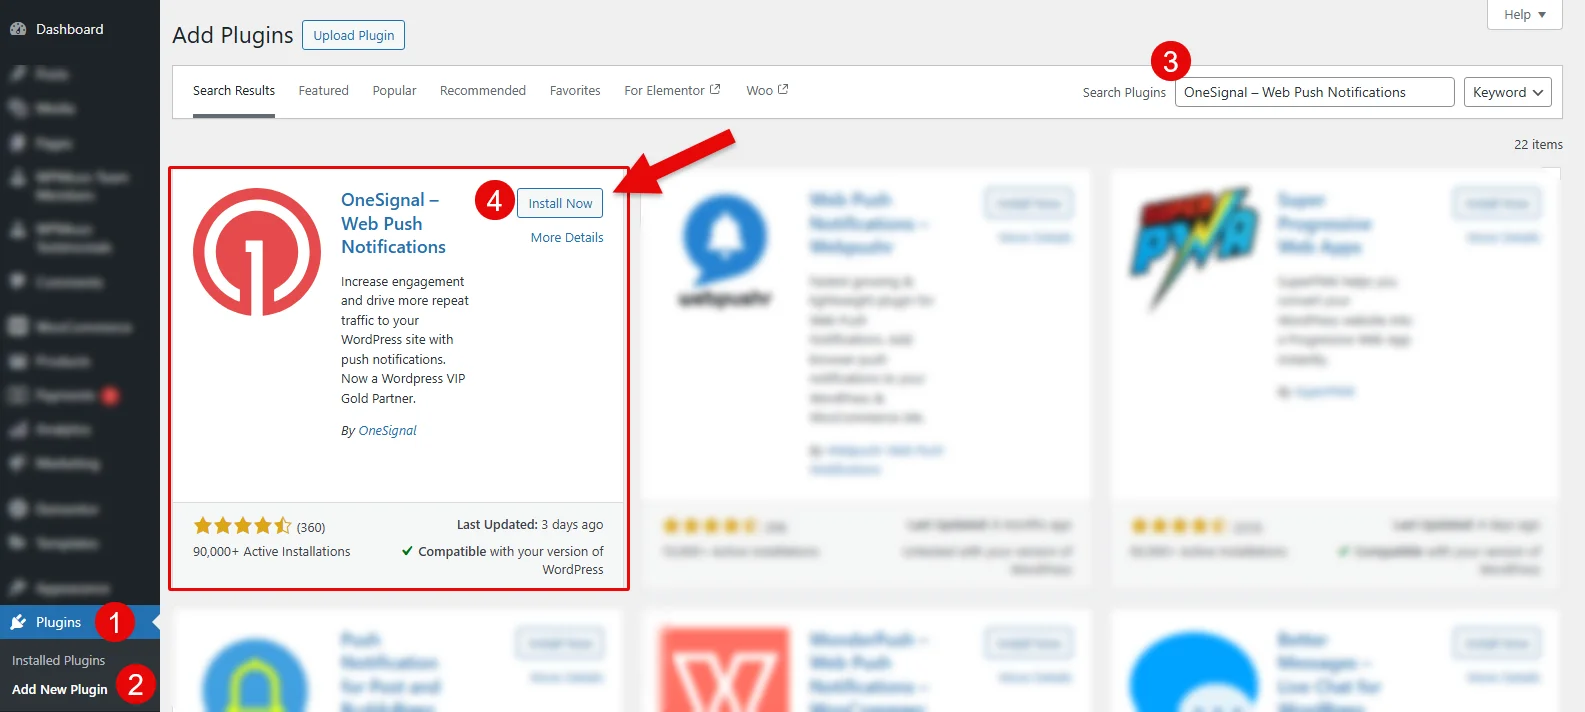
Once installed, activate the plugin.
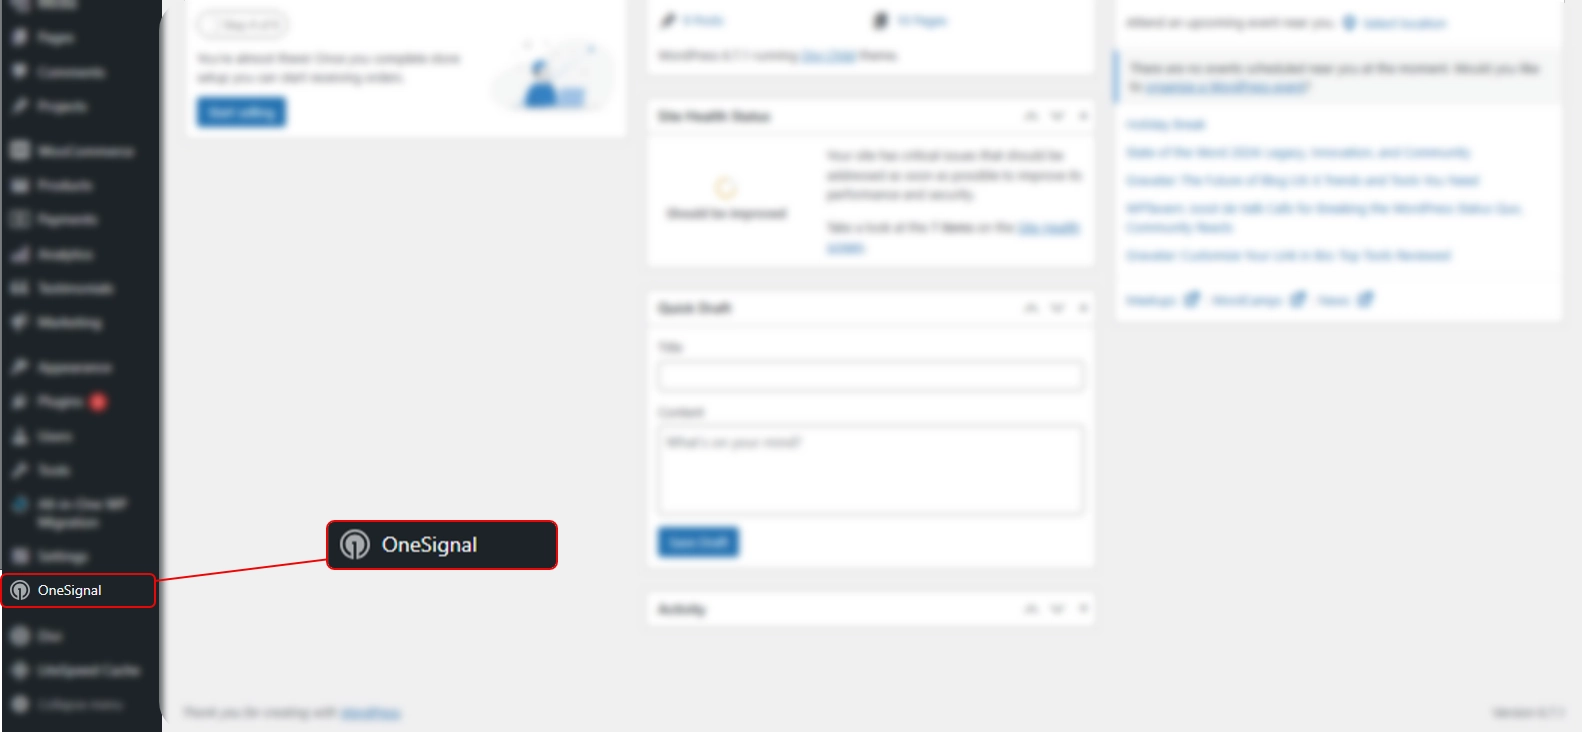
As soon as you enable the plugin, you can find its settings menu in the WordPress Dashboard’s sidebar, as you can see above.
Step 2 – Activate the Plugin’s License
After activating the plugin, you need to verify its license. So, for that, access its menu option.
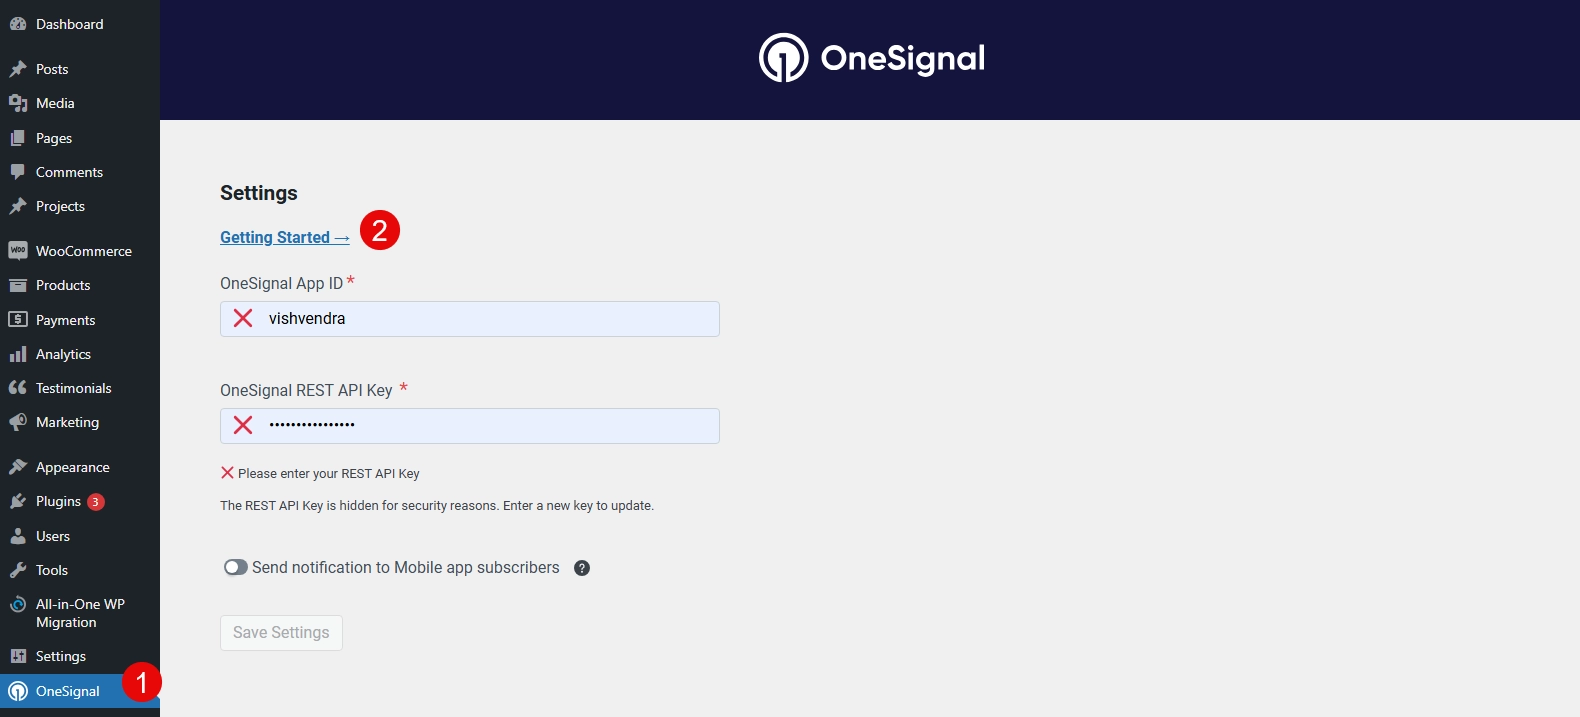
Here, you need to insert the OneSignal App ID and REST API Key.
Click on the Getting Started link to generate those. As you click, it will redirect you to OneSignal’s registration page.
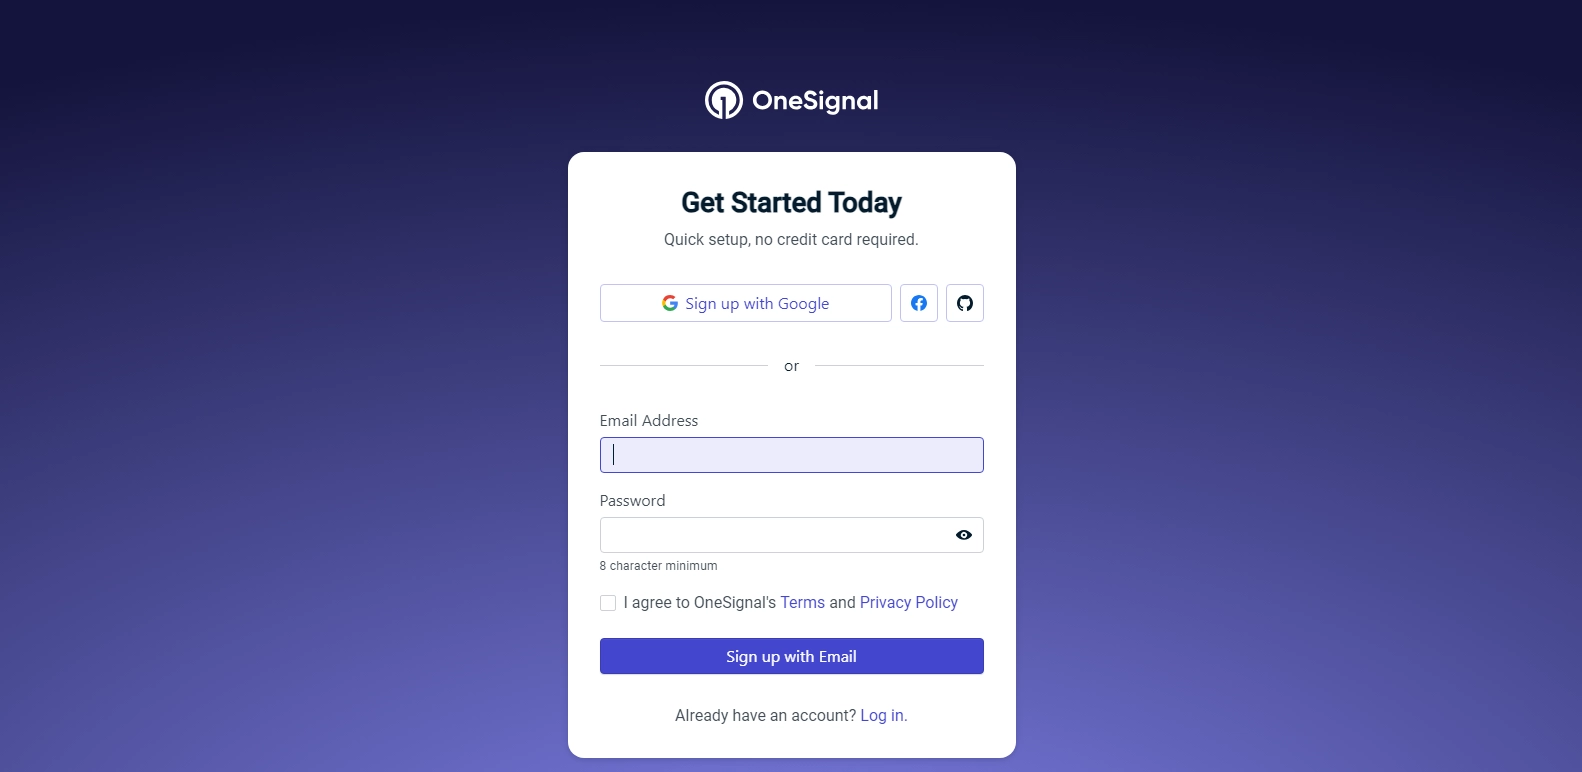
If you aren’t redirected to the registration page, then follow this URL: OneSignal Sign Up.
Here, use your details to register, and once you’ve created a OneSignal account, you’ll be redirected to choose a plan.
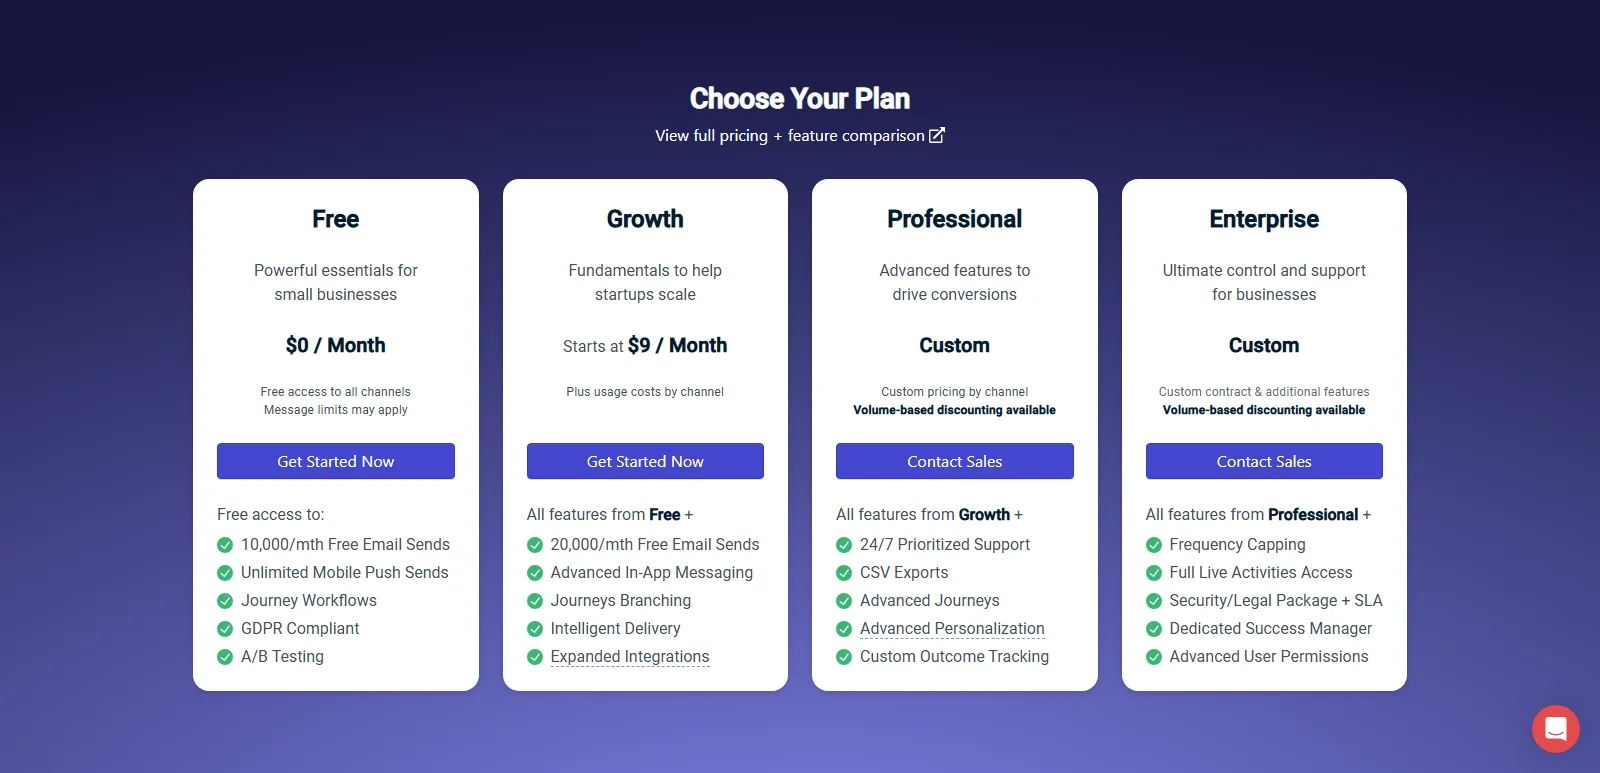
Select the one that’s appropriate to you. For this tutorial, I am selecting the free one.
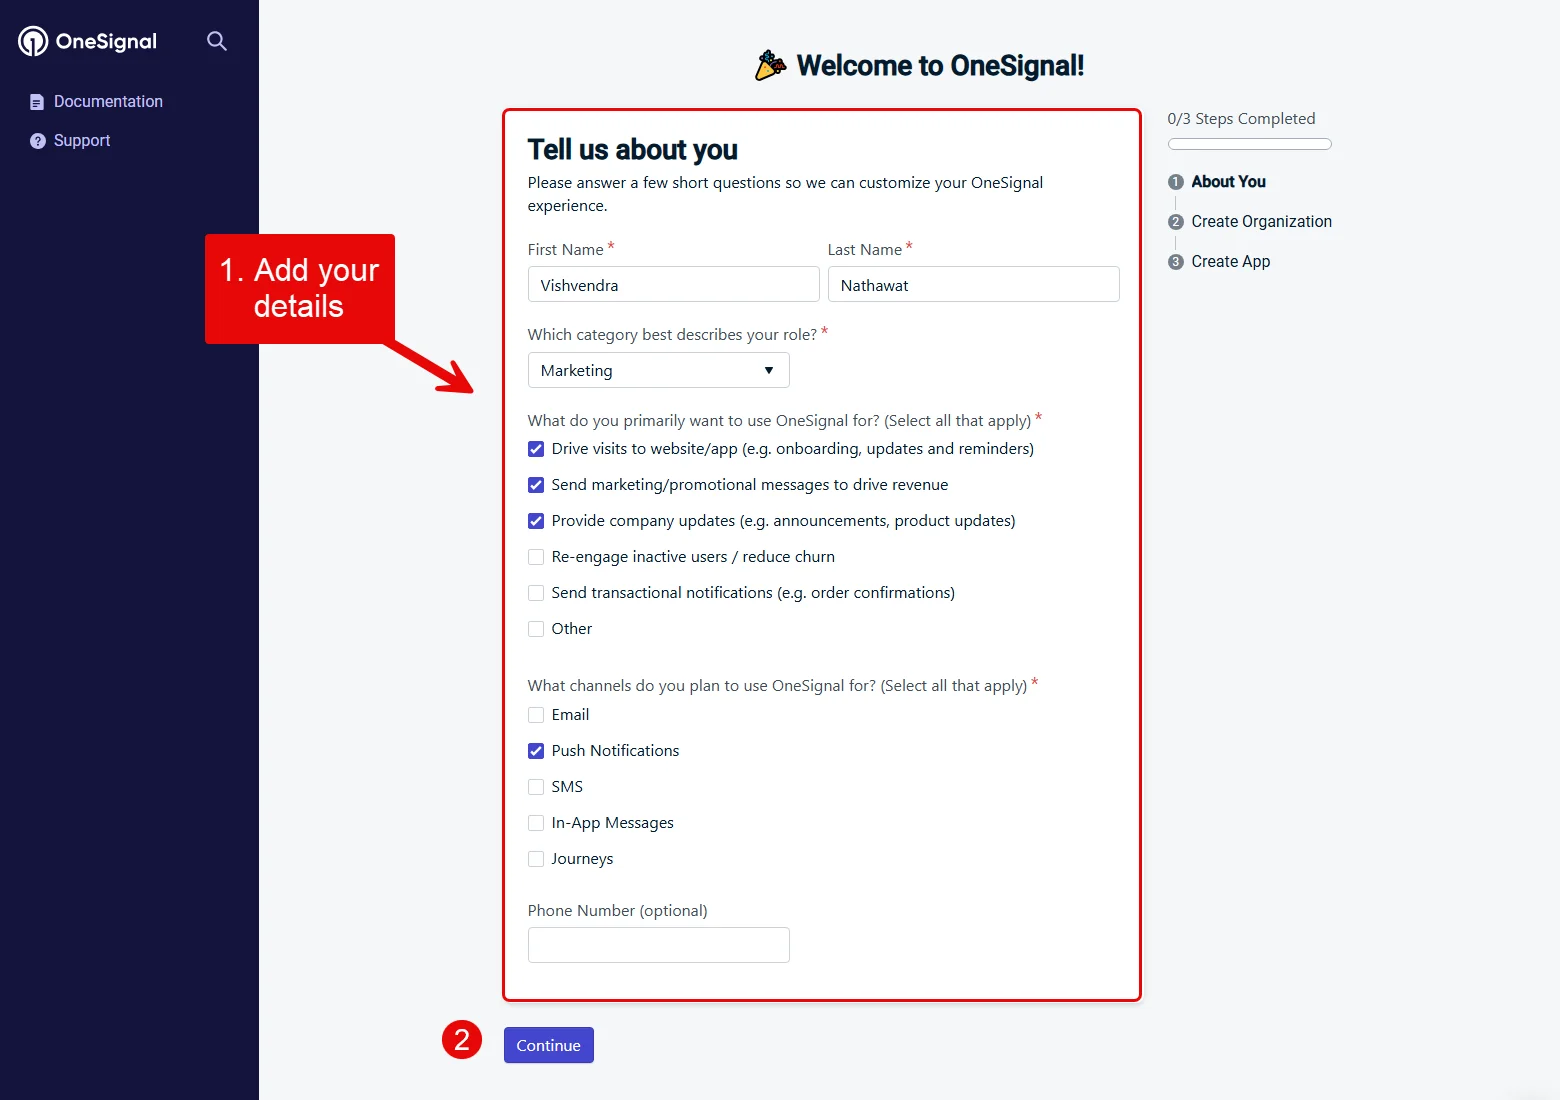
Upon selection, you are required to add your details to create a OneSignal App. So, add the details. After that, click Continue. Likewise, on the 2nd step, you need to add details about your organization.
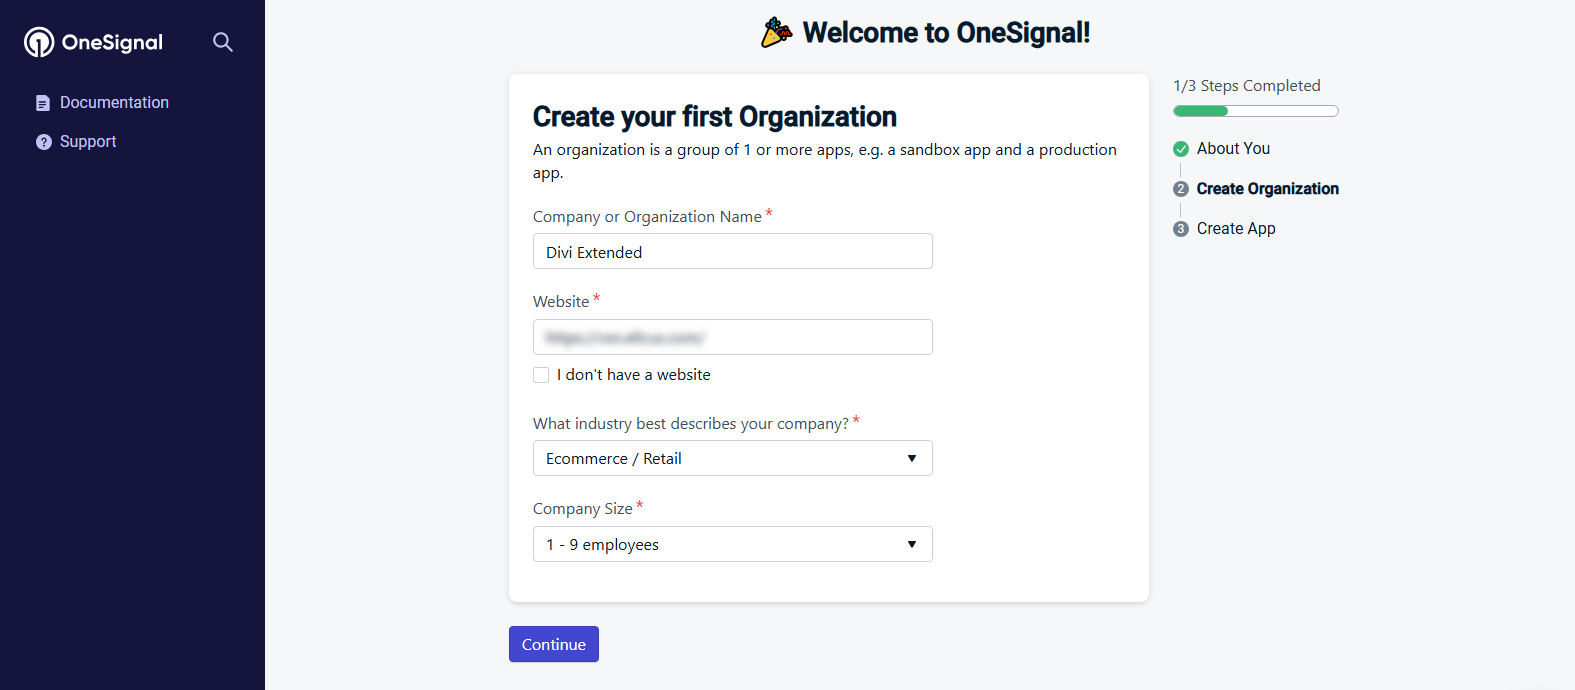
Add the details, and click Continue.

Finally, in the last step, you need to name your App/Website. Simply define a name, and then click Create.
As you complete the final step, you can access the OneSignal Dashboard.
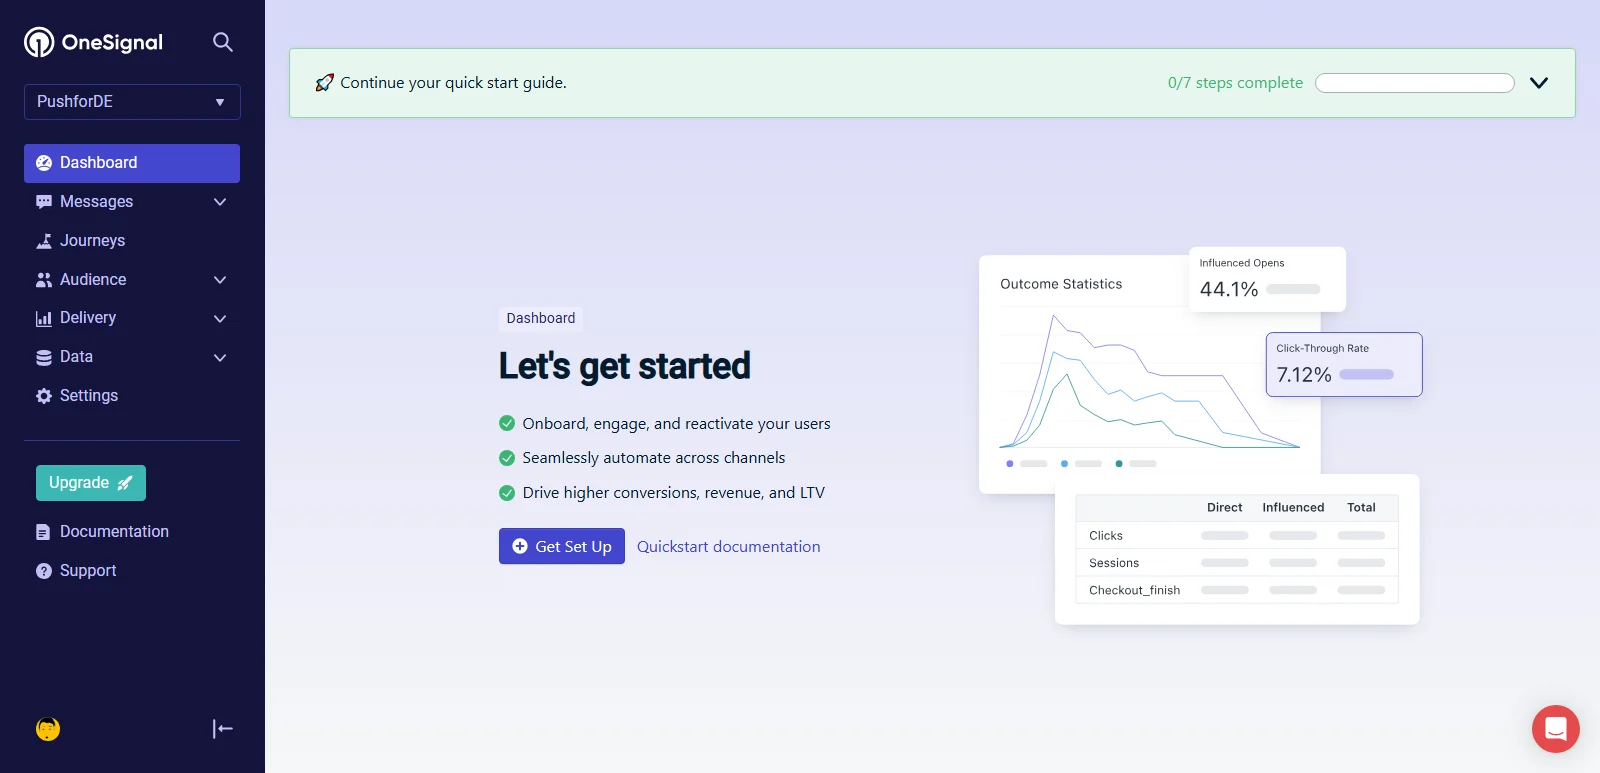
To get the App ID and Rest API Key, go to Settings → Keys & IDs.
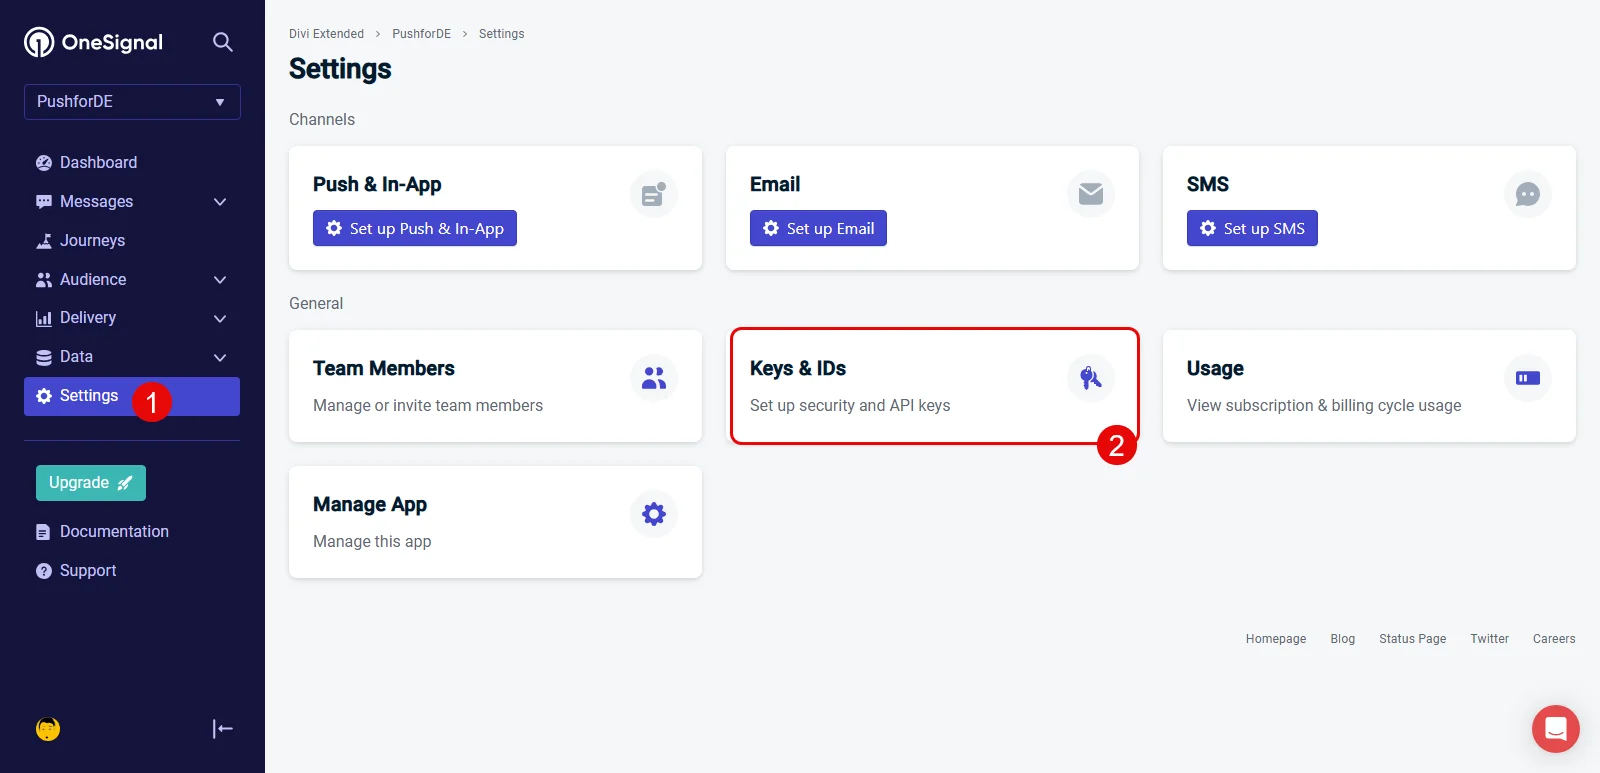
There, you can see your APP ID in the top section with a copy option.
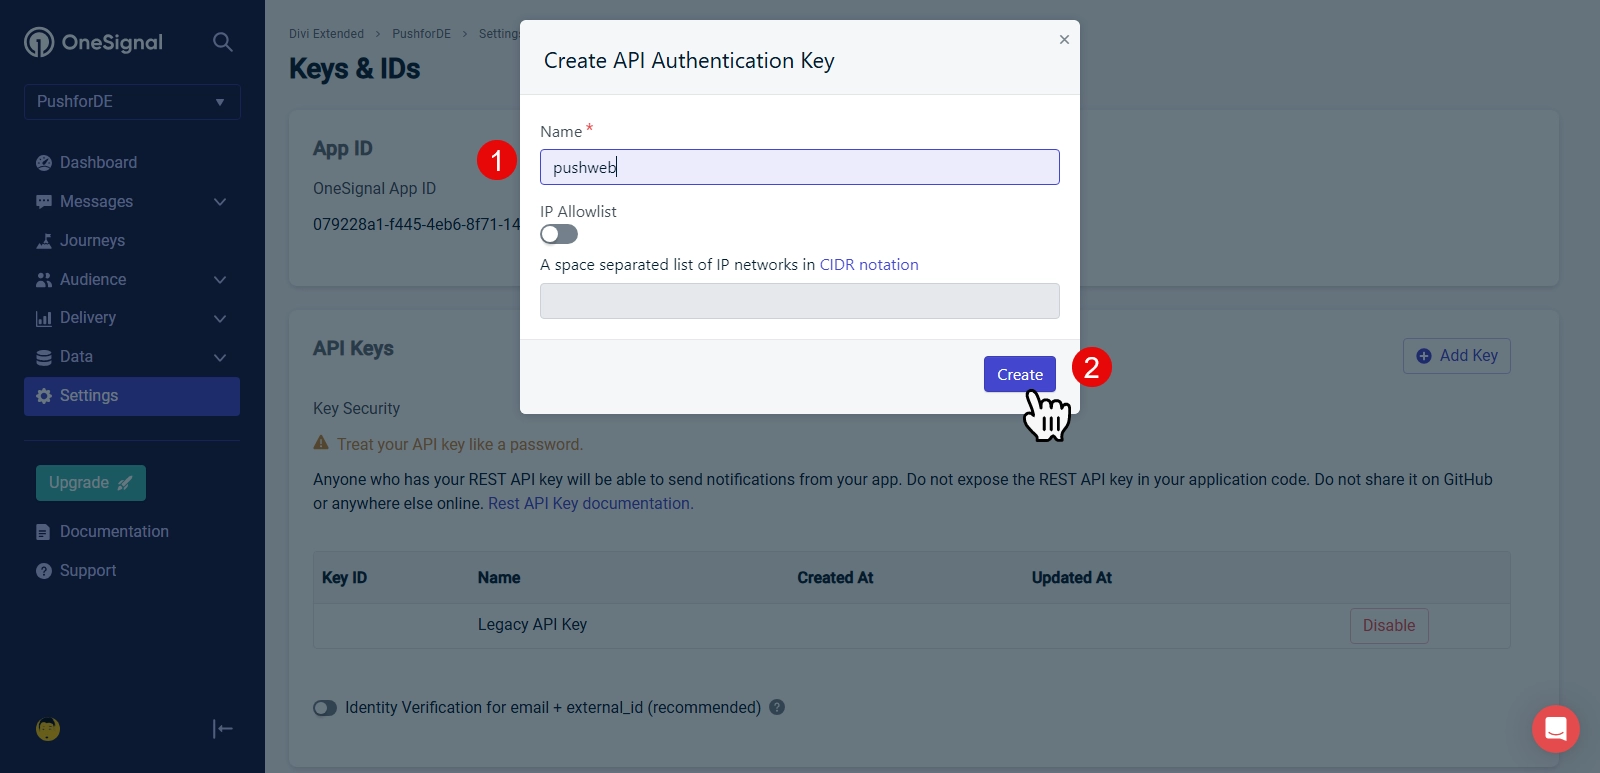
To get our REST API Key, click on the Add Key button in the API Keys section. This will open a popup in which you need to enter the name. Add the name and click Create. Upon that, you can see a new popup with the API key.
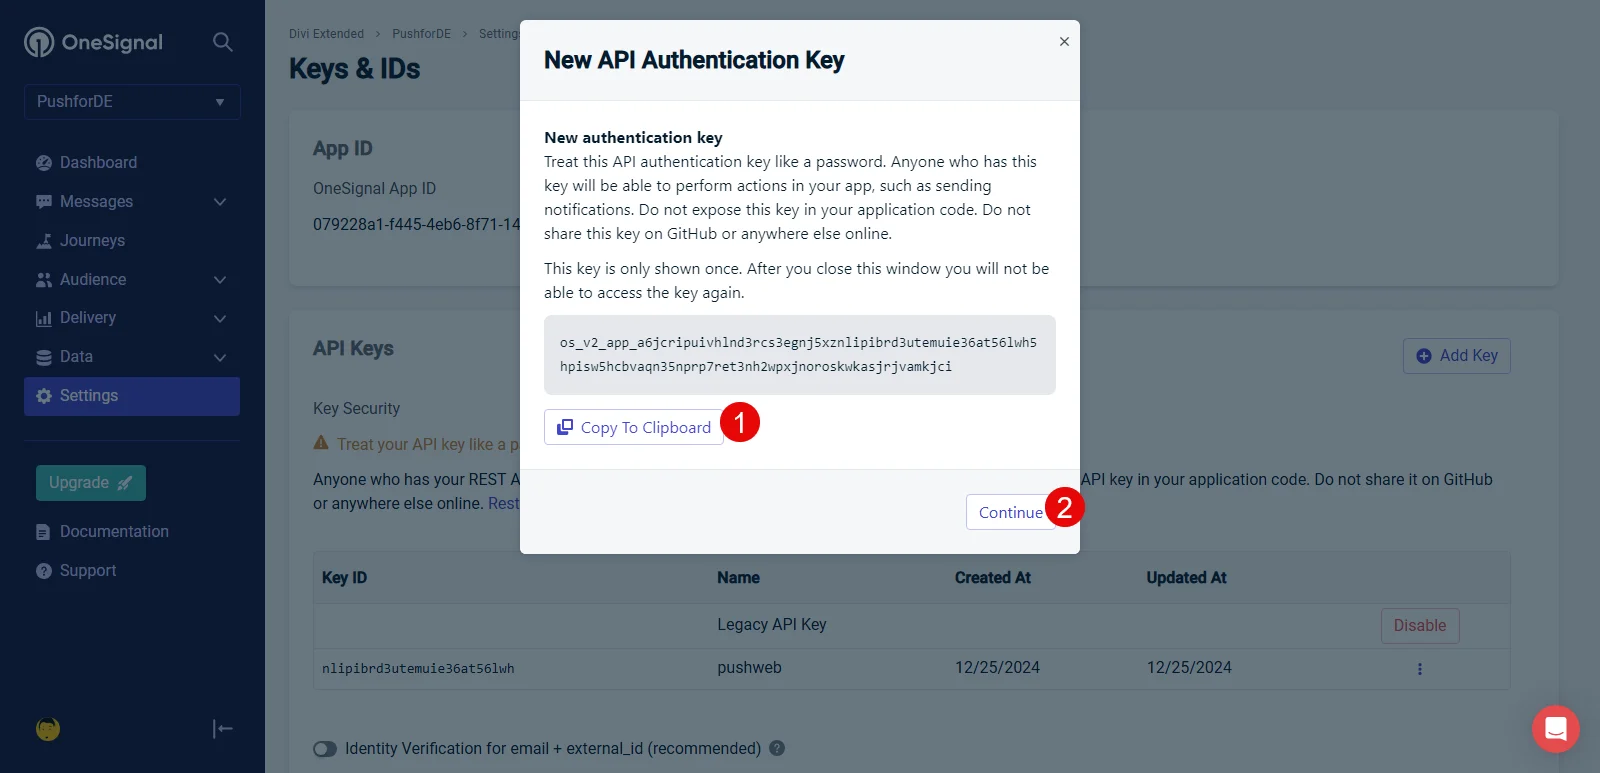
This API Key is only shown once, so you need to copy it and save it in your local files. Click on the Copy To Clipboard → Continue.
After copying it, go to the OneSignal WordPress menu and paste the ID and Keys, respectively.
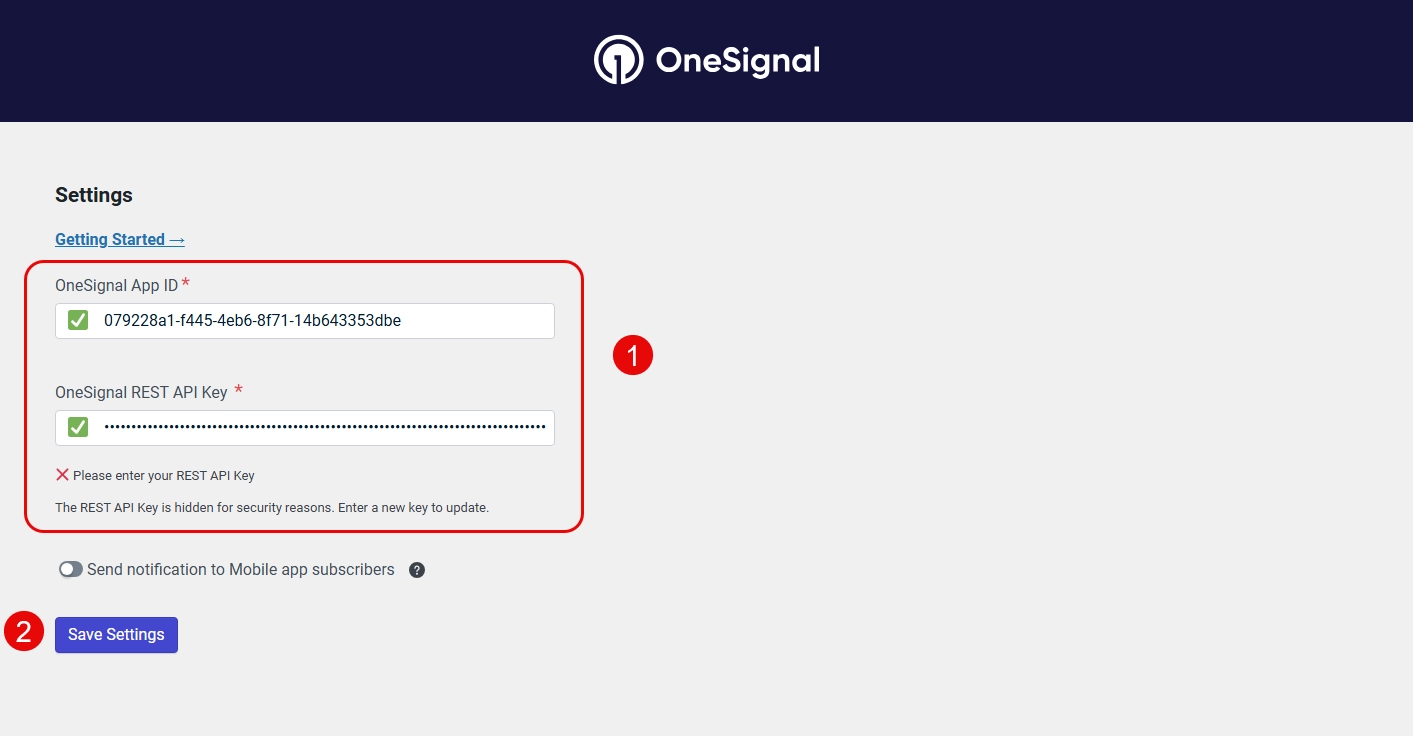
As you enter the ID and Keys, the fields will be green. If you want to send notifications to mobile app subscribers, you can turn the toggle. But for this tutorial, we are keeping it as it is and then Save Settings.
Step 3 – Create and Send Web Push Notifications
Our plugin is activated with ID and API Keys, so we now have to create our push notification. To do that, go to the OneSignal Dashboard. You need to use the website; the plugin only syncs the data and displays the push notification.
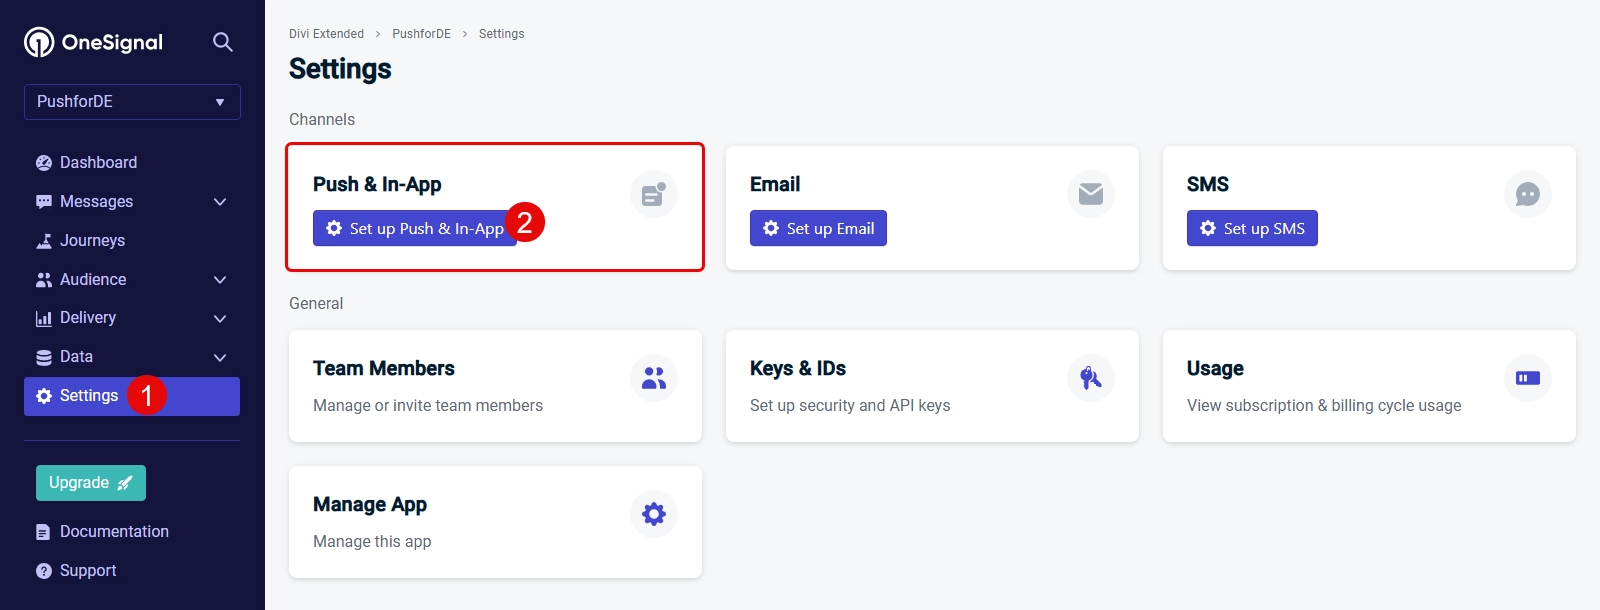
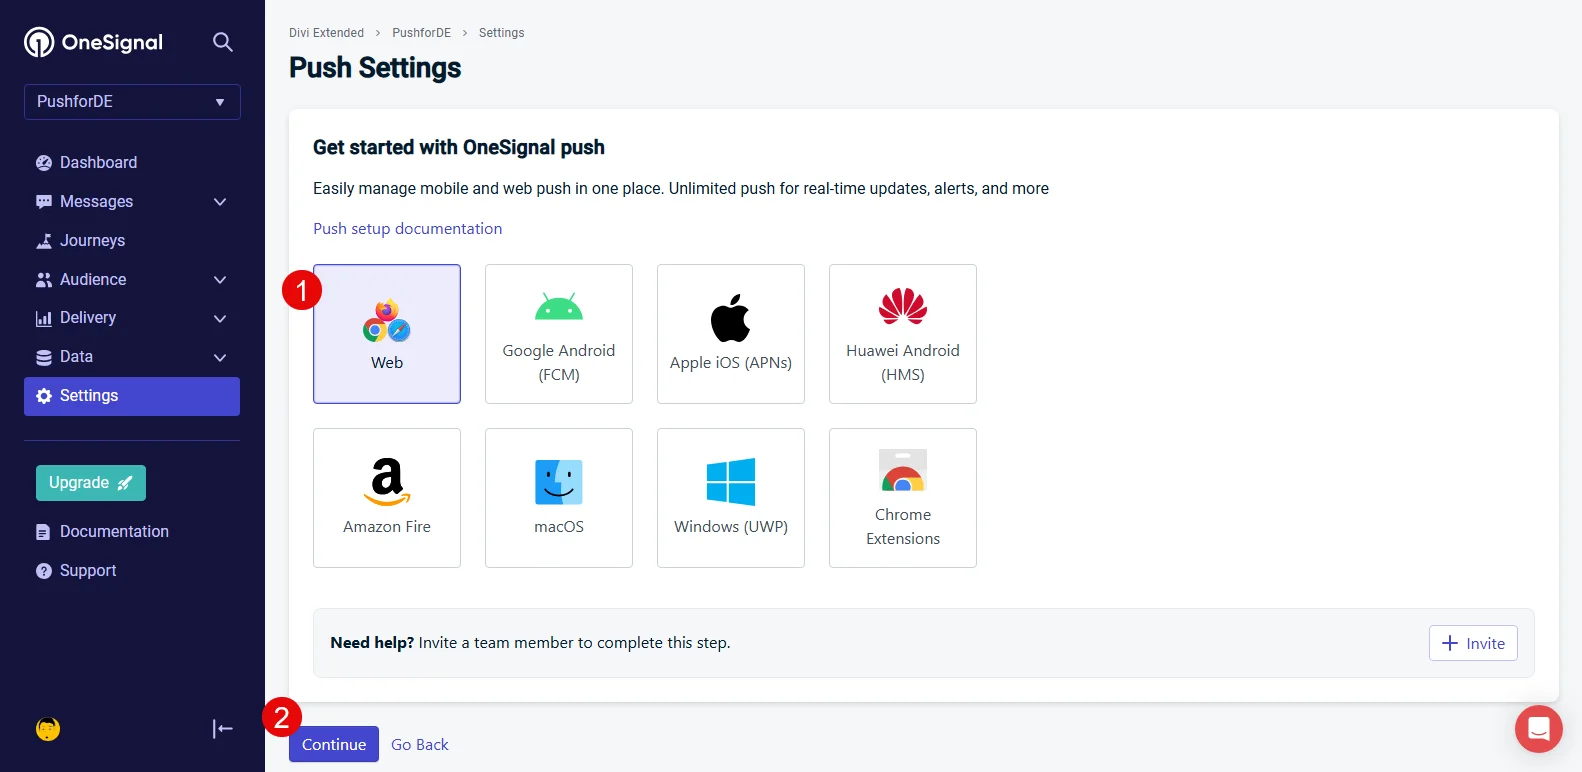
Then, go to settings and open Set up Push & In-App. There, you need to select Web and click Continue.
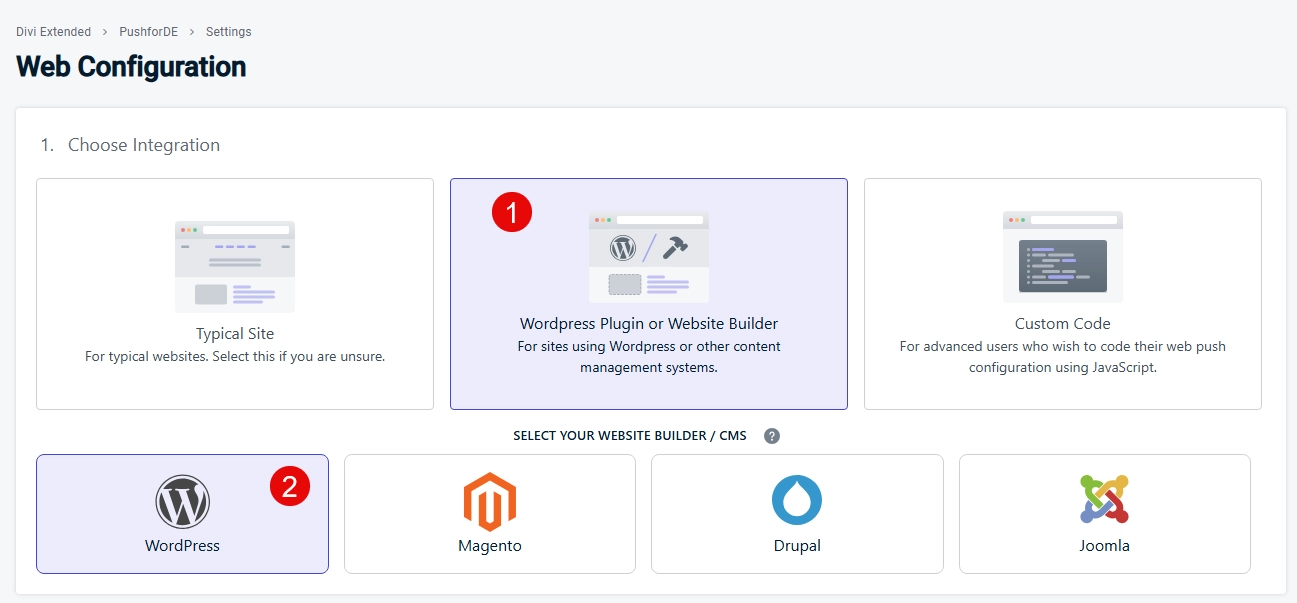
In the next window, you need to select WordPress Plugin or Website Builder.
You need to also enter other details to complete the setup. For example, you need to add the website URL, permission setup, welcome notification text, and advanced push notification settings.
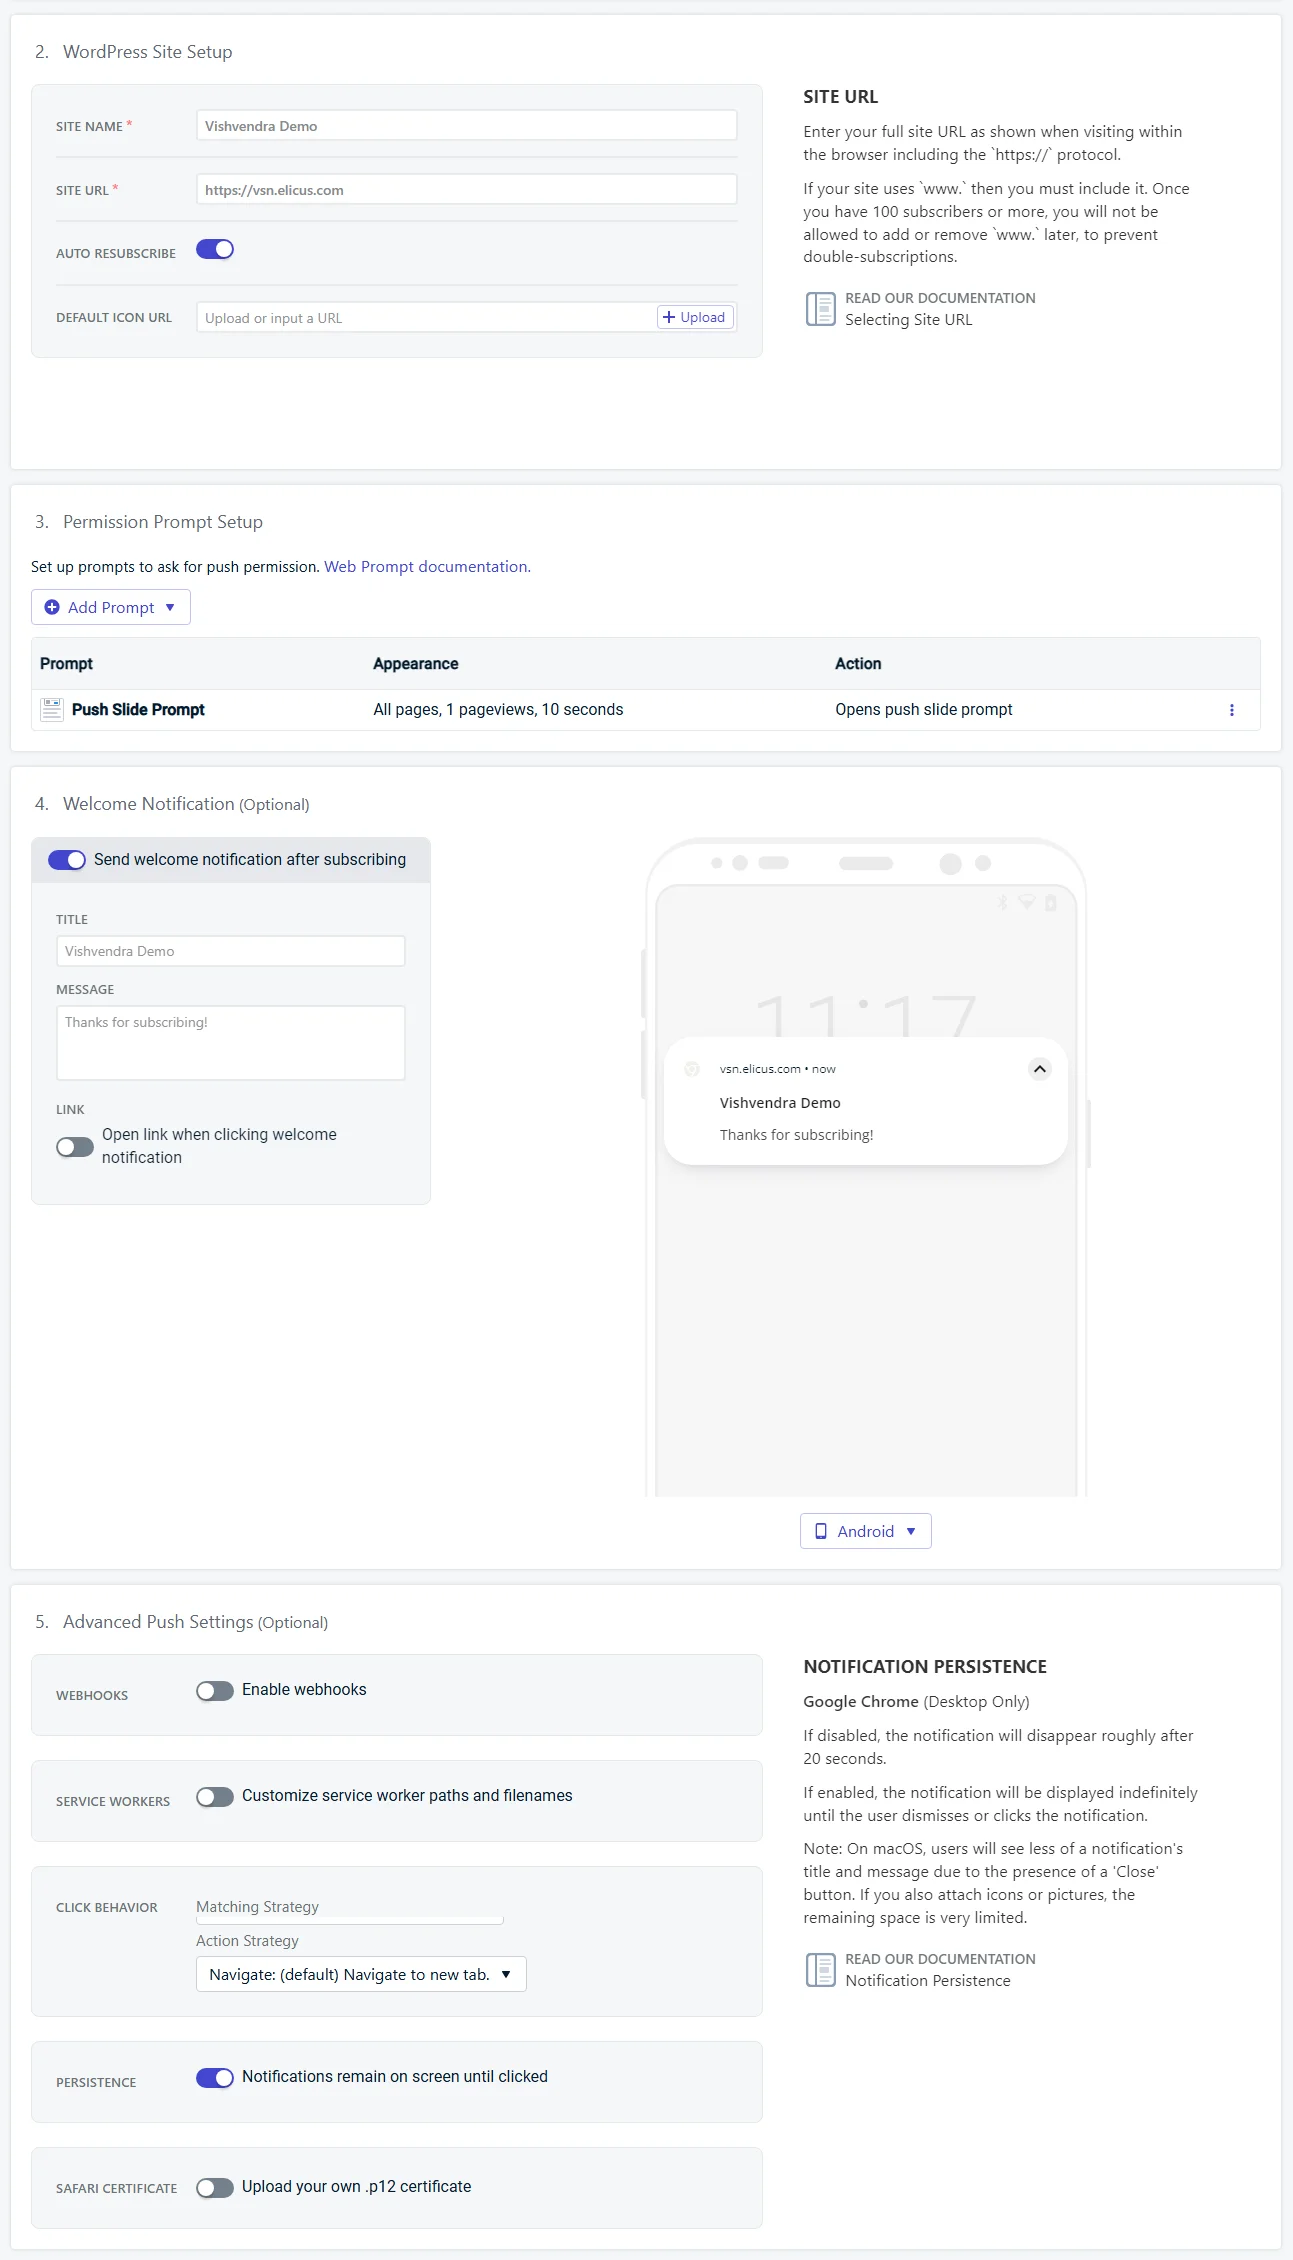
If you want to customize your Show Notification popup’s content, go to the Permission Prompt Setup section and click the menu option (three vertical dots.)

This lets you change the prompt type and its content. You can also use it for categories and show it based on pageviews and time.
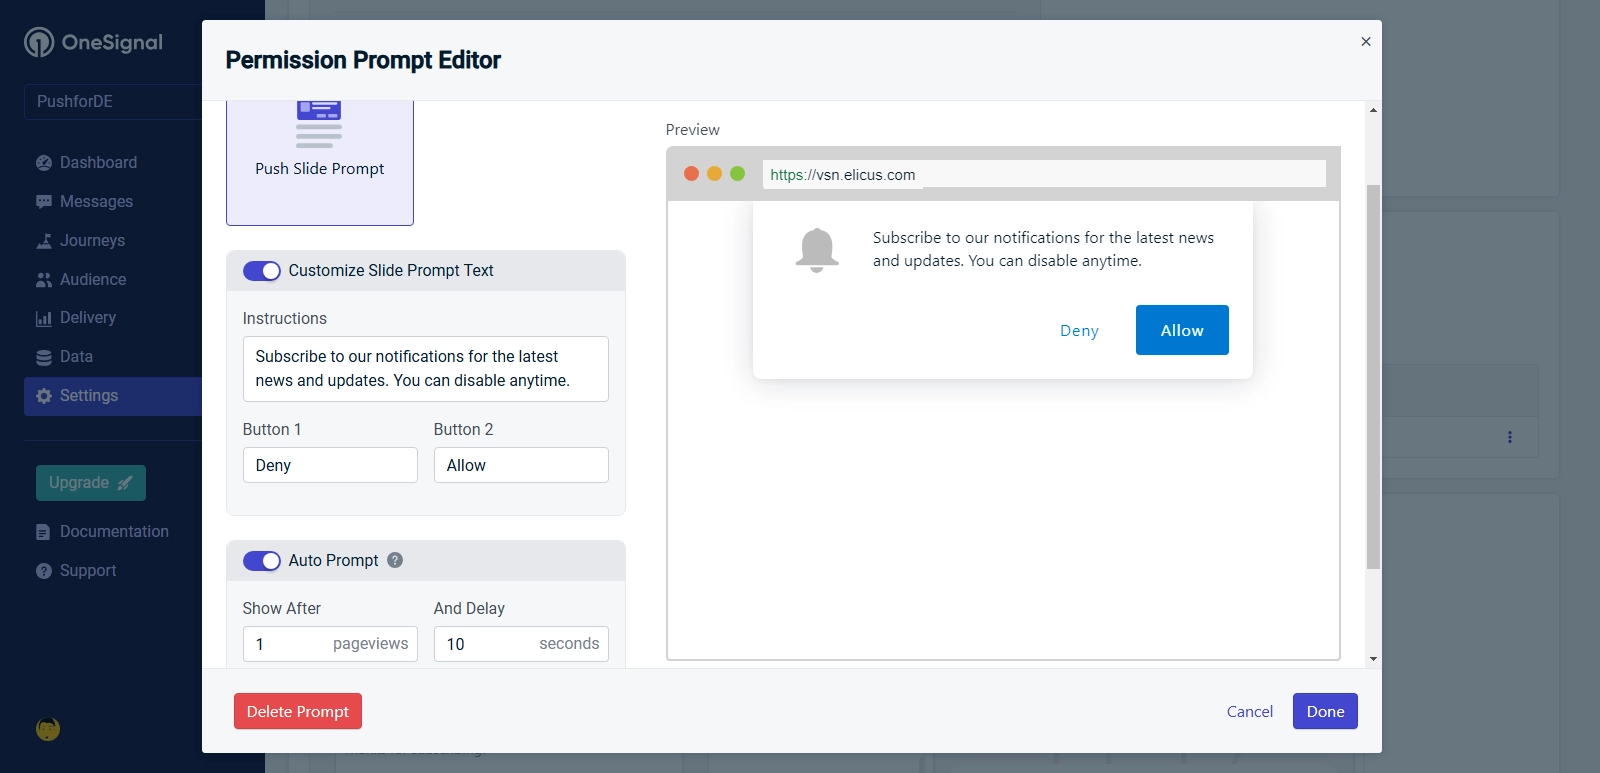
Once done with customization, click Done. Then go to the bottom of the setup page and click Save.
After finishing the setup, you’ll be provided with a new APP ID and API Key. Simply copy them and add them to your OneSignal WordPress plugin.
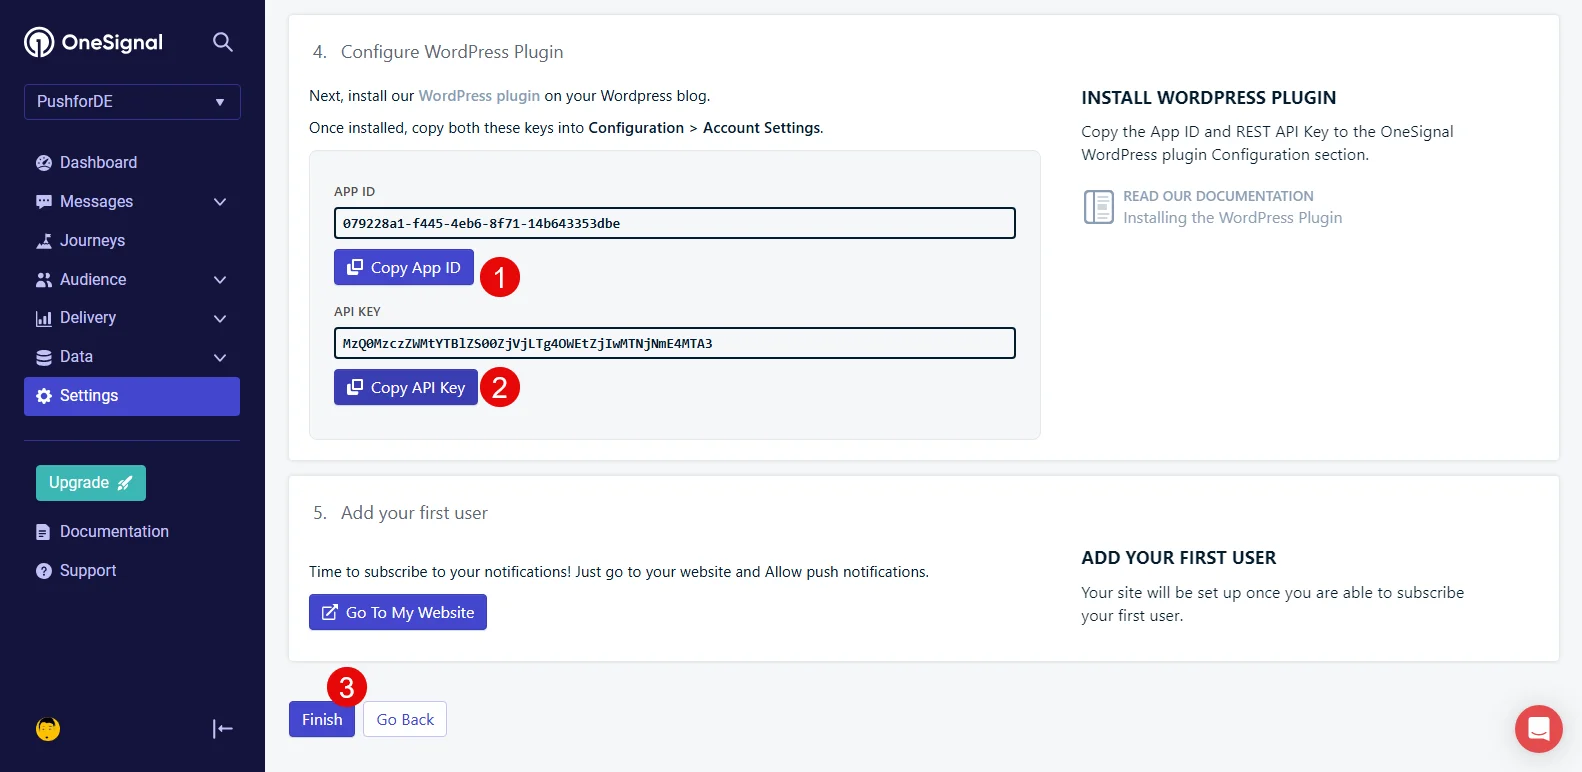
Then, click Finish to apply the setup on your website and display the push notification popup. The Allow/Deny push notification will be displayed as follows:

For browsers like Opera, the Show Notifications prompt will be displayed like the following:
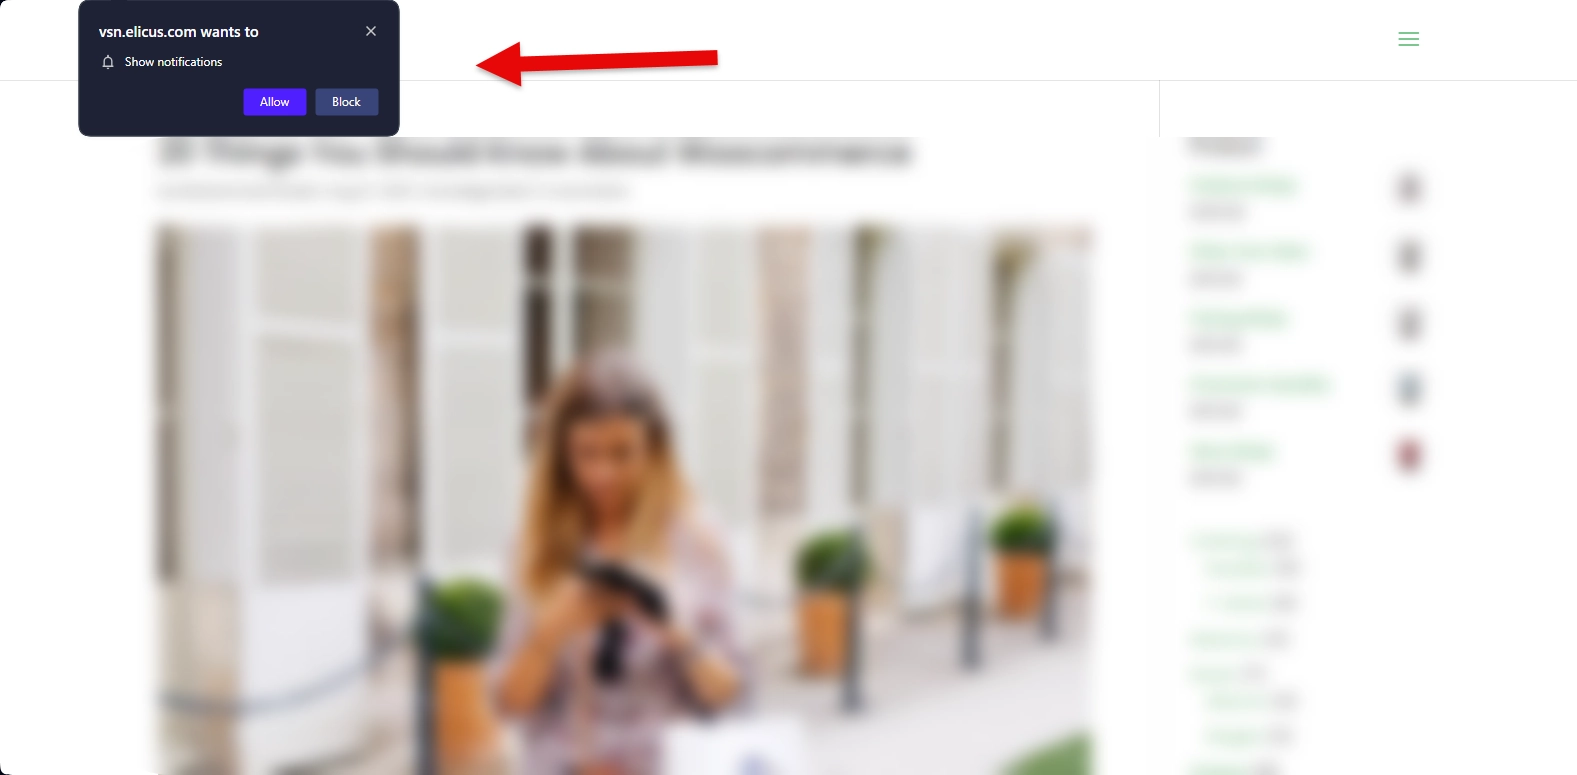
Now, whenever you release an update, your subscriber will get a push notification on their devices.
Step 4 – Send a Web Push Notification
Creating a push notification isn’t enough. You need to send it manually if you’re using the OneSignal web push notification plugin. To do that, you need to access the Messages → Push.
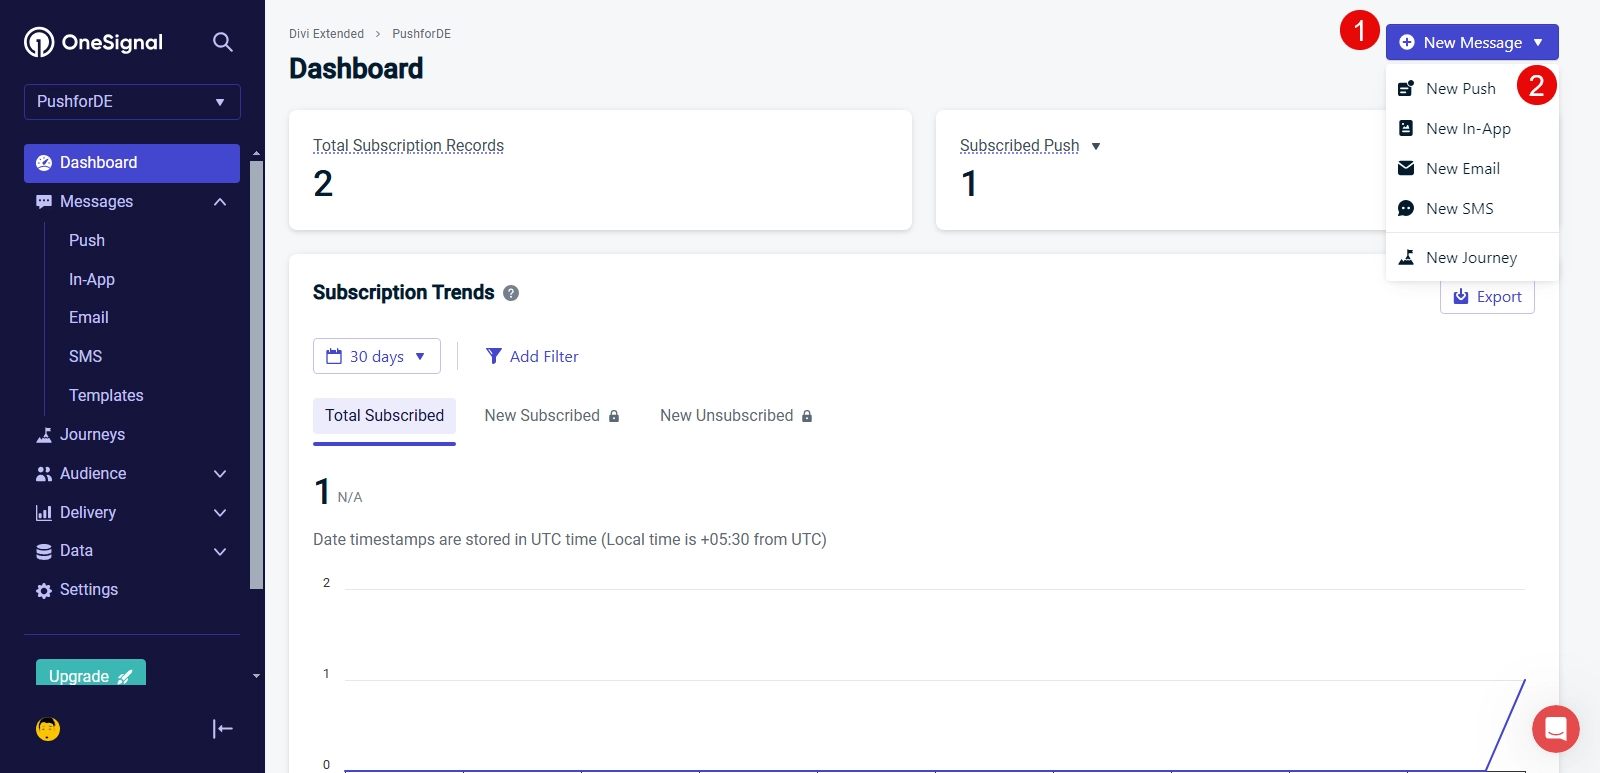
You can also click on New Message → New Push. This will directly open the new push notification’s message window.
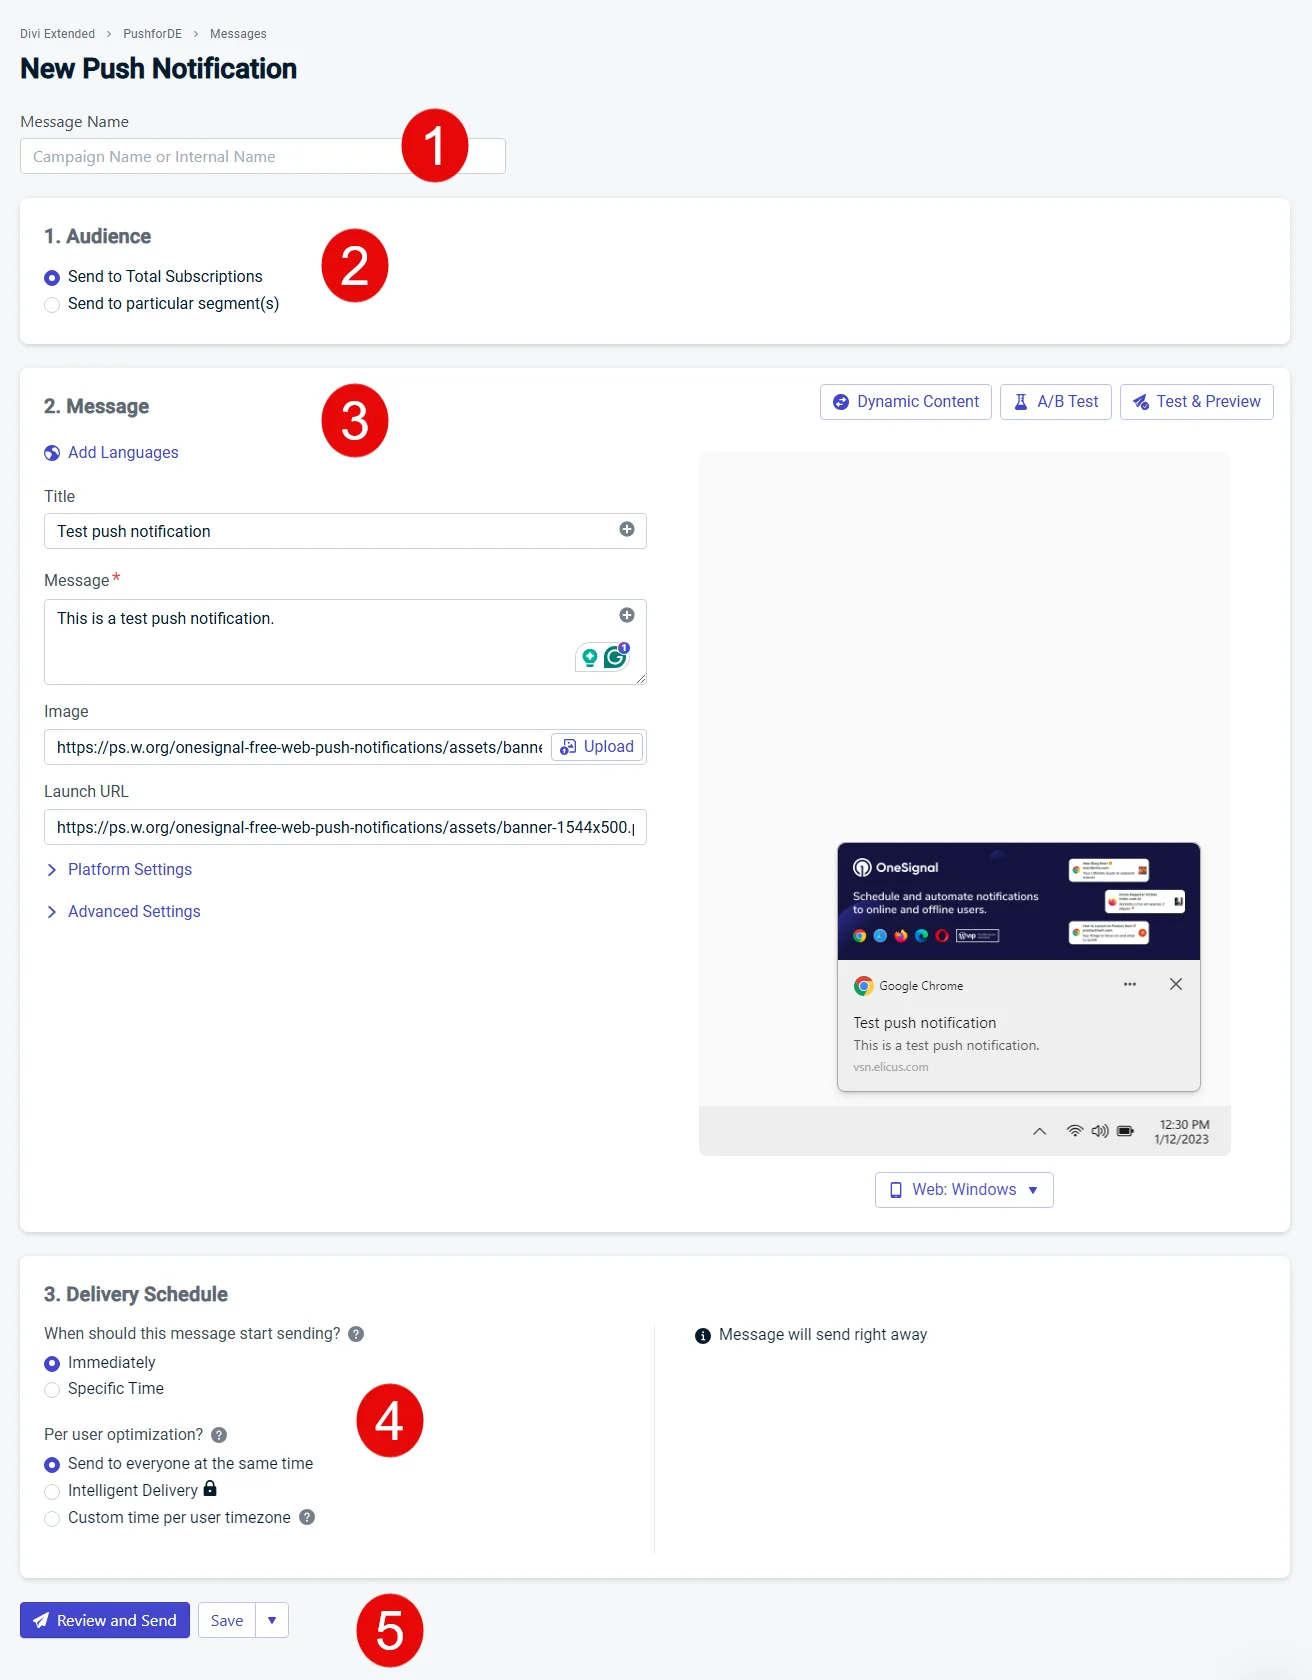
Here, you need to:
- Enter the push message’s name
- Select the audience
- Add message content: Title, message, content, and link
- Select send time
- Review and Send
A popup will appear with details of your push message so that you can review it. Once reviewed, click the Send button. This will send a push notification to your subscribers’ devices like the following:

That’s it; you have successfully created a push notification on your WordPress website.
General Guidelines Related to Web Push Notifications
The nature of push notifications is similar to popups; therefore, it’s always best to follow some general guidelines so you won’t break any laws and create a bad user experience. Those guidelines are:
- Don’t send push notifications to users who didn’t opt in.
- Have clear options on the Show Notifications popup to opt-in and not.
- Keep messages concise, clear, and relevant.
- Don’t send push notifications unnecessarily.
- Avoid clickbait or misleading content.
You can find more guidelines regarding privacy, performance, and technical implementations. But if you follow the above, your push notifications for WordPress will have satisfying results.
Other Plugins You Can Use to Enable WordPress Notifications
OneSignal is one of the best plugins to enable push notifications on WordPress. However, if you’re looking for something different, you can also try the following ones:
a. PushEngage
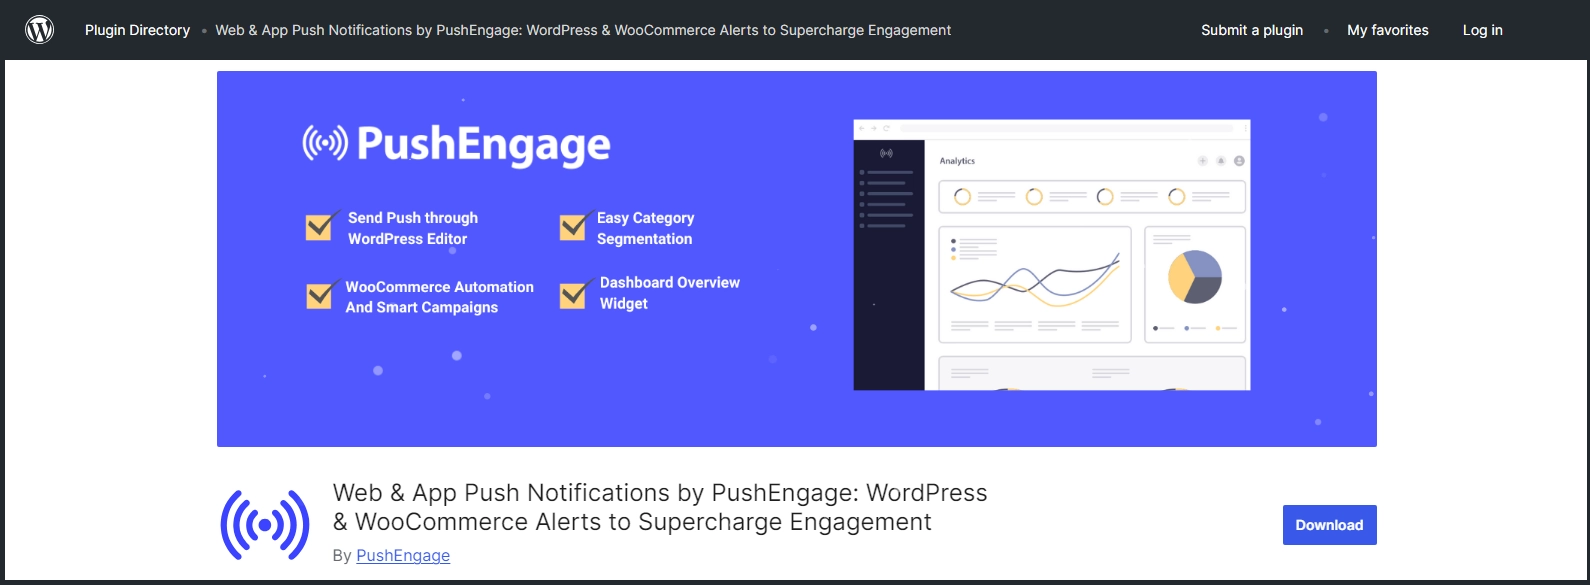
PushEngage is another free notification plugin for WordPress. Using this plugin, you can create and send web push notifications to your subscribers directly from the WordPress Dashboard. Unlike OneSignal, you don’t have to visit the platform.
Furthermore, it provides an auto-push feature, so you don’t have to send notifications manually. However, the only thing that some users won’t like about the free version is that you can use it only for 200 subscribers. After that, you need to get the premium version.
Other than that, it’s a good push notification plugin for WordPress.
b. Push Notifications for WP
Don’t want to complicate your web push notifications? If so, then, in this case, the plugin by Magazine3 will be useful.
This plugin provides simple options for creating your notification popup and sending push notifications to the users. You only have to register and then use the keys to activate the license. It provides self-hosting to send your web push notifications.
Frequently Asked Questions
Are push notifications free to use on WordPress?
Most push notifications WordPress plugins work on a freemium pricing model. You can create basic or limited functionality push notifications, but to use more features, you need to opt for a premium/paid plan.
Are push notifications safe?
Yes, push notifications are safe if you choose an established push service provider. Also, the nature of push notifications is minimalist by default. Hence, they won’t overwhelm the user when you send them.
How do users subscribe to push notifications?
When you enable push notifications on your website, the website will start to display a Show notifications prompt/popup, either in the top left corner or in the middle, based on the template used. Most of the time, the subscriber’s prompt has an Allow or Deny button, which users can choose to subscribe to or not.
What is the best WordPress push notification plugin?
All plugins are good in one way or another. However, the ones mentioned in this article (OneSignal, PushEngage, and Magazine3 plugin) are most recommended among the WordPress community due to their robust features, ease of use, and good integration with WordPress.
How can I test if my push notifications are working?
A plugin like OneSignal provides you with a Test Subscription option, which you can use to test your web push notification on the WordPress website.
Conclusion
So above, we discussed working on the web push notifications, type, and their need. We also looked at the steps for enabling them and what guidelines you should keep in mind when creating and sending push notifications.
With the above information, you can easily create web push notifications on your WordPress website and allow users to opt in to receive your updates.
The plugin we used offers extensive features that allow users to effectively achieve their targets regarding push notifications. Now, it’s your turn to create your push notifications and increase your subscriber count.
Let us know your experience in the comments.





0 Comments