Last Updated: Jan 16th 2025.
Hosting companies require a practical Divi hosting child theme for their WordPress websites to introduce their businesses to customers.
Creating a WordPress website using Divi is a great idea to make an appealing professional online presence. It doesn’t need coding expertise or skills to create a WordPress website. Divi provides you with essential customization options, an intuitive drag-and-drop builder, customizable themes, useful plugins, and user-friendliness to easily create a professional website.
In this post, we’ll guide you through the complete step-by-step process, from installation and creation to launching a WordPress website. We have covered the design phase of this process, which includes using the Divi theme in detail to craft your website.
What Things You Need to Create Your WordPress Website Using Divi
These are some mandatory things that we require before creating your WordPress website using Divi. Let’s see.
1. Buy a Domain
The important thing to remember before buying a domain is the domain name. You must select an appropriate domain name to represent your business perfectly and provide your business vibes to the audience. You can do detailed research about your industry or niche and finalize the best domain name for your website.

Always try to get the top-level domain extension that suits your industry. We recommend you go with the .com as it is the most popular and trustworthy extension globally.
Many hosting providers offer domain names by checking them with ICANN and making them available for you. These hosting providers help you find the availability of the finalized domain name after research. They’ll show you if it is available and then you can buy it. These are some hosting provides that you can consider:
- Hostinger
- GoDaddy
- Siteground
- Hostgator
2. Select a Hosting Plan
After selecting the perfect domain name for your website, you need to proceed further and select a hosting plan. If you go with a normal web hosting type plan, you need to install and set up WordPress yourself. The other option is to go with Managed hosting plans where the providers take care of the entire setup and provide you ready to use WordPress website.

It completely depends on your choice and the requirements of your website. If you want a hassle-free experience with limited control over website management options you can go with the Managed hosting. Otherwise, if you are skilled enough to handle the setup and management of your website, go with the first one.
Start Creating Your WordPress Website using Divi
After finishing the installation and setting up things on your website, let’s proceed with further process to create your website using Divi.
Divi Theme is super powerful and offers outstanding features to create and customize your website in a unique style. Divi supports several plugins, child themes, and extensions to cater to the specific needs of a website. You can quickly create beautiful and appealing websites for different niches or industries using Divi Builder, Theme Library, prebuilt layouts, and child themes.
It also provides extensive options to manage them flexibly. It is a WordPress theme but works like an integrated framework capable enough to set up things the way you like on your website.
Divi offers two plans. The first one comes with core features and is sufficient to create a nice professional website. Divi Pro is the second option with advanced features like Divi AI and Divi Cloud to make things on your website innovative and practical. If you want to work in a more creative way you can buy Divi Pro, otherwise choose the basic Divi. Let’s start and create your WordPress website using Divi.
1. Installation of Divi
When you have purchased Divi, it’s time to install and use it to create our WordPress website.
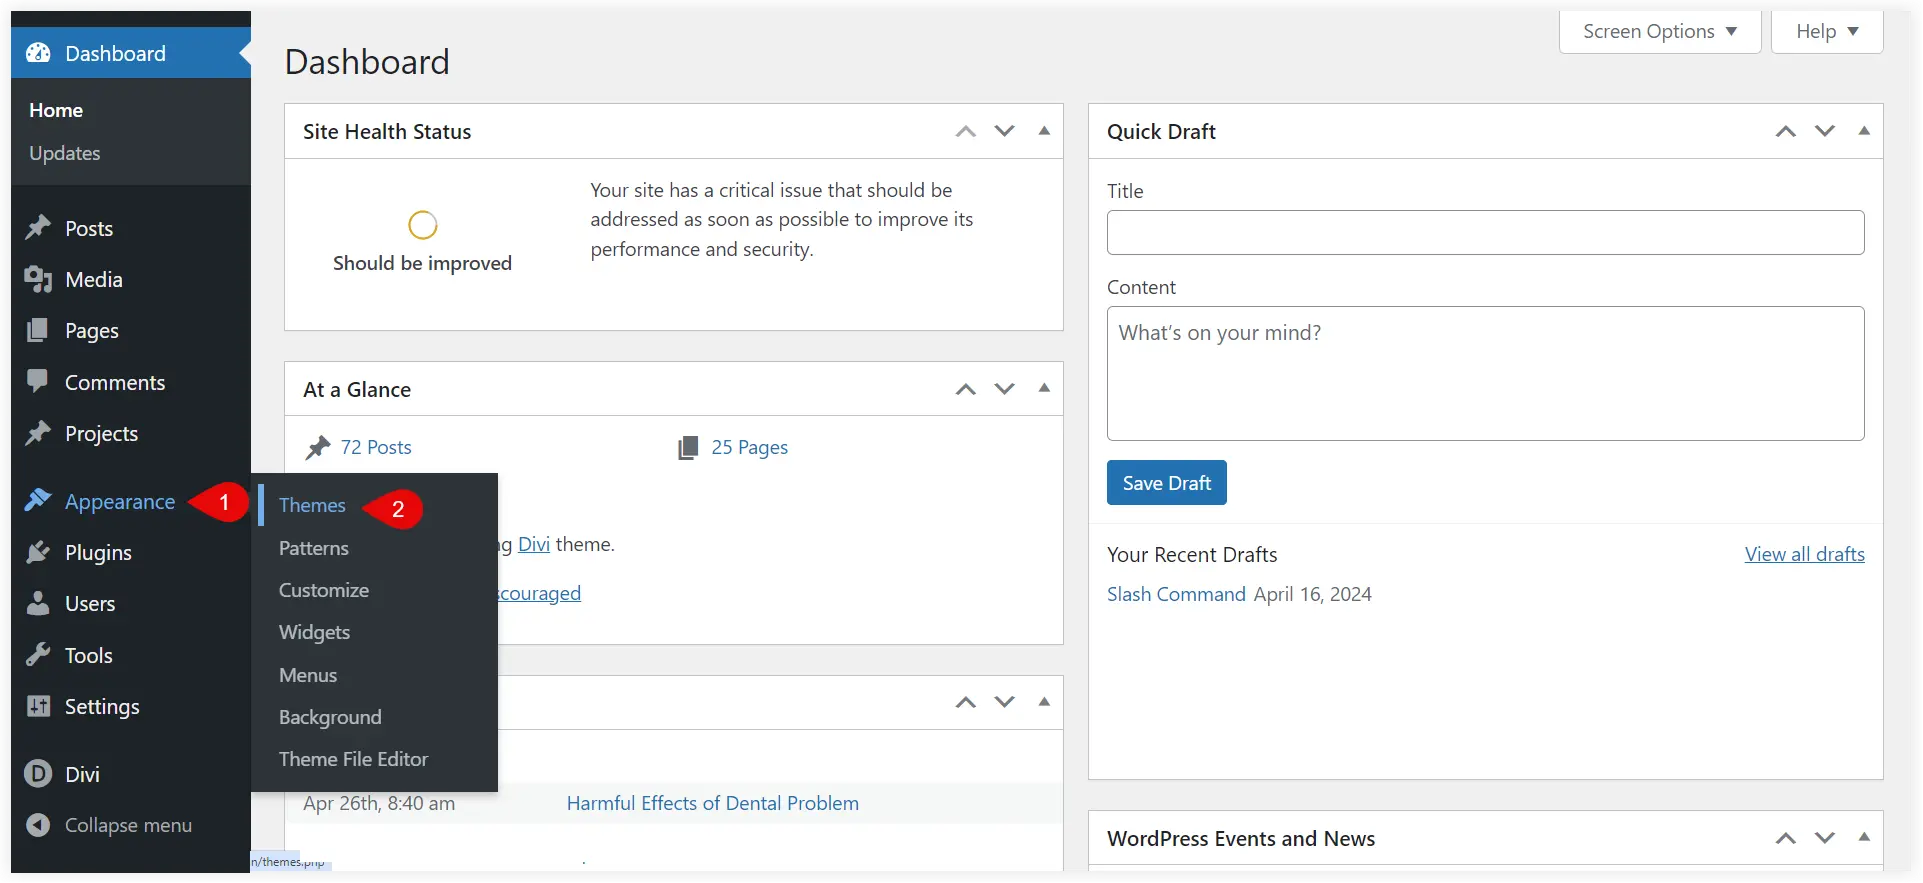
Go to the WordPress dashboard and navigate to Appearance > Themes.
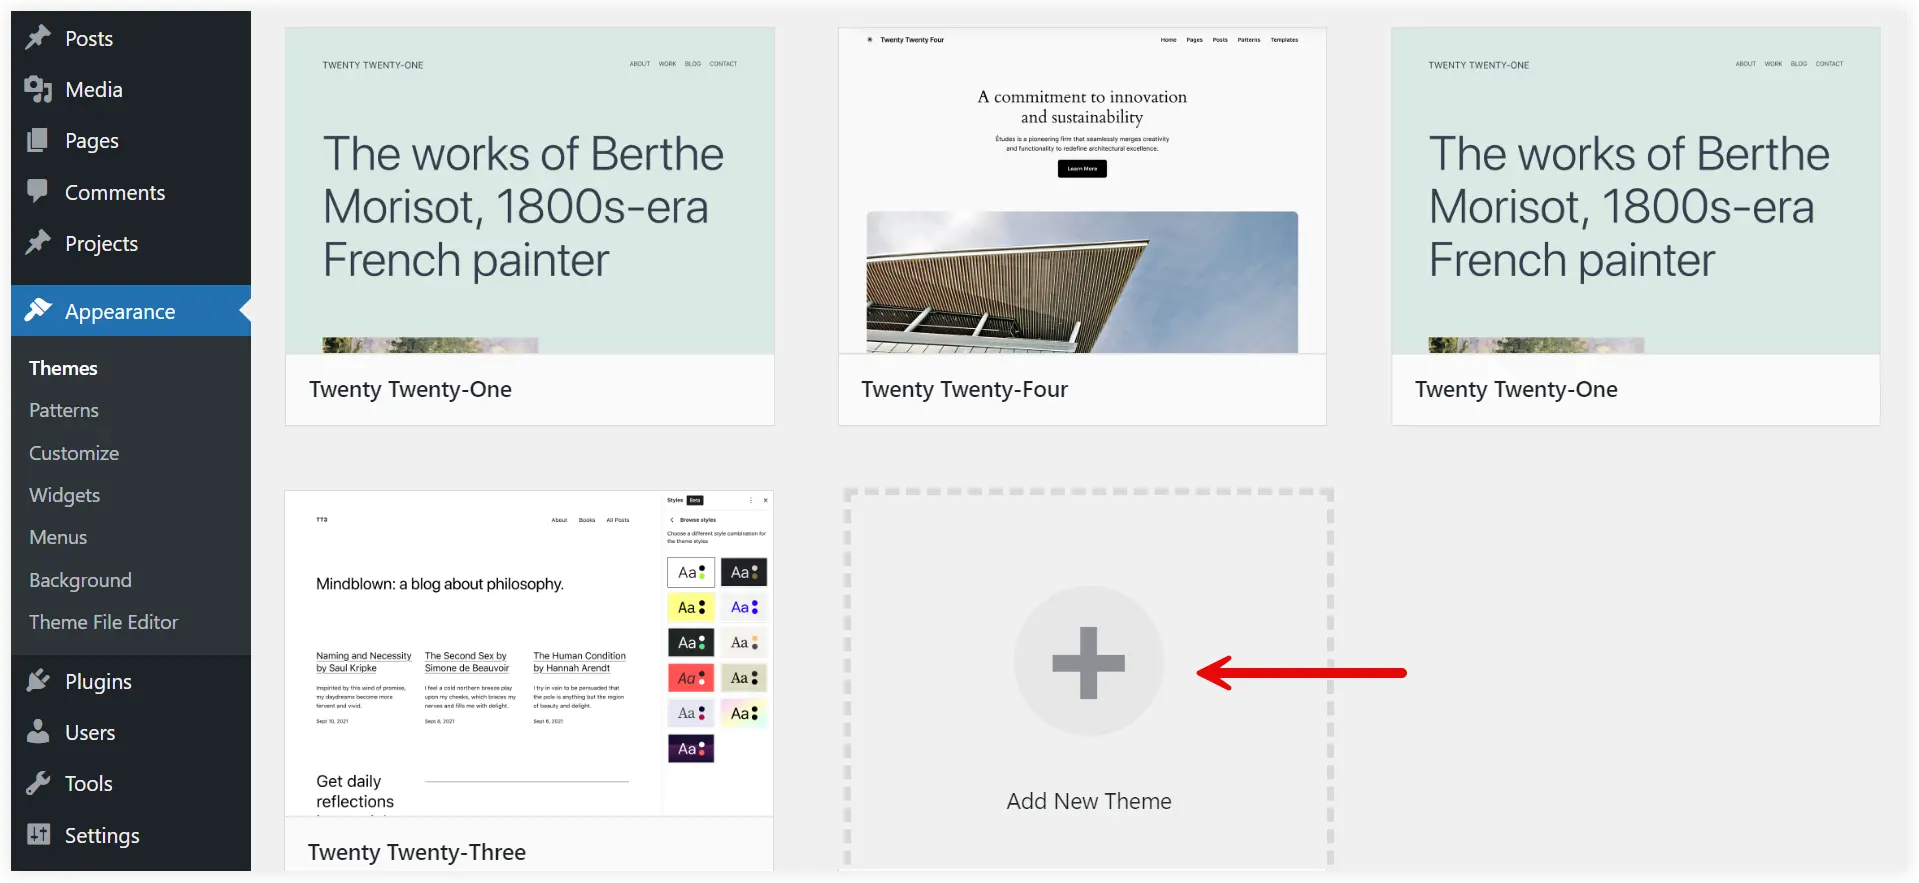
You need to click the Add New Theme button.
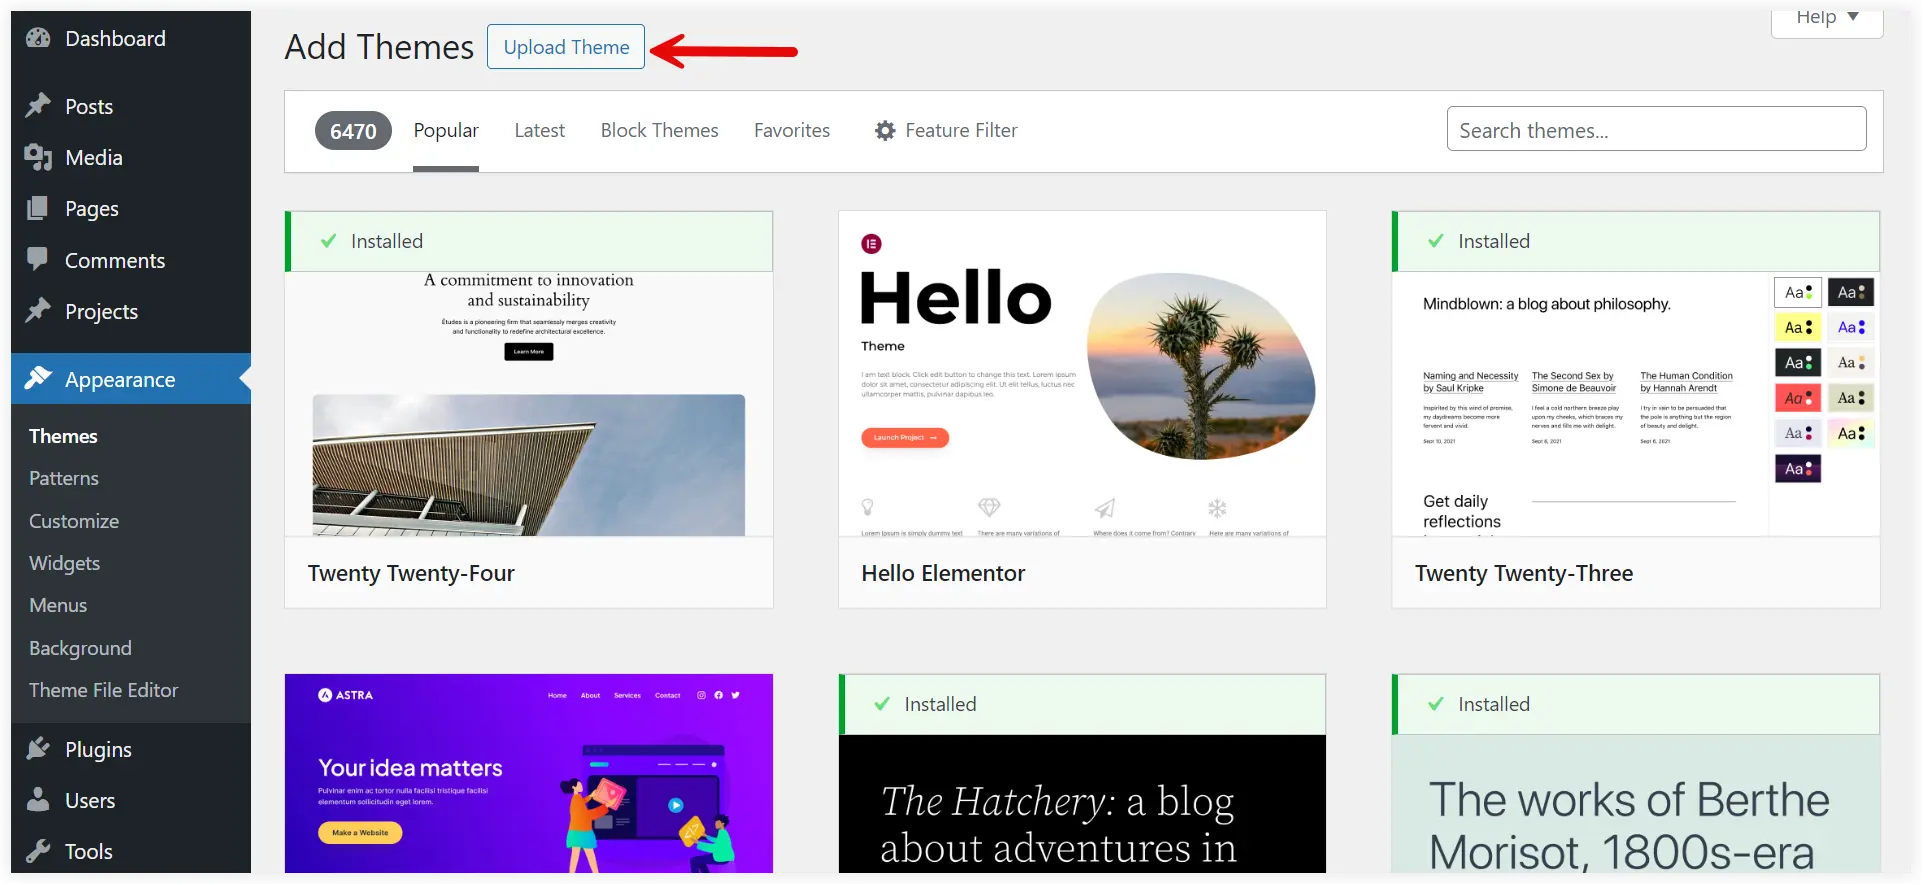
Upload the Divi theme file.
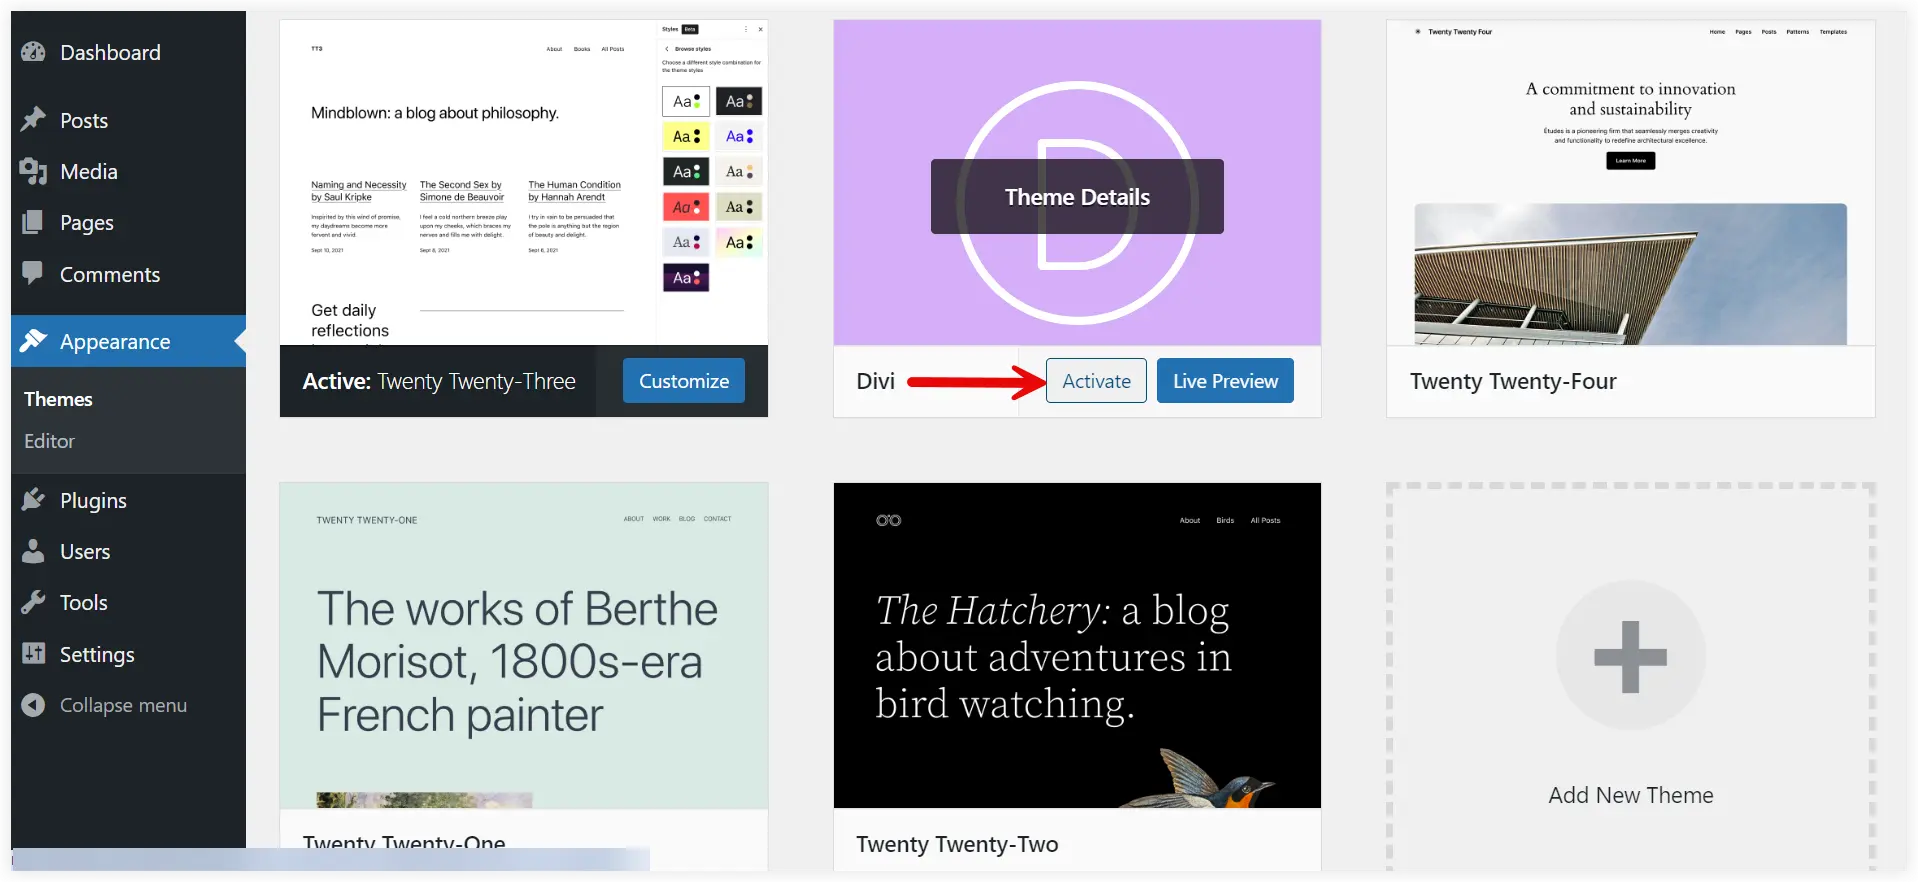
After installation click on Activate to make the Divi theme live on your website.
If you want to get complete access to Divi products, layouts, and updates, navigate to your Elegant Themes account page. Click Account and select Username & API Key.
Now enter your username and click on Generate New API Key.
After generating the new API Key, you need to activate it. This is necessary to connect your Divi installation to Elegant Themes and access all the pre-built layouts, updates, and other features of Divi.
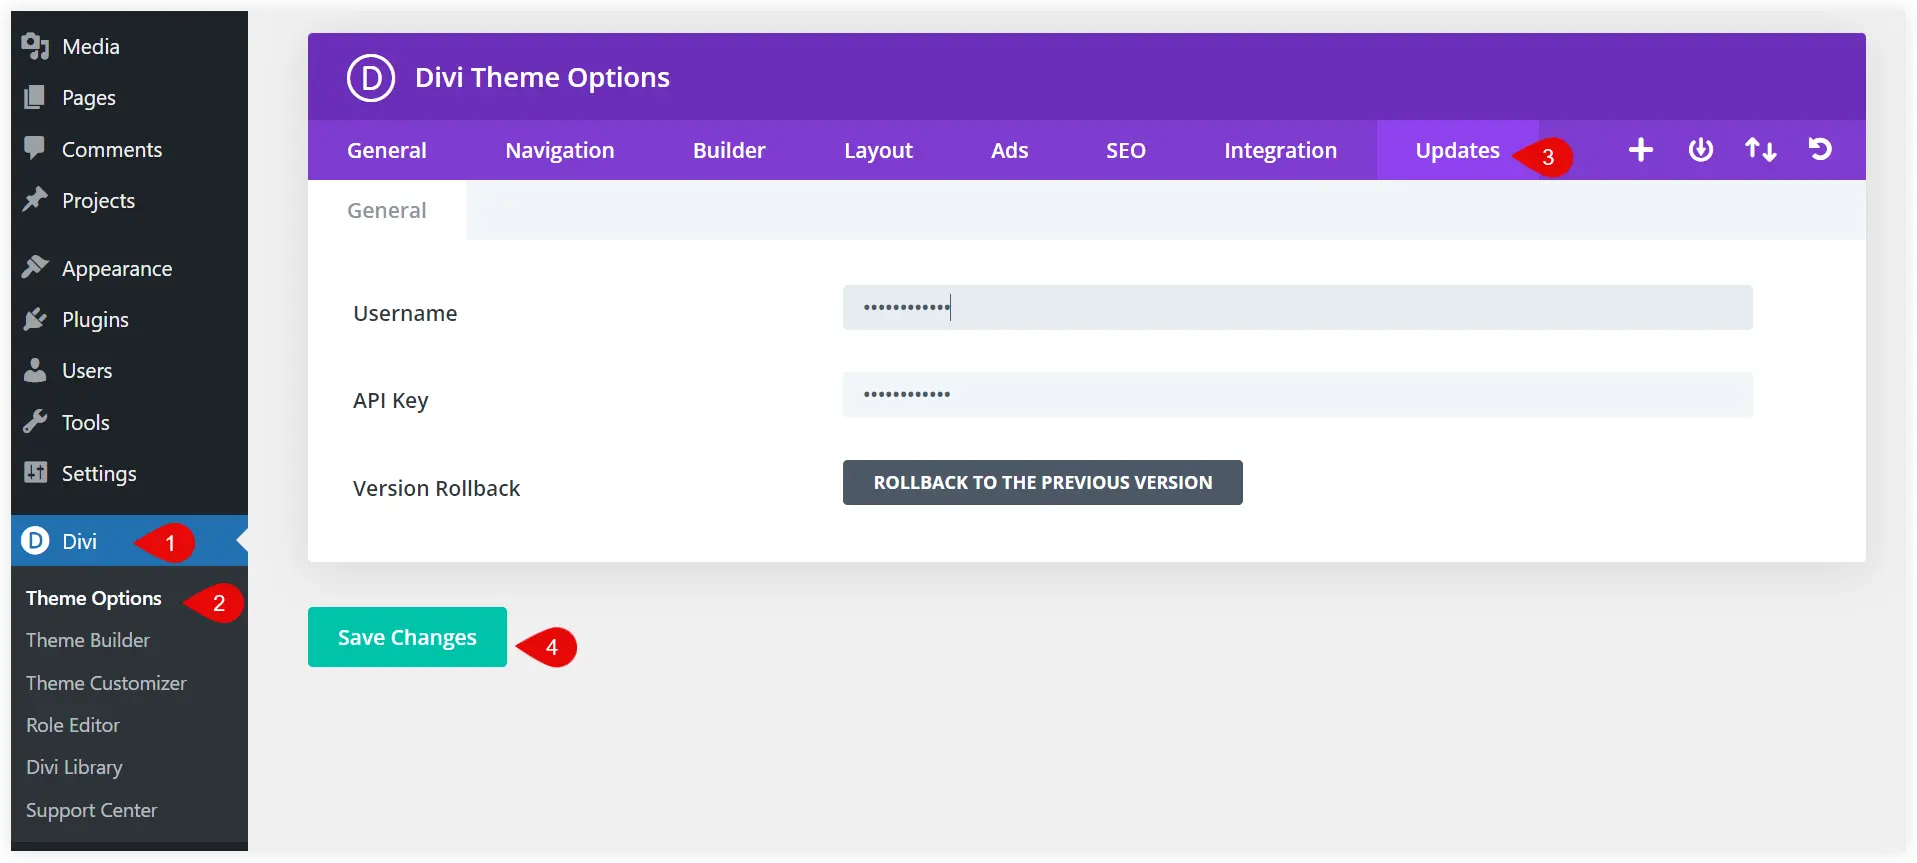
Navigate to Divi > Theme Options. Click on the Updates tab. Enter your Username and the API key generated from your ET account. Click Save Changes and your API is activated.
1. Create Pages for Your Website
Every website requires some essential pages and all these pages collectively form its structure. The basic pages that most websites have are Home, Blog, Services, About, and Contact. We need to build all these pages to create a WordPress website using Divi Builder. We will add these pages to create the structure of a website and will use the prebuilt layouts to feed content into them.
Create Add New Page. Mention its title and click on publish to make it live.
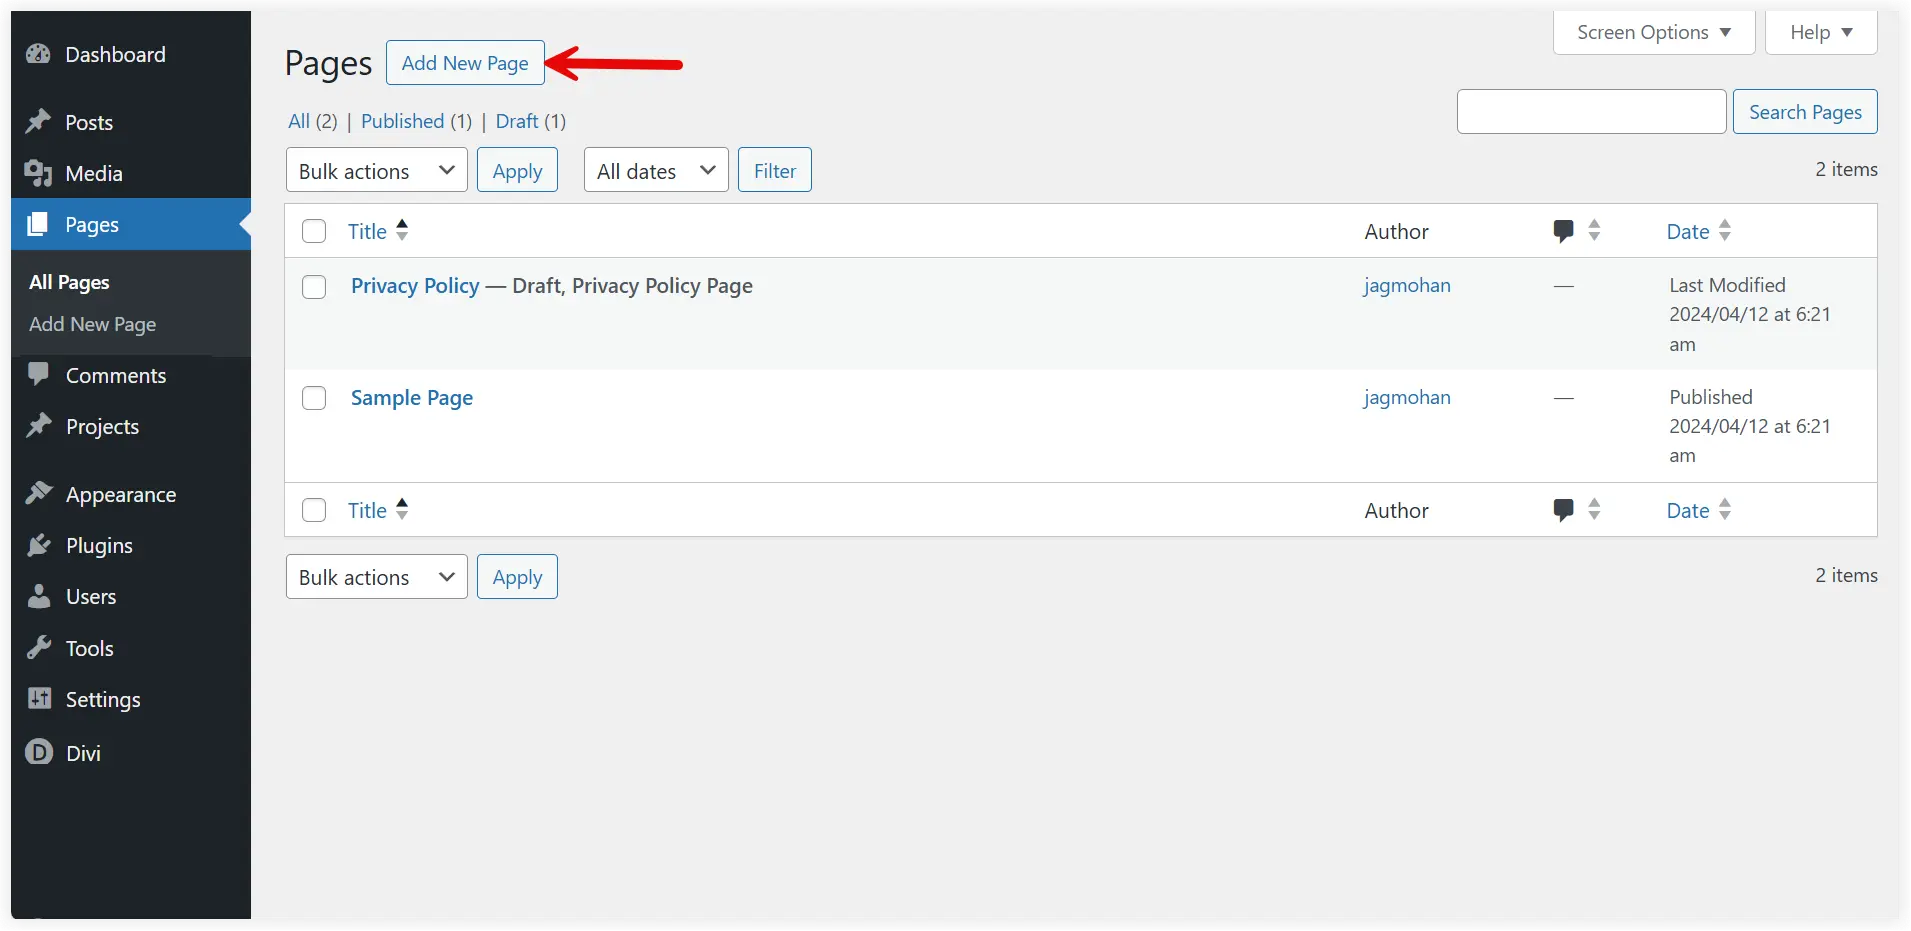
Similarly, you can add all the other pages for your WordPress website.
2. Use Pre-Built Divi Layouts
With Divi, you can quickly create a full-fledged professional layout. There are around 2600 individual page layouts that make it possible. Divi Offers layout packs for almost every industry and niche. Select the layout pack using Divi Builder and your website is ready within minutes.
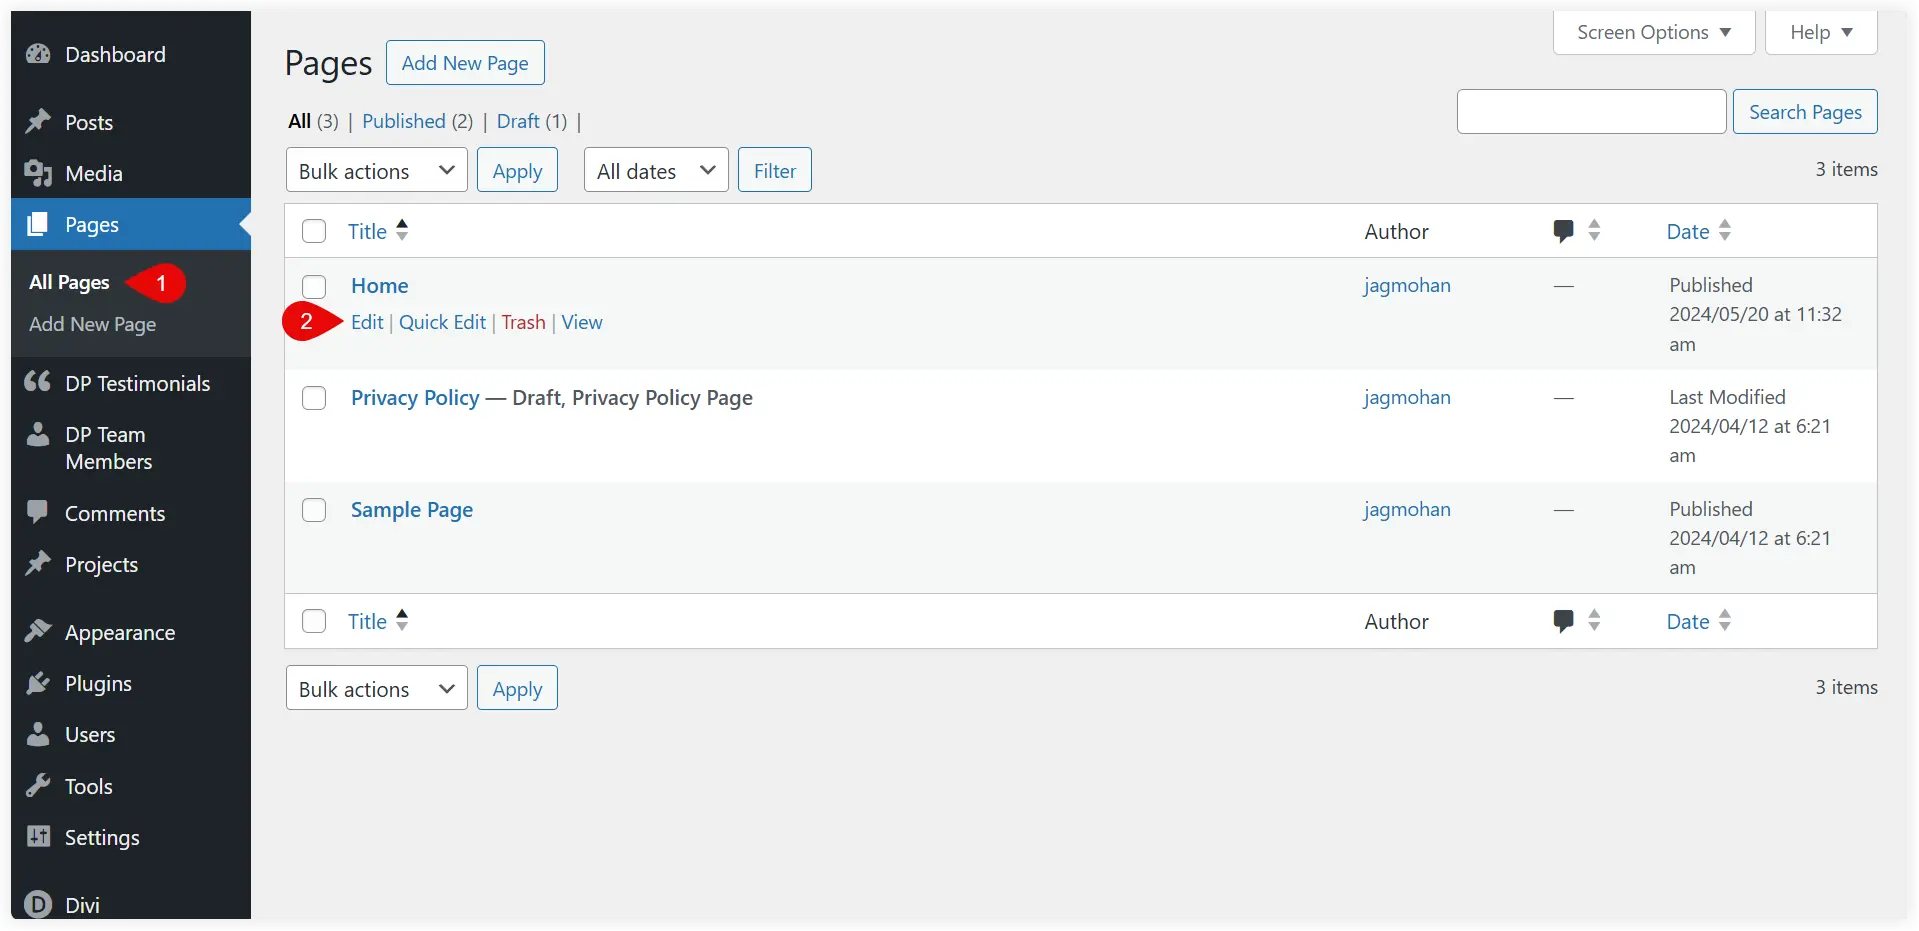
Click on All Pages and Edit the homepage.
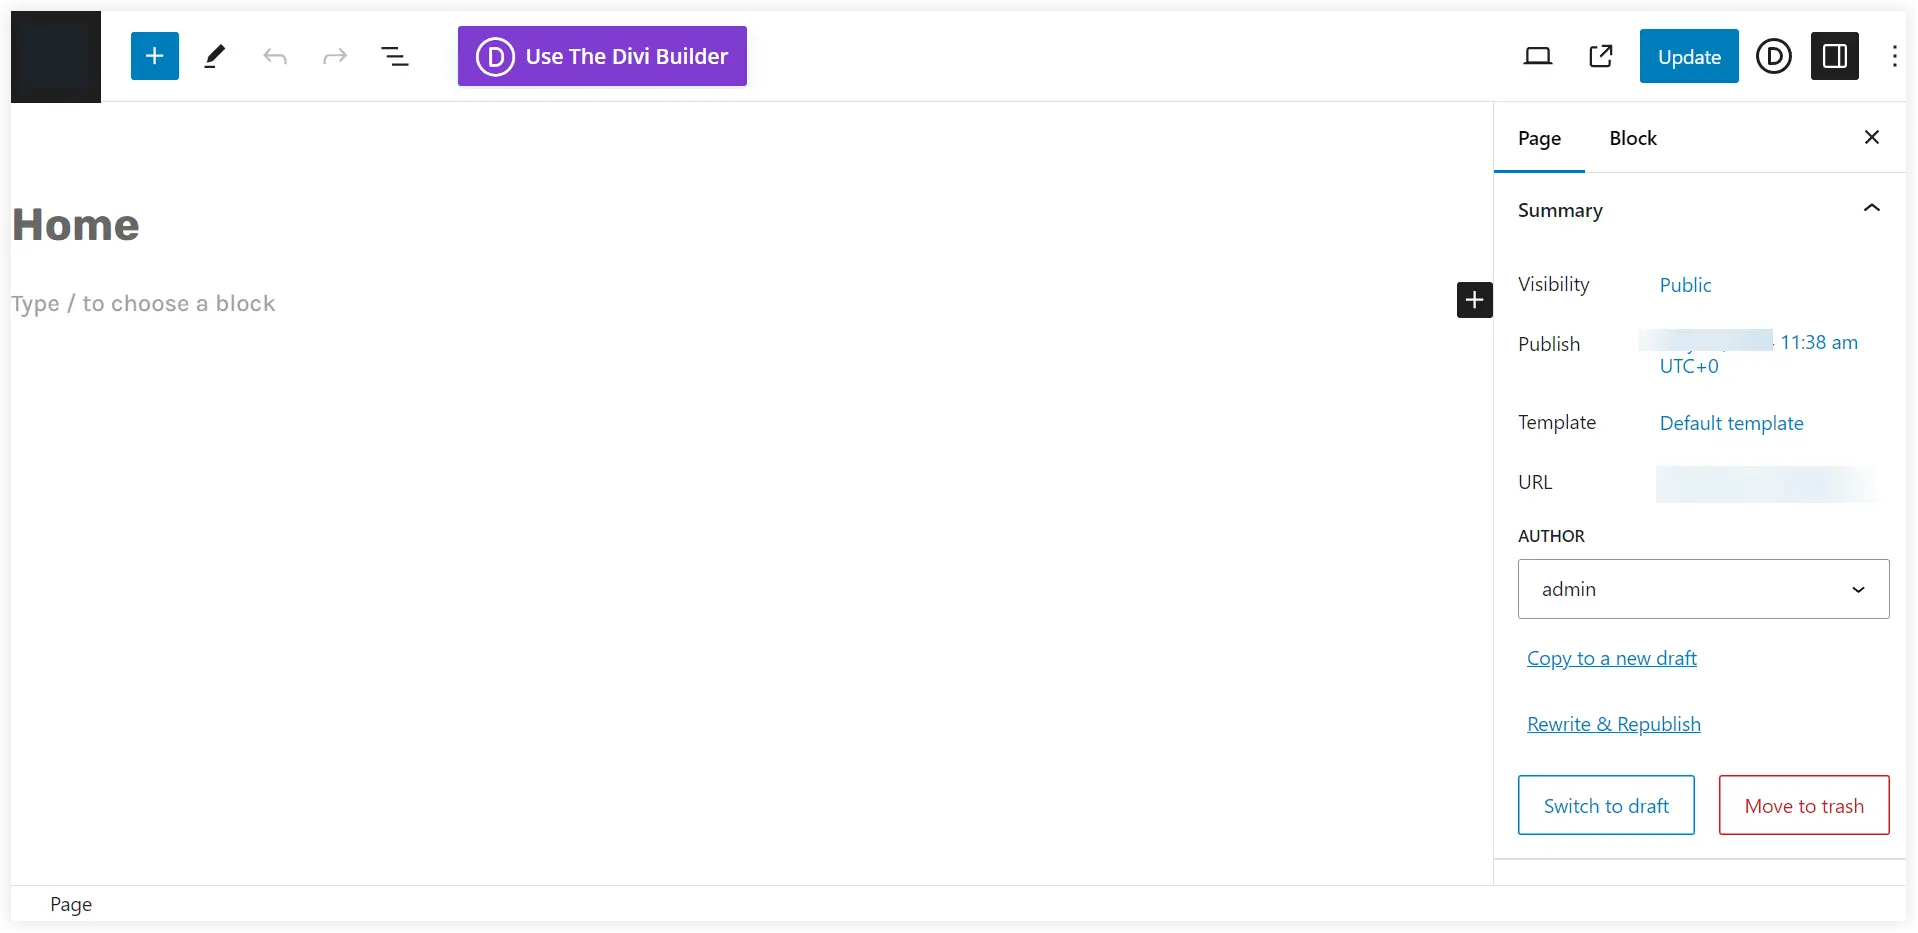
By default, it will be opened in the Block editor. Select Use Divi Builder to edit it.
Choose A Premade Layout option.
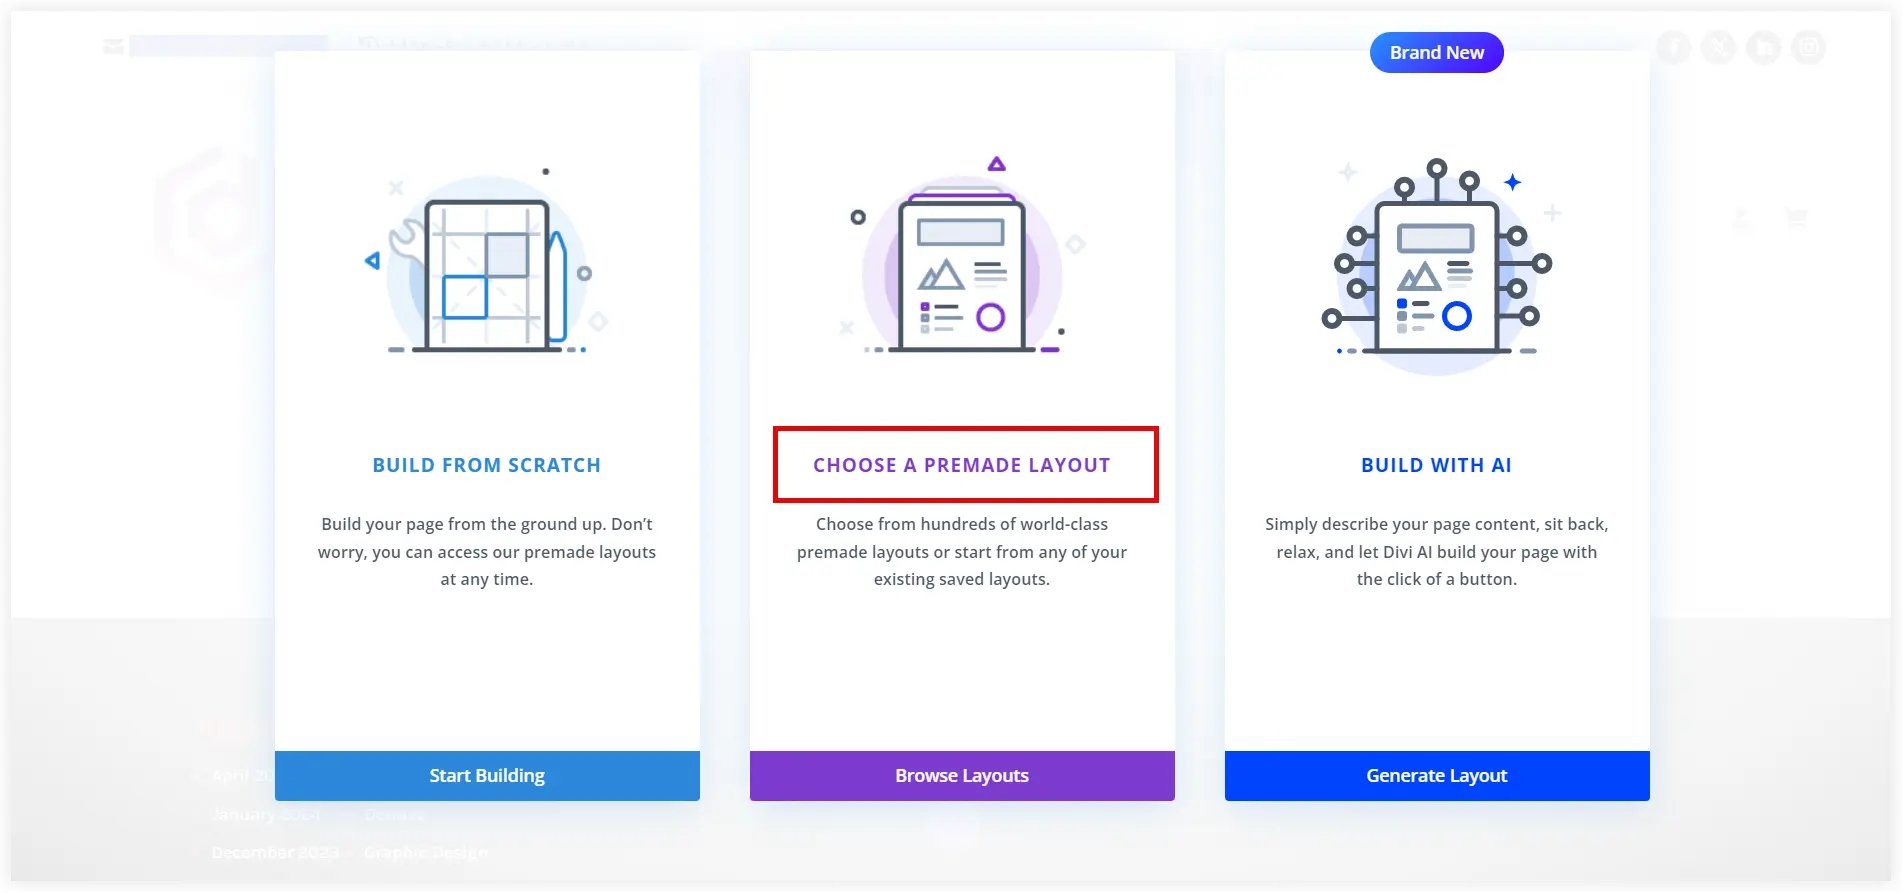
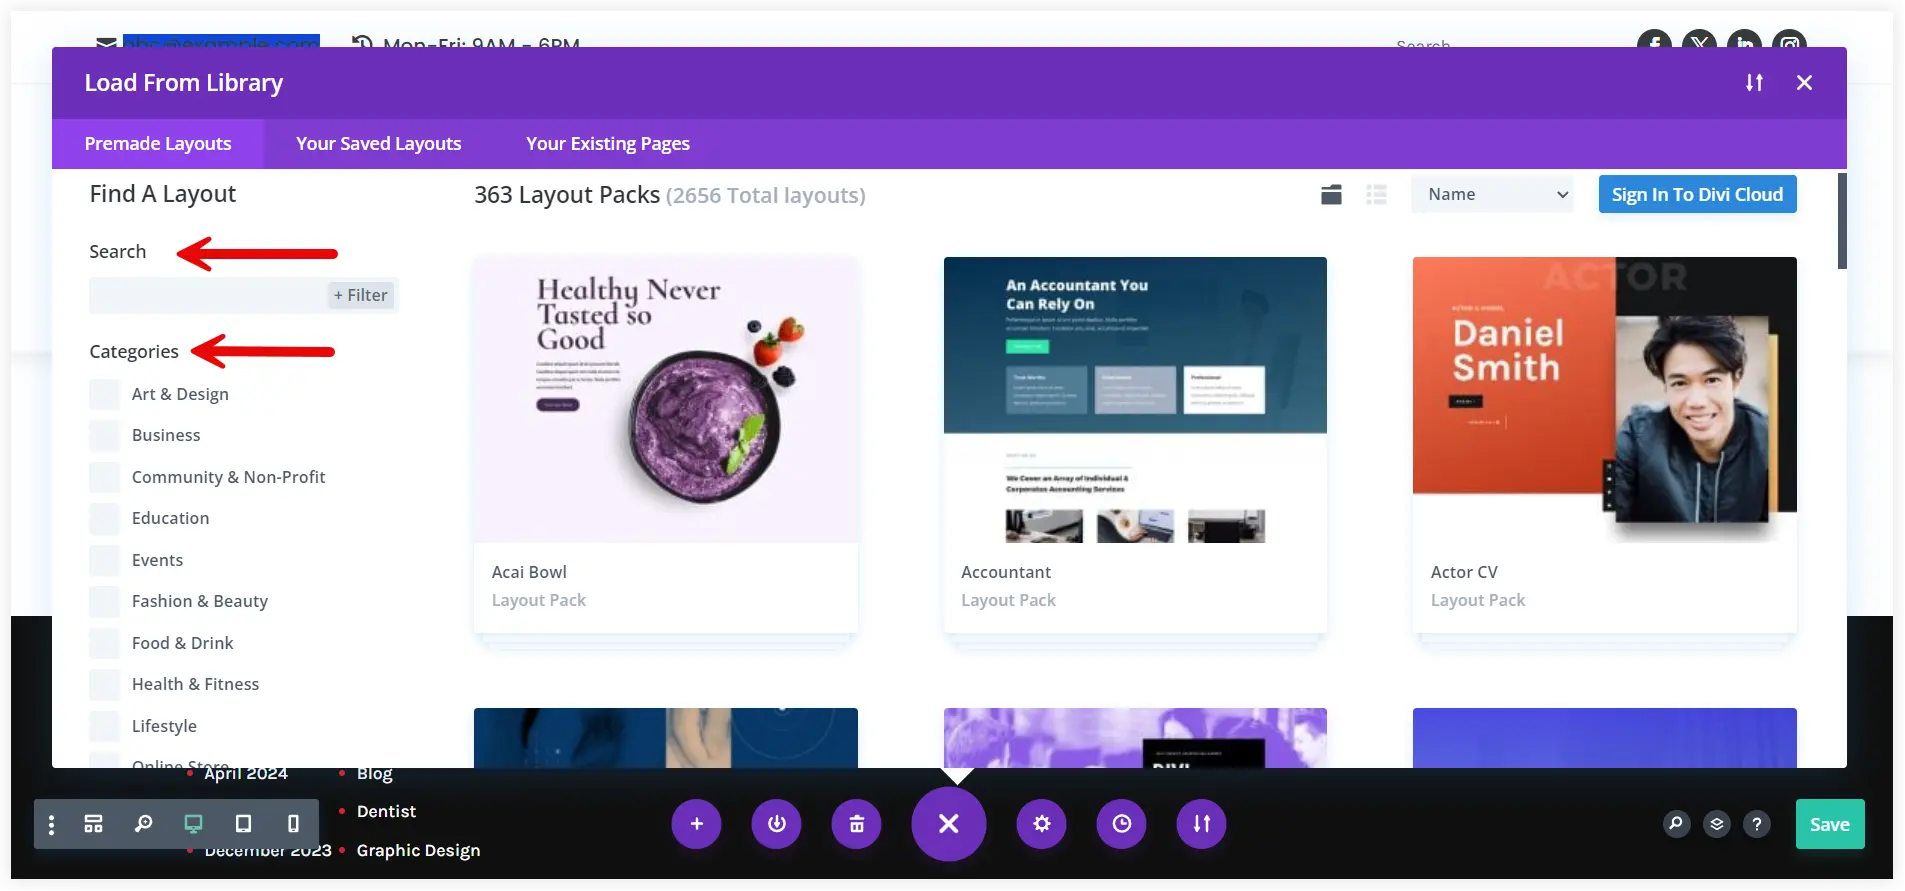
360 Layout Packs, comprising over 2600 individual layouts for different industries and niches, are available here. Search for the industry or niche you want and select it.
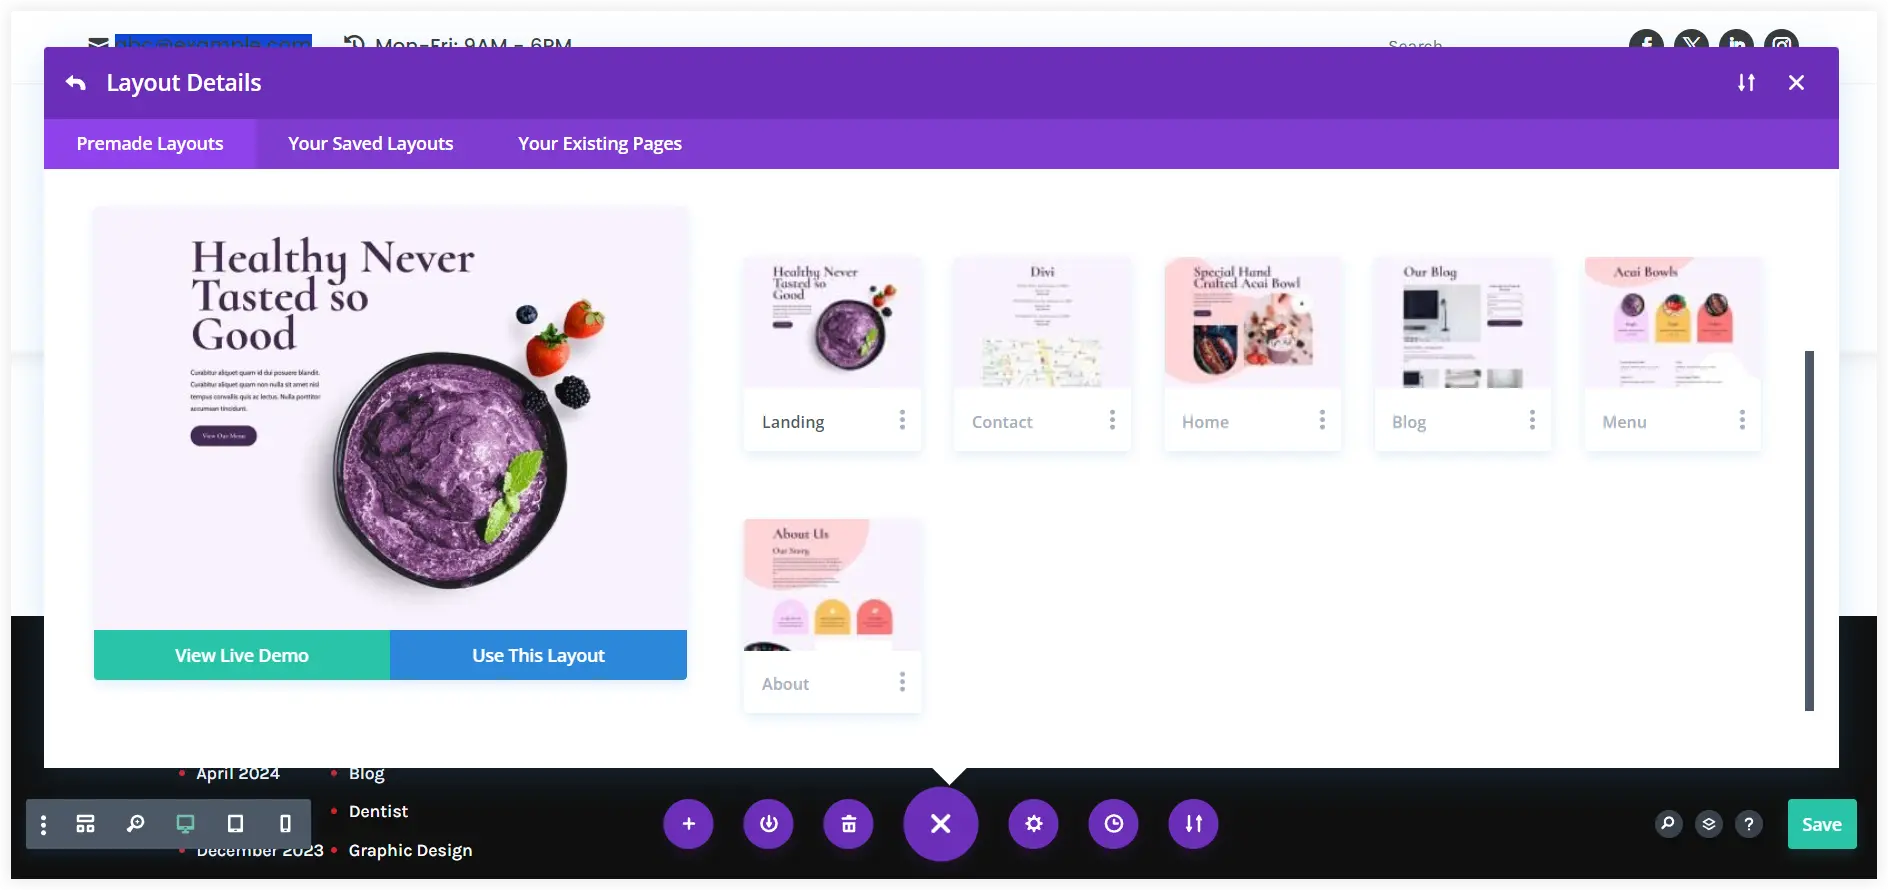
After selecting your layout pack, you can explore all its page layouts and experience it using View Live Demo. After having a real-time look at the layout pack, you can select this pack for your website with the Use This Layout Option.
Customize Website Layout Using Divi
After installing the layout pack you can start customizing it with Divi to suit your needs. The visual Divi builder can bring your dream website to reality, be it design, styling, or generating content with Divi AI.
1. Create New Sections
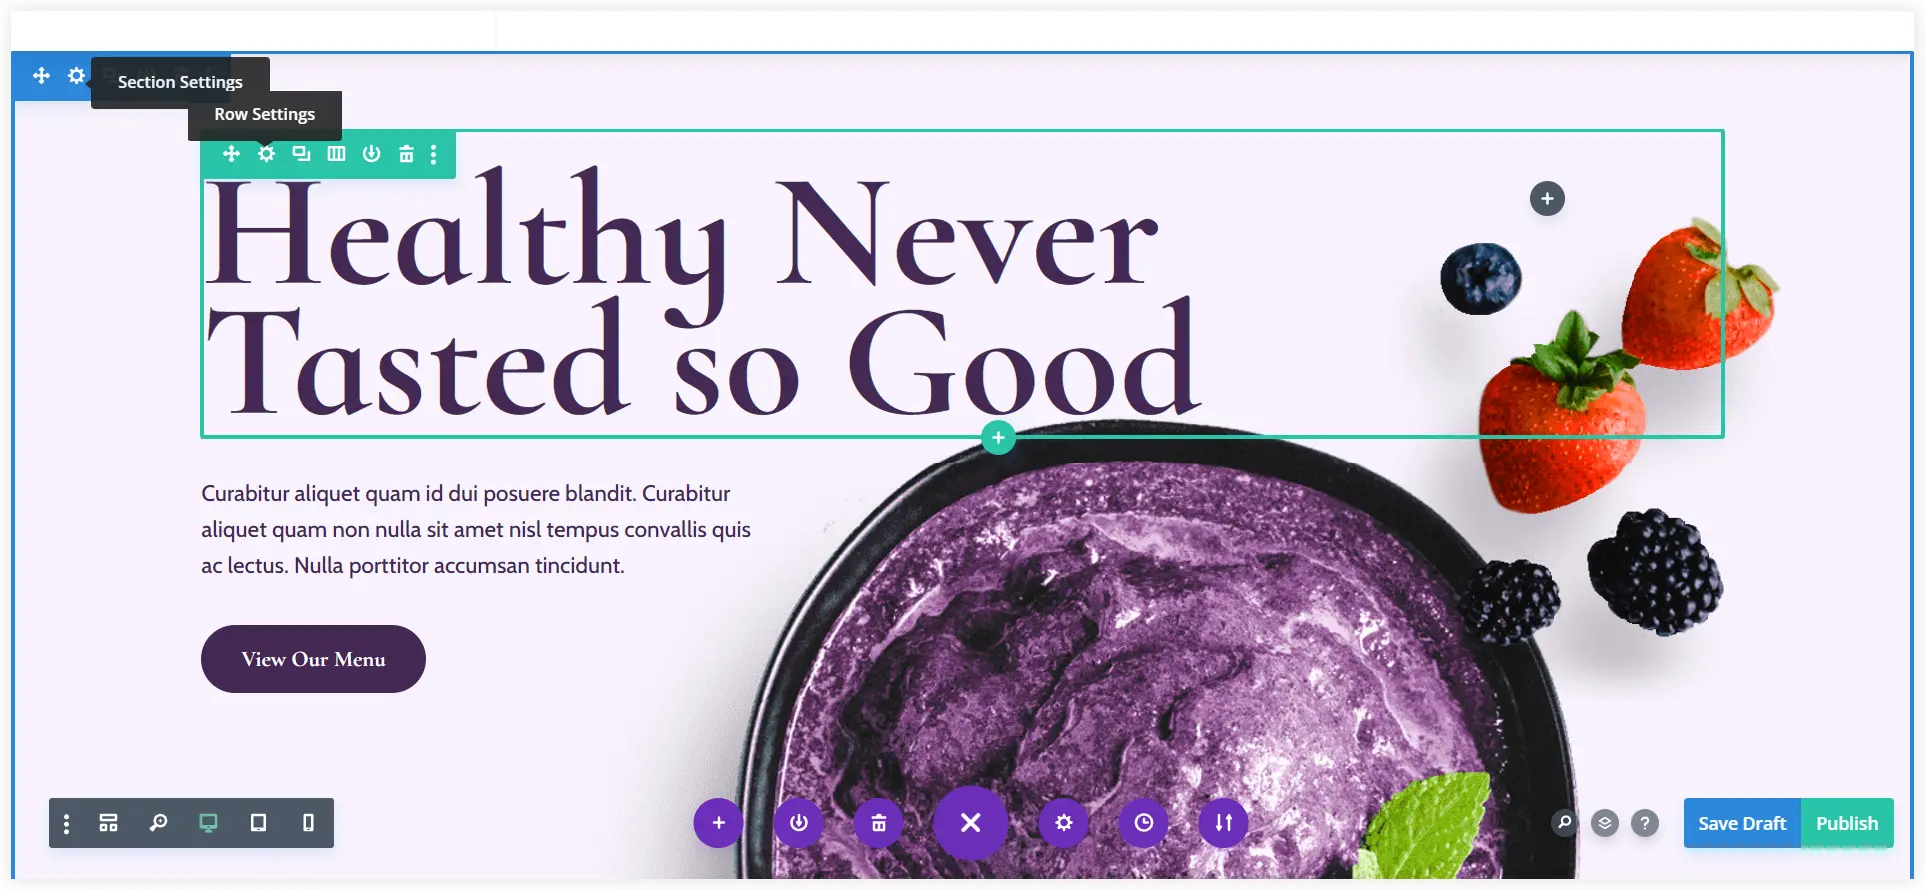
Divi Builder can be used to add additional rows or sections to the existing page layouts. Existing rows and sections can also be customized using the Row Settings and Section Settings.
2. Add New Divi Modules
Divi Builder allows you to easily add new modules to the existing layout. Click on the ‘+’ icon to add a module. Choose a Divi module from the over 40 available options, then set its display and functioning on your website.
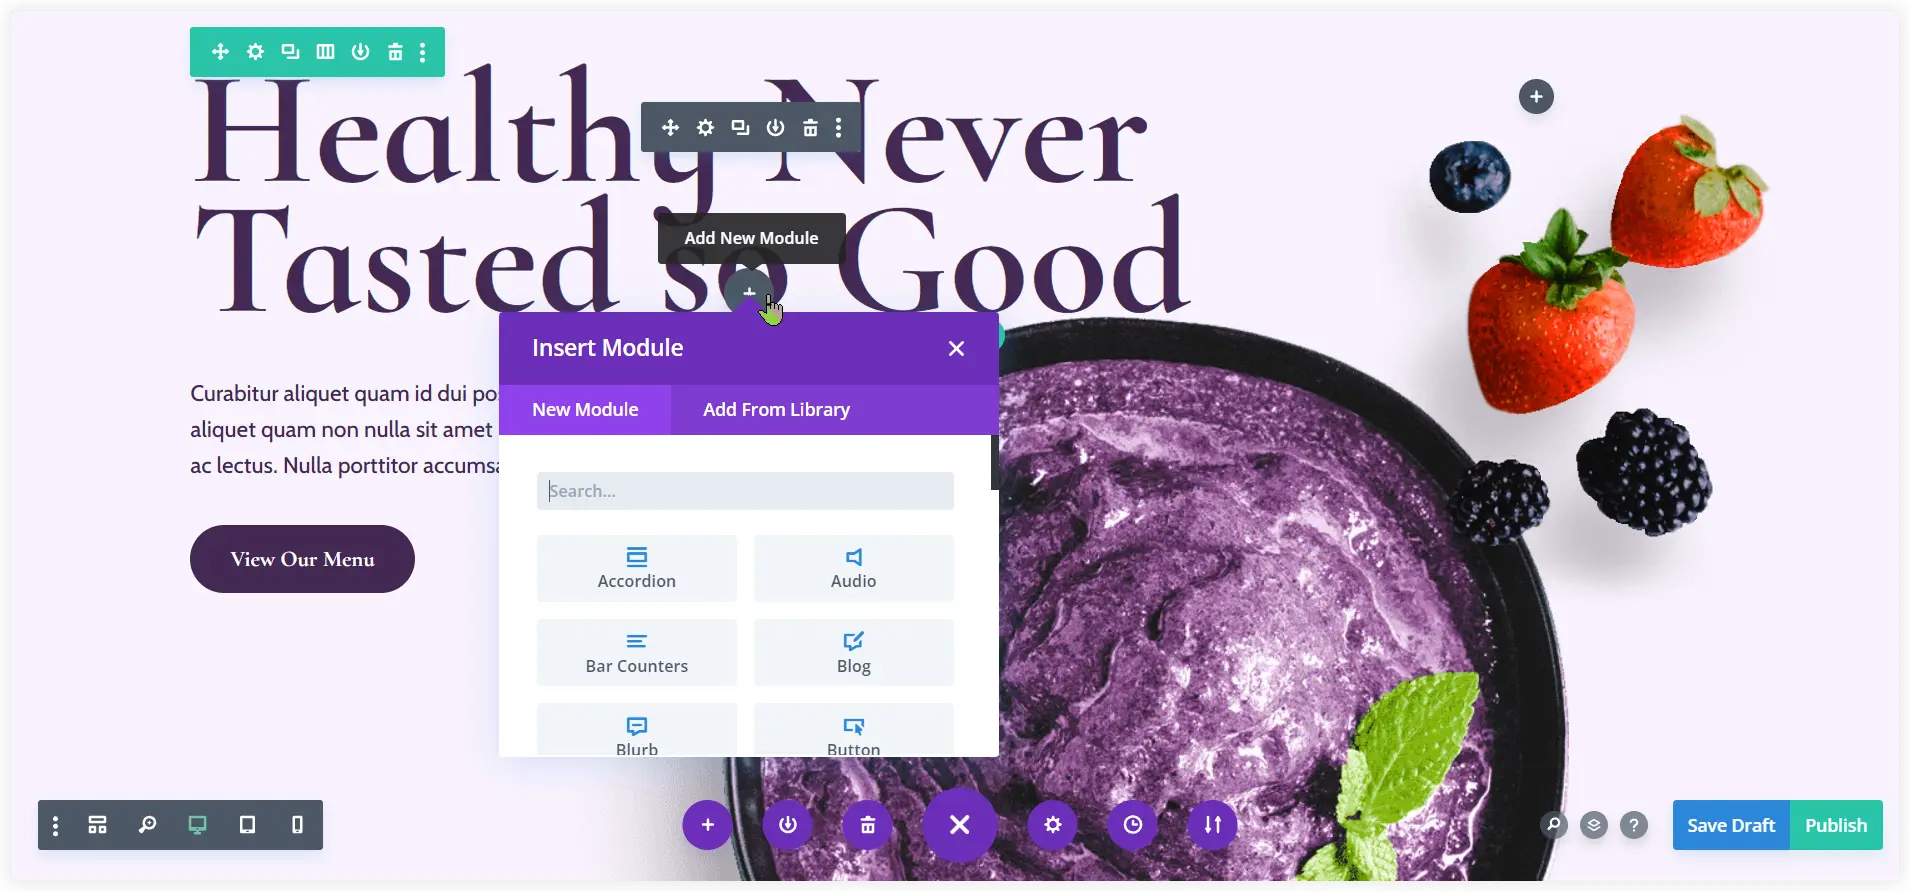
3. Configure and Style Divi Modules
You can configure the newly added or the existing modules of the layouts using Divi Builder.
To modify an existing module in layout, click on the Settings icon and customize it the way you like.
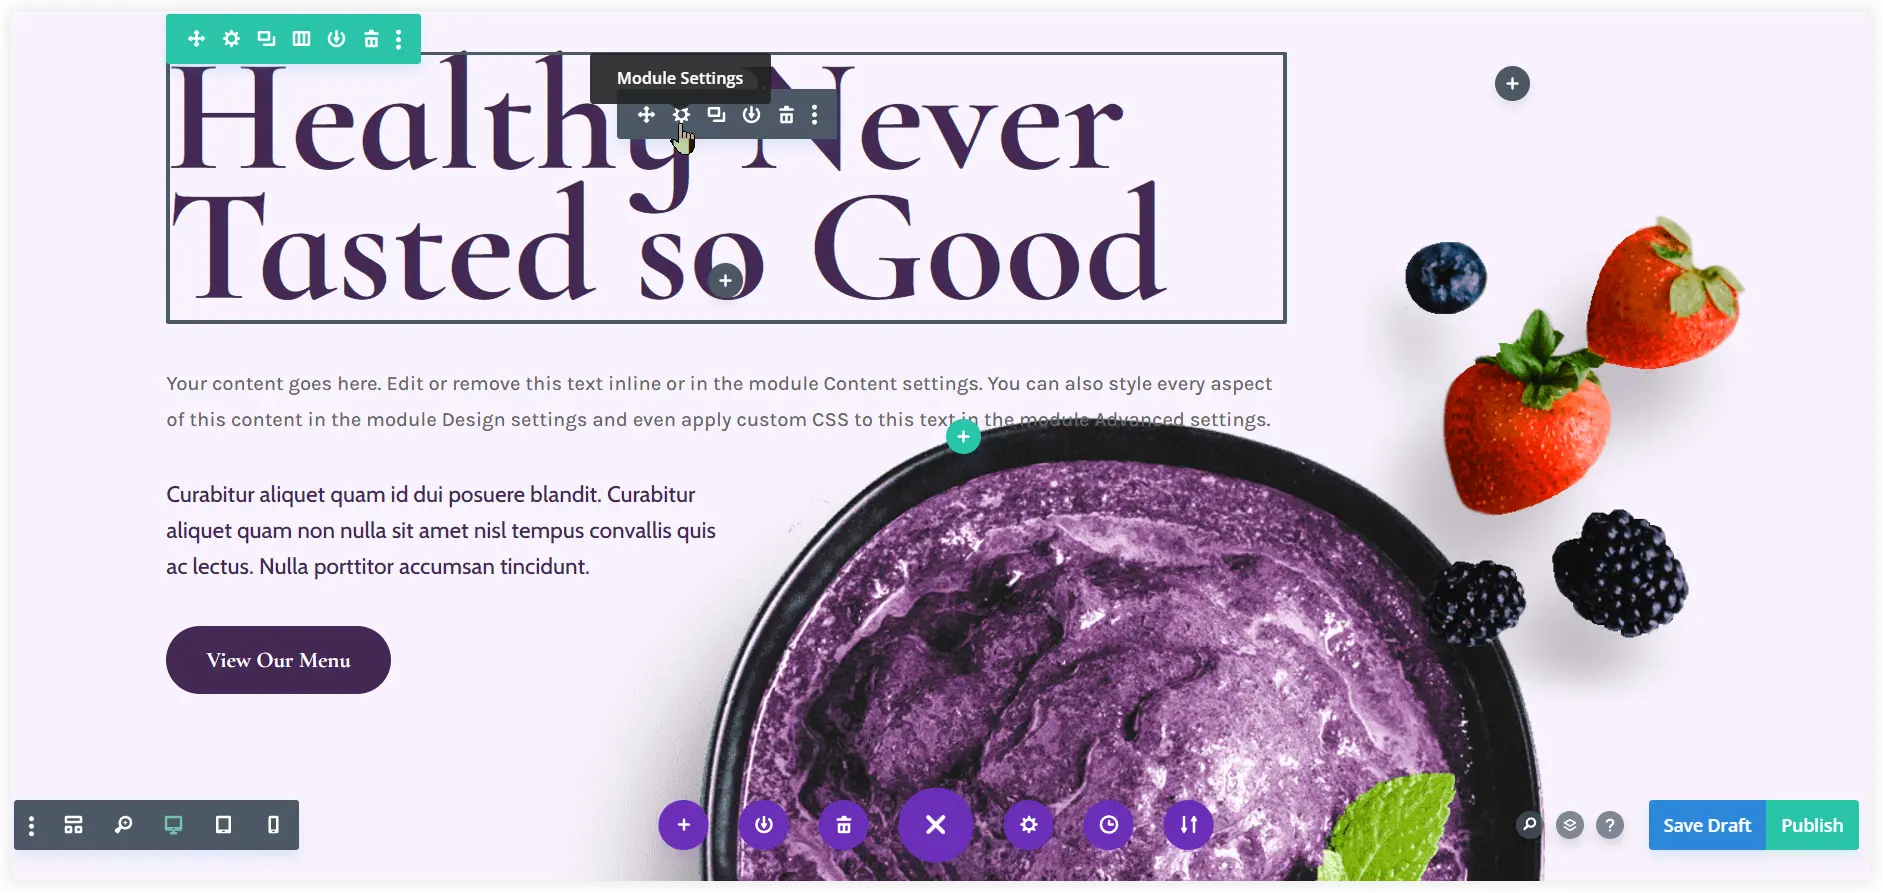
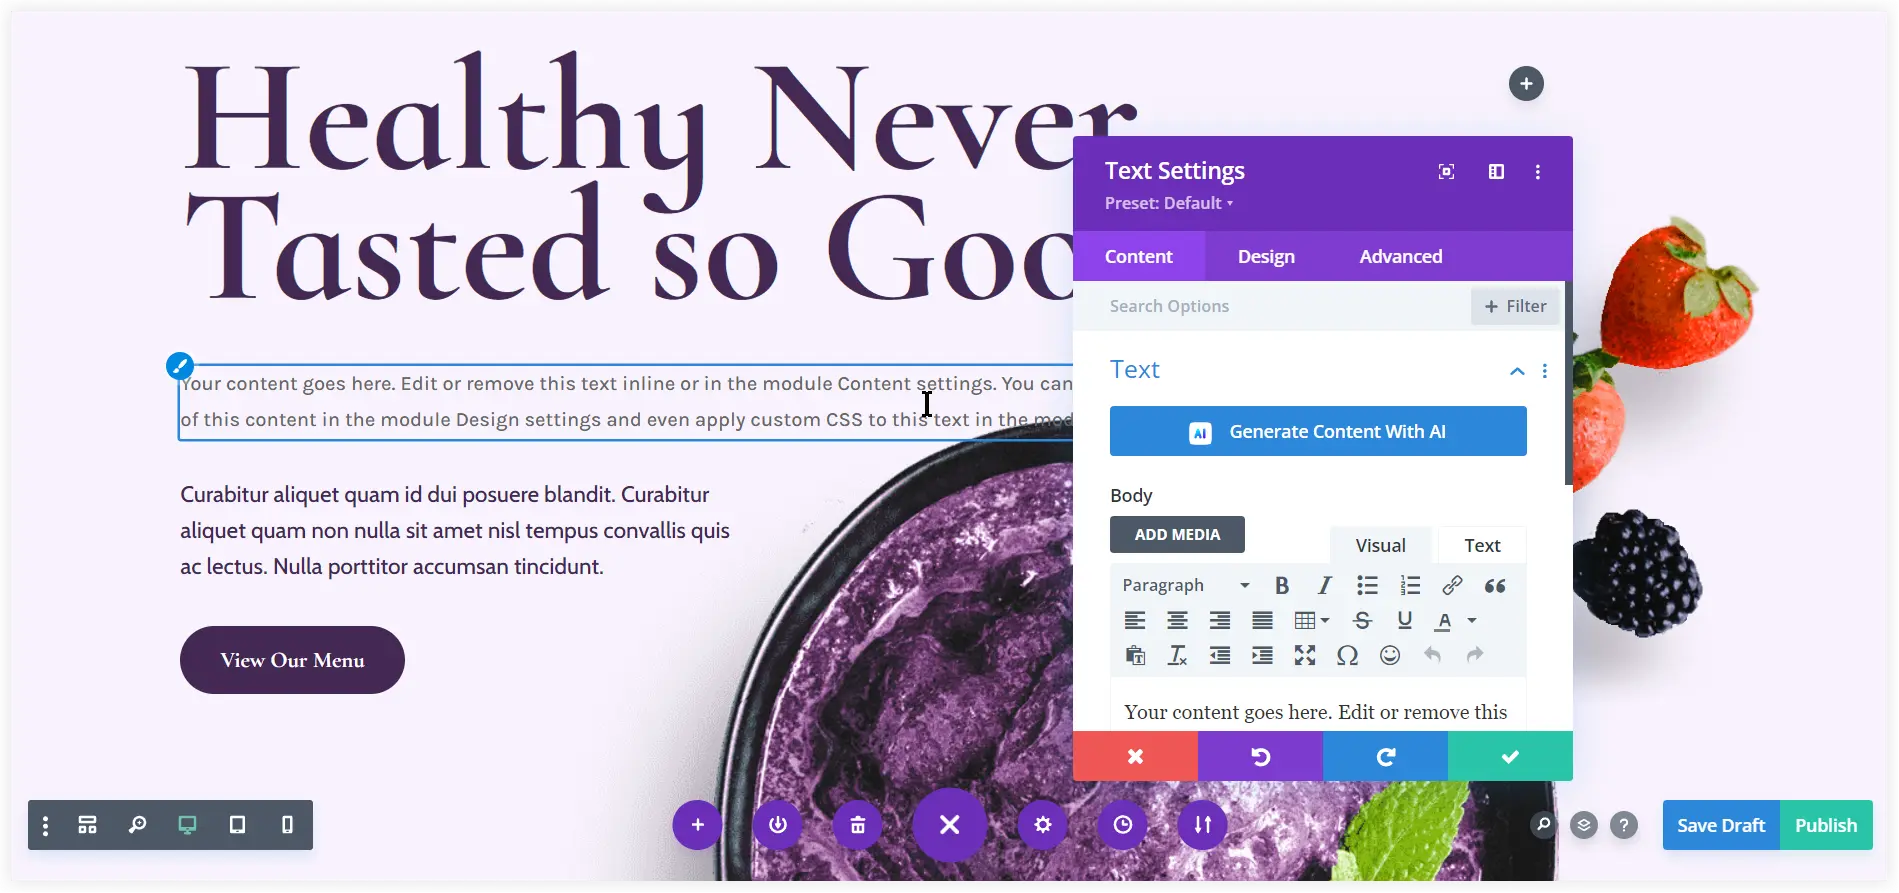
Like in a Text Module, there are options to insert the content and tune up its styling with the website.
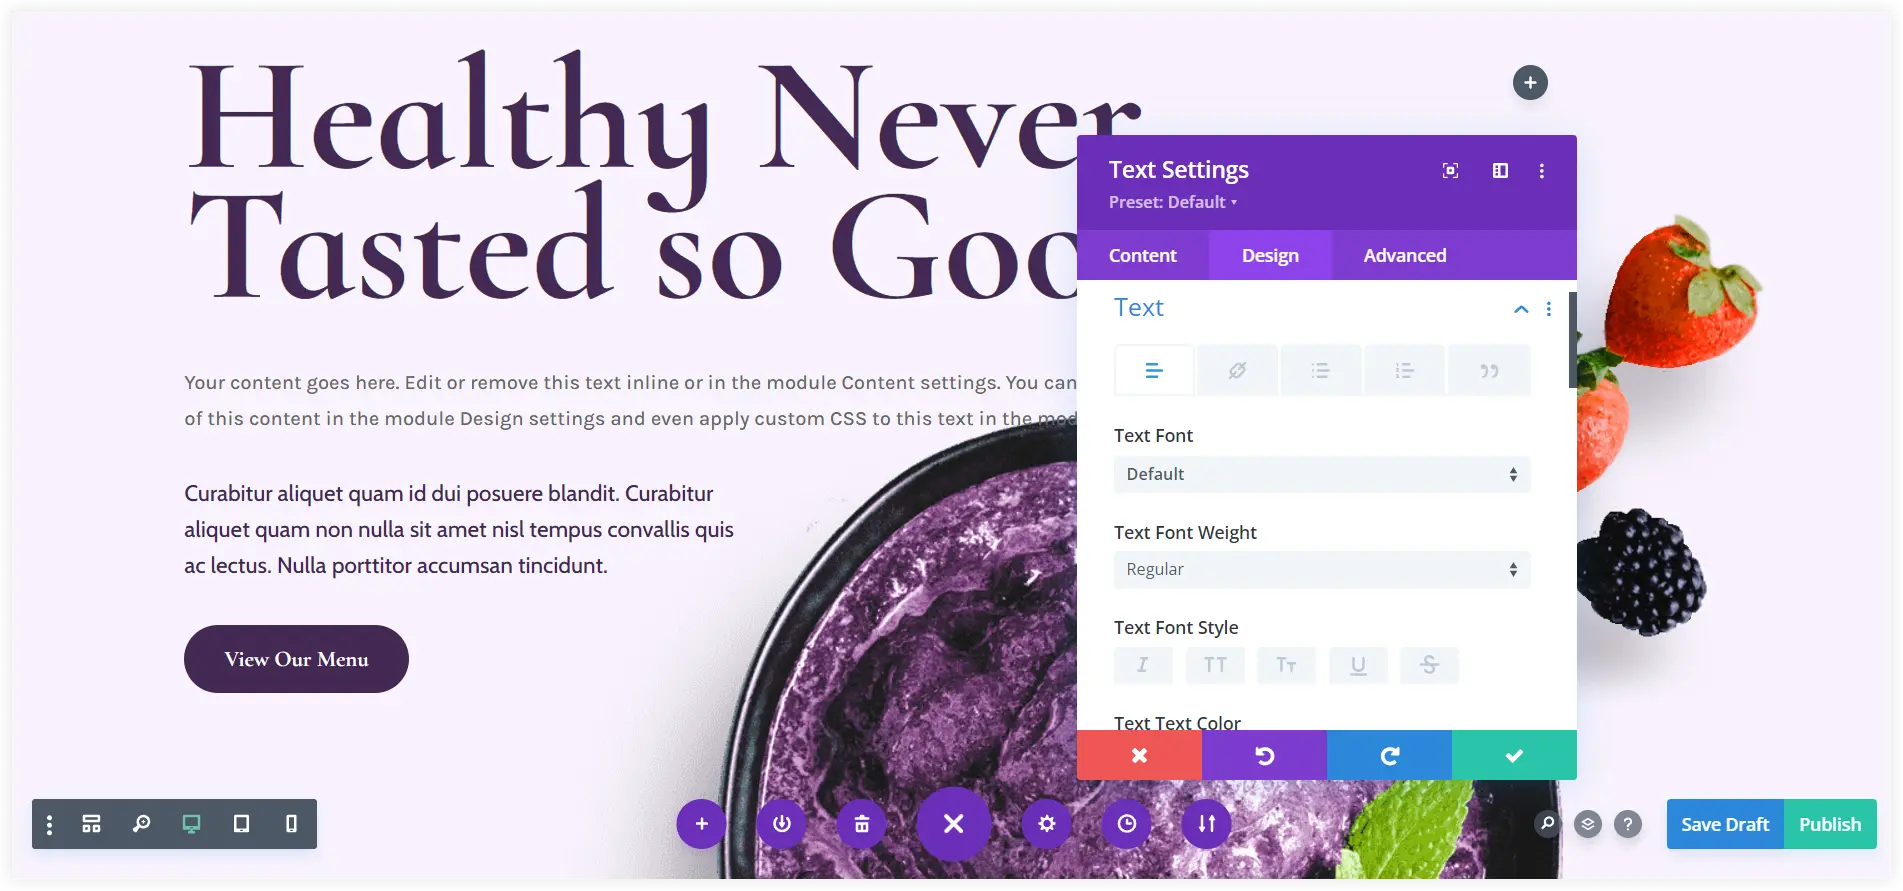
The Design tab of every module offers numerous options to style the module uniquely. Typography, Sizing, Spacing, Borders, Shadows, and many more things can be tuned for an appealing appearance.
4. Generate Content with Divi AI
If you have purchased Divi Pro, you can take innovation to the next level on your website by creating content using Divi AI.
Navigate to the module settings and use Generate Content with AI.
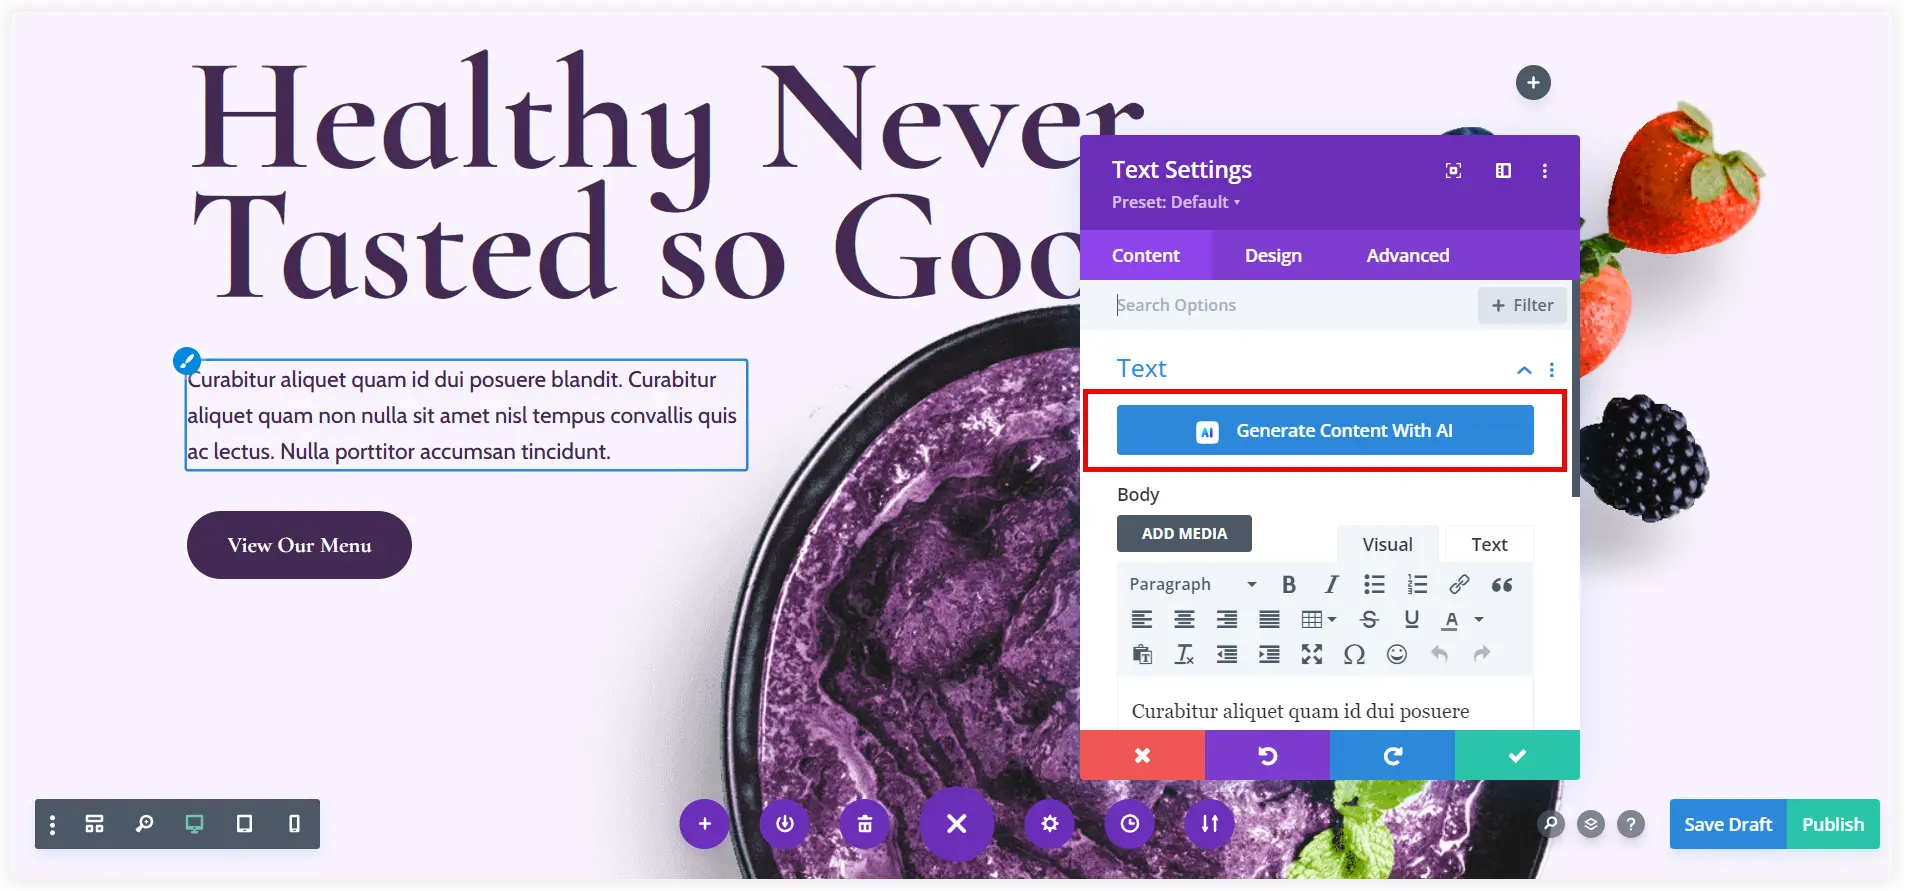
See how Divi AI performed to provide you with the best innovative results.
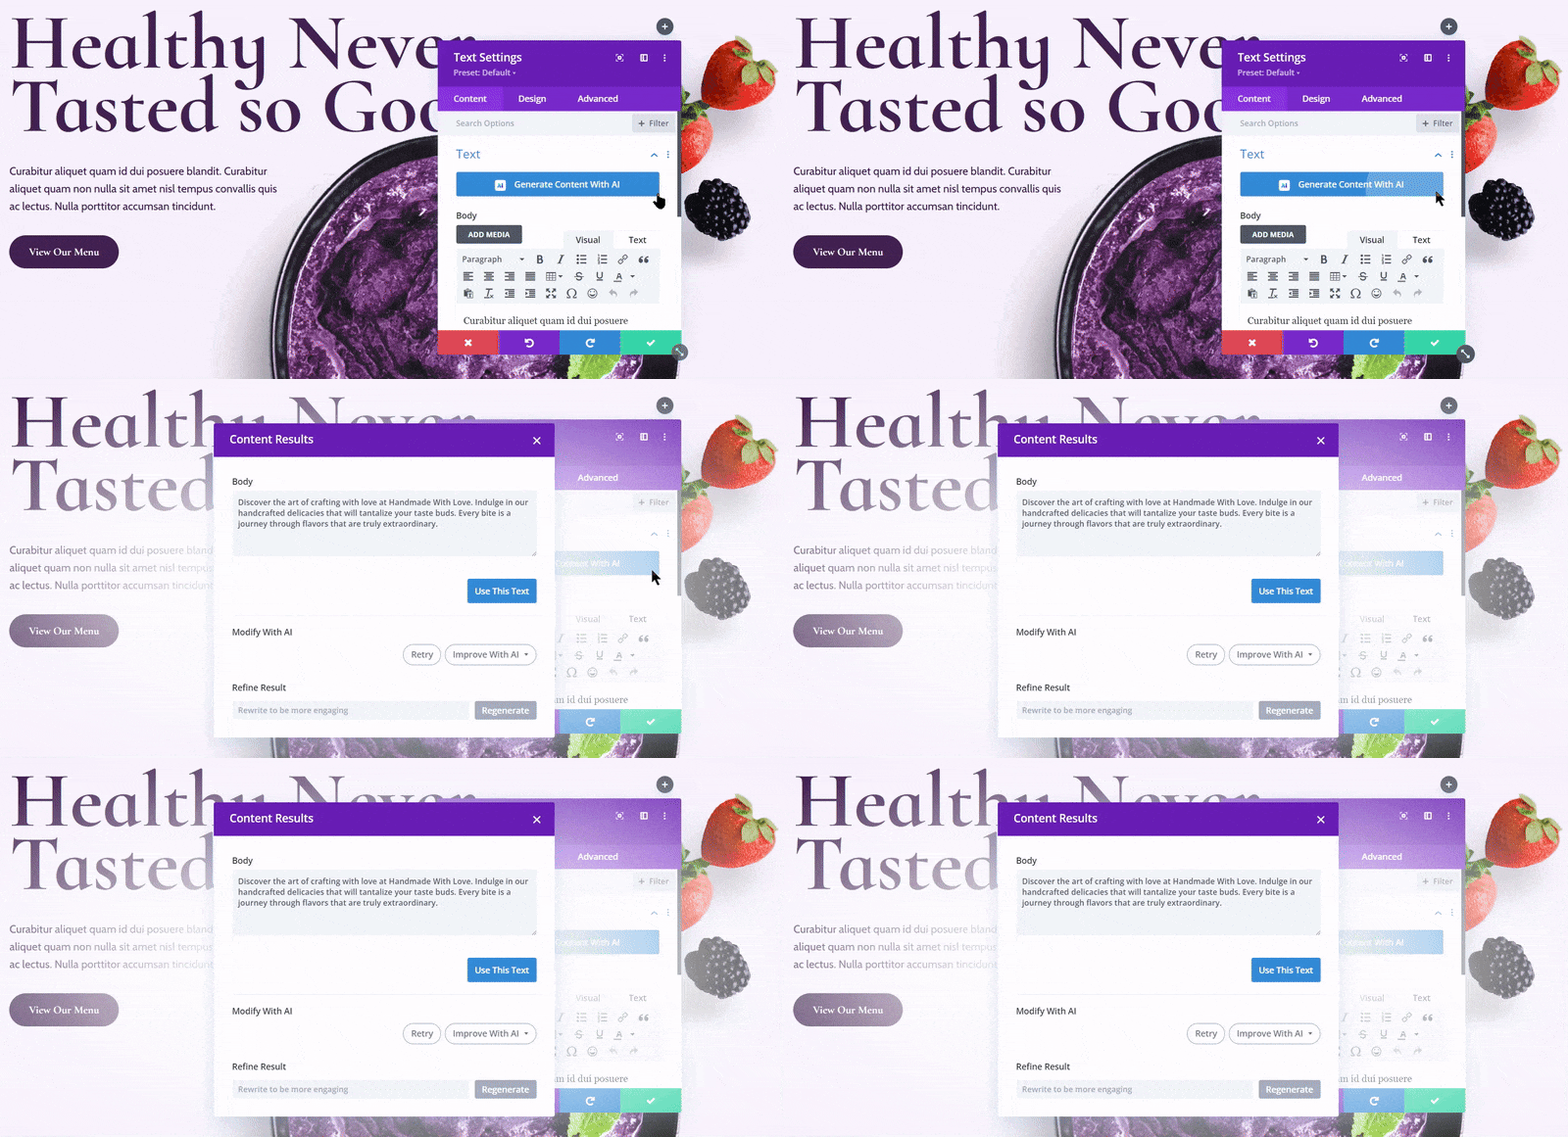
You can use the generated text and carry on creating content with the same approach for the entire page layout. You can refer to our post to learn more about creating layouts with Divi AI.
In the same way, you can create or edit images using Divi AI. It delivers outstanding results to make your website stand out in the competition.
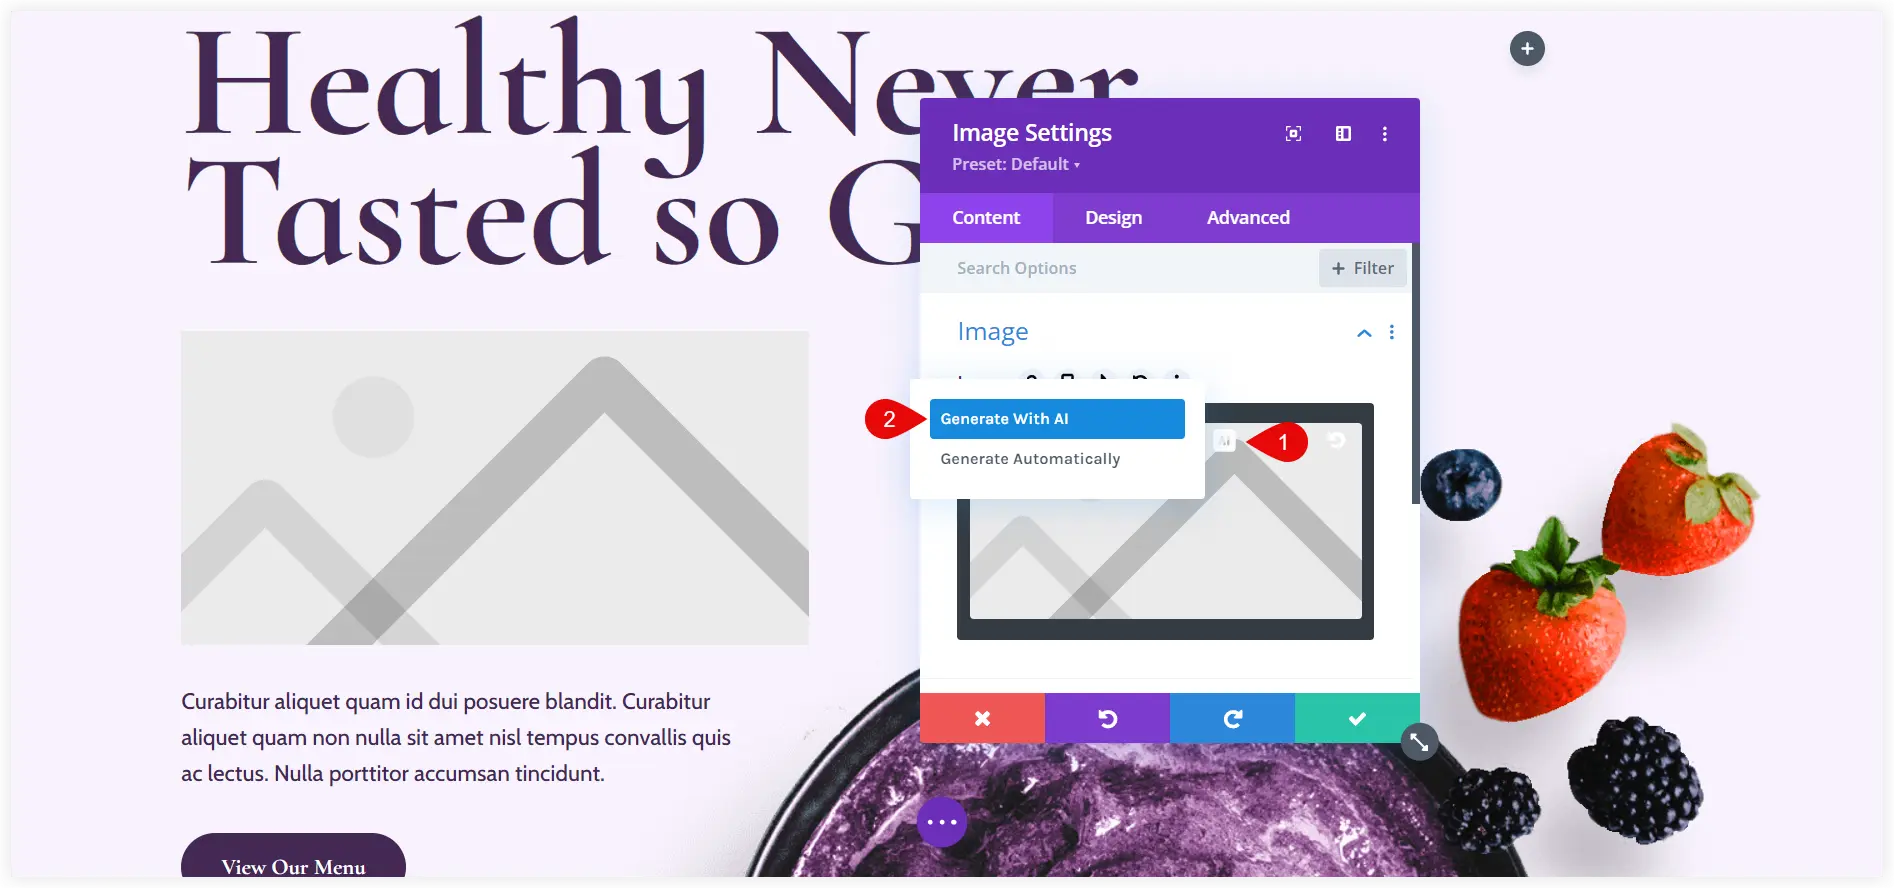
Click the AI icon of the Image Module and select Generate with AI.
Enter the description of the image you want and click on Generate. Be patient while Divi AI creates photos in accordance with the description, which may take some seconds.
See the outstanding results. You can use any image from the results or can generate more if you don’t like them.
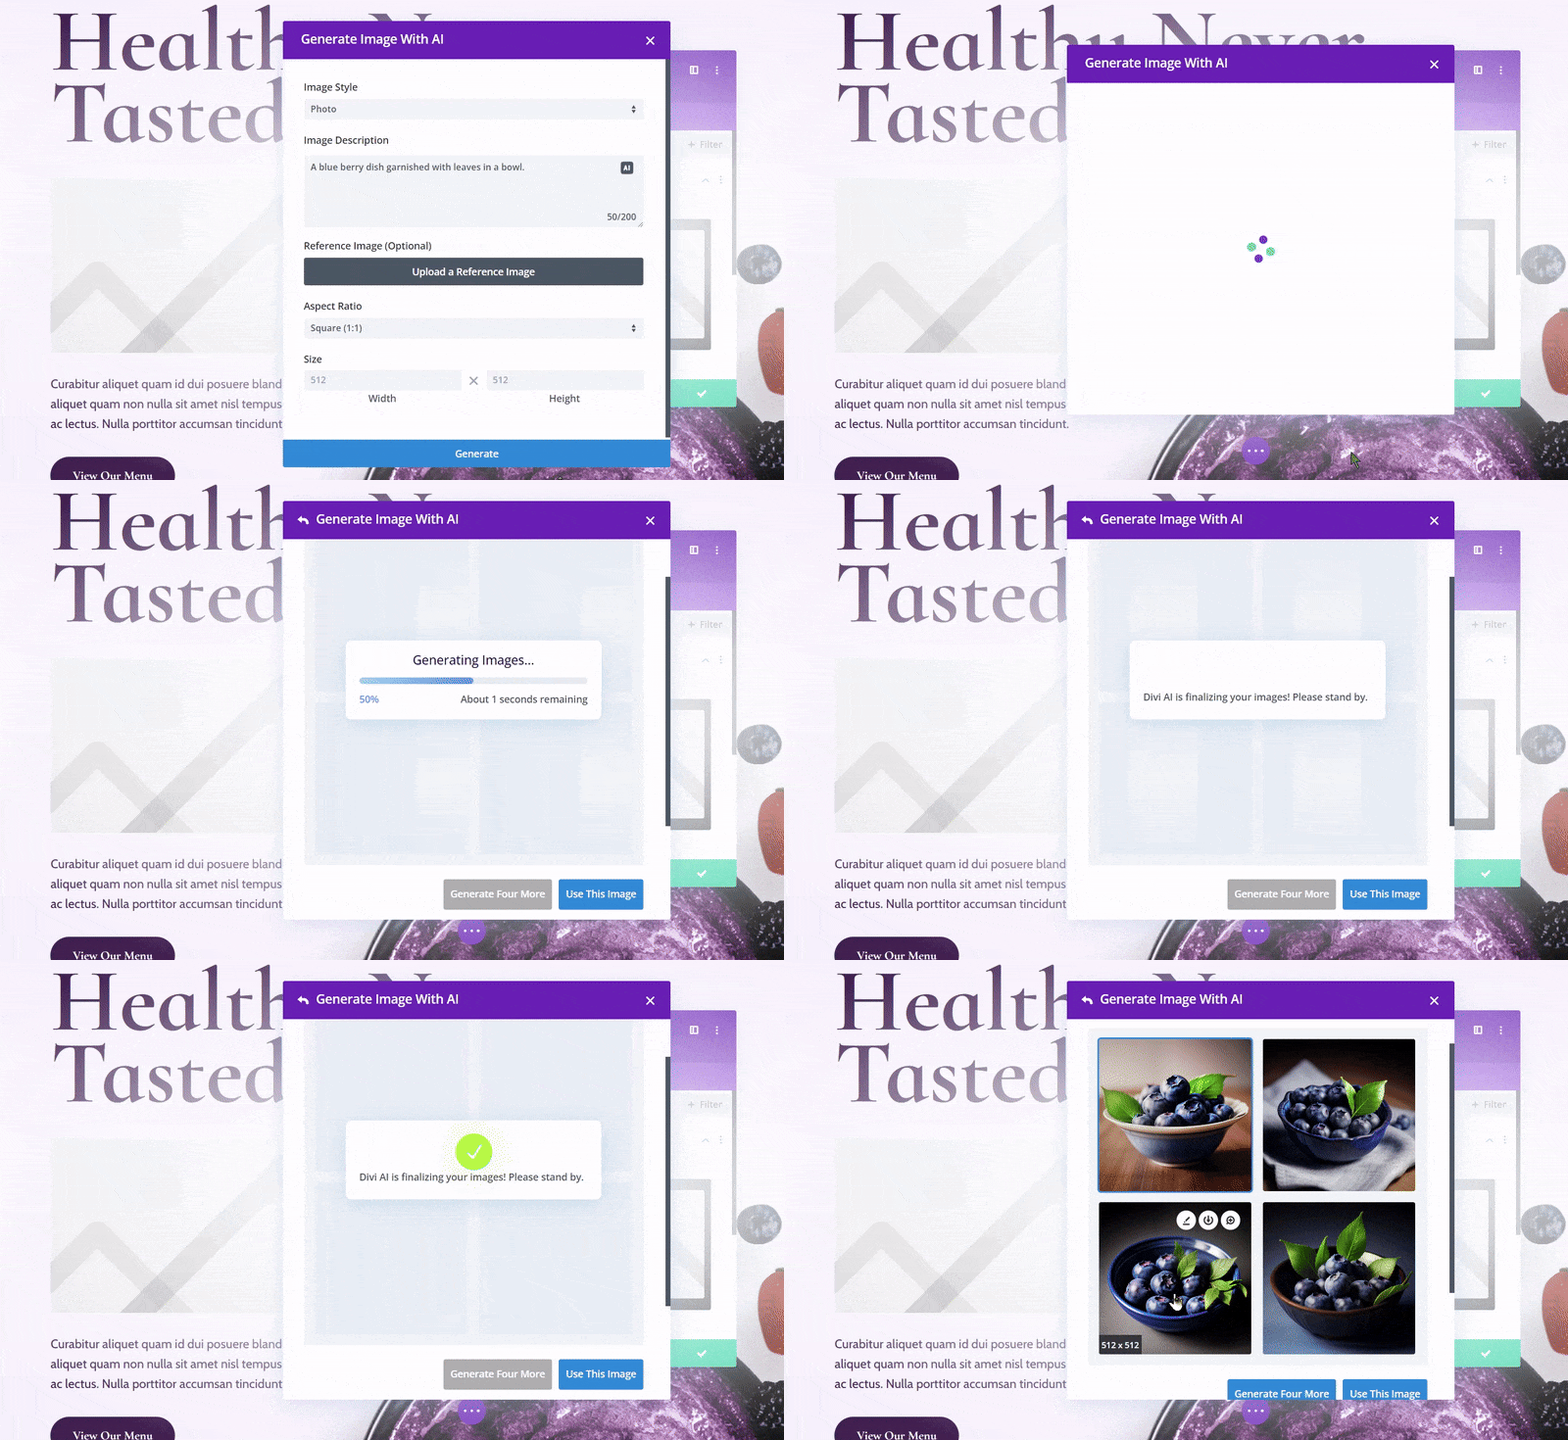
Moreover, if you want to learn image editing with Divi AI in detail you can refer to our post. you can also create many kind of business websites such as web design, portfolio etc. with the same approach.
5. Upgrade Your Website with Divi Marketplace Products
After creating the content for all the pages of your WordPress website, it is time to decide which plugins shall be installed to improve usability. It depends on the type of website you created.
- E-commerce websites – If your website is an online store, WooCommerce is the best choice. Some additional plugins such as Divi WooCommerce Extended can also be considered to extend the functionality of your online store.
- Restaurant website – For restaurant and food websites, Divi Restro Menu is the perfect solution to display beautiful food menus.
- Blog websites – The Divi Blog Extras plugin outstandingly showcases your posts on your Divi blog with 10 beautiful blog layouts.
- All websites – Divi Plus plugin offers 60+ modules and 4 extensions to make it more practical. Apart from that it also provides prebuilt websites, starter templates, and section blocks to transform the design of your website.
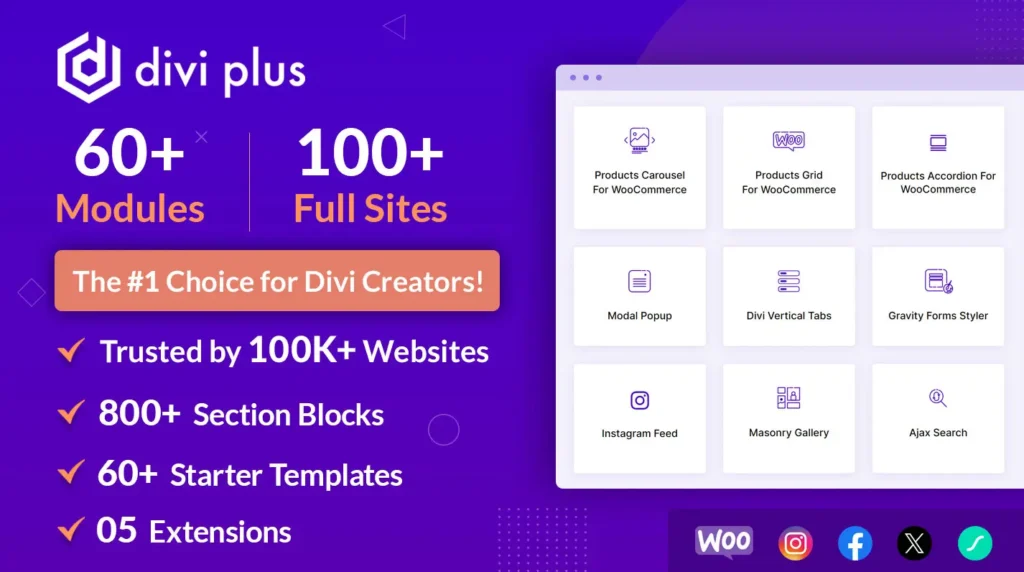
Thousands of additional plugins are available that enhance your website’s usability and are built to achieve particular goals.
After setting up your website, there are a few more essential plugins that you should install in addition to these. Your website’s seamless operation is ensured by these plugins. Let’s review them.
- Optimization – Optimize the speed of your website and make it fast using WPRocket. WP-Optimize ensures a smooth operating database for your website.
- SEO – A good SEO plugin like Yoast or Rank Math can rank your website at the top of the search results.
- Caching – W3 Total Cache takes care of all the cache hassles to fast delivery of fuels on your site to reduce bounce rate and increase conversions.
- Security – Plugin like Wordfence provides complete peace of mind with its advanced firewall, malware scan, and login security features.
- Backup – This is another major aspect that can’t be ignored to maintain the consistent working of your website in the worst website crash scenarios. Updraft Plus offers you extensive backup services in such data-disaster situations.
All the things explained in this post collectively work to create a beautiful WordPress website using Divi. Be it the design, content, styling, plugins, and pre-built layouts, every step of this tutorial is essential and plays a vital role in crafting a professional website.
Finally, I want to say that Divi makes it simple and effective to create a WordPress website. Divi’s user-friendly builder, powerful customization options, and large variety of themes enable you to create a professional and eye-catching website that meets all your requirements. Divi offers the flexibility and resources to realize your idea, regardless of your level of experience as a developer. Begin your journey into web design with Divi and turn your concepts into a stunning and fully working website.



0 Comments