In this blog post, we’ll walk you through on how to add custom icons into the post meta of the Divi Blog module and post layout. By default, there are no such things with the Divi Blog module and post layout. But using the Custom CSS provided in this post, we will add icons to the author’s name, date, and comments.
Now, let’s do the job.
Adding custom icons to the Divi blog post meta.

- Create a new post or edit an existing one.
- Deploy Divi Builder.
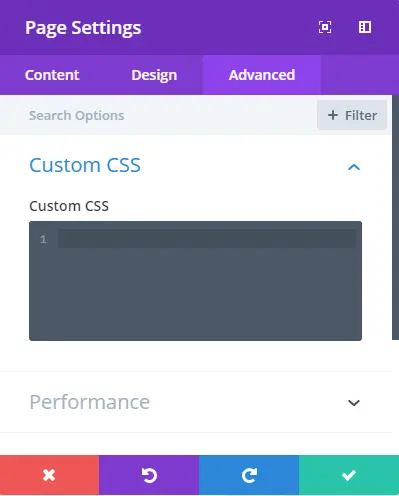
- Once Divi Builder has launched, go to its Page Settings.
- Then, go to the advanced tab, and in the Custom CSS settings, add the following custom CSS.
.author.vcard:before {
    padding-right: 5px;
    font-family: ETModules;
    content: '\e08a';
}
.published:before {
    padding-right: 5px;
    font-family: ETModules;
    content: '\e023';
}
.comments-number:before {
    padding-right: 5px;
    font-family: ETModules;
    content: '\77';
}

5. Update, and preview changes.
Adding custom icons to the Divi Blog module for post meta

- Edit your blog page. Or create a new page if you haven’t created a blog page yet.
- Launch Divi Builder. (Skip this step and jump to step 6 if you have already created a blog page using the Divi blog module.)
- Build From Scratch.
- Choose, Build on the Front End.
- Once the page builder canvas has launched, add a new row. And then, add the Divi Blog module.
- Upon adding the module, go to Page Settings.
- Then, go to the advanced tab, and in the Custom CSS settings, add the above custom CSS.
- Save.
- You’ve successfully added the custom icons into the post meta of the Divi Blog module.
Summary
Above, we’ve shown you how you can easily add custom icons to your post meta for the Divi Blog module as well as post layout. If you want more customization for your blog module as well as post layouts, then get our premium products,


0 Comments