
It’s a must that a contact form should have Google reCAPTCHA or any other security options enabled on it. Well, reCAPTCHA is most recommended. It protects your contact forms from getting filled out by bots or spam. And if you want to know how to add CAPTCHA to WordPress contact form 7, then in this blog post, you’ll learn to do that in easy steps.
Let’s get started!
1st, create Google account for reCAPTCHA
To enable reCAPTCHA on your contact form 7, follow the steps below to create an account and get essential details regarding reCAPTCHA.
- Go to Google reCAPTCHA page and then click “Admin Console” in the top right corner.
- Upon the next window, it will display a form that needs to be filled thoroughly to receive reCAPTCHA API keys.
- Below screenshot would help you to understand the process of creating an account for reCAPTCHA,
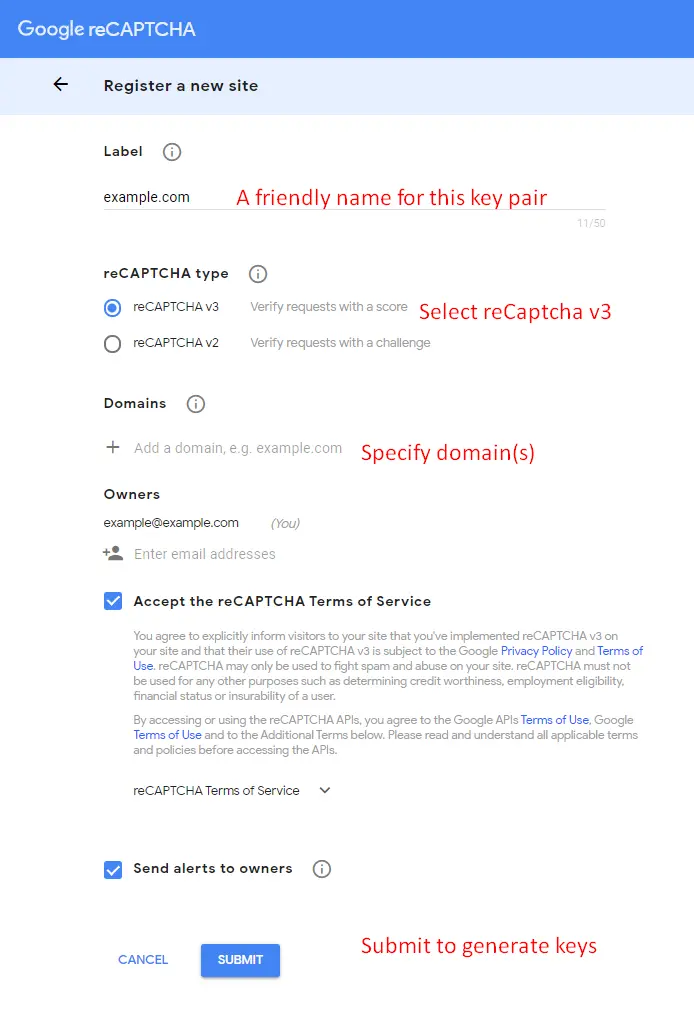
- Once you enter the required details, it will lead you to another page, where you’ll get the SITE KEY and SECRET KEY. Both these keys will later come in use. Make sure you copy both of them. Or keep the tab open.
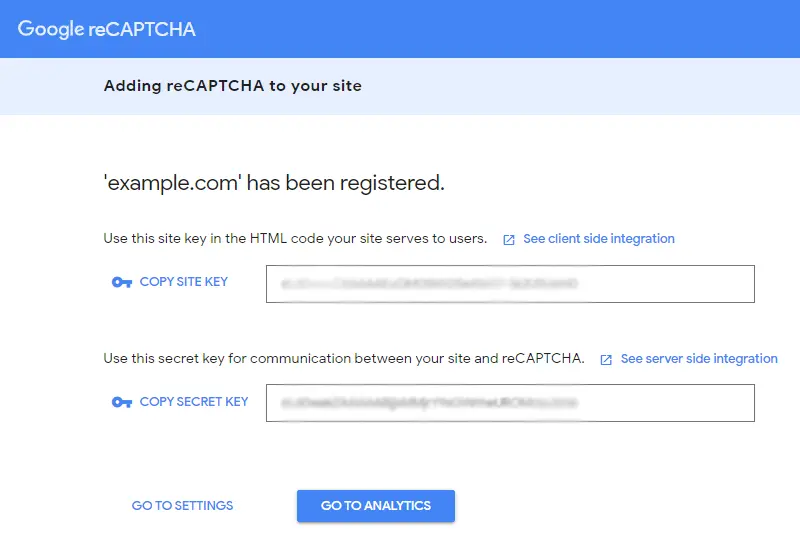
- Once copied, both the keys, move on to the next step.
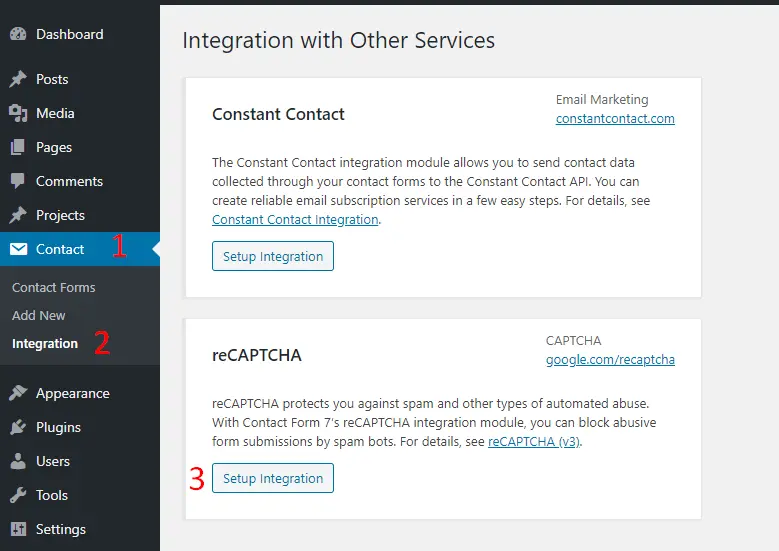
2nd, log into your WordPress admin panel
Follow the below steps to add the API keys you have received from Google reCAPTCHA page into your website, and display them on contact form 7.
- On your WordPress Dashboard, go to the Contact > Integration page.
- Find the reCAPTCHA section and click the Setup Integration.
- On the next screen, you’d find two input fields in which you have to enter the site and secret key you have received from the Google reCAPTCHA account.
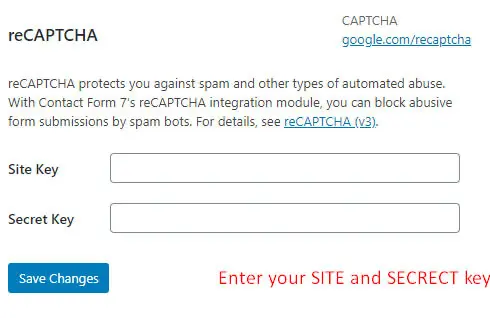
- Once added, your reCAPTCHA keys into the respective input fields. Go to Contact > Contact Forms.
- Then, add the shortcode below to the contact form field: [recaptcha] and save.
- After that, add plugin ReCaptcha v2 for Contact Form 7.
- Then, Go to Contact on your WordPress Dashboard > reCaptcha version > and from the Select reCaptcha Usage dropdown menu > choose reCaptcha Version 2 and submit.
- After this, refresh your site, and you’d be able to see your contact form with reCAPTCHA.
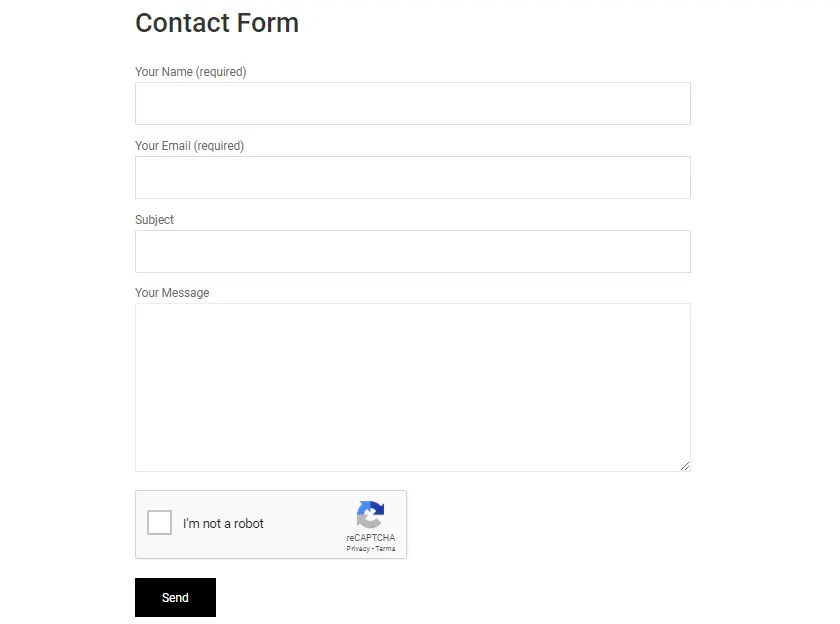
However, the above steps only help you to add reCAPTCHA v2 on your contact form. If you want to add reCAPTCHA v3, then you have to register your domain again and generate a new SITE and SECRET key for the same. Moreover, for adding reCAPTCHA v2, we used the shortcode [recaptcha], but in the case of v3, we also don’t need that.
Summary
Above, we have shown you how you can easily add reCAPTACHA to your Contact Form 7. If you find this blog post helpful, share it with other WordPress users to help them add a protective layer on their contact forms. If you still find adding Google reCAPTCHA hard on your Contact Form 7, you can contact us for added support and assistance.
Got any suggestions regarding this method or if you know any other method to add reCAPTCHA on your contact forms, please share your views in the comment section.


I add reCAPTCHA to my Contact Form 7 and it works on my Divi WordPress site but not in the pop ups. How do I fix this issue?