
If you’re wondering how to add a drop cap in Divi’s archive posts’ excerpt and content of the single blog post, then stop doing that. Because in this blog post, we’re going to see how we can add drop cap either into the blog page’s post excerpt or in the post content.
So, without taking any further moment, let’s get started!
Add Divi drop cap for the blog page excerpt
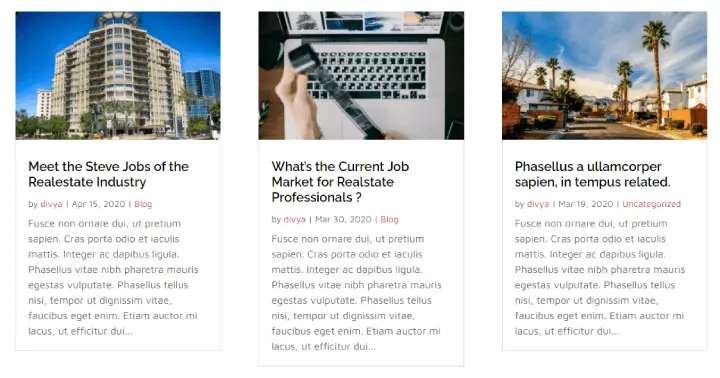
Blog page without Divi drop cap
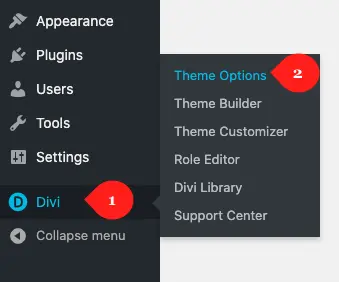
Step 1: Insert Divi blog module
To add Divi drop cap inside the post excerpt of a blog page, first, you need to go to the page where you have created your archive. However, if you haven’t created the blog page before, then simply create a new page.
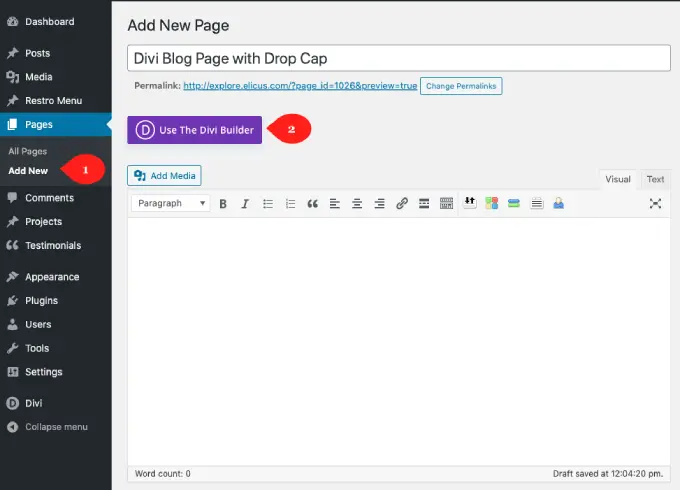
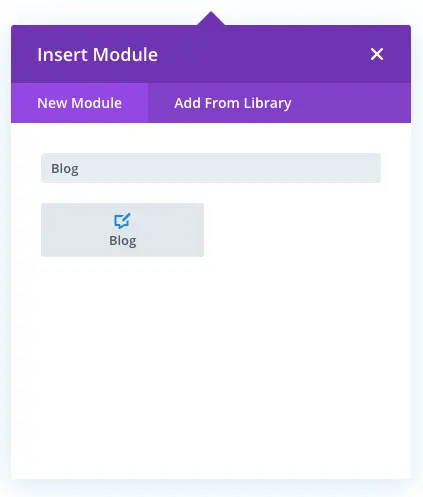
Once the page created deploy Divi Visual Builder and insert the Divi Blog module.
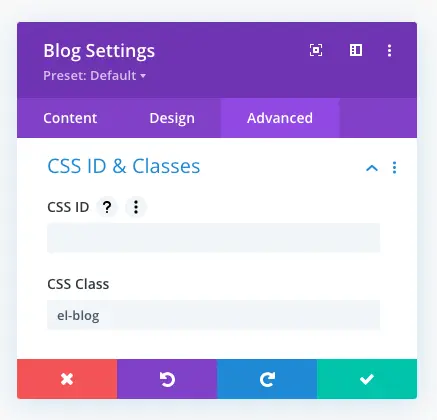
Step 2: Add class name
Now, after inserting the native blog module, go to its advanced settings. Then in the CSS Class input field of the CSS ID & Classes settings, insert el-blog CSS Class name.
Step 3: Insert the Custom CSS
Once added the CSS class in the blog module’s advanced settings, save it. And then go to Divi Theme Options.
In the General tab, scroll a bit and then in the Custom CSS field, past the following custom CSS.
.el-blog .post-content-inner:first-letter {
display: block;
font-size: 26px;
font-weight: 500;
margin: 0 4px 0 0;
}
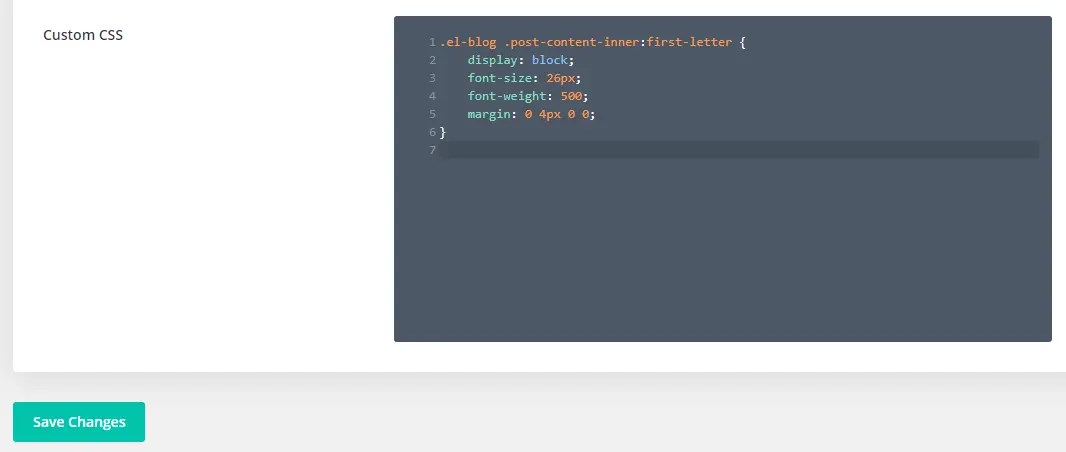
Once added the custom CSS, Save Changes, and refresh your blog page to see changes.

In addition to the Divi Theme Options to add custom CSS, you can also add that in your theme’s style.css file. However, it’s recommended that you make changes to your site’s child theme.
Add drop cap for Divi Blog Extras blog pages

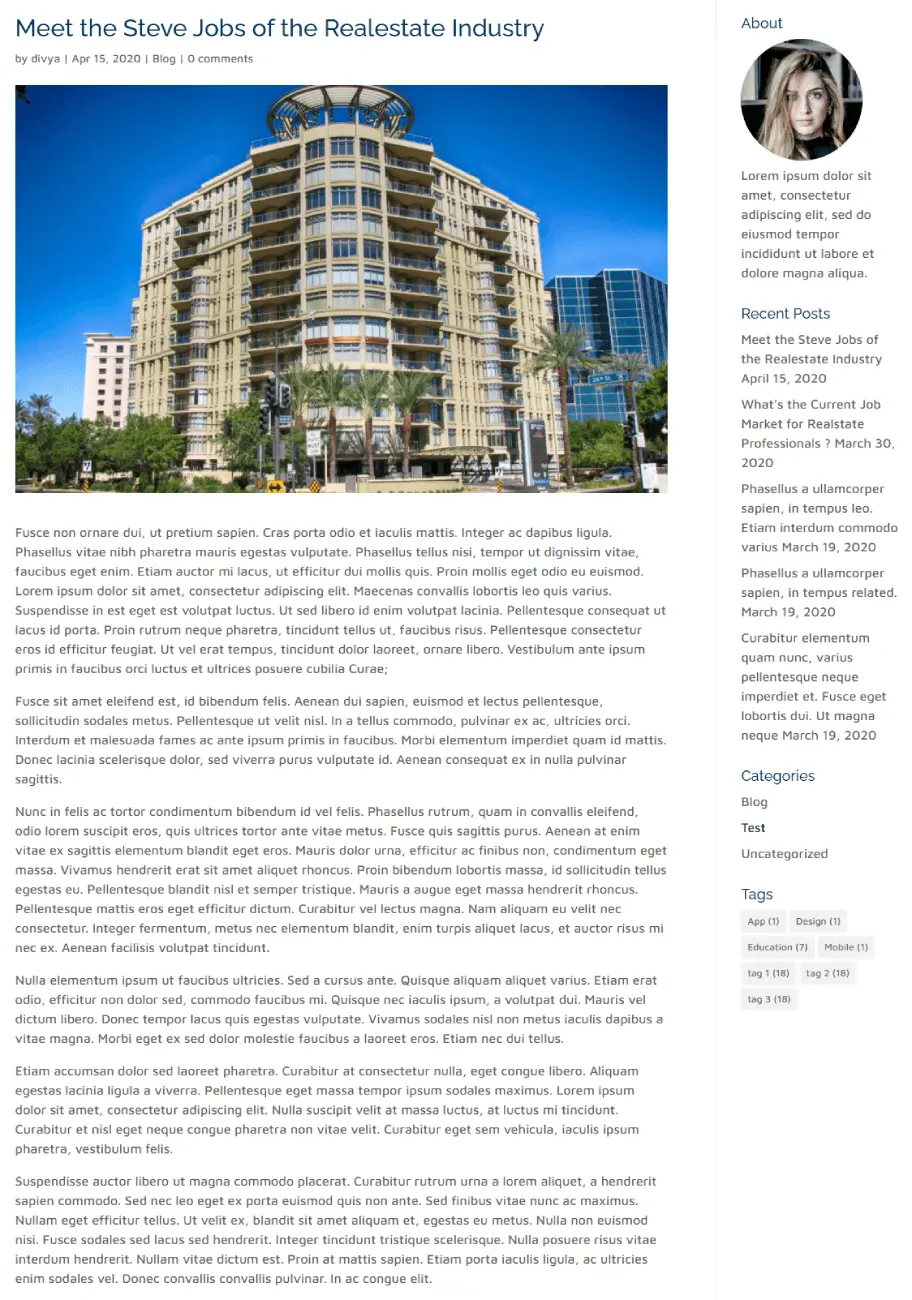
Blog pages created using Divi Blog Extras without Divi drop cap.
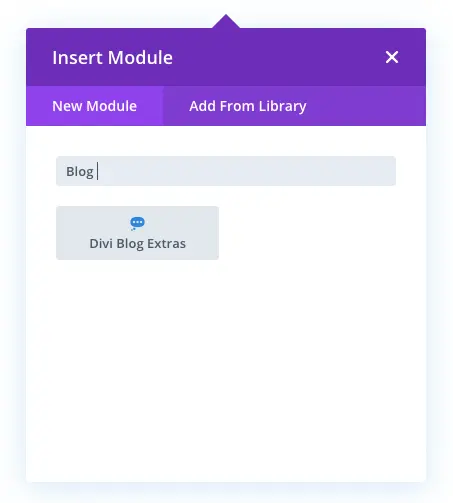
Step 1: Insert Divi Blog Extras module
Likewise the above steps, first, you need to either create a new page or edit existing ones to add drop cap in the blog pages created using Divi Blog Extras plugin. Then, once the page created and deployed the Divi builder, insert Divi Blog Extras module.
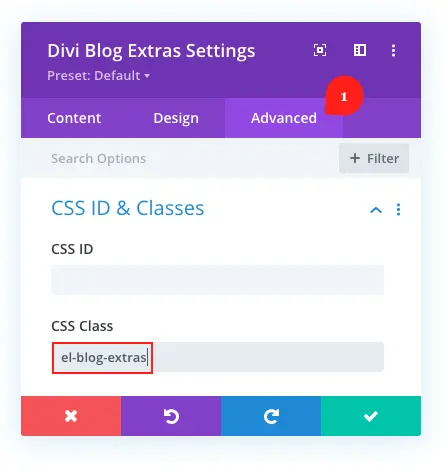
Step 2: Add class name
Now, after inserting the Divi Blog Extras module, go to its advanced settings. Then in the CSS Class input field of the CSS ID & Classes settings, insert el-blog-extras CSS Class name.
Step 3: Insert the Custom CSS for drop cap
Once added the CSS class in the module’s advanced settings, save it. Then go to the Divi Theme Options, and similar to the above steps, add below Custom CSS.
.el-blog-extras .el-dbe-blog-extra .post-data:first-letter {
display: block;
font-size: 26px;
font-weight: 500;
margin: 0 4px 0 0;
}
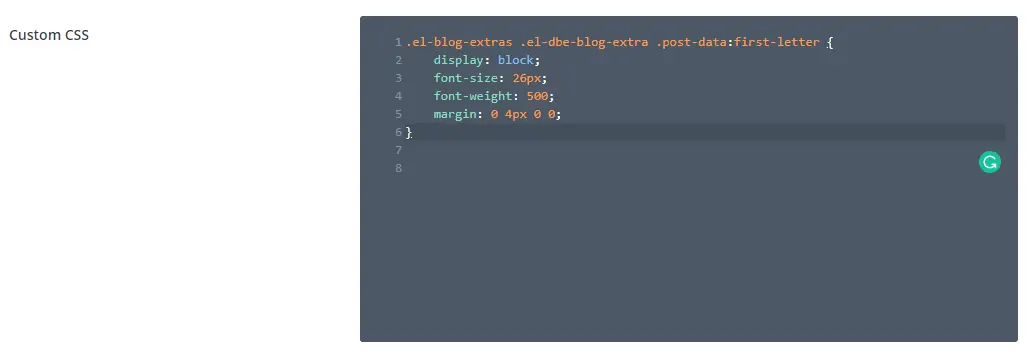
Once added the custom CSS, Save Changes, and refresh your blog page to see changes.

Add Divi drop cap for a single post content
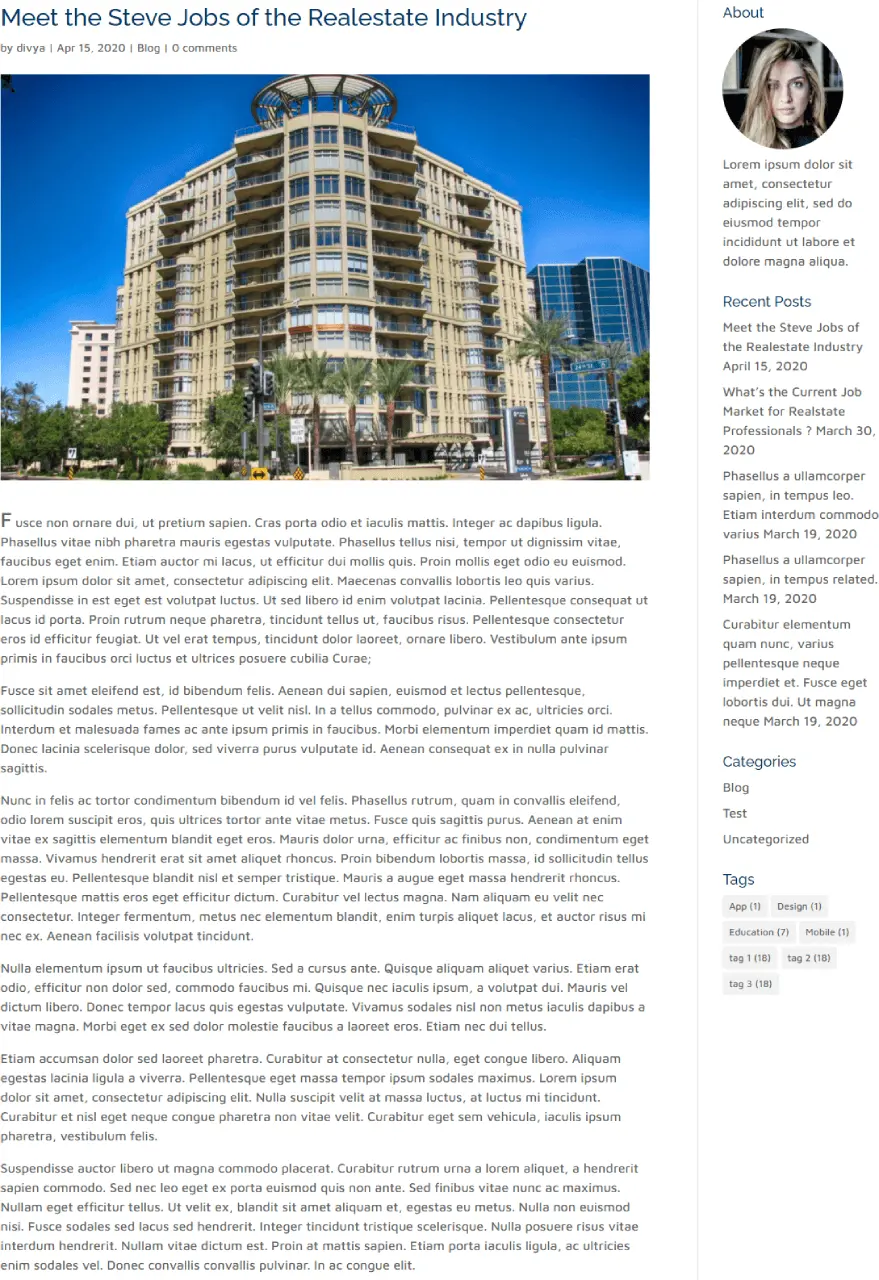
Post Content without Drop Cap
To add drop cap in article’s content area there’s nothing much you need to do. Just go to the Divi Theme Options and add the following custom CSS.
.single .et_pb_post .entry-content:first-letter {
display: block;
font-size: 26px;
font-weight: 500;
margin: 0 4px 0 0;
}
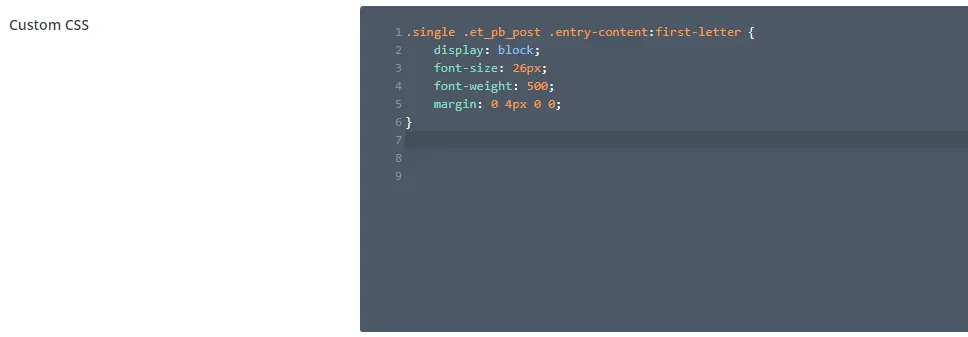
Once added the custom CSS, Save Changes, and refresh your blog page to see changes.
That’s it, we’ve successfully added Divi drop cap for blog page and single post content.


0 Comments