Elegant Themes regularly releases updates for Divi. Some of those updates are more important than others. A recent update, called Divi Presets, is one of the most impressive and important updates so far. It promises to save you time in designing and editing your Divi websites.
In this article, we’ll take a close look at Divi Presets, see what it can do and why you need it.
What is Divi Presets?
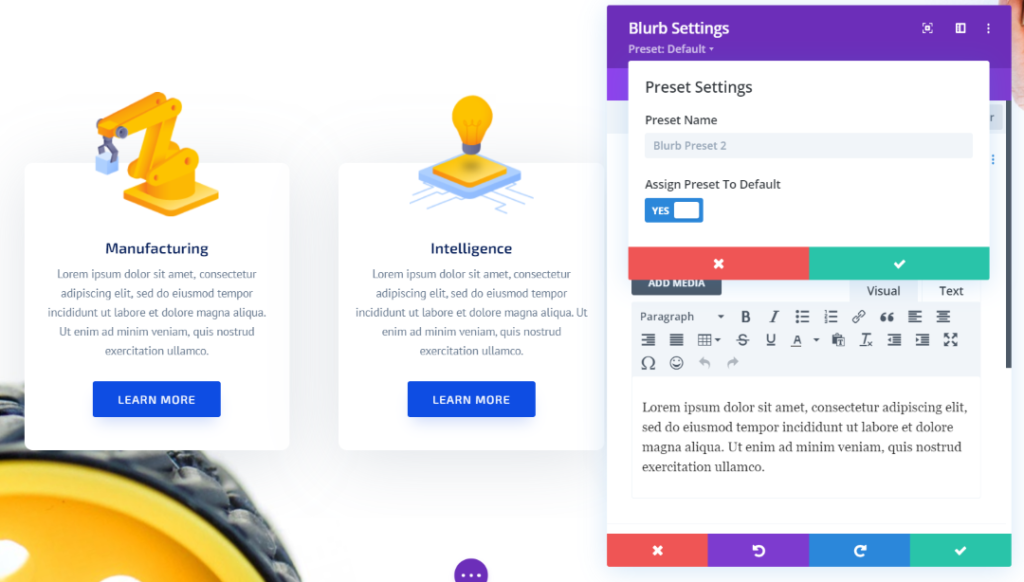
A preset is a module design that we can save and reuse. Divi Presets allows us to save multiple custom designs for modules and then select those designs in later use from the preset list.
Why use Divi Presets?
One of the greatest advantages of Divi is the level of customization for each module. You can easily adjust colors, fonts, sizes, backgrounds, borders, animations, and lots more.
However, to reflect those changes in other modules takes time, a lot of time. And Divi Presets solves this problem.
Before Divi Presets, we could copy and paste the styles from one module to another. Or, we could make a style the default that all of the modules of that type will use. That was helpful, but not at its full potential.
With this new feature, all we have to do is save the design and then select it for any module we want to use it. We can set a design as the default and then override that design just by selecting a new one. We can edit any design and the changes are reflected in every module across the website that uses that preset.
This means you can create multiple versions of a module and then choose the preset you want each module to use.
Creating and Adding a Divi Preset
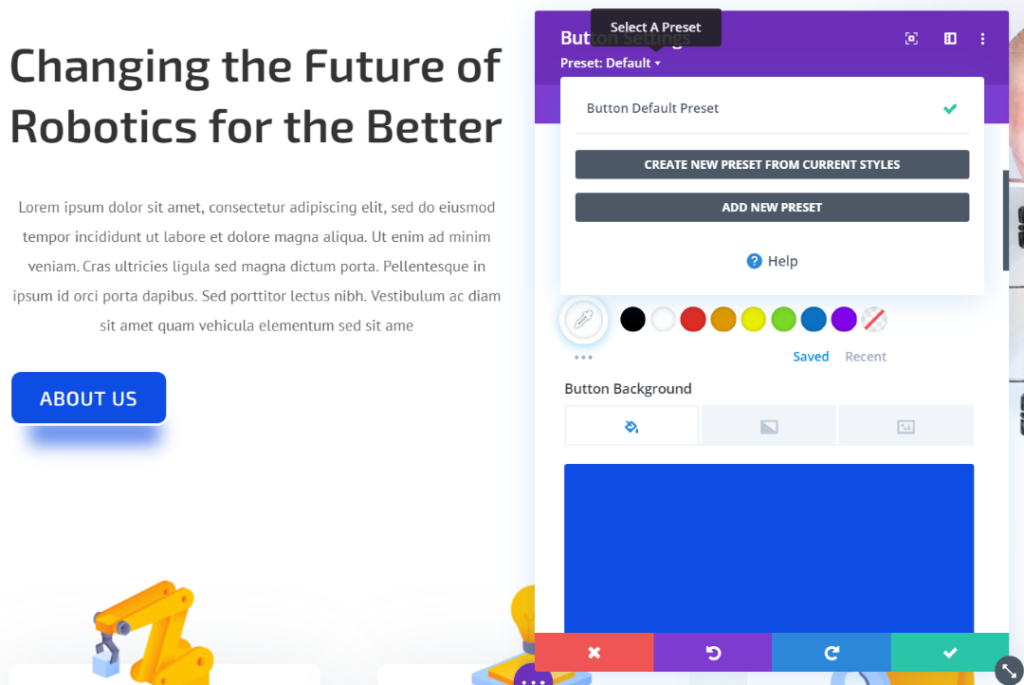
Once you have the design you want for your module, select, Preset: Default, under the module’s name at the top of the settings. This will open a modal where you can create a new preset based on the current styles or add a new preset.
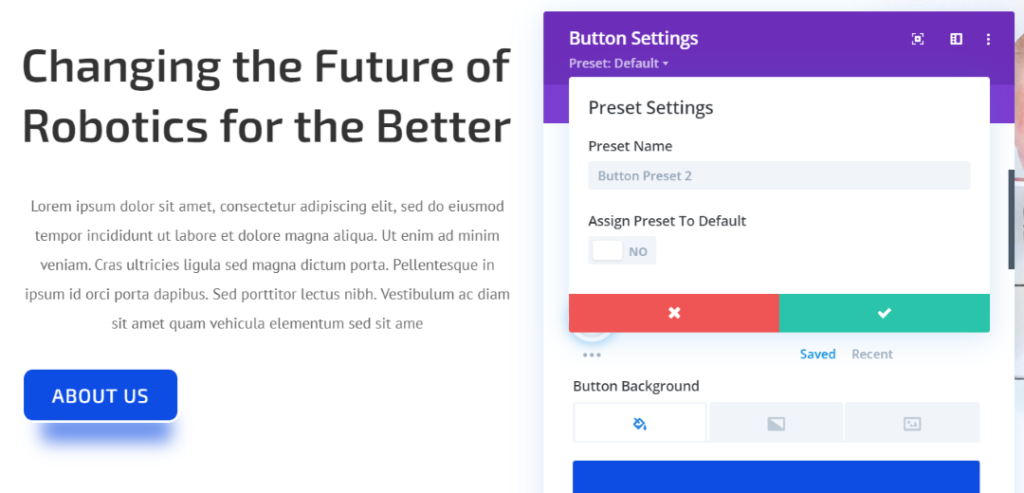
Choosing one of the options lets you provide a name and choose to assign it as the default style.
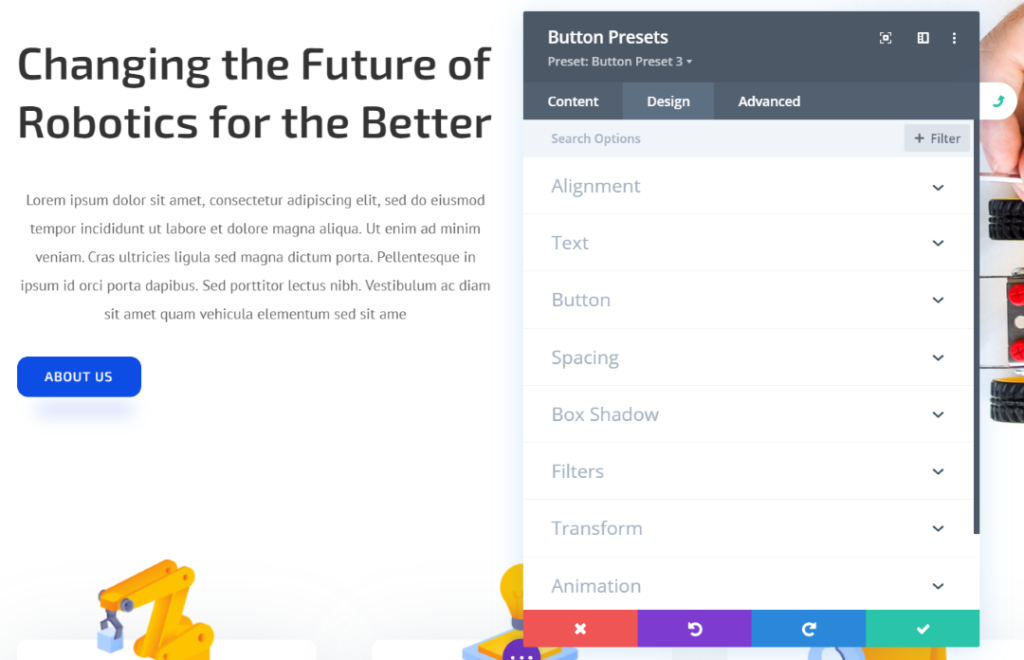
Once you’ve clicked the green checkmark, the card flips around and you can make any adjustments you want to that style.
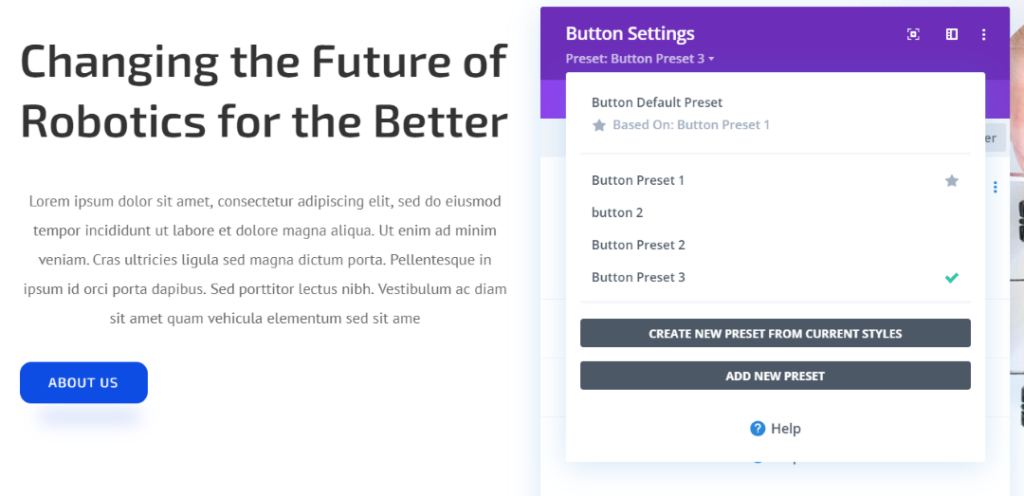
Once you’ve created a preset you’ll see it listed when you click the preset button. You can then select it to use it or edit it. Presets are module-specific, but the list will appear in every module of that type. In this example, these presets will appear as options in every button module. You can edit, duplicate, delete, etc.
Divi Presets Examples
Let’s look at a few examples of how to use Divi Presets and see why they’re so useful and important.
Blog
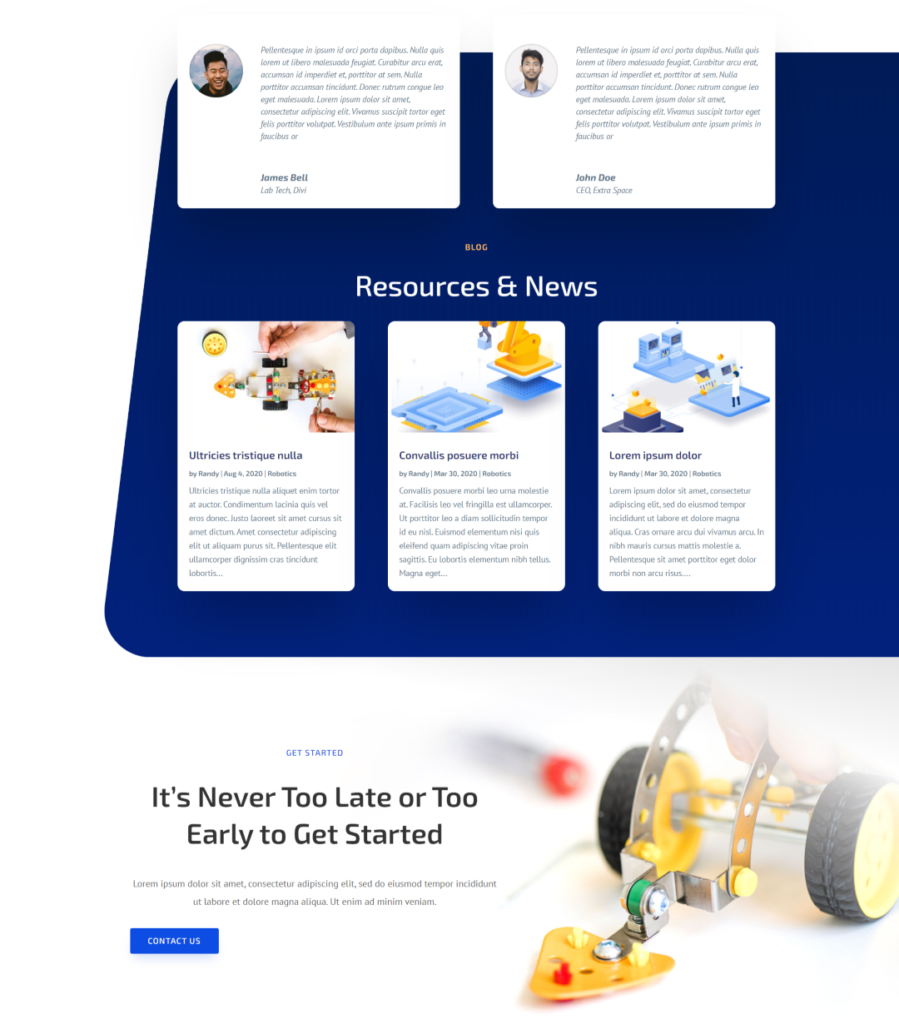
For this example, I’m using the Divi Blog and Landing Pages from the Divi Robotics layout. Each of these pages includes a blog. I want to make changes to one and reflect them on each page. The example above is the landing page.
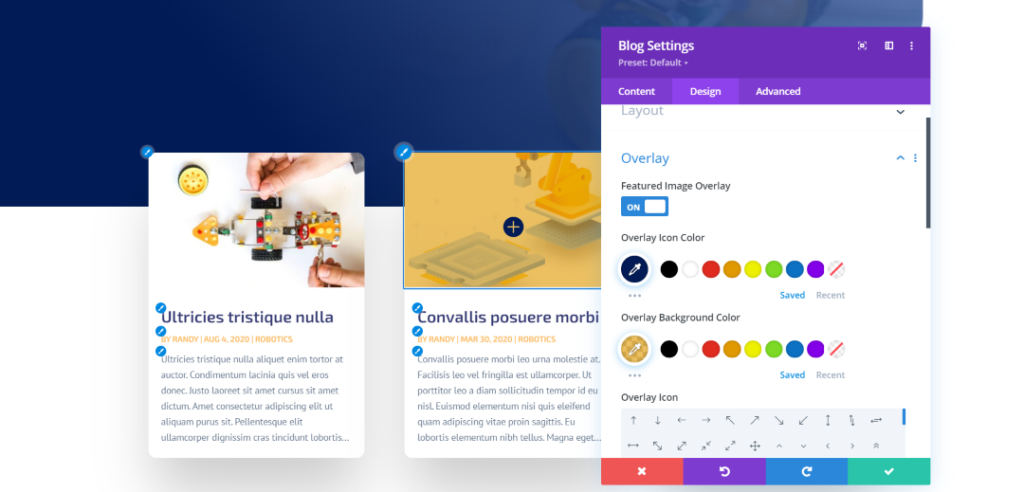
I’m making the changes on the blog page. I’ve added an overlay using colors from the layout. I’ve also increased the size of the heading text and changed the meta text color to match the layout.
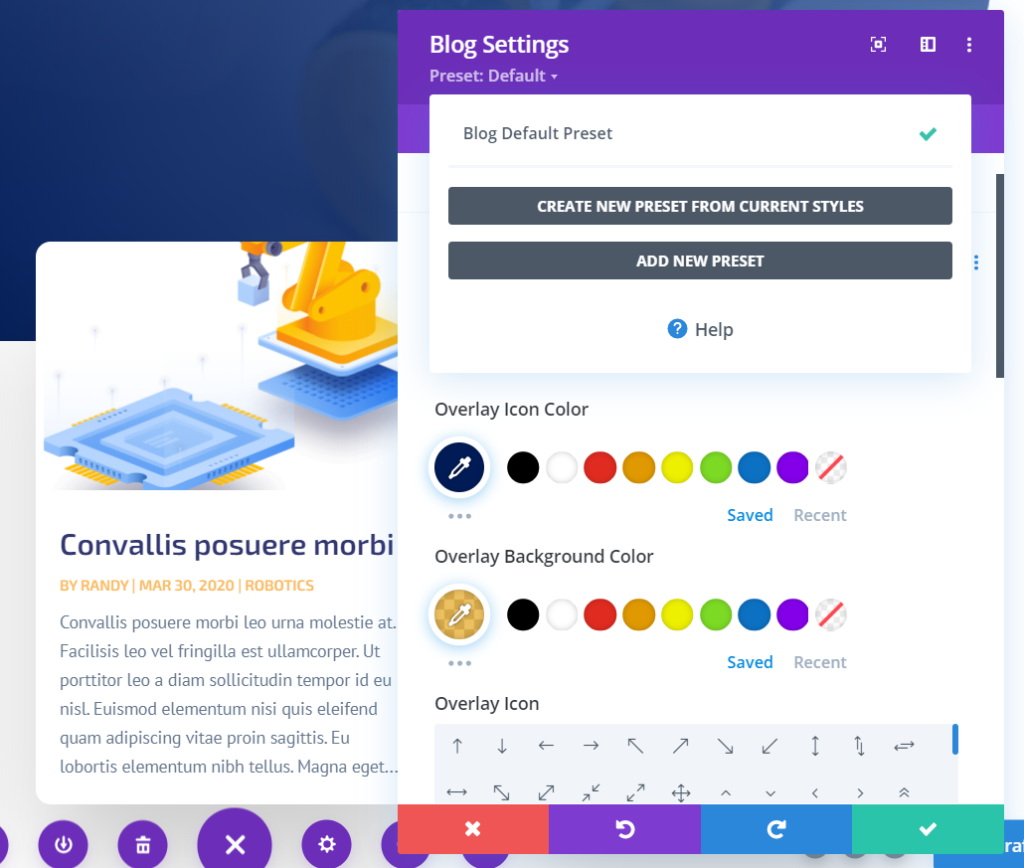
Next, I’ll create a new Divi blog preset from the current design.
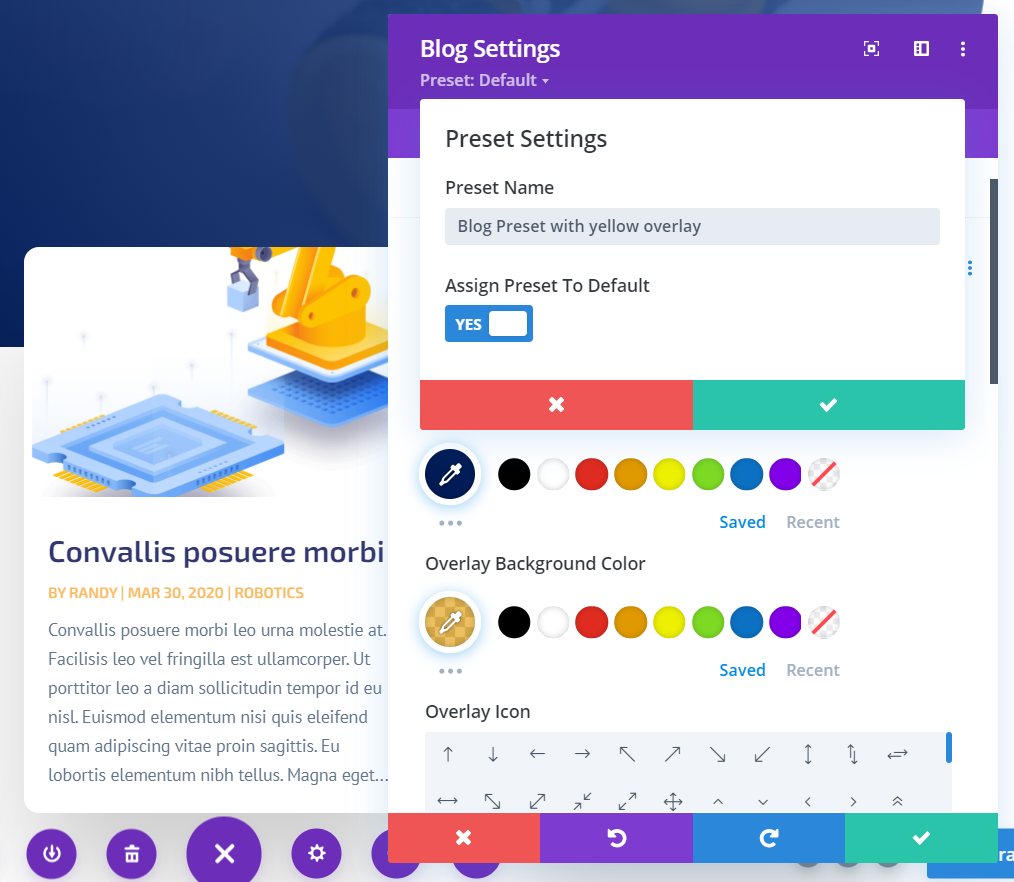
I’ve given the preset a name and selected it to be the default.
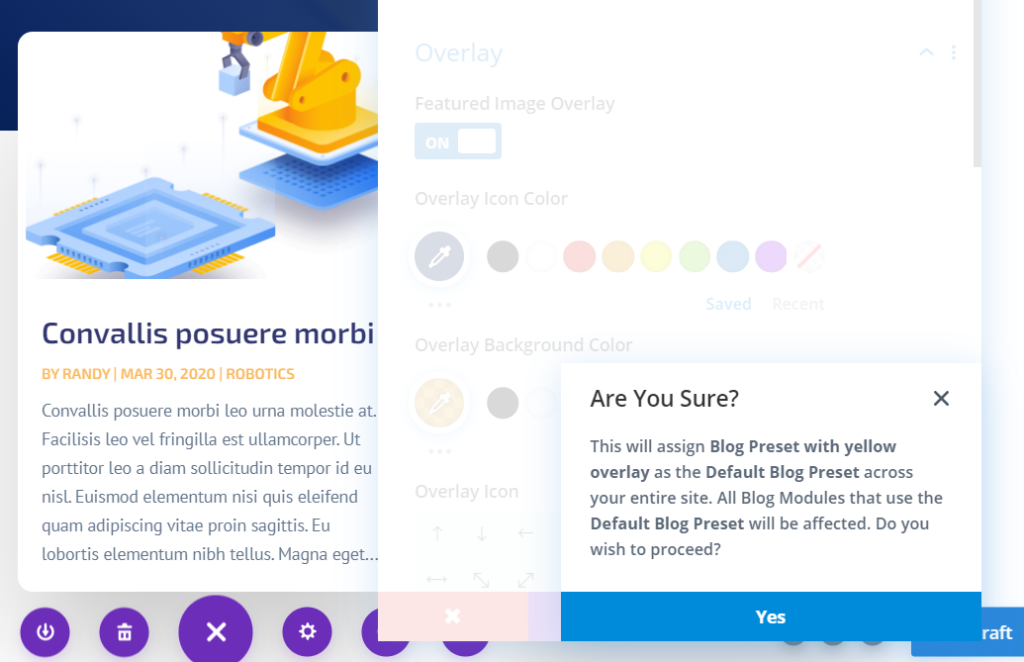
When saving it, it informs me that it will assign the preset to each blog module across the website. This is a good reminder that I’m about to make changes that will affect other pages.
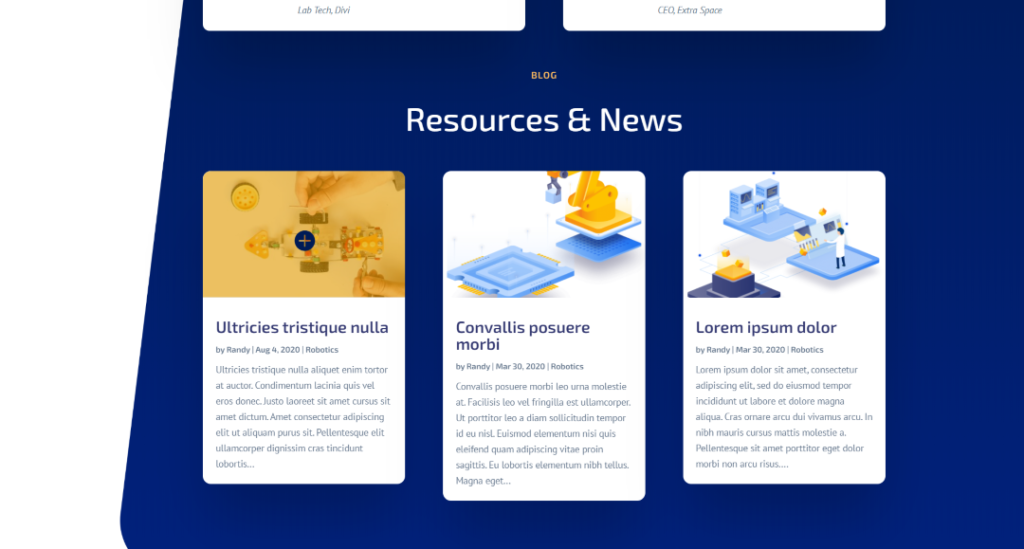
Now, the landing page and home page display the same design. I didn’t make any changes to the landing page. Since it’s using the same preset, the changes are automatic.
Contact Form
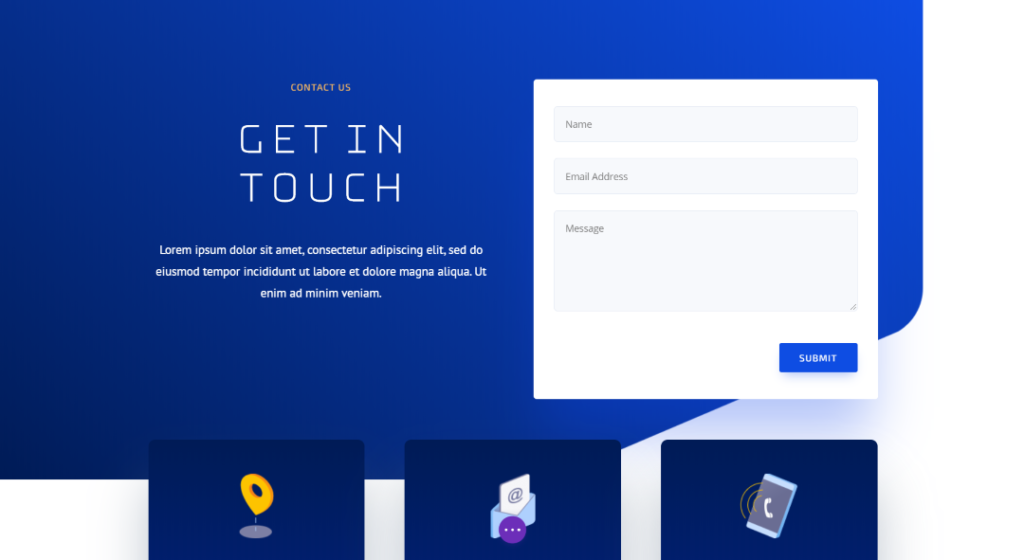
For example with the contact form, I want to have a couple of options and use a/b testing to see which is best. This is the original design from the robotics layout.
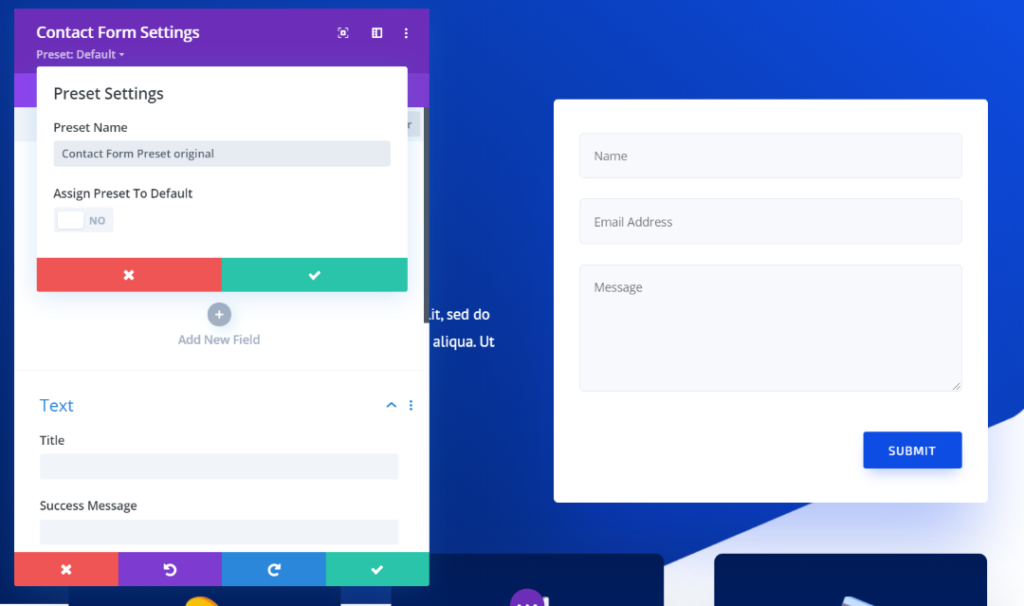
I’ve saved the current design as a preset, but I’m not assigning it as the default. This will make this style available to me, but I’d have to select it. If I make it the default, every contact form will automatically have this design.
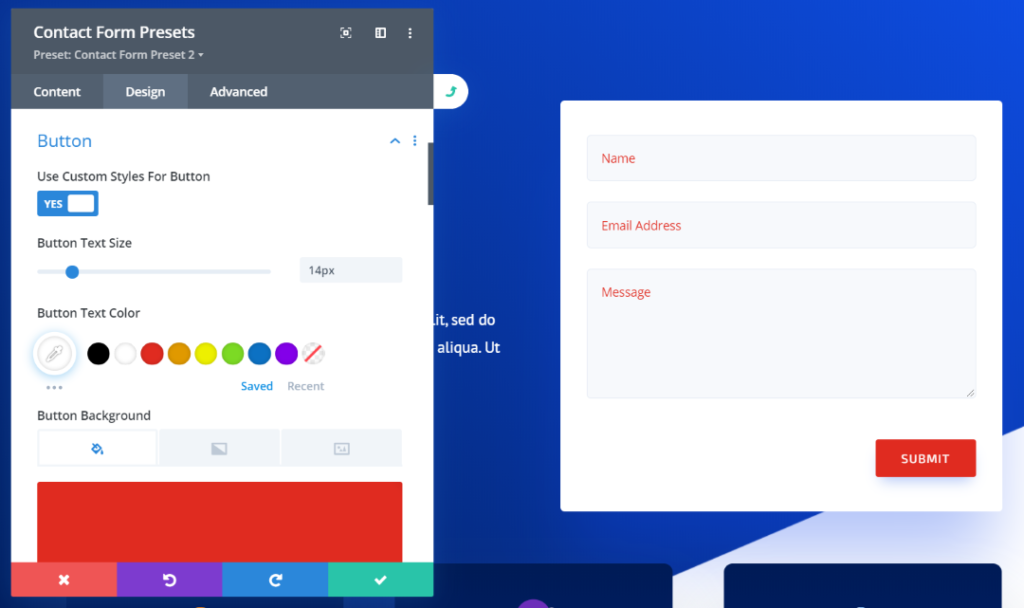
I duplicated the preset and changed the color of the field text and button. This is preset 2.
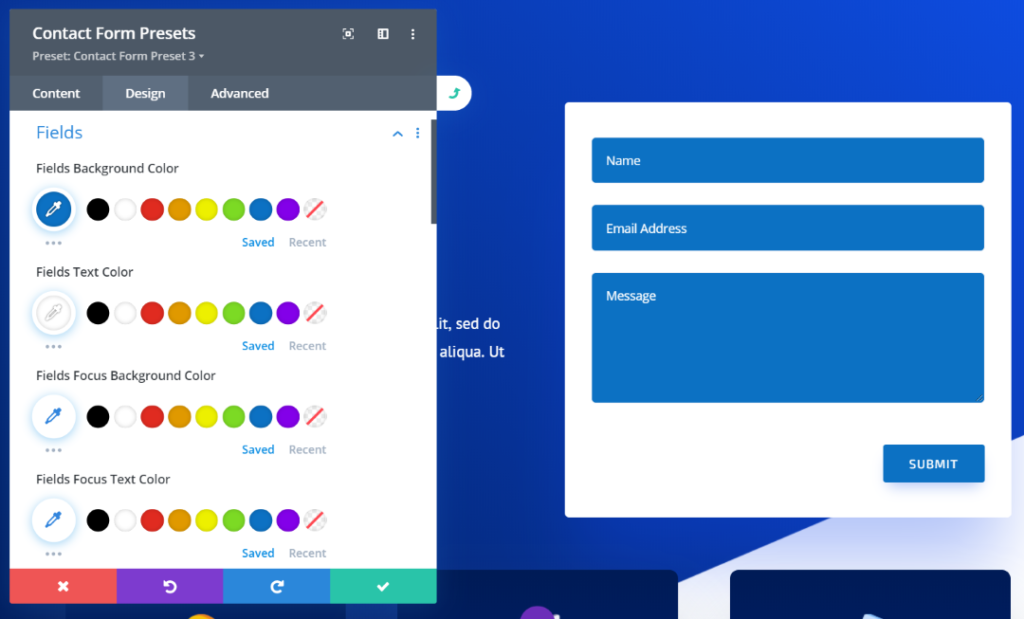
Preset 3 has a blue background for the fields and white text.
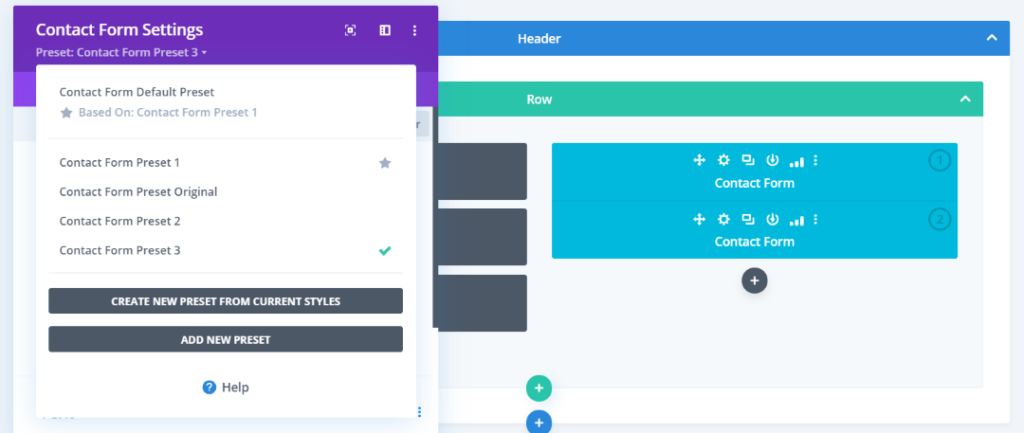
Now I can run my a/b split test and all I have to do is choose which preset I want the contact forms to display. When the split test is complete, I just have to copy the module, choose a different preset, and run the test again.
Blurb

For this example, I want to have several options for blurbs. I’ll create multiple presets and then assign them where I want to use them. The first preset is the original design. This allows me to use it as the default or at least have access to it for future use.
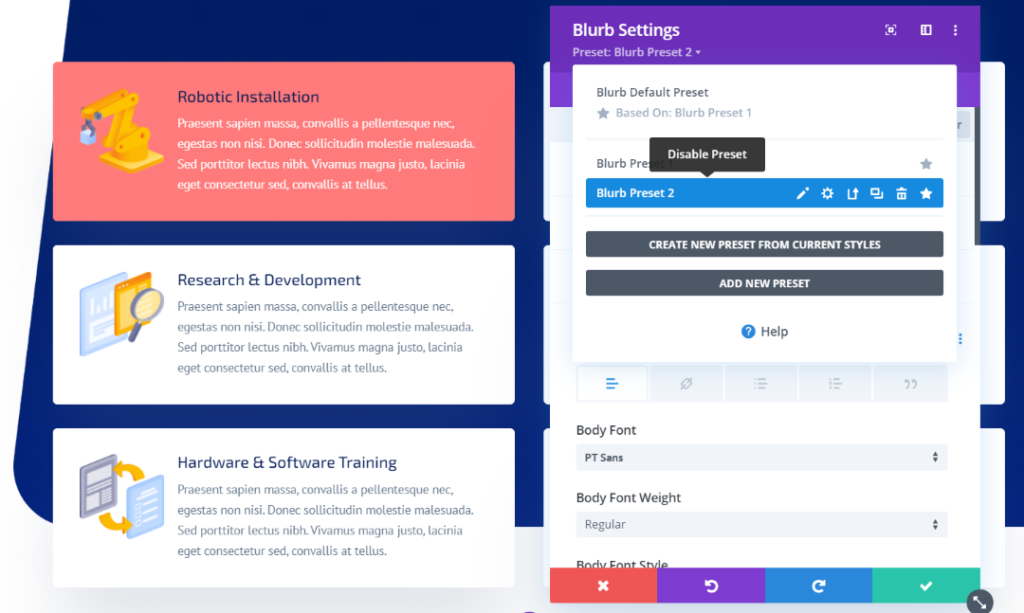
The second preset changes the background color and the body text color.
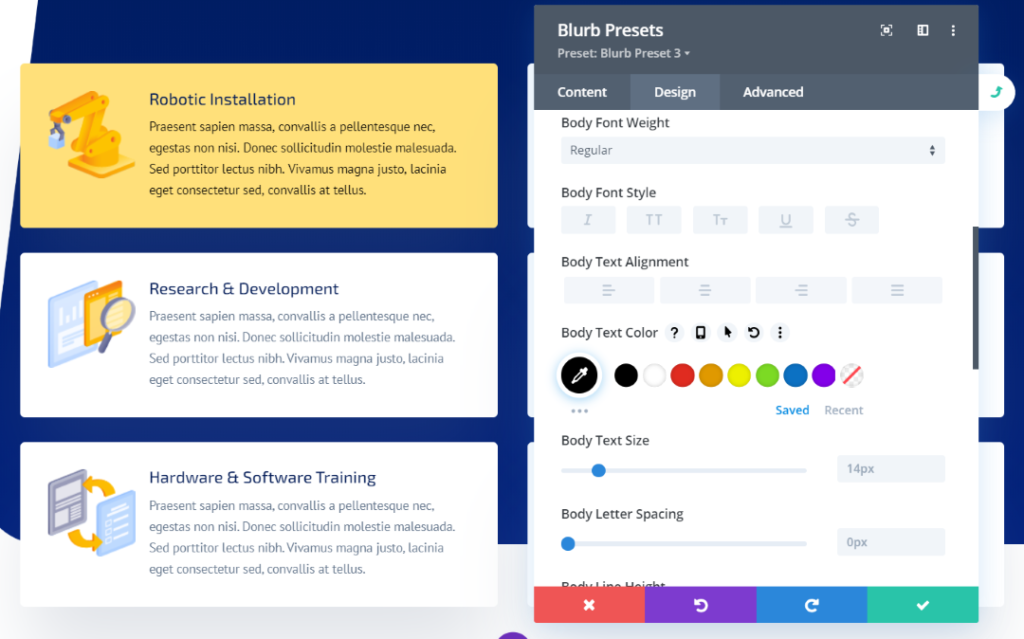
The third preset also changes the background and font colors.
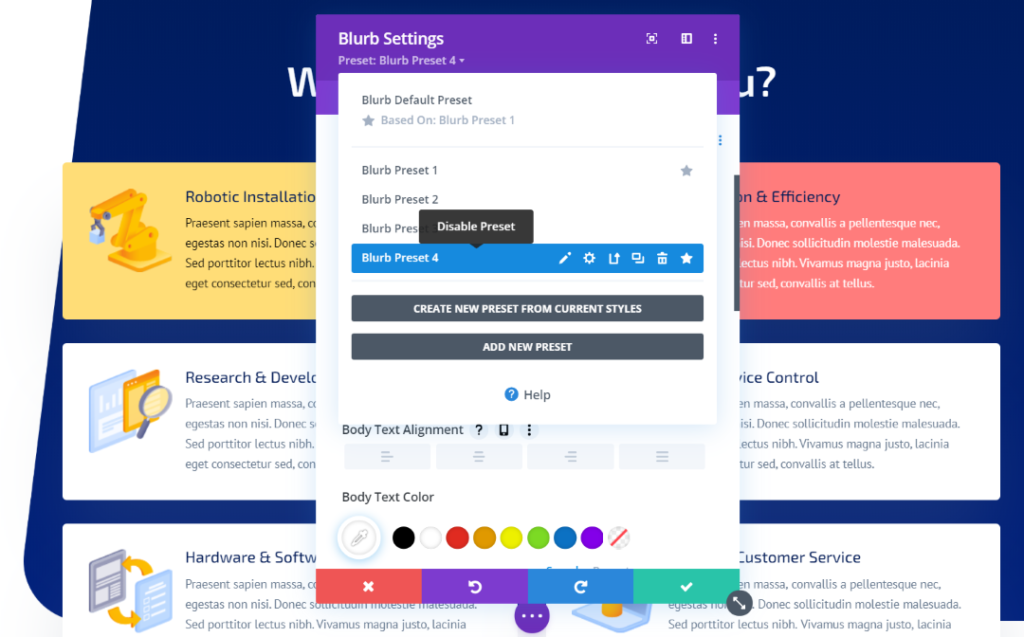
Now all I need to do is choose which preset each blurb module will display.

Here’s the result. I have three blurb module designs to choose from.
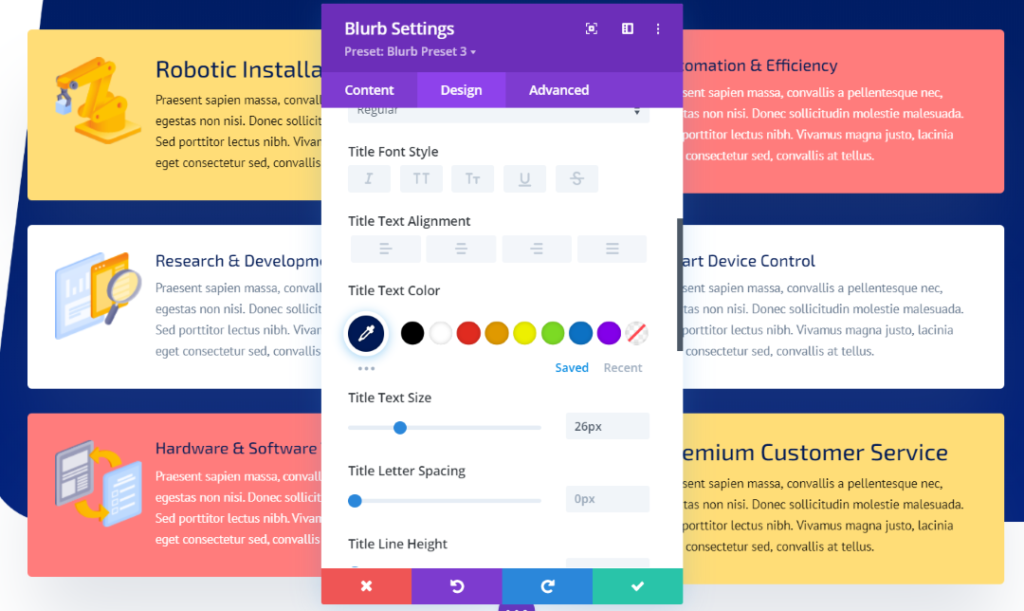
If I update one of the presets, every module that uses that preset is automatically updated to match. In this example, I’ve updated the title font size for the third preset and then updated the preset. The last module uses that preset, so it also updates to the new settings.
Ending Thought
That’s our look at the new Divi feature, Divi Presets. The ability to create multiple presets and select the one you want is a game-changer for web design. The user interface is intuitive, so the presets are easy to create and edit. Editing a preset reflects the changes across your website so you don’t have to open every module on every page when you want to make a design change.
This saves a lot of time in making major design changes. Divi Presets is the fastest way to choose styles and edit them across your website. I highly recommend using Divi Presets for every website you create.
We want to hear from you. Have you tried Divi Presets? Let us know what you think about it in the comments.




0 Comments