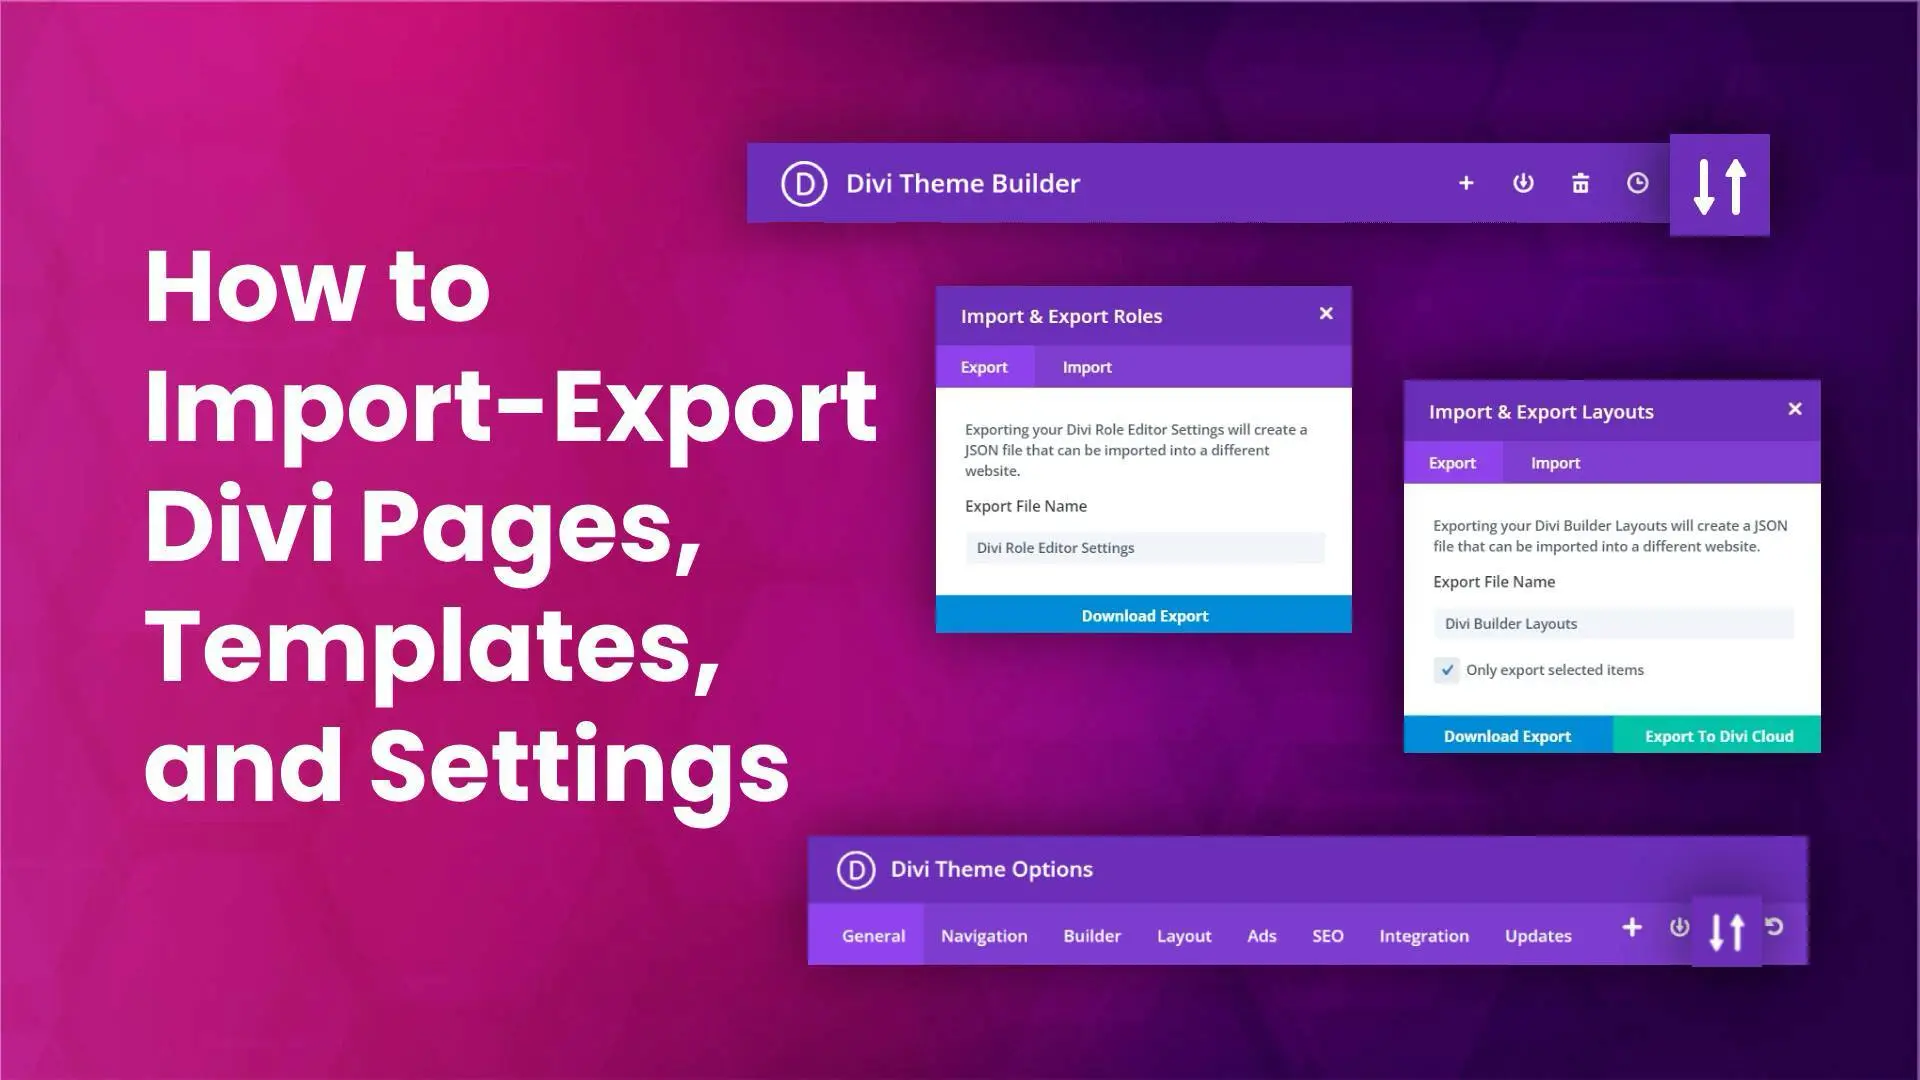
Divi has an excellent portability mechanism that is available in many components of the Divi theme. You can Import and export content, settings, templates, and layouts between different websites using this mechanism. This helps you to share your customized Divi layouts and settings with your colleagues, save your preferred presets for future client builds, and backup specific portions of your website.
All the exports are in the form of JSON files and those JSON files can be imported to replicate all the Divi content, settings, and configurations on the other subdomains or peers.
In this article, we are going to cover all the points about Divi Import Export settings and will demonstrate some quick ways to utilize the Divi Portability system conveniently.
There are 6 possible ways by which you can export Divi settings, templates, pages, layouts, etc., and import them to the other website.
- Import and export Divi post or page
- Import and export Theme Options
- Import and export Theme customizer settings
- Import and export templates using Divi Theme Builder
- Import and export Divi layouts using the Divi library
- Import and export Divi Role Editor settings
Note: Whether it is a Divi Theme Options settings, Theme Customer Settings, Divi Theme Builder Templates, Divi Library Layouts, Page Layouts, Section Layouts, Module Layouts, or Divi Role Editor settings, they will imported exactly from where they have been Exported. i.e. If you have exported a layout from Divi Library then it will be imported only in Divi Library not anywhere else.
Let’s go through them one by one in a detailed way.
1. Import and export Divi post or page
Posts and Pages are the key components of a website to display and accumulate content. In Divi, the posts and pages are a part of custom layouts. Imagine you have a Divi website on a particular domain and you have some Divi posts on it. Now if you want those posts on your other domain what would you do? The simple answer to this question is Divi Import Export settings.
The Post or page settings let you migrate a post from one Divi website to another easily. It will extract the entire content of a post or page including media files and will zip it in a JSON File. You can now import this JSON file to get the post replicated on your other website.
Let’s go through some simple steps to perform this import-export operation.
A. How to export a Divi post or page layout
First of all open the post or page that you want to export and edit it with Divi Builder. At the bottom area, you will see the icon to display Divi builder options. Click on it.

The icon will expand to display a list of options including the Divi Portability icon with upside down arrows.
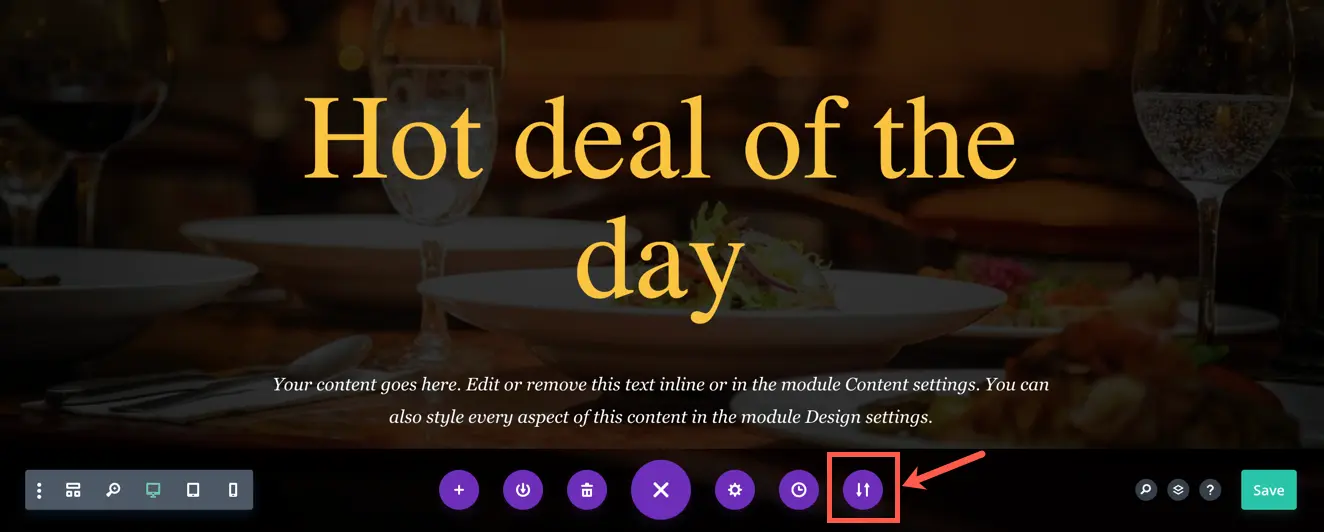
After clicking on the Divi Portability icon, the ‘Import and Export Page Content’ dialogue box will appear. Now there are two options on offer. One is to export the post or page content and the other is to import it.
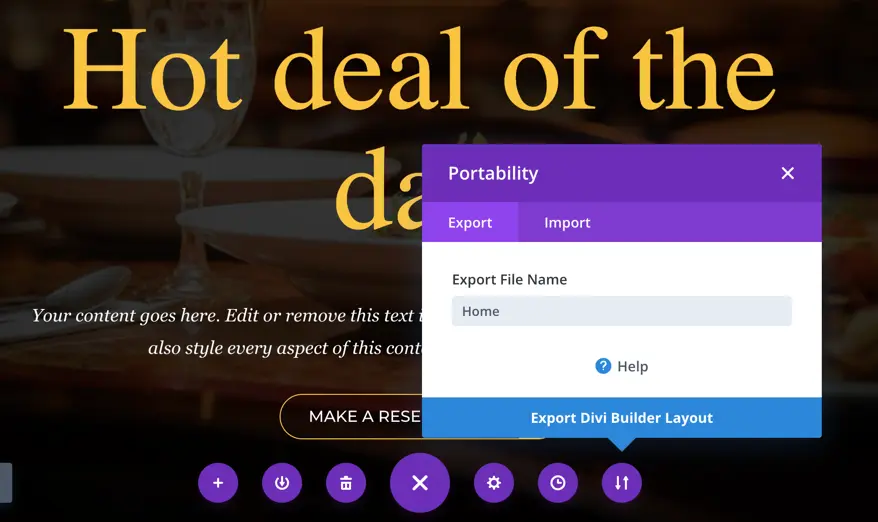
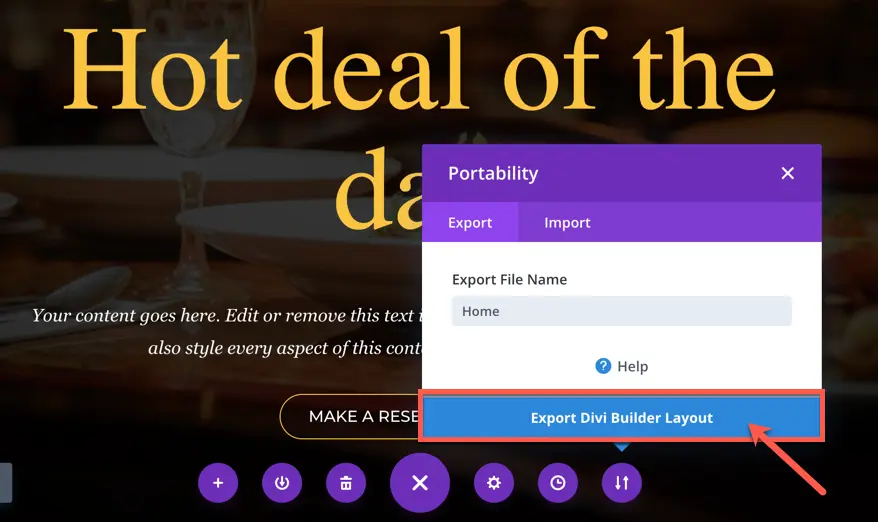
Give the file a suitable name and click ‘Export Divi Builder Layout’. The JSON file containing the layout and content of the post or page will be downloaded within a few seconds after clicking on it.
B. How to import a Divi post or page layout
The same dialogue box can be used to import a Divi post or page layout with its content. You only need to navigate to the import tab and upload the JSON file for that particular post.
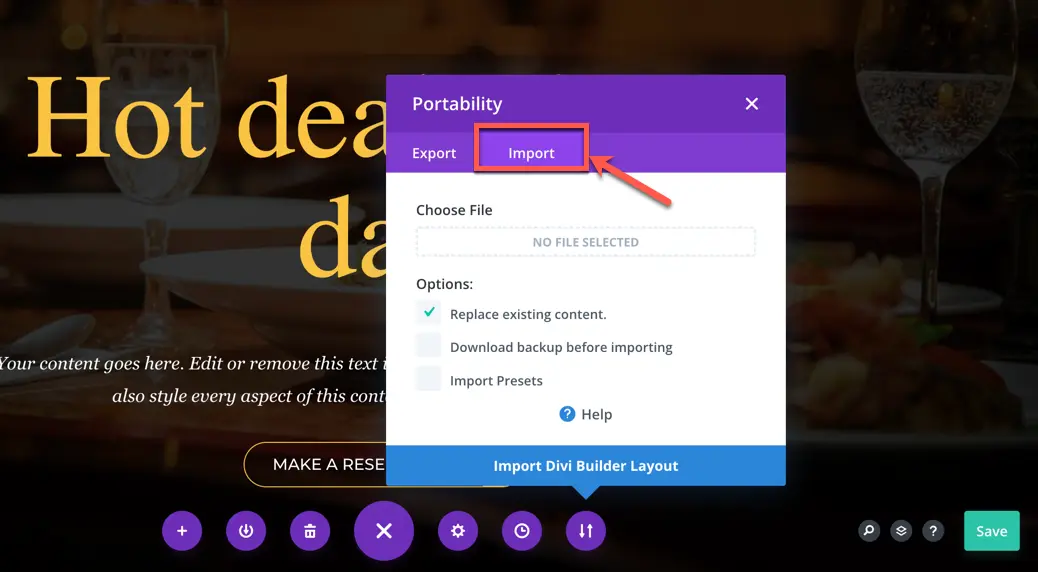
You can select the first checkbox to replace the existing content of the post or page.
select the next checkbox, if you want to download a backup of the existing post or page before it gets replaced with the new one.
You can also import preset elements such as custom buttons with the help of the third checkbox.
Now click on the ‘Import Divi Builder Layout’ button to replicate your desired post(the one you exported) on the current post.
After that click on the Save button and reload the page to see the changes.
2. Import and export Theme Options
This is the most essential component of the Divi Portability system which brings its scalability factor to the next level. The Divi theme options cover almost all the major configurations including the builder, Layout, SEO, and many other important settings of your Divi website. Some common tasks performed with the Theme Options are
- Configuring the website logo, Social Icons, and Sidebar layout
- Settings to enable Divi Builder for Post types
- Enabling Dynamic CSS
- Displaying Author, Date, and Categories
- Displaying Dropdown Menus
If you want to apply the same settings and configurations on your other website, you can do it quickly with the Divi import export settings under the Divi Portability system.
Follow these simple steps to import and export the Divi theme settings using Theme Options.
A. How to export Divi settings using Theme Options
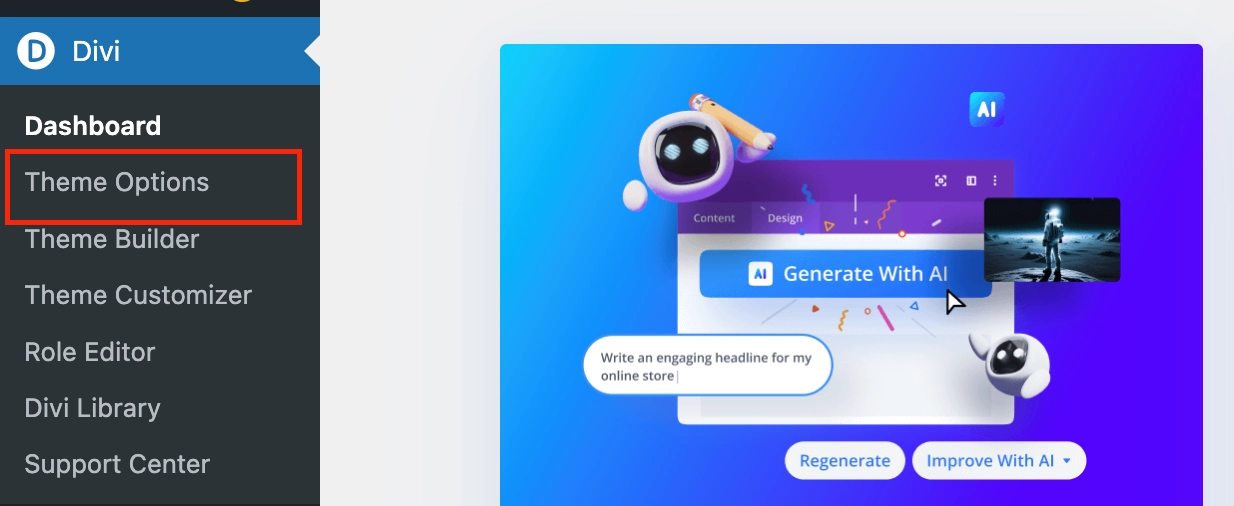
Navigate to the Theme options using the Divi option present on your WordPress dashboard.
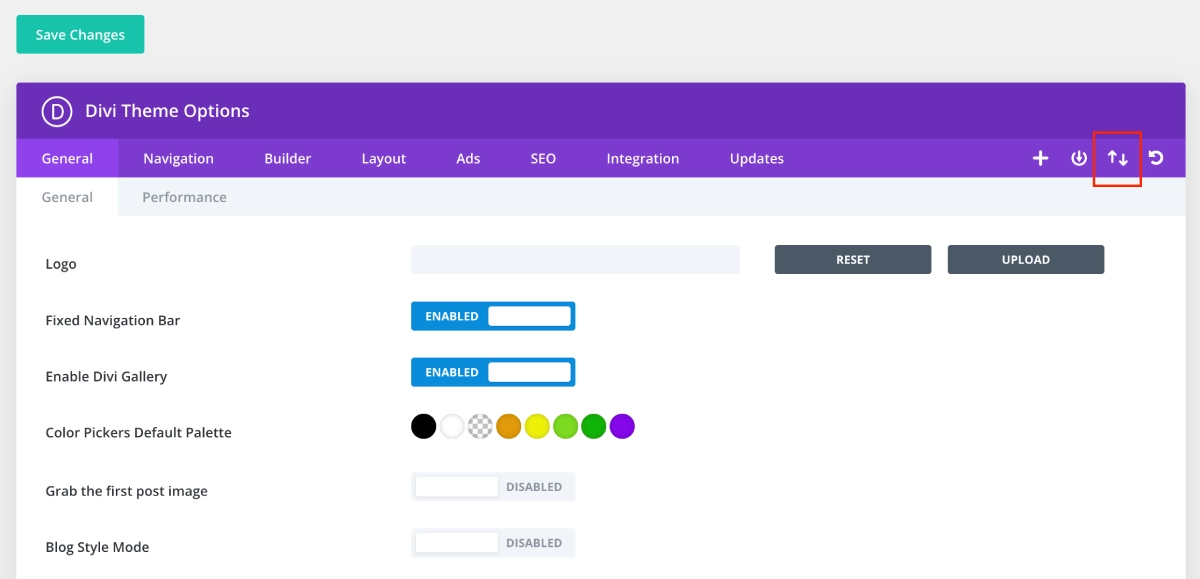
Click on the Divi Portability icon.
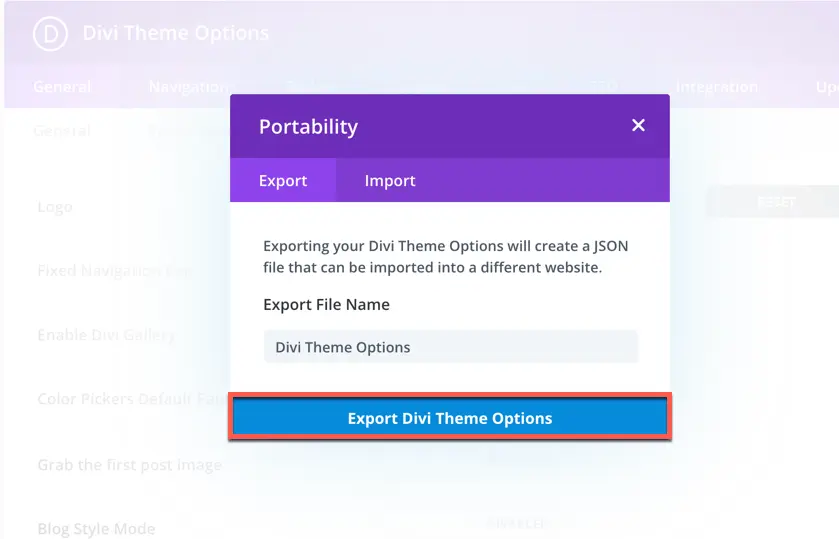
The ‘Import export Theme Options’ dialogue box with the Export and Import tab will instantly appear on your screen. Enter a suitable name of the export file and click on the ‘Download Export’ button. Now you can use this exported JSON file to import this website’s whole Theme Option configurations on any other website.
B. How to import Divi settings using Theme Options
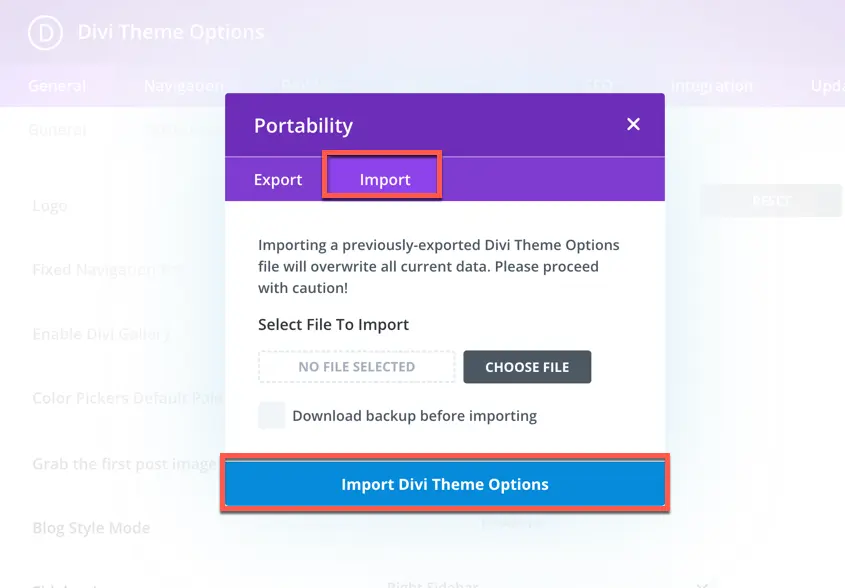
Similarly, you can import a Divi theme options file by uploading it from the Import tab. You can select the checkbox if you want a separate backup of the existing settings for your website. Click on the ‘Import Divi Theme Options‘ button. Now click on Save and reload the page again to see the changes.
3. Import and export Theme customizer settings
This is the other crucial element of WordPress which gives you the power to customize the theme structure from the root level. It comprises of
- General settings of the website including layout and background
- Footer layout and design options
- Homepage settings
- Menus
- Widgets
Let’s see the steps to Import and export Divi Theme Customizer settings
A. How to export Divi Theme Customizer settings
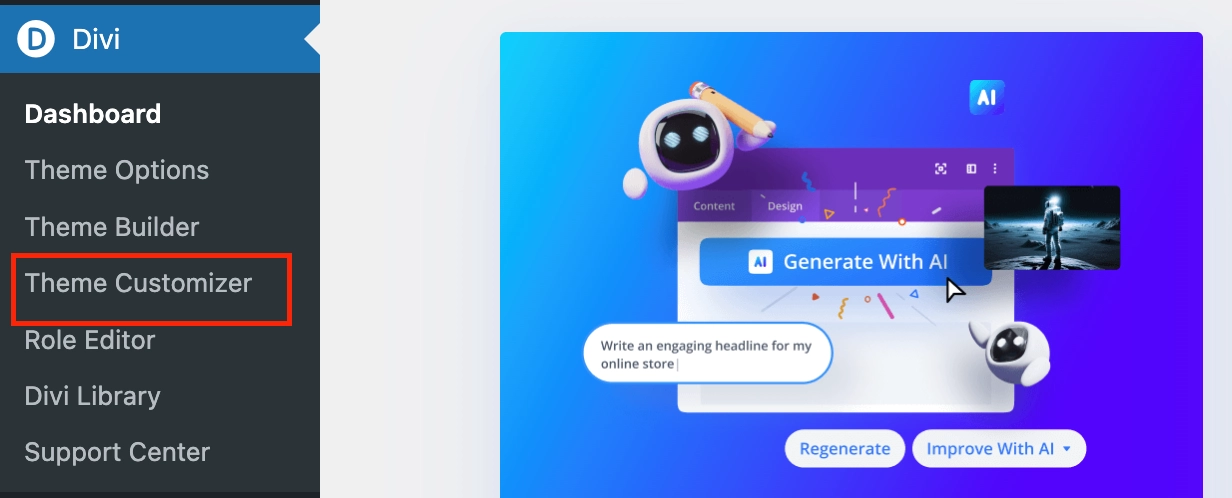
Navigate to the Theme Customizer from the dashboard of your WordPress website. Hover on the Divi option and click on the Theme Customizer to open it.
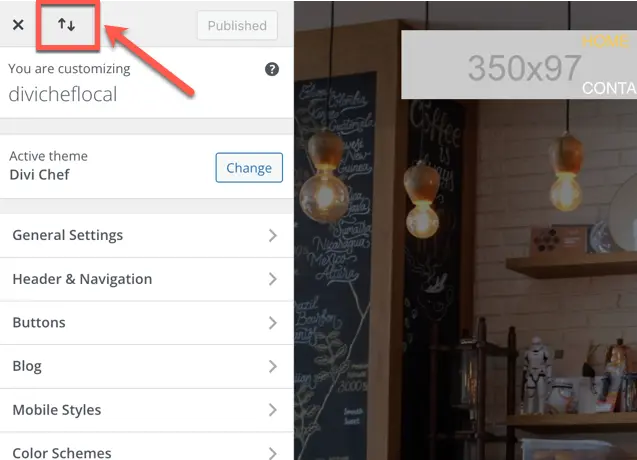
Click on the import export icon at the top of the theme customizer.
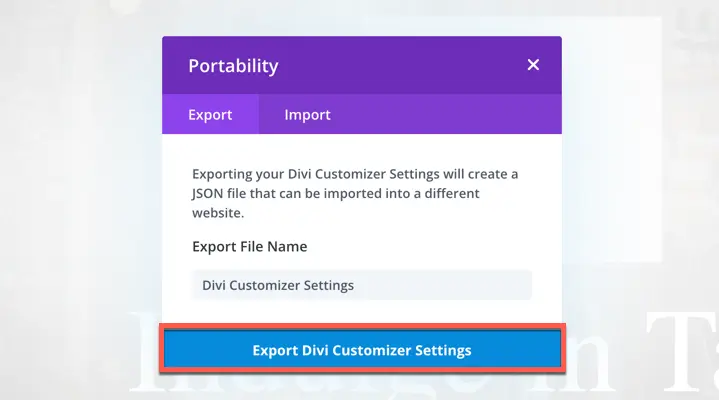
Import and Export Customizer options will instantly appear on your screen. The Export tab is active by default. Give an appropriate name to the export file and click on ‘Download Export’. The downloaded JSON file can be used on any other website with the help of the same import option.
B. How to import Divi Theme Customizer settings
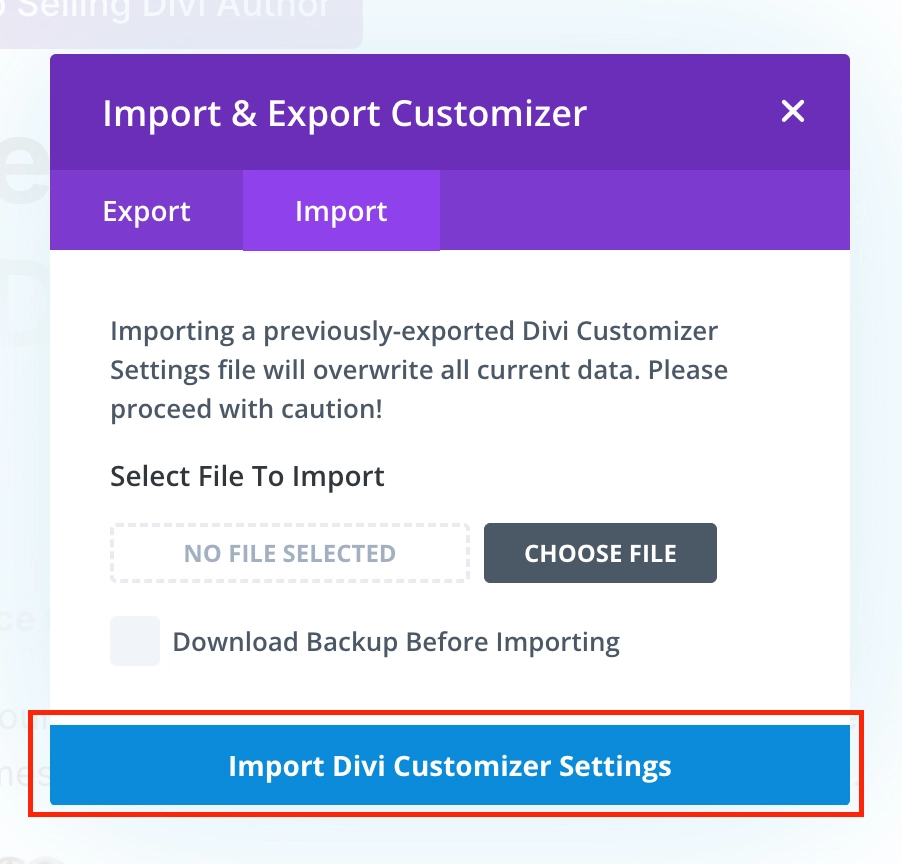
Click on the Import tab, and select the file that contains all the settings for the Theme Customizer of your desired website.
Don’t forget to download the backup of the existing settings of the Theme Customizer if you want to use it further. Click on ‘Import Divi Customiser Settings’ to deploy the settings of any other website on your current Divi website.
4. Import and Export templates from Divi Theme Builder
Divi Theme Builder is an amazing tool to transform the structure and design of your website. You can customize the header, footer, and body of your website in your way using Divi Theme Builder. There can be a lot of templates saved in your website’s Theme Builder.
Now if you want the same templates on any other website or want to replicate the existing website with the templates of other Divi websites, the Divi Portability option in the Divi Theme Builder is the perfect solution.
Let’s see how we can export or import Theme builder templates.
A. How to export Divi templates using Theme Builder
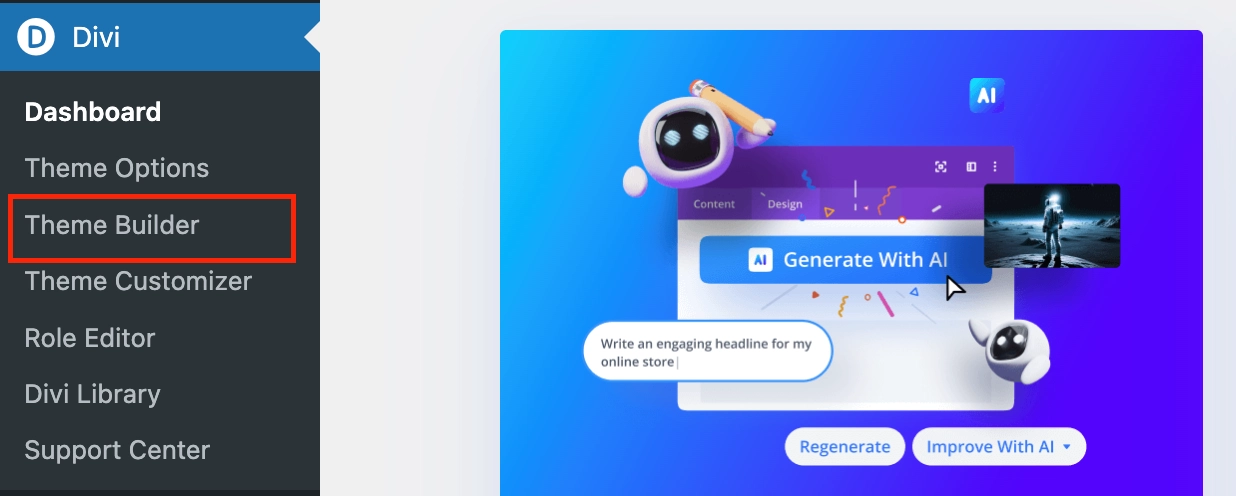
Navigate to the Divi from your WordPress dashboard. Click and open the Theme Builder.
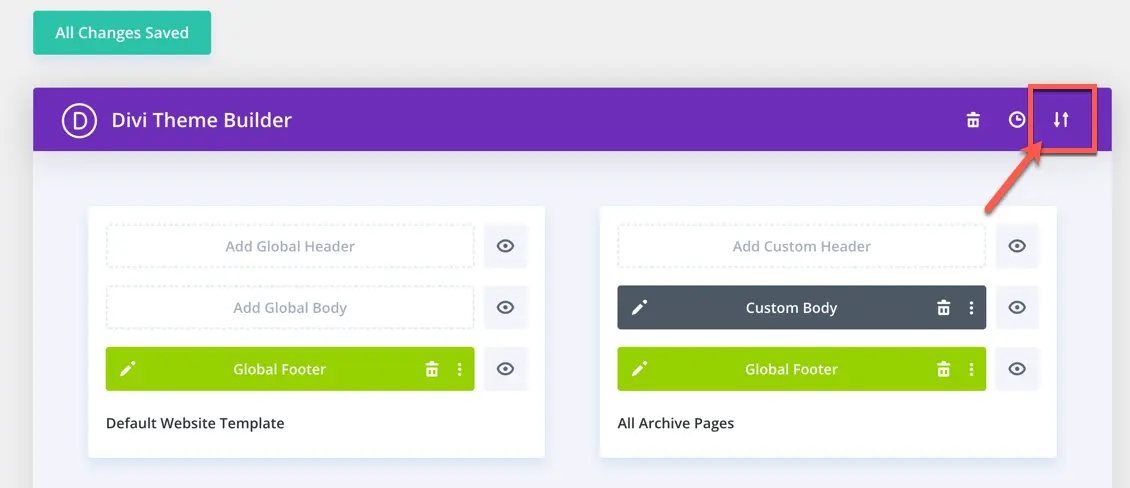
Click on the Divi portability icon on the Theme Builder and the ‘Import Export templates’ dialogue box will immediately appear on your screen.
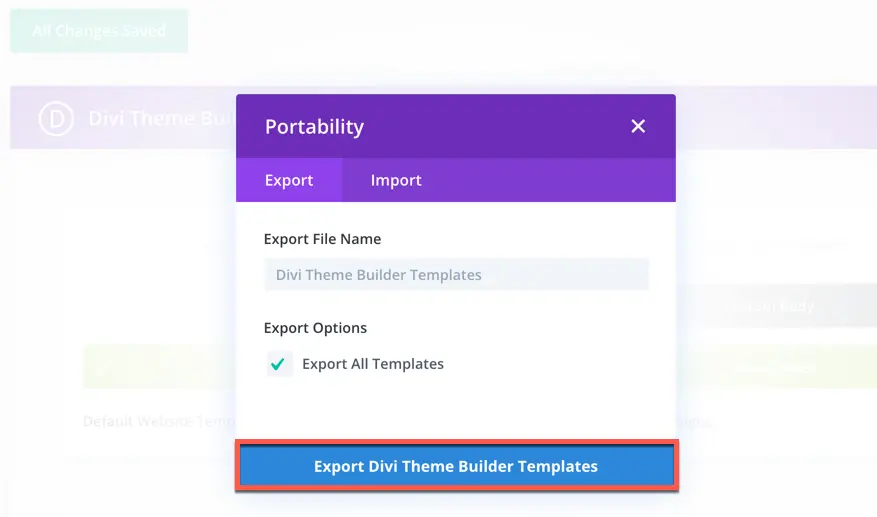
Select the templates that you want to export. By default, all the templates would be exported. Give a suitable file name, click on Export Divi Theme Builder Templates, and save the downloaded file.
B. How to import Divi templates using Theme Builder
To import a Theme builder settings you need to select the file and have to check mark some options which completely depend upon your requirements. By default, the first check box is selected that overrides the existing template of your website.
You must select the second check box if you want to pre-assign the imported template according to its type, i.e. if it is a new product template then as soon as the import is done it will be assigned to the products replacing the existing product template.
Also, it is recommended to download a backup of the existing template before importing a new template so that you can revert the changes if you face any problems with the new one. After this click on ‘Save Changes‘ to save the import.
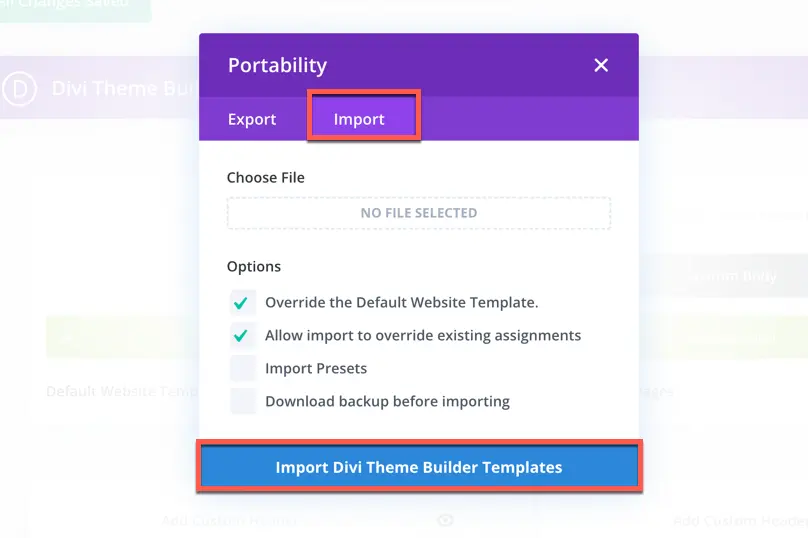
Refresh the Theme Builder and check for the newly imported templates.
5. Import and export Divi Layouts in the Divi Library
Divi library is a useful place where you can save all types of your custom and pre-built templates, layouts, and sections for further use on your website. When you use the Divi Visual Builder there is an option to save that item to the library. Give the item a suitable name and you can access it anytime from the library while dropping a new module.
If you want to replicate the same layouts on your other website or want layouts from another website, that can be easily done using the Divi Portability system in Divi Library.
Let’s take a quick look at the steps to Import and Export Divi Library layouts
A. How to export Layouts from the Divi Library
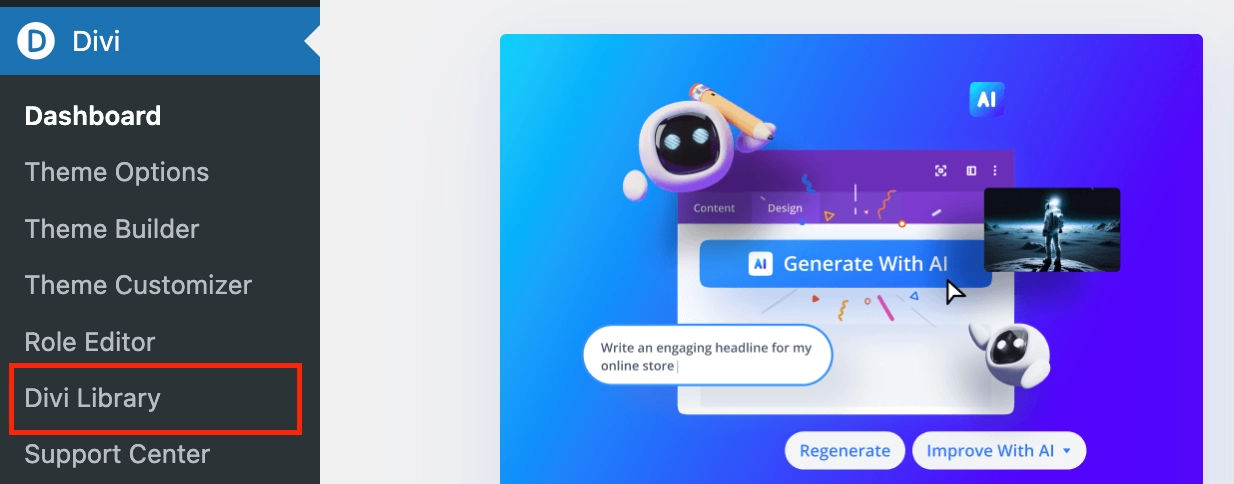
Go to your WordPress dashboard and hover on the Divi option. Now click on Divi Library to open it.
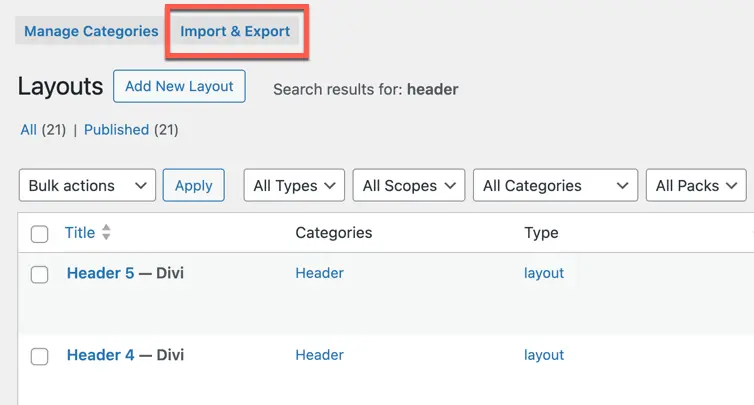
Click on the Import Export button at the top of the Divi Library. These are some already existing header layouts highlighted using the arrow in the ‘Type‘ column.
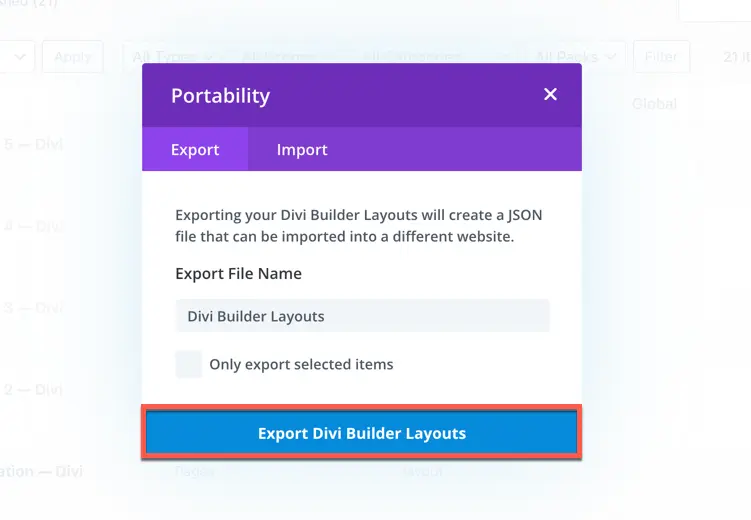
A dialogue box with Import export tabs will be opened. Now give a suitable filename to the export file and select the checkbox if you only want to export the selected layouts. You can select the individual layouts before coming to this Import-Export dialogue box.
By default, all the layouts will be exported. Click on the Download Export button. You also have the option to save it on the Divi Cloud and reuse it on your other Divi website. Save the downloaded layout file and use your custom layouts on any Divi website.
B. How to import Layouts from the Divi library
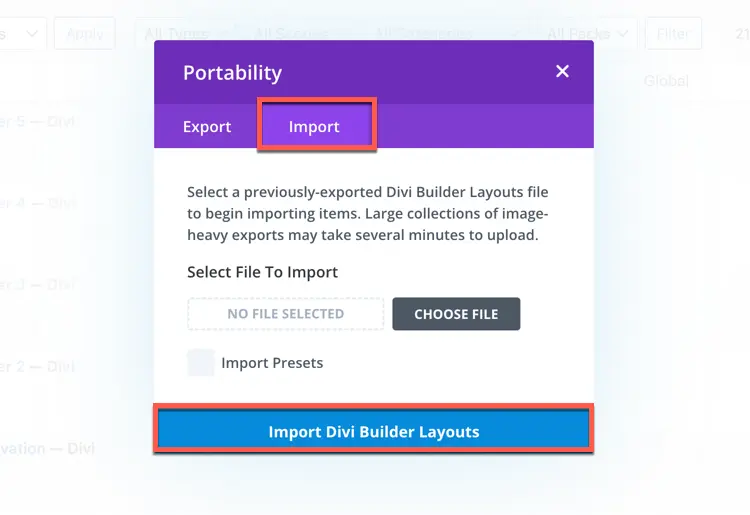
To import layouts from other websites you only need to select and upload the exported JSON file. Select the Import Presets checkbox if you want to import the styling on the elements used in the layouts as presets. Reload the page again and check for the imported page layouts.
Moreover, you can also use the Divi Layouts Extended which contains more than 2000 useful pre-built layouts that can make your website look more appealing without the hassle of importing layouts from offline files or the cloud. They will remain in your WordPress Dashboard inside the Divi Layouts Extended panel from where you may import them to your Divi Library and then use them anywhere on your website.
6. Import and export Divi Role Editor settings
You know very well that there are separate roles such as administrator, Author, Editor, etc. for users working on a Divi website. You need to provide separate permissions to them for performing operations such as editing content, layouts, configuration, and other similar operations. The same kind of permissions can be provided to access the Theme builder, Divi library, and other important components of Divi. Some of the important areas whose access can be managed from the Divi >> Role Editor option are
- Builder Interface
- Library Settings
- Module use
- Portability
Now if you want an exact similar set of user permissions on your other websites or import the Role Editor settings of any Divi website to this website, it can be easily done through the Divi Portability system.
Let’s see how we can do it.
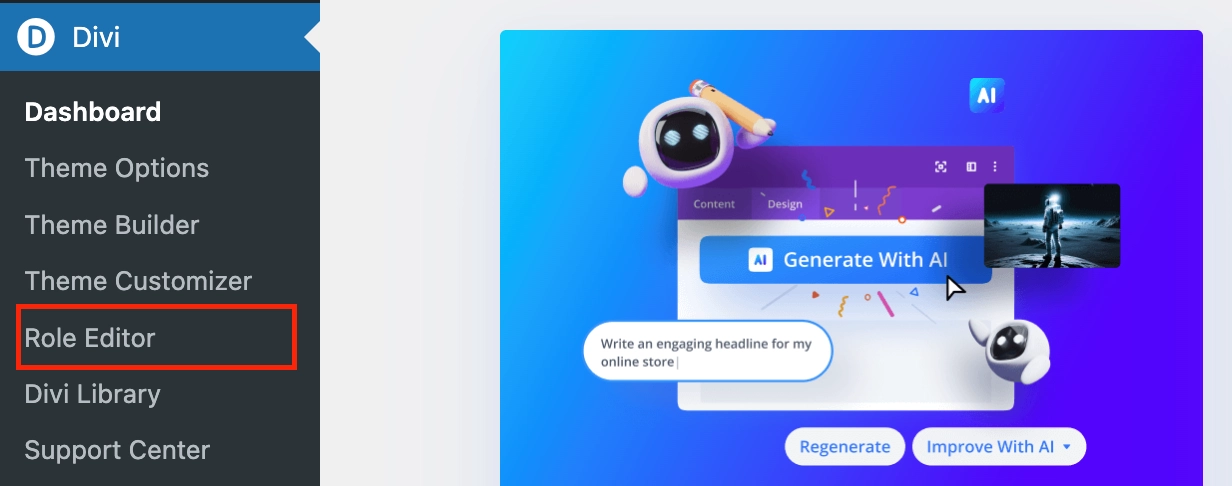
Navigate to the Divi Role Editor from the WordPress Dashboard.
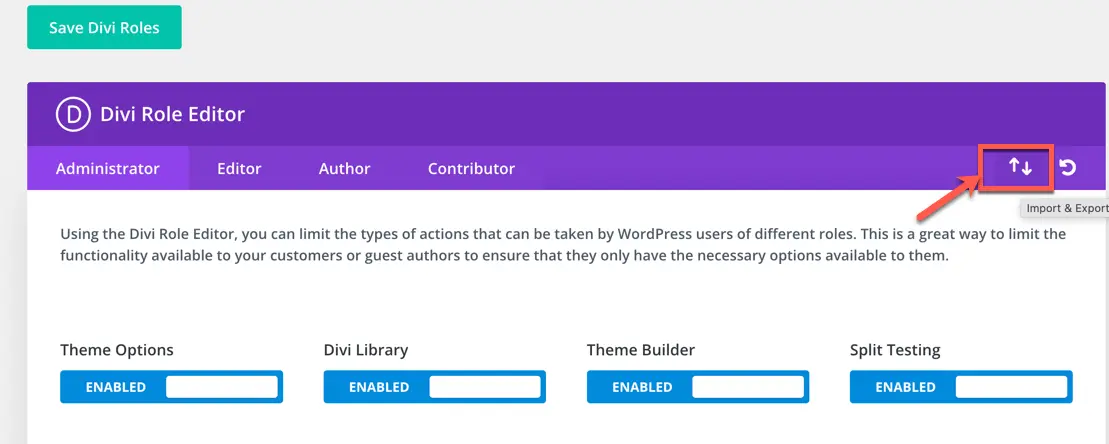
In the Divi Role Editor, you will find separate permissions for Administrator, Author, and other users. You can adjust the Role settings as per your requirements before performing an import-export operation. Look at the Divi Portability icon on the top right and click on it.
A. How to export Divi Role Editor settings
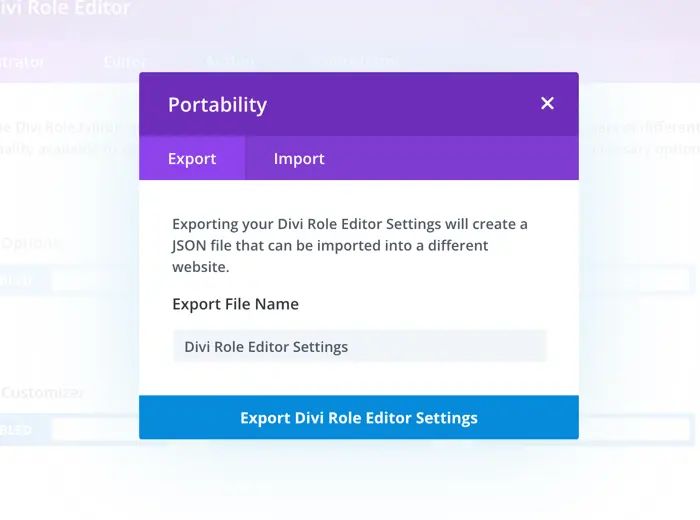
The dialogue box for Import Export Roles will appear with the Export tab active by default. To export Role Editor settings, go to the export tab give a suitable name to the export file, and click on the Download Export button. The export file will be downloaded within a few seconds. Now you can use that downloaded file to apply the same Role Editor settings on another Divi website.
B. How to import Divi Role Editor settings
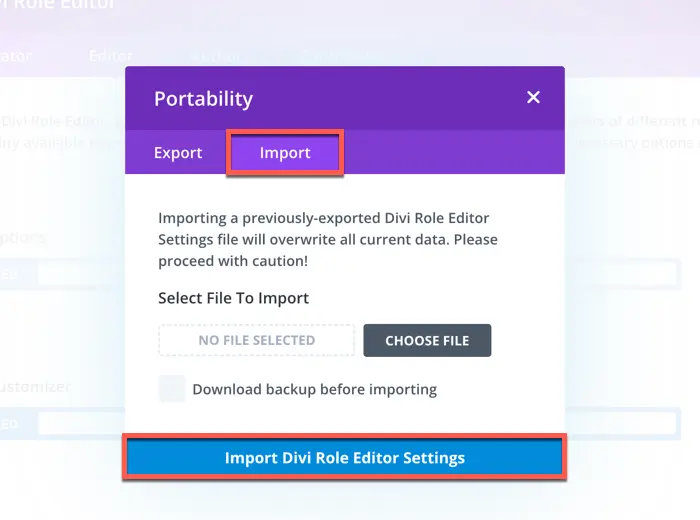
To import a Role Editor file, you need to click on the import tab which has the option to select the Role Editor file that you want to import. It is recommended to select the checkbox to download the backup of the current Role Editor settings before it gets replaced with the new one that is being imported.
Click on the Import Divi Role Editor Settings button to import the file. Now refresh the Role Editor and check if the newly imported settings are imported. Finally, click on the Save Divi Roles button on the top of Divi Role Editor to apply the new role settings.
This article clearly explains all the possible ways to use the Divi Portability system on your website. It’s a wide area and we have tried to cover every aspect of this Divi component. Hope you’ve liked the Divi Portability system which is quite helpful for migrating settings, templates, layouts, etc. from one Divi website to the other.




0 Comments