For an online venture, a contact form works similarly to the visiting card of an offline business. Interested customers contact you whenever they want. And a contact form available on the website does the same. Interested users contact you whenever they want. If you’re using a Divi theme, then creating a contact form is pretty simple. It provides you a module, which you can easily insert on a page and create a beautiful Divi contact form.
And every time a user tries to connect with you using the contact form, you get a message in your inbox. By default, the message you receive only has the message in it, a plain text. But if you want to change that pattern, you can do that with ease.
Therefore, in this blog post, we’re going to find out how we can change the contact form’s message pattern. So, without taking a moment, let’s dive right in!
Step 1: Create a Contact Form
Before we change the message pattern, we’ll receive it in the inbox; first, we need a Contact Form.
So, to create a Divi contact form, insert the Contact Form module on a page. Upon inserting the module on the page, you’ll get 3 fields by default in the Contact Form that are Name, Email, and Message with a Submit button.
Step 2: Add more fields in the Contact Form
To add more fields in the Divi contact form, simply go to the module’s settings, and inside the Content tab, click Add New Field.
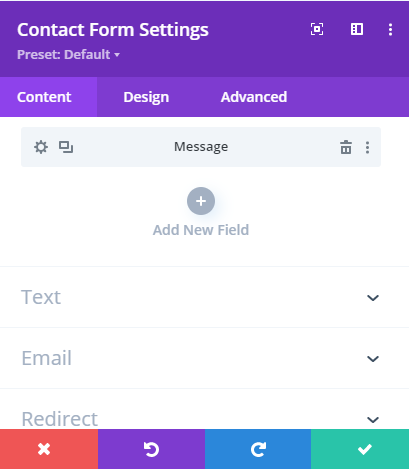
Once you click the Add New Field icon, it will open up a new window where you get the option to enter Field ID and Title. These two input fields of the new contact form field will help you recognize that field later when customizing or making changes to the contact form and its message pattern.
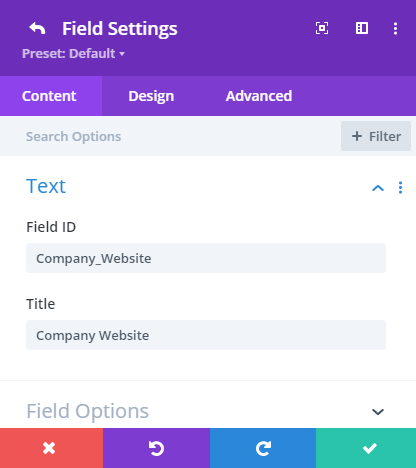
Moreover, the Title input field, shown in the above screenshot, reflects the text we type in as a placeholder for that particular field in the contact form. For example, I’ve used “Company Website” as the title, and it will be displayed in the contact form for the field on the front end.
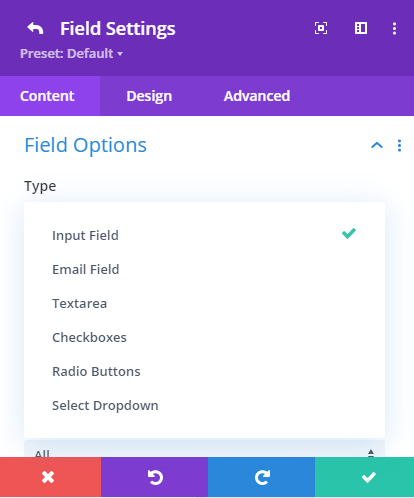
Once you’ve given the new field its title and id, move to the Field Options settings, to assign its type. Like how you want to use this field, an Input field, or Email. There are a total of 6 field types that you can assign to your new field. And it will work according to that type.
For now, the 6 field types available in the Divi contact form module are Input, Email, Textarea, Checkboxes, Radio Buttons, and Select Dropdown, same as you can see in the above screenshot.
Step 3: Assign an email address
For this tutorial I’ve created the below contact form with additional fields other than what we get by default. There are total 7 fields in the contact form in which we’ve added 4 fields additionally. The extra fields we’ve added are 2 text fields, Phone and Company Website. 1 dropdown field to provide users with the country option. And the last field we’ve added is the Radio Button field, asking users to how to contact them back, either by phone or an email.
That’s it, our Divi contact form is almost ready.
After creating a contact form what required from you to do is assign an email address to it. This email address will be served as the receiver of the message. When the user sends the message it will arrive in the inbox associated with this particular email address.
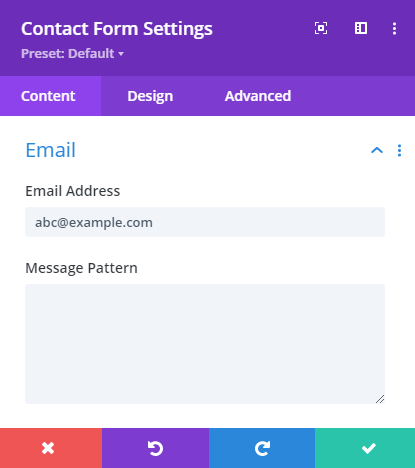
If you want to send the message to the administrator’s email of the website, then there’s no need to enter it here. The Divi will take care of it itself. However, if you want to send the message other than the admin’s email, then simply go the Email settings in the Content tab of the module, and inside the Email Address field, input your email.
Once you’ve entered the email, or not, let’s move to the next step of this article which is changing the message pattern.
Step 4: Change the message pattern
Creating a custom message pattern for the contact form isn’t a tough task. All you need to do is add %% symbol before and after the Field ID of a field inside the Message Pattern field available in the Email settings of the Content tab.
For instance, we want to include Company Website field in the custom message pattern, then how we’re going to write it. We simply go to field’s settings, and then from there, we’ll copy its Field ID which is Company_Website.
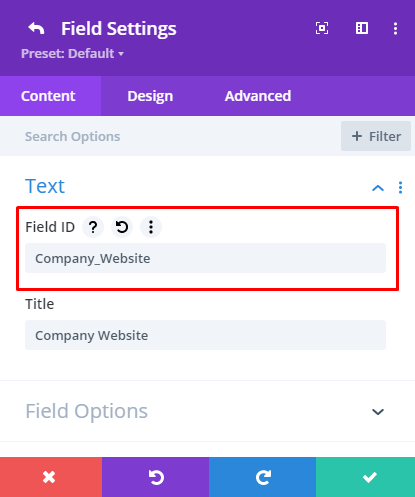
After fetching the field id, we’ll go to the Email settings, and then inside the Message Pattern field, we’ll write the field id as, %%Company_Website%%. You can get the idea from the below screenshot.
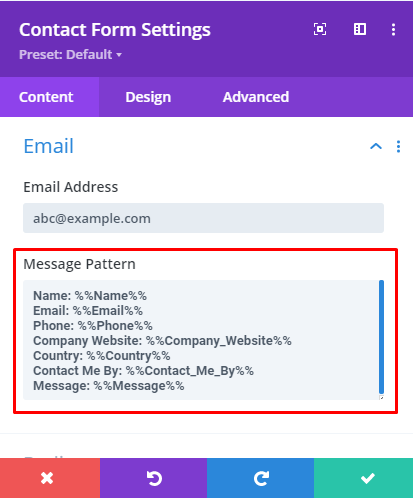
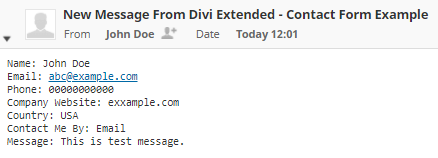
Once added the required field in the custom message pattern, save it, and then send a test message to see if changes have occurred on the pattern. If everything will go alright, then you’ll get the message similar to the below screenshot.
Conclusion
By following these steps, you can, too, create a custom message pattern for your Divi contact form. Which would be more clear and in a way you want it to deliver the information. Perhaps you want message first or users email. You can create the custom message pattern according to the requirement and the way best suits you.
If you think this article has helped you or it’s helpful for the Divi community, then please share it as much as you can. However, if your still not getting it right, then let me know in the comments. I’ll be more than happy to assist you in creating a custom message pattern for a Divi contact form.
Last but not least, if you want to customize your Divi contact forms created using the Contact Form 7 & Caldera Forms, then you should try our new Divi module Form Styler.




Is there any solution to have an email template?
It is a good documentation for a simple form, but what can I do when I have to make a complex form with conditional logic?
I work on a site and I have to make form with a dropdown. The rest of the elements in the form depends on the selected element from the dropdown, so I want to make an email pattern, where I set something like that: If a is selected, write something in the email, with the content related to a, and if b is selected, do the same, with the elements related to b.