Breadcrumbs are very important for both user and search engine perspective. It helps the user to navigate the website through pages, smooth and easy. As well as it also helps the search engine to index the website’s pages in the server depository in an organized way. So, whenever a query hits the server depository, the page with related content would appear in the search result with breadcrumbs. It improves user interaction with the website, and boosts SEO, too.
Therefore, if you want to add breadcrumbs to your Divi theme website, then this article is what you looking for. In this blog post, we’ll take a look at new plugin called Divi Plus. And will learn how we can create Divi breadcrumbs using this powerful Divi plugin.
Divi plus has 7 unique Divi modules. All can be use to create beautiful website segments, which are essential in day to day website designing. And its Divi Breadcrumbs module to create beautiful breadcrumbs in Divi theme website.
Adding Divi breadcrumbs module on a web page
To move forward in this post, first, you’ve to purchase the plugin. And then install it in your plugins library.
Make sure you activate the plugin because sometimes we forget to activate it and then get anxious. I do it many times.
Step 1
After installing and activating the plugin, go to all pages tab and select the page where you want to add Divi breadcrumbs.
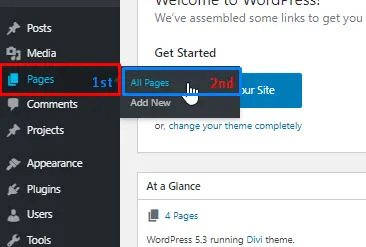
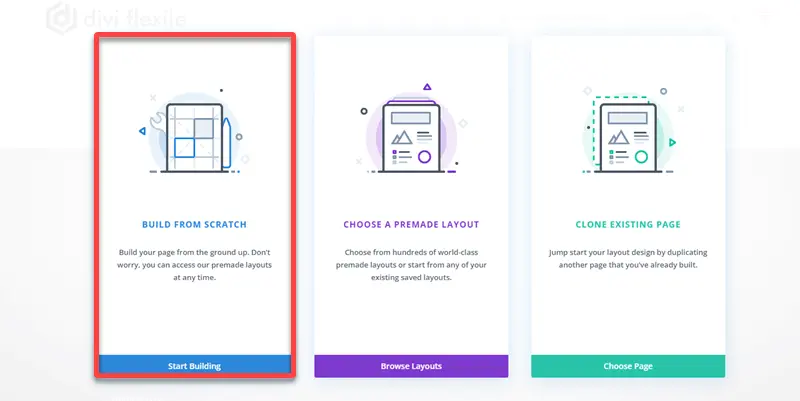
Opening of the page, select use Divi Builder. And then choose build on the front end for better designing experience. After that choose Build From Scratch.
Step 2
Insert new row, and choose DP Breadcrumb module.
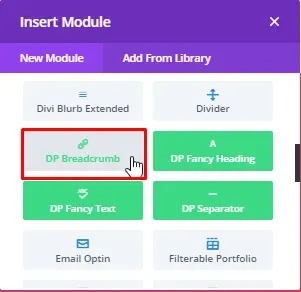
The breadcrumb will appear on your web-page. Now, it’s time for some customization. Make sure you’ve assigned parent and child for all the pages on your website. Because if not, then it can nag the module to display breadcrumb on the web-page.
Creating Divi Breadcrumbs
Step 1
From two layout options choose layout 1.
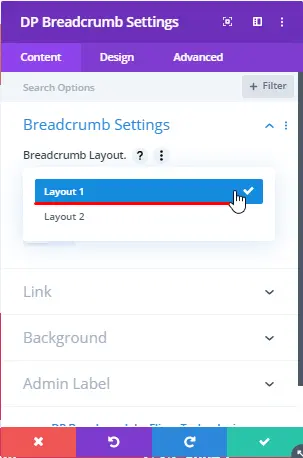
After choosing layout, tap on Design tab.
Step 2
In Breadcrumb Styling, set color of Breadcrumb Background to #840018. And then, check “Different Background for last item” as “YES”.
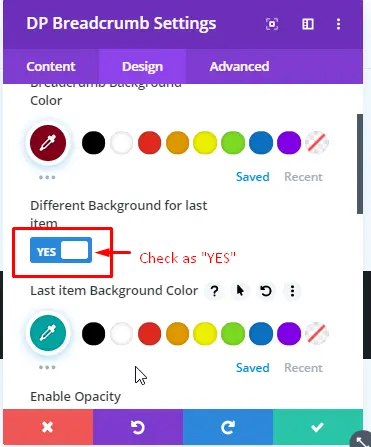
Set color for last item Background to #00A5A2.
Step 3
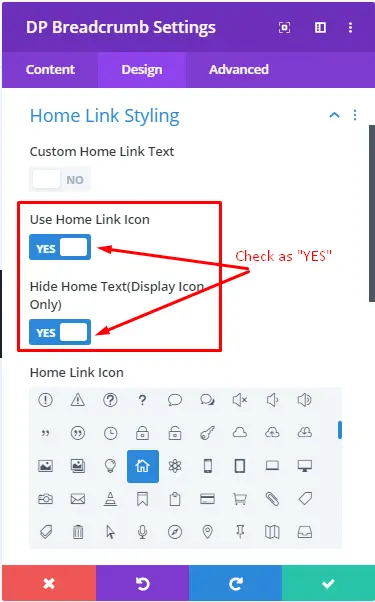
In Home Link styling menu, check both “USE Home Link Icon” and “Hide Home Text” as “YES”.
Home Link Icon: See screenshot
Set Home Link Icon Color to: #00A5A2
Step 4: Text Settings
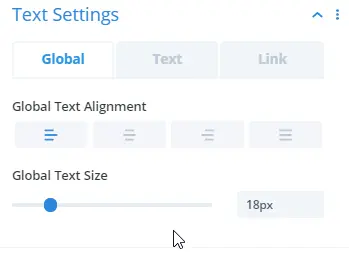
Global Text Settings-
Text Alignment: Left
Global Text Size: 18px
Text Text settings-
Text Font: Nunito
Font Weight: Semi Bold
Text Color: FFFFFF
Letter Spacing: 1px
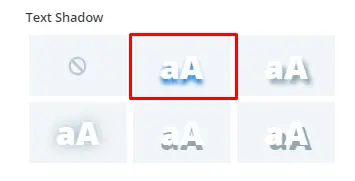
Text Shadow: See screenshot
Text Shadow Color: 000000
Link Text Settings:
Keep all the settings same as the text. And leave other settings as the way they were and your breadcrumb is ready.

Creating Divi Plus Breadcrumbs using layout 2
Divi Breadcrumbs with text separator
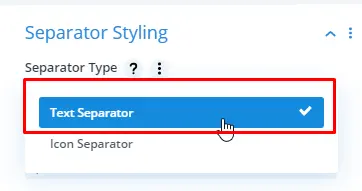
Separator Type: Text Separator
Separator Text: “|”
Font Size: 25px
Separator color: #30C419
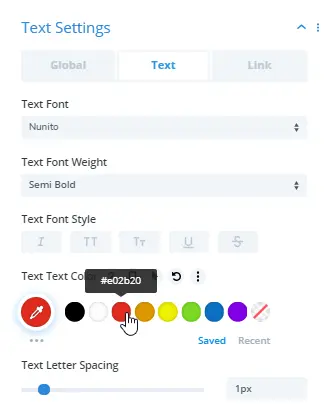
Text Settings-
Font: Nunito
Text Font Weight: Semi Bold
Text Text Color: #E02B20
Letter spacing: 1px
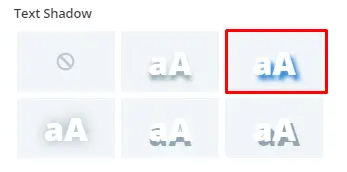
Text Shadow: See Screenshot
Shadow Color: #770019
Link Text Settings-
Link Font: ASAP
Font Weight: Regular
Link Text Color: #0C71C3
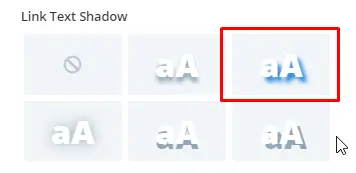
Link Text Shadow: See Screenshot
Shadow Color: #000000
Divi Breadcrumb with Text separator is ready.

Divi Breadcrumbs with Icon separator
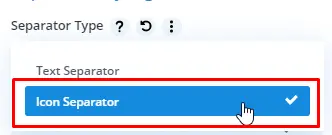
Separator Type: Icon Separator
Separator Icon: See Screenshot
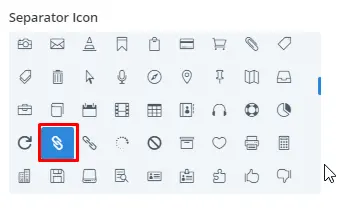
Icon Size: 16px
Separator color: #FF0221

Do more with filter option
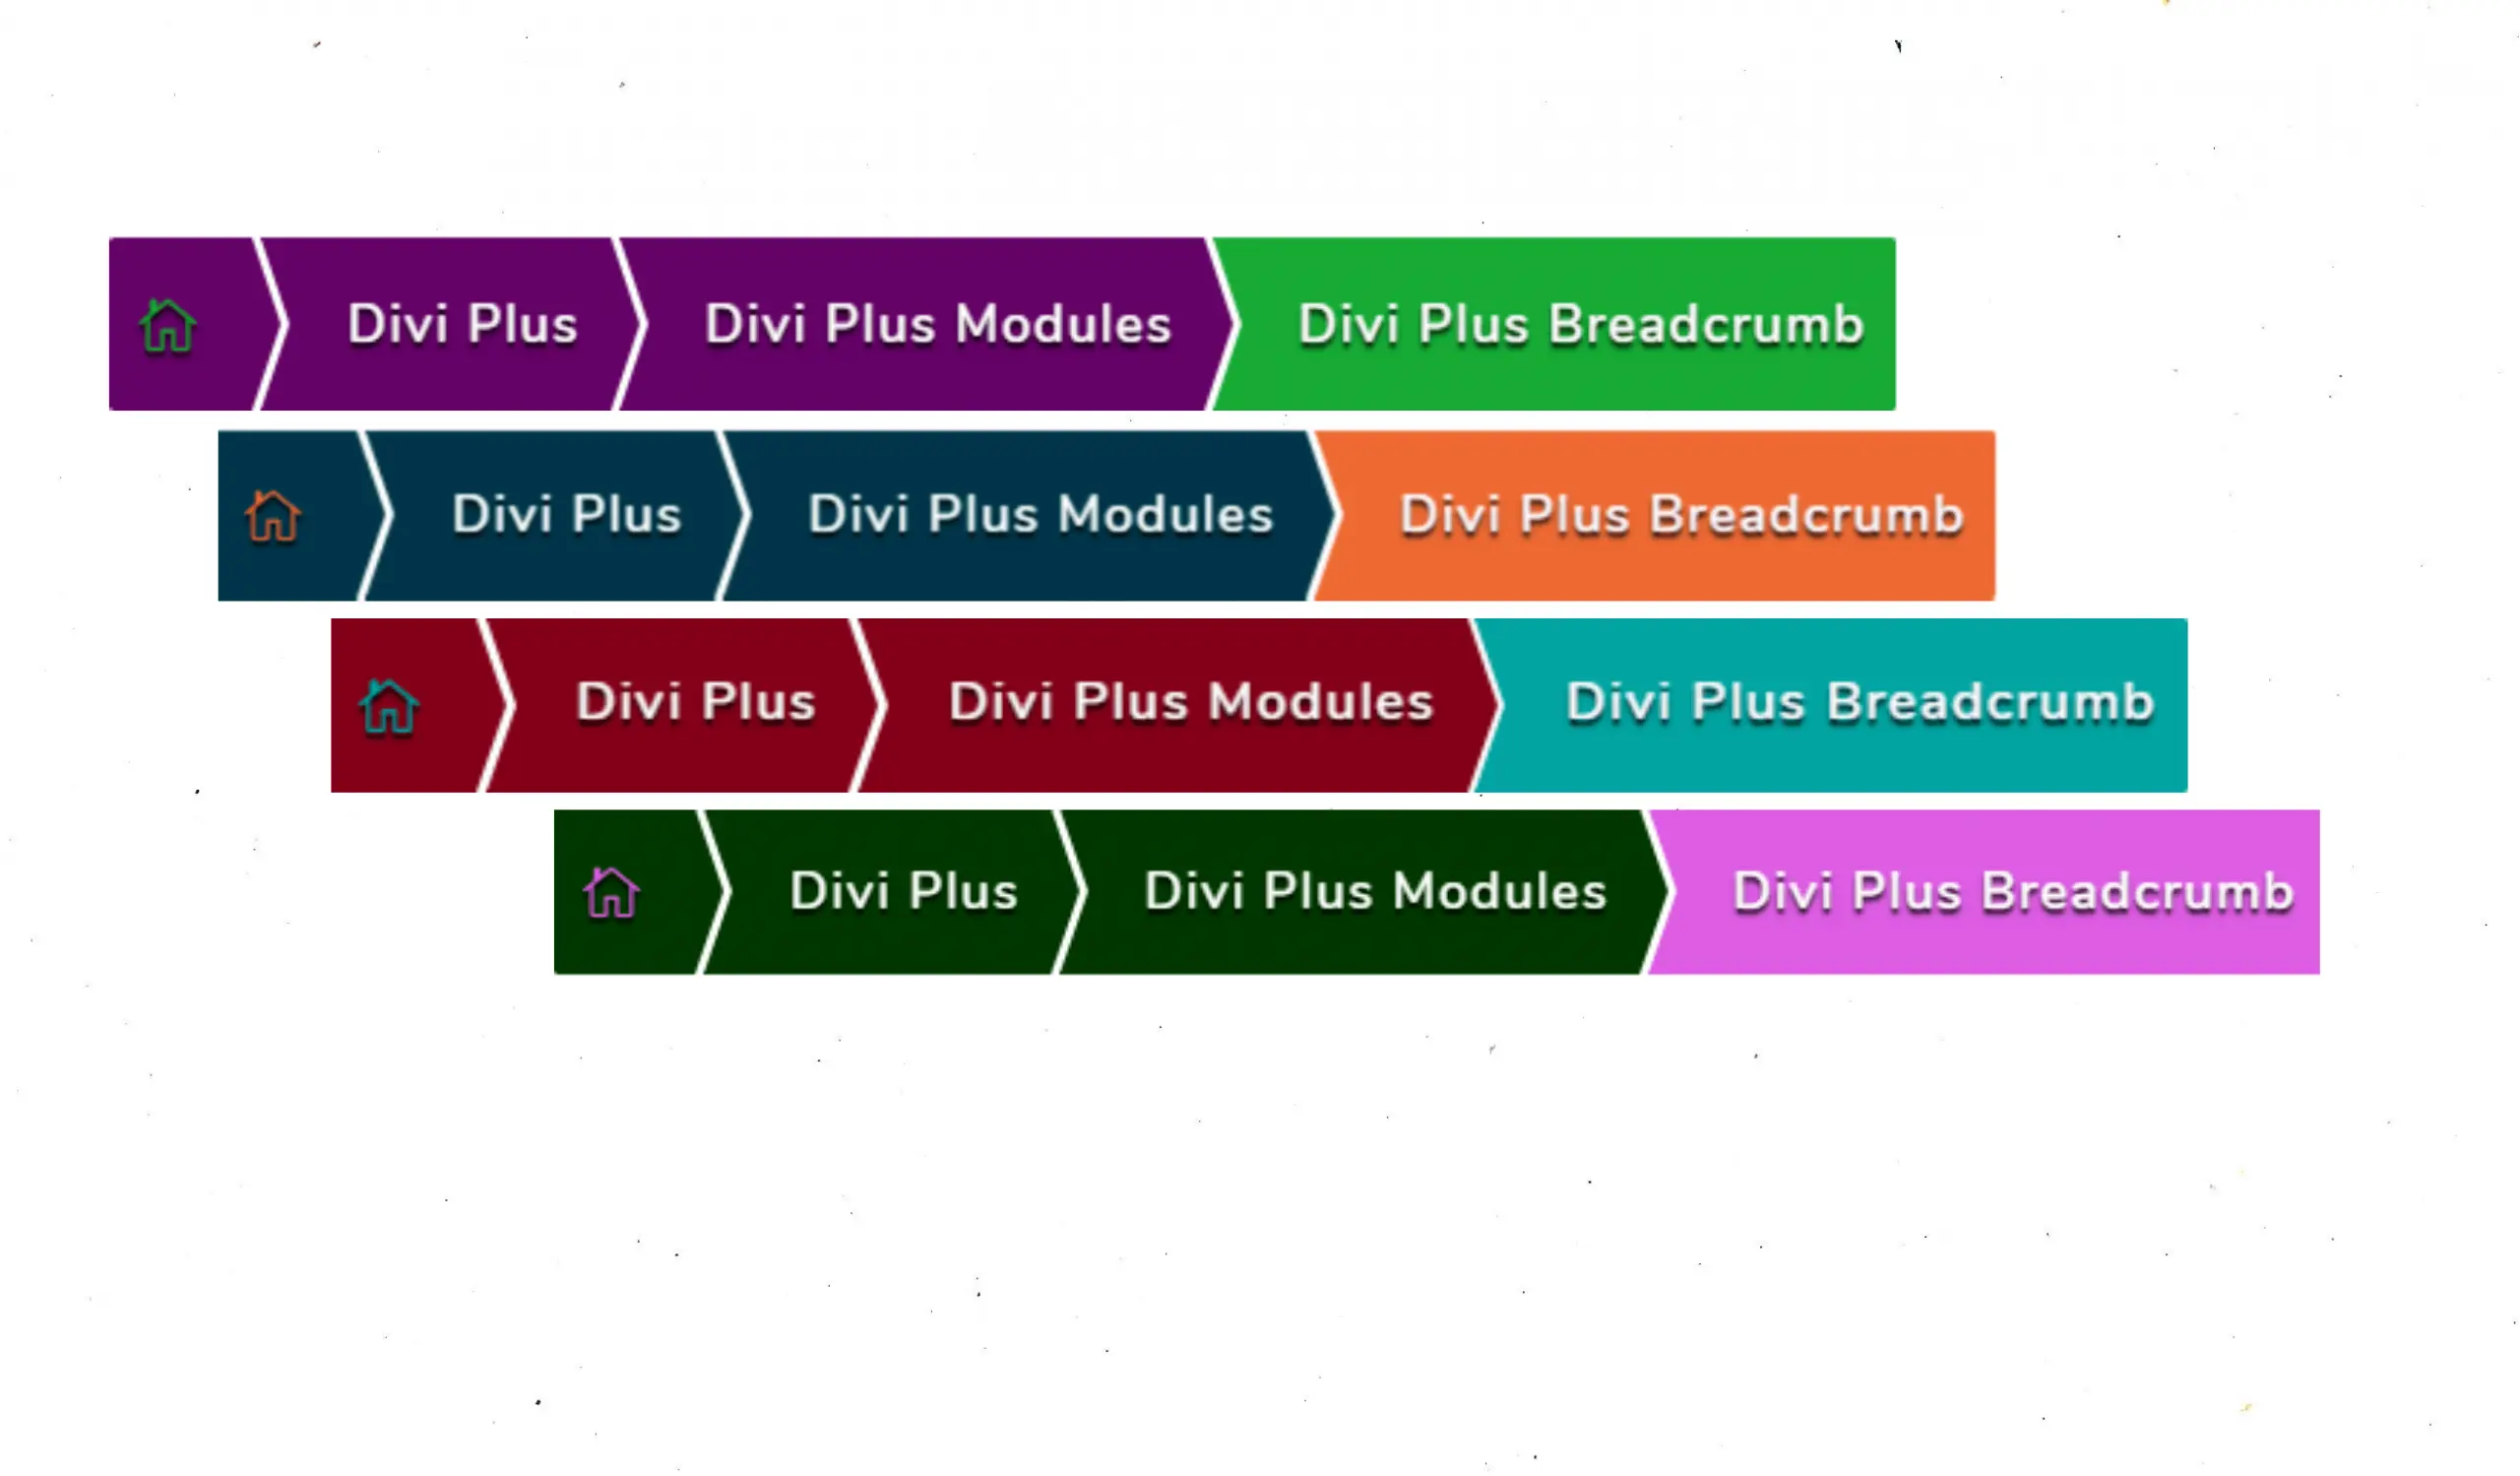
With Filter option in Divi module, you can create multiple color combinations for your Divi Plus Breadcrumb. It’s easy and most recommended if you want more than one design of your breadcrumb.

More Divi breadcrumbs example


Final thoughts on Divi Plus Breadcrumbs
Divi Plus Breadcrumb module is a fast and easy way to create breadcrumbs in your Divi theme. And with this module, you will not need any other plugin to create breadcrumbs like Yoast SEO. This single module takes care of everything related to breadcrumbs and how they’ll appear on the search result.
If you’ve already used this module of Divi Plus, then write your views in the comment section. Moreover, don’t forget check out its other Divi modules like, Divi text module, before and after image slider, fancy headings, separator and fancy text.



Thanks for this tutorial, really appreciate the steps to setting it up, makes it a whole lot easier to figure out.