
If you are a WordPress user, you must know that it lacks a default booking system for appointments and services. So, you are left with two options: either integrate a third-party booking app’s code or simply add a booking plugin. And we all know the latter is the right option to choose.
Why? Because with a plugin, all you need to do is:
- Install
- Activate
- Configure
- Use
But with a code, the case is way different.
Also, a lot of WordPress websites use Divi, which is one of the most famous themes and page builders out there. It allows you to build different types of web page elements easily as well as effectively. So, if this is the case, you should look for the booking appointments WordPress plugins that are compatible with Divi.
In this article, we will guide you on how to build a booking system for appointments and services with WordPress and Divi.
What Is a Booking System for Appointments and Services?
If you are running a consultancy firm, salon, parlor, or simply a company of some sort, you just need a booking system to schedule appointments and even meetings for the teams.

The online booking system is a great way to schedule meetings or appointments. The customer or client doesn’t have to visit the location to book their slot. Instead, they can use the online booking system from the comfort of their home or any place. Besides, an online booking system allows you to reap other benefits:
- Fewer no-shows as the system reminds the client about the appointment.
- No double booking.
- Better time management.
- Data collections and insights.
- Enhanced efficiency among staff.
Also, if you’re using WordPress, then using the available WordPress booking plugins makes it easier to create and manage the system.
There is a plethora of different WordPress appointment booking plugins. You can build the booking system using these plugins that are also compatible with Divi.
Let’s get started and see how to add a booking system for appointments with WordPress and Divi.
How to Build a Booking System for Appointments and Services With WordPress and Divi
Build a WordPress Appointment Booking System Using Bookly
One way to create a WordPress booking system is by using Bookly.
It is a free appointment-booking WordPress plugin that businesses and consultancy firms can use. Initially, you can use its free version, and when your business starts to scale, you should also move to its pro version, which comes with various useful add-ons.
The booking system made using Bookly is responsive on all kinds of devices.
To use it, all that is needed from your customers is to pick the right time and service that they want, with some personal details.
After this, it’s all done. You will instantly get an SMS or email notification about your customer’s activity. Not only this, but the activity is also automatically added to the Appointment Booking Calendar.
Let’s guide you step-by-step on how to use Bookly to make booking forms on WordPress.
Steps to Build a Booking System for Appointments and Services With WordPress Using Bookly
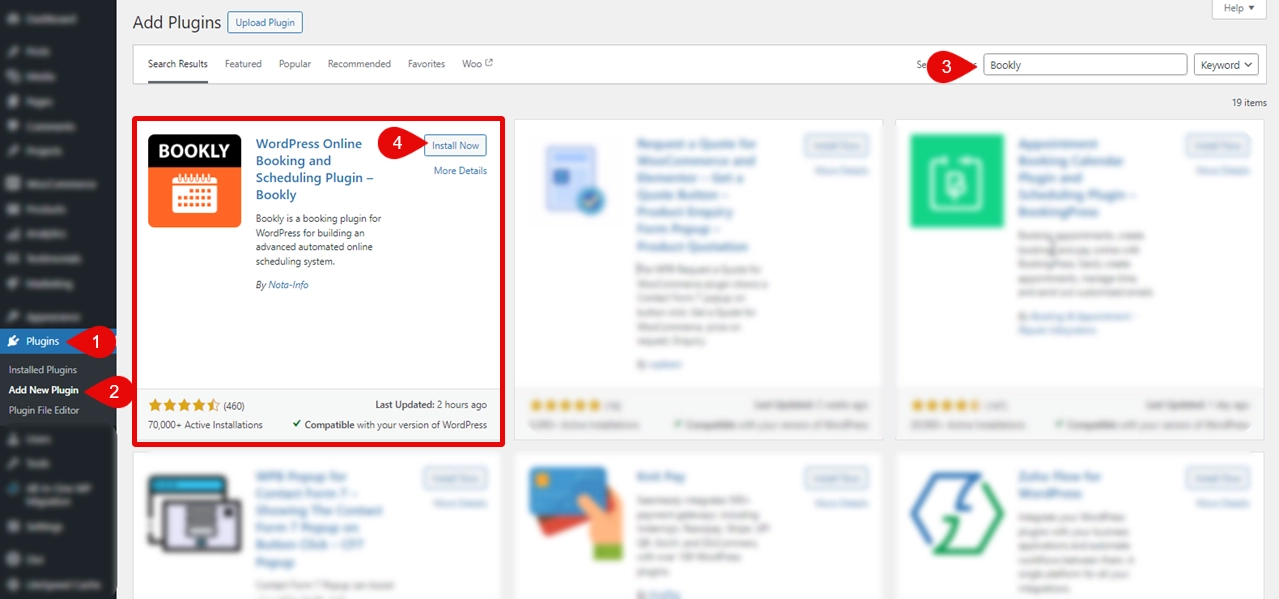
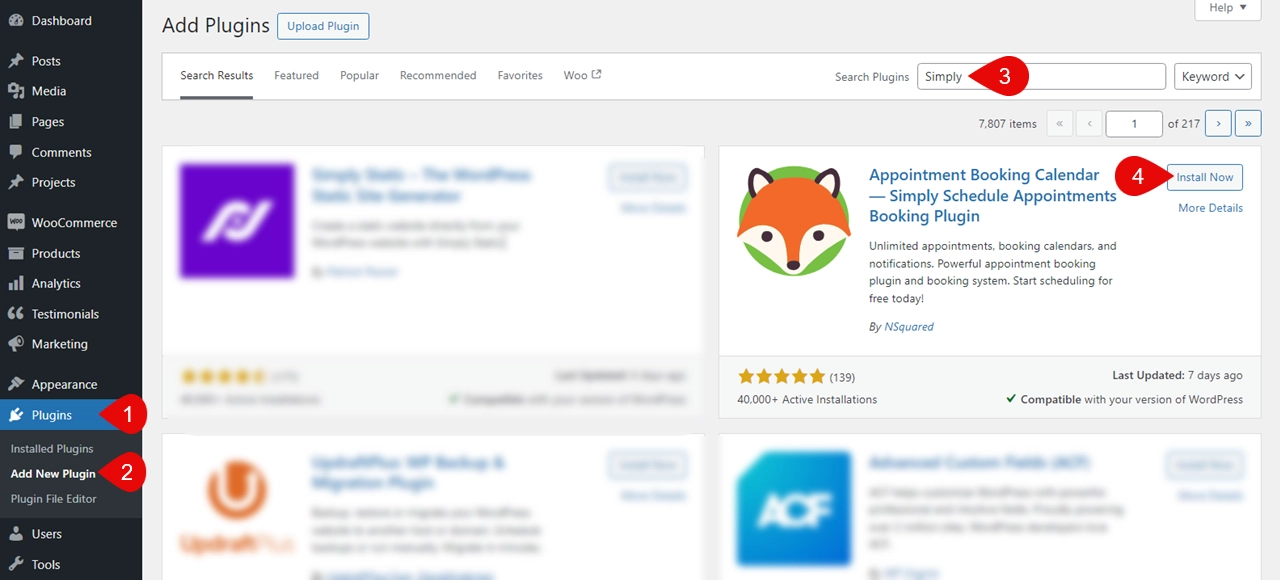
Go to the Admin Dashboard and navigate to Plugins → Add New Plugin and search for “Bookly,” then click on the “Install Now” button to install.
After successful installation, activate the plugin by clicking on the “Activate” button and you are good to go.
Open the newly activated Bookly plugin from the dashboard to set it up. Upon opening, you will see different fields that define the Company’s business hours.
Fill in all these tabs with the right information.
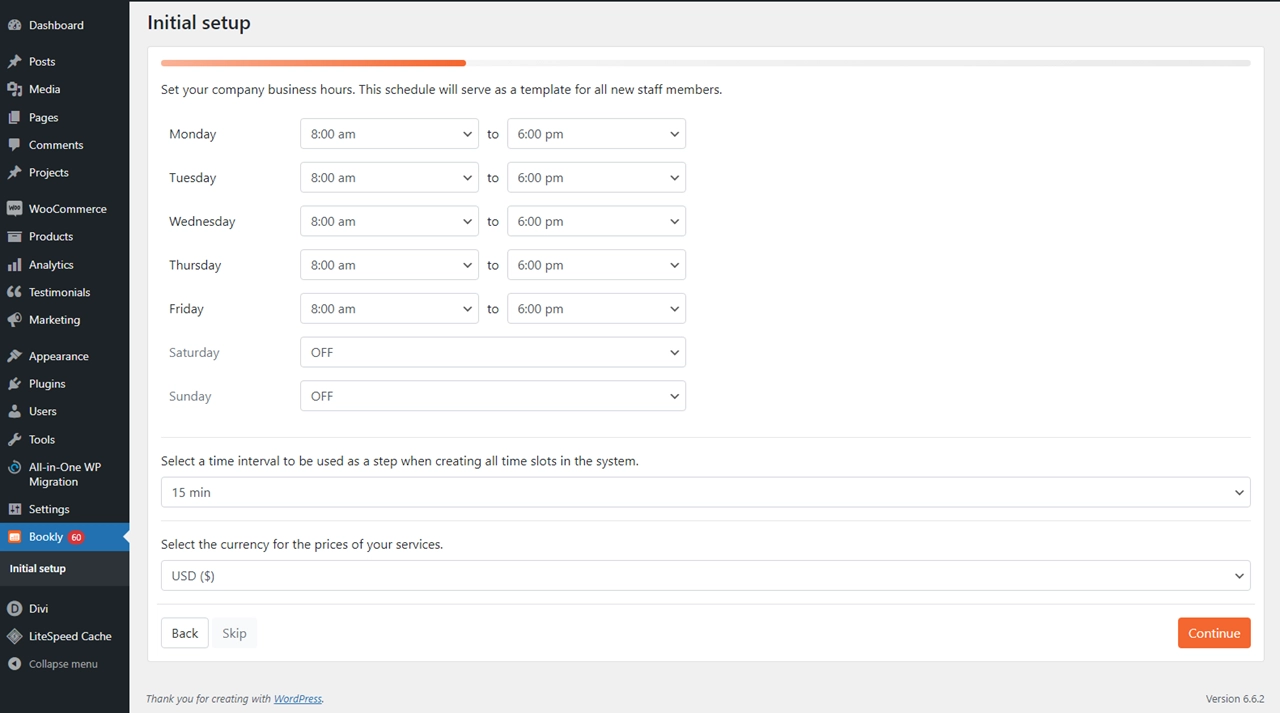
Add your timings, time interval for the slot, and currency.
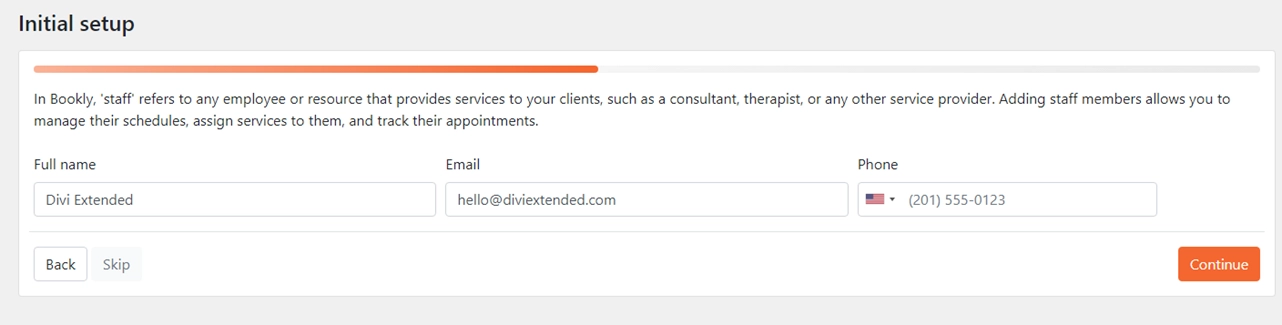
Then, add your employee’s name, email, and phone number, and then hit “Continue.”
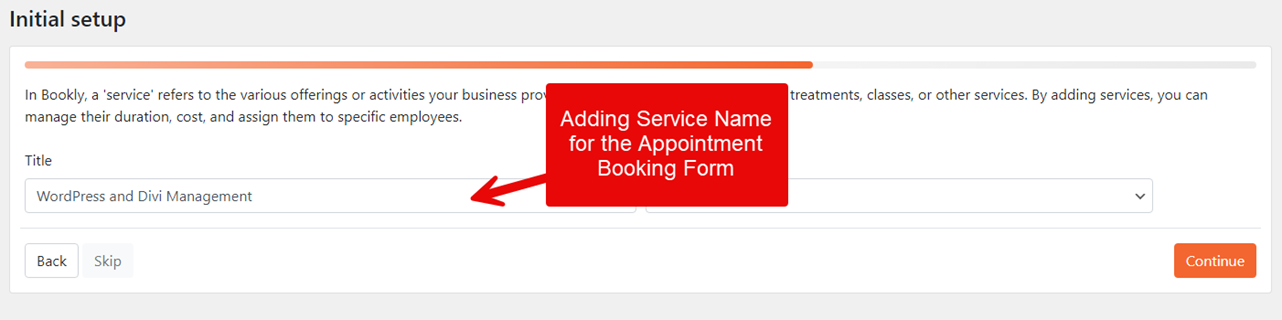
In the 3rd step, mention the service you are going to provide and its duration.
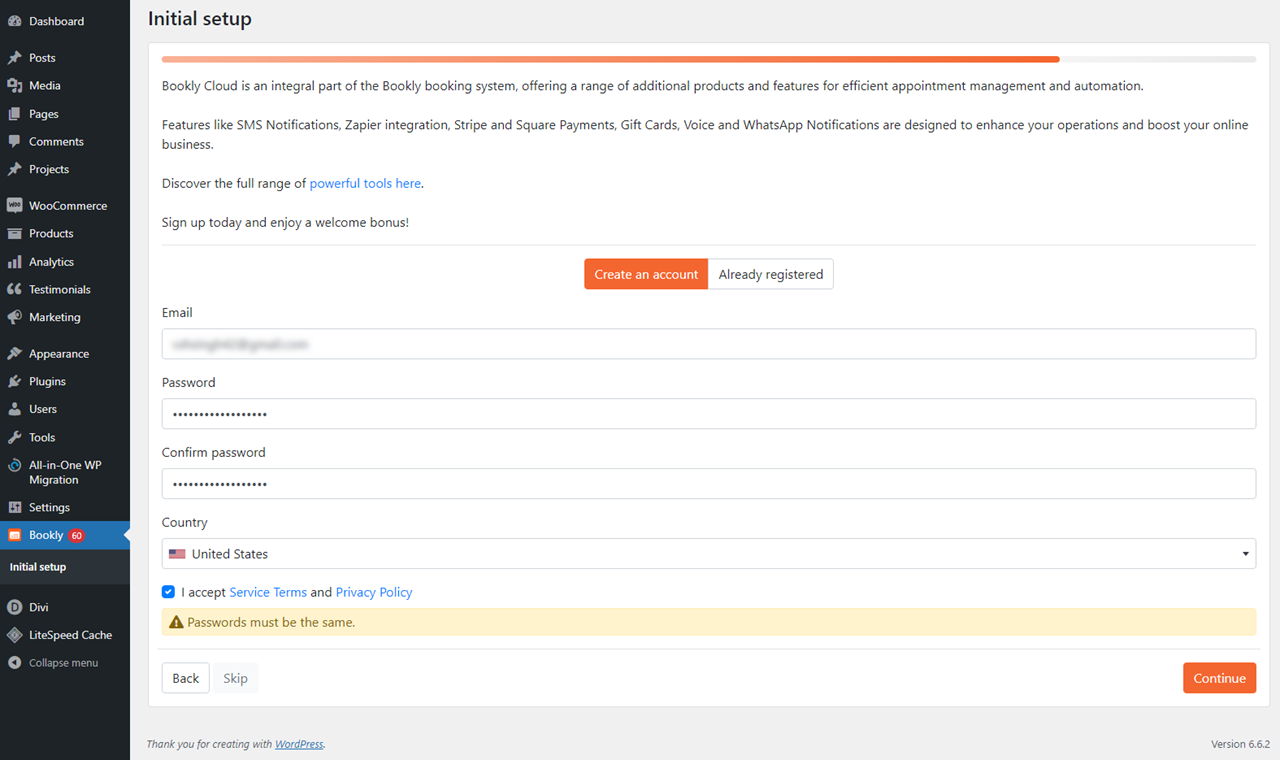
After this, the final step requires you to create your Bookly account if you haven’t already. Simply add the required details to create your account, and you’re done.
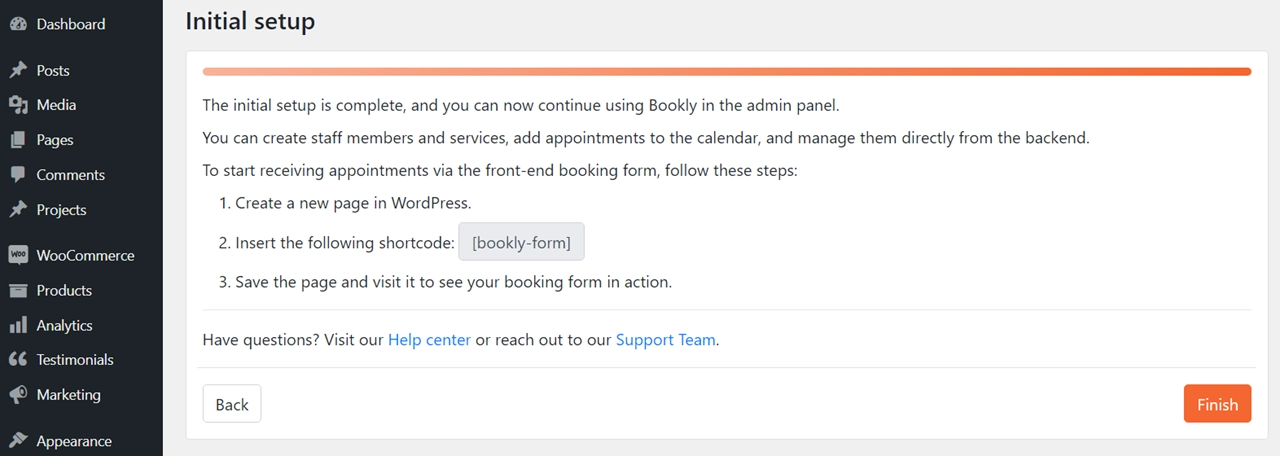
The initial setup is completed, now you have to open the page where you want to add your booking form in edit and paste the shortcode given.
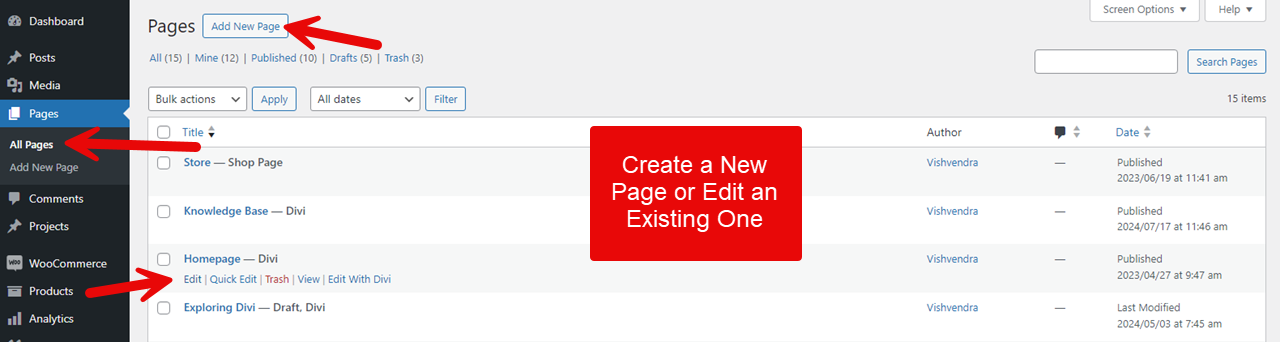
To do so, go back to the Dashboard and click on “Pages.” Select the page where you want to add the booking form. We are selecting the home page for this guide and opening it in Edit form.
Select the Blocks, the “+” sign at the top of the menu, and click on “Bookly” to add the form.

You can select the default options from the tab opened on the right side and view your page.
After selecting, view the page where you will see your form.
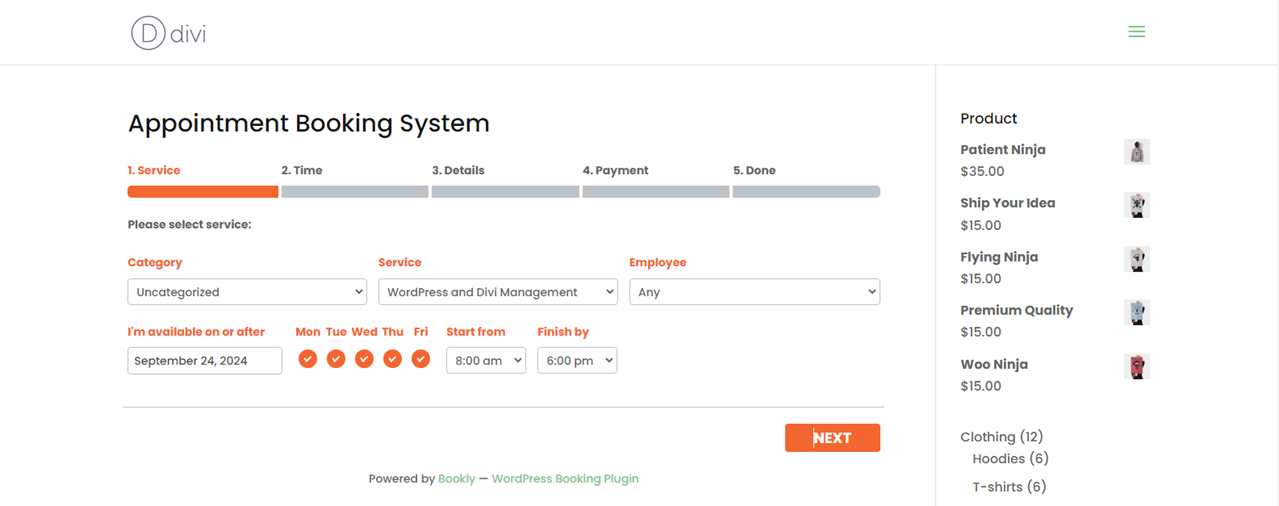
This is how you can create a booking appointment form with Bookly and watch your sales go up.
How to Build a Booking System for Appointments and Services with Divi
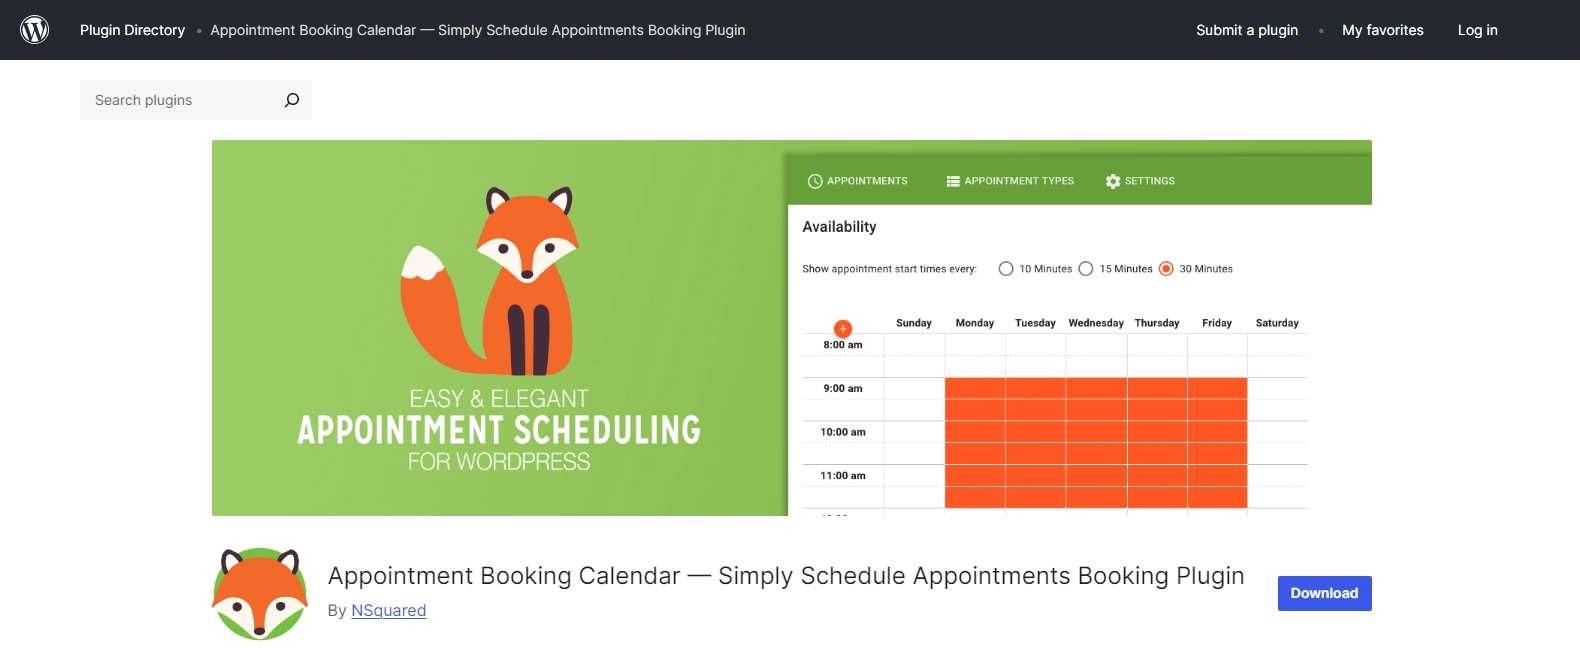
If you are using Divi for your WordPress website, you can use a Divi booking plugin for WordPress, such as Simply Schedule Appointments, Amelia, or Appointment Hour Booking. The best thing about these plugins is that they integrate well with Divi and give a seamless user experience.
We are using Simply Schedule Appointments to create the booking system; you can use any of the plugins mentioned above.
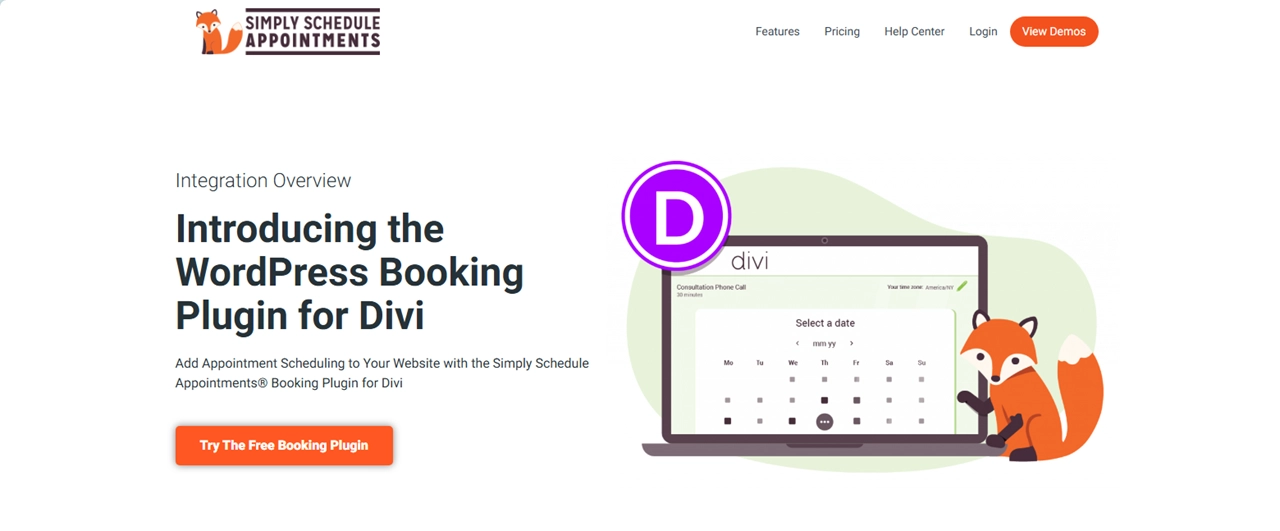
Simply Schedule Appointments is a freemium plugin that also comes with a premium paid version. This plugin helps you to accept appointments and bookings seamlessly through your Divi website. The automatic booking module for Divi available with this plugin gives your website a fine look and lets your customers know you work professionally.
Combining the power of Divi with this booking module, you can easily create a beautifully looking appointment calendar. It is an all-in-one integrated booking system for your business that will impress your clients.
Without wasting any more time, let’s see how we can install and use Simply Schedule Appointments.
Step 1: Installation of Simply Schedule Appointments
To install Simply Schedule Appointments, you can either go to their official website and download the free version from there.
You can also open the Admin Dashboard on your website and follow the steps we discussed for Bookly. Go to the Dashboard → Plugins → Add New Plugin → Search Simply Schedule Appointments. Then, install the plugin and activate it.
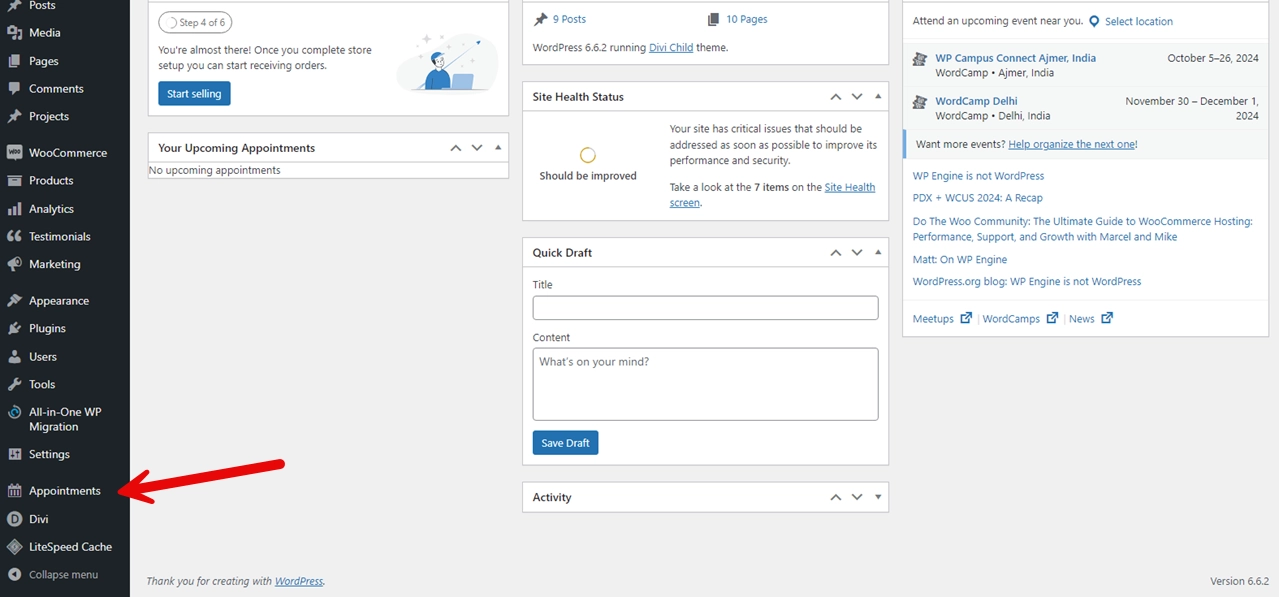
In the dashboard, find the option “Appointments” and click on it.
You will be redirected to the Simply Schedule Appointments page.
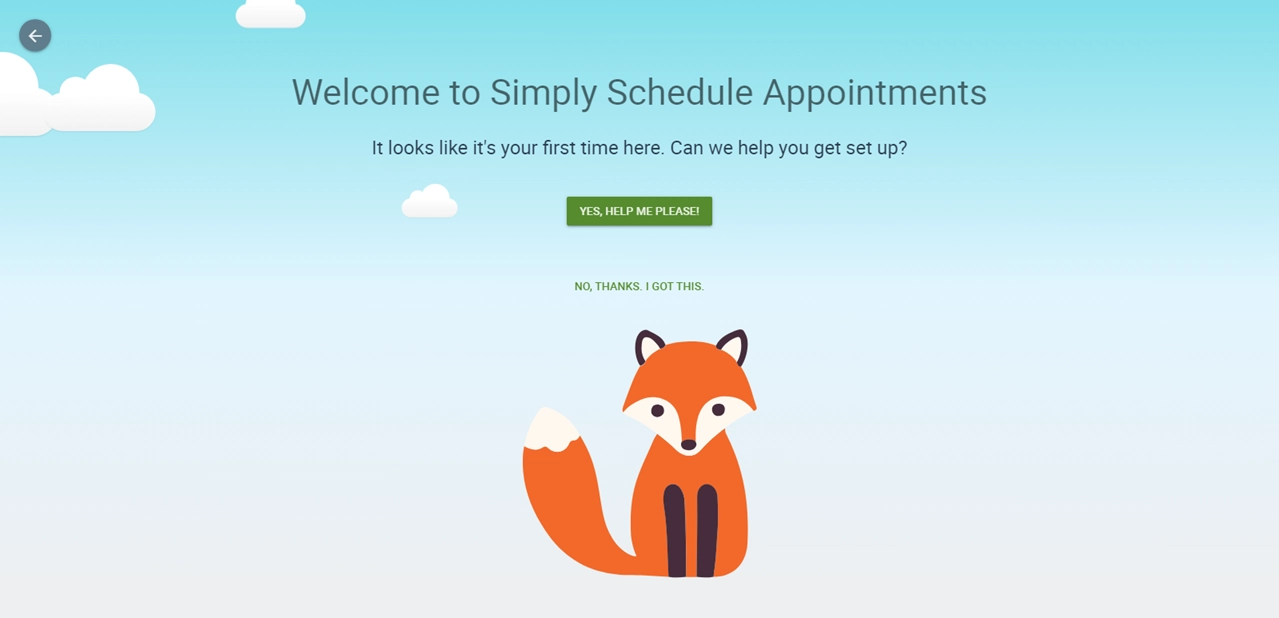
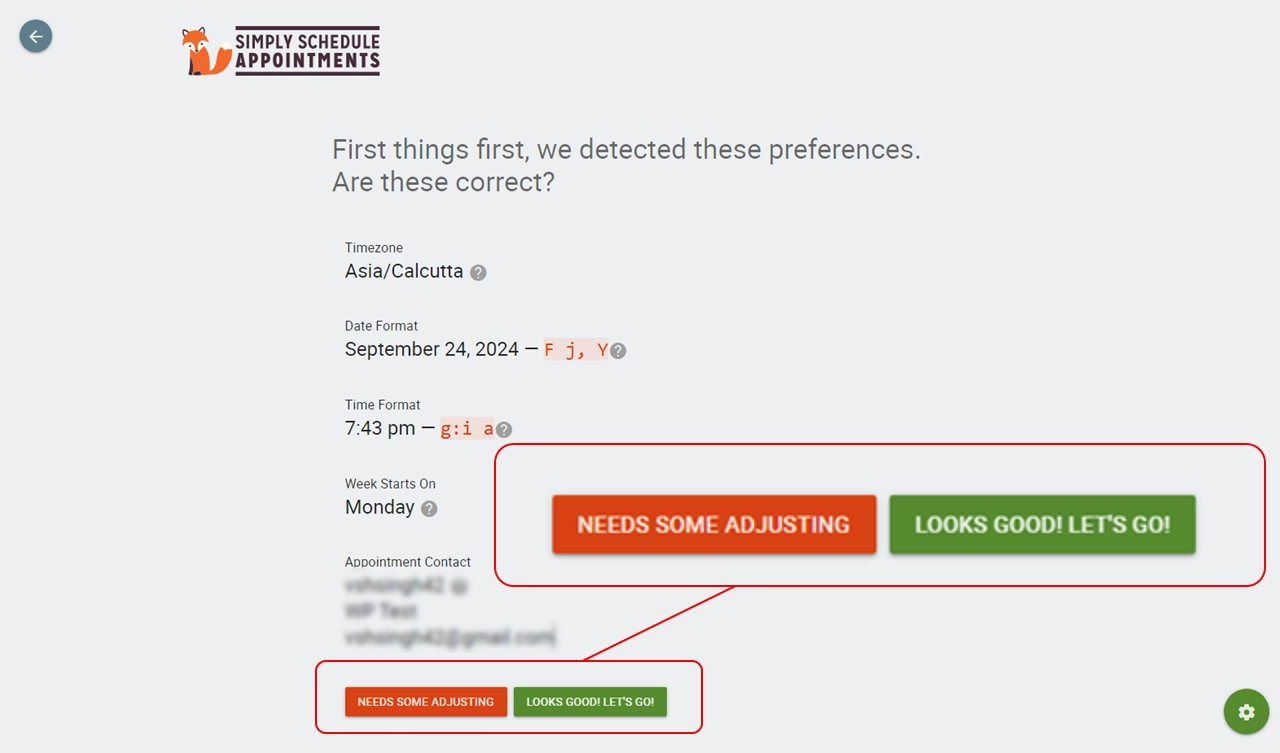
If you need help with the plugin, go to the “YES, HELP ME PLEASE!” button, where the plugin automatically detects Time Zone, Date Format, Time Format, Week Starts On, and Appointment Contact. So, check if all the information detected by the plugin is right, and click on the “LOOKS GOOD! LET’S GO!” button.
And if you need some adjustments to the information, click on “NEEDS SOME ADJUSTING.”
And if you don’t want help, you can directly hit “NO, THANKS. I GOT THIS.”
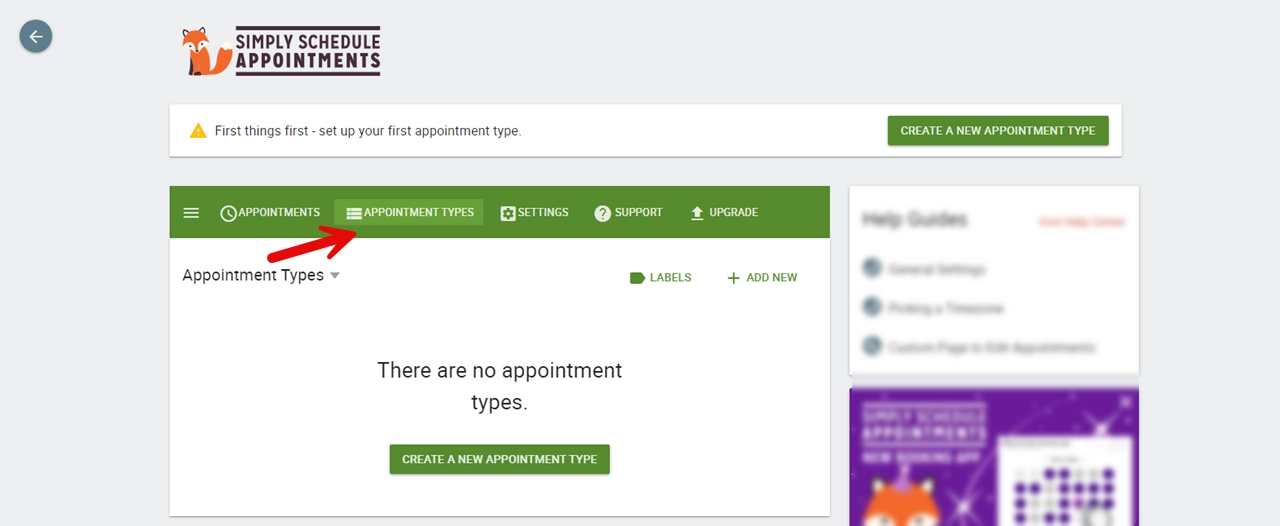
Step 2: Create a New Booking Form Using Simply Schedule Appointments
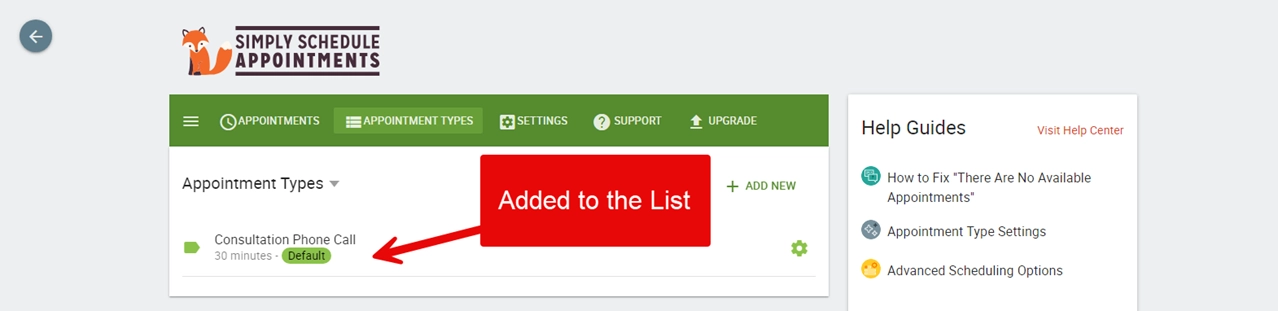
Now you have to select the “APPOINTMENT TYPES” from the menu and select “CREATE A NEW APPOINTMENT TYPE.”
You need to fill out all the information on the booking form. You need to set the name and duration, and duration units.
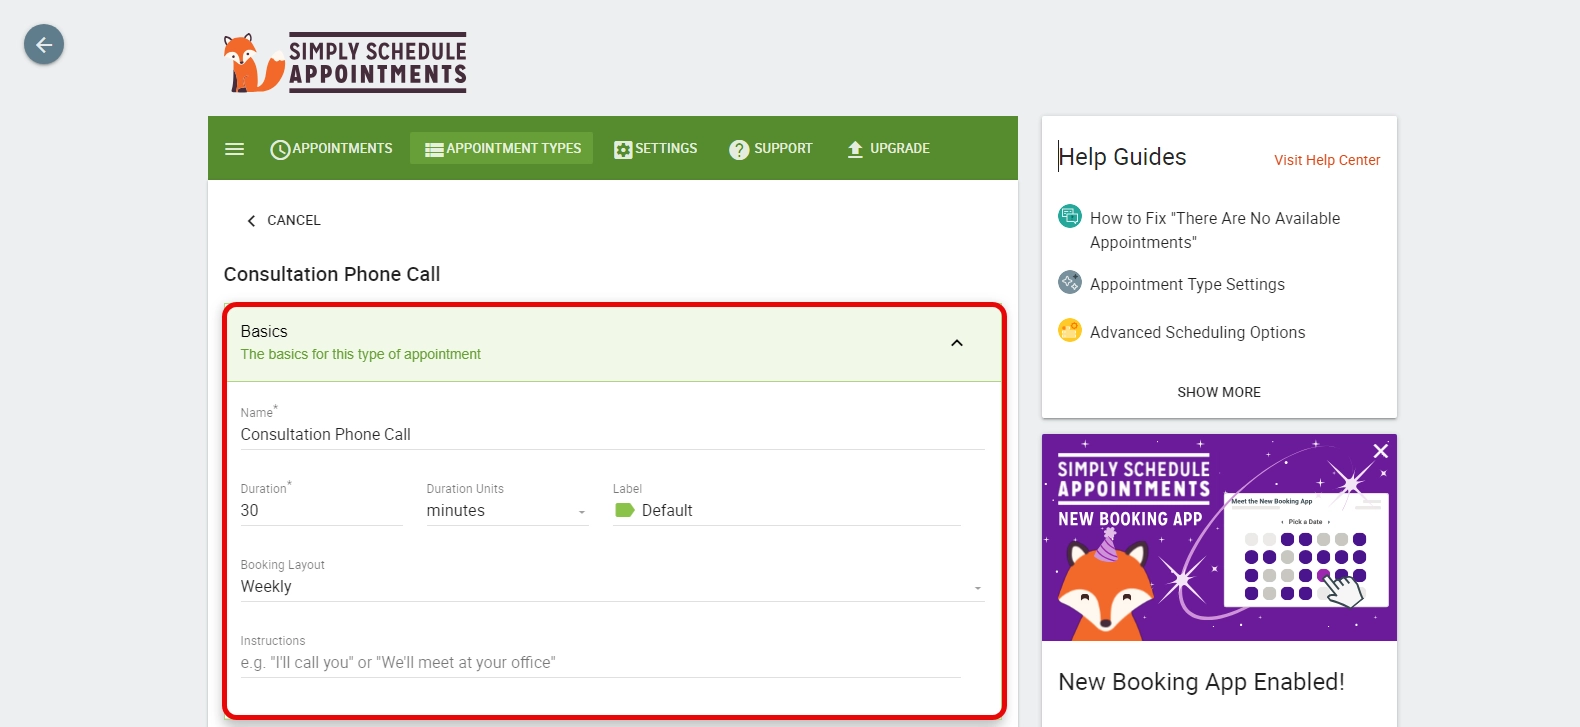
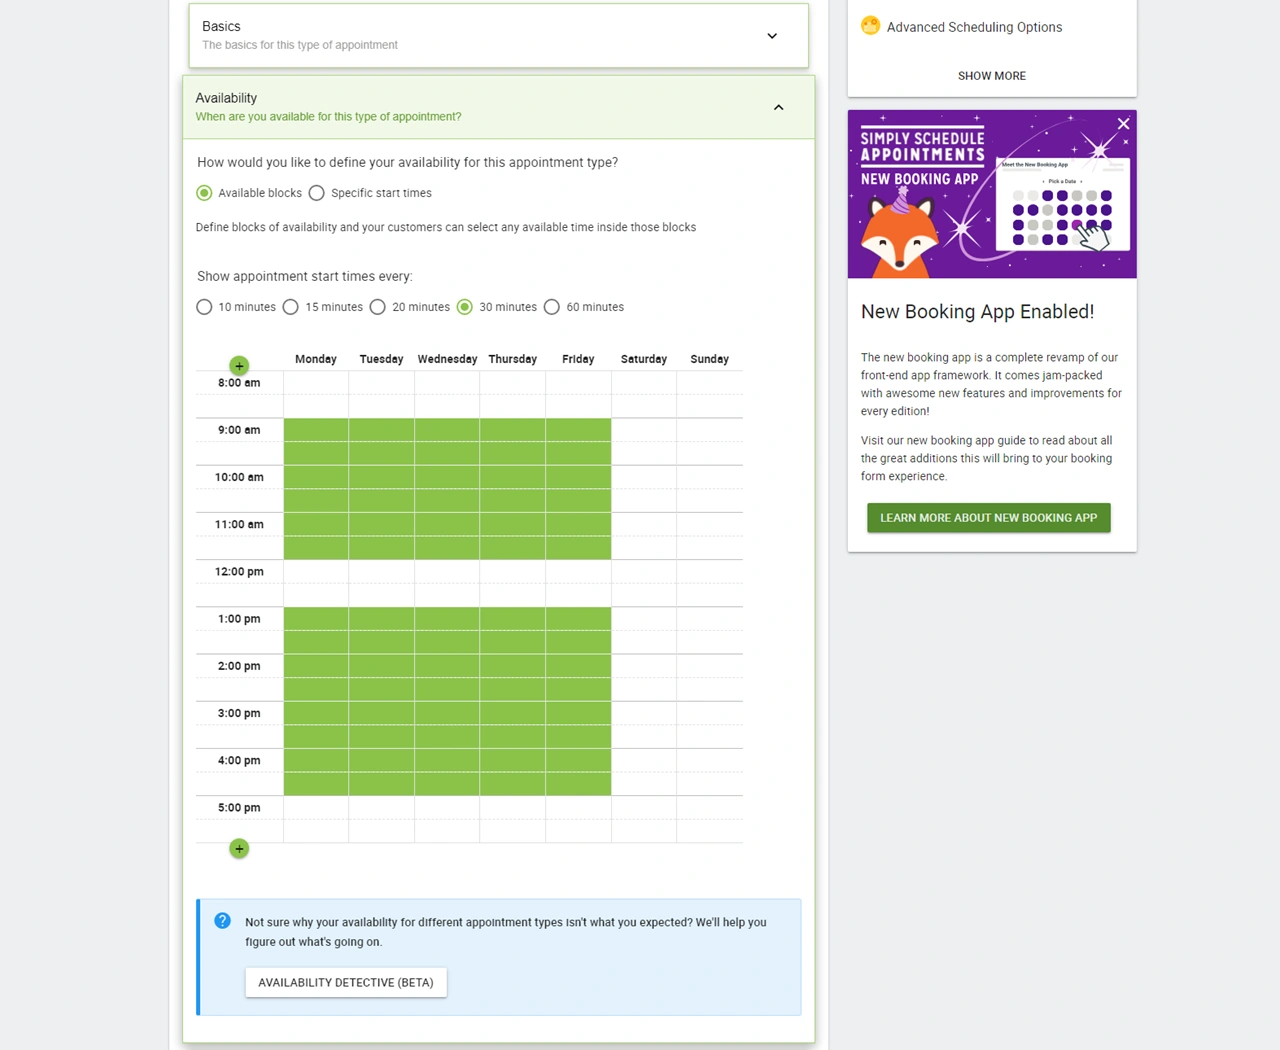
Then, add “Availability” when you are available for the appointment in the calendar. Set the appointment start time.
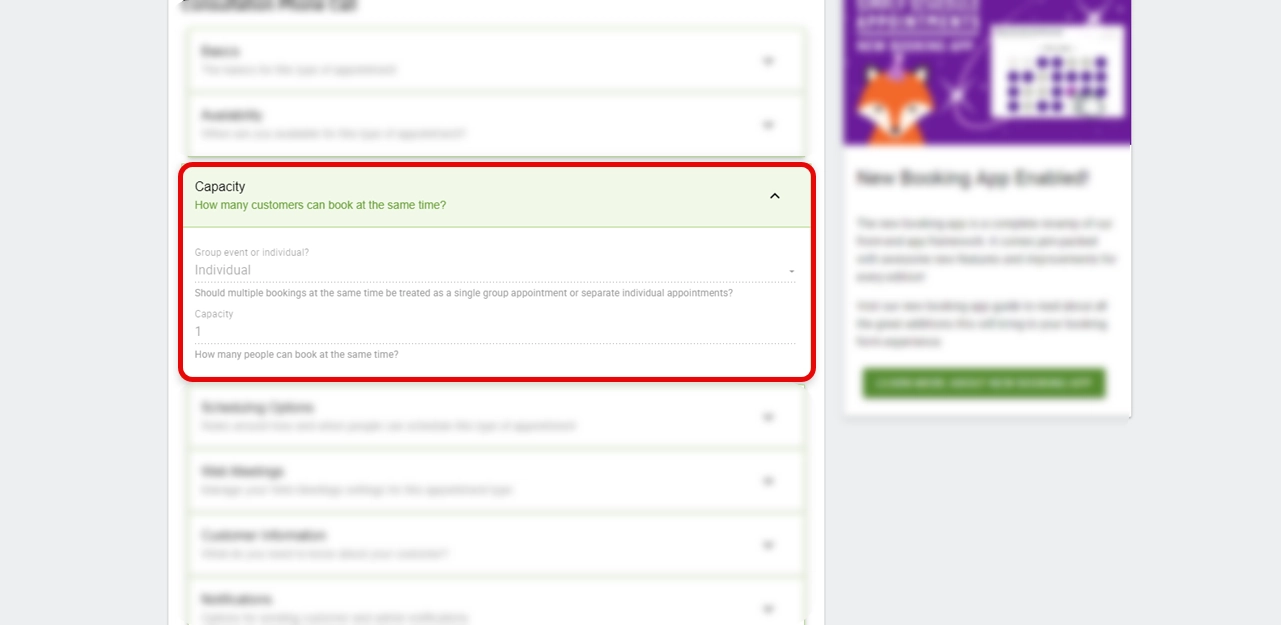
Next, the “CAPACITY,” which will explain how many customers can book at the same time. For the free version, you can only set it to 1.
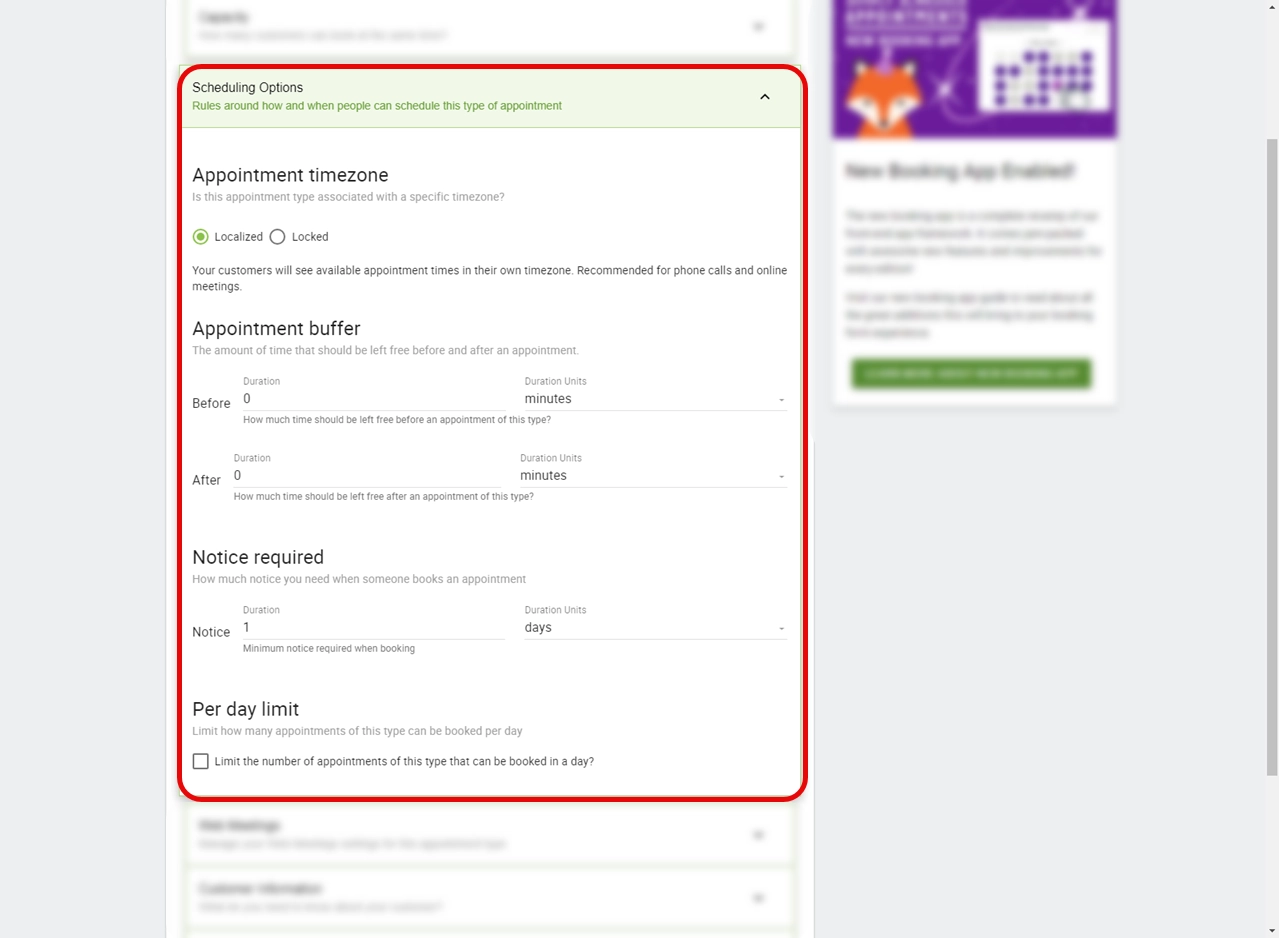
After this, you should set the “Scheduling Options” that explain how and when people can schedule this appointment, including appointment time zone, notice required, and per day limit.
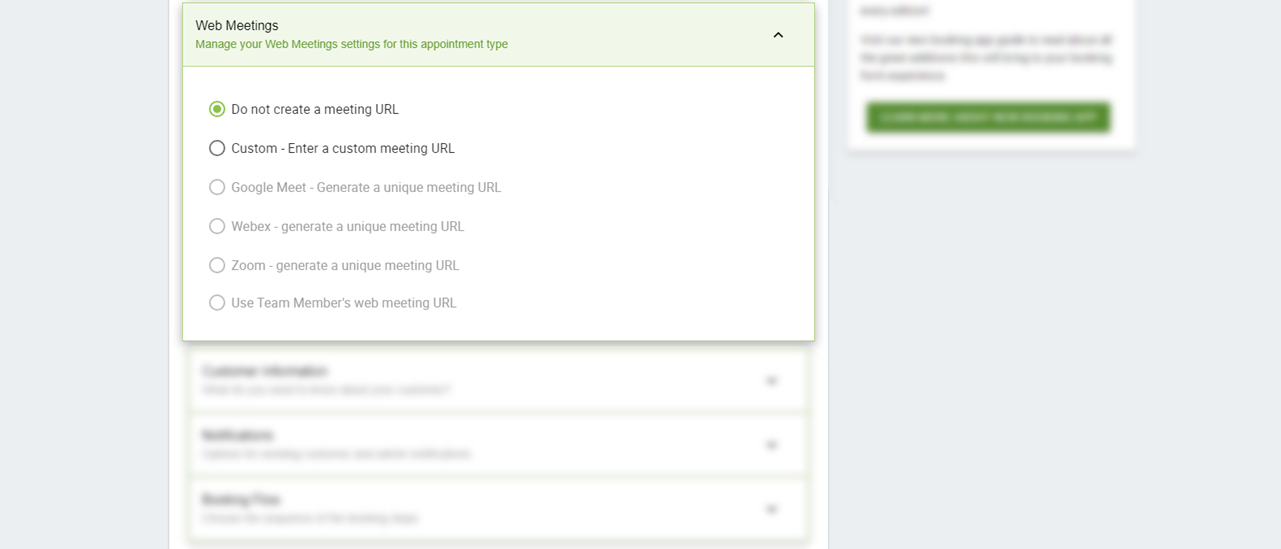
Up next is the Web Meetings Settings; you have two options available for the free version: either use no URL for meetings or make a custom URL.
The “Customer Information” settings are the most crucial thing about this booking form. Tick the options you want to ask from your customer.

Next, select options to send “Notifications” to the customer or sender, and then the “Booking Flow.”
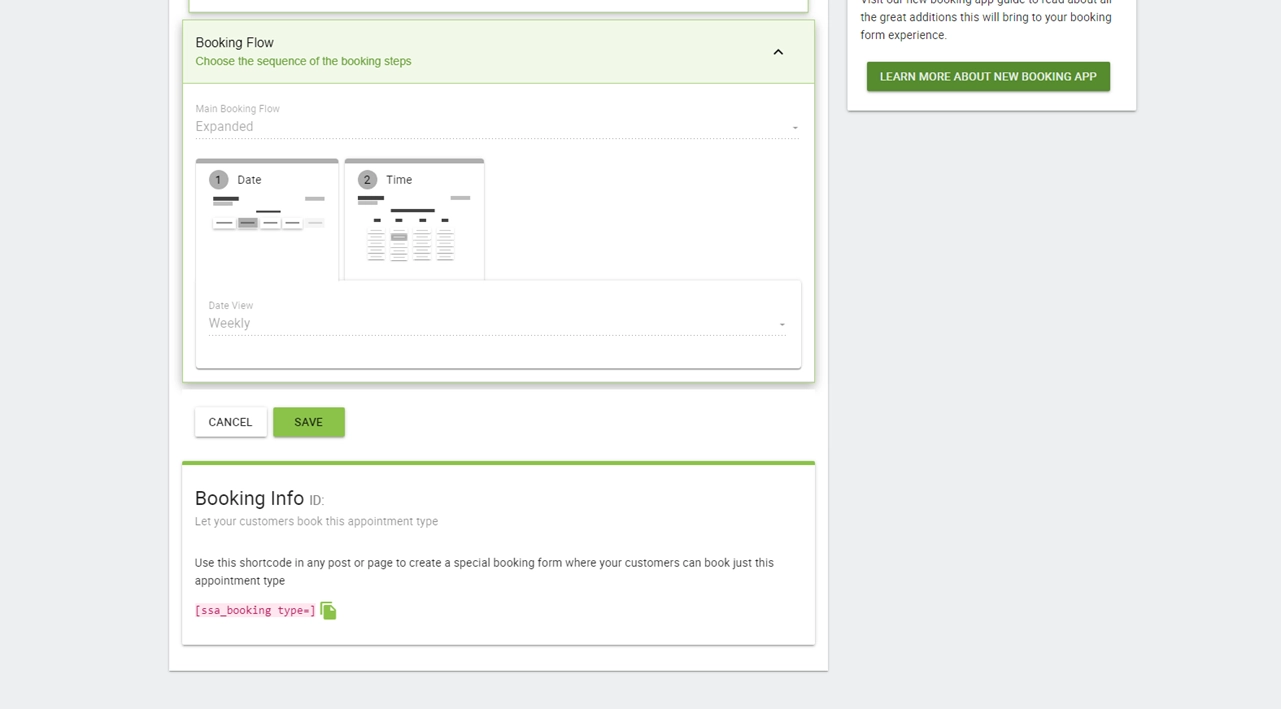
After this, “SAVE” all the changes.
Step 3: Adding the Booking System Form to Divi
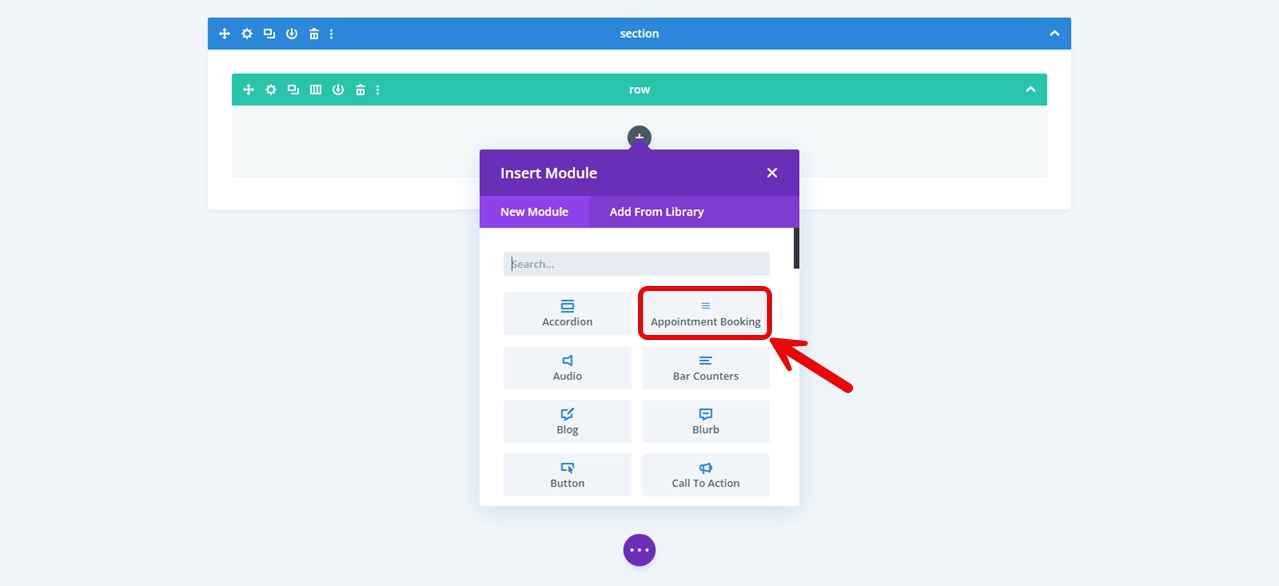
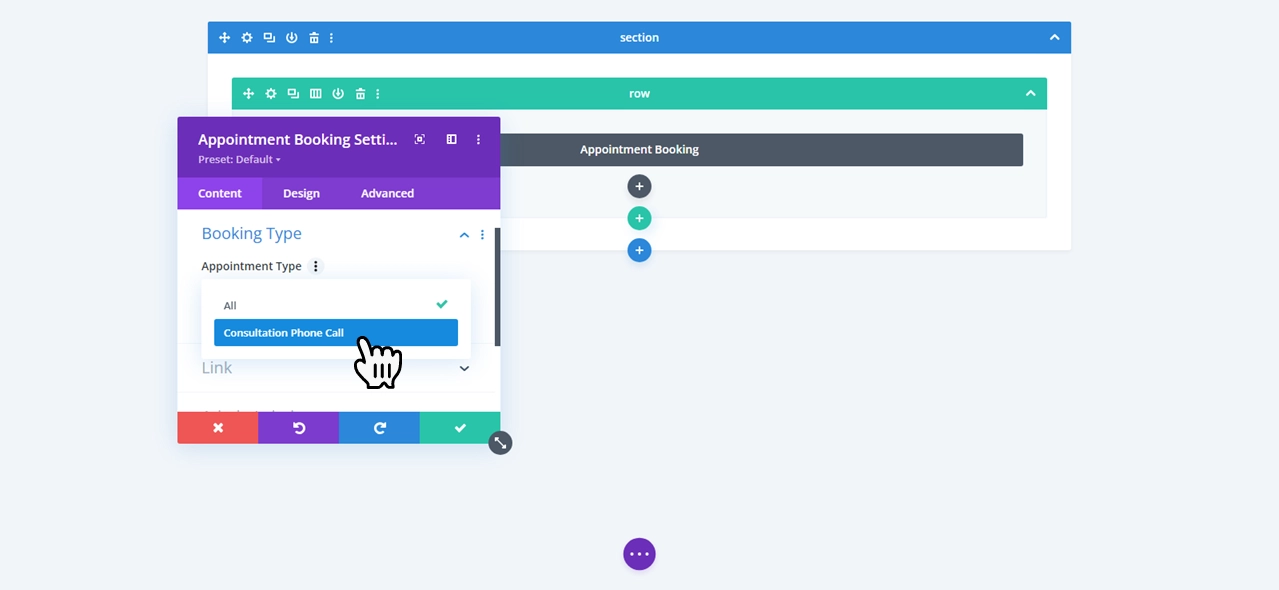
After creating the booking form, you can normally add it with the shortcode to your WordPress website. However, as we are using the Divi Builder, it will add a new module to the Divi Builder known as Appointment Booking; click on it.
Now navigate to the “Appointment Type” option and choose “Consultation Phone Call.”
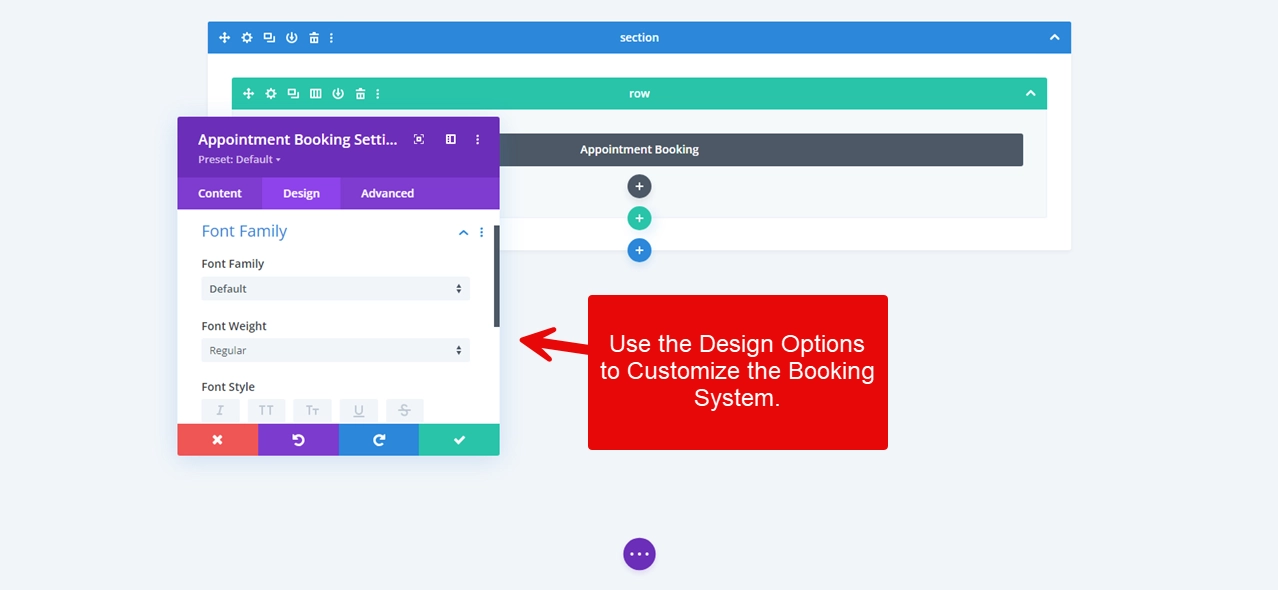
Then, you can choose the “Design” tab, where there are multiple customization options like Font Family, Colors, and Padding. As for now don’t change the “Advanced” options.
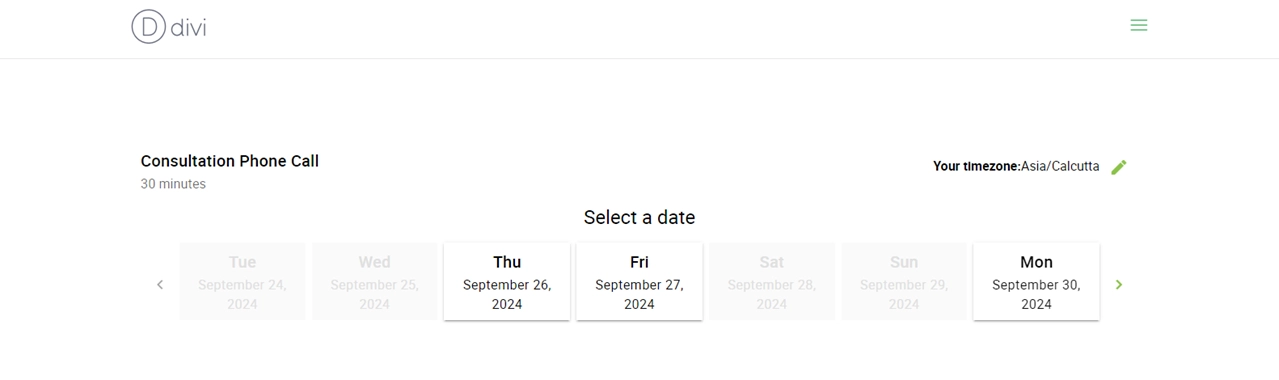
When you are done with everything, click on the tick and save the changes. Review your booking Calendar; the first page asks for the date:
Then, the time.
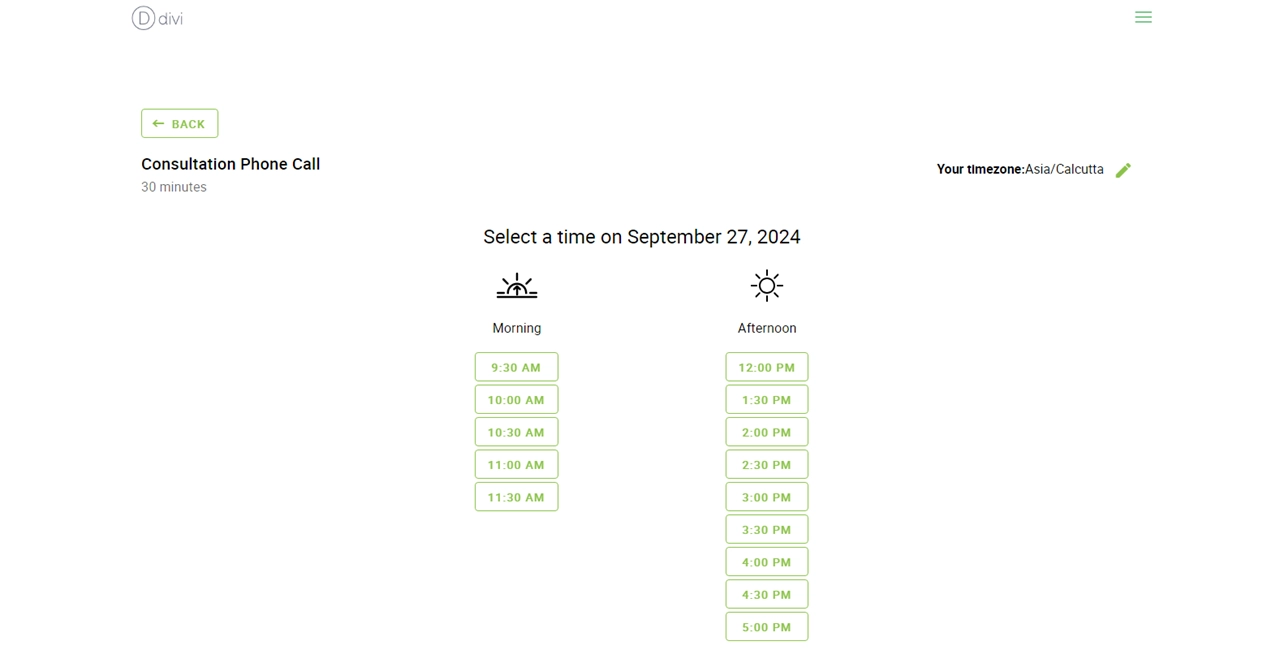
Lastly, your customer will provide their Name and Email and click on “BOOK THIS APPOINTMENT.”
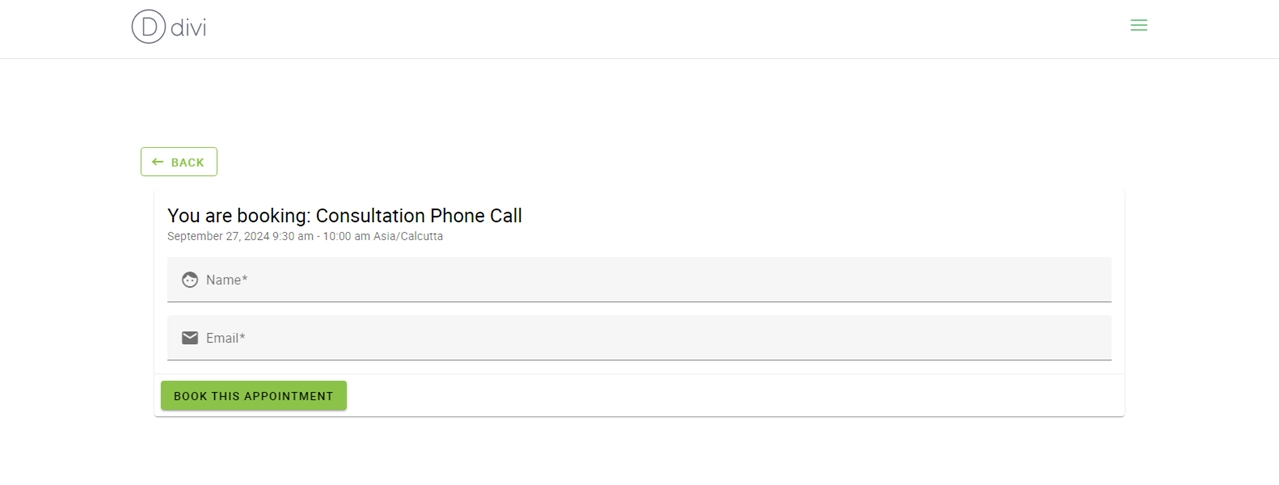
By providing their details, customers can easily book their appointments.
If you’re using Gravity Forms in Divi, then you can easily integrate the Simply Schedule Appointments in it, using the fields available for Gravity Forms.

Furthermore, to enhance your Divi Gravity Forms look, you can use the Divi Gravity Forms Styler. It’s an intuitive plugin that offers various options to transform your simple-looking form into an engaging one. Learn more about Divi Gravity Forms Styler in this post.
Final Words
If you are running a business that either offers services or consultation, an online booking system is a must-have option on your website.
It is a great way to communicate with your customers and allow them to book a slot for your services without you being directly involved. If your business is using WordPress, then there are tons of good WordPress appointment booking plugins, such as Bookly. It is not only a free plugin but also offers a seamless user experience.
If you use Divi Builder, there are some great WordPress appointment booking plugins available with Divi integration, such as the Simply Schedule Appointments plugin.
It works beautifully with Divi Builder and creates a stunning booking form in WordPress.
In this article, we explained step-by-step instructions on how to add both Bookly and Simply Schedule Appointments plugins to your WordPress and Divi website and build an effective booking system for appointments and services. Follow the steps and create your own booking system for appointments and services in no time.
Let us know your experience using them; we’d love to hear your thoughts in the comment section.
If you need help creating a booking system on your Divi website, reach out to us. You can also try our Divi Restro Menu plugin if you’re building the booking system for a restaurant website. Using this plugin, you can showcase your food menu on the website and provide more info to the guests on what they can enjoy while they visit.

The plugin includes multiple layouts and offers premade layouts so that you can quickly set up your online food menu.
Try it today and make your food menu accessible to all.


Insightful guide, thanks for breaking down the setup so clearly. But How well do these plugins handle appointment rescheduling or cancellations from the client side? what you think?