
A directory website can be a robust solution for organizing and displaying different types of listings for businesses and services. It is a one-stop destination for people to find businesses, organizations, real estate, and restaurant listings. WordPress can be combined with the Divi theme to offer a versatile website for creating an engaging, functional directory without any coding expertise.
This post will guide you through the steps to build a fully functional directory website using WordPress and Divi. If you are planning to build a local business directory website or a niche service listing, this guide can be a perfect tutorial.
How to Create a Directory Website with WordPress and Divi
The entire process of building a directory website involves multiple steps. We have covered every crucial setting, from getting a domain to customizing your finalized directory website in detail.
Let’s start
Prepare the Initial Setup
The initial setup includes the necessary things required to start the major steps of the process.
1. Buy a Domain

Selecting the right domain is very important as it is the main door to explore your website on the internet. Try to keep the domain name simple and relevant to the context of your directory niche. If you plan to build a real estate directory website, choose a name that resembles it. Find a reliable domain name provider such as Hostinger that offers domains at a competitive price.
2. Purchase WordPress Hosting

Most of the hosting providers in the market offer different kinds of hosting services, such as shared, VPS, and dedicated. We prefer you go for the WordPress hosting plans. They are specifically optimized to provide website hosting on the WordPress platform. With a single click, your WordPress directory website will be ready for use. This will help you to start the building process without getting stuck in a tiresome manual WordPress installation.
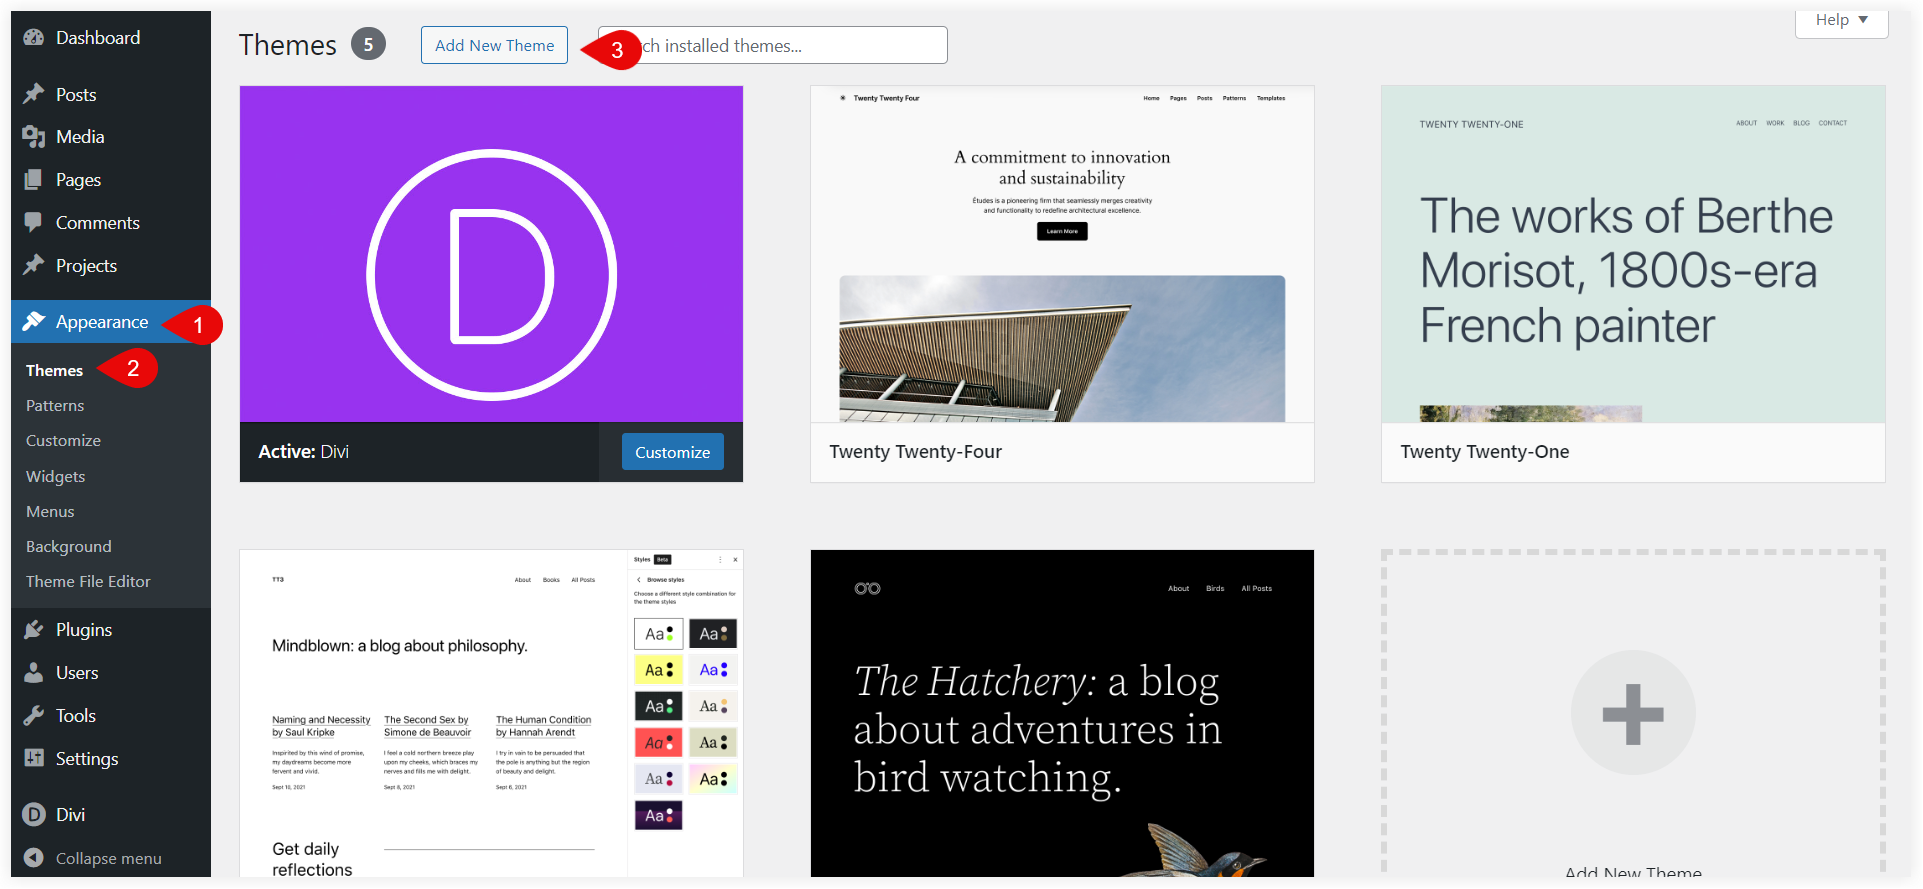
3. Install Divi Theme
This is the last and crucial step of our initial setup. We are using Divi to build our directory website, and that’s why we need to purchase the Divi theme. It comes with the power of Visual Theme Builder, prebuilt layouts, and elements that open creative possibilities to design a professional directory website.
Install WordPress Directory Plugin
After finishing the initial setup, the next important thing we need is a WordPress Directory plugin. This will let you add, edit, and remove listings saved by users on the website.
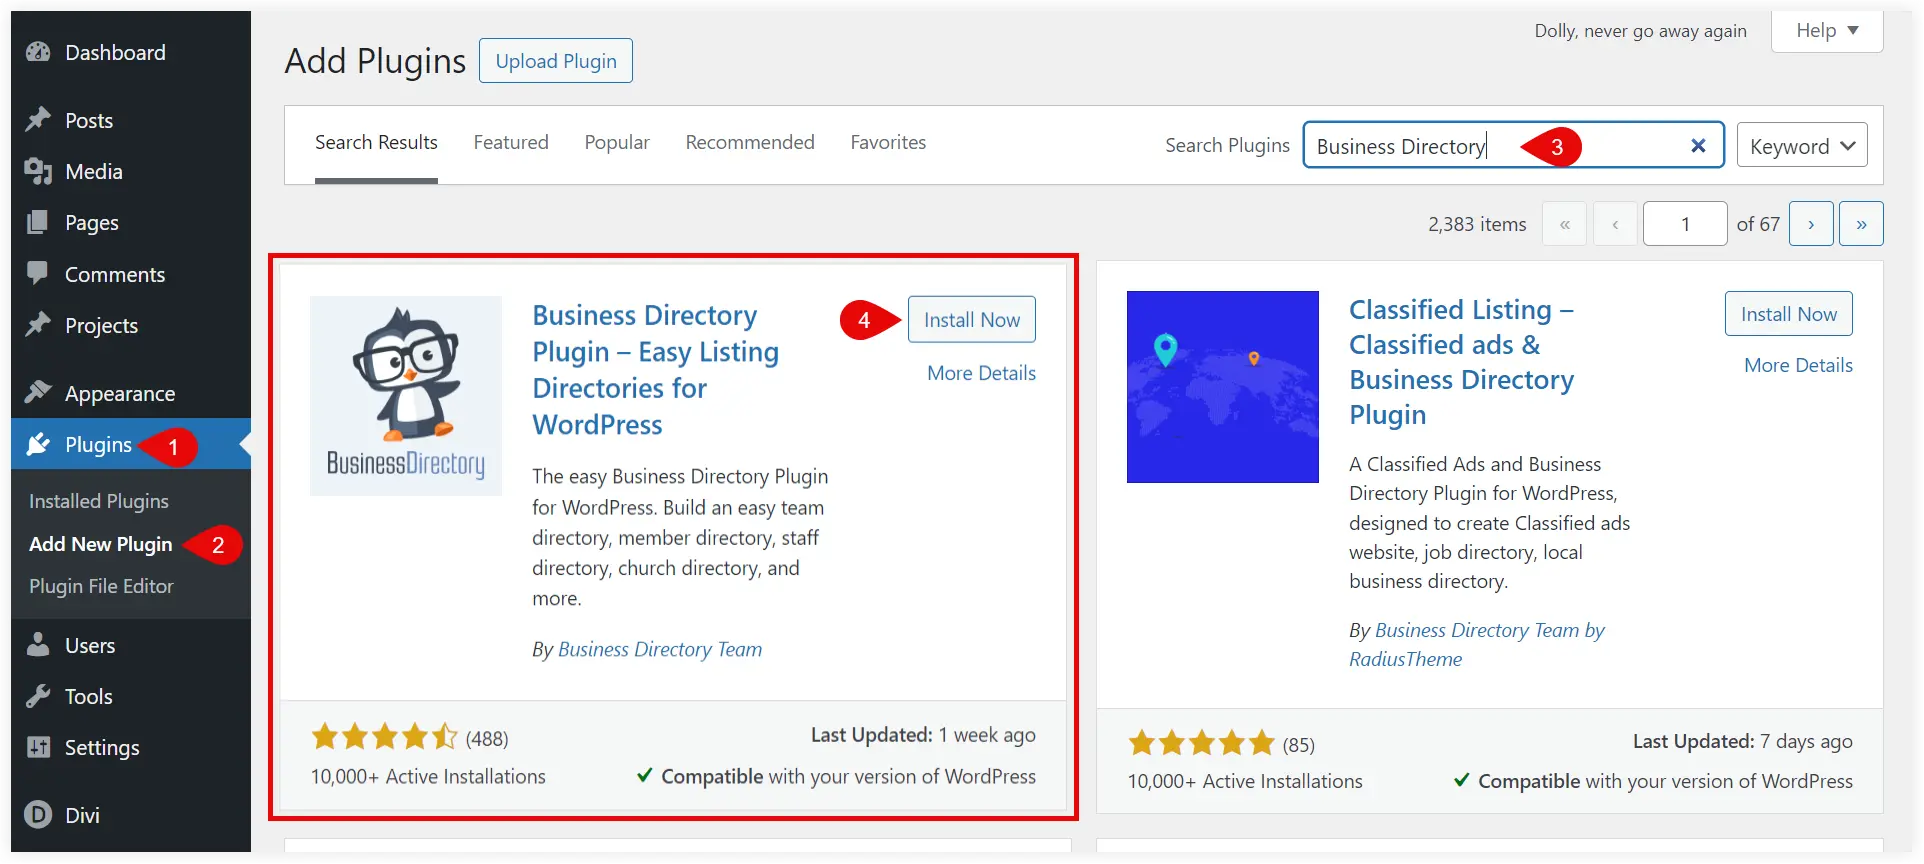
Some of the popular directory plugins for WordPress are Business Directory, GeoDirectory, Directorist, and Listdom. All these are nice, but we recommend you pick the free version of the Business Directory plugin. It’s because this directory plugin for WordPress has the essential features, comes with an easy-to-use interface, and would not overwhelm you with its features.
Go to your WordPress dashboard. Select Add New Plugin, search for ‘Business Directory’ plugin, and install it.
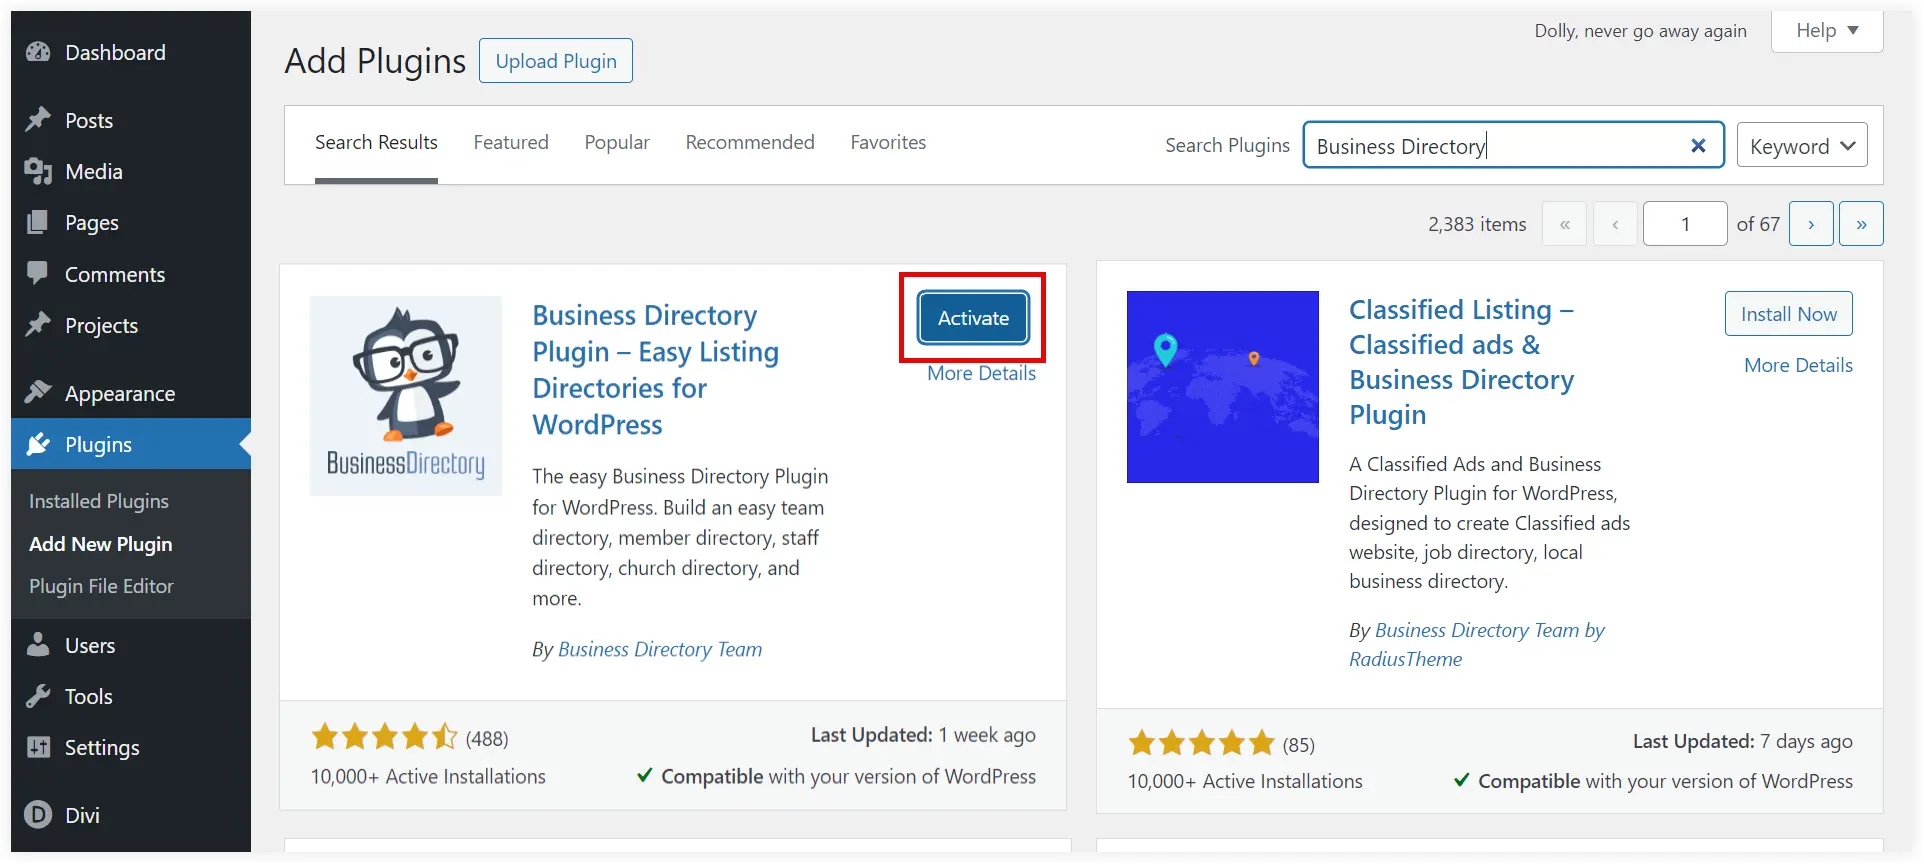
Activate it.
Configure WordPress Directory Plugin
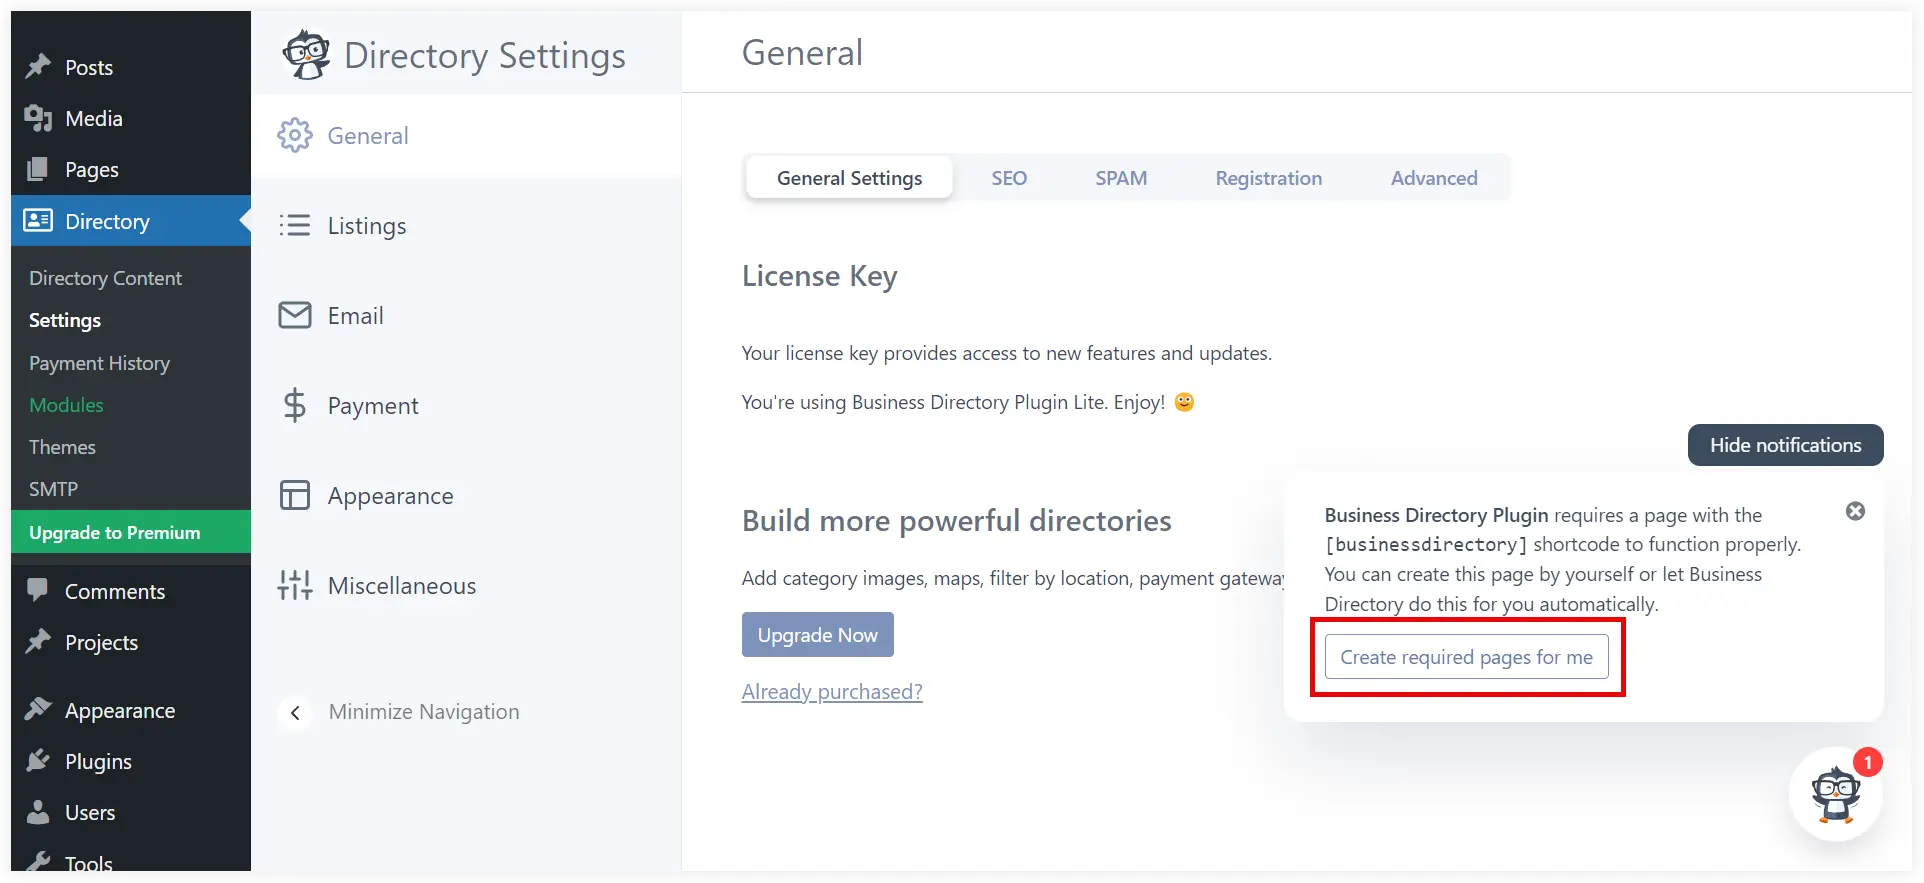
After successfully activating the WordPress Directory plugin, it’s time to configure it. Right after its activation, while exploring its General Settings, you’ll notice that this plugin requires shortcodes to showcase listings.
Build a Business Directory Page
The business directory page will interact with the users and help them explore the directory listings. Two options are available for that: copy the shortcodes or let the plugin create pages by itself. Choose the second option, as it would make this entire process easy.
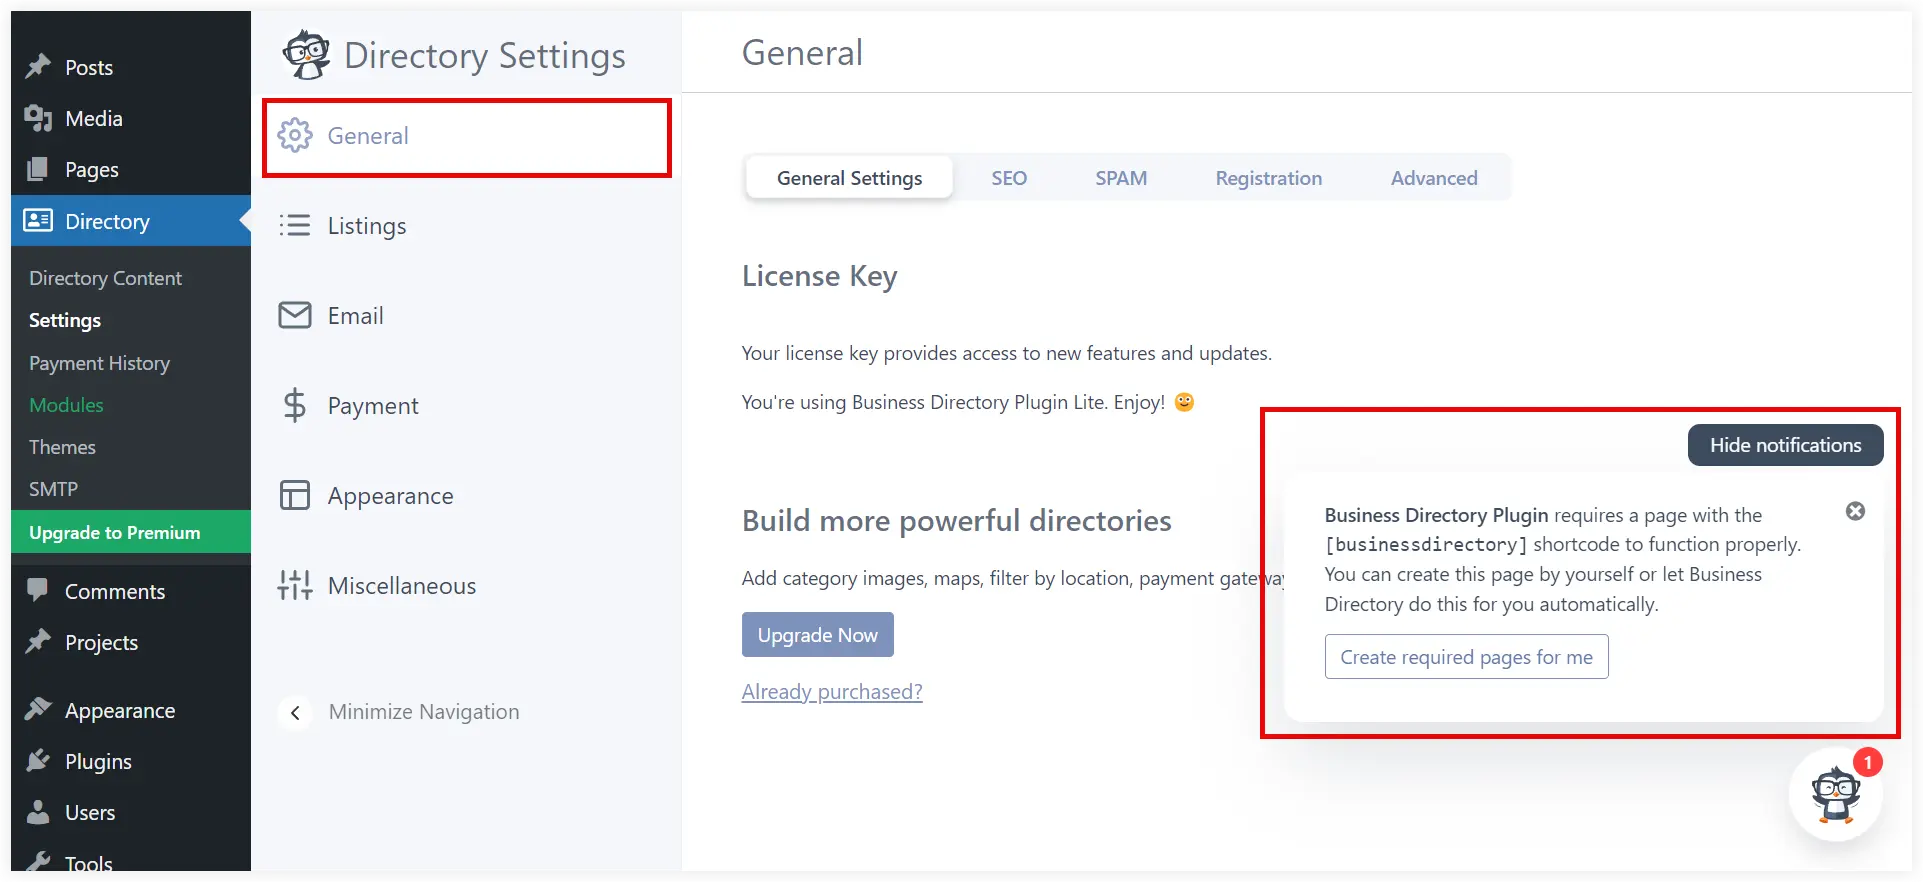
Click on the required pages for me.
The new business directory page will be created. Click on the notification to view it.
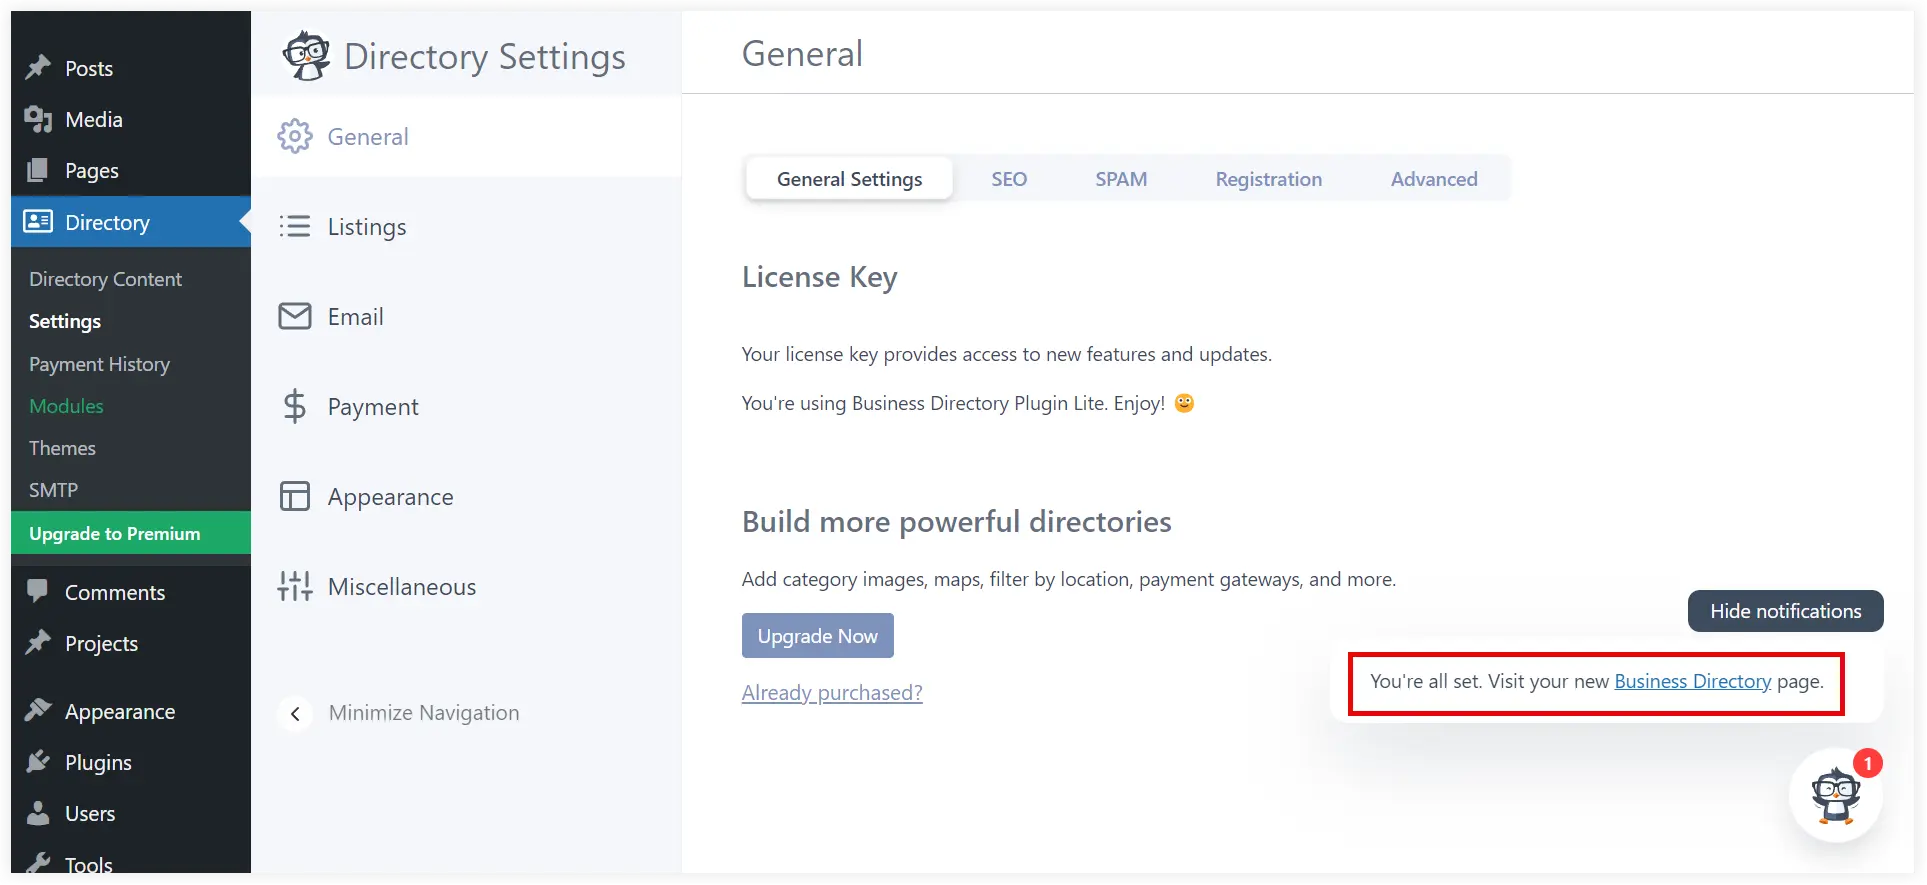
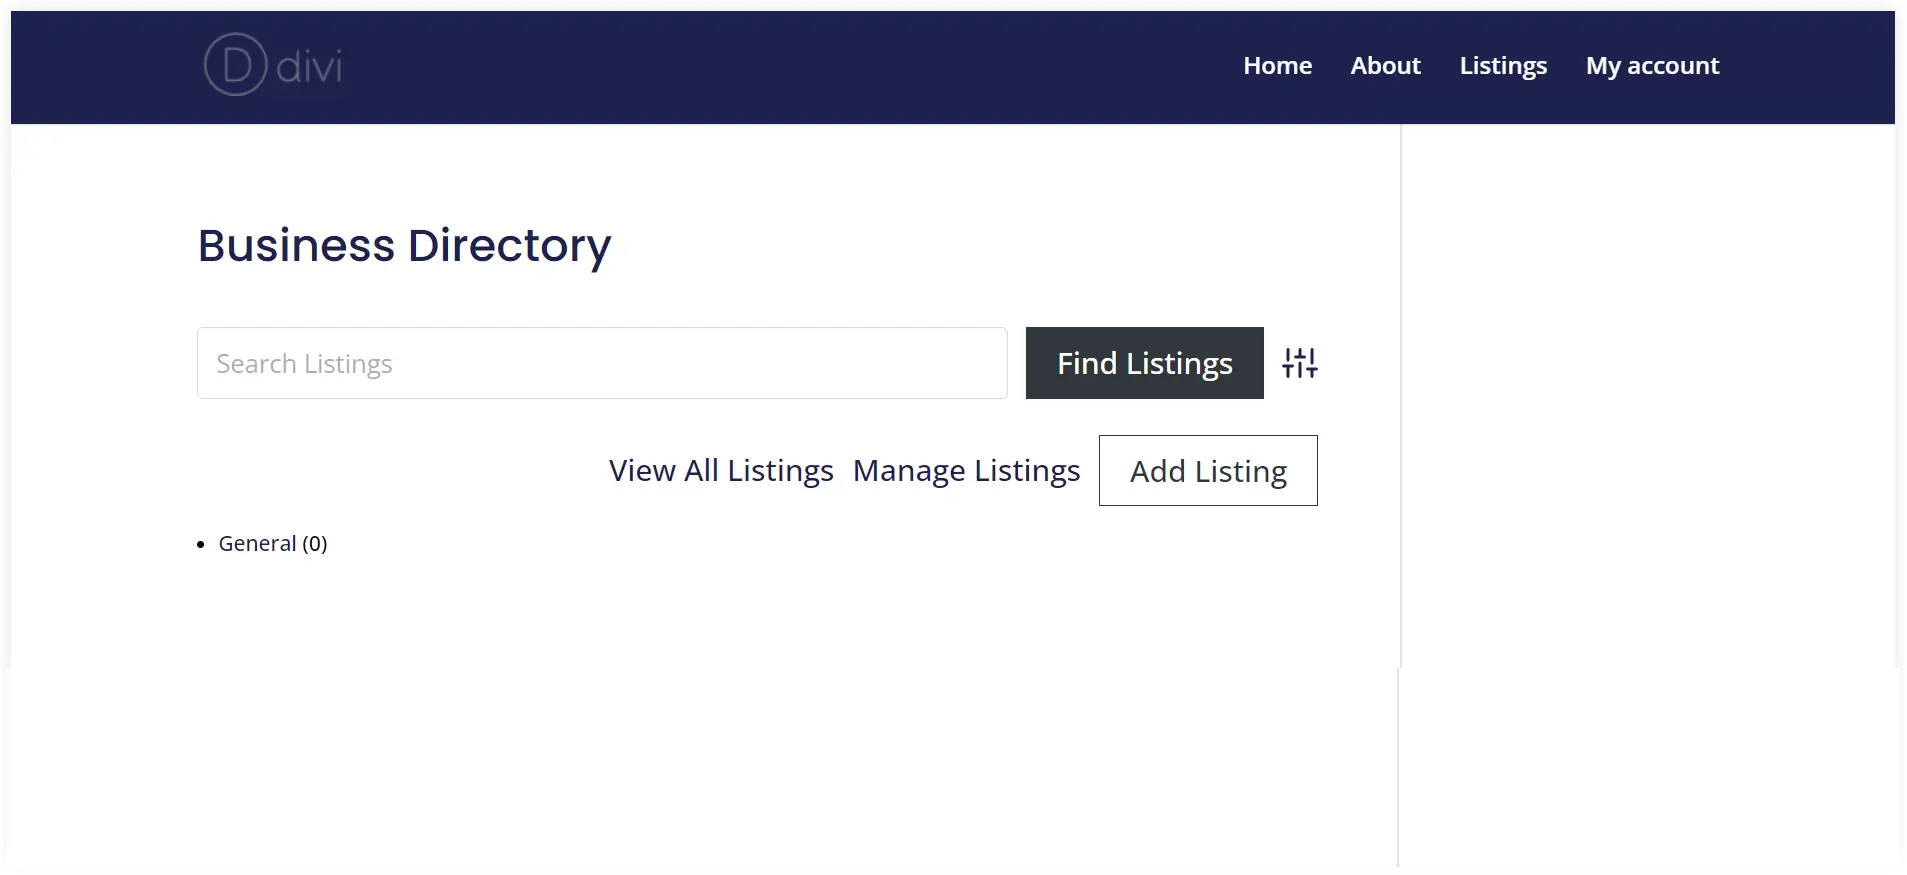
Take a look at your business directory page.
Create a Custom Listing Form
After creating a directory page, we need to create a custom listing form. This will help people search listings for their favorite coffee shops. It gives you options to create fields, arrange them in a specific order, and select what fields you need depending on the niche or industry of your business directory website.
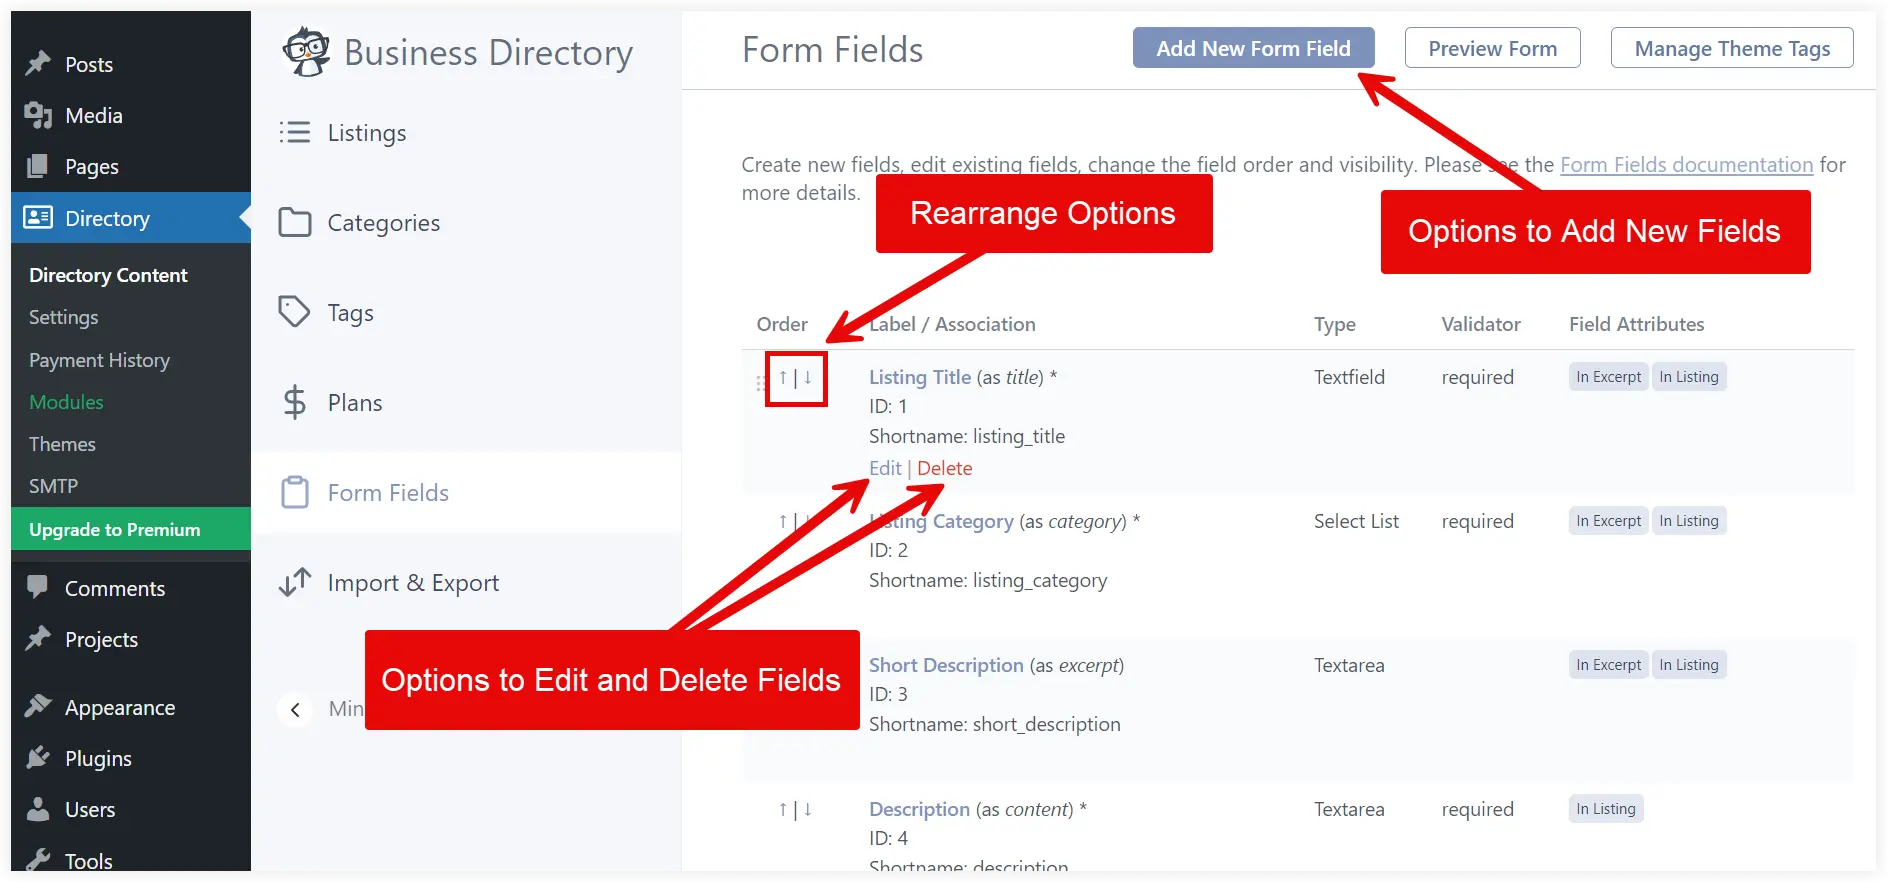
Select Directory Content and Click on the Form Fields.
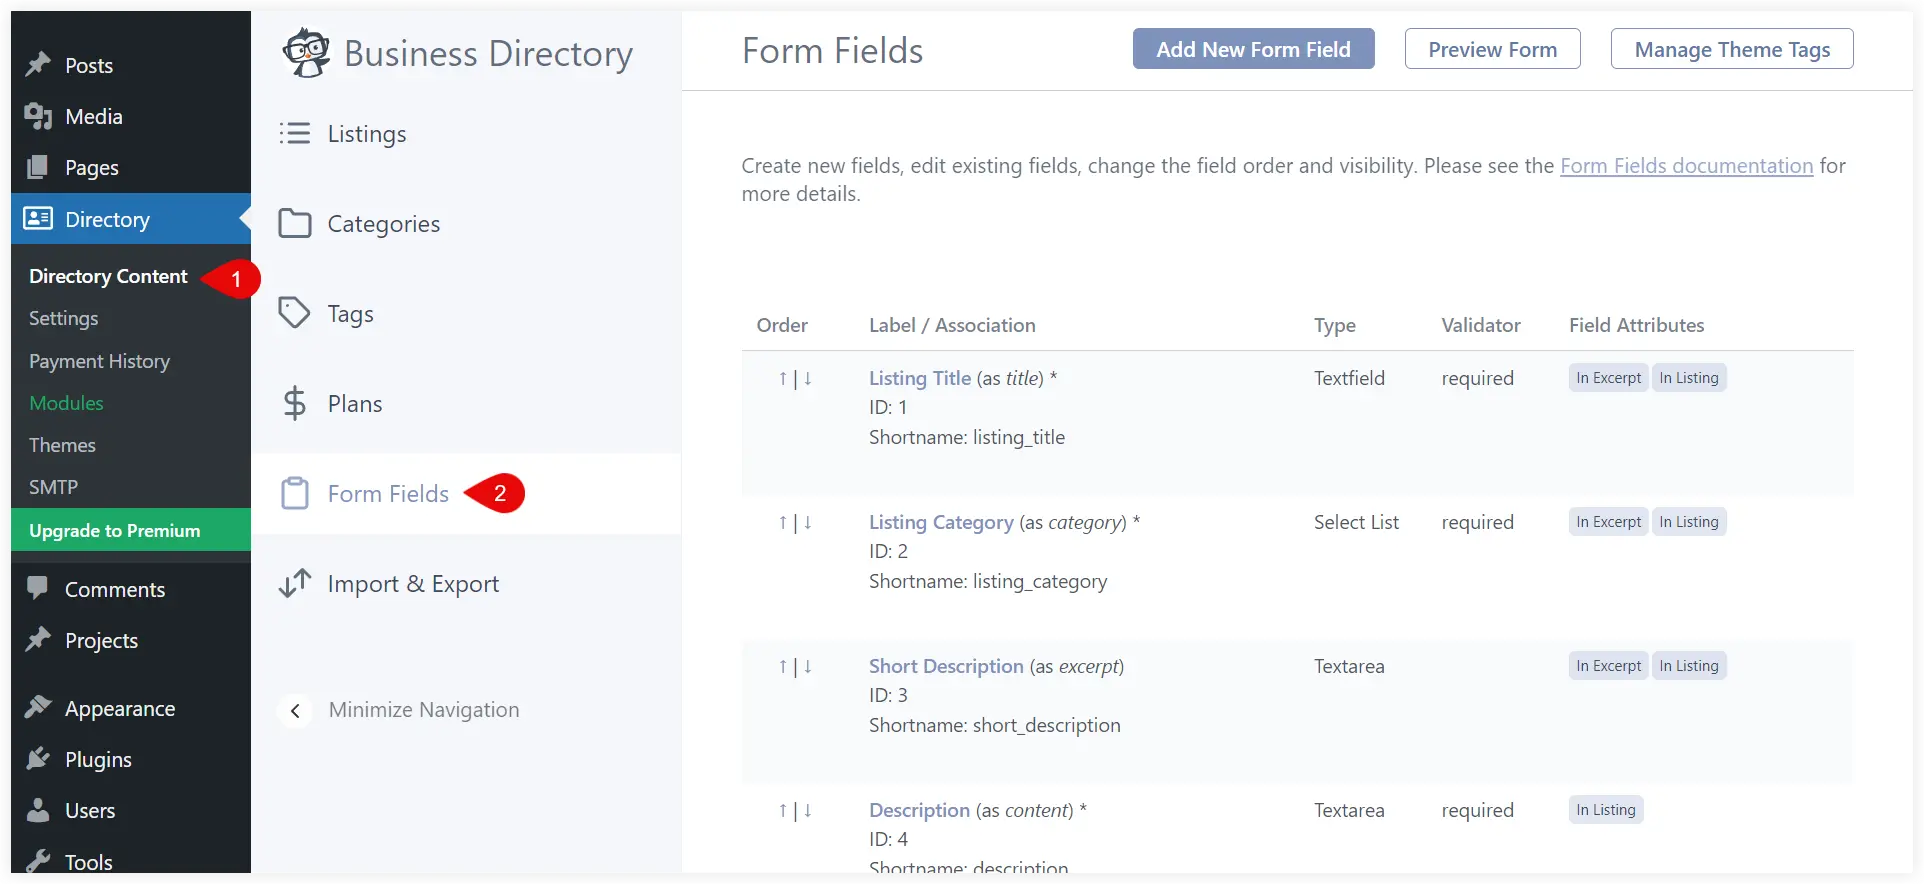
You will observe that many fields are already there. These are the default fields. Now you can add more fields, edit, or delete the existing ones using the easy options. Use the arrows to rearrange them in the desired order.
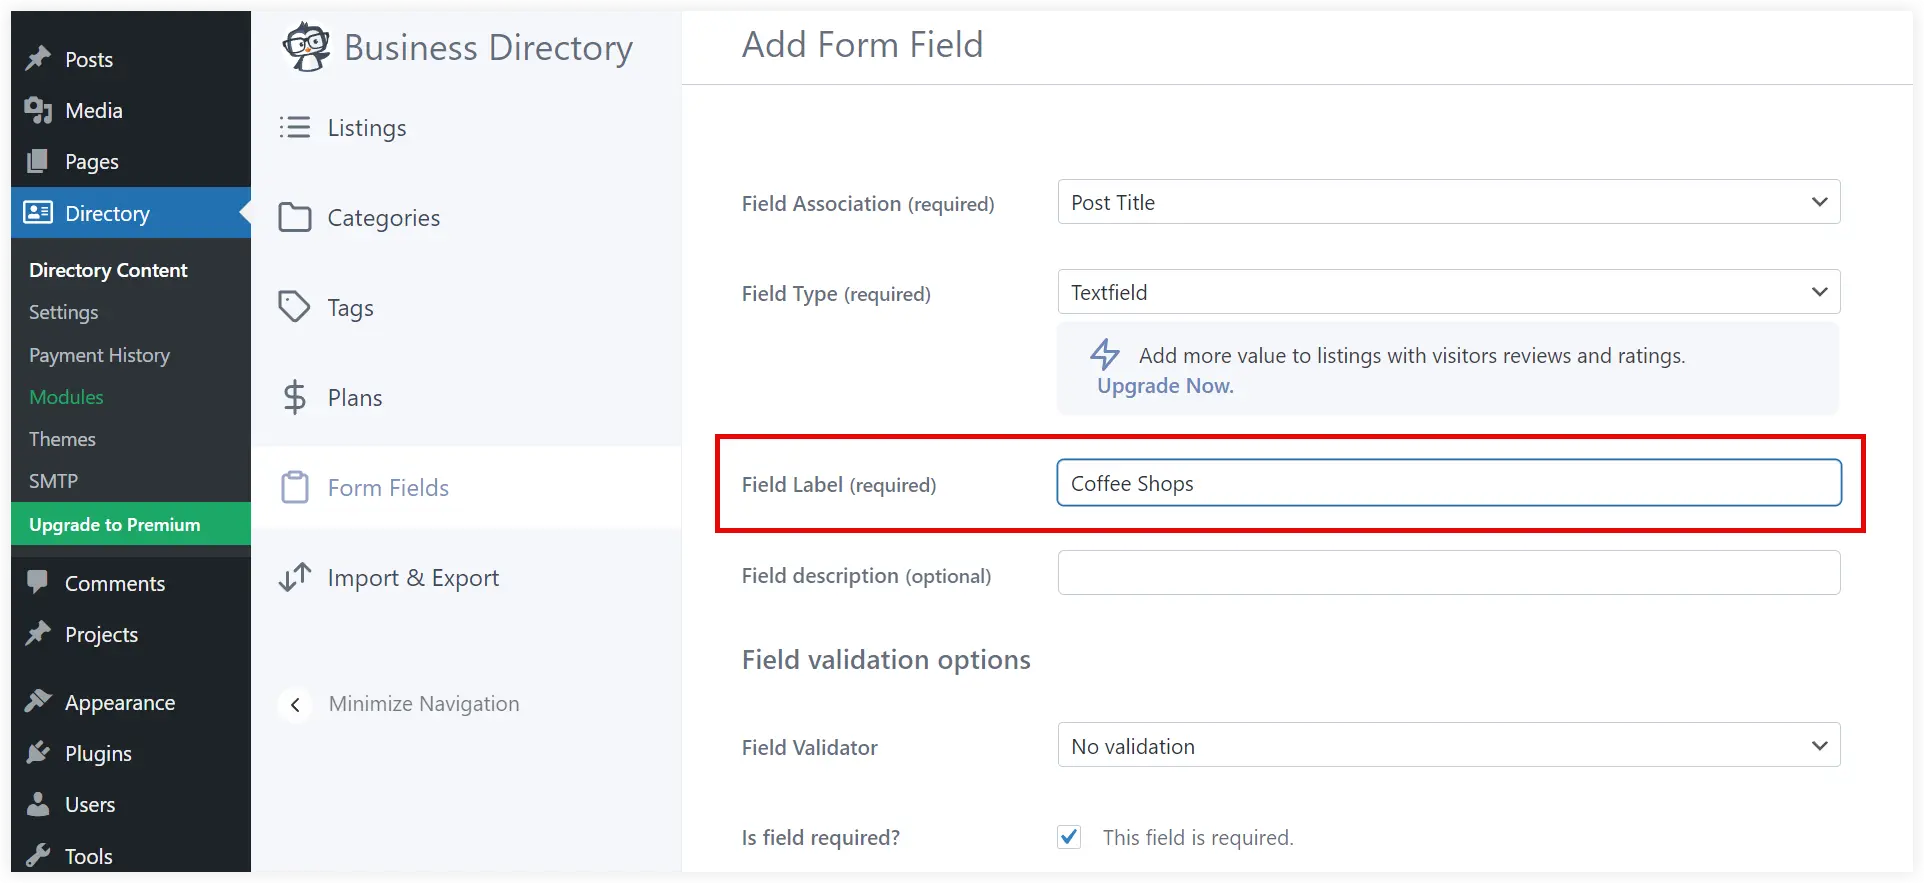
On your product directory website, you want to let users add listings for coffee shops. The simple solution is to optimize the existing fields or add new ones. Edit the existing listing and change the Field Label.
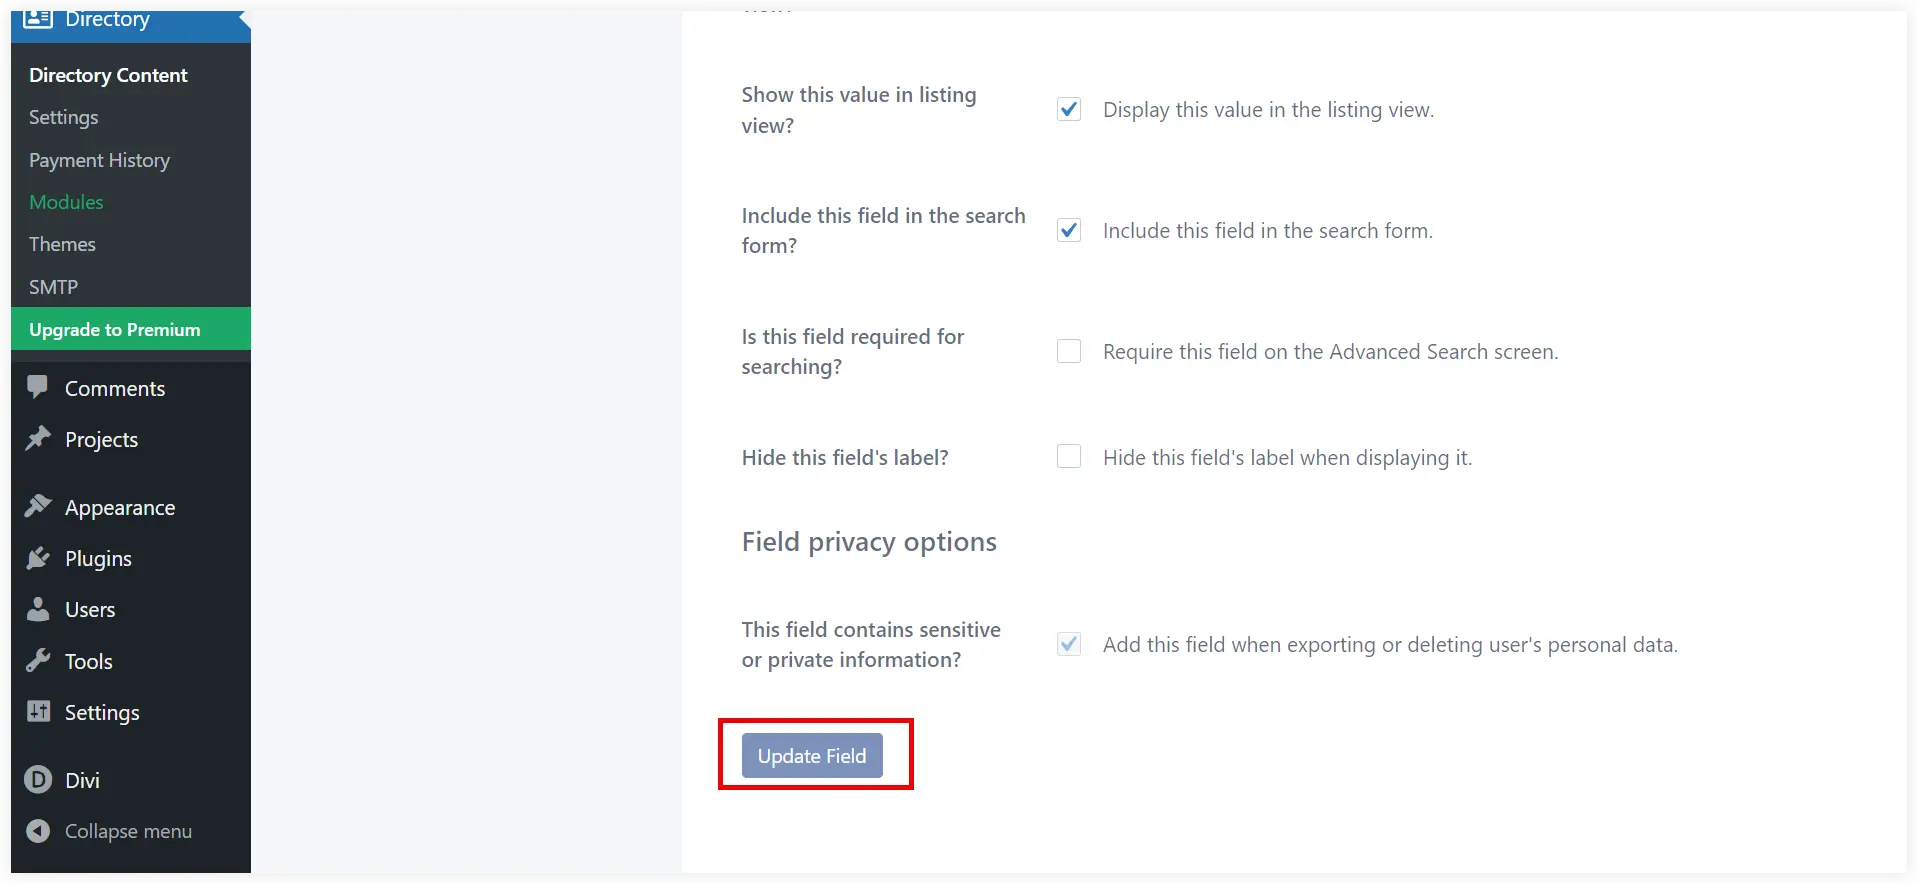
Keep the rest of the field as it is and click the Update button at the bottom.
In the same way, you can edit or add more fields to your WordPress directory website.
Organize Listings in Categories
Keeping things organized in categories on your WordPress directory website will help users sort coffee shop listings based on their preferences. Coffee shops can be sorted based on location, price, menu specialty (espresso, cold brew, etc.), and business hours. This will result in a seamless user experience on your directory website. Let’s see how to do it.
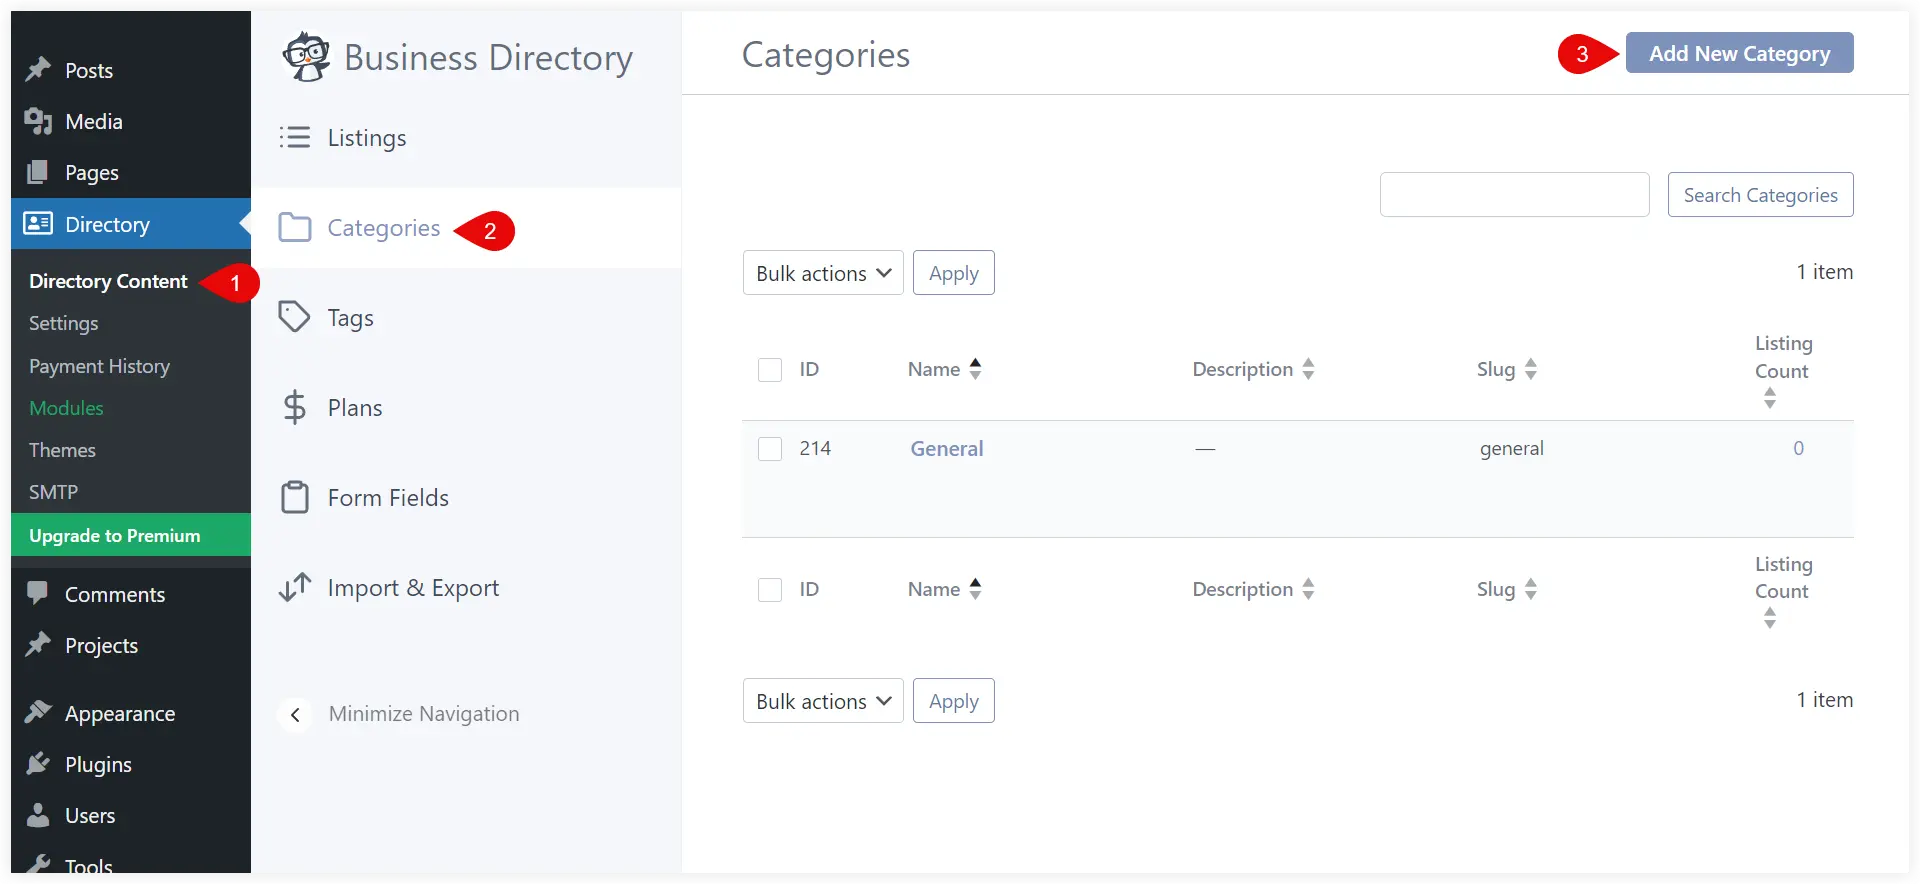
Navigate to Categories options and click Add New Category.
Enter ‘location’ as the category name and Add New Category.
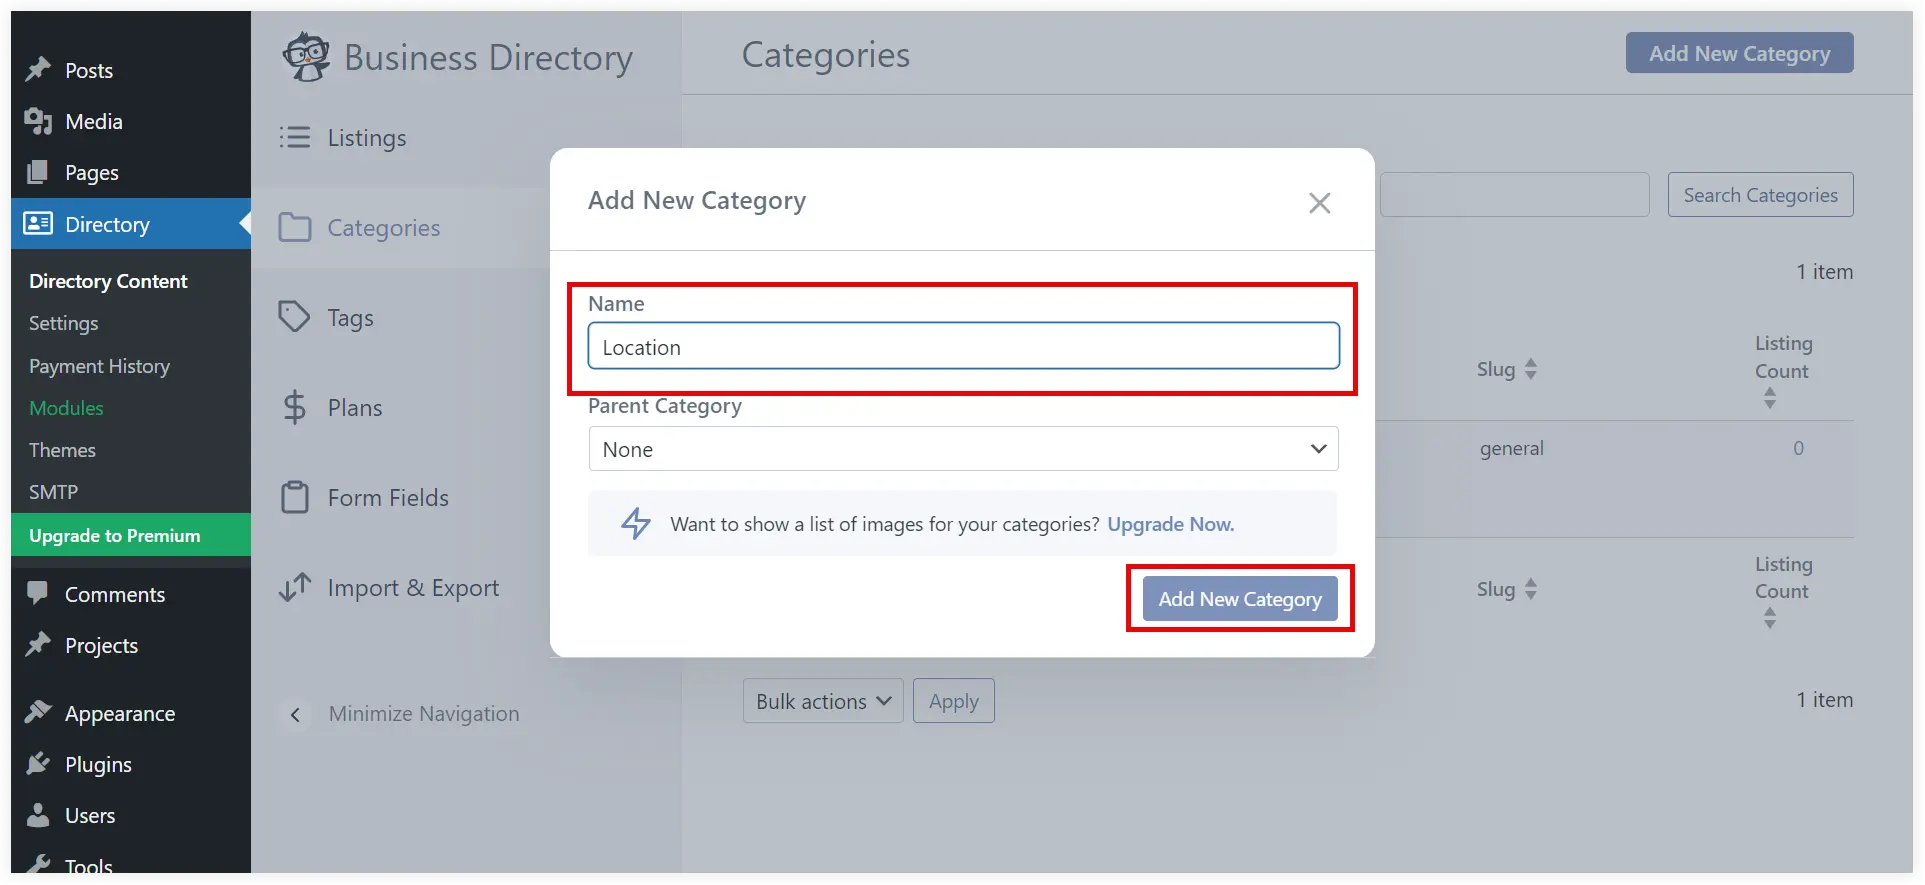
Repeat the same steps to add more categories to your coffee shop directory website.
Start Adding Listings in the Directory
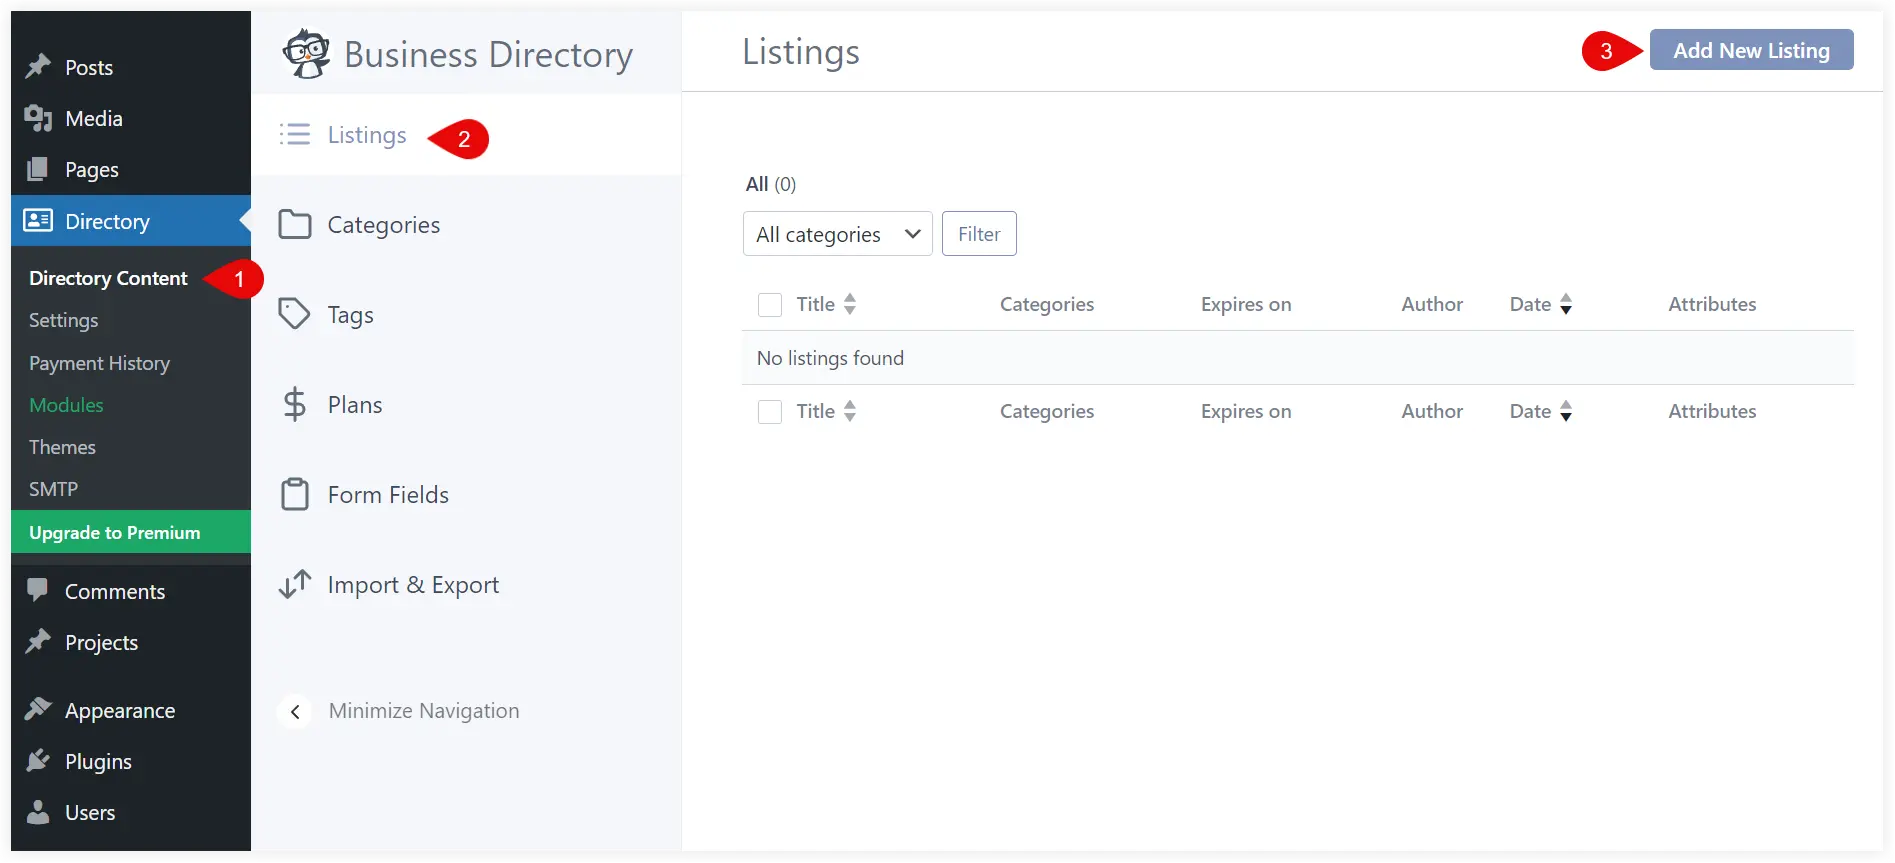
After creating all the categories, you can start adding listings to the directory. Go to the Listings and click Add New Listings.
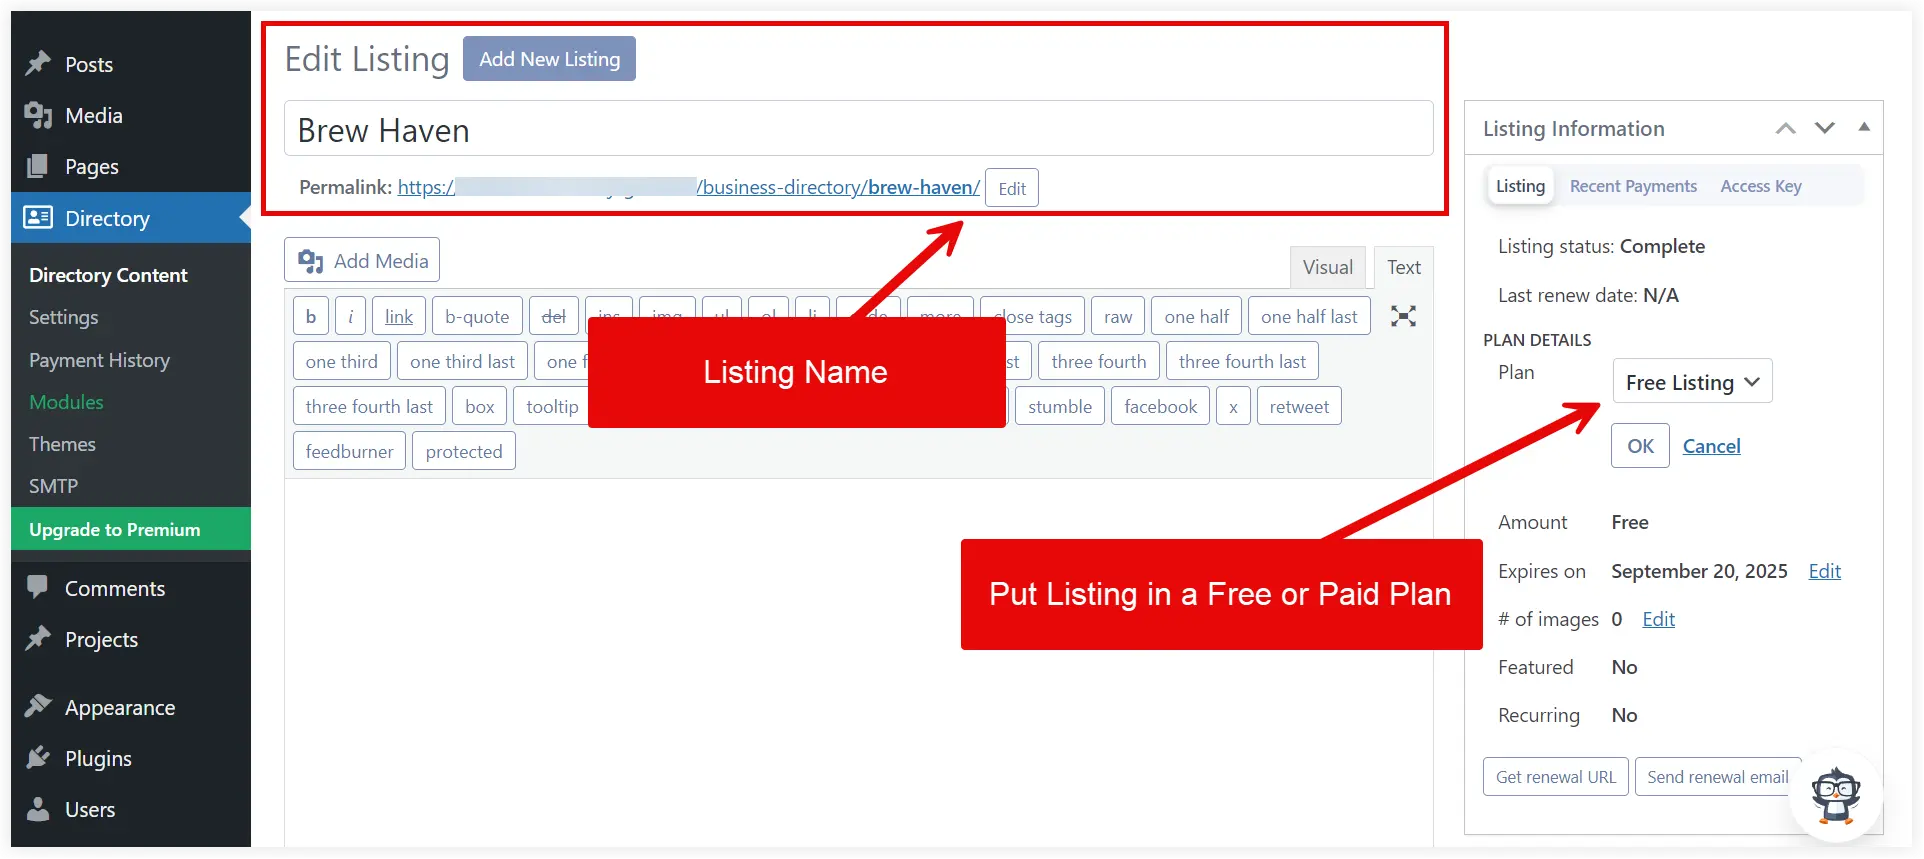
Add the listing name and display it for free or under a paid plan.
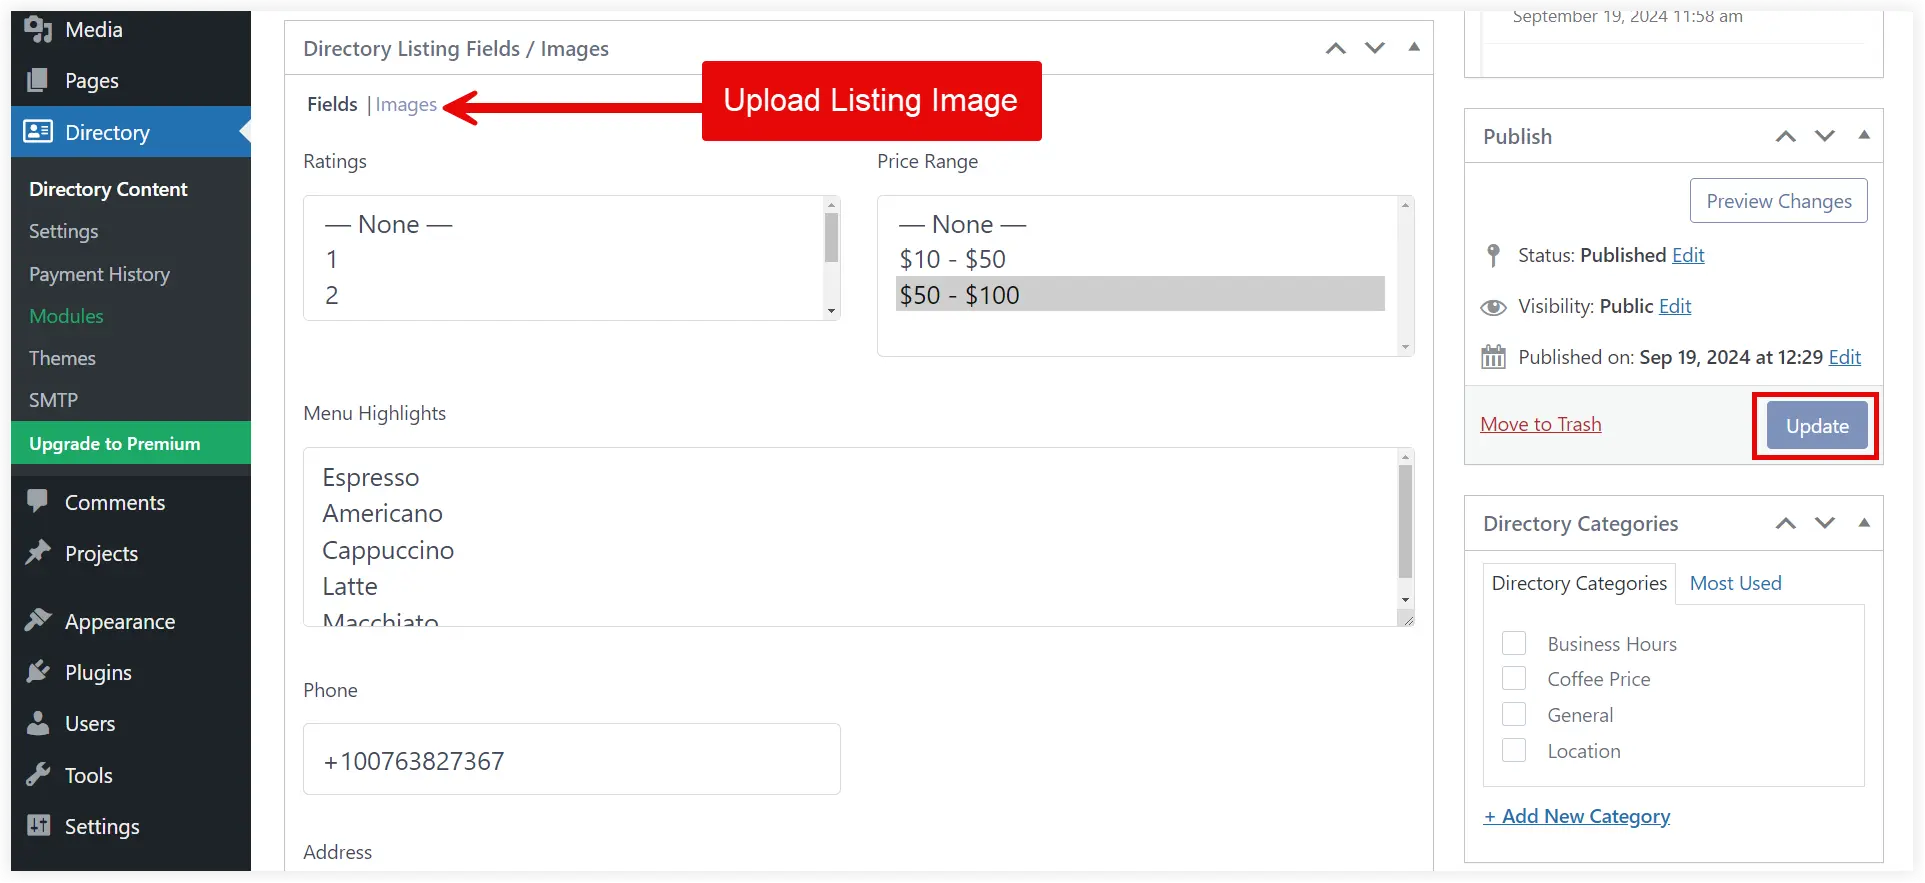
Next, input the values for the Directory Listing Fields. Select Ratings, Price Range, and Menu Highlights, and enter other essential details for that coffee shop listing. After entering all those details in the listing fields.
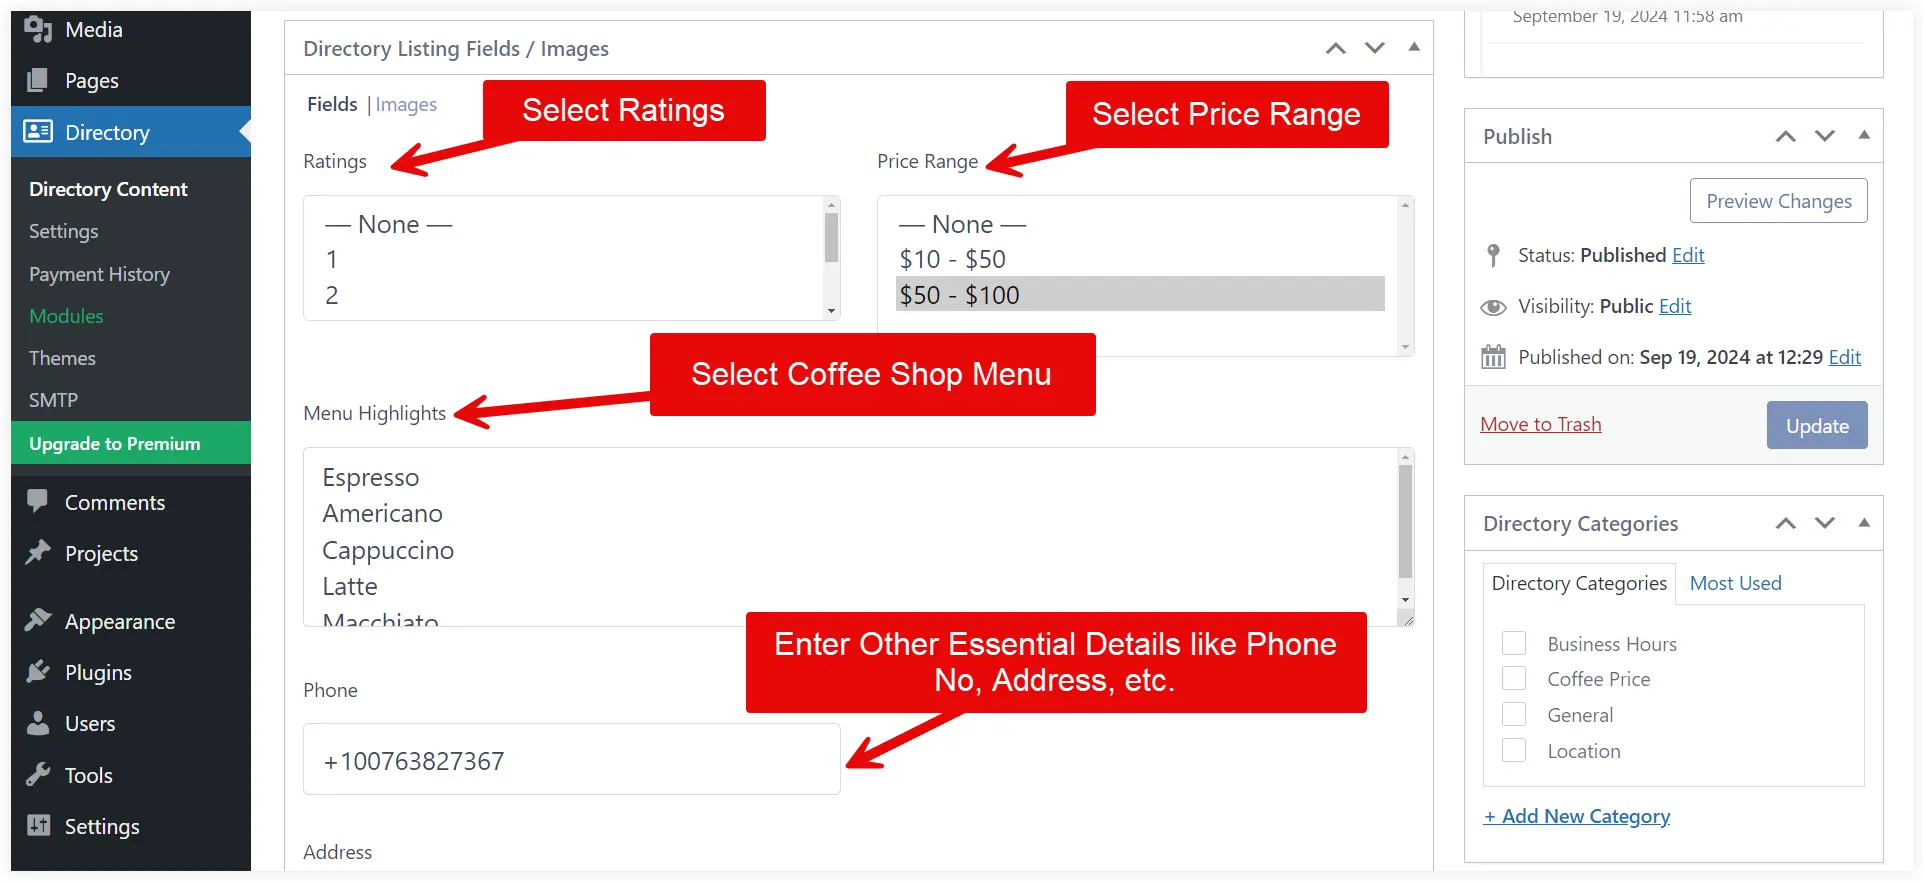
Also, upload some good images of the coffee shop to provide a quick visual view to the users on the website. Click Update to save the listing.
You can repeat the same steps to enter more listings into your coffee shop directory website. That is all about the plugin configuration of your directory website. Let’s move to the design phase.
Design a Directory Website using Divi
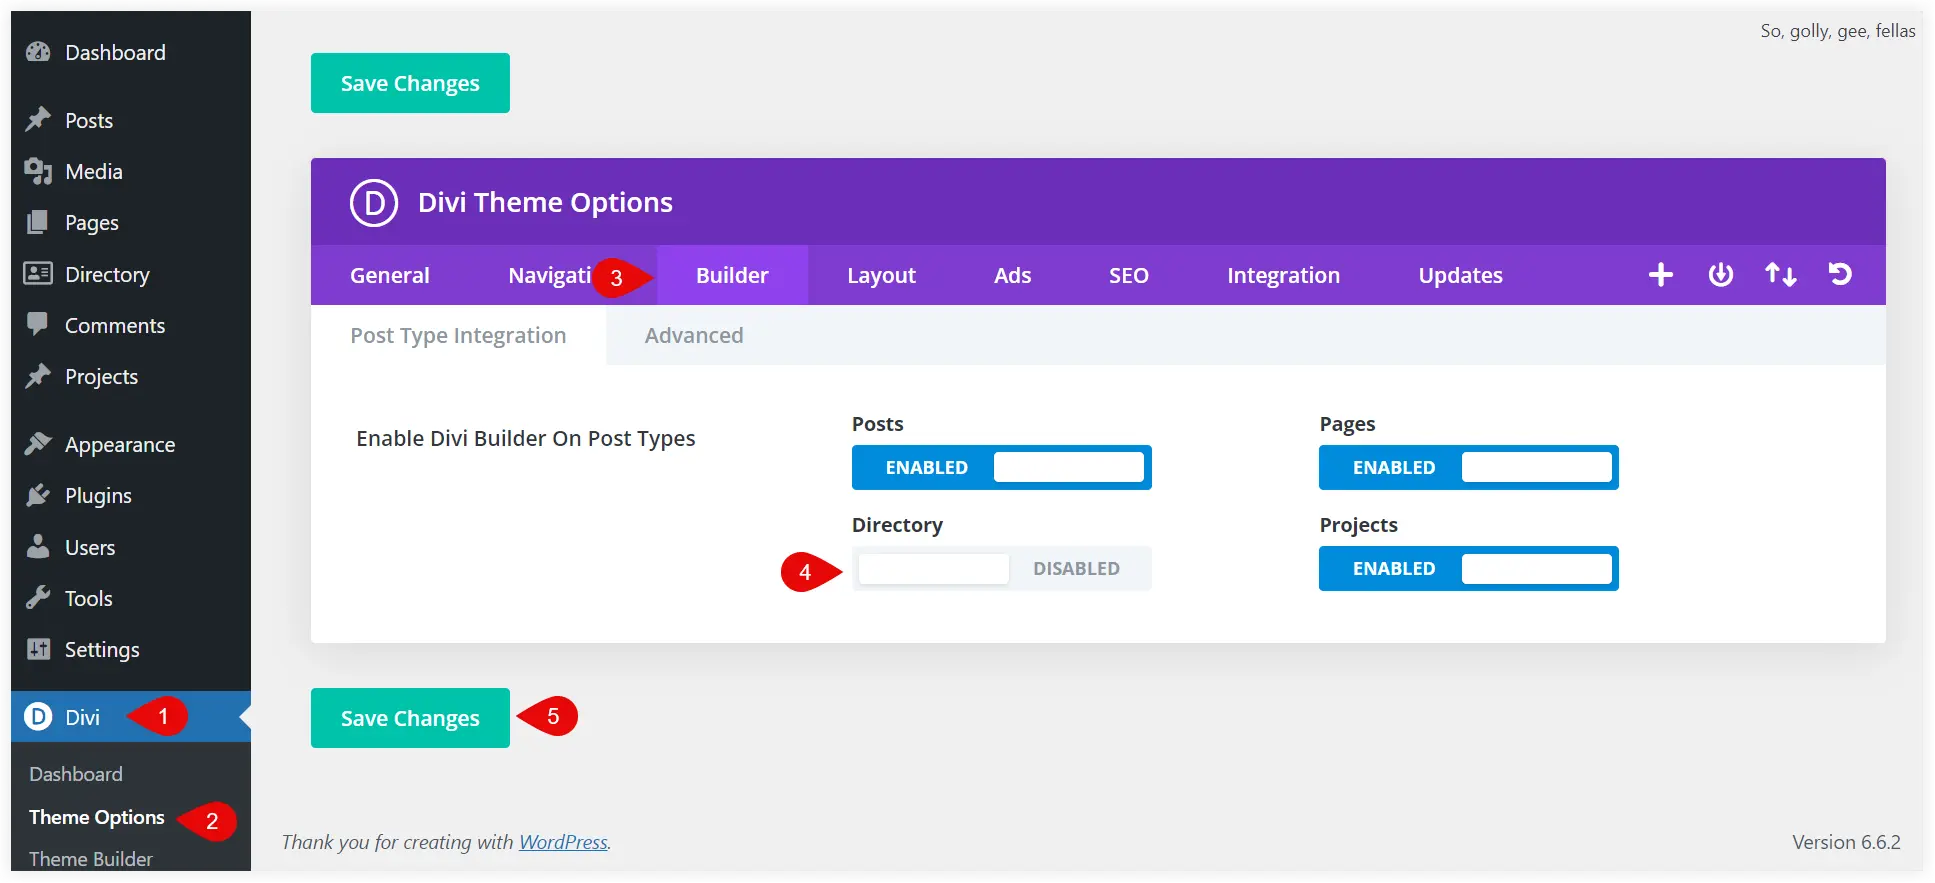
After finishing all the essential directory plugin WordPress configurations, we can focus on the design part of the directory website. We will use the incredible options provided by Divi Theme Builder to create listing pages. You need to enable that functionality for custom post types in Divi Theme Builder.
Navigate to the Divi Theme Options, select the Builder tab, enable the Directory option, and click Save Changes.
Next, we will create a listing template for our page using Divi Theme Builder.
Create a Listing Template in Divi Theme Builder
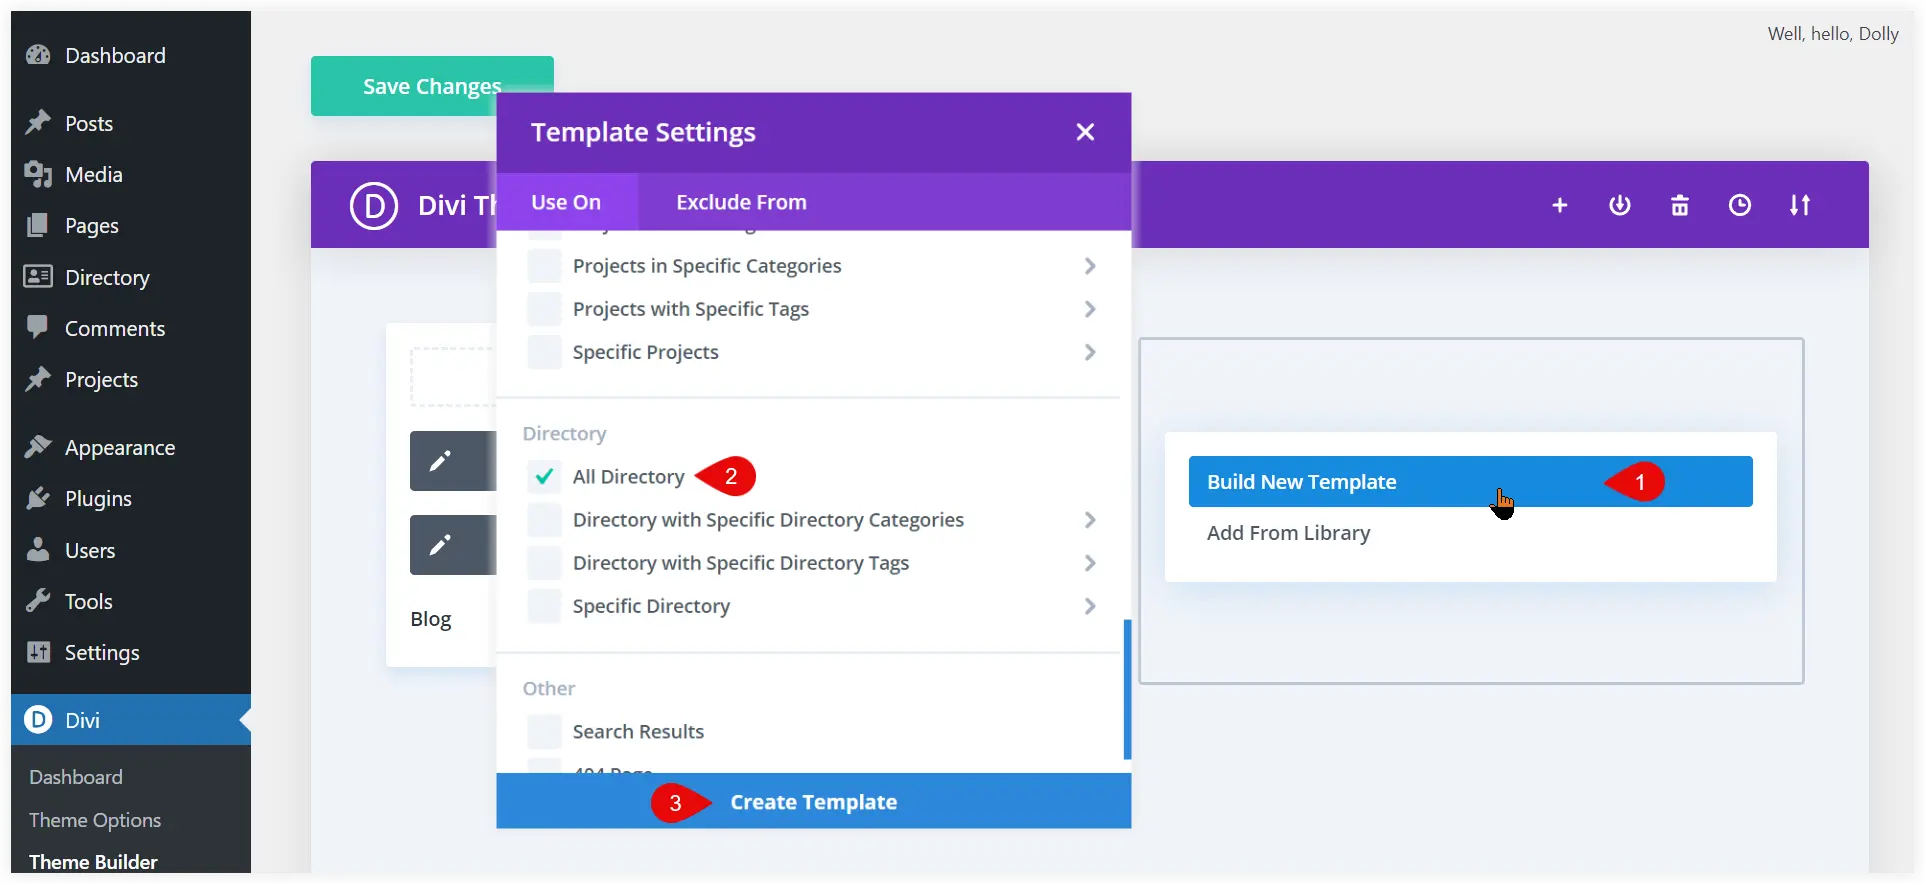
We will create a global template for listings that will be used to showcase the listings when users explore them on the directory page.
Click Add New Template, select Build New Template, choose All Directory, and then click Create Template. Now, this template is applied to display listings on your directory website.
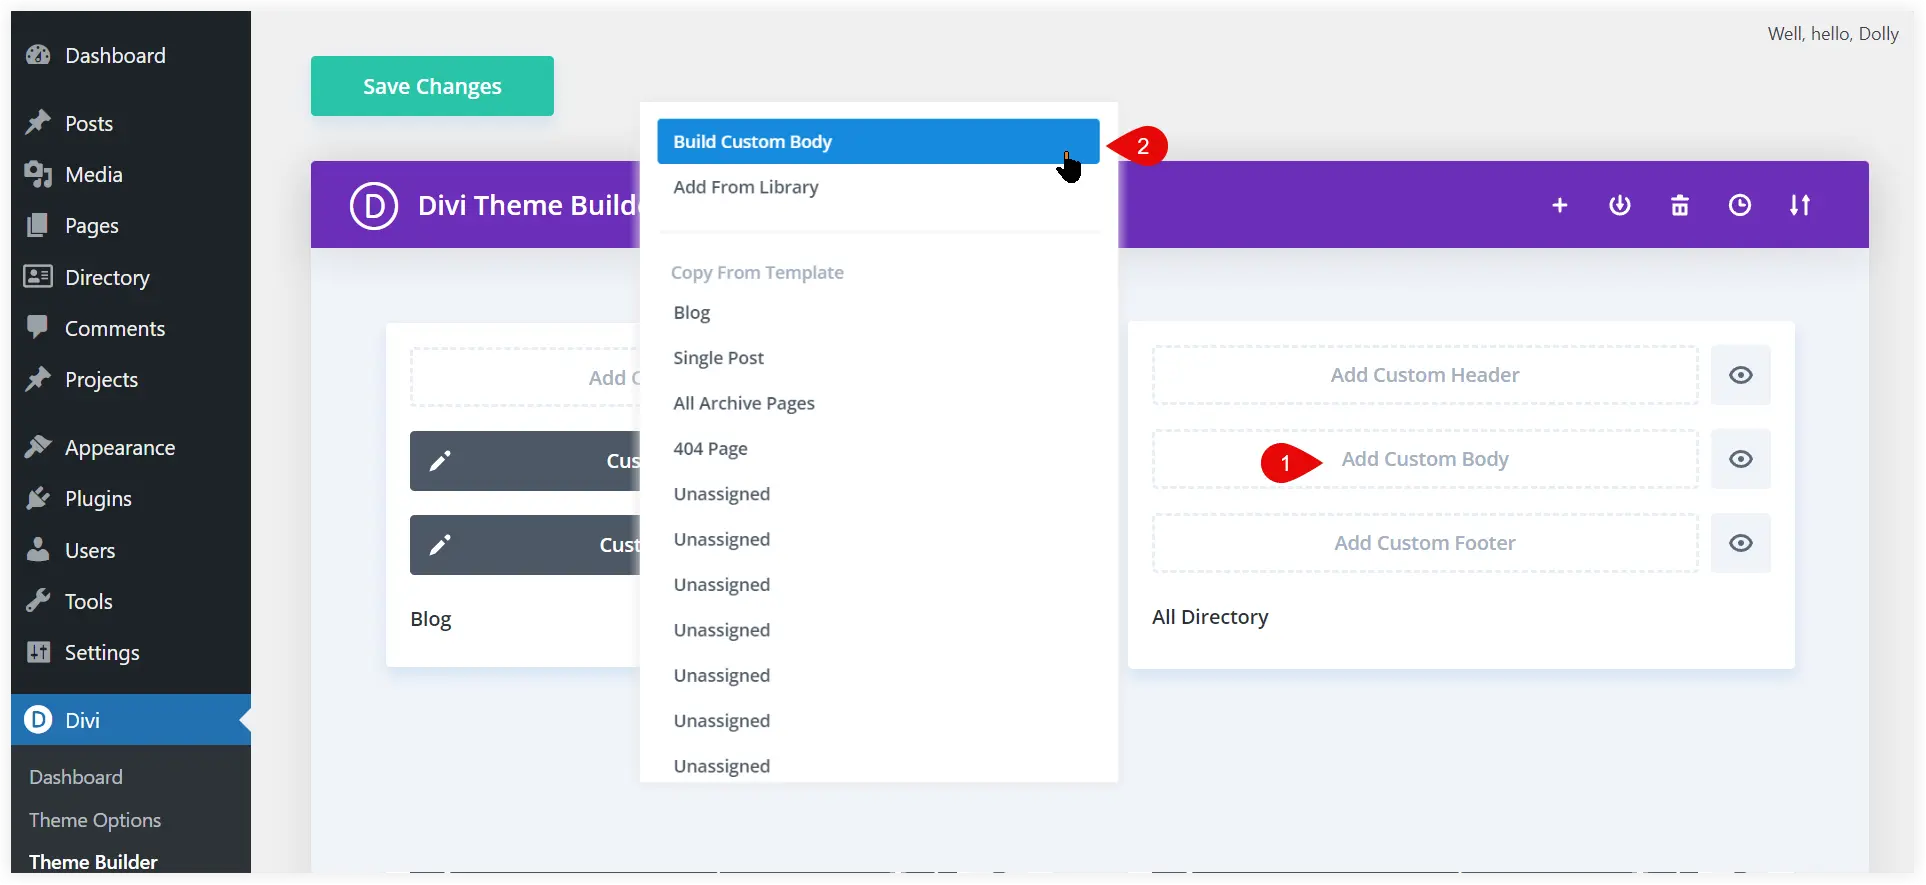
Design your Listing Page Template
After creating a global page template to show listings, we will move forward with the design phase. Click Add Custom Body.
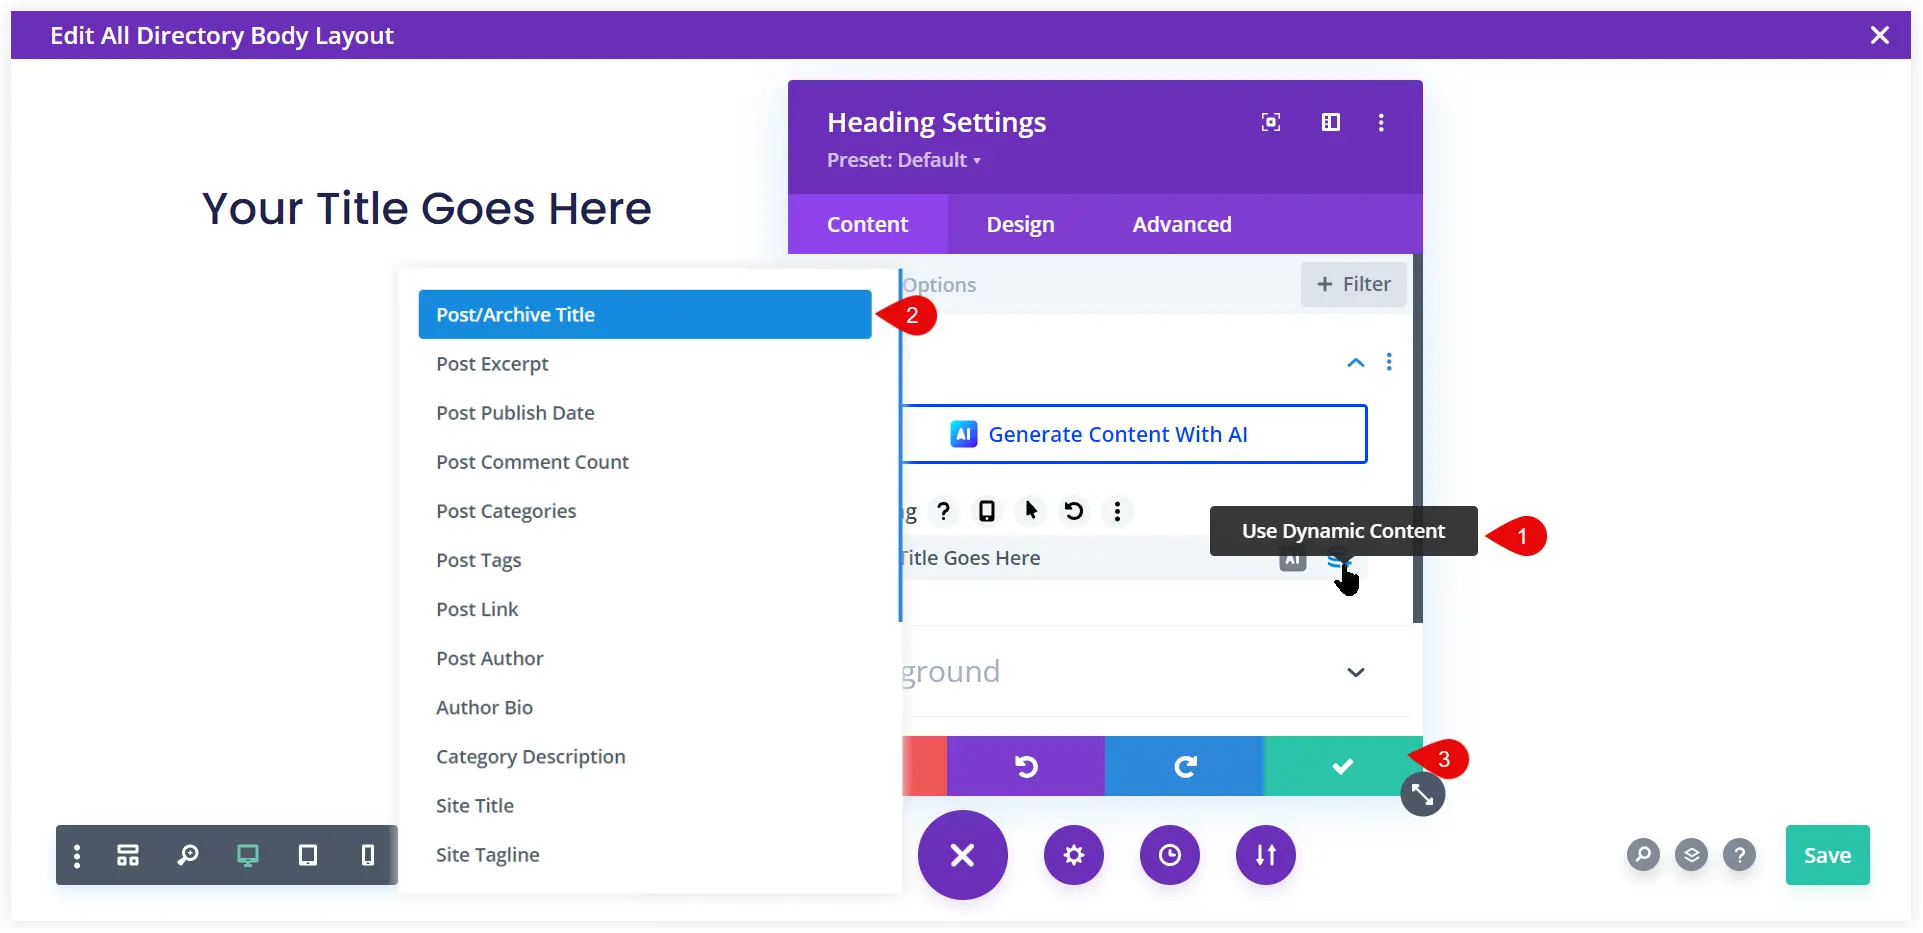
Select a single column row and add a Divi Heading module to show the listing name to the users. We will use the dynamic content feature of Divi to display the title of every listing in the heading. Select the Post/Archive title option.
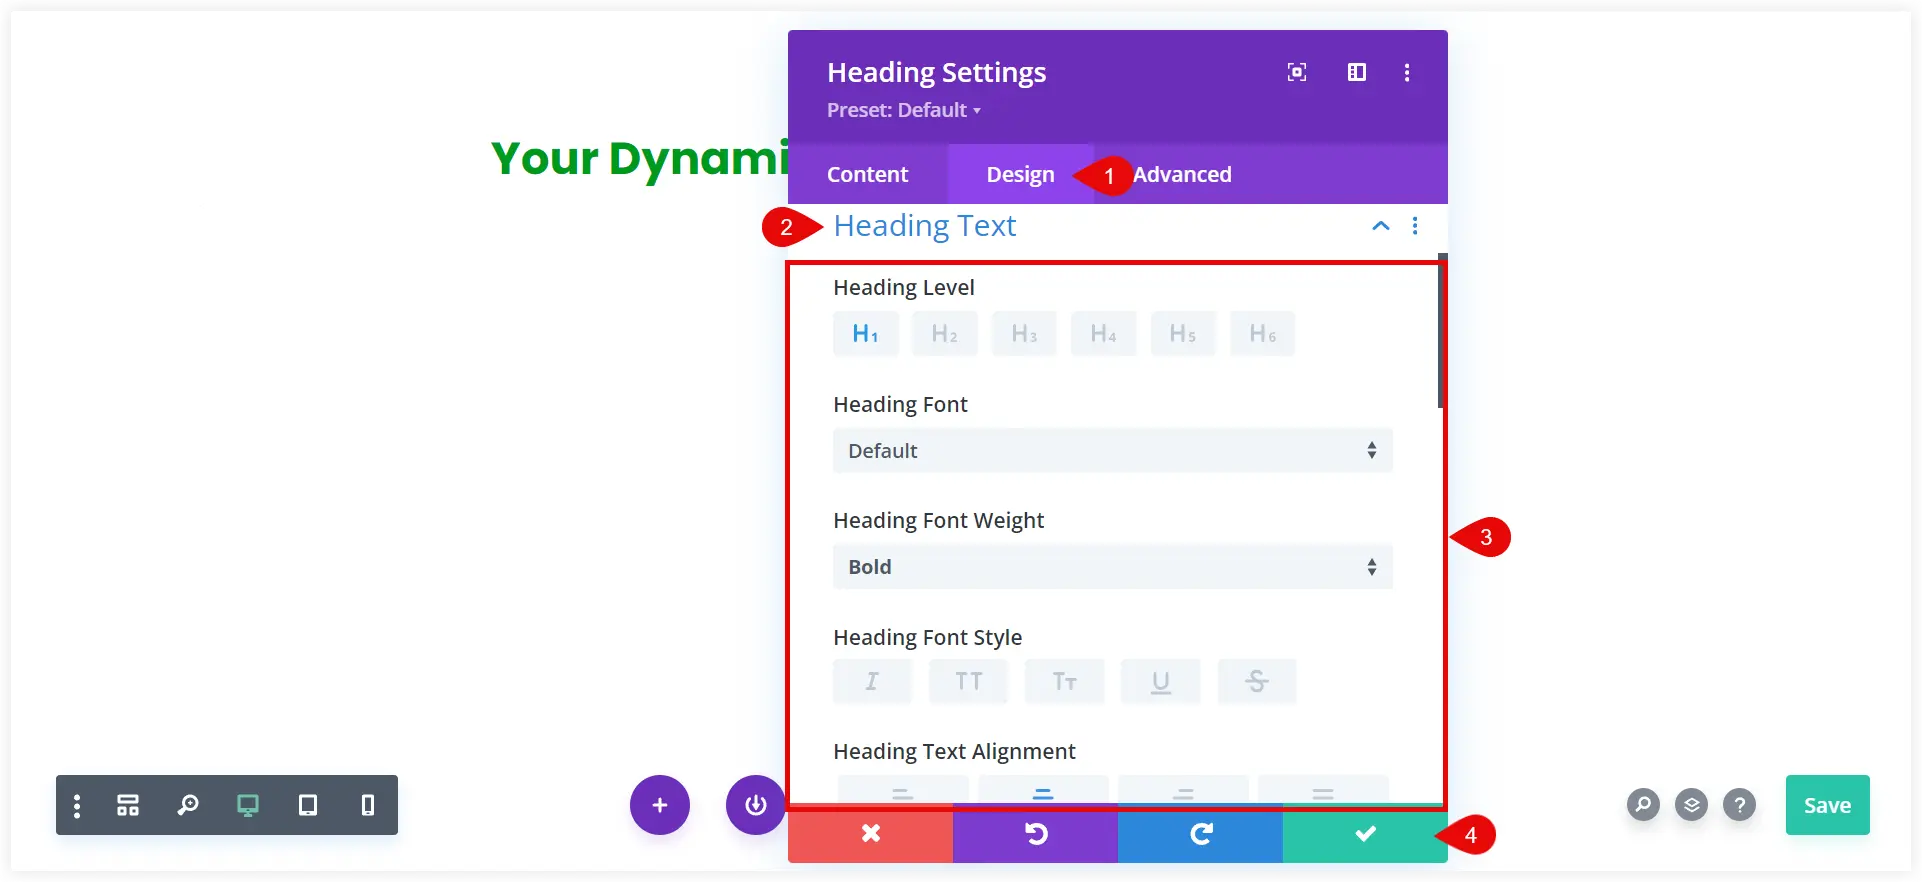
You can do some essential styling tweaks to make it look visually engaging. Go to the Design tab and customize the Heading Font, Heading Font Weight, Heading Text Alignment, and Heading Text Color.
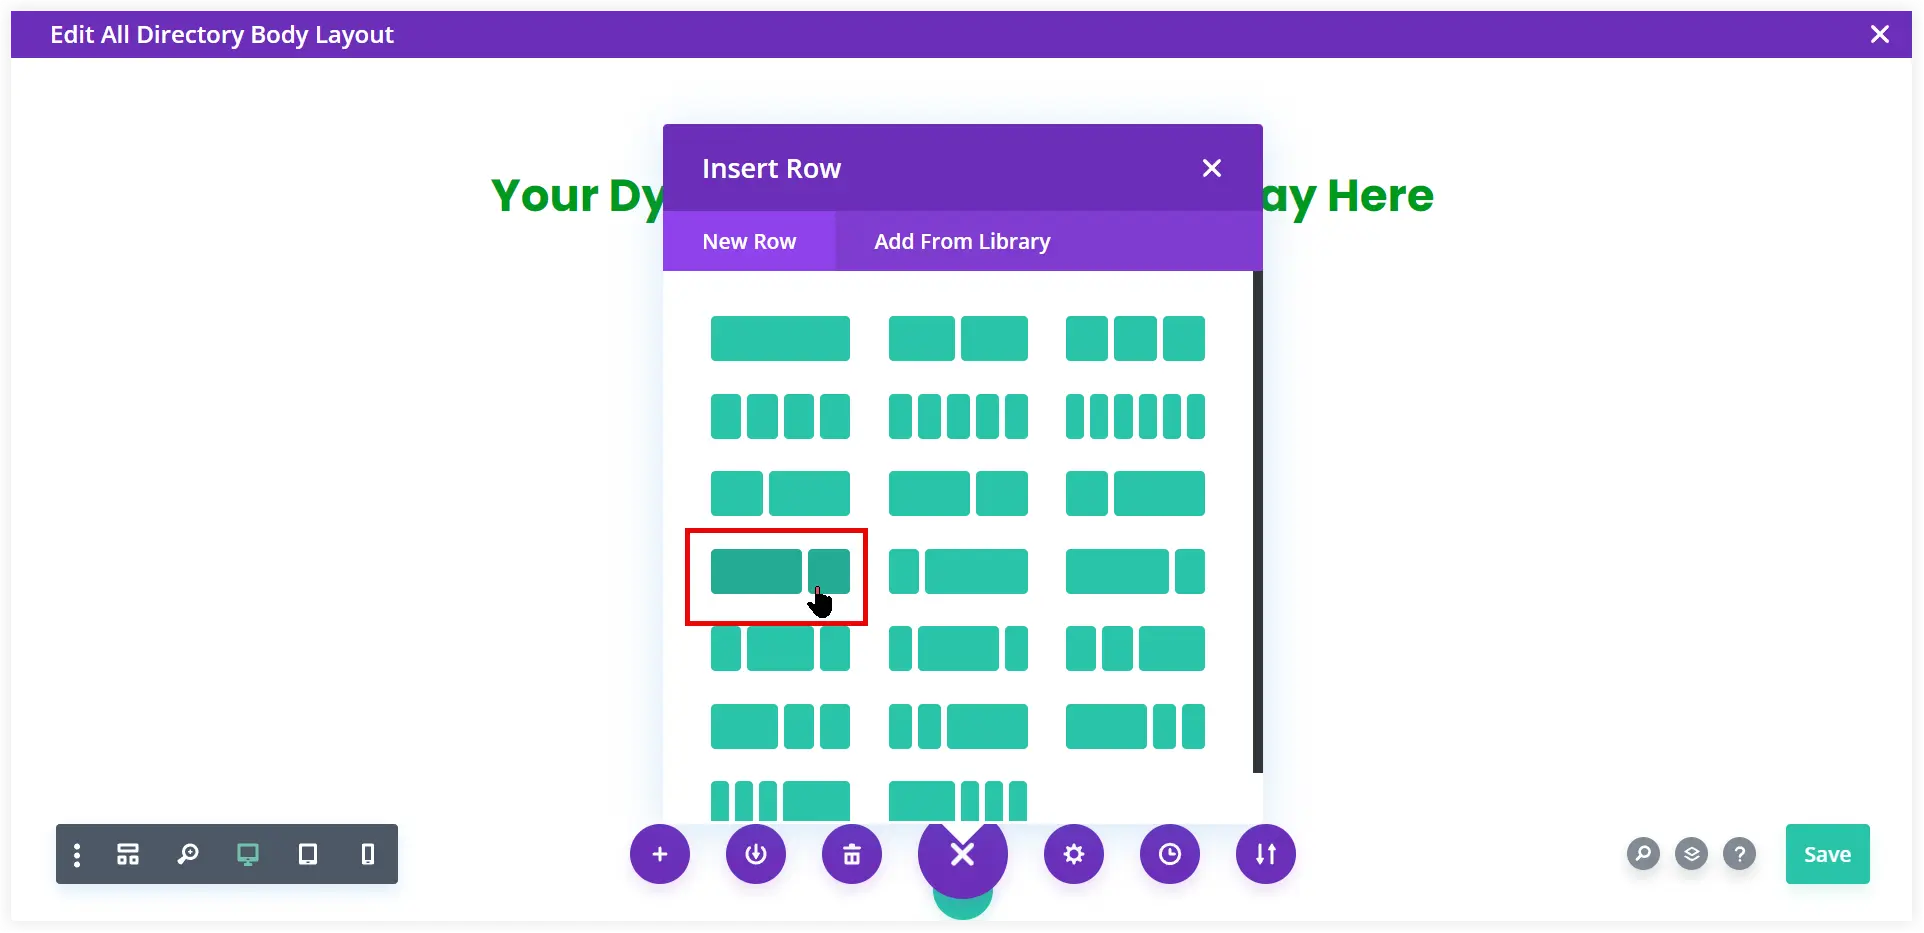
Next, add a new regular section using the blue plus icon.

Select a 2/3 – 1/3 row layout in the new section.
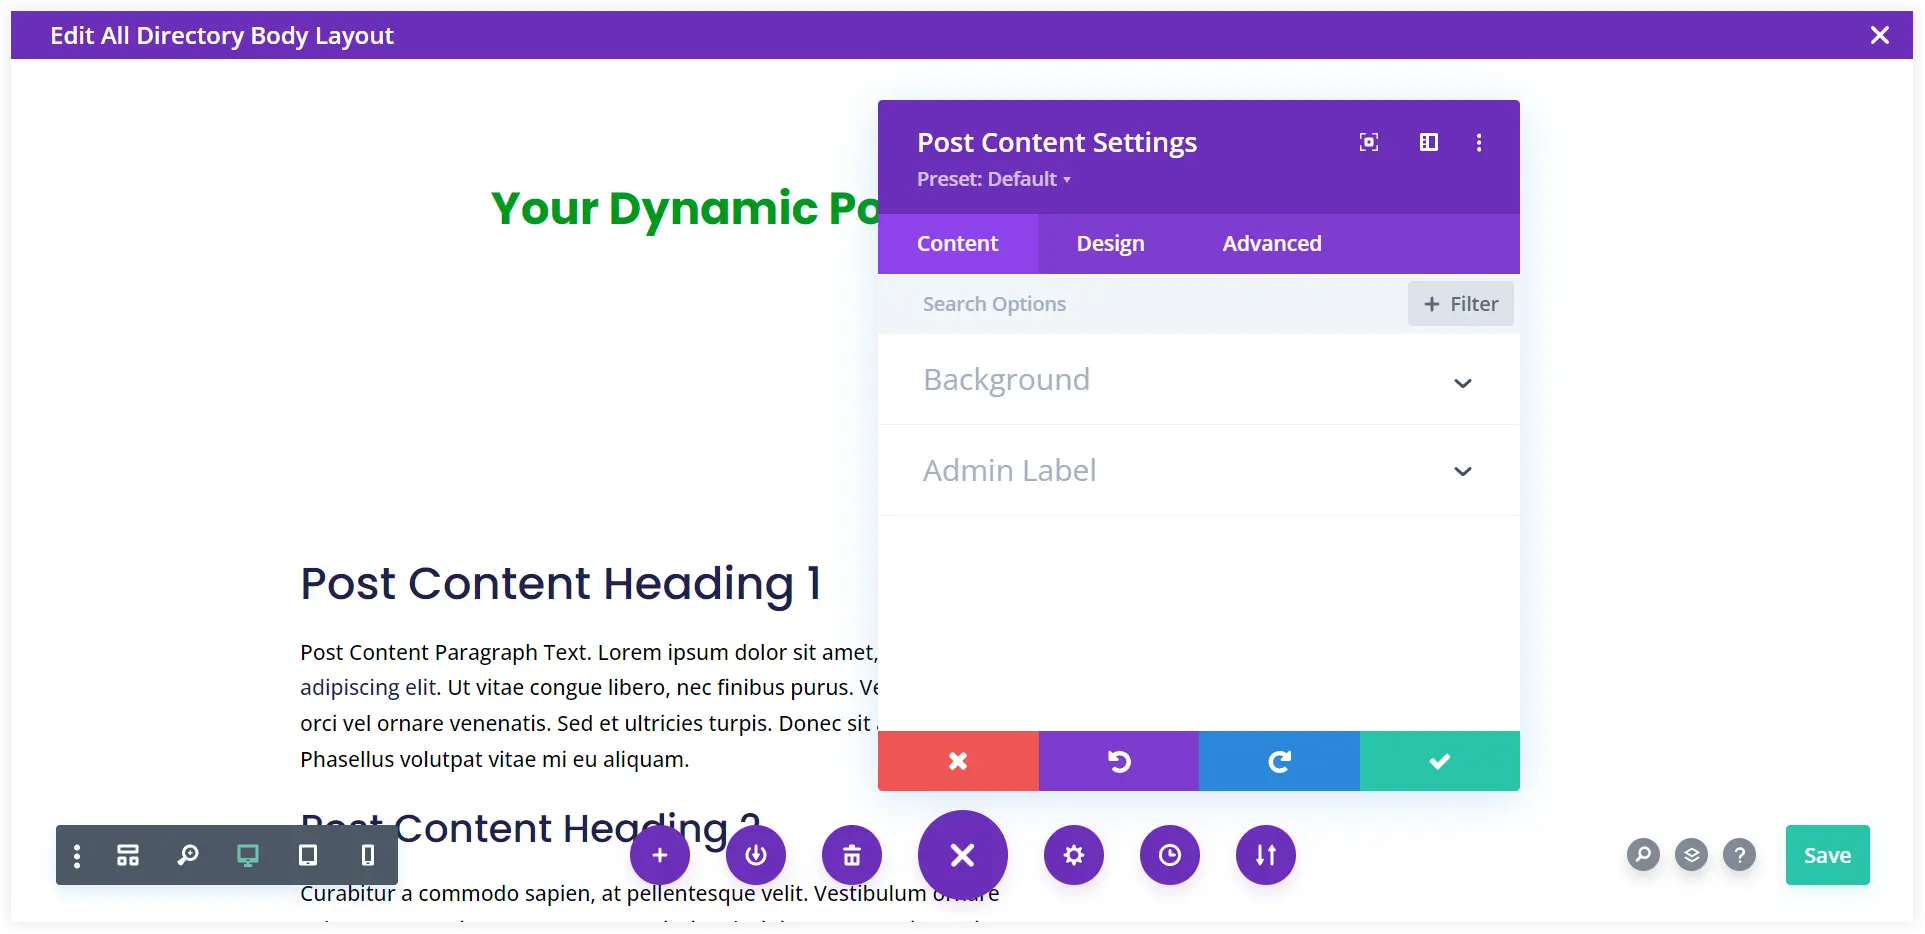
The first wide row will hold the Divi Post Content module and will feature the content from your form fields on every listing page.
The Code module, which displays the business directory’s search bar, will be placed in the second narrow column. This will allow users to browse and find listings on the website. Paste the following shortcode in the code module for that.
[businessdirectory-search]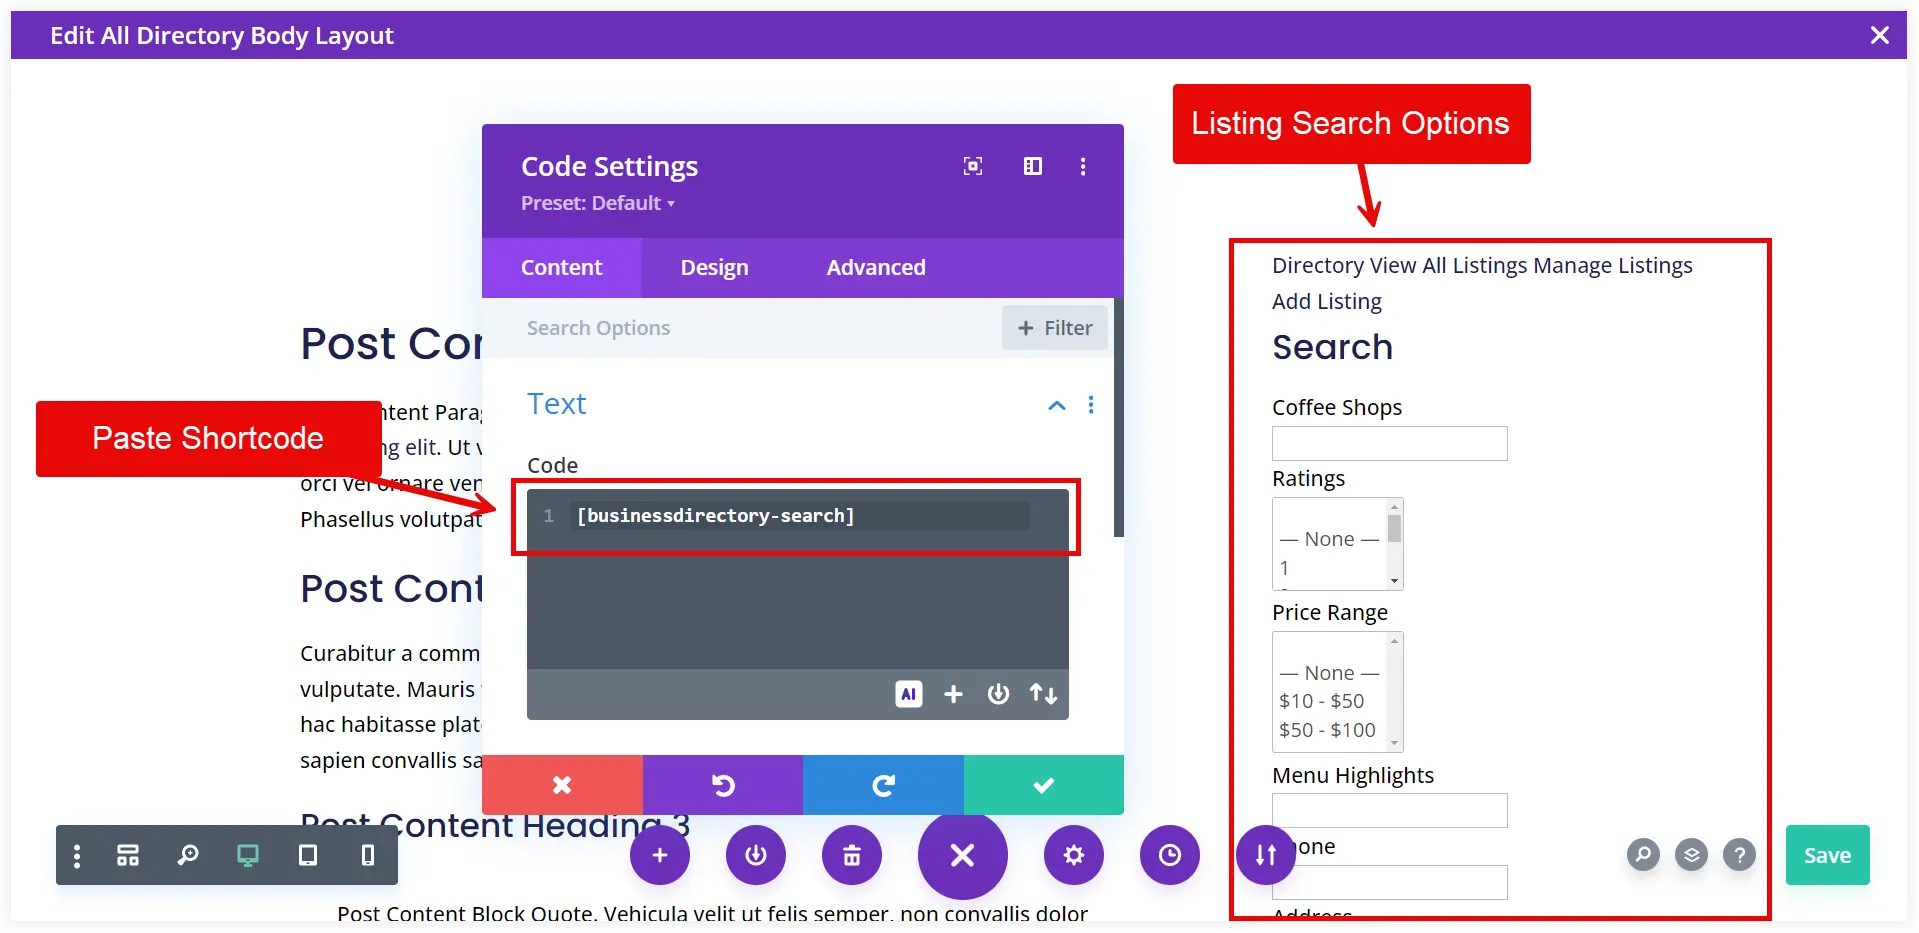
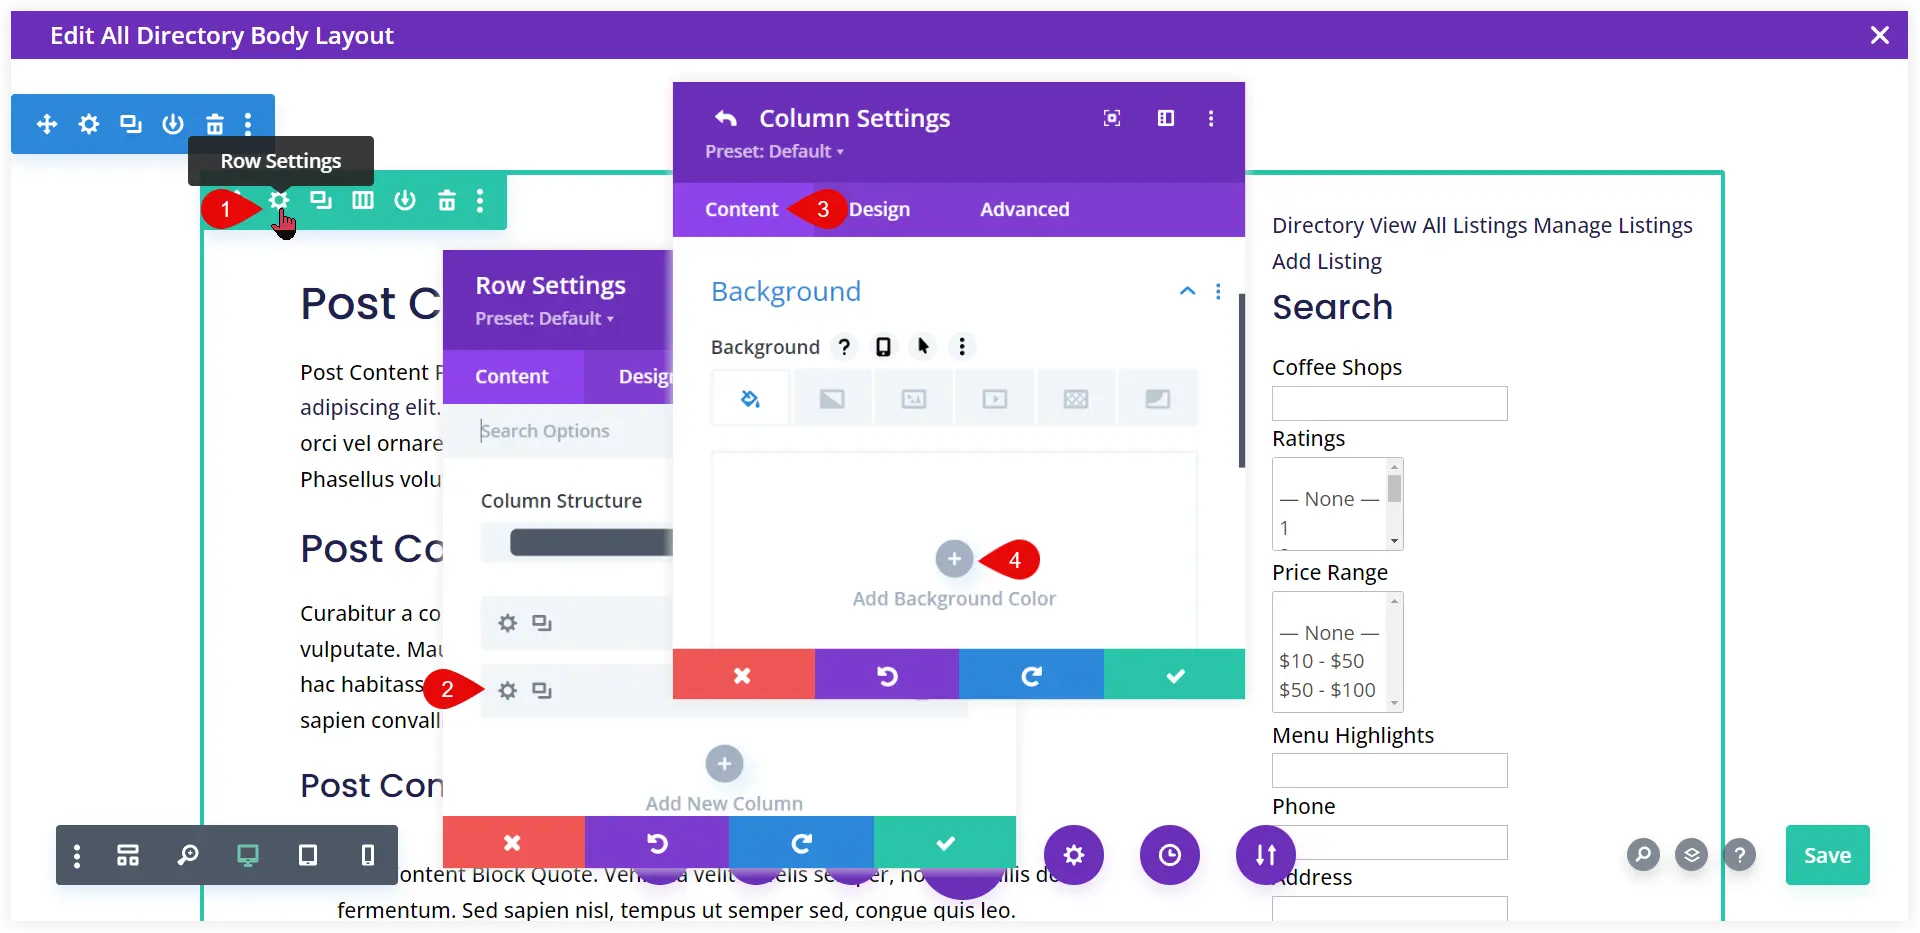
The second column with the search bar does not appear good. We can modify the column background color to make it look separate from the listings.
To make everything look organized in the search bar, paste the code below into the Divi Code module.
<style>
  #wpbdp-search-page {
    padding: 20px;
  }
  .wpbdp-search-page .wpbdp-form-fields {
    display: block;
  }
  .wpbdp-page label, .wpbdp-form-field label {
    font-size: 16px;
    font-weight: 600;
  }
</style>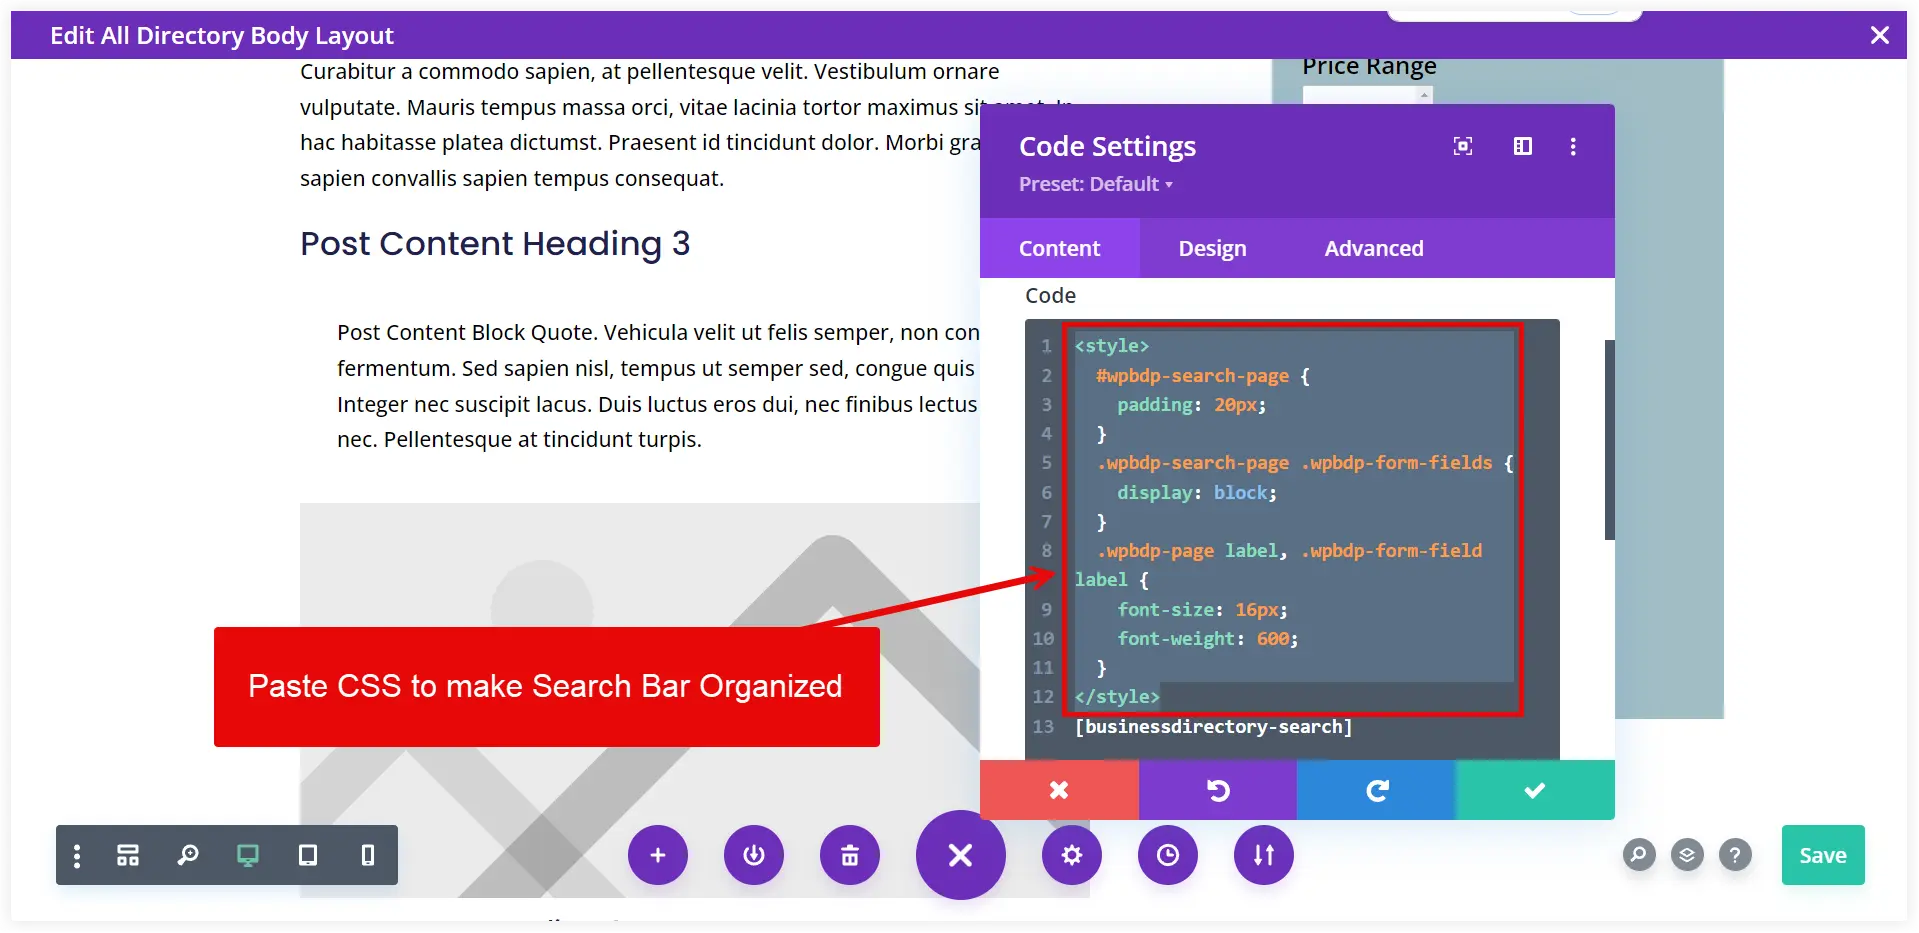
That’s done. Now your coffee shop directory website is ready to cater to the users. They can easily apply various search filters to find the desired coffee shops.
You can also explore a similar post to ours to understand the process of creating an eCommerce store using WordPress and Divi.
Final Takeaway
Finally, using Divi and WordPress to create a directory website is a simple process that enables you to achieve a visually attractive and fully functional directory website.
By following the discussed steps, you can start from the initial setup of your website to its final functional state.
The Business Directory WordPress plugin plays a major role in setting up your directory website. It lets you add listings and custom fields to provide a more advanced search experience for the users.
After going through this post, you may have a clear-cut idea for creating a directory website and can use your creativity to build more for various other niches, such as real estate, restaurants, salons, etc.


Hi
Thanks for mentioning Listdom. The Divi addon of this plugin enables the users to design the listing details page, listing cards and even the map info windows with Divi.