
In the modern era of online shopping, eCommerce is essential for the success of any business. WordPress can utilize its plugin compatibility excellently when it pairs with Divi. It offers you enormous design possibilities with Divi’s drag-and-drop interface, prebuilt divi layouts, and customization options to create a fully functional and appealing online eCommerce store. Divi provides you with unmatched powerful options to build an eCommerce website with WordPress and WooCommerce. The interesting thing is that you don’t require any coding skills to create an eCommerce store with WordPress and Divi.
This post will guide you to set up a fully functional eCommerce store with WooCommerce, WordPress and Divi. It will be a nice learning experience for beginners as we will cover all the essential steps to create an eCommerce store with WordPress and Divi from scratch in detail.
1. Setting Up WordPress
First of all, we need our WordPress website which will work as an online eCommerce store. Let’s see how can we set up our WordPress eCommerce website to transform it into a functional online store.
a. Choose a Reliable Hosting
Reliable hosting is essential to ensure the performance and security of your eCommerce store. Make sure the hosting you chose offers fast loading time, minimal downtime, 24/7 support, and strong security.
Take a look at some of the top hosting options you can go with.
- Siteground
- Bluehost
- Hostinger
- GoDaddy
- HostGator
b. Install WordPress
After selecting a hosting provider, install WordPress. We recommend the use of one-click WordPress installation which is offered by most of the hosting providers. This is quite easy and will take much less time compared to the manual WordPress installation.
c. Configure Basic WordPress Settings
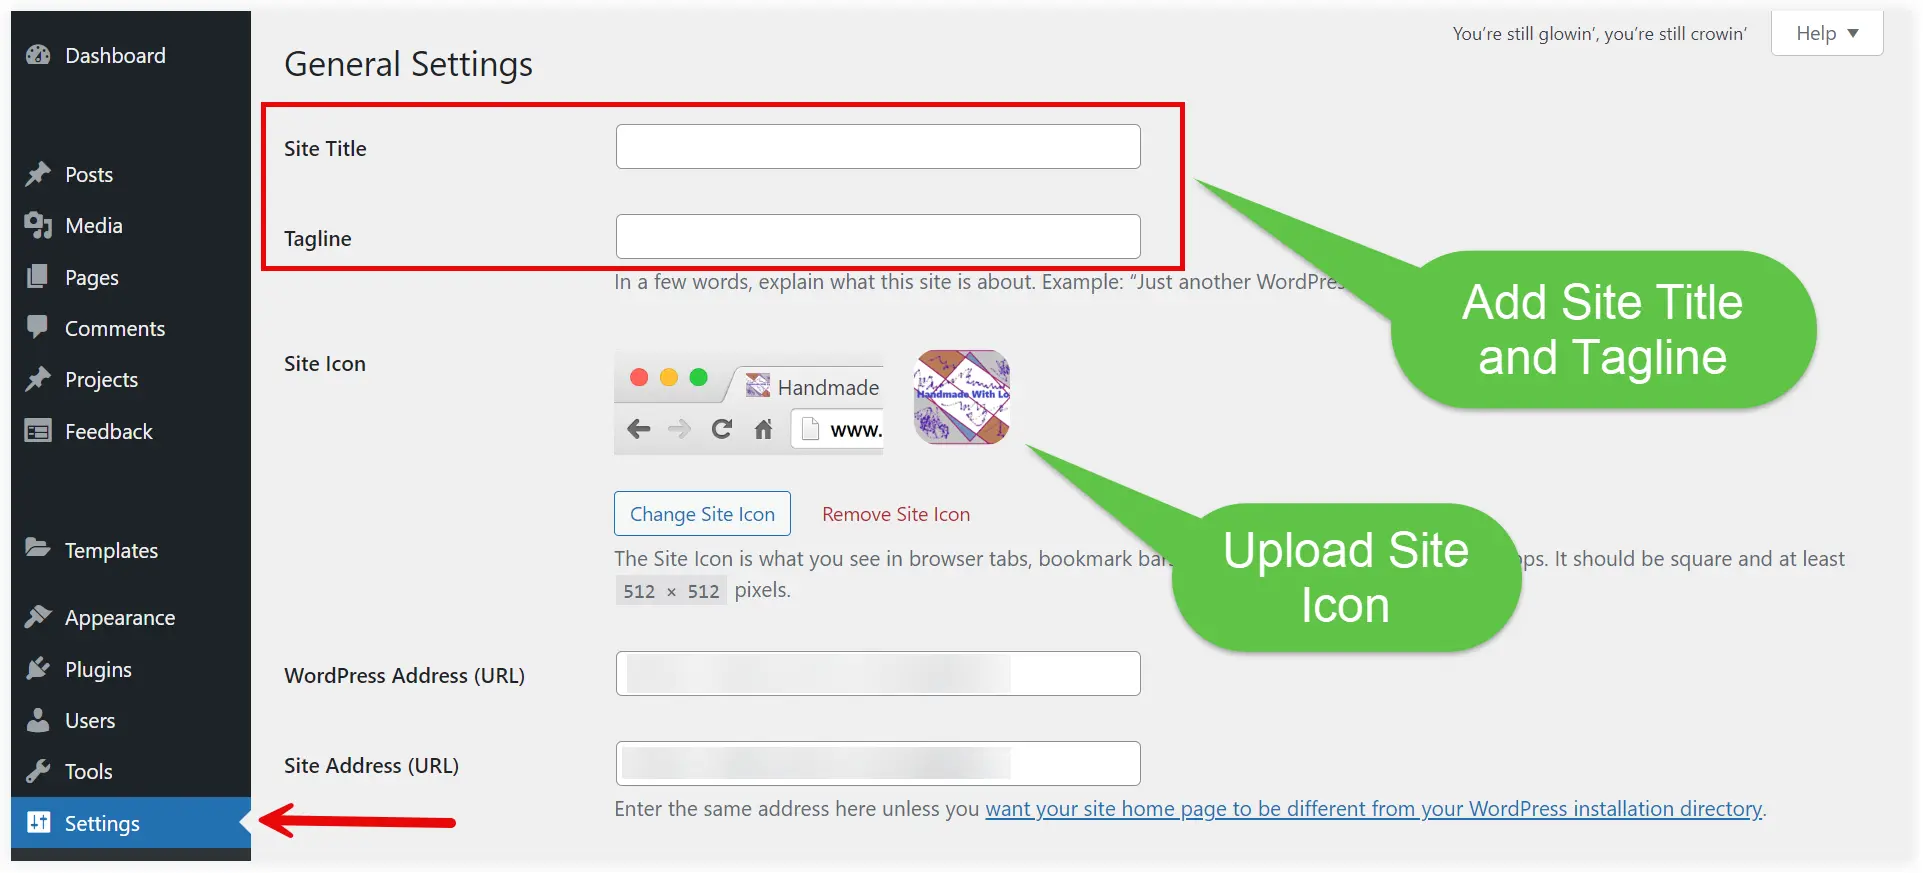
After doing the one-click WordPress installation. Add your site title and tagline in the Settings > General Section.
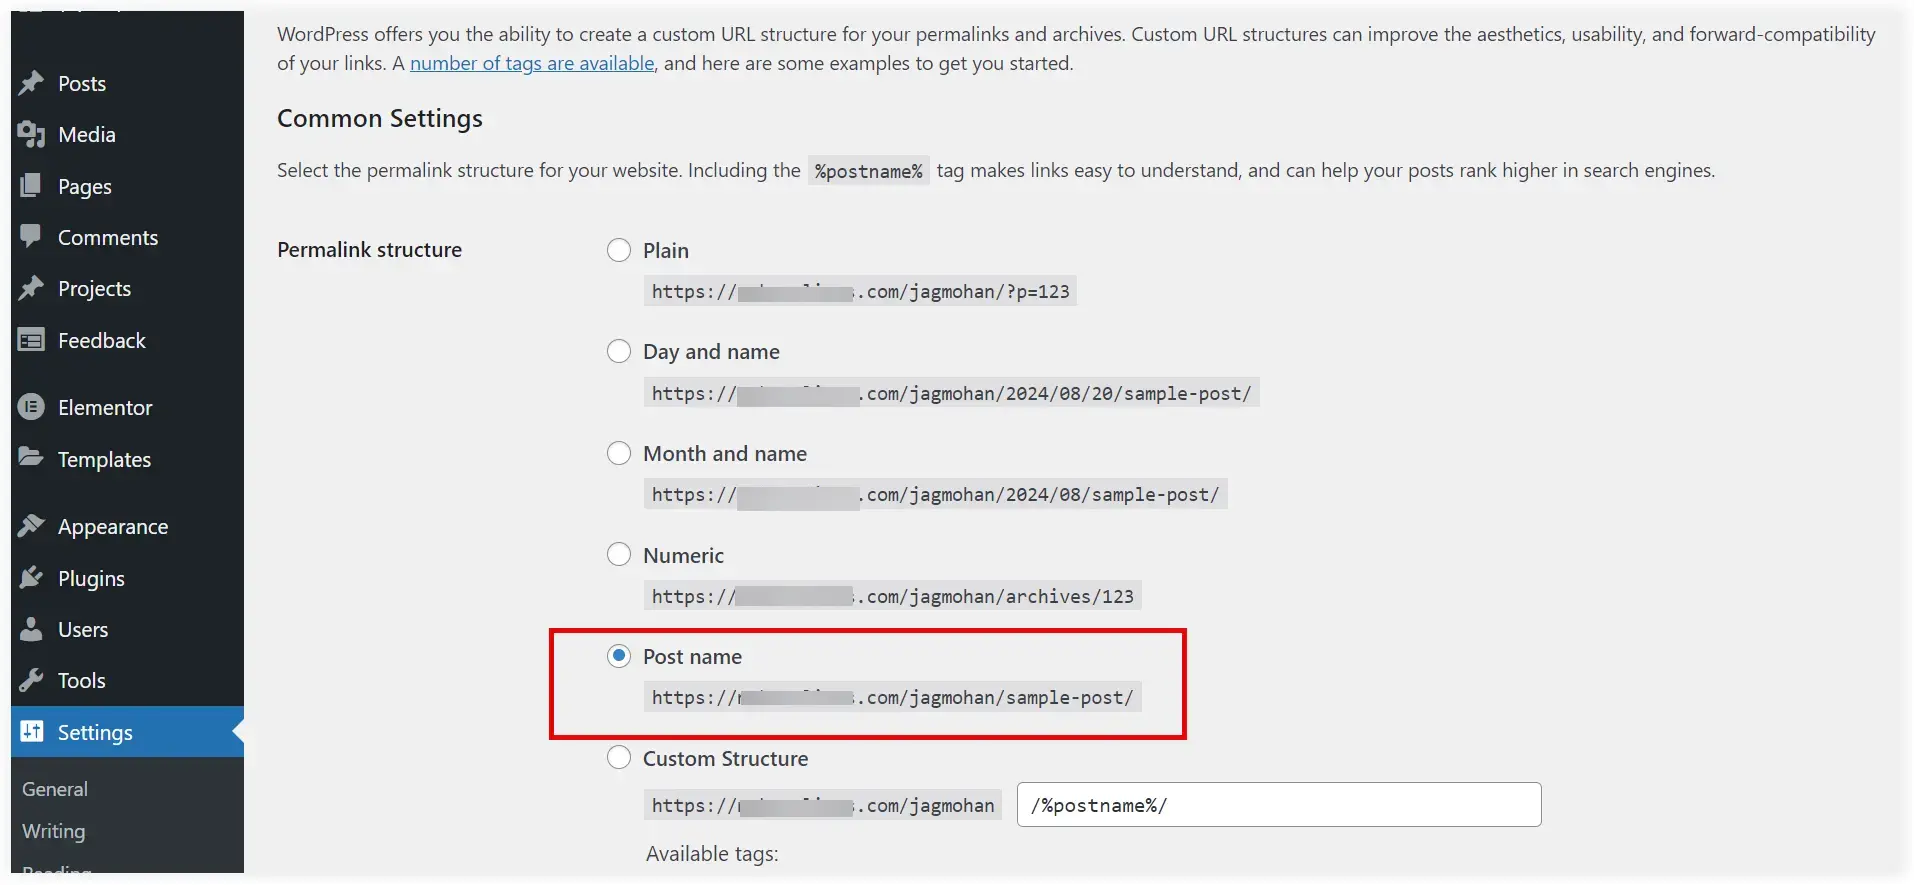
Configure the permalink structure under Settings> Permalinks to ensure SEO friendly nature of the URLs. Select the “Post name” option for a clear readable URL format.
2. Install and Configure WooCommerce
WooCommerce is a popular plugin that is powering the majority of eCommerce stores. It seamlessly integrates with WordPress to turn your website into a flexible and scalable online store. WooCommerce enables your store to sell physical products, digital downloads, and subscriptions.
Let’s see how we can install the WooCommerce website on your website.
a. Initial Setup
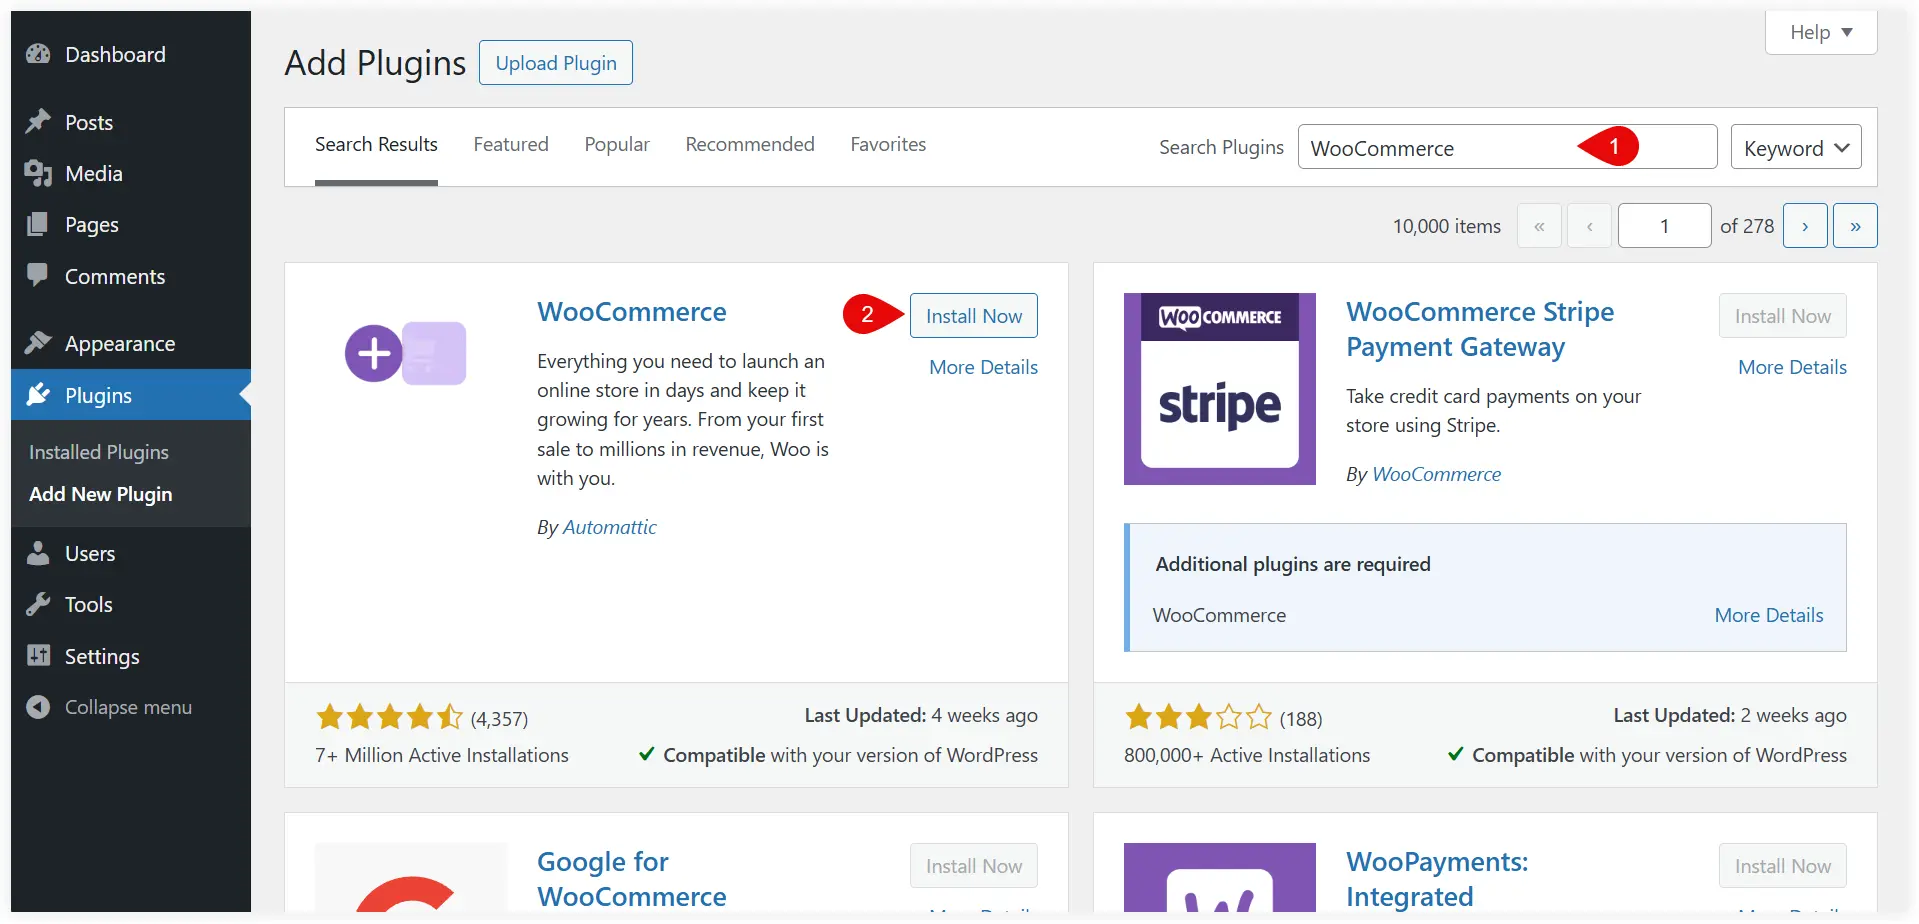
Go to your WordPress dashboard and navigate Plugins > Add New.
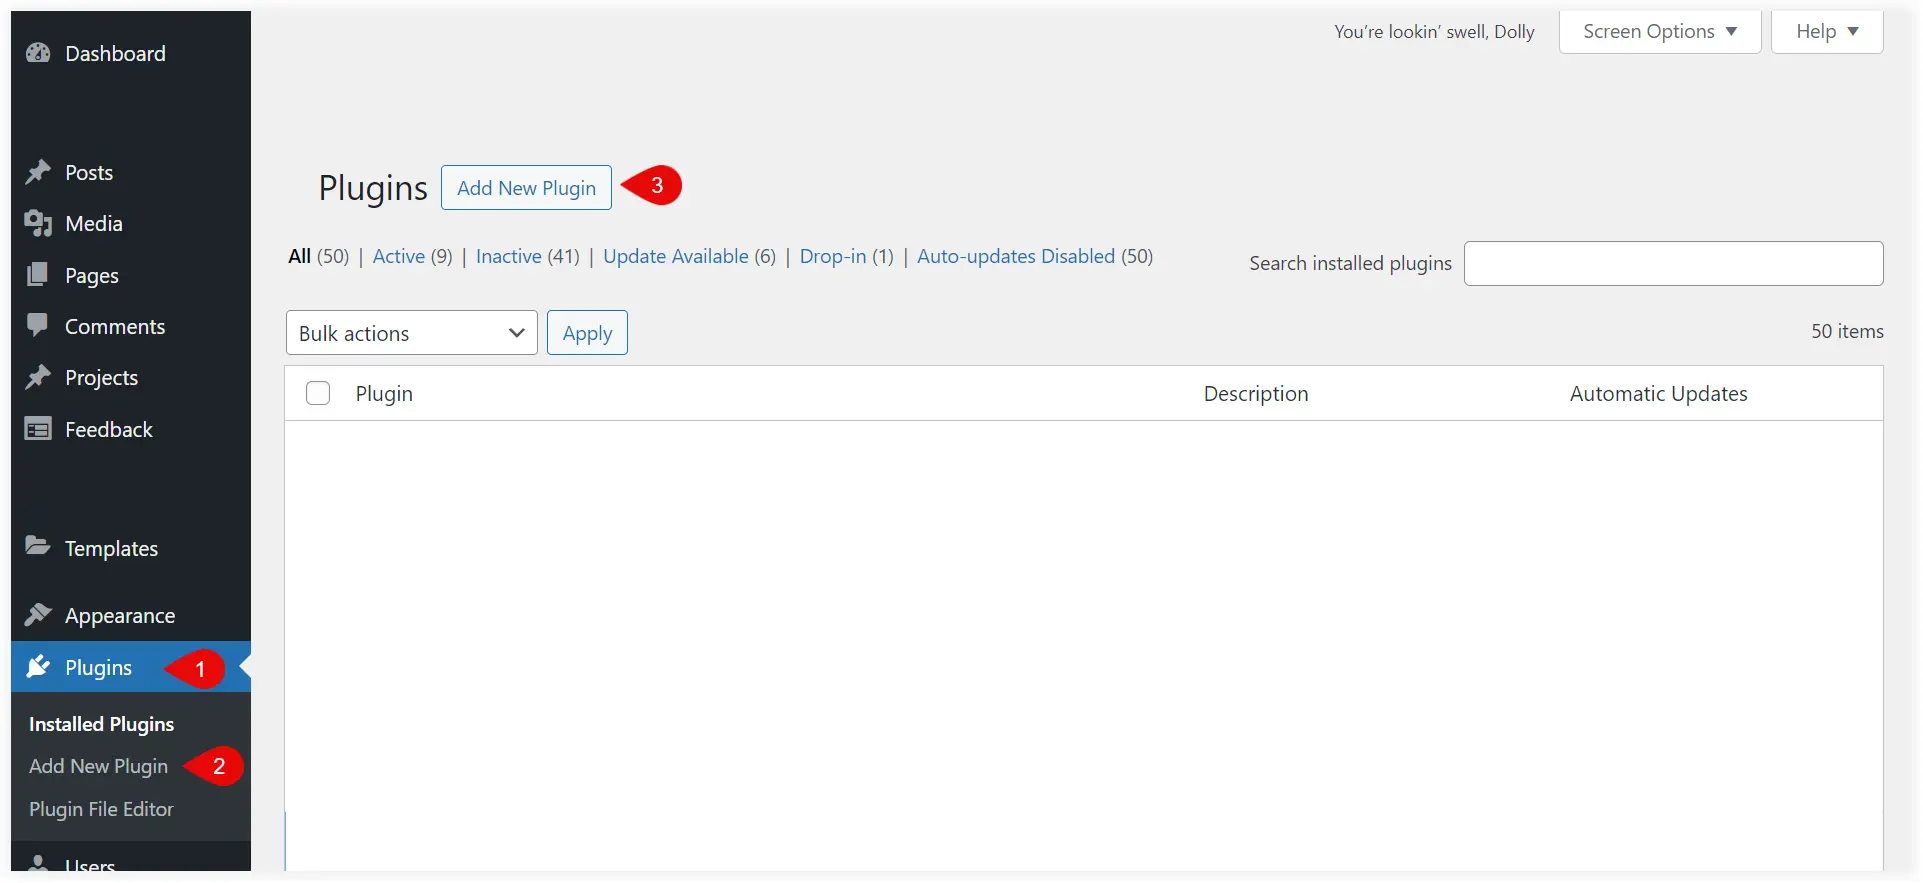
Search for “WooCommerce” and click Install Now.
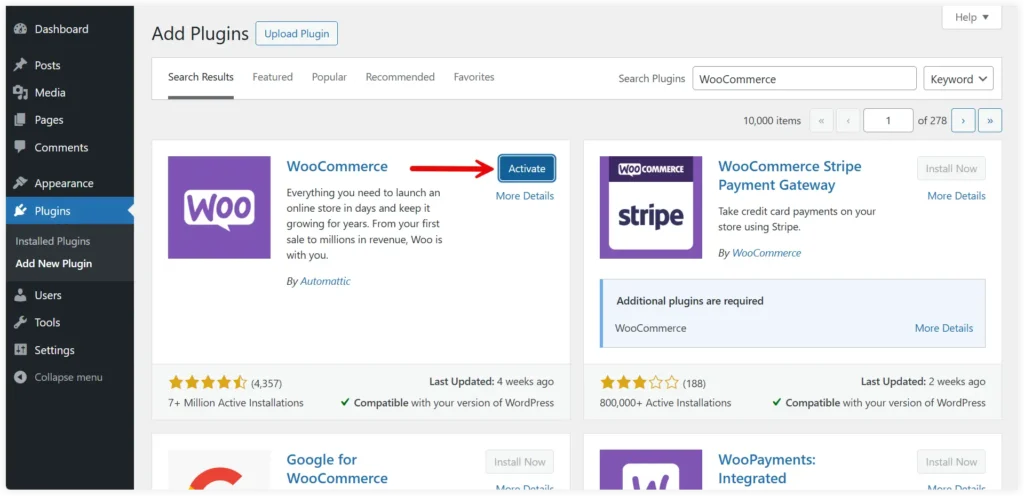
Activate it.
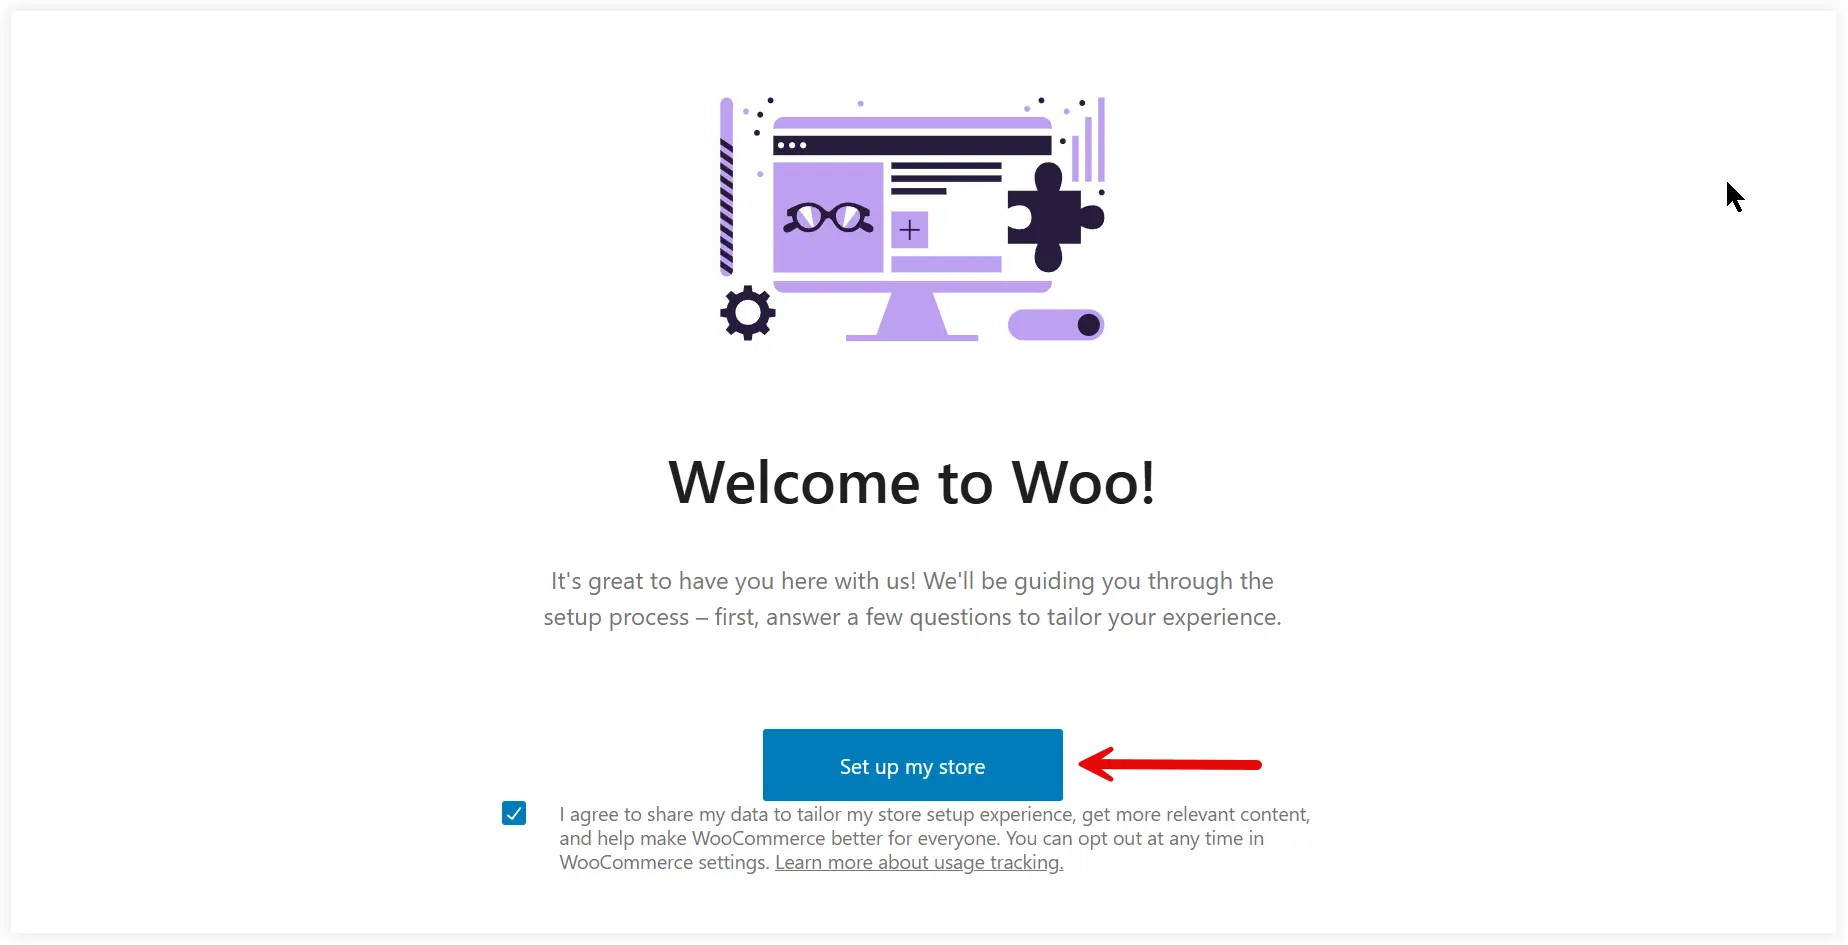
After activating a prompt screen will ask you to start the initial setup of WooCommerce. Click “Set up my store” to start the setup.
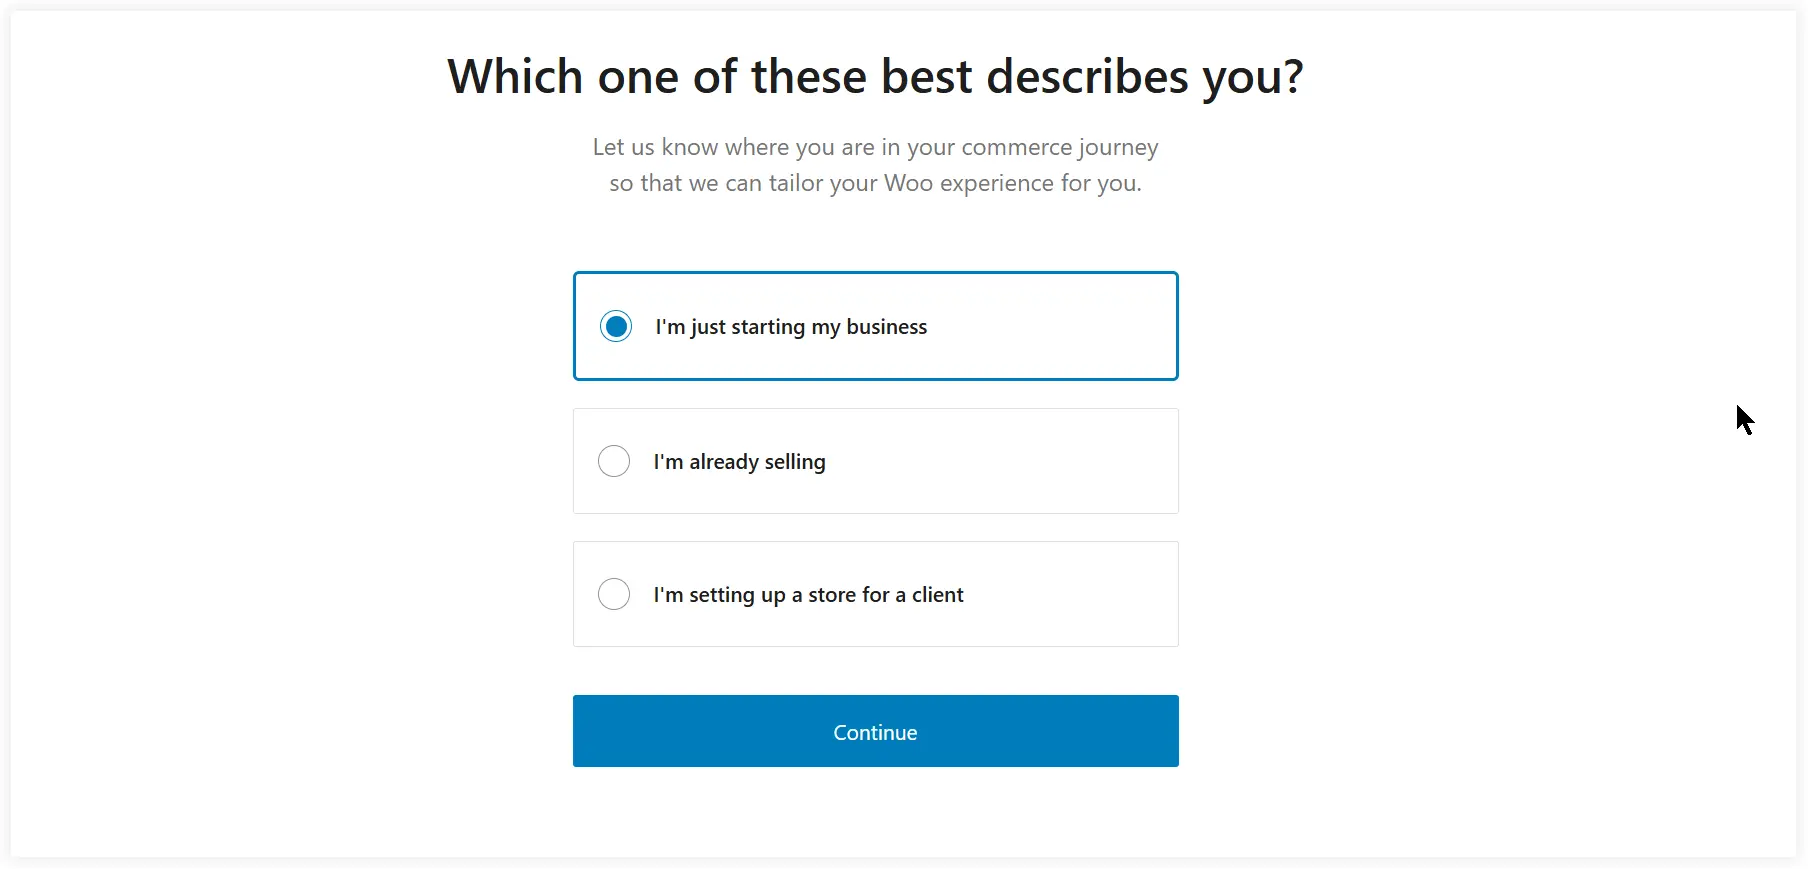
Select a suitable option. We are creating a new online store for our business and thus selected the first option. Click Continue.
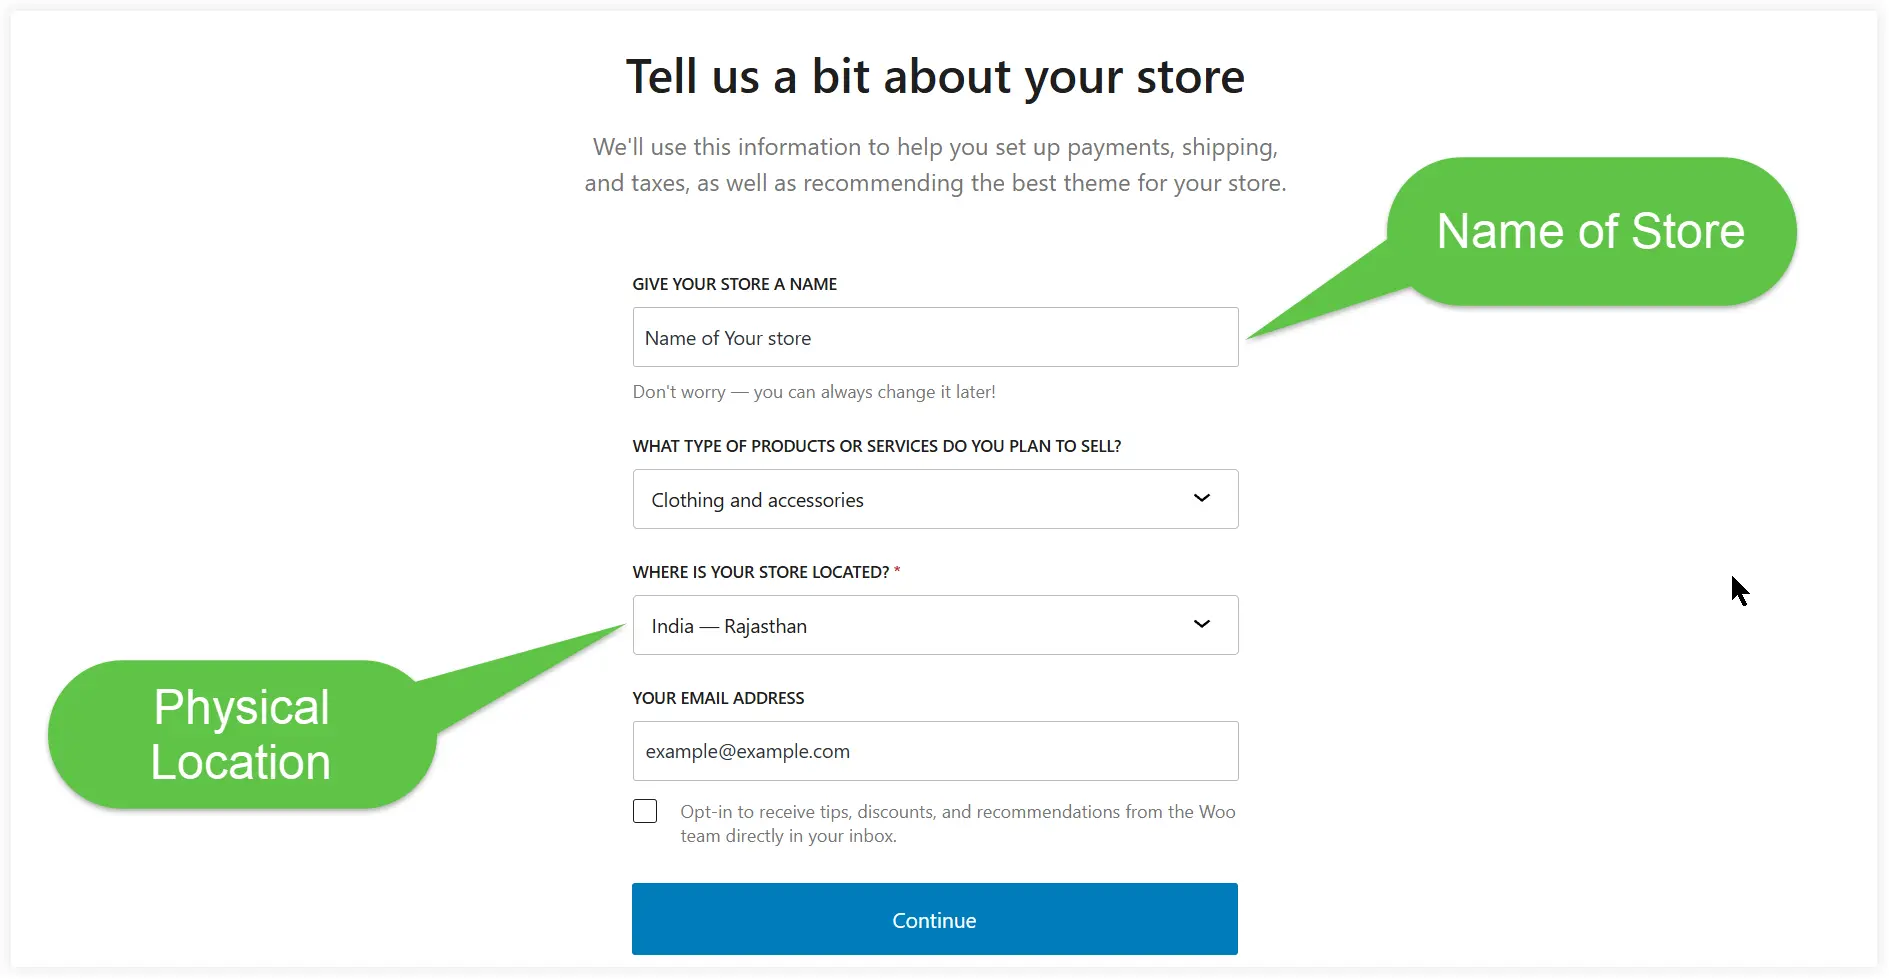
Now, name your store, select the industry your online store belongs to, select the physical location of your store, and mention your email address. Click Continue.
Now there are some free features offered by WooCommerce that can help in the business growth of your store. We prefer to install them.
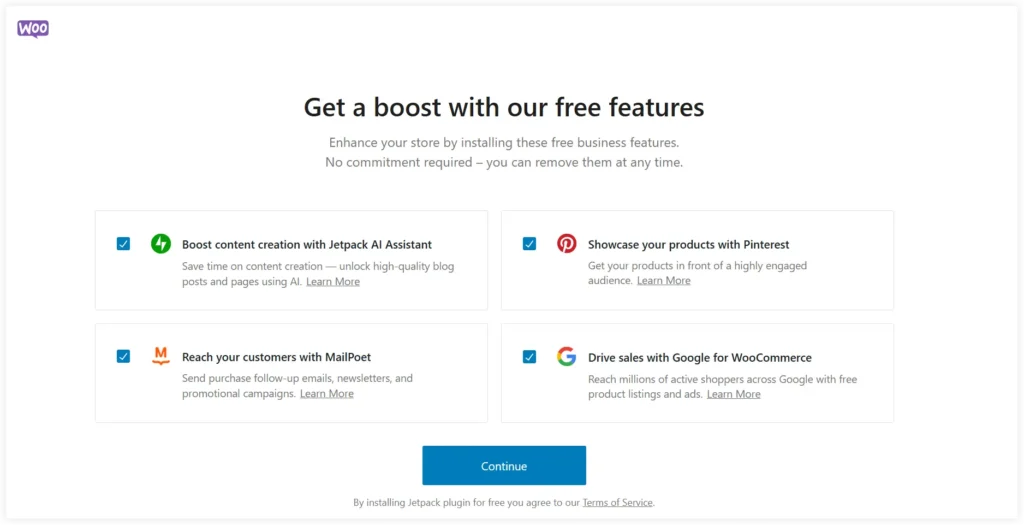
We will reach the main customization section after installing these business features.
In the next step, we will see the detailed customization process.
b. Configure and Add Products to your eCommerce Store
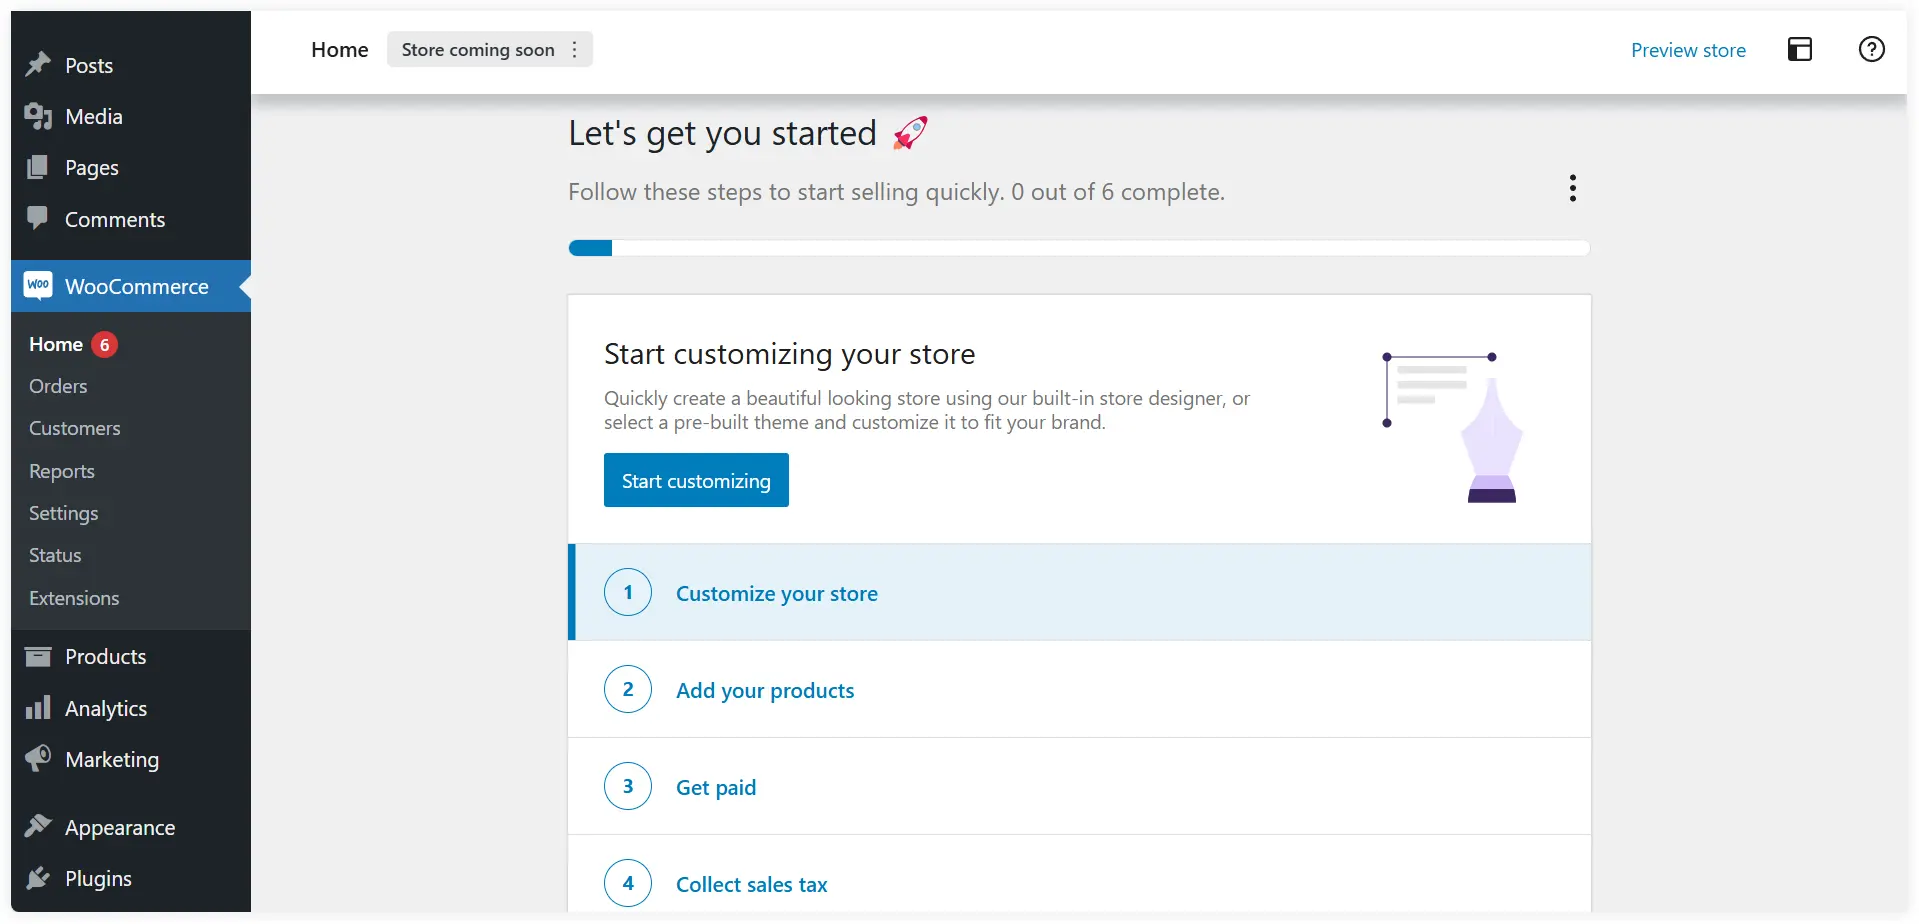
We will reach your WooCommerce store’s primary configuration section after completing the first setup, where you can make step-by-step customizations. Leave the “Customize your store” option for now and will discuss it in the next section after configuring the eCommerce store.
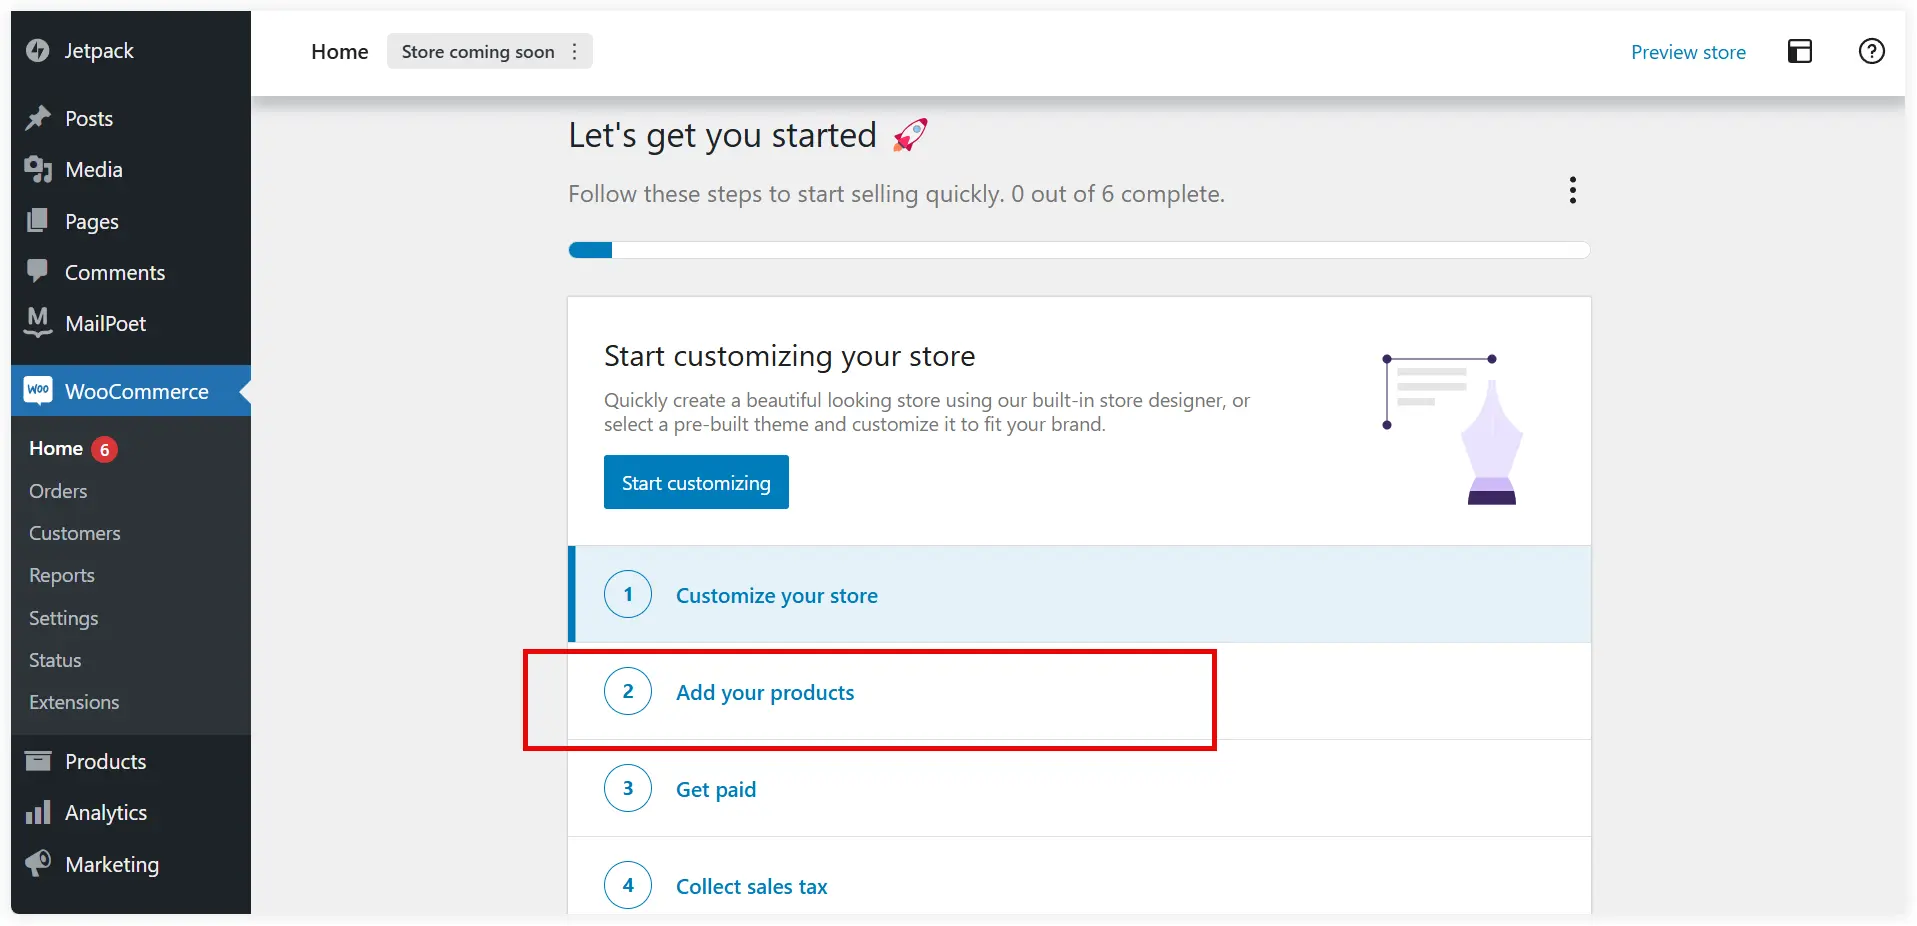
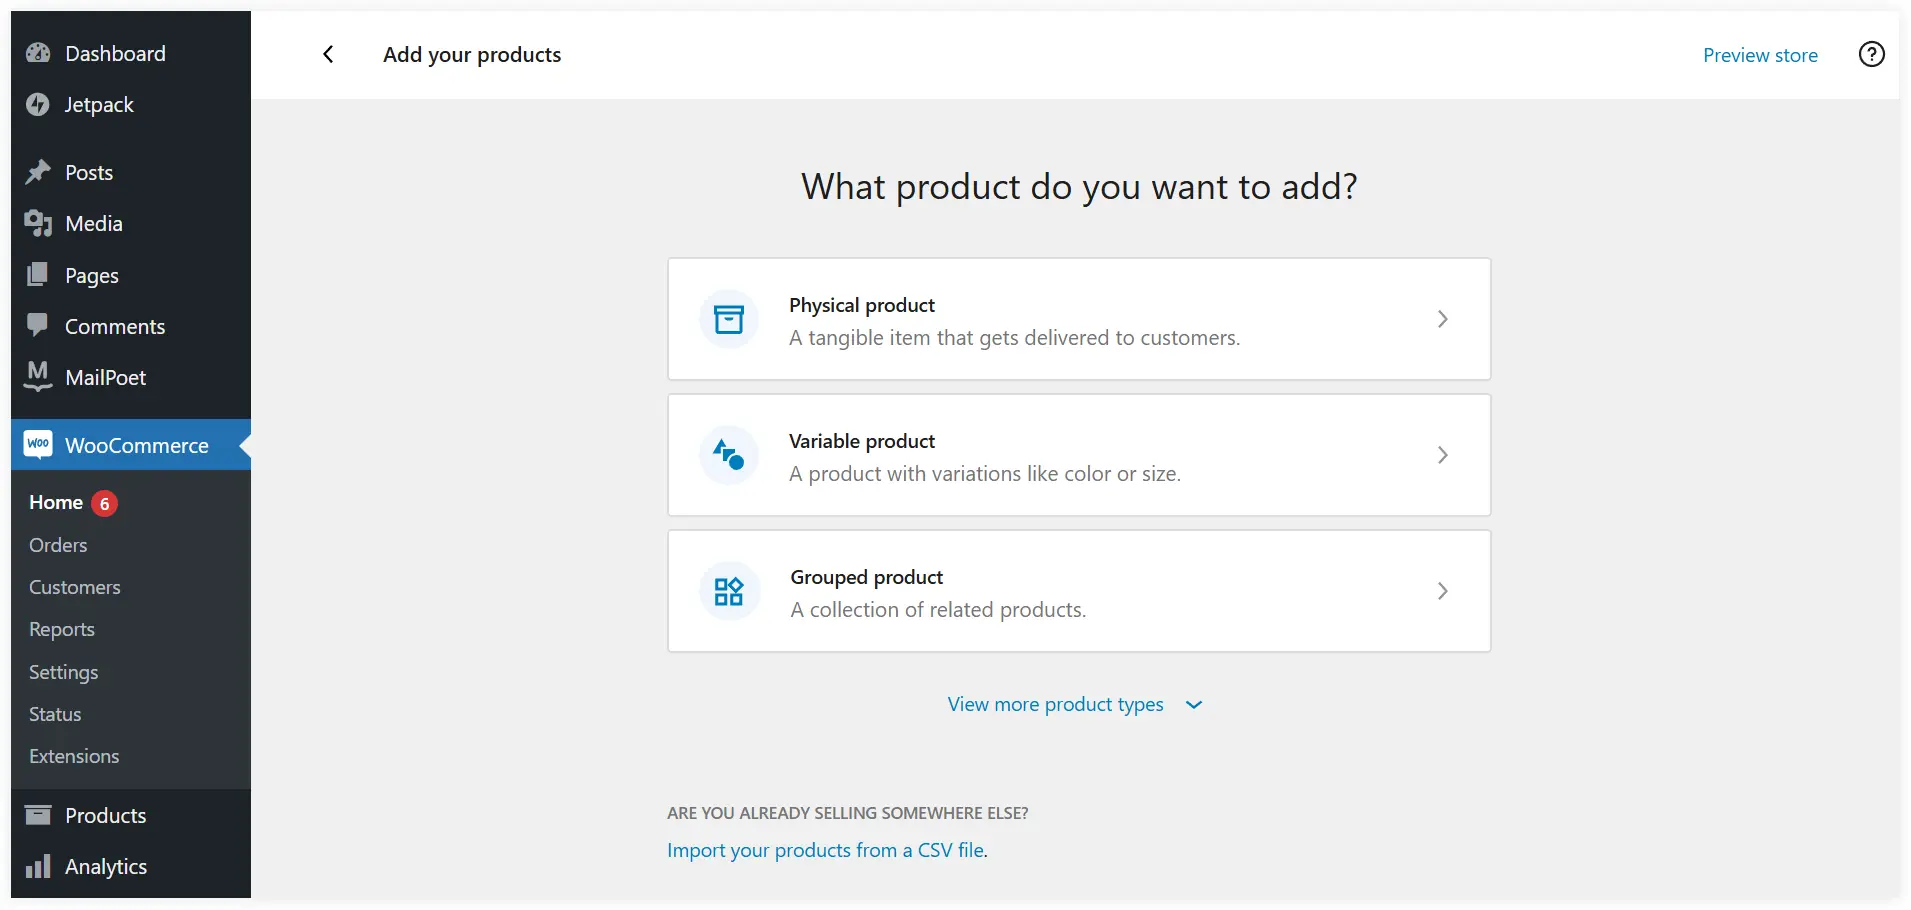
Select the second option in the list which lets you add products to your store.
Select what type of product you want to add. Choose the Physical product option for a tangible item. If your product has color, size, and other variations, choose Variable product. If the product is a collection of items then choose the Grouped product.
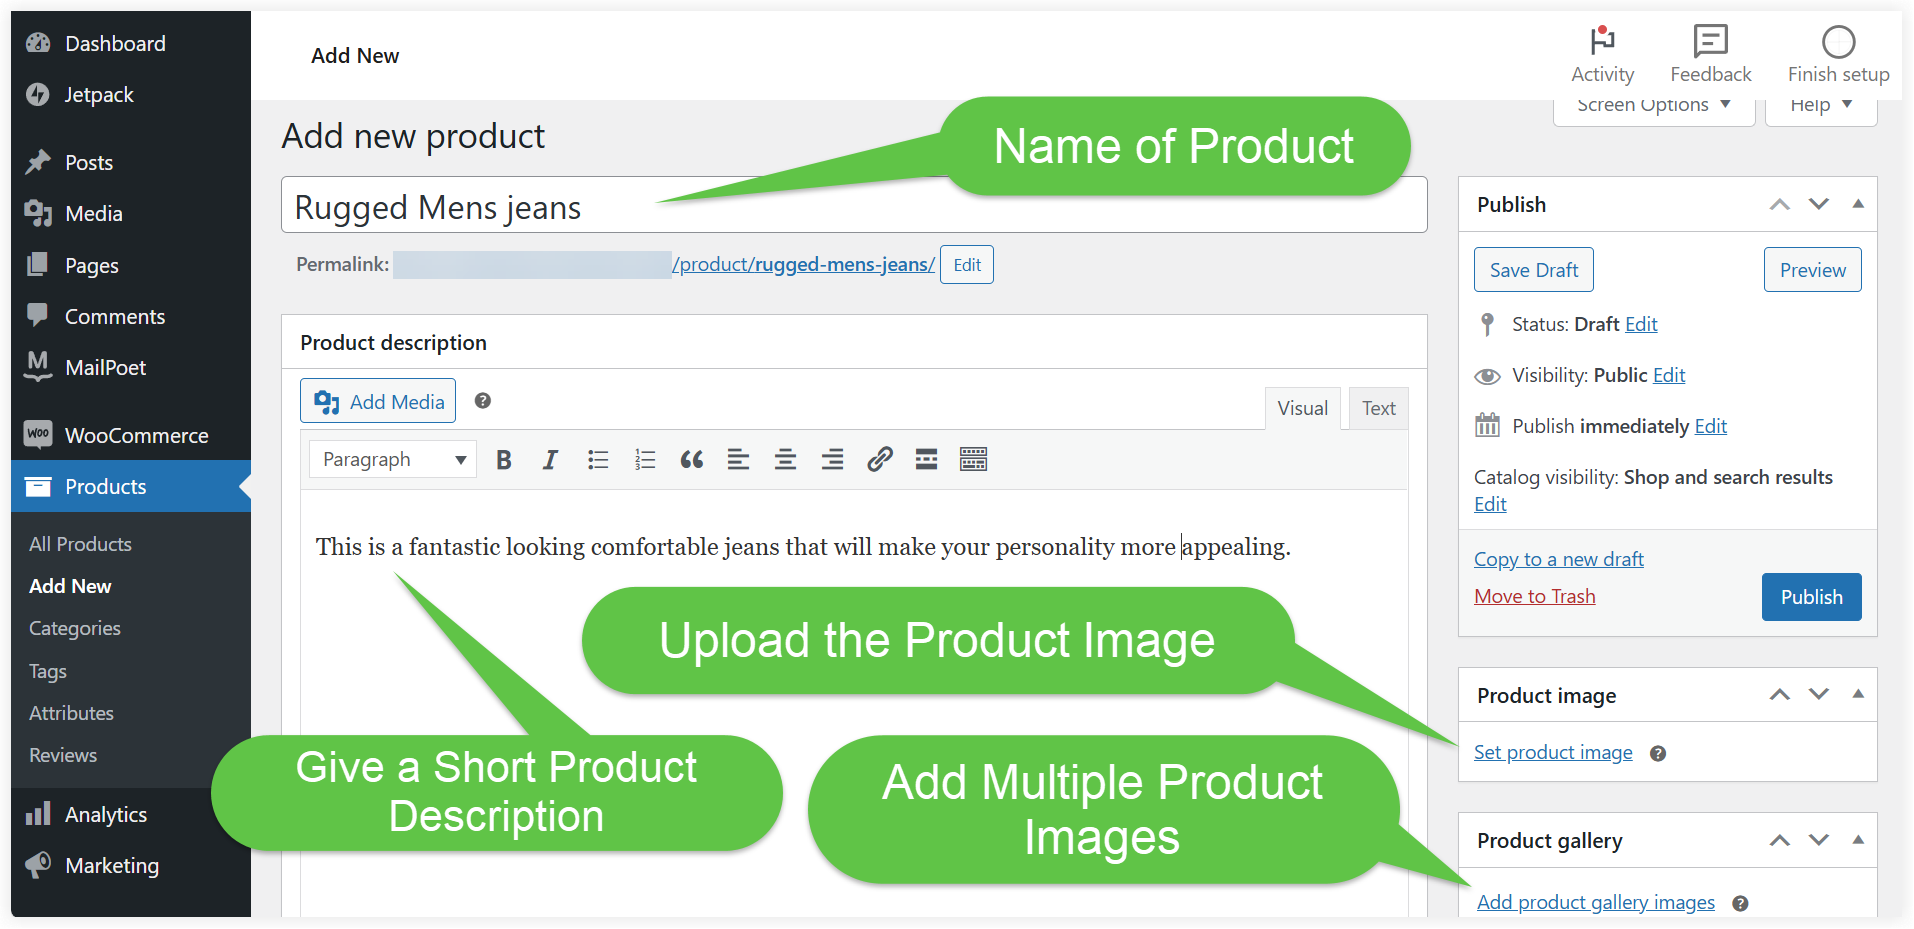
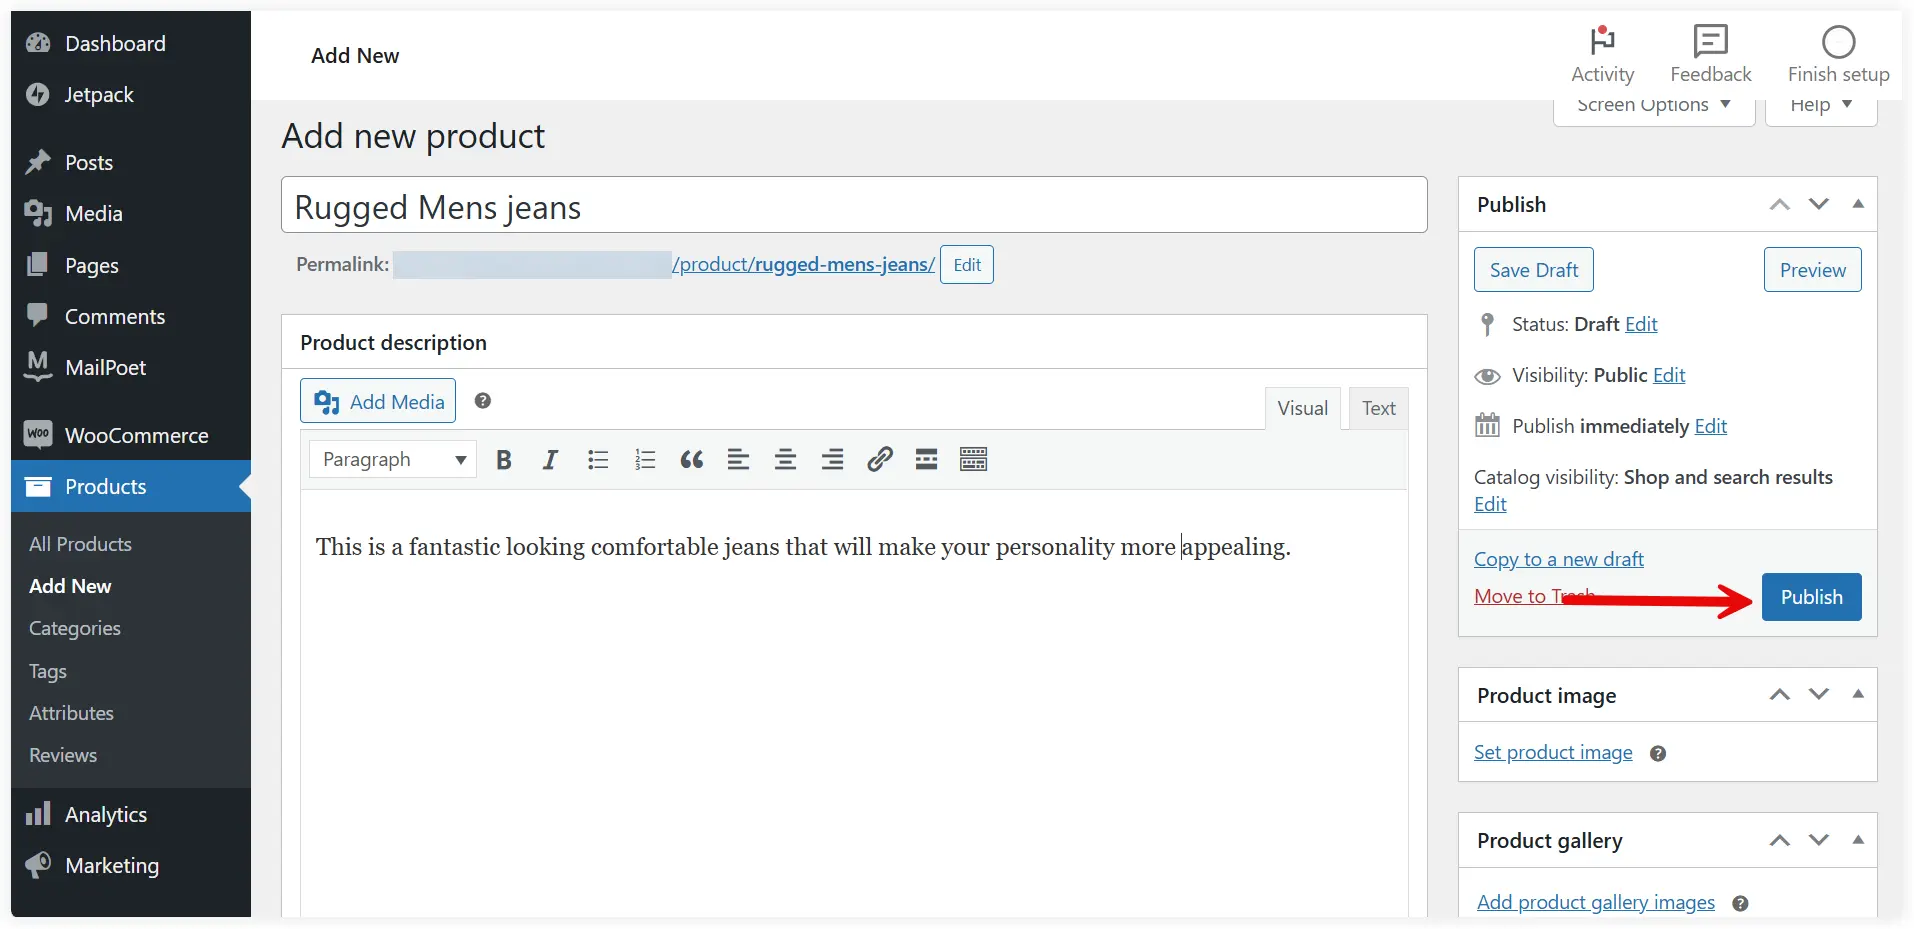
Suppose you chose the Physical product option to add your product. Enter the product name, description and upload the product image. You can also add multiple images of a product to present it from different viewpoints.
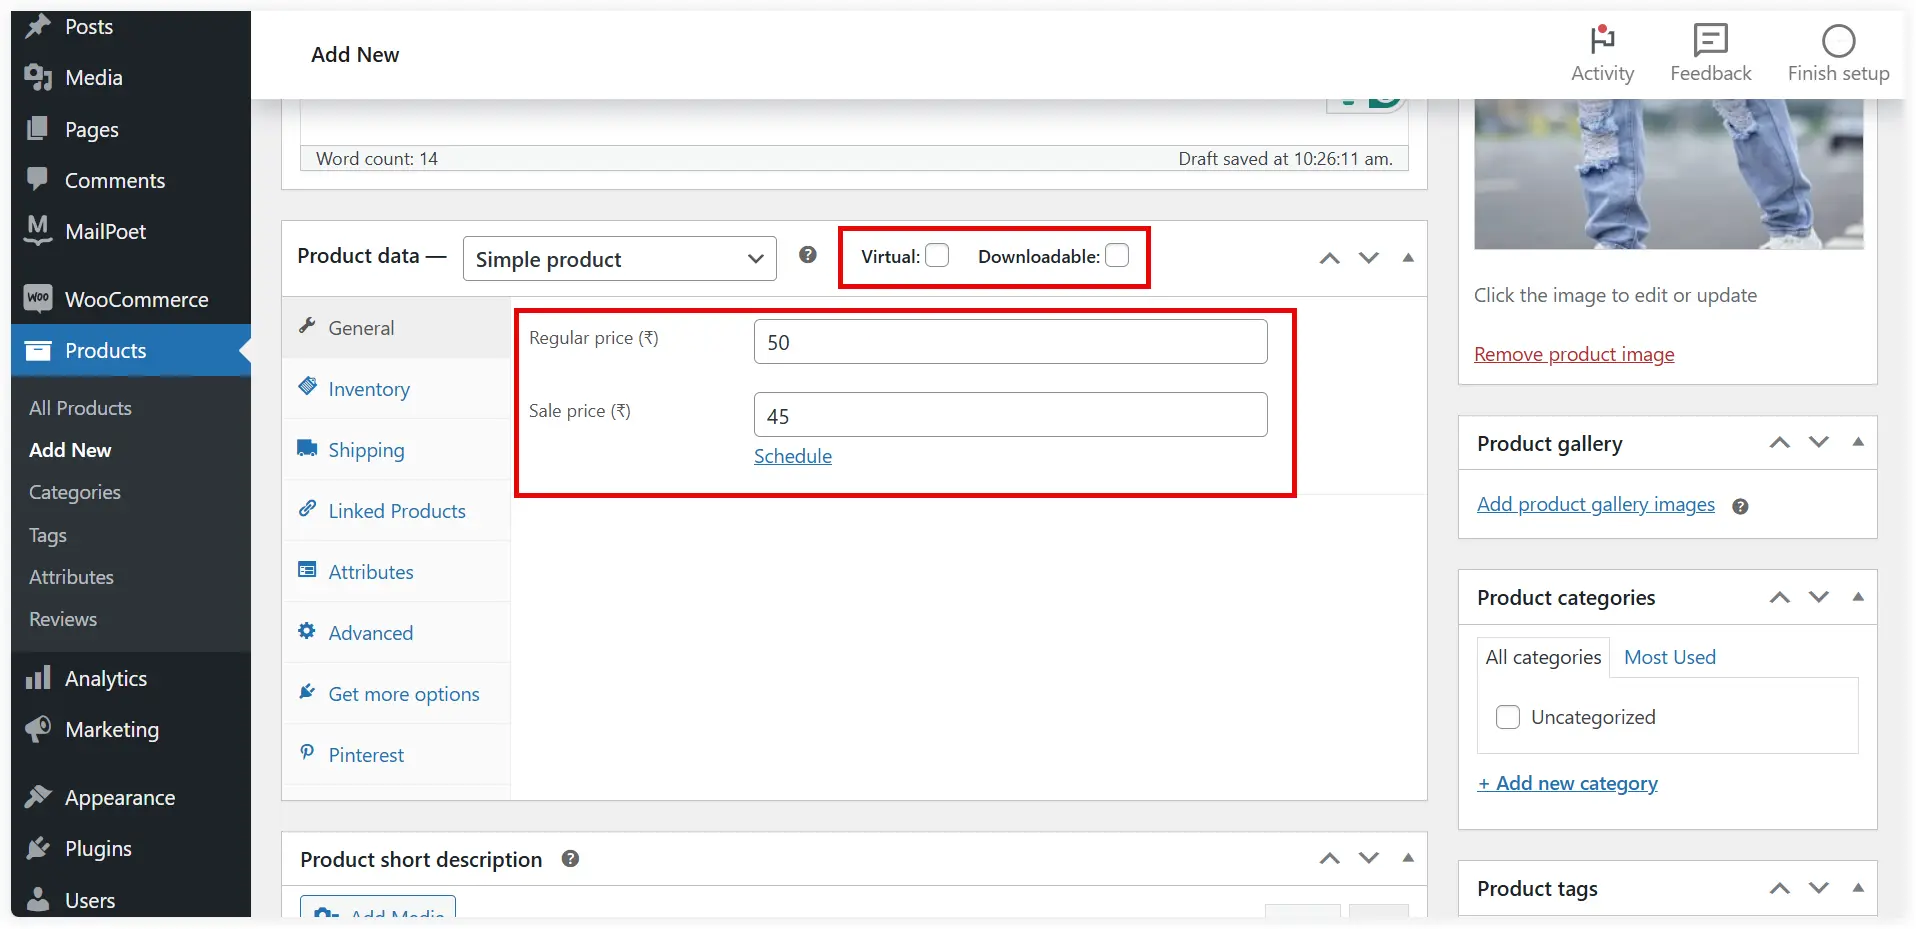
Mention the regular and sale price of the product in General settings. Virtual products are intangible and can’t be shipped. Online courses, ebooks, software licenses, and subscription-based membership come under the category of Virtual products. Downloadable products are virtual intangible products like image files, ebook PDFs, music tracks, etc. These can be downloaded and saved.
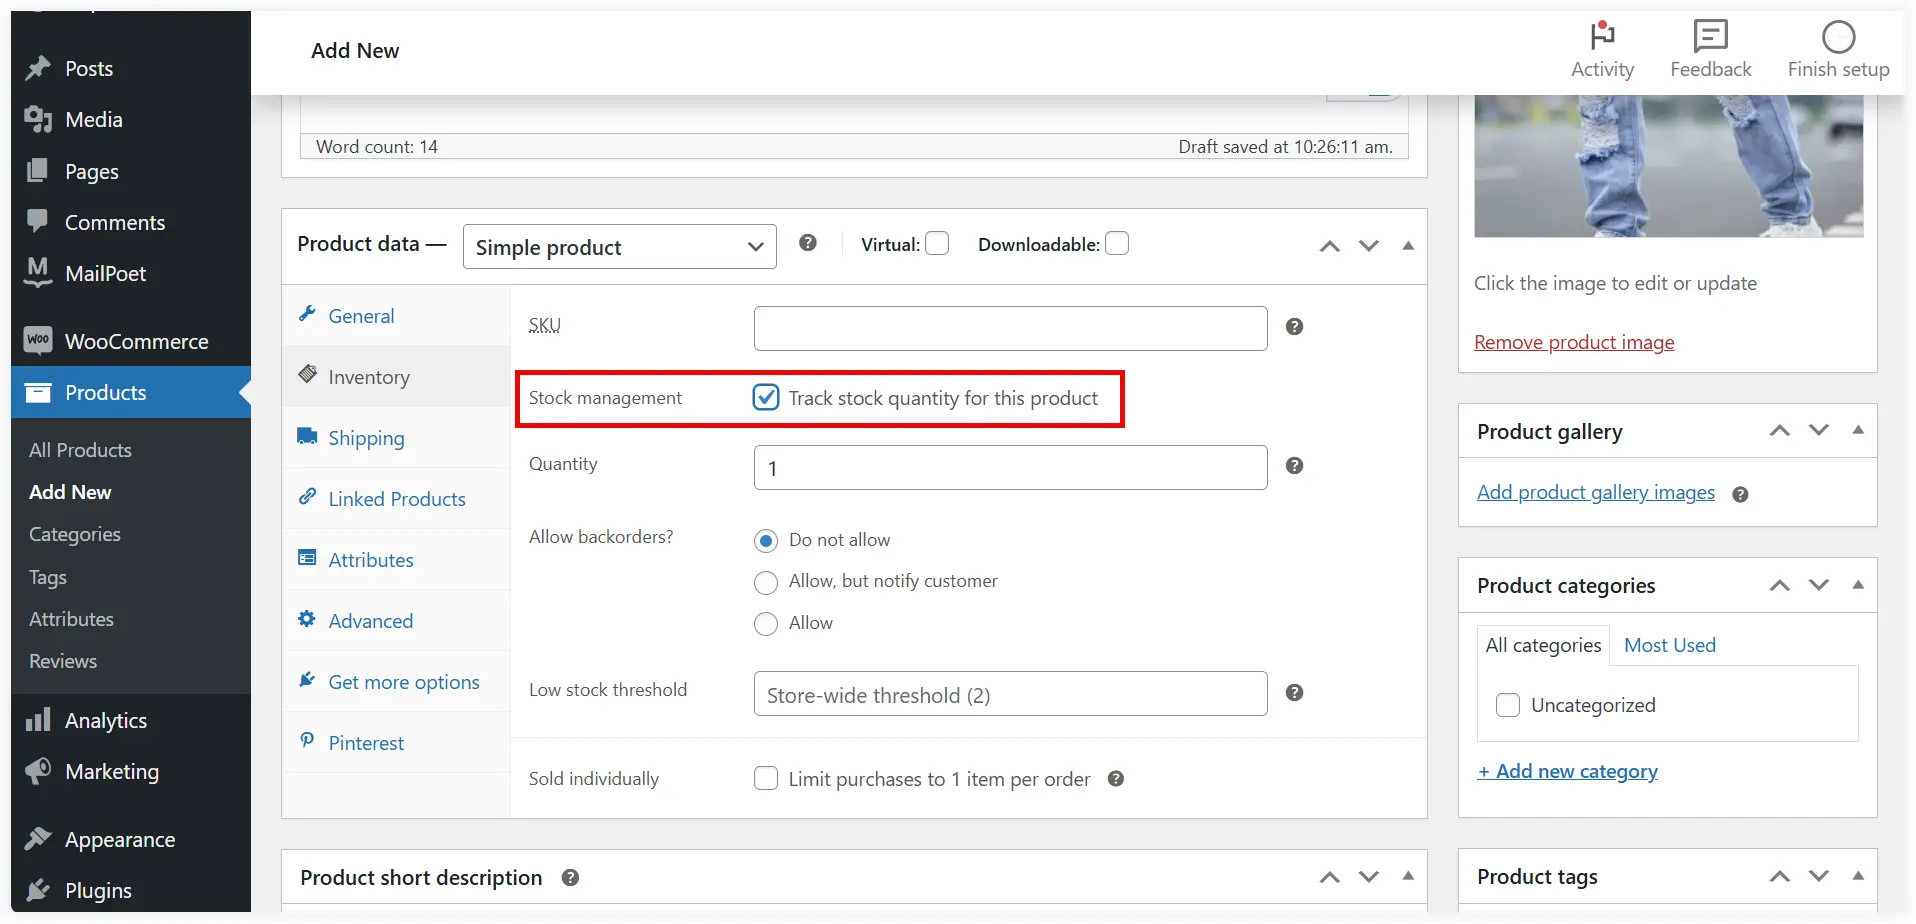
You can also configure the Inventory settings to manage the stock and inventory on your eCommerce store. Mention SKU (Stock Keeping Unit) which is a unique identifier for each product. If you enable Stock management, you can monitor and show real-time updates of low-stock or out-of-stock to the customers.
Set the Quantity which displays how many products you have in your inventory. When you Allow backorders the customers will be able to make orders even when the product is out of stock. Enter the Low stock or out-of-stock threshold value on which email notification will be sent. You can also limit the customers to buy 1 item per order.
Click Publish.
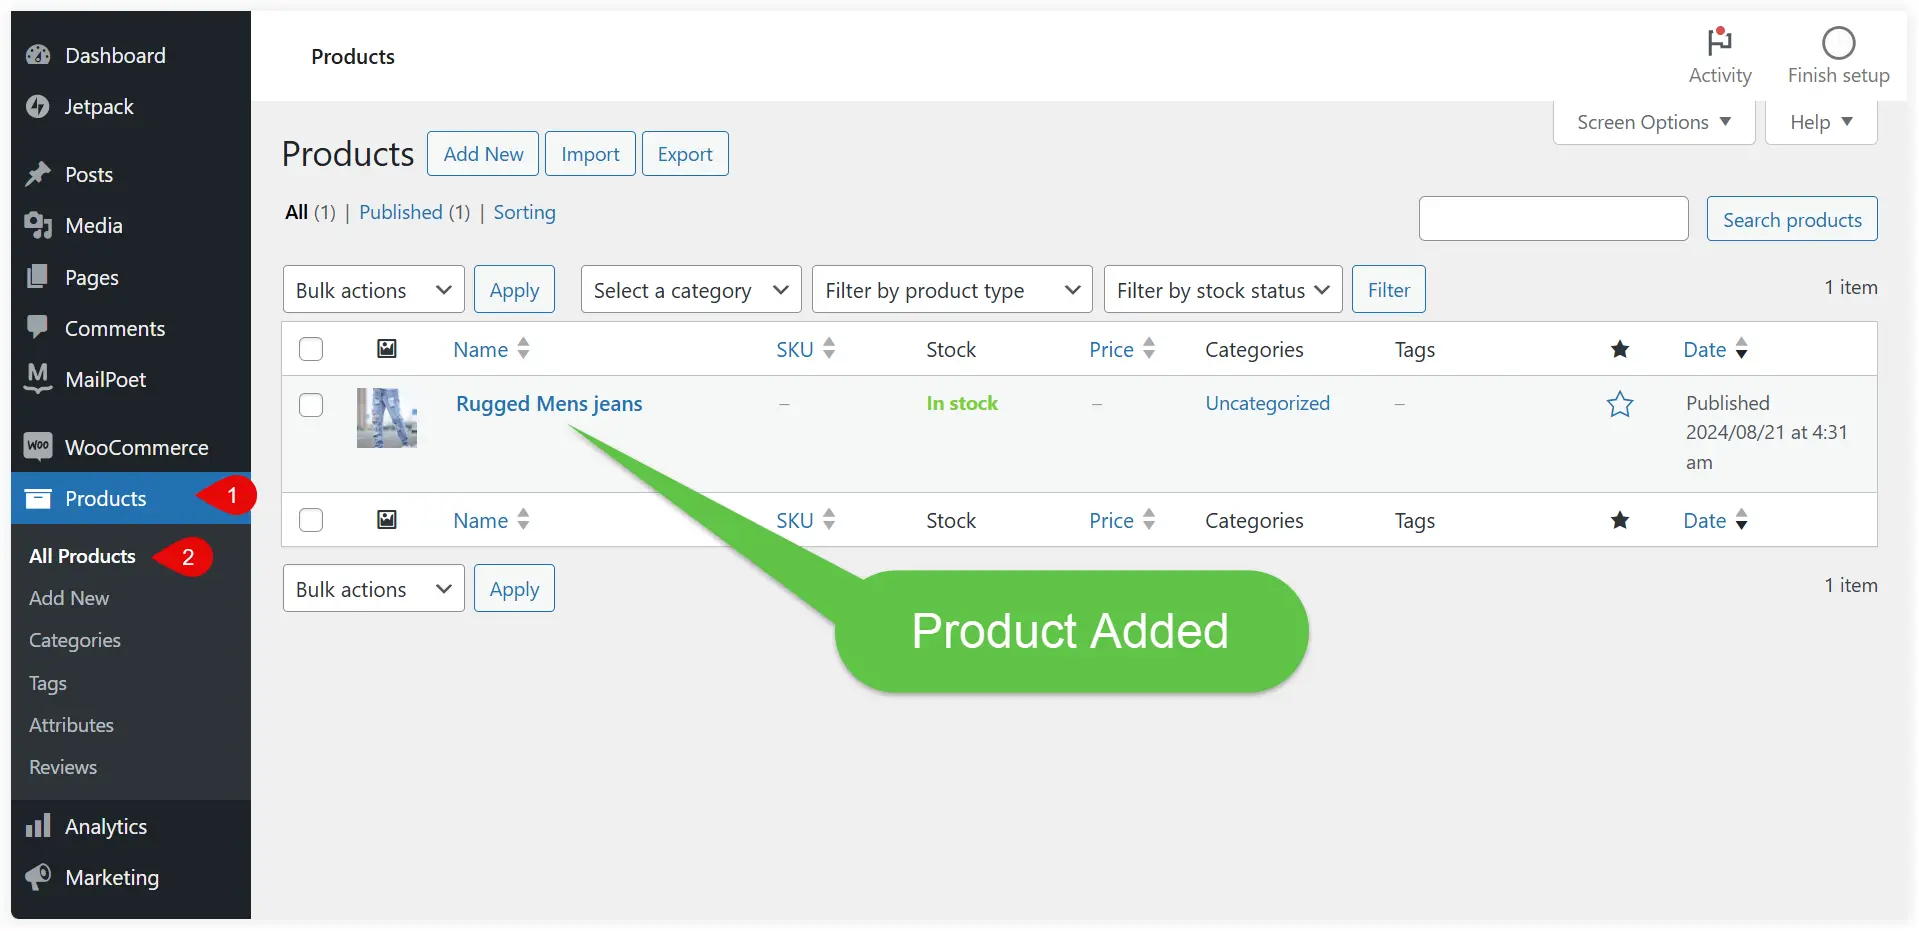
That’s done. In the same way, you can add more products to your eCommerce store.
To verify the added products on your store. Go to WooCommerce >> Products >> All Products and check if the added product is in the list or not.
c. Configure Payment Options
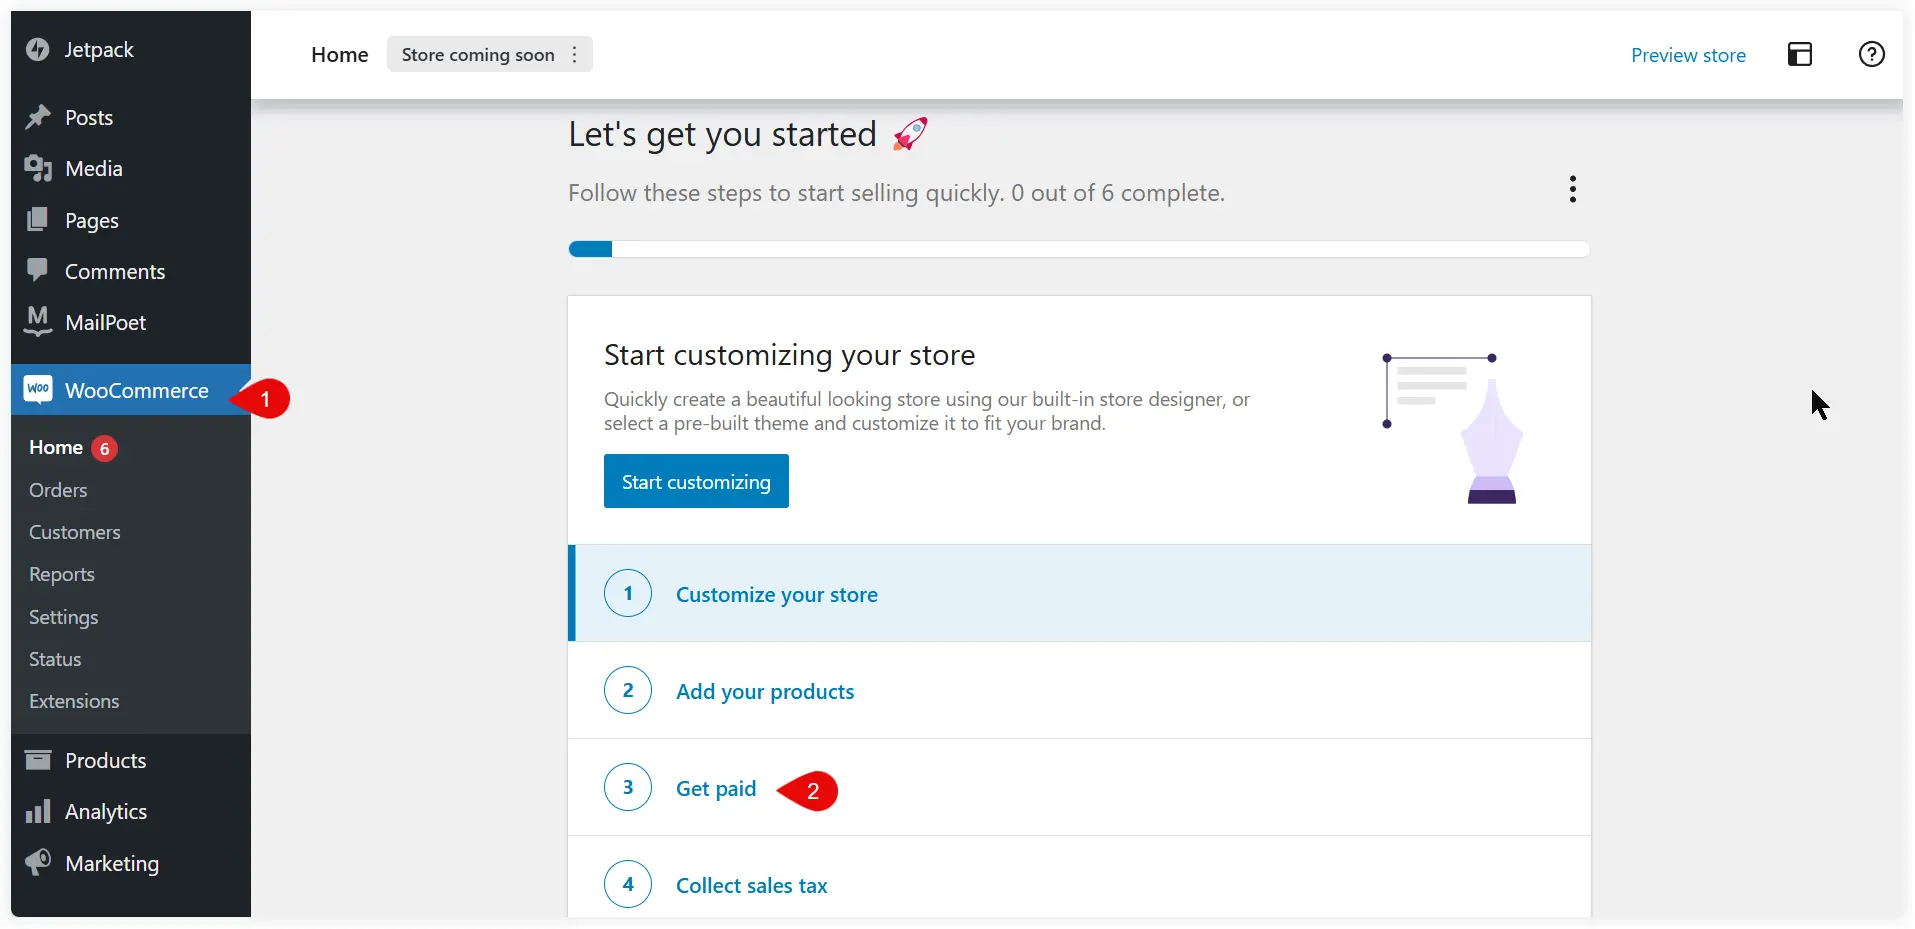
An eCommerce store also needs functionality to receive payment for sales. WooCommerce provides very simple options to do that. Click on WooCommerce and navigate to the primary setup section from where we started the configuration in the previous step. Select the Get Paid option.
WooCommerce offers you integrations with many popular payment platforms. You can choose any one of them for your eCommerce store.
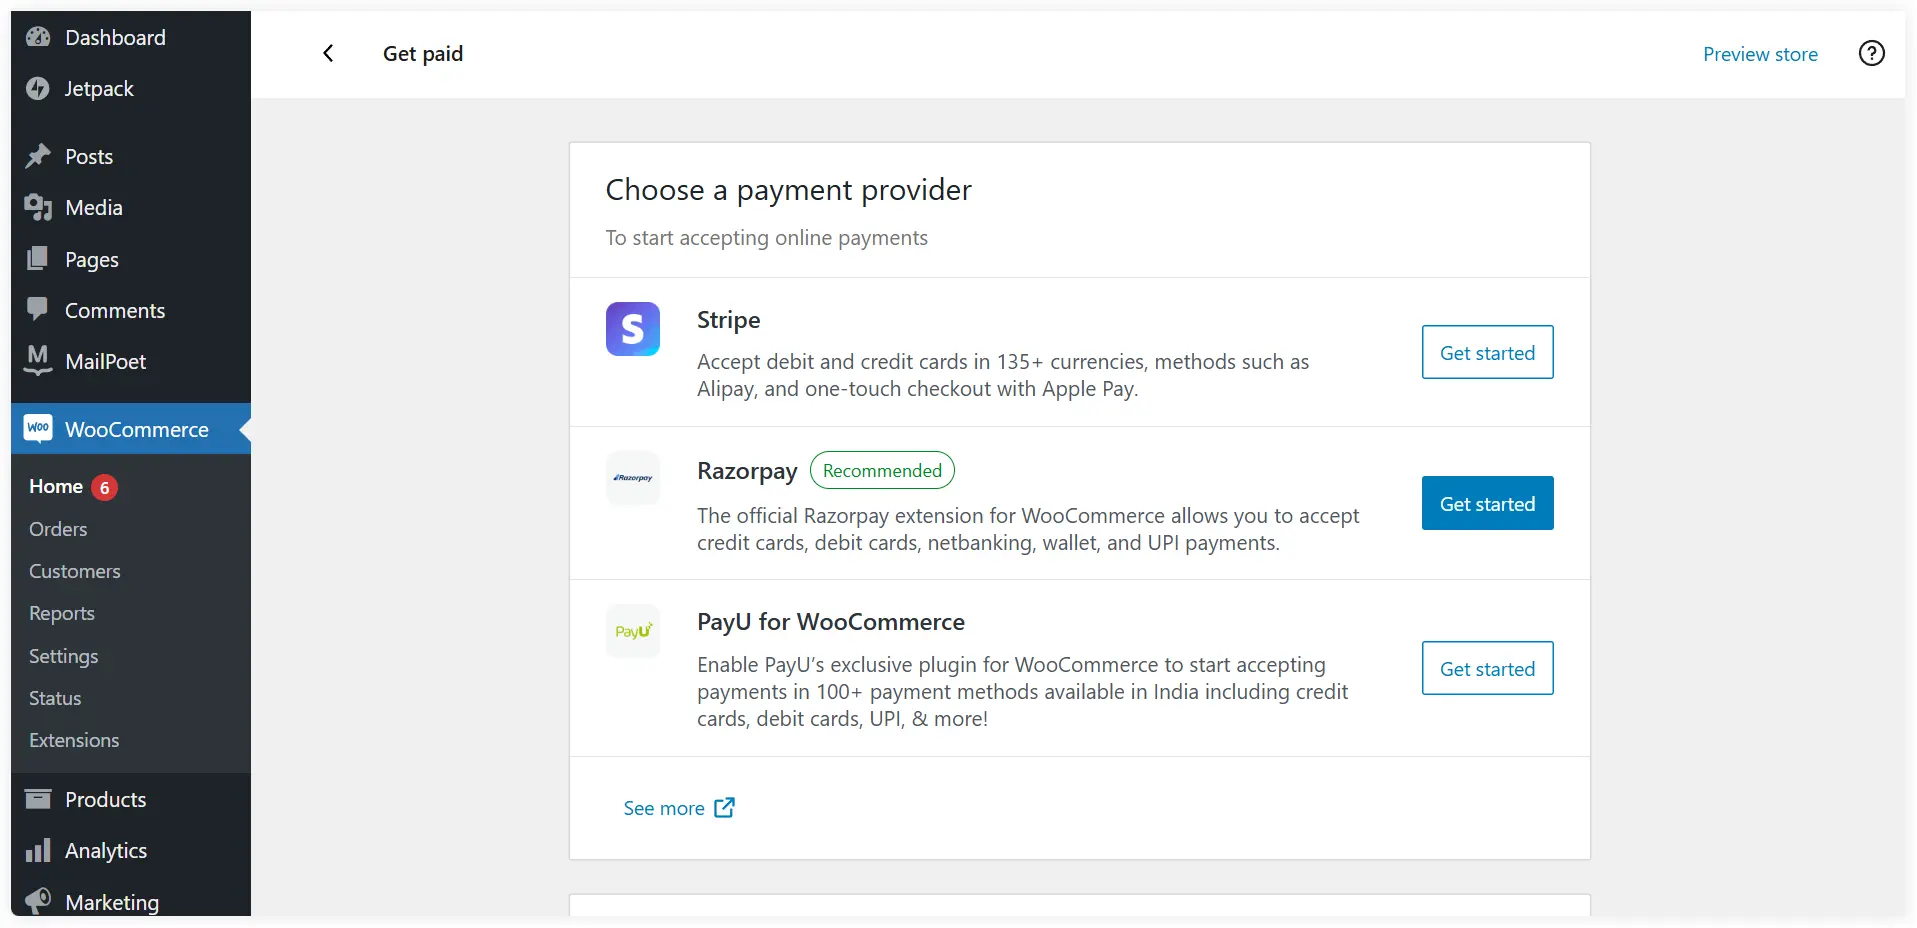
We selected Razorpay and started its installation.
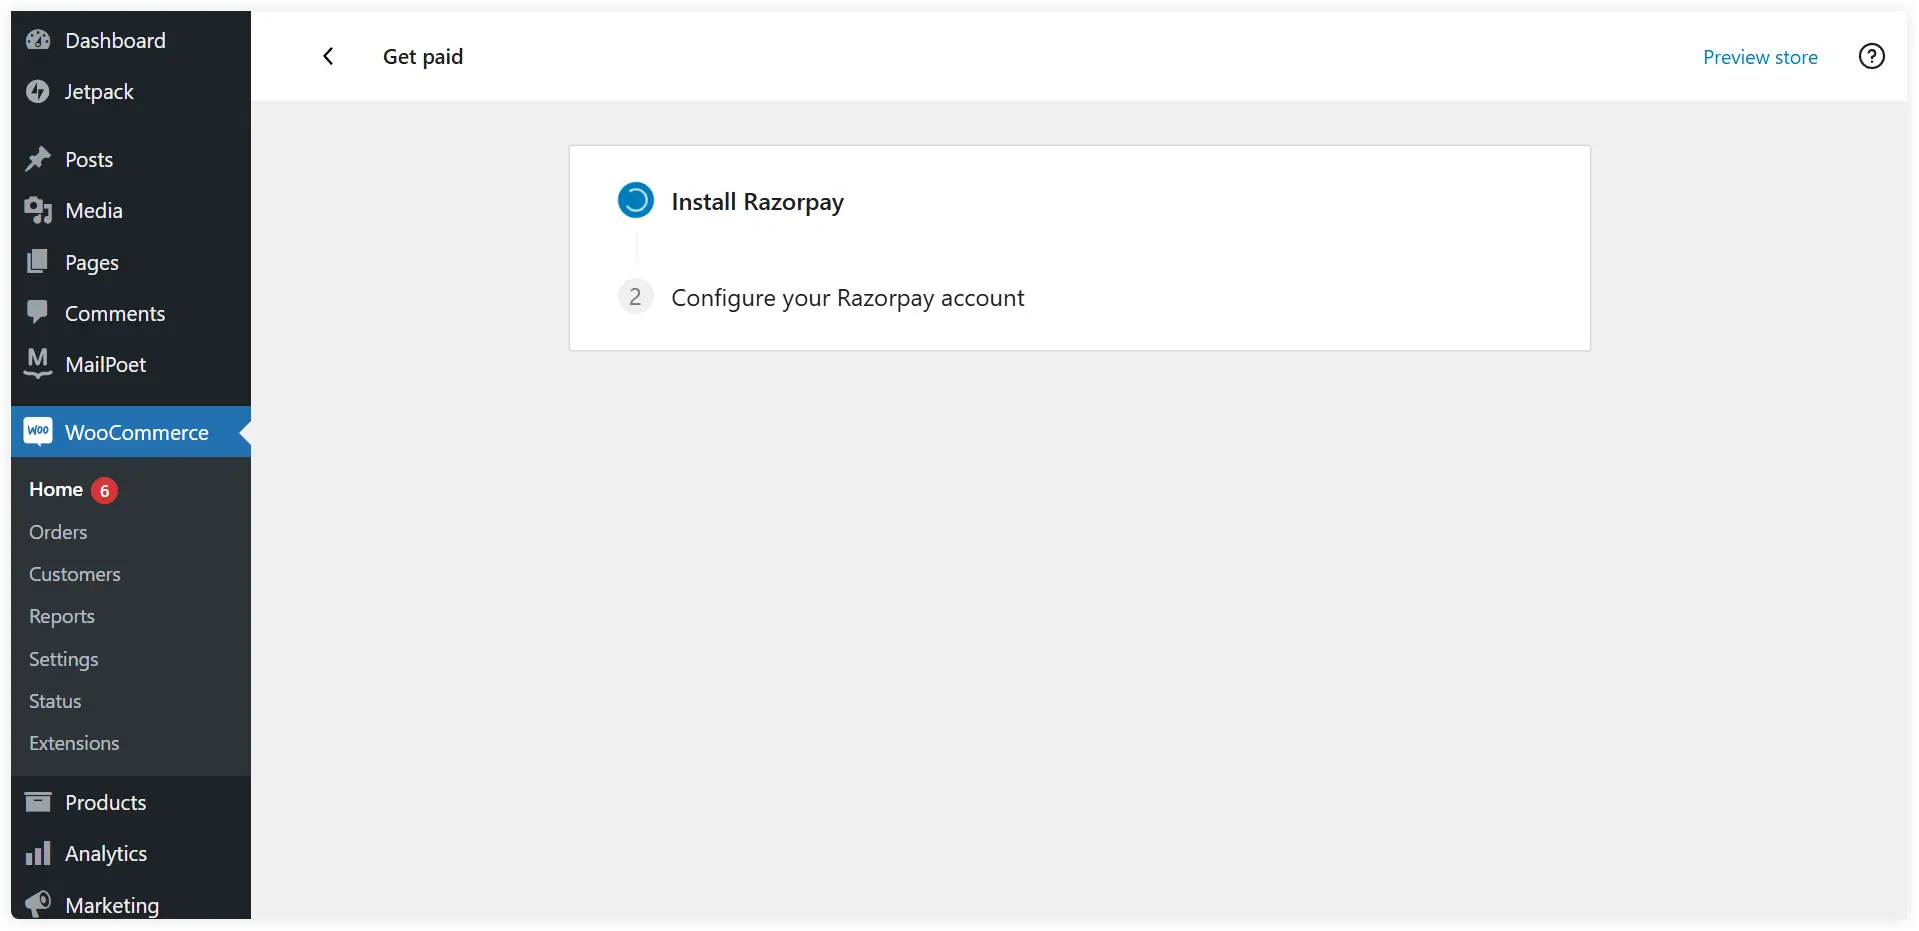
After the installation, you can start configuring your Razorpay account.
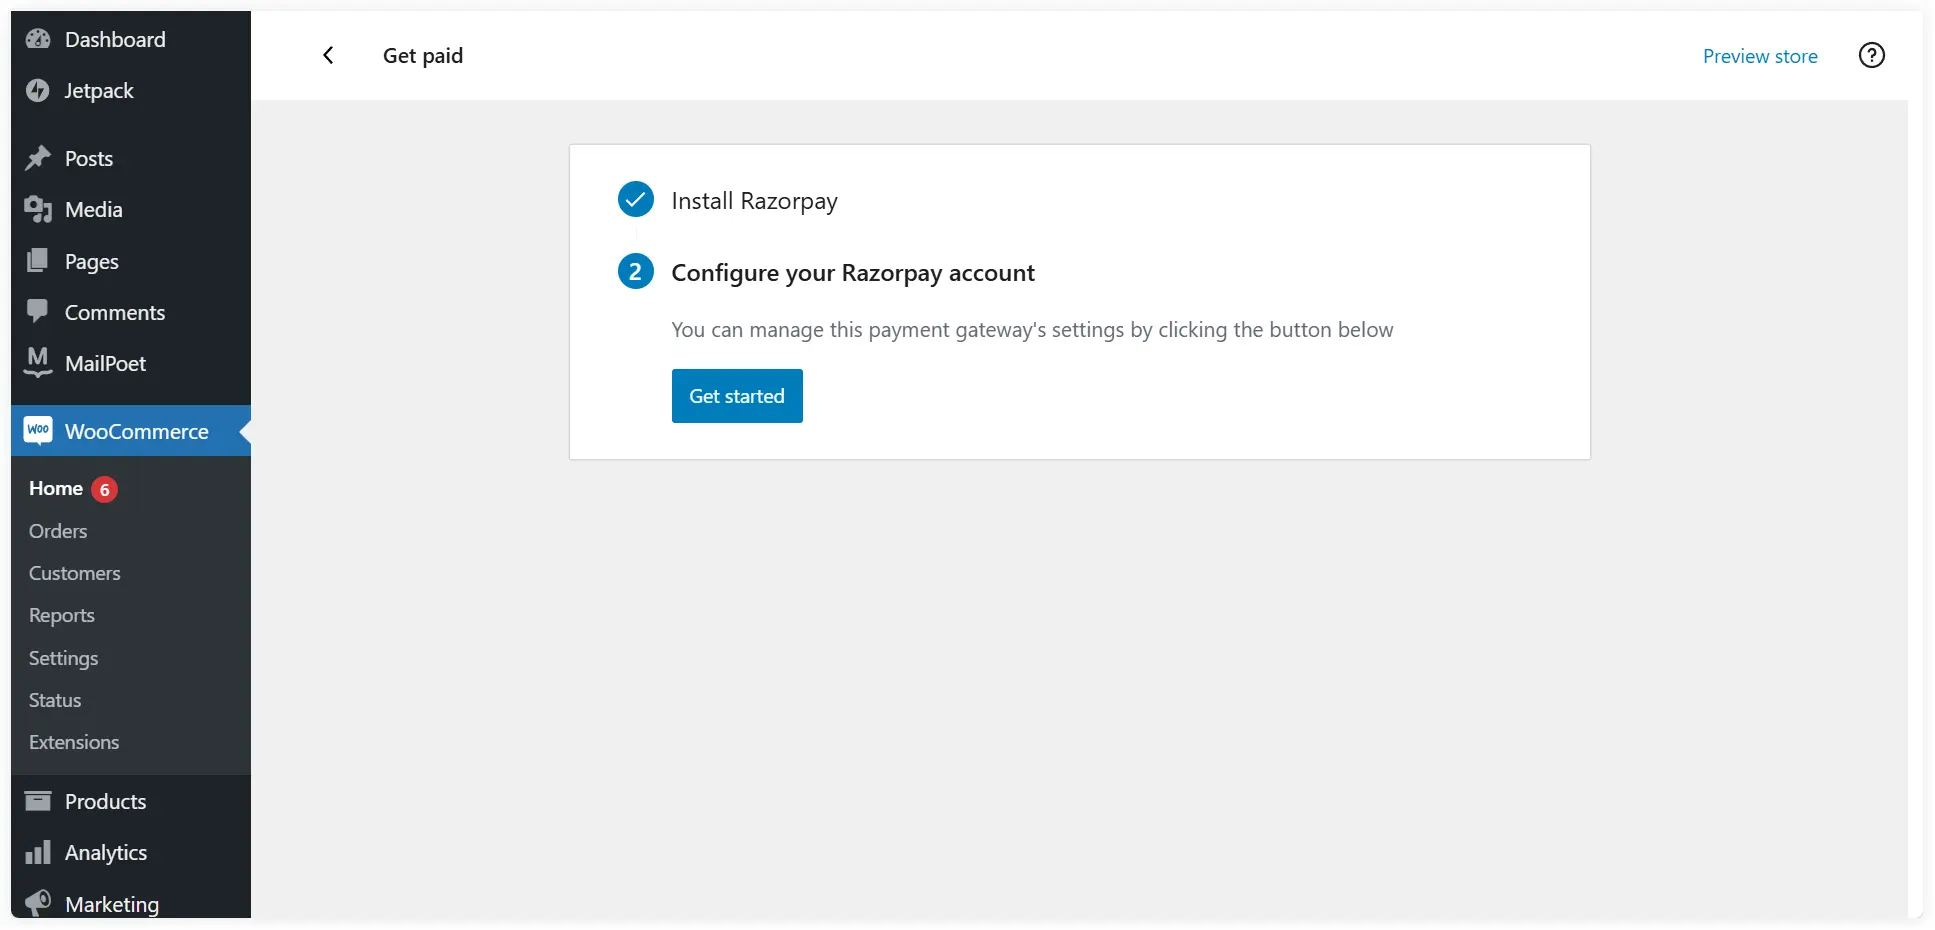
It will land you in the Razorpay Payment Gateway settings. To configure these settings first you need to sign up or log in to your existing Razorpay account to generate the Key ID and Key Secret. These can be generated from the API Keys section of your Razorpay dashboard.
Enter the title and description that would be displayed to the user during checkout. Enter the generated Key ID and Key Secret. Keep Payment Action as Authorize and Capture. Mention the Order Completion Message or use the default one. Leave the rest of the settings as it is. Click Save Changes.

The payment section of your eCommerce store has been configured now. We just finished configuring WooCommerce, which is an important part of our process to create an eCommerce store with Divi.
Let’s now move on to the installation of Divi on your eCommerce store.
3. Installing and Activating Divi
It’s time to install the Divi theme on your eCommerce store. Divi’s fantastic features make it easy to design your eCommerce store professionally and scale it easily when the business expands. Divi Page Builder helps you create and design your entire online store with its easy drag-and-drop functionality. Moreover, you can use visually appealing pre-built Divi child themes, sections, and layouts to build it quickly.
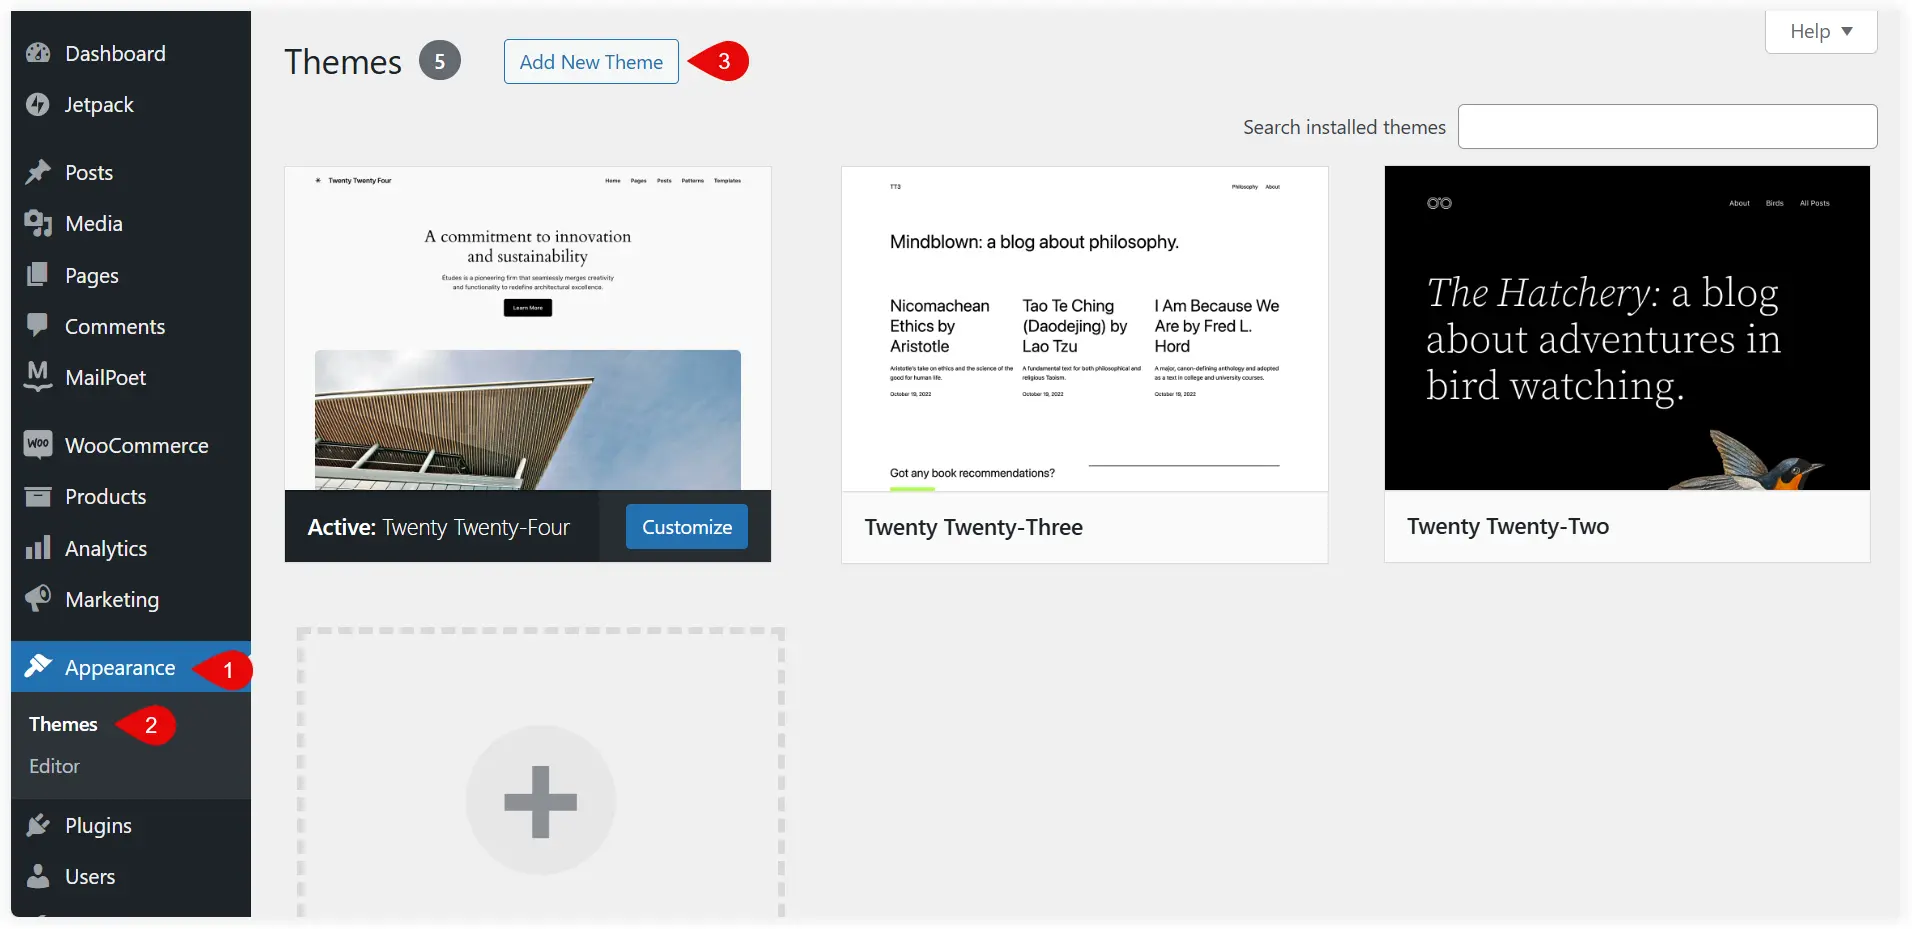
First, you need to purchase Divi Theme and download its Theme file. Go to Appearance >> Themes. Click on Add New Theme.
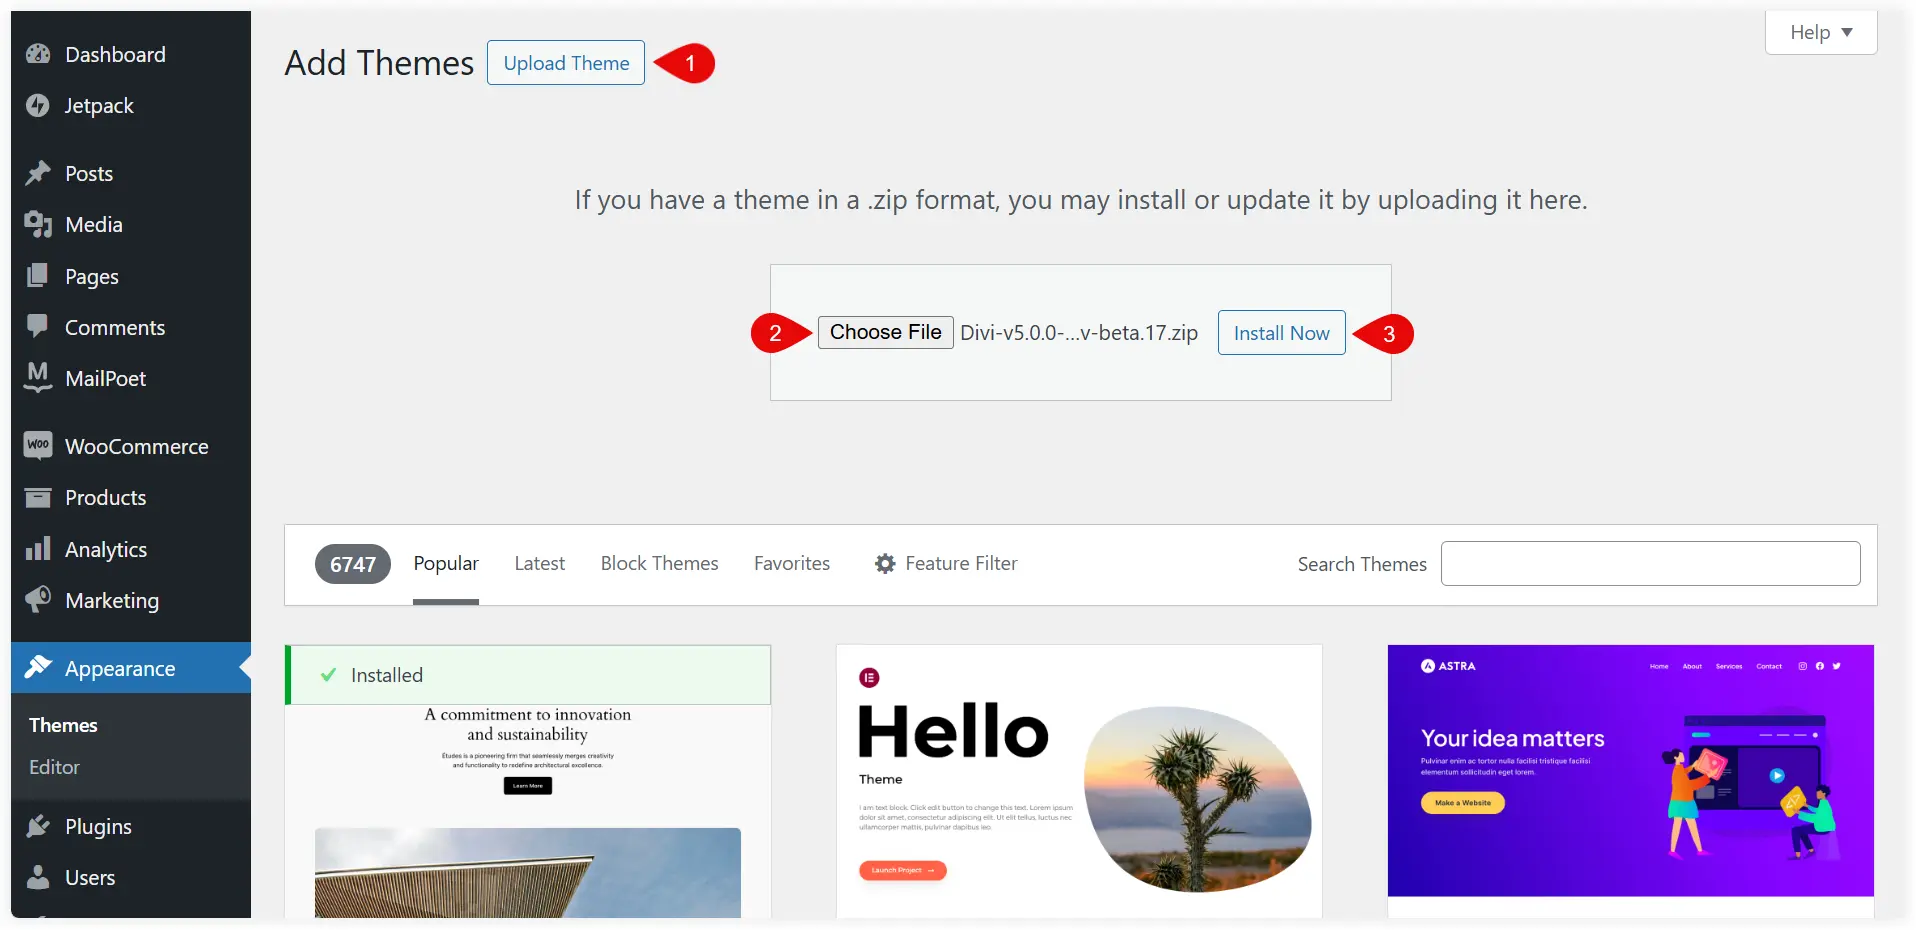
Upload the file and Click Install Now.
After installing the Divi theme, Activate it. Now you get full access to the exceptional features of Divi such as Divi Page Builder and Divi Library.
Let’s now move on to the design part of our WooCommerce store which is the primary part of the process to create an eCommerce store with Divi.
4. Design Your eCommerce Store using Divi Page Builder
After installing Divi, are you ready to unlock your creativity to design and build a sensational online store using Divi Page Builder? Let’s start the design process from the custom homepage which is the first place of customer interaction on your eCommerce store. Customers will form a reliable first impression if it appears well-designed and organized.
a. Create a Custom Homepage
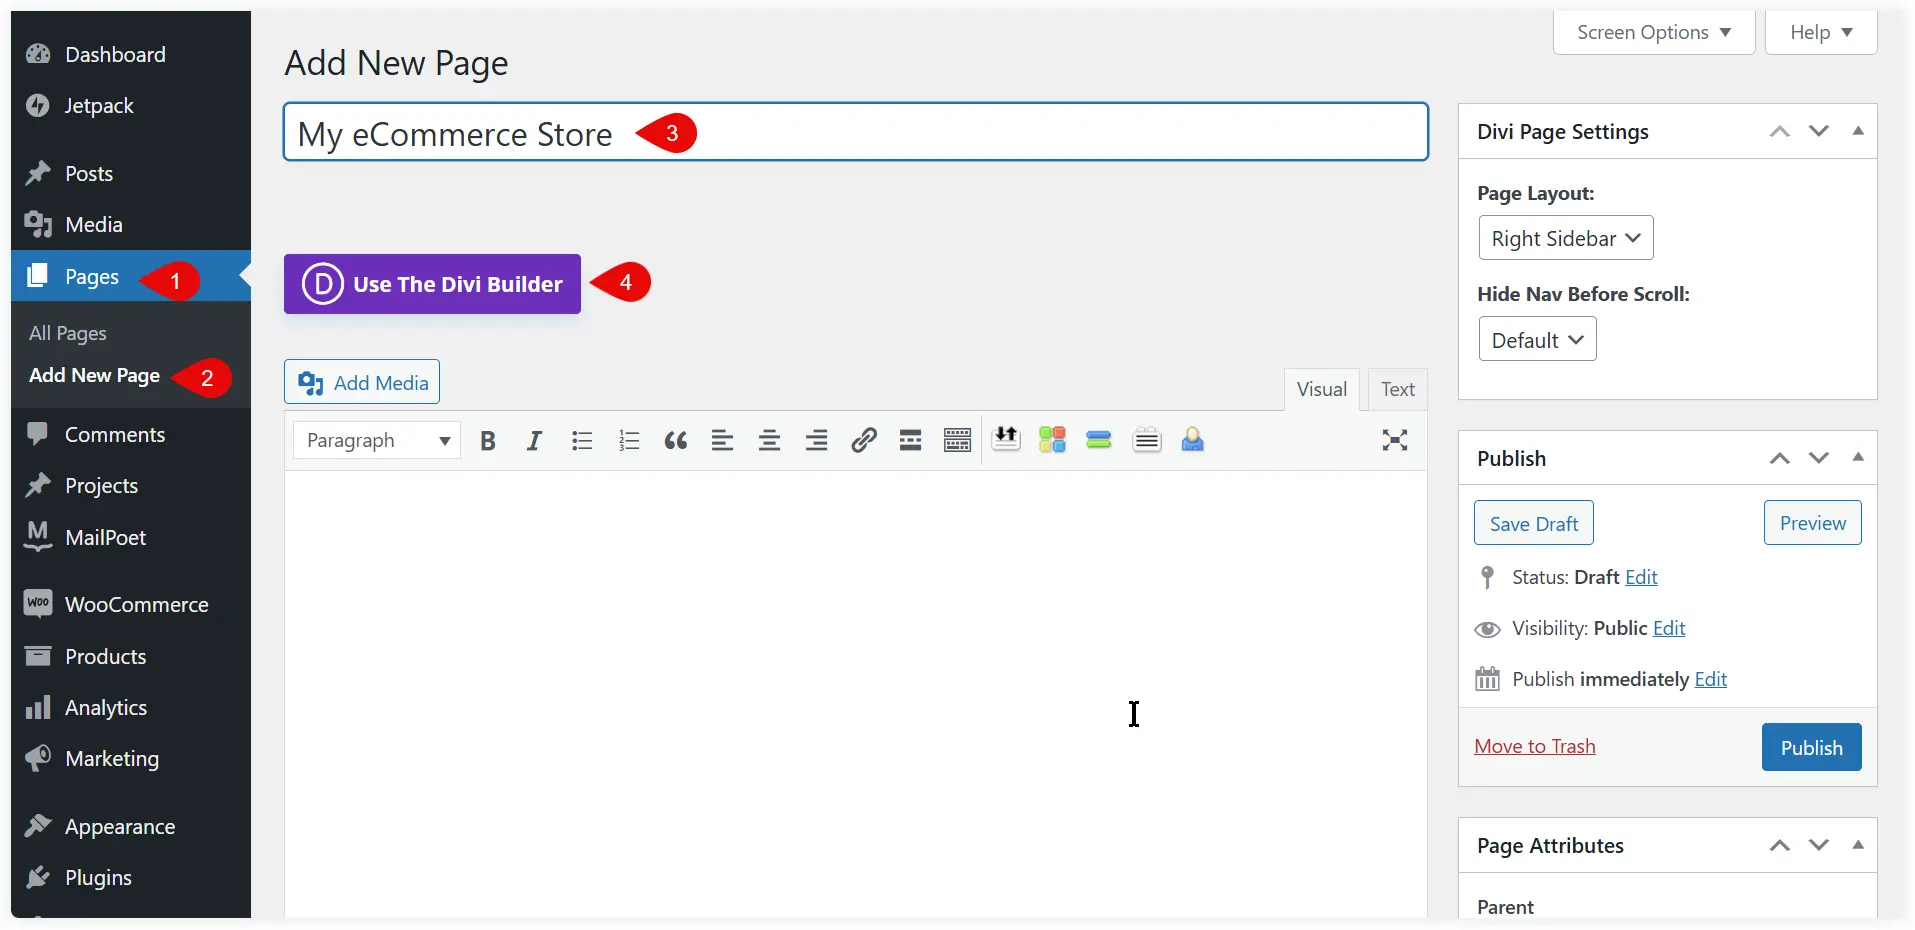
Select Pages >> Add New Page. Mention the title and click Use the Divi Builder.
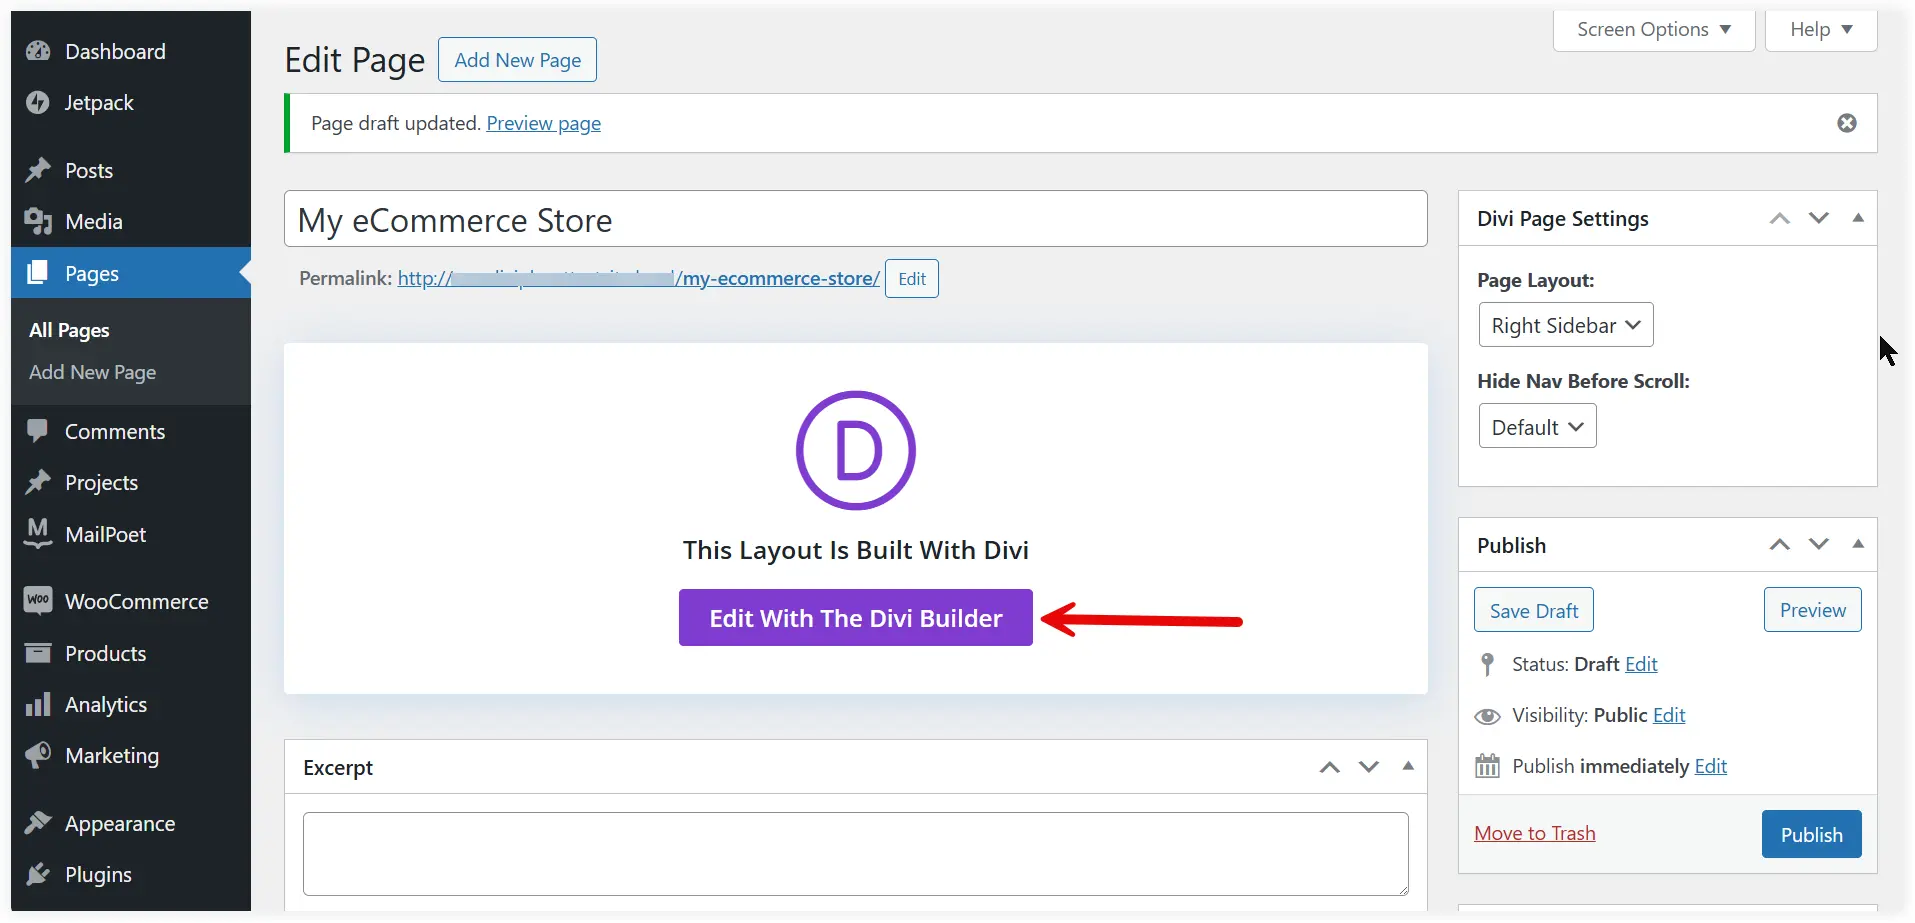
Click Edit With The Divi Builder.
The latest Divi Page Builder offered in Divi 5 will let you create an amazing homepage for your online store.
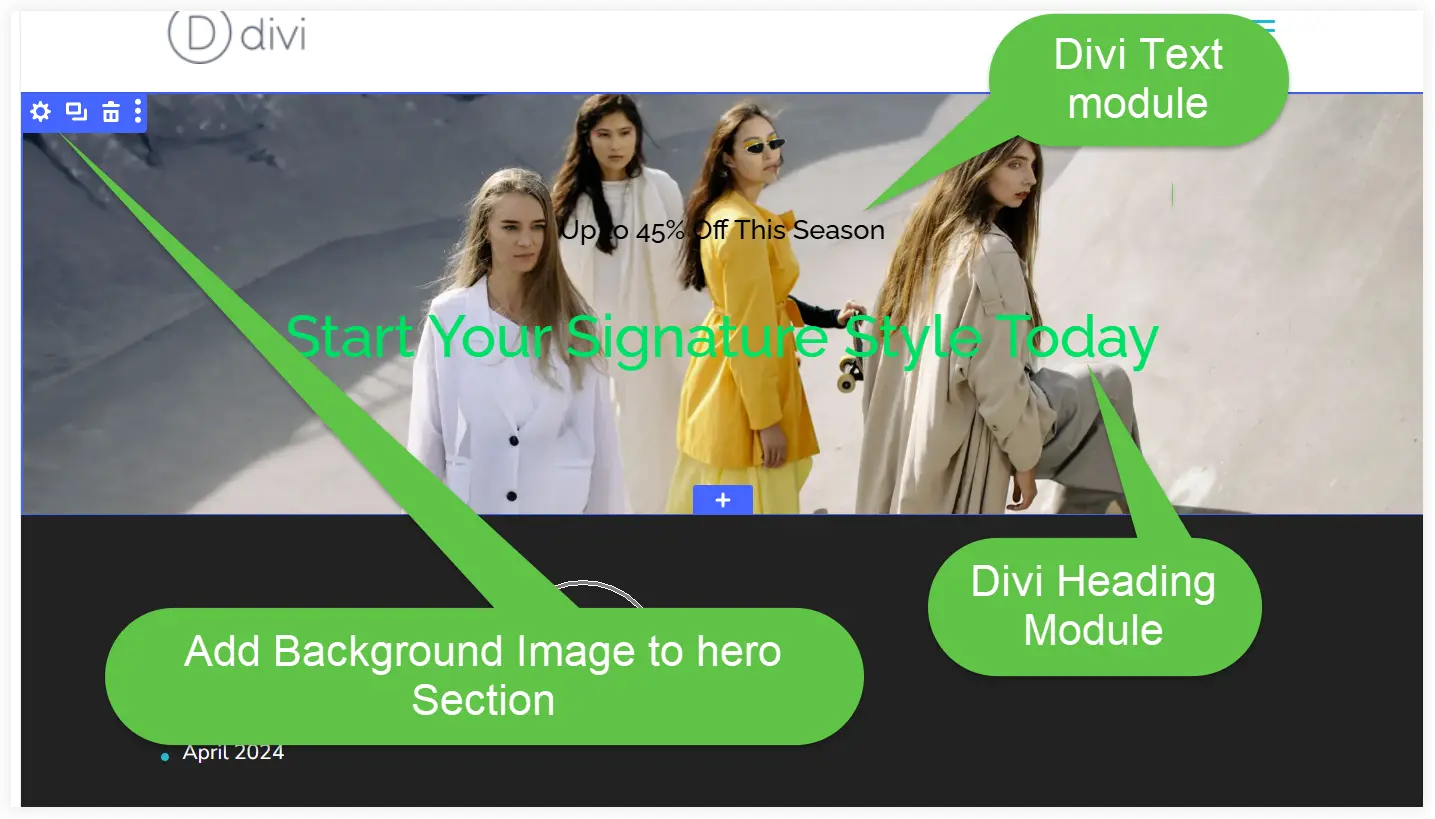
First, create an attractive hero section that engages users with its first look. Place a background image in the Divi section, and place a text module to mention a tagline that reflects the latest offers and discounts. Add a heading module to highlight the hero section.
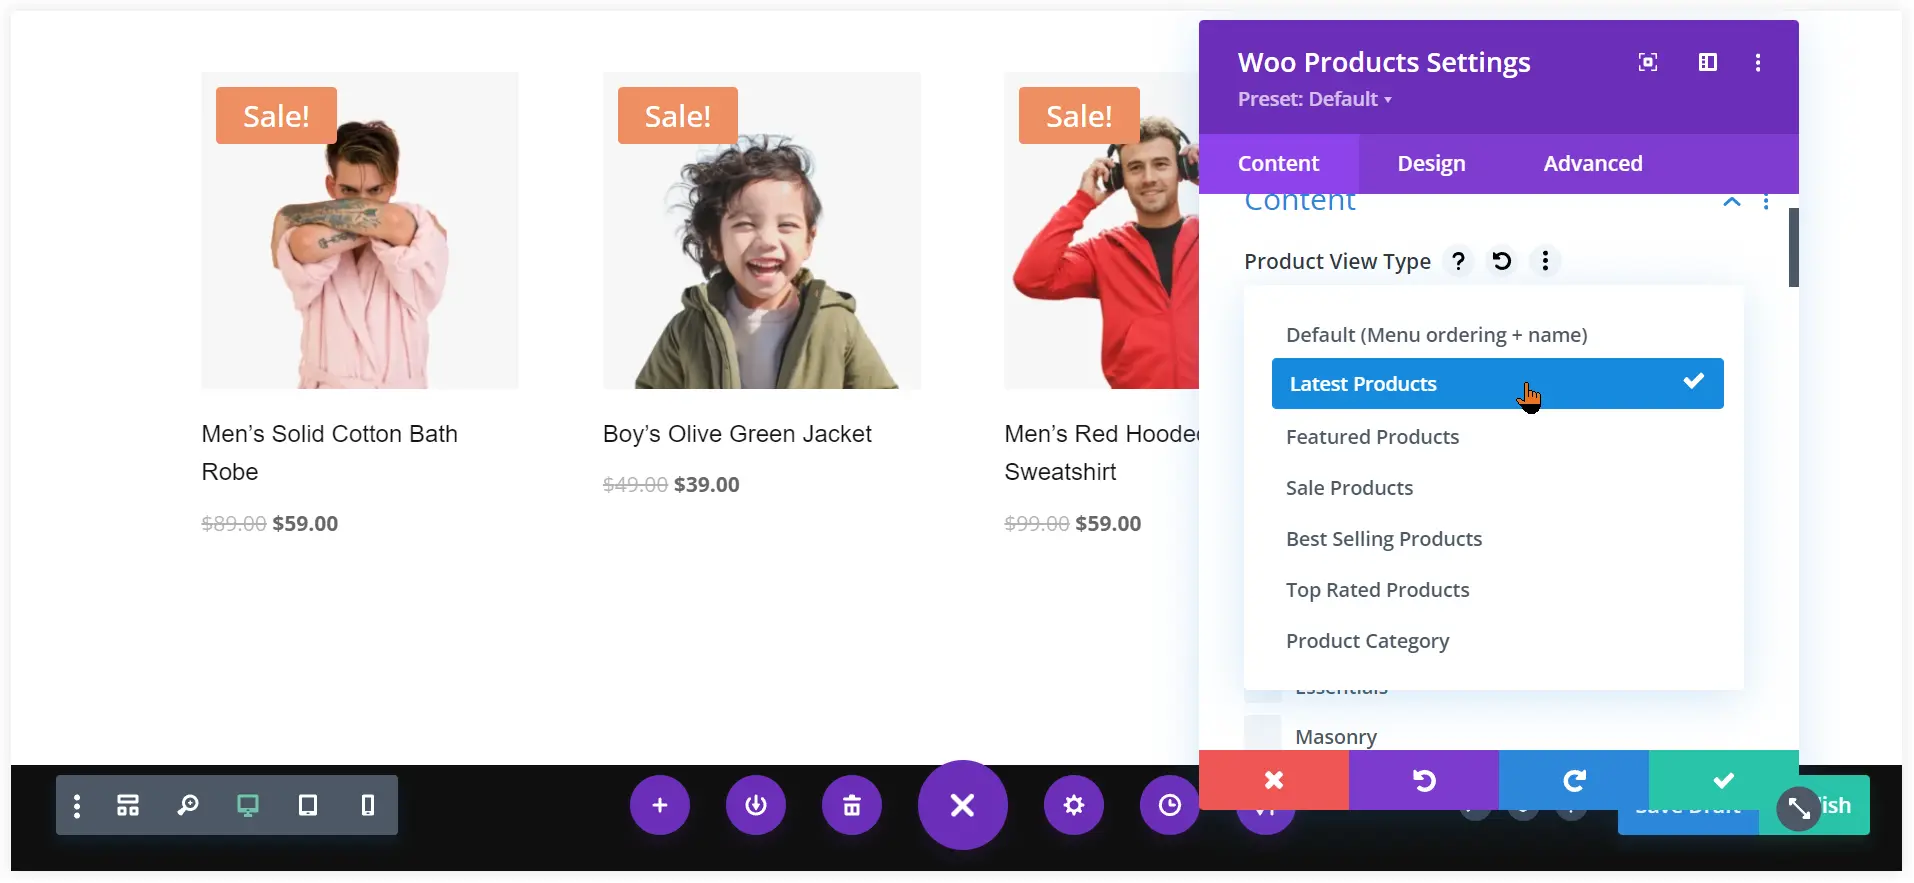
Create a new section, place a heading, and use the native Woo Products module to display your products. This WooCommerce module gives you options to display the Latest, Featured, Sale, Best Selling, Top Rated, and Products from various categories. We chose the Latest option and it shows all the latest products from our store.
In the same way, you can add the remaining sections of the homepage using Divi Builder and Divi WooCommerce modules. The other sections you can include on the homepage of your E-commerce store are:
- Bestseller
- Category
- Discount CTA section
- Update and notification
You should try prebuilt Divi homepages for your store which look professional and visually appealing. In the next section, we will discuss the use of Divi prebuilt templates to create pages for your online store. This will make our process to create an eCommerce store with Divi simple.
b. Create Divi Page Templates
You can create Divi templates for all the other pages( Product page, Shop page, etc.) and save them in the Divi Library to use them globally in your store.
Let’s create a Divi Template for your store’s single product page. This template will be used globally for all the products on your eCommerce store.
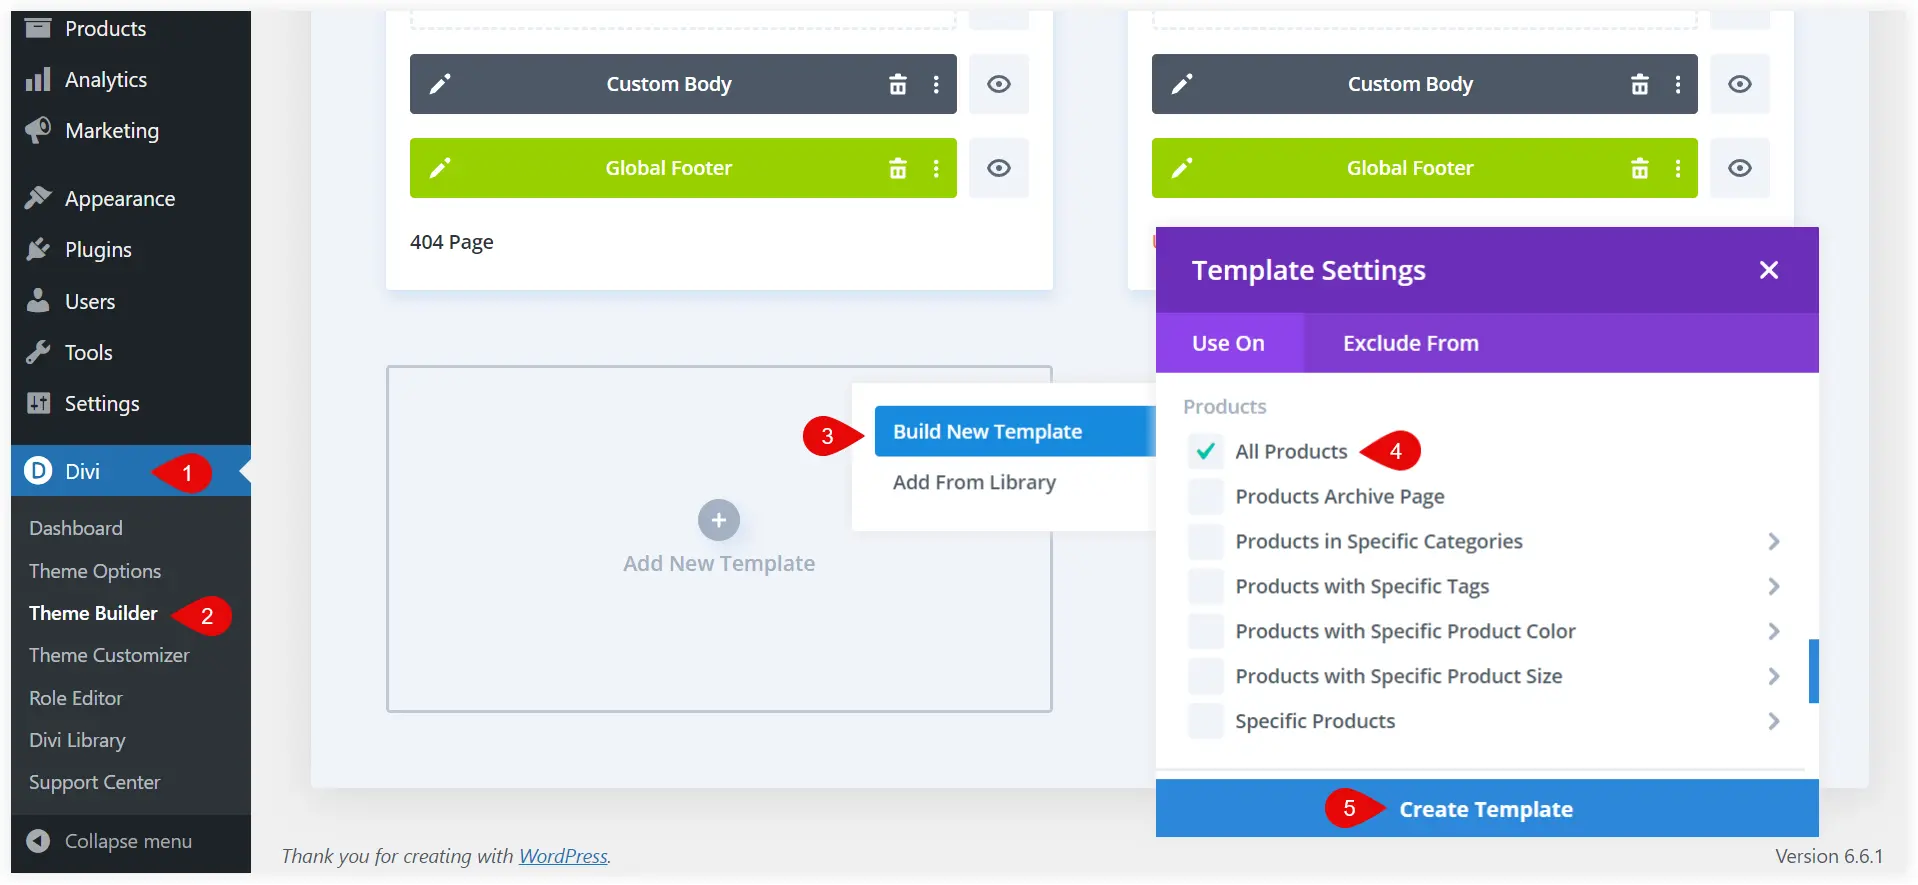
Go to the Divi Theme Builder. Click Add New Template >> Build New Template. Scroll and select All Products. Finally, click on Create Template. This template will be used globally to display products on their single product page.
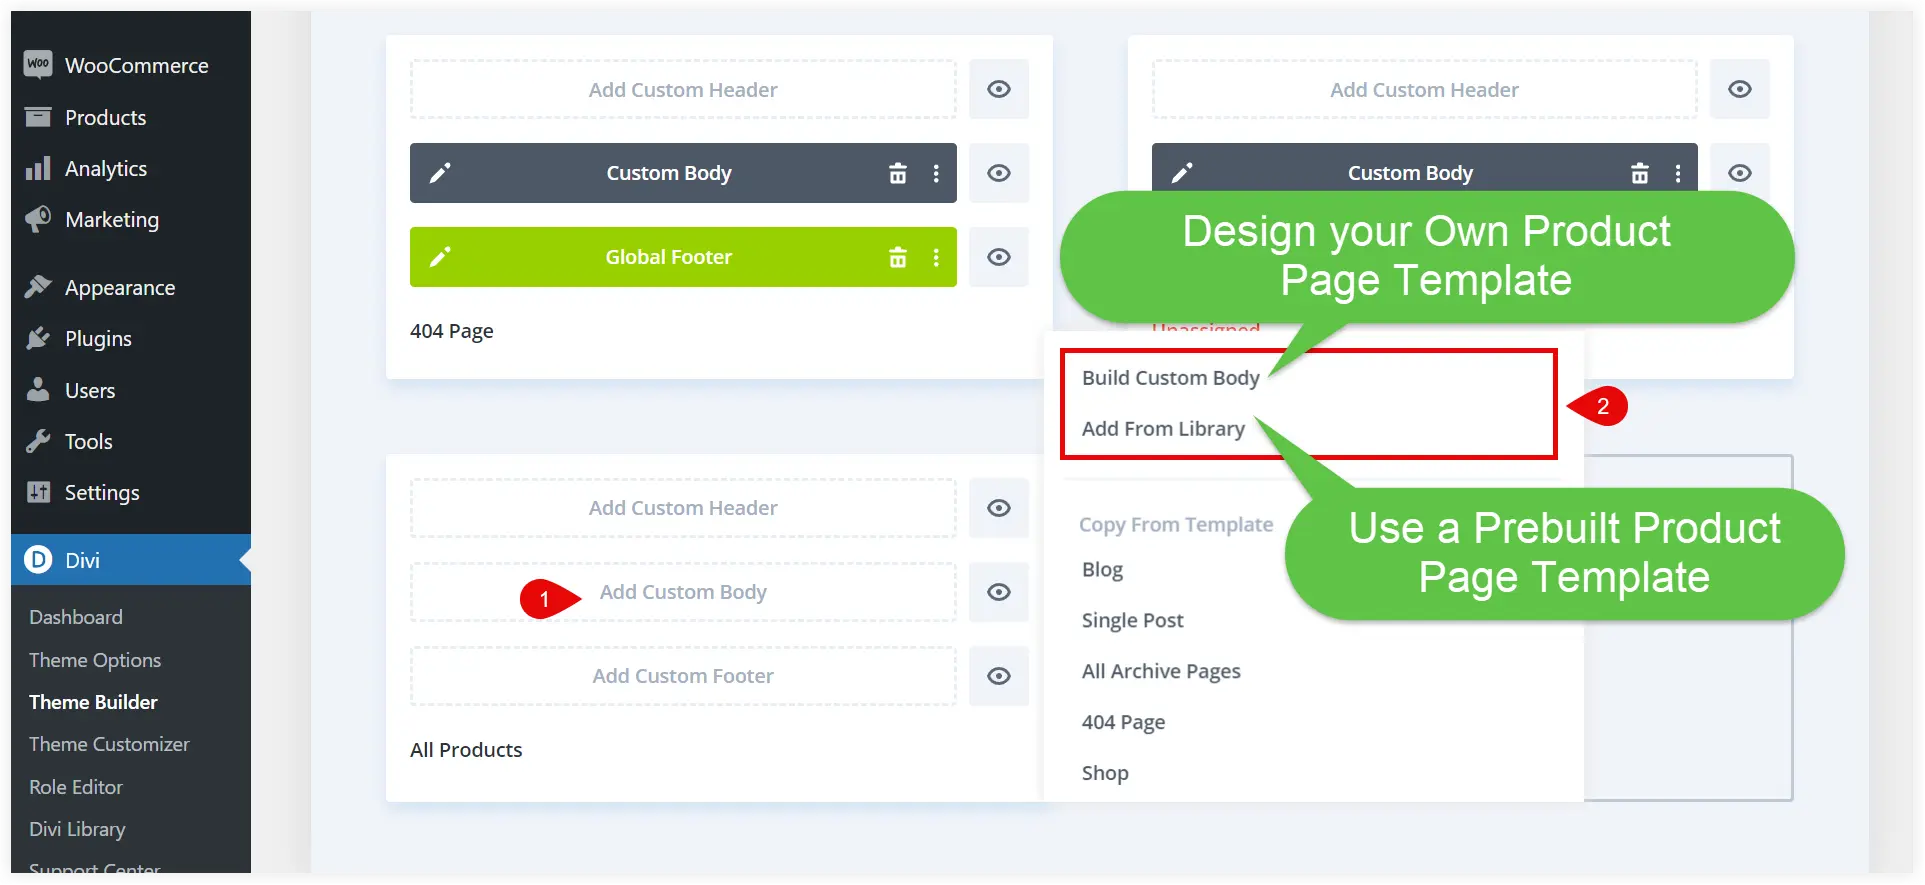
Now you have two options. You can create a custom single-product page template or use a prebuilt single-product page. Select Build Custom Body to create a personalized template.
If you want to build it quickly without messing with the design hassles, choose a prebuilt template and customize it to match your store’s needs. Select Add From Library for that. You also have the option to use the Divi Layouts Extended plugin which offers an ultimate pack of prebuilt Divi WooCommerce layouts.
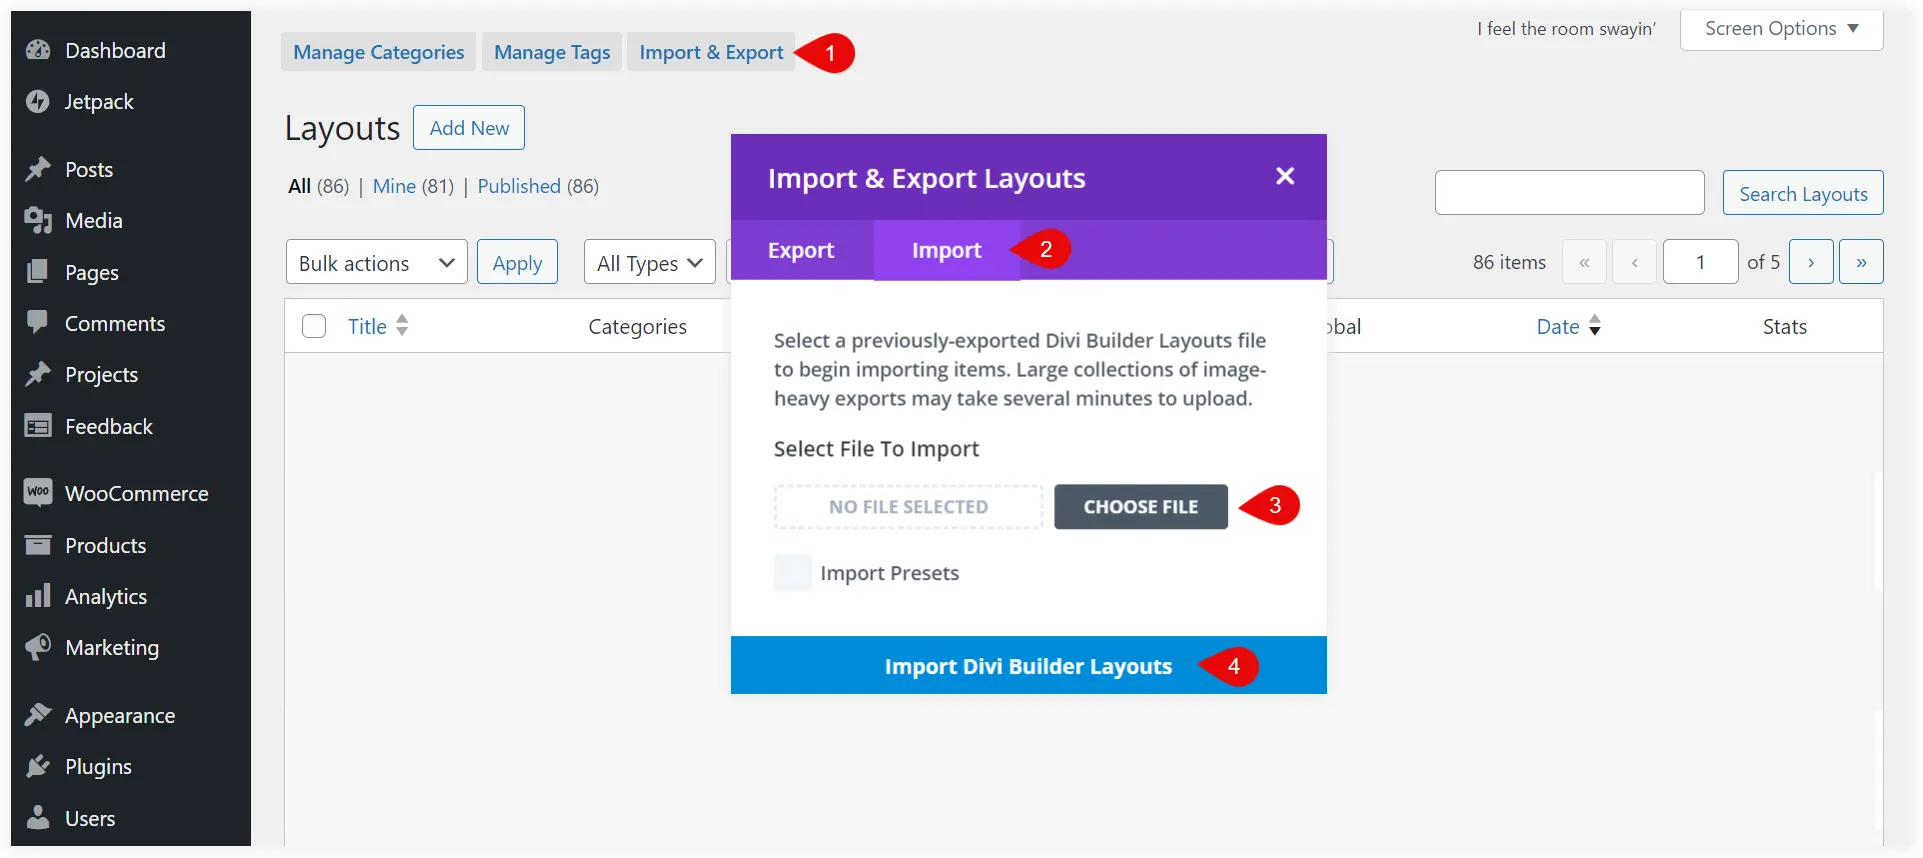
After downloading a prebuilt page layout, import it into the Divi Library.
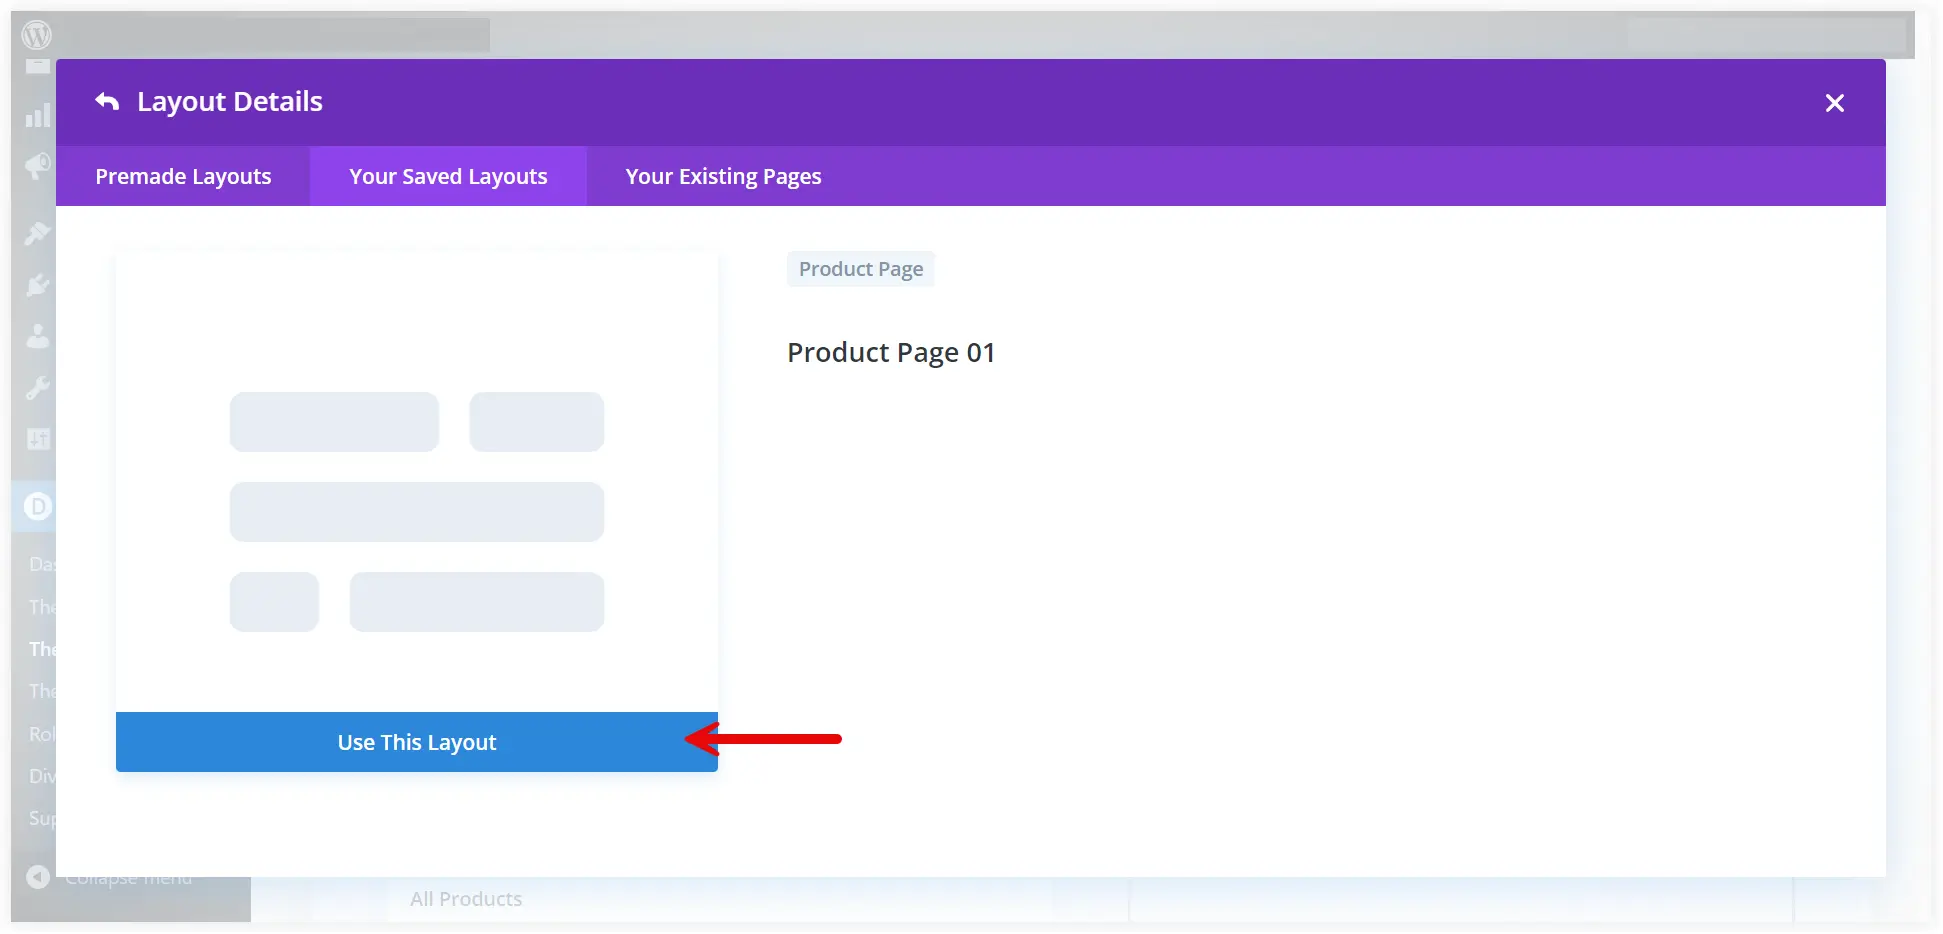
Now go back to the previous screenshot and select Add From Library. Select the product page layout you want to use.
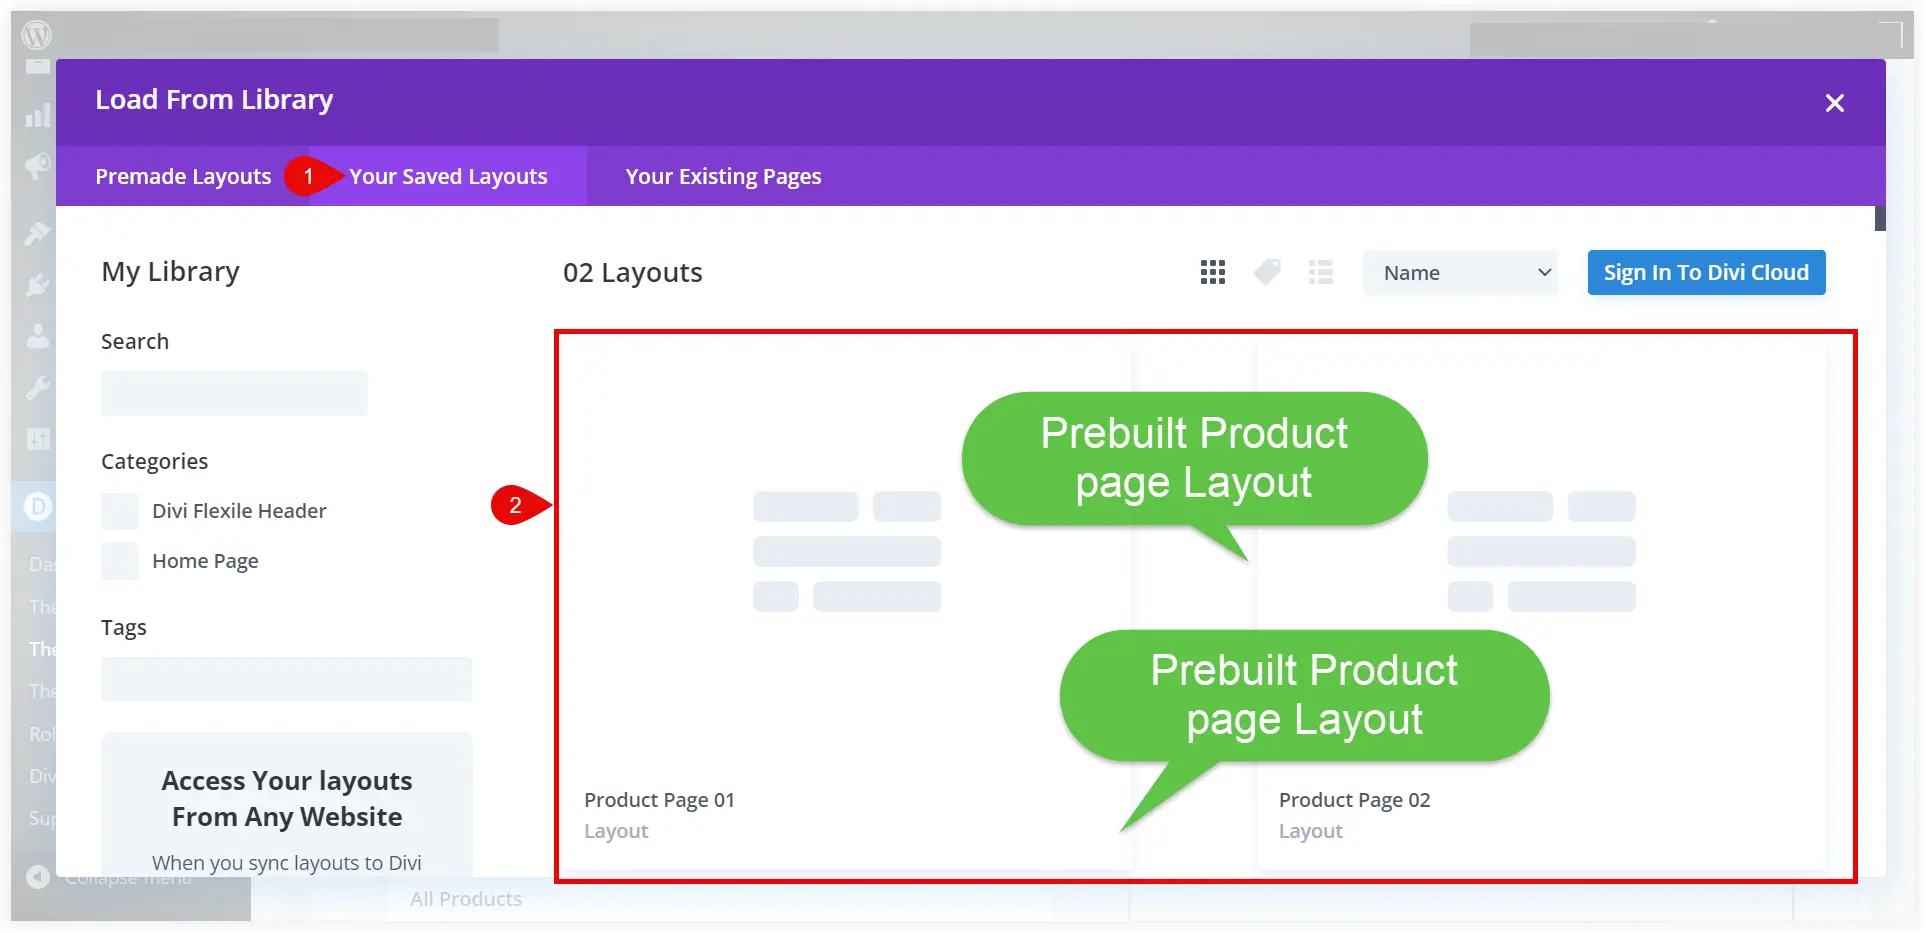
Click Use This Layout.
Finally, click Save Changes on the top.
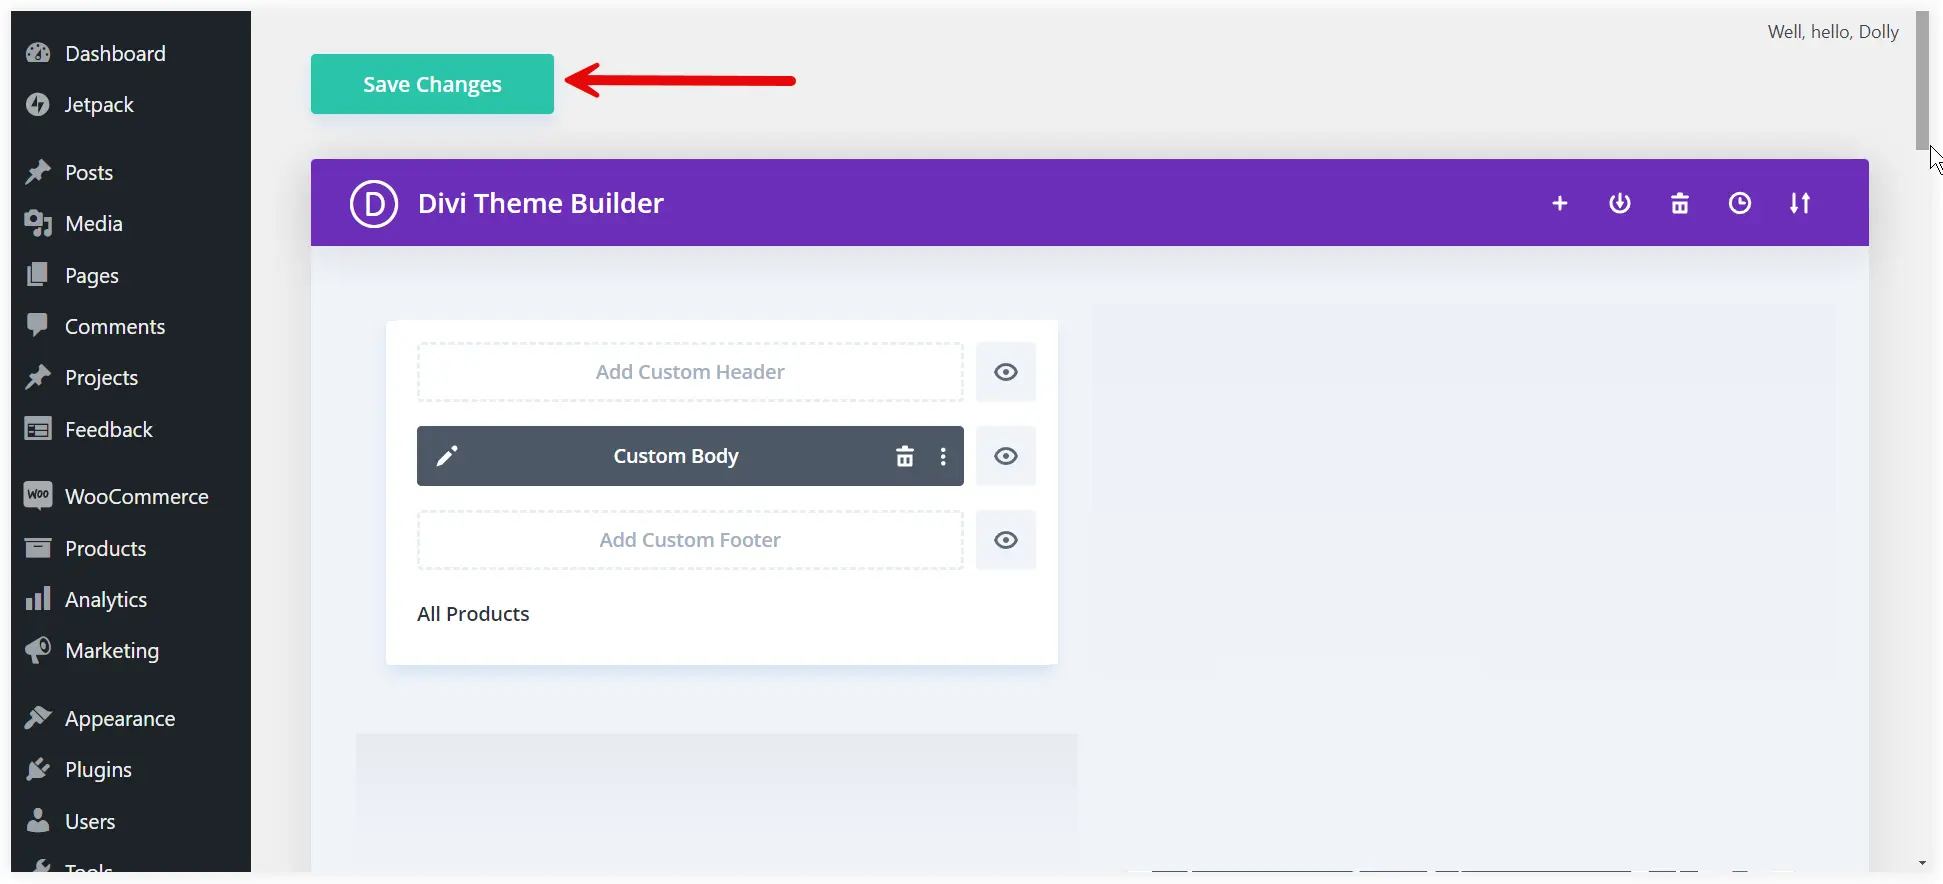
The Divi single product page template has been successfully imported and configured to act as a product page for every product in your store.
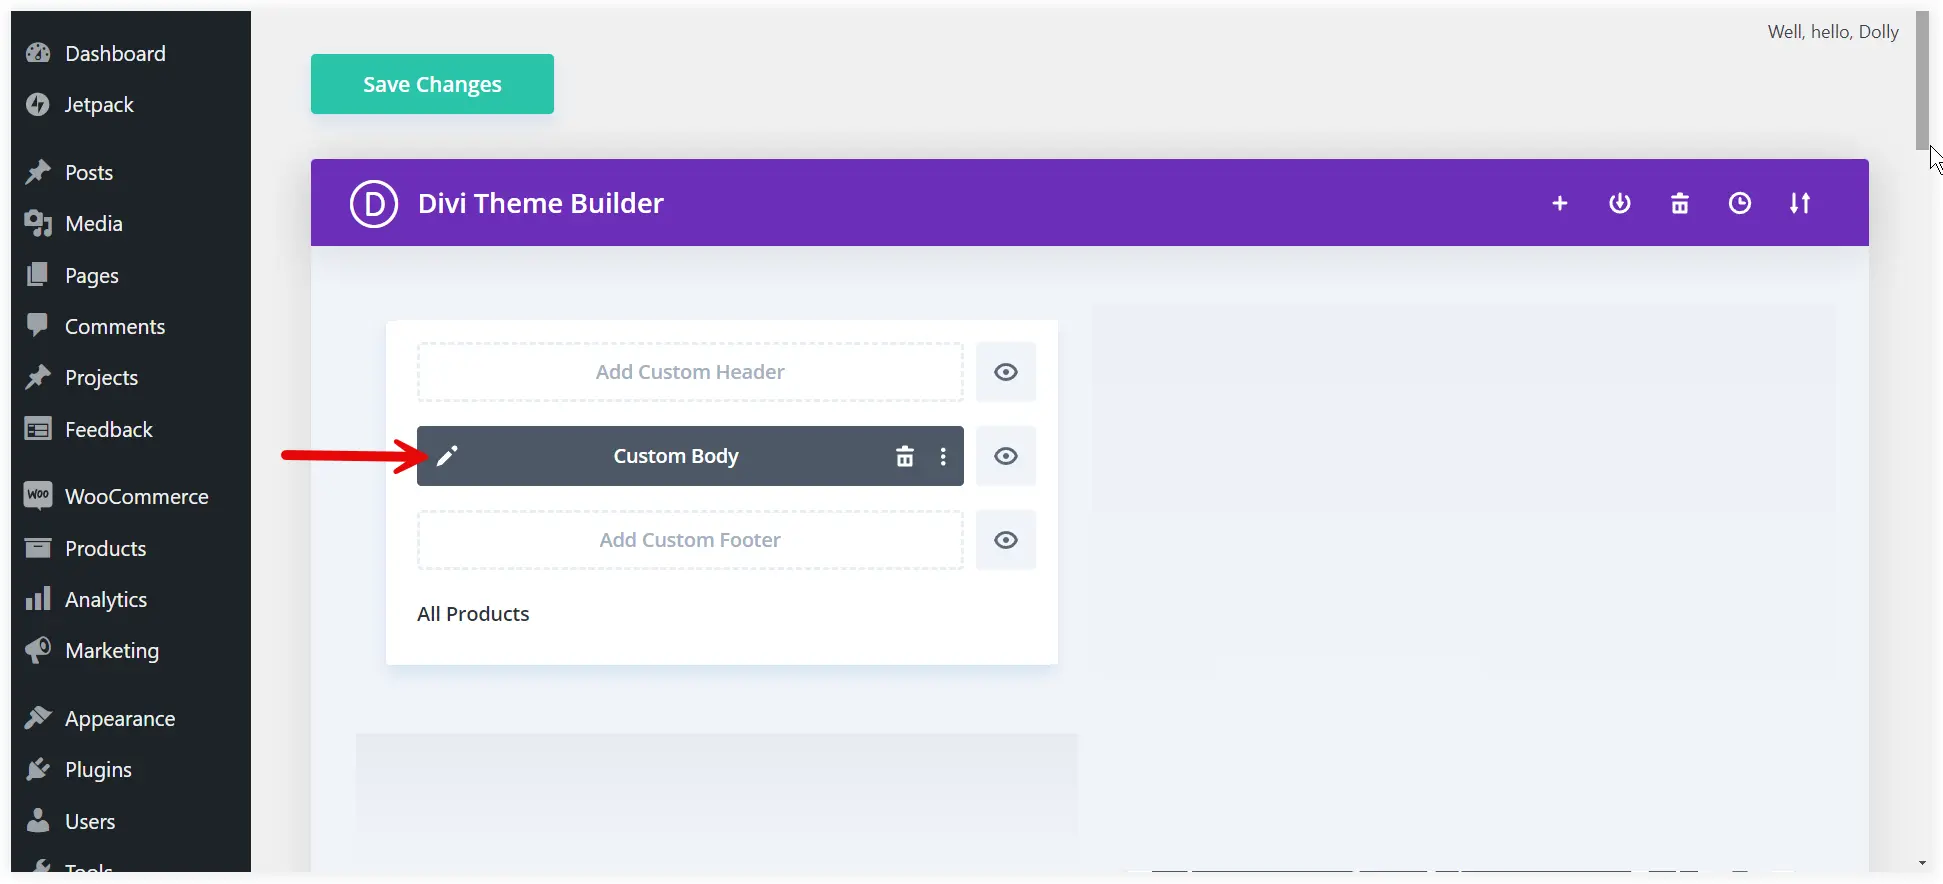
You can personalize it to suit your online store’s requirements. Click the Edit icon.
The template will be opened in the Divi Theme Builder. It contains all the essential sections like product image, description, pricing, Add to cart button, reviews, etc. Modify, reposition, or add new sections the way you like, and click Save.
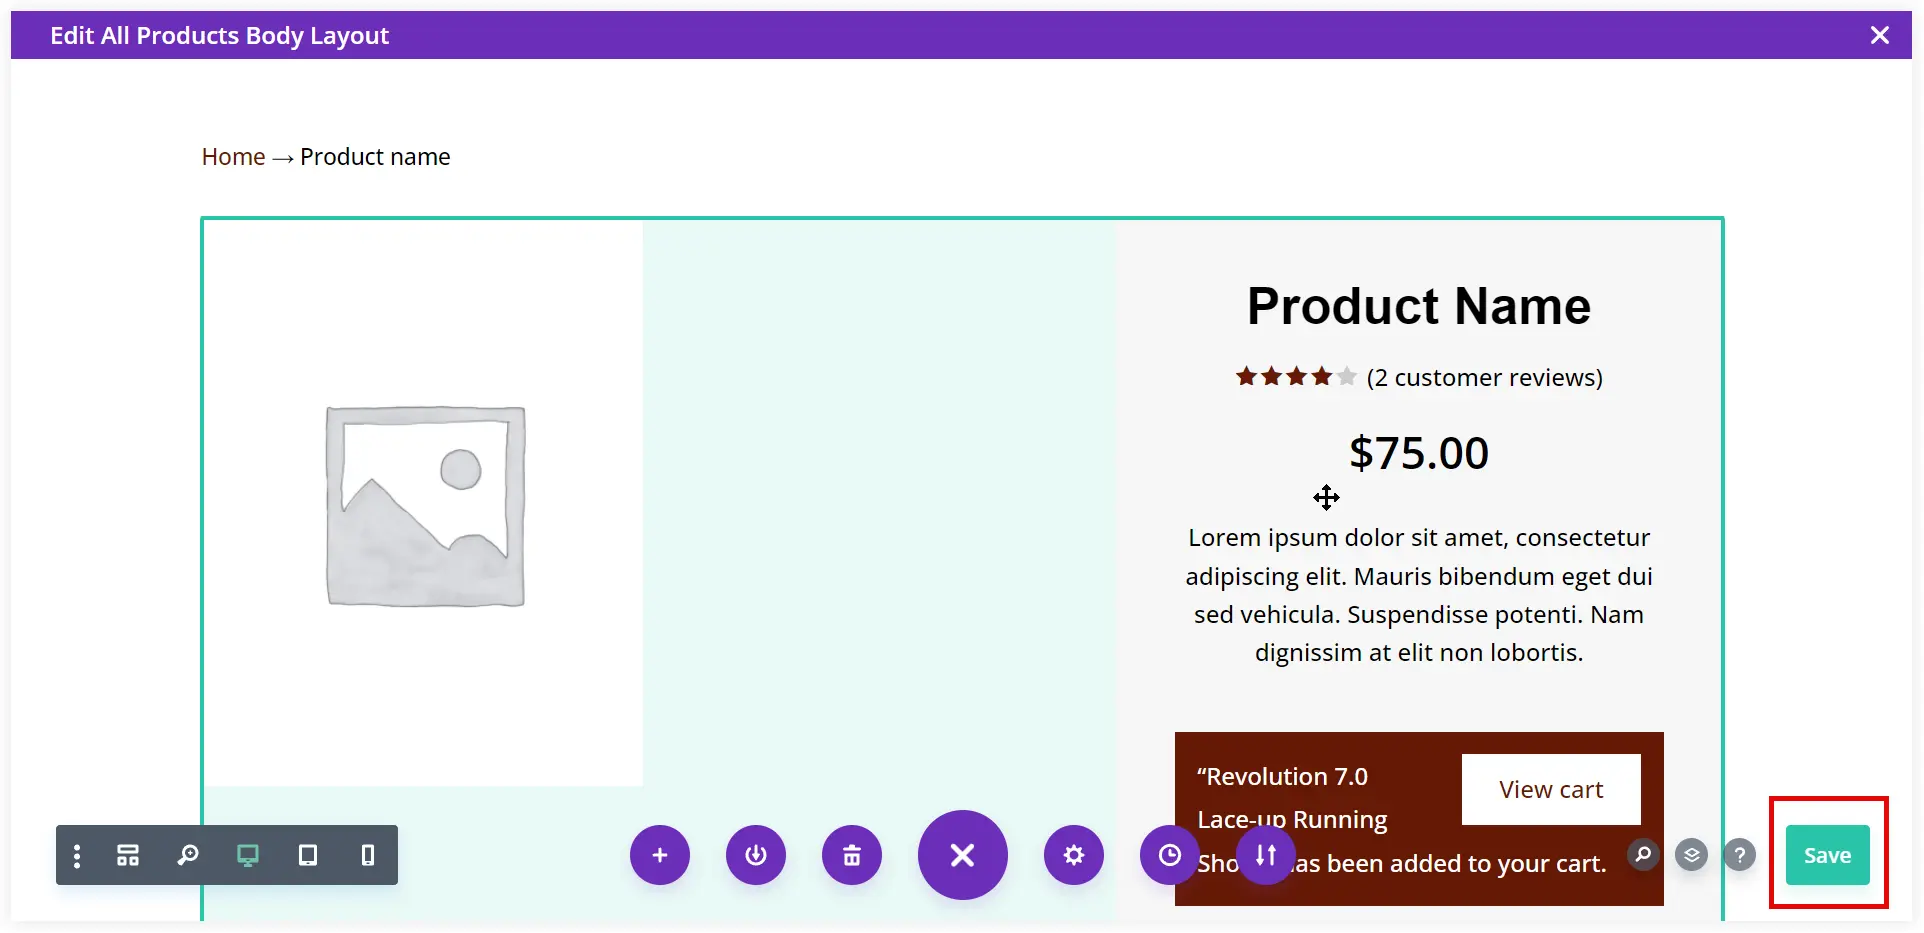
See how it looks on the front end of your online store.
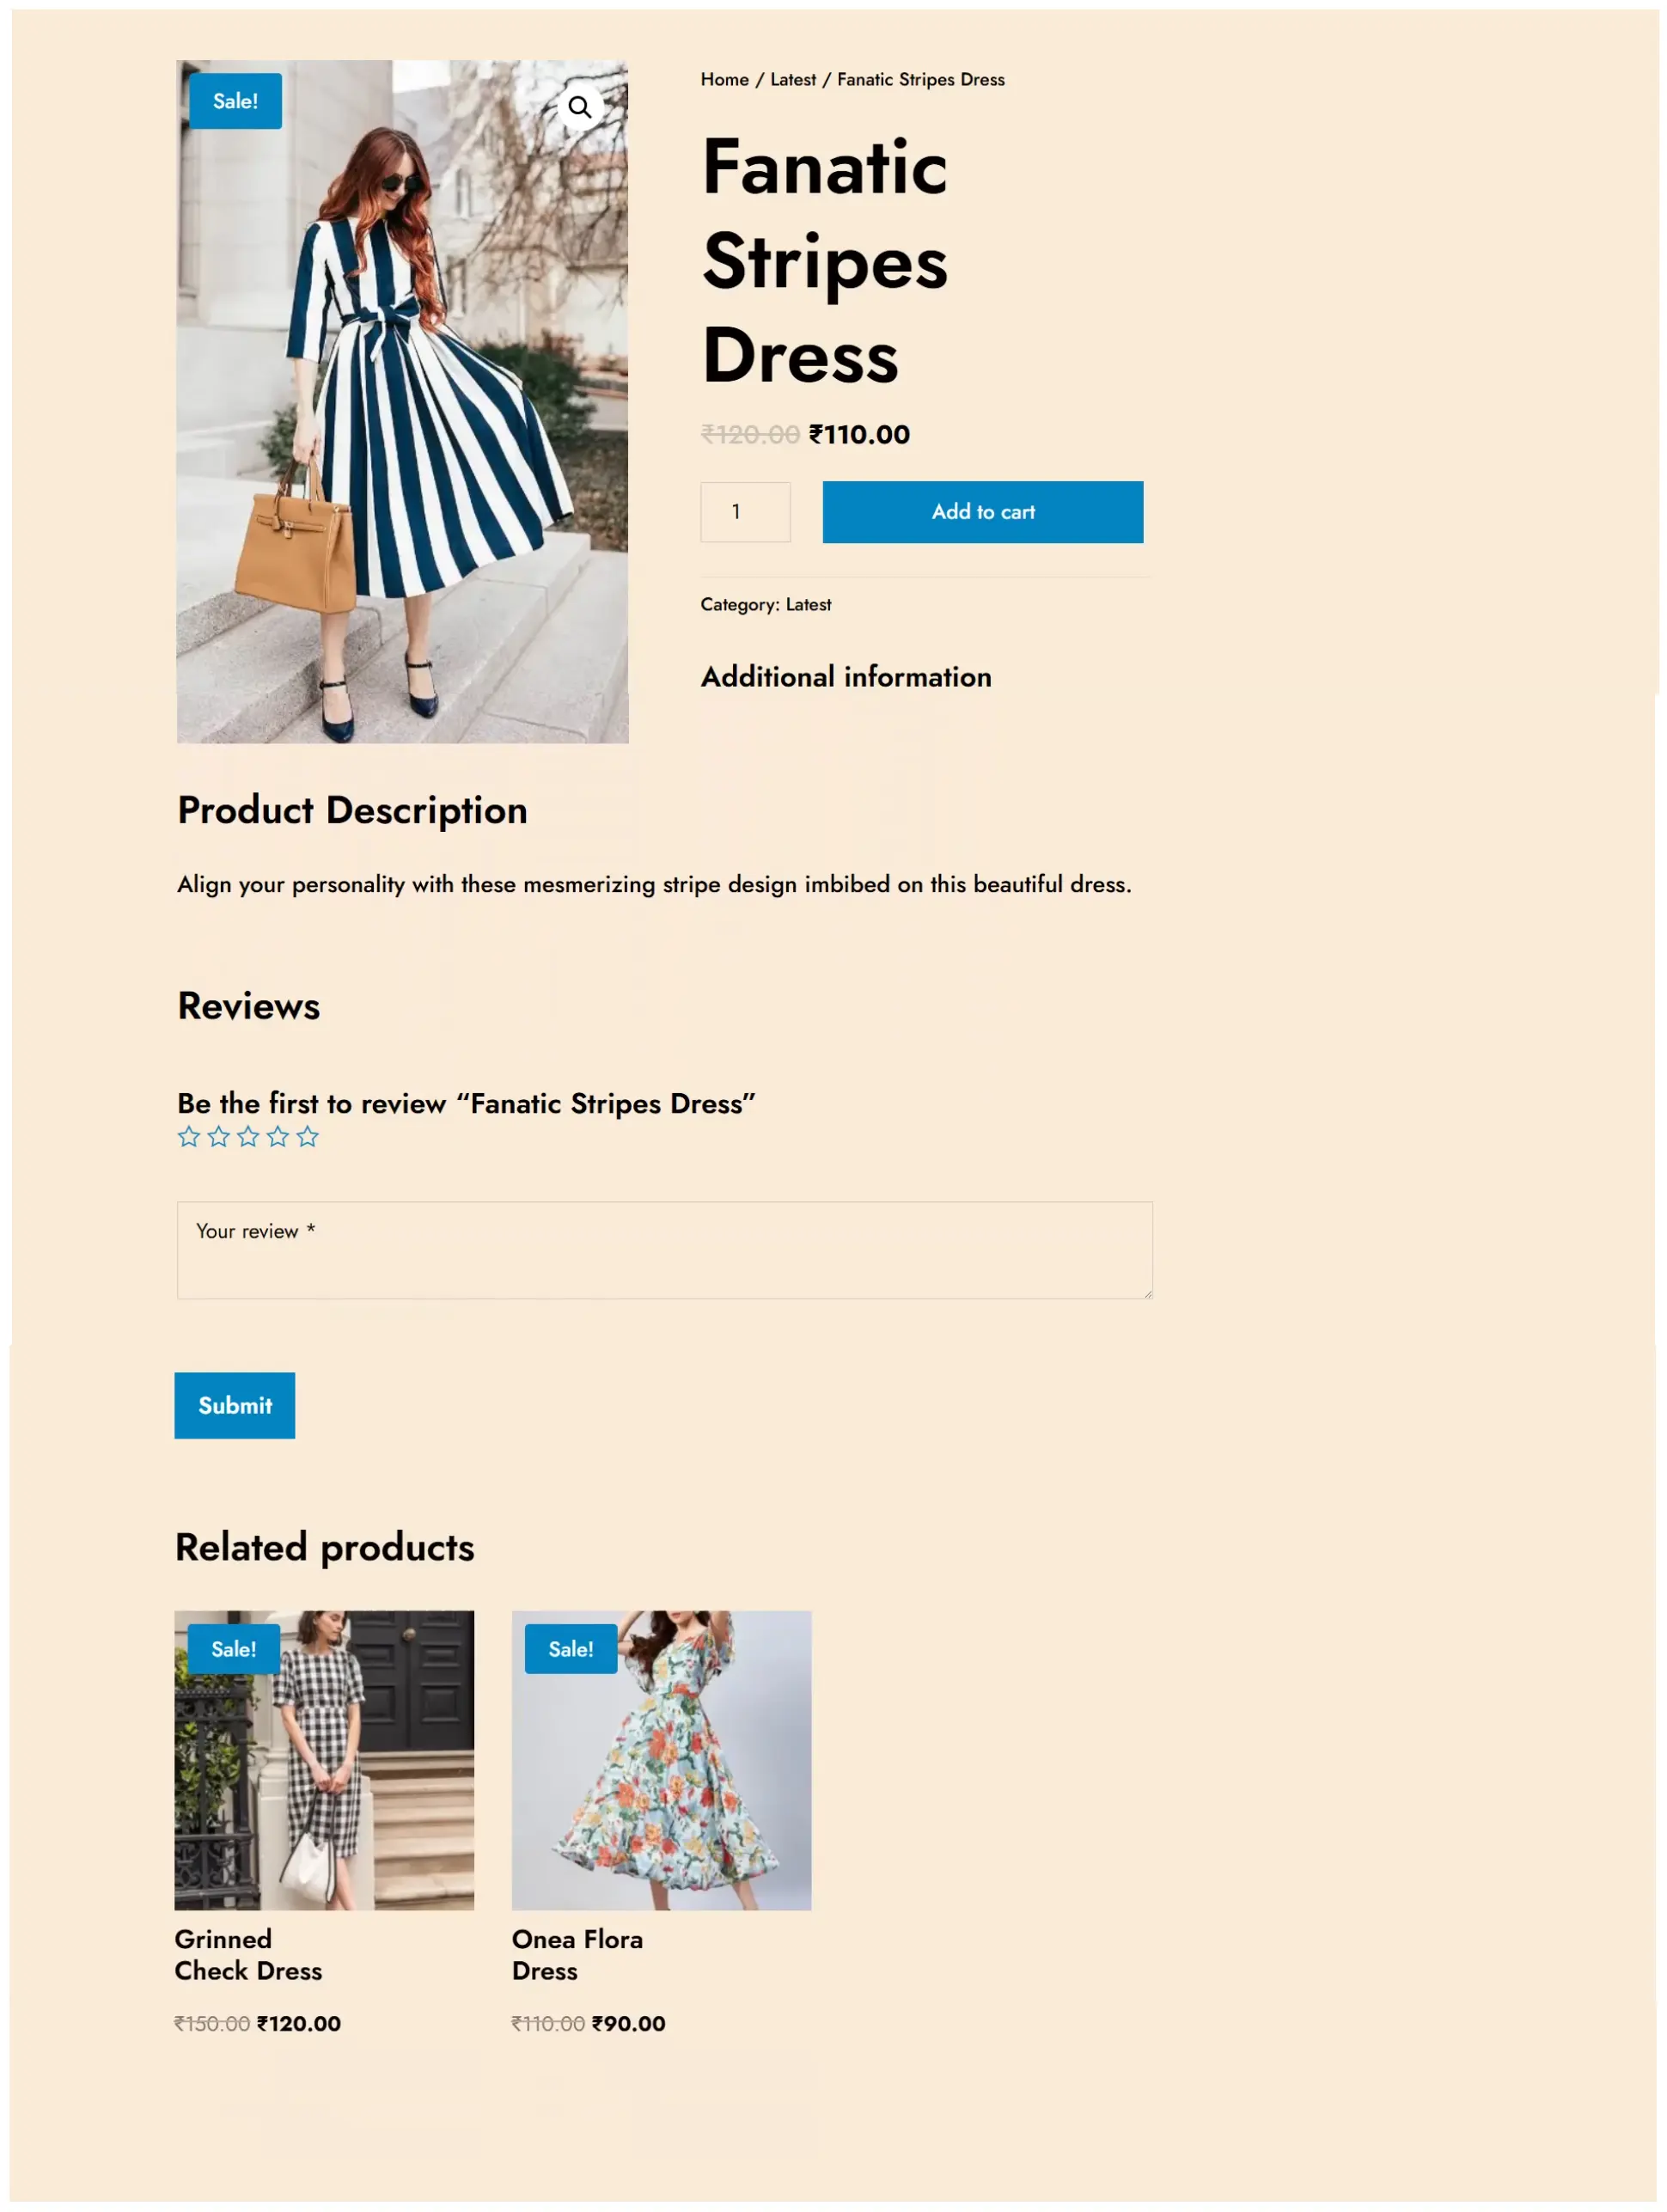
Congratulations, you have designed the product page of your online store. The same approach can be used to design and configure the other pages of your store. Import the pre-built template of the page you want in the Divi Library and utilize Divi Theme Builder to personalize it and assign it as a global template across your store.
This was the key part of the process to create an eCommerce store with Divi and you have completed half part till here.
c. Create a Custom Menu for your eCommerce Store
The menu of your eCommerce store is another crucial component that we cannot ignore. It facilitates users to explore various pages of your online store.
Let’s create a custom menu and give it a unique visual appeal using prebuilt Divi header layouts.
Navigate to Appearance >> Menus. Name your menu. Select it as a Primary Menu and click Create Menu.
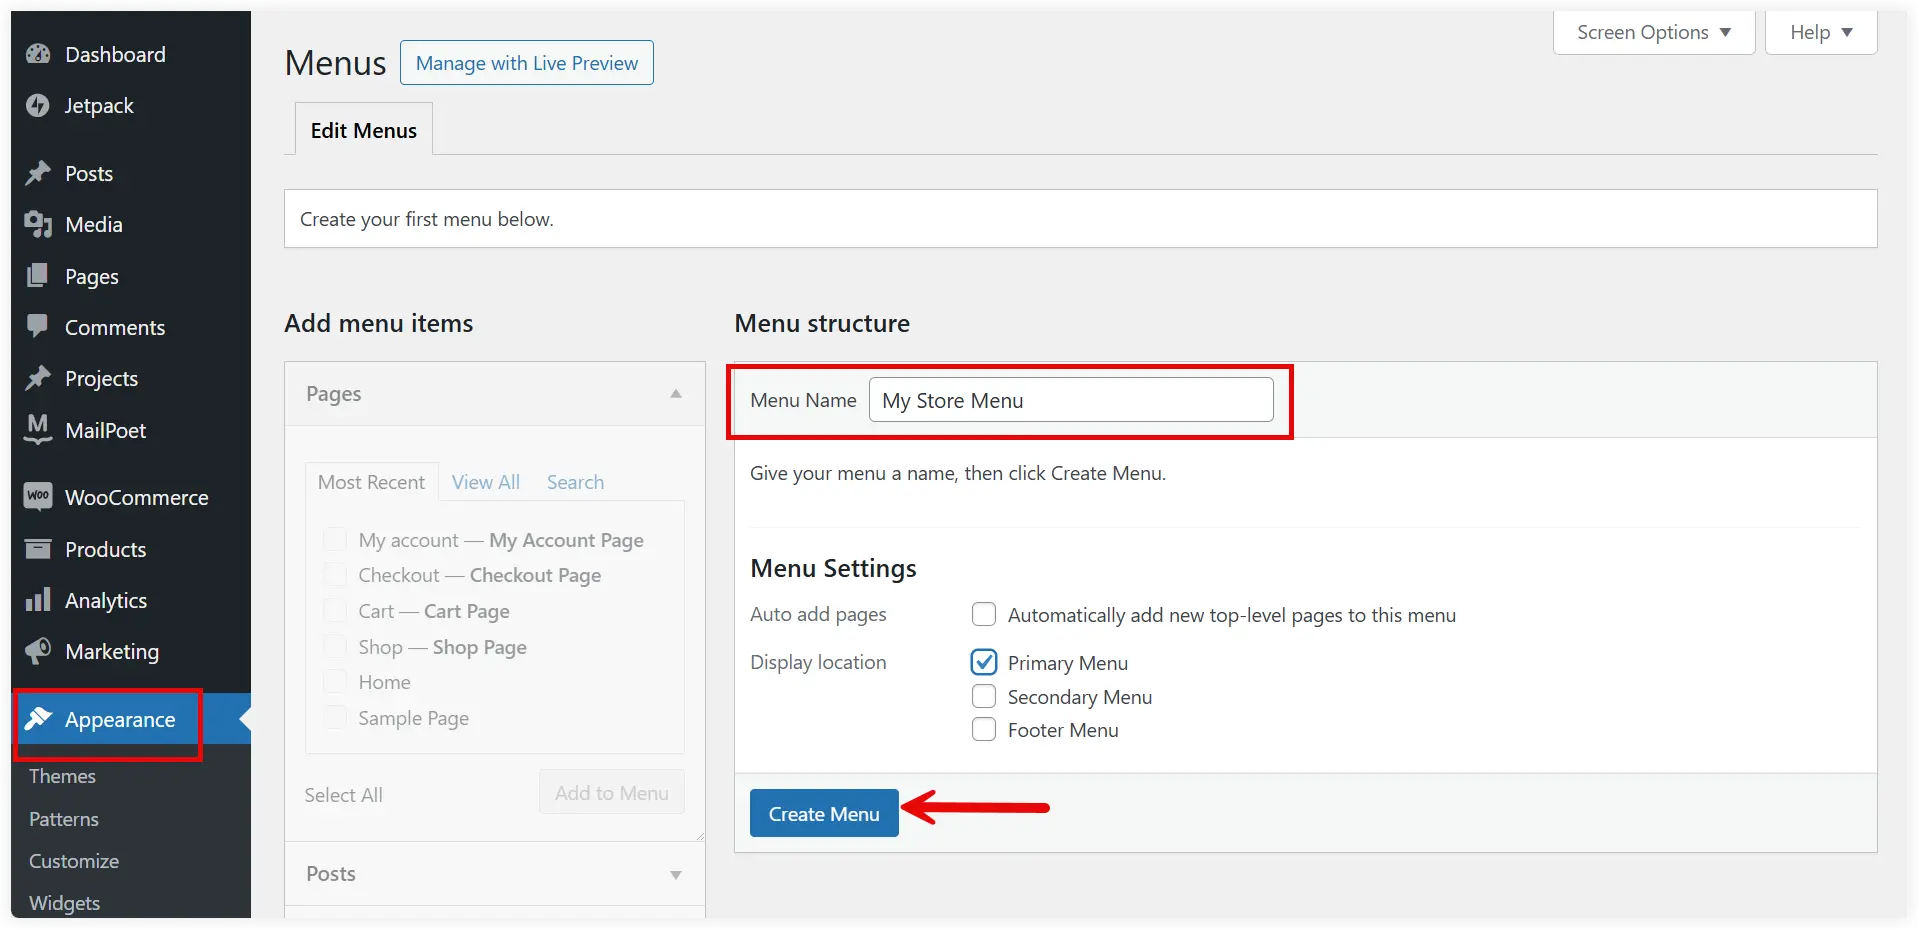
Include the essential pages of your eCommerce store as menu items. Select them and click Add to Menu.

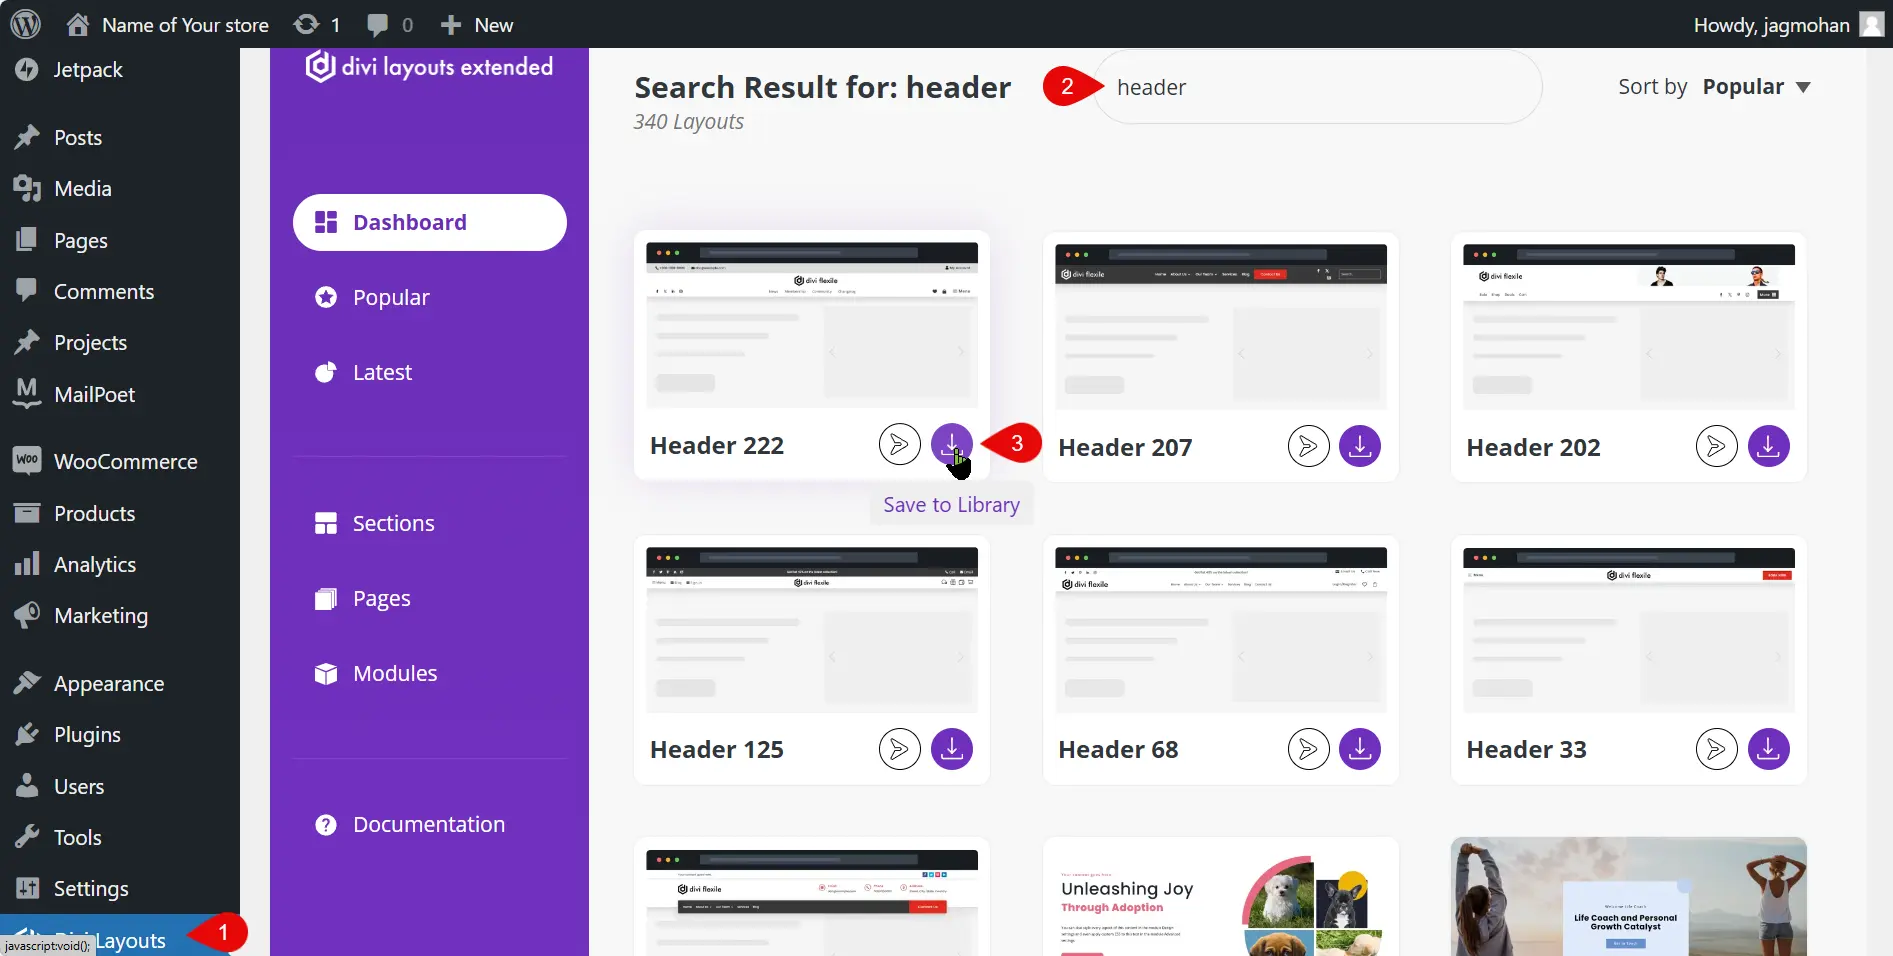
Now to deploy the prebuilt Divi header layouts we will again use Divi Theme Library and Divi Theme Builder. If you have installed the Divi Layouts Extended plugin, explore the header layouts and select the one that goes perfectly with your store.
Go to the WordPress dashboard and select Divi Layouts Extended. Now search for the header layouts and explore all the available. Select the one you want to use and save it to the Divi Library.
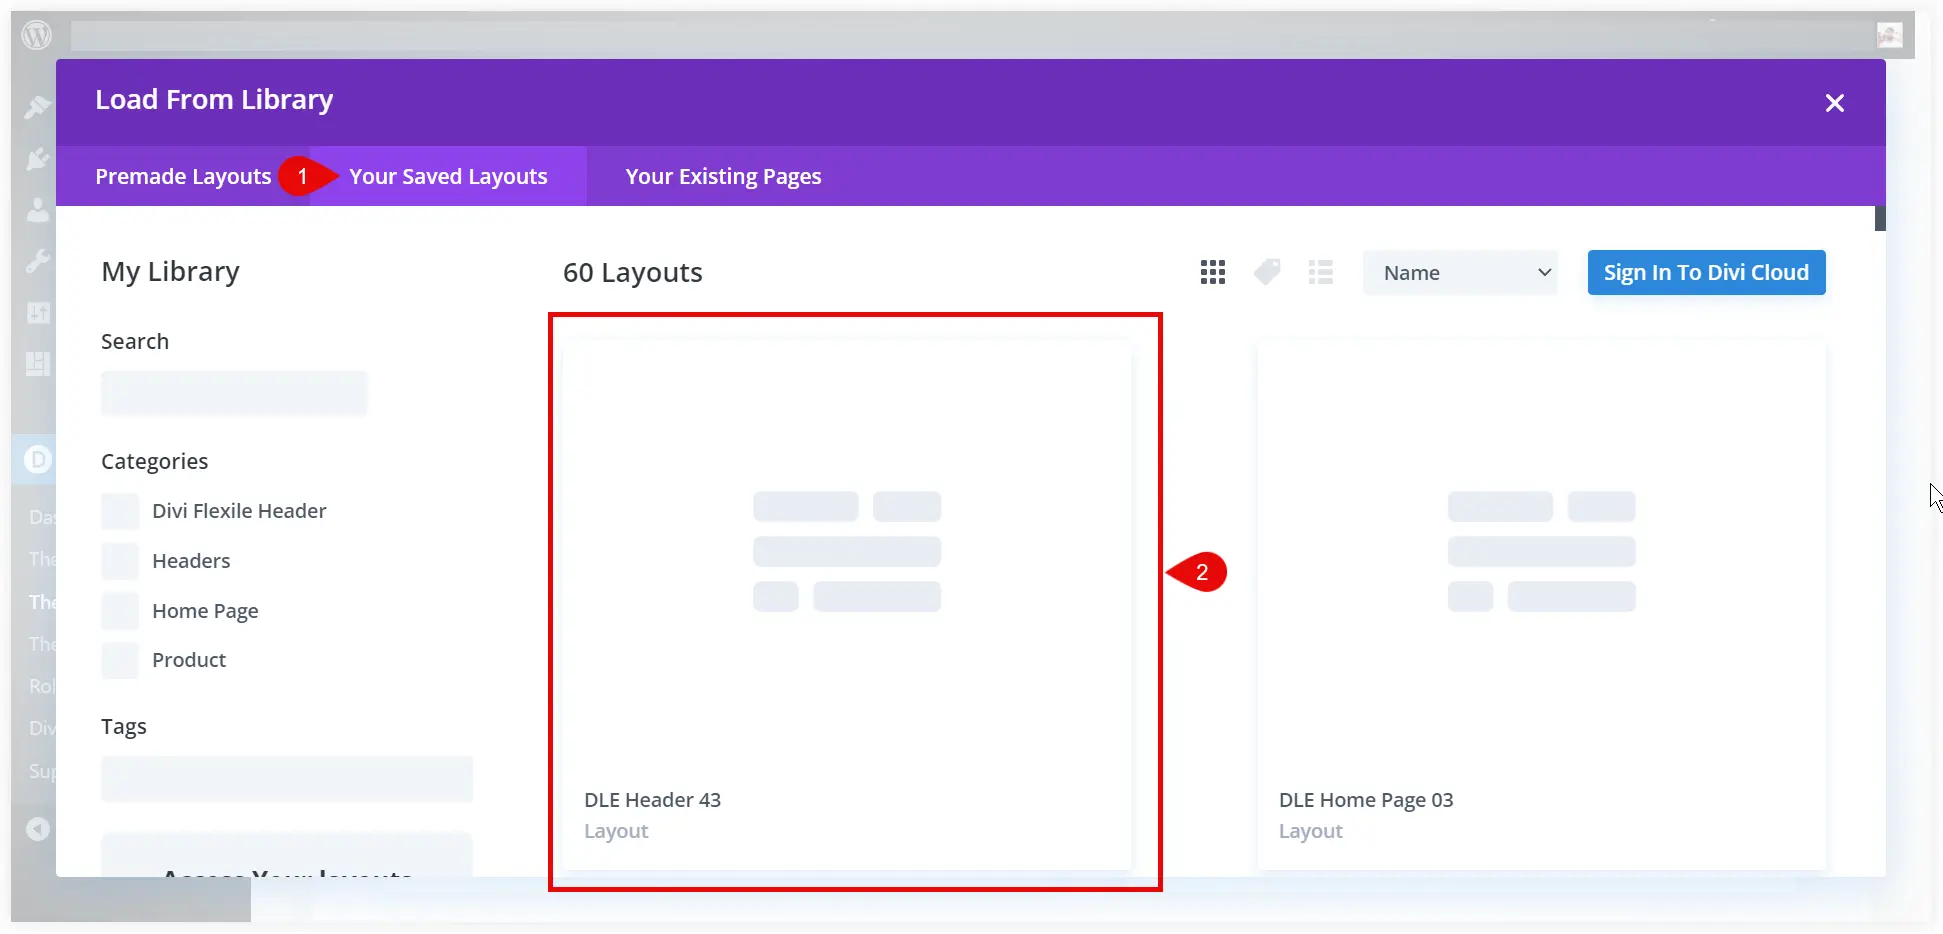
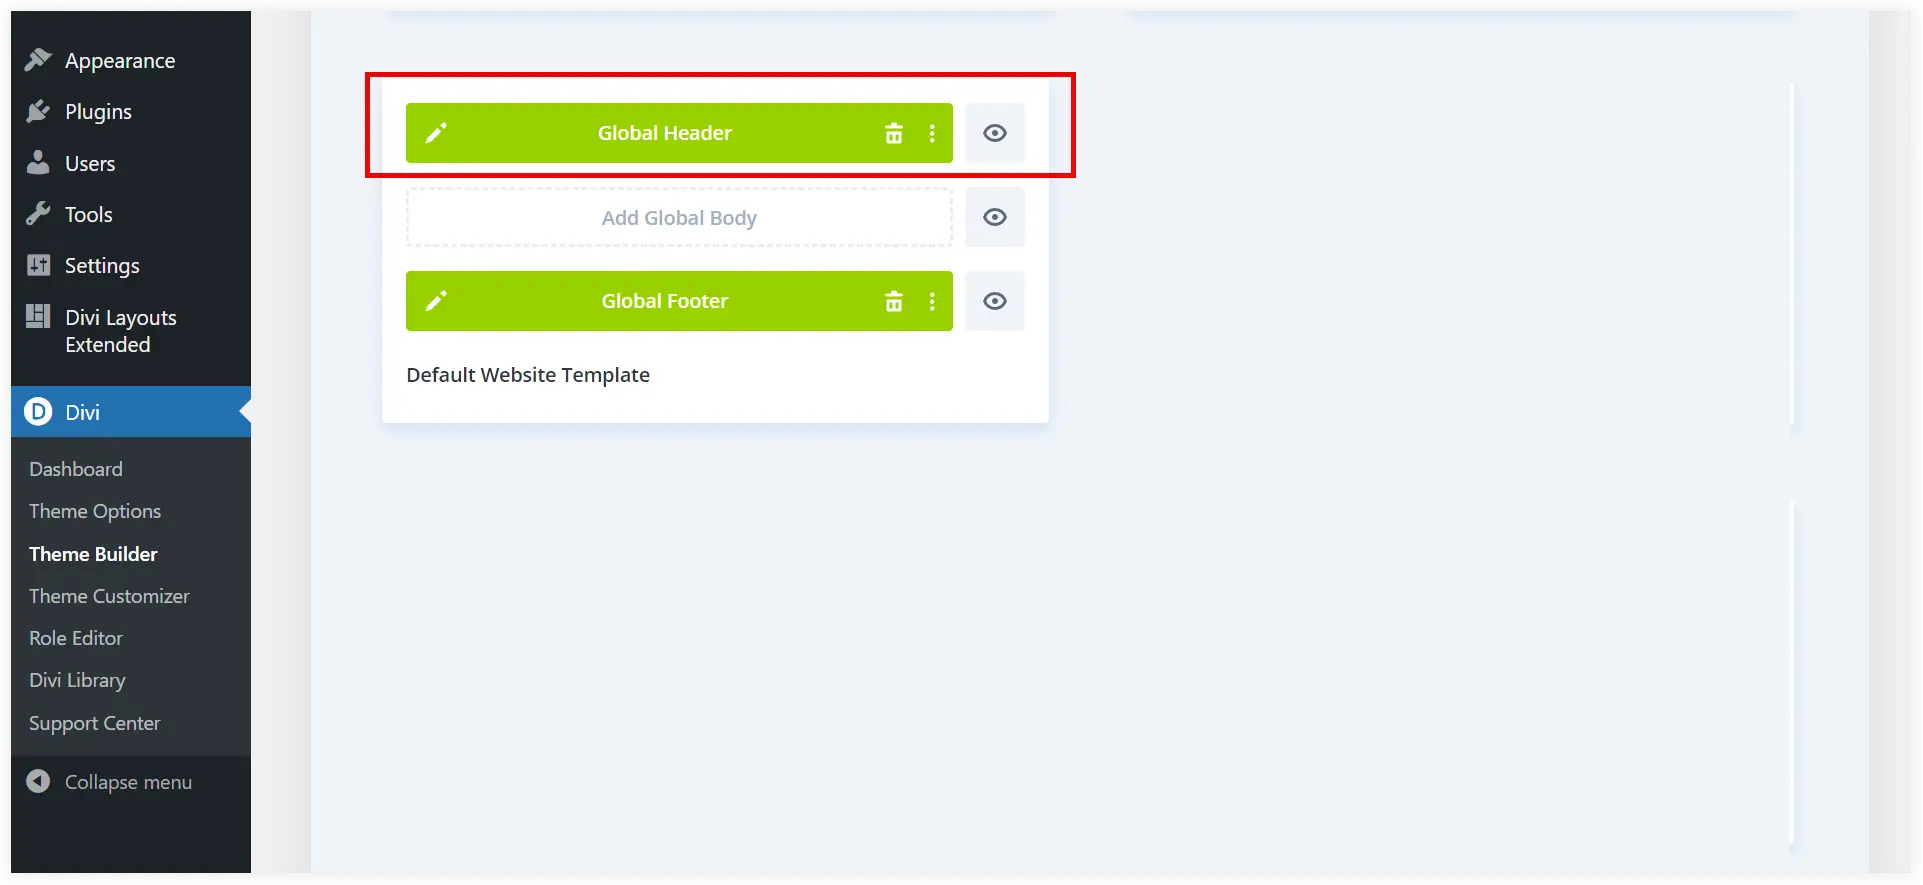
Open Divi Theme Builder and go to your Default Website Template. Click Add Global Header, and Select Add From Library.
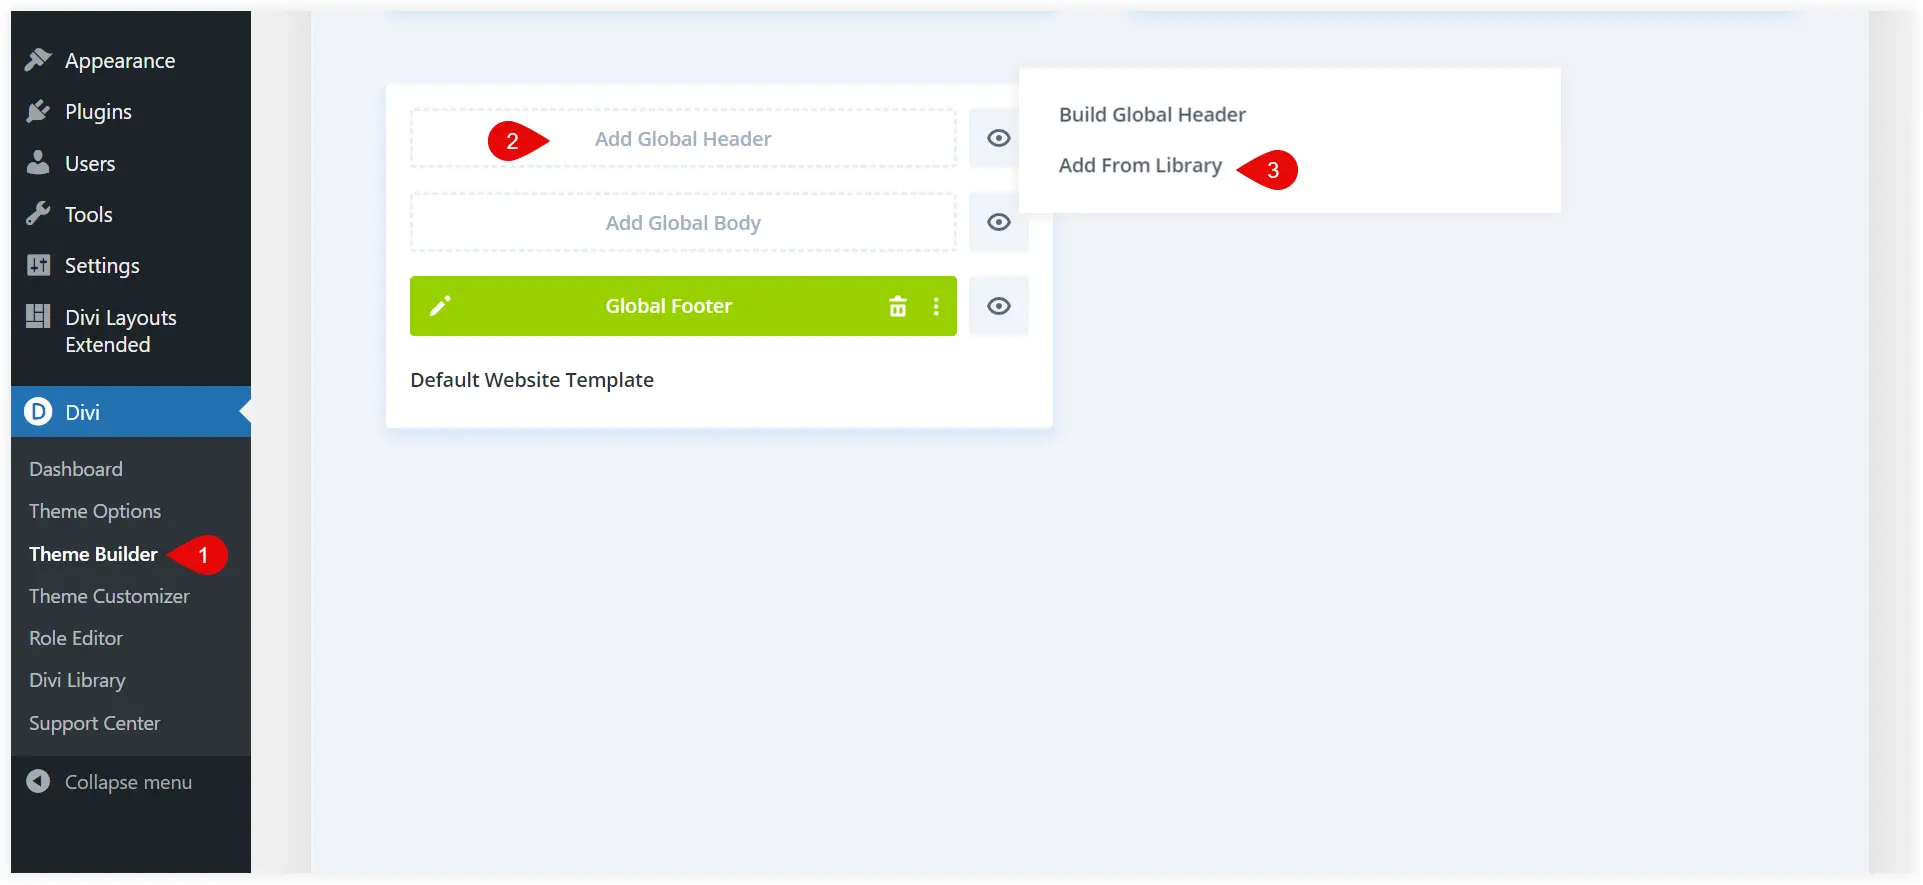
Browse Your Saved Layouts and find the Divi eCommerce header layout you saved to Divi Library.
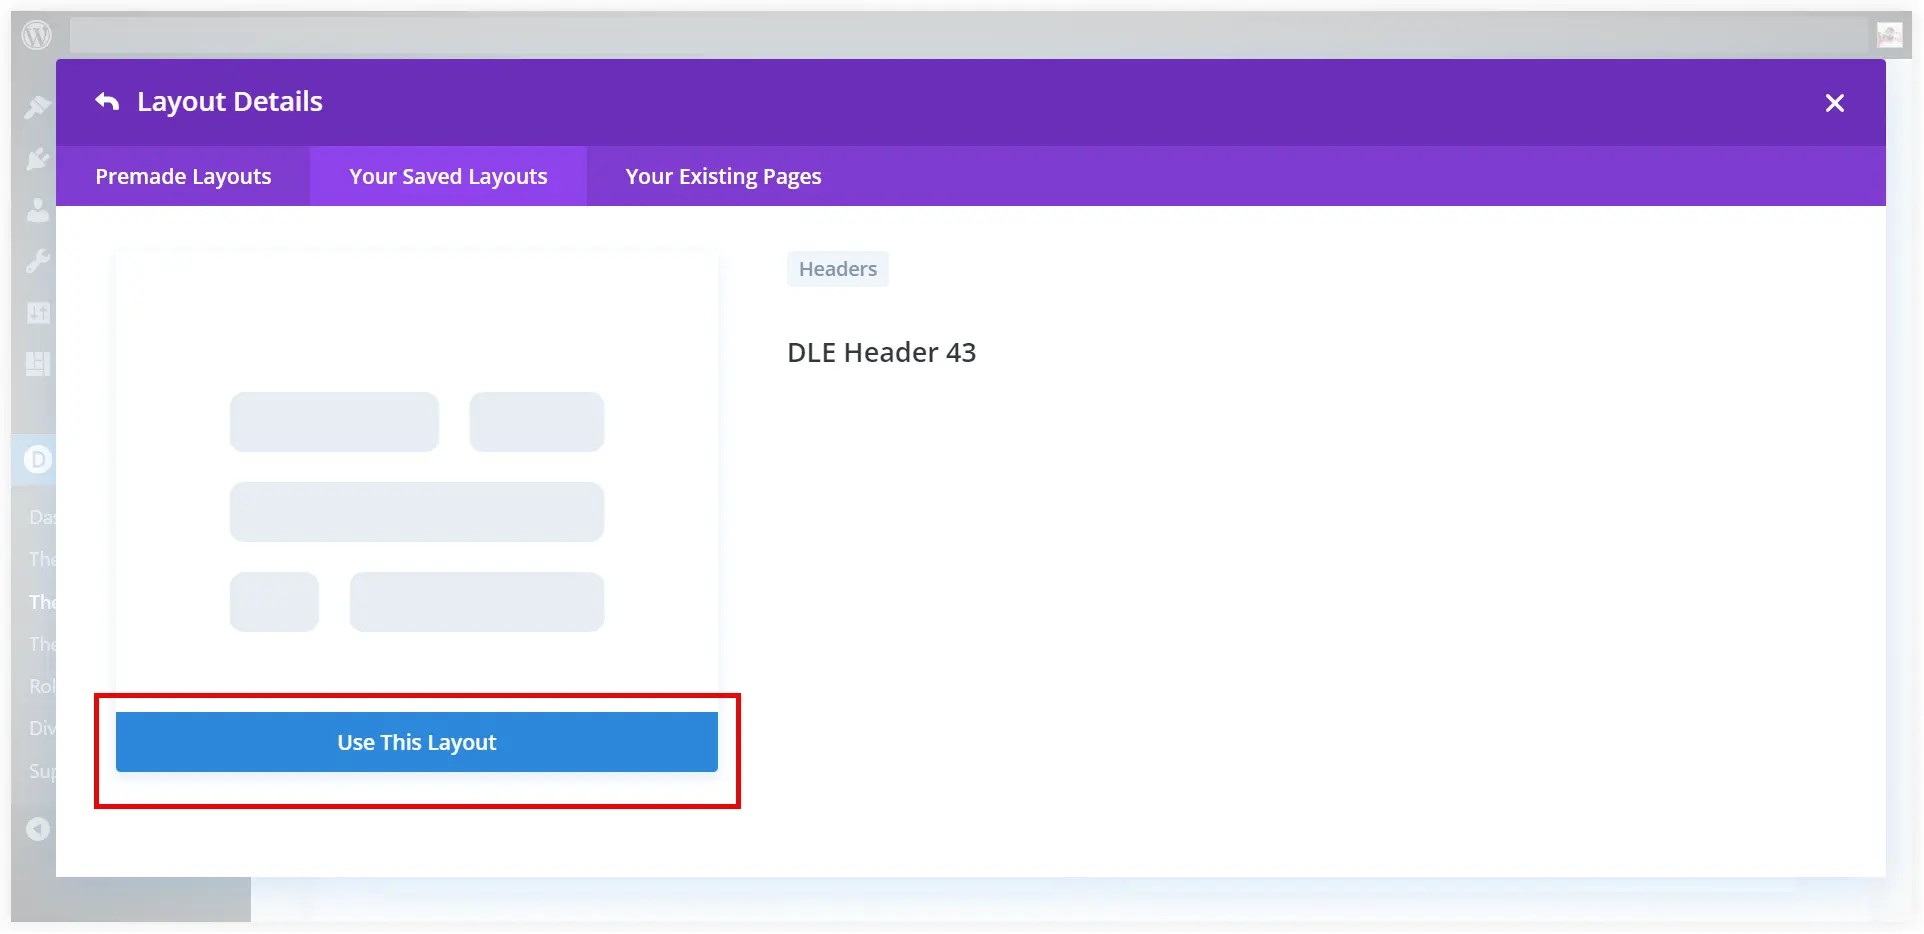
Click Use This Layout.
Observe the new header you chose has been assigned to the entire store.
That’s done. Your eCommerce store is ready to show the latest online fashion trends to customers and take your business to new heights with its strong online presence.

After creating and building your eCommerce store, you may move forward with social media promotion and SEO optimization tactics before making it live.
Final Takeaway
In conclusion, we can say that creating an eCommerce store using WordPress, Divi, and WooCommerce is a straightforward process. You can easily create a personalized professional fully functional eCommerce store by following the outlined steps of this post. This post explains everything from scratch and will be useful for beginners to get a better understanding of how an eCommerce store can be created in WordPress using Divi. Just open your WordPress dashboard, plan your eCommerce store structure, and follow the outlined steps to unleash your creativity and make a remarkable impression with your eCommerce store.


0 Comments