Providing a mini cart with Divi to customers is a good option to improve the customer experience of a WooCommerce store. It keeps the customers updated with the cart status by continuously displaying the cart information without a page reload. Mini carts also enhance the customer convenience and accessibility of your WooCommerce store.
In this post, we will demonstrate the use of a Divi mini cart on a WooCommerce store using the Mini Cart module of Divi WooCommerce Extended plugin.
How Mini Cart Helps on a WooCommerce Store
See how a mini cart eases a user’s journey on your website.
The customer can check the cart information anytime from the header with a click and the interesting thing is that this happens quickly without a page reload.
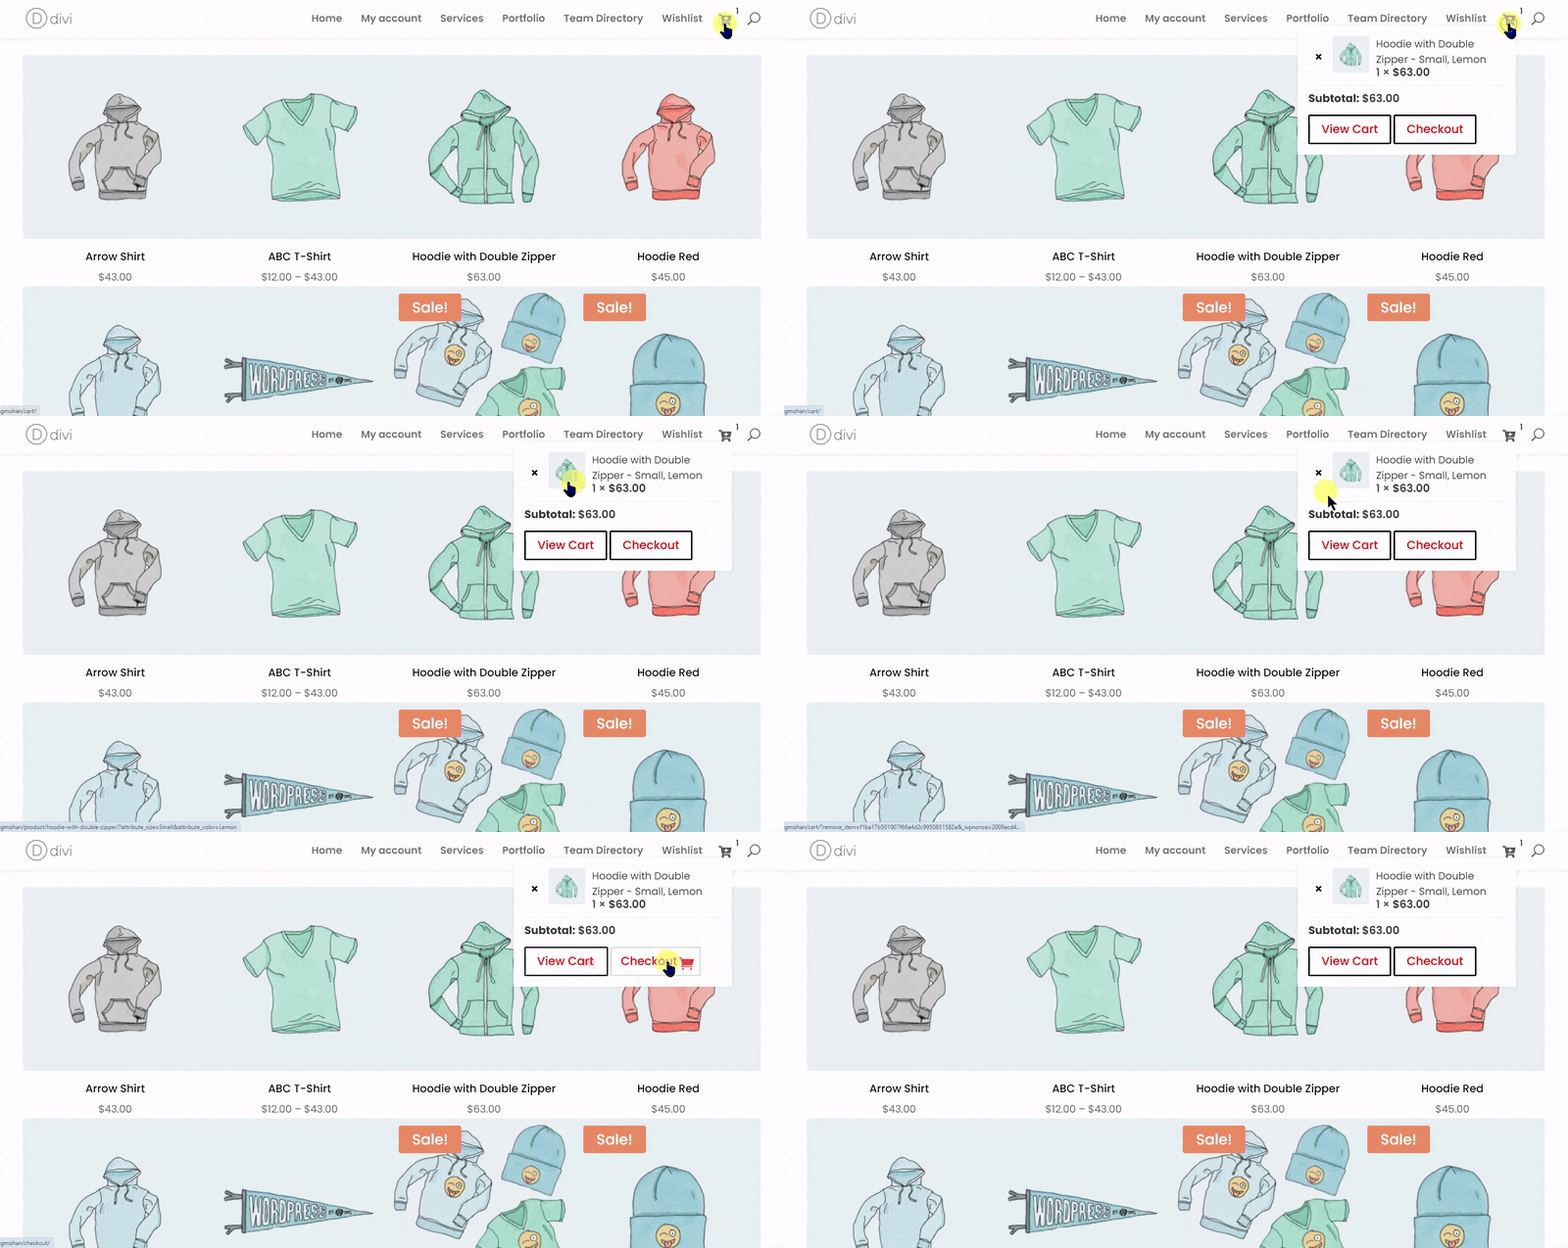
Imagine a customer is shopping on your Woo store and is continuously browsing through many products. After adding products to the cart he wants to check what products he had added along with their details. He can do it easily without leaving the current page using the Divi mini cart.
Let’s explore the features you get in the Mini Cart module of the Divi WooCommerce Extended plugin and see how it can be used to display cart information using a mini cart on your online store working on Divi.
1. Mini Cart Icon
The cart icon on the header is the most used area by the customers to view the cart. You can either use Divi’s native cart icons or custom icons on your header.
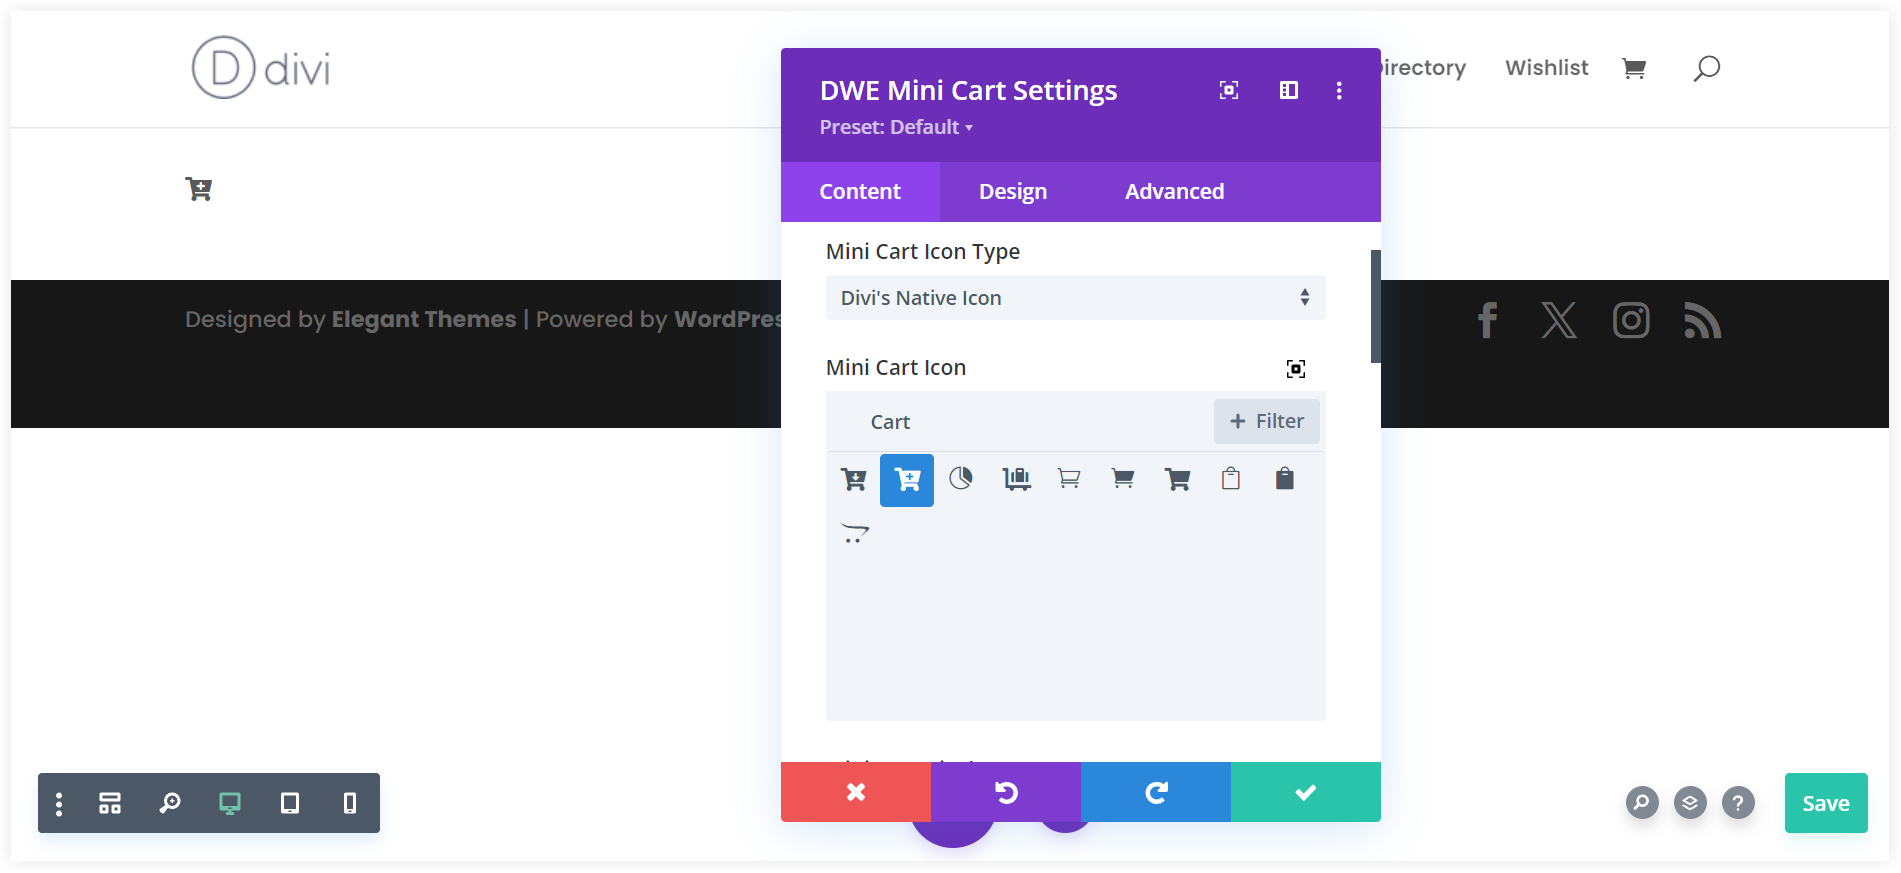
2. Configure Mini Cart Display
The Mini Cart module of Divi WooCommerce Extended provides you with four options to set up the display. You can show it in a Dropdown, Overlay, Off Canvas, or Modal format.
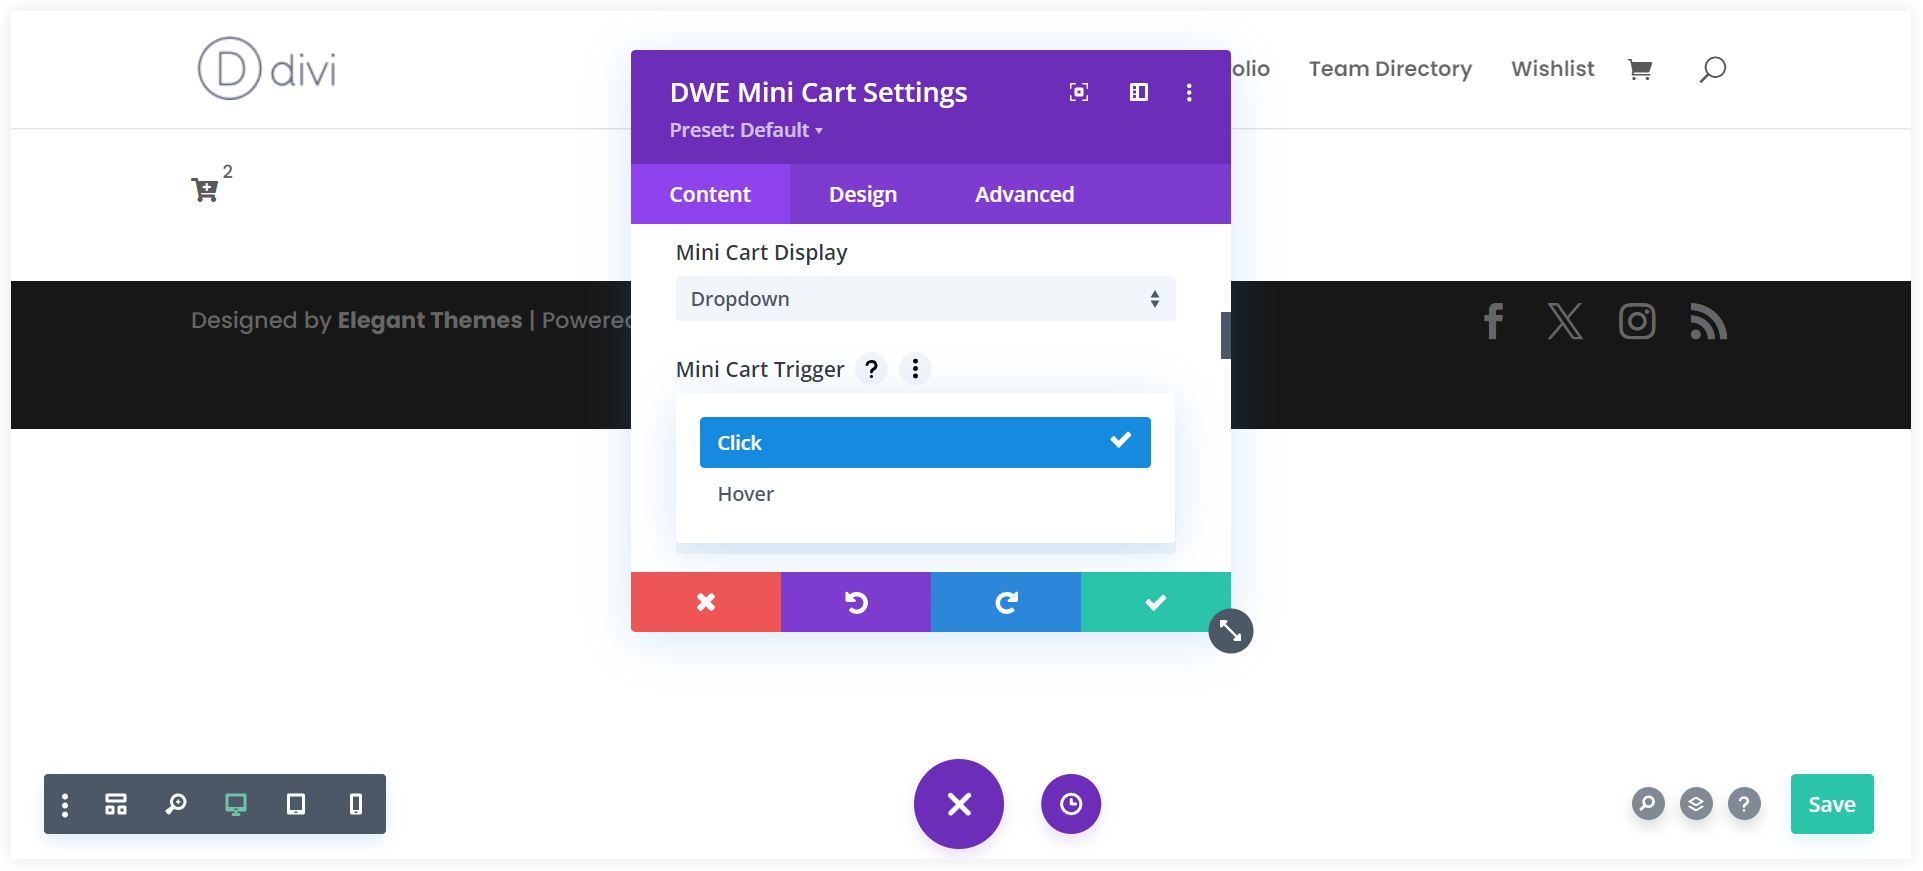
When you choose Drop Down you also have the option to trigger the mini cart with a click or hover.
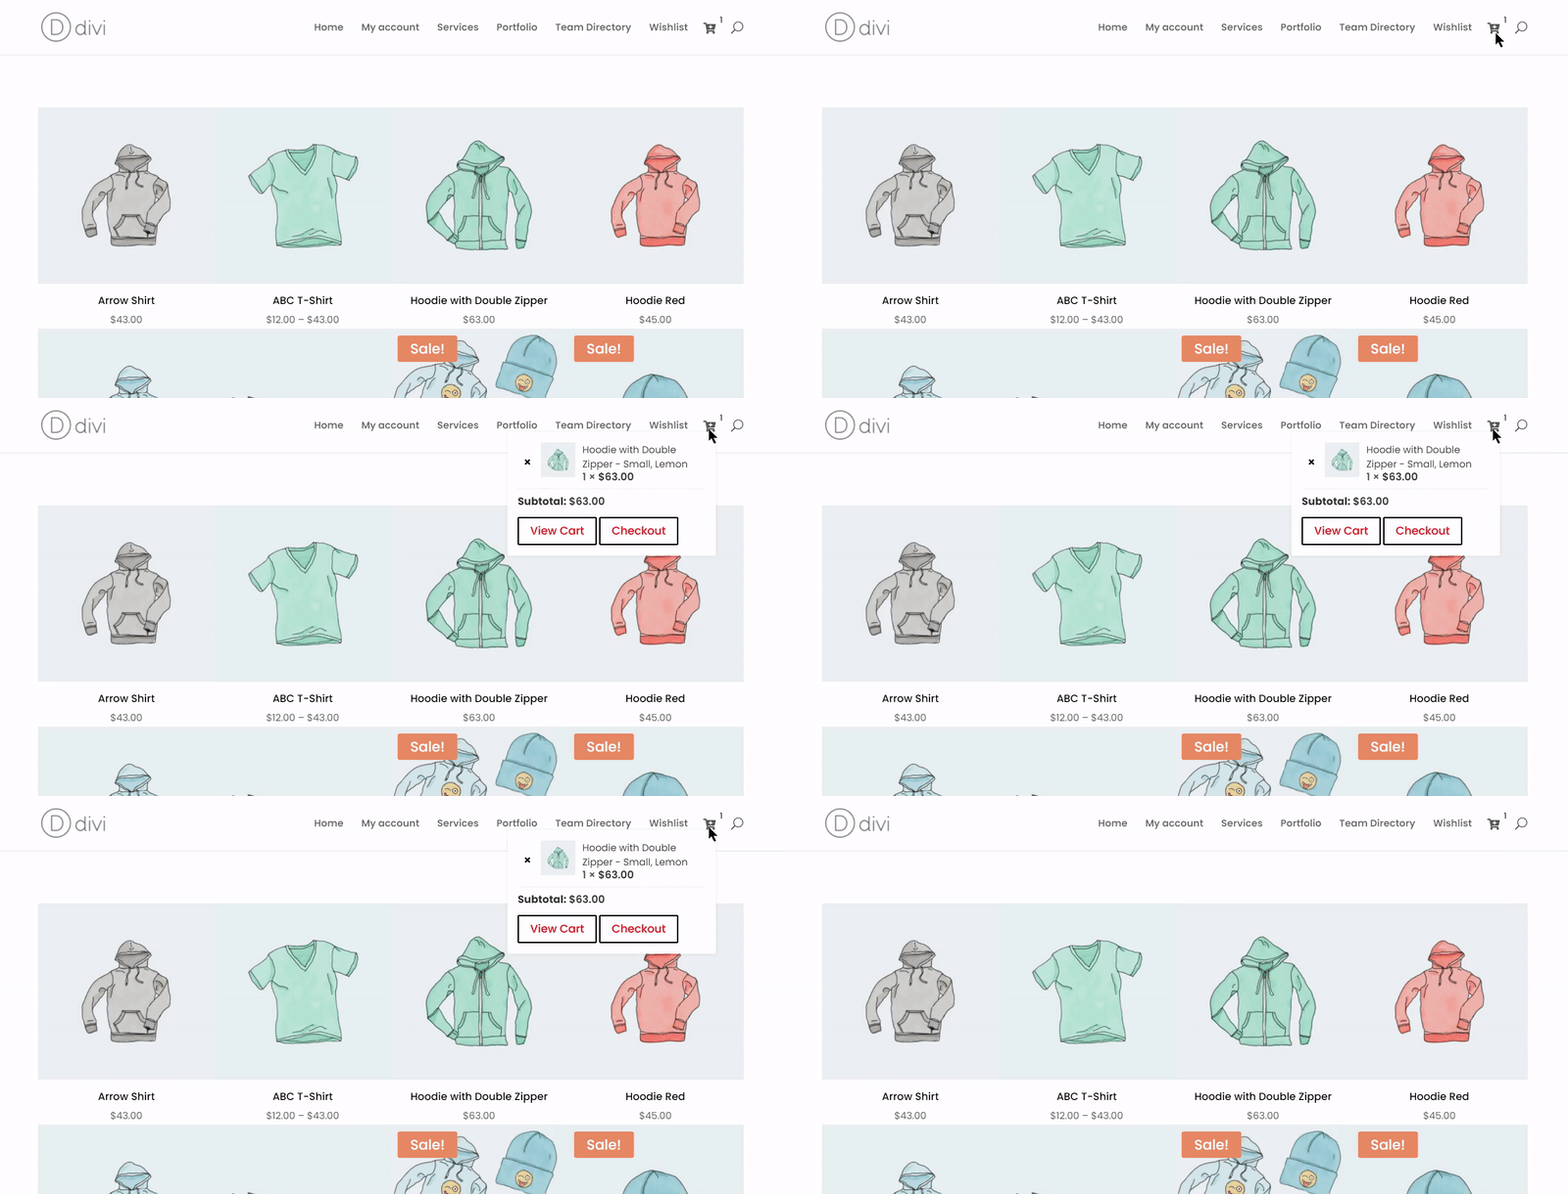
The Mini Cart Placement option lets you decide the opening direction of the Drop Down.
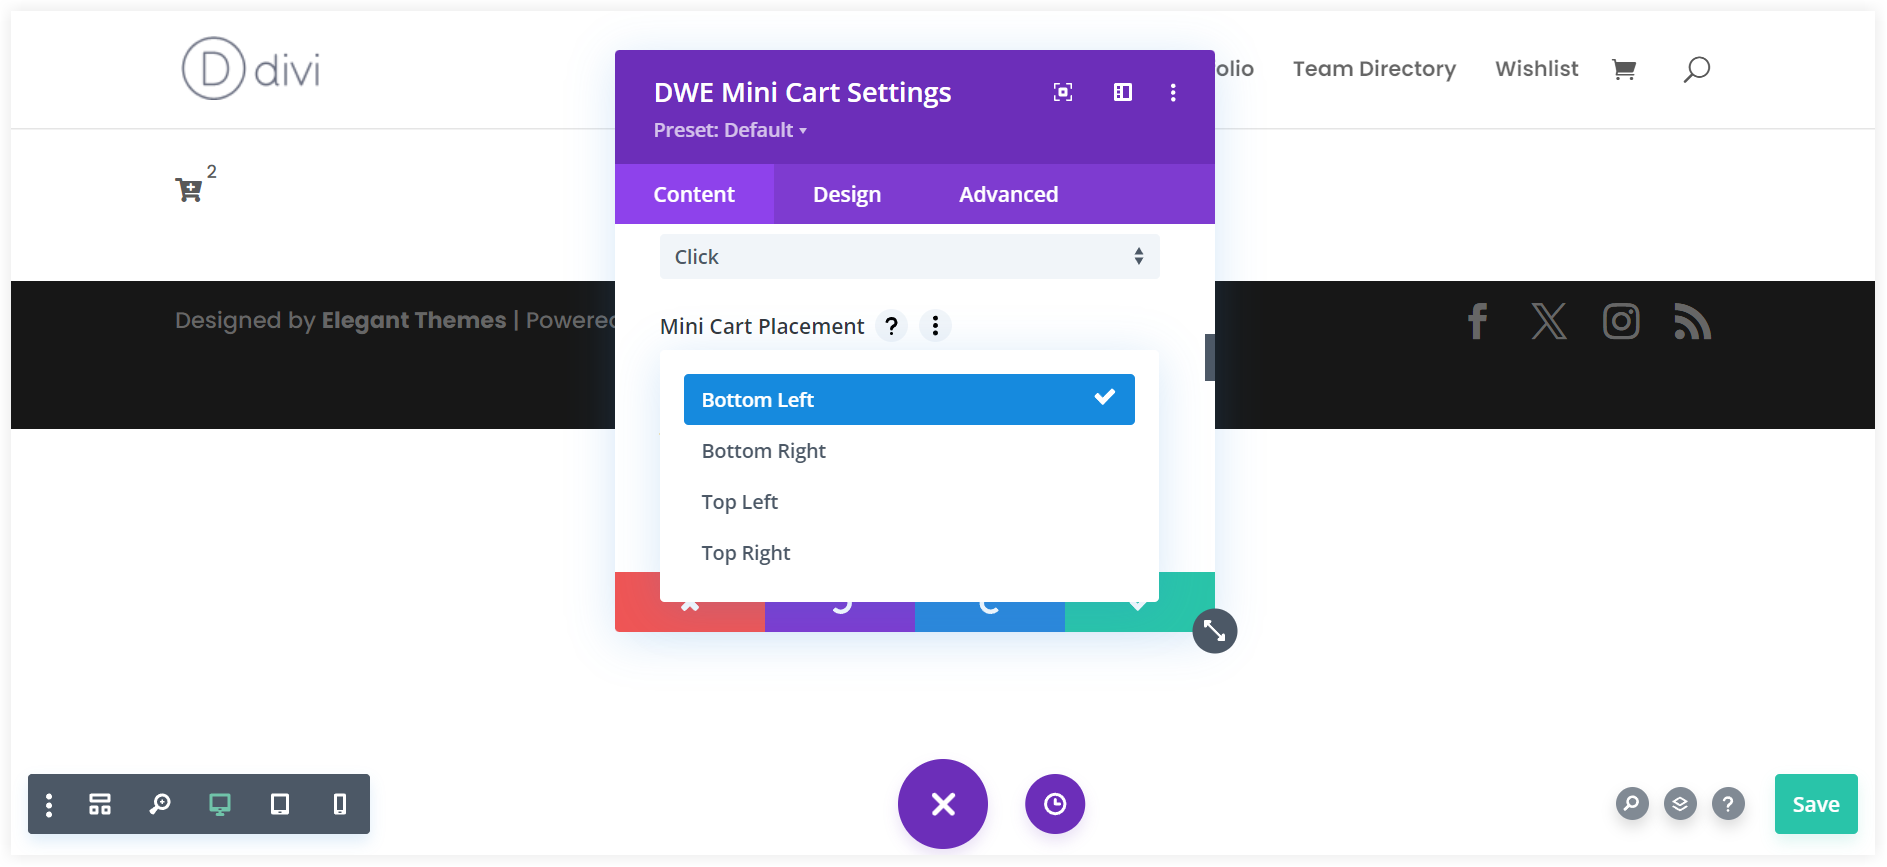
It is also possible to trigger the mini cart on the customer’s action like a hover or click.
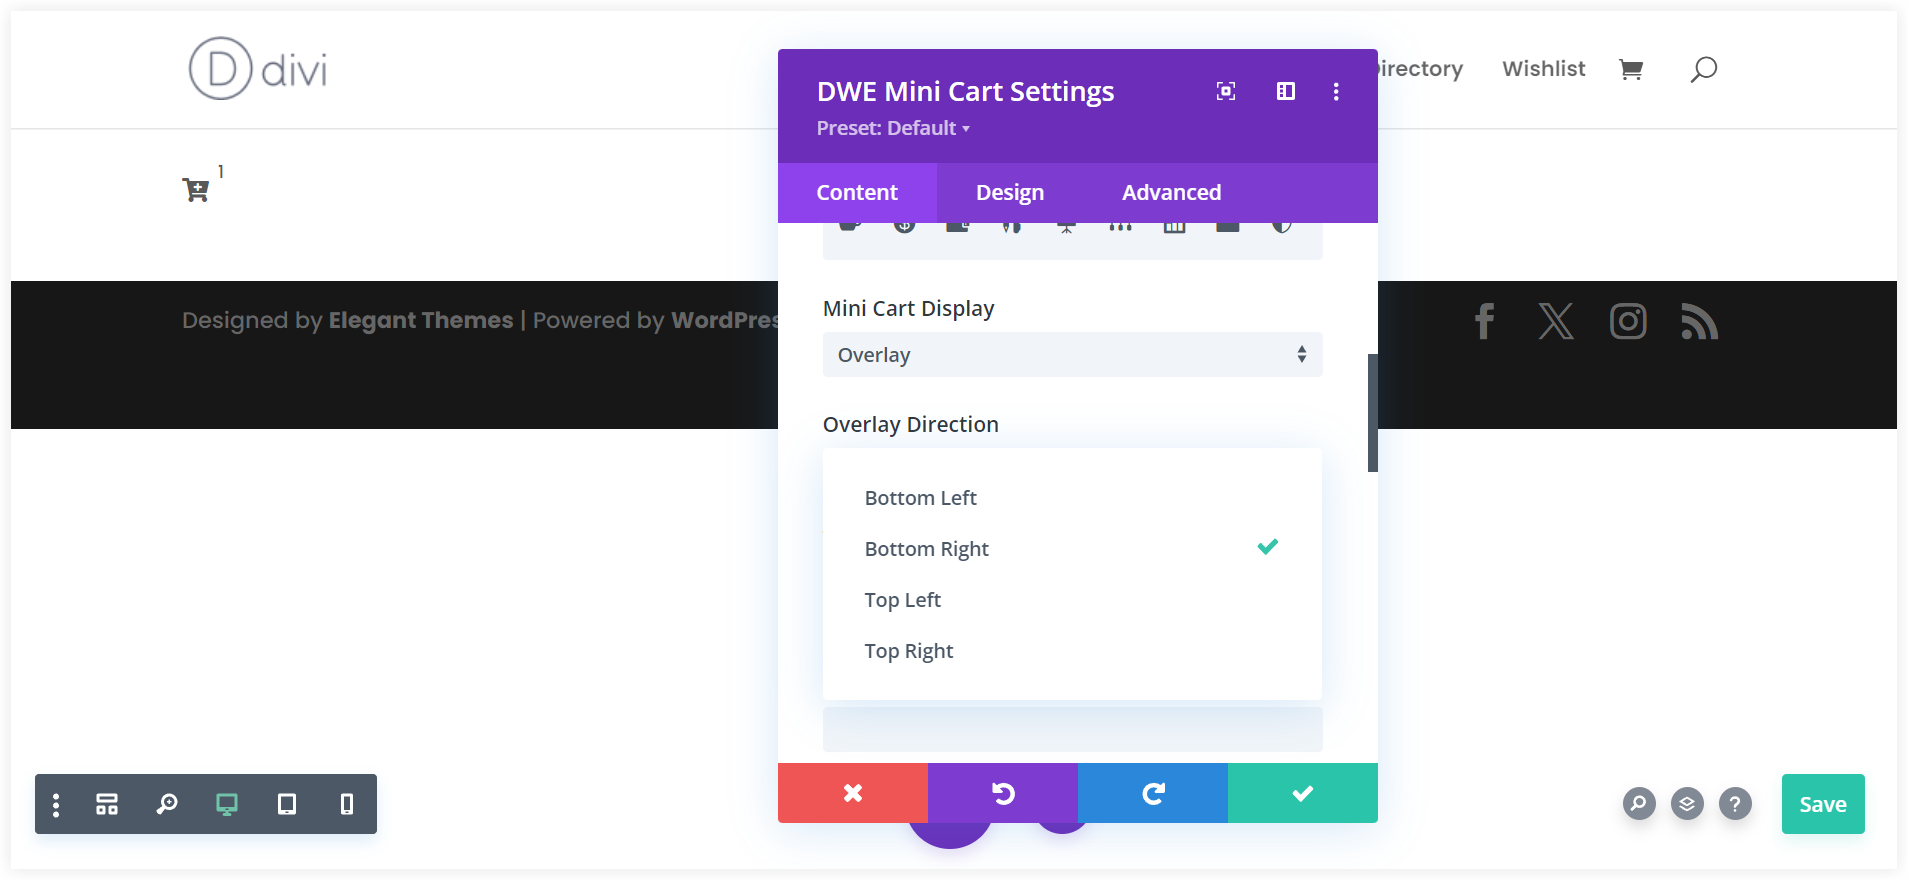
When you choose the Overlay style, you also get the direction option to guide the overlay from a specific direction.
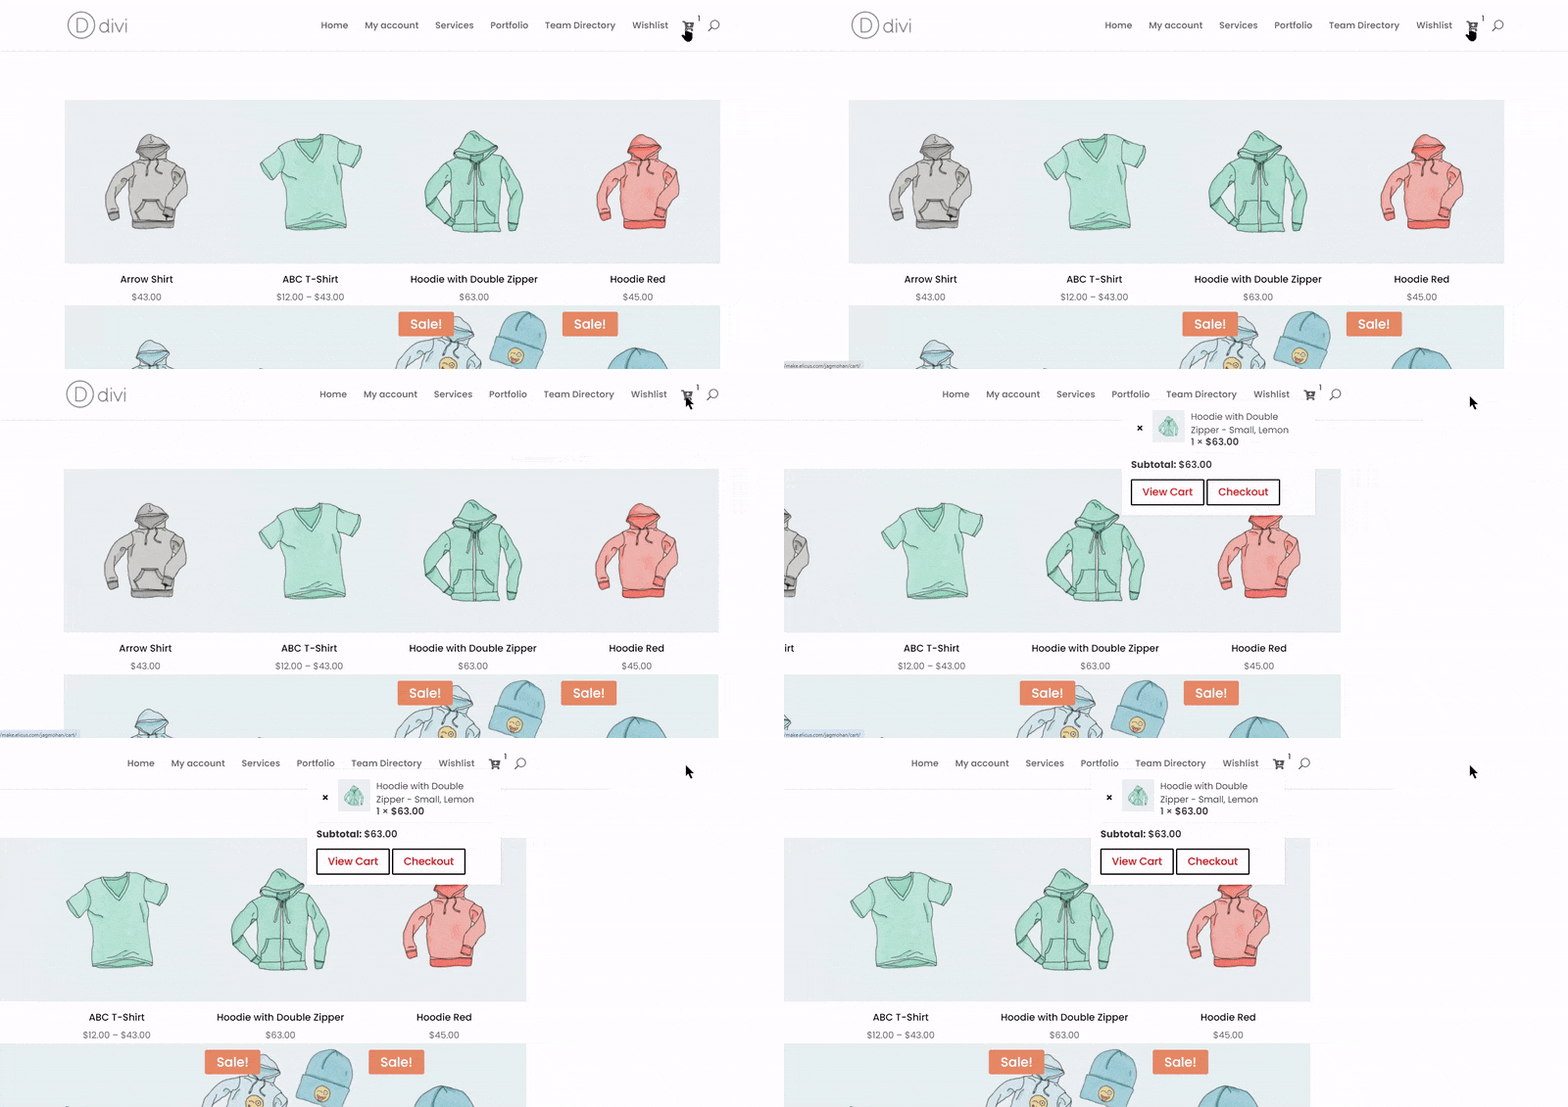
Off Canvas style also allows you to display it on the right or left side.
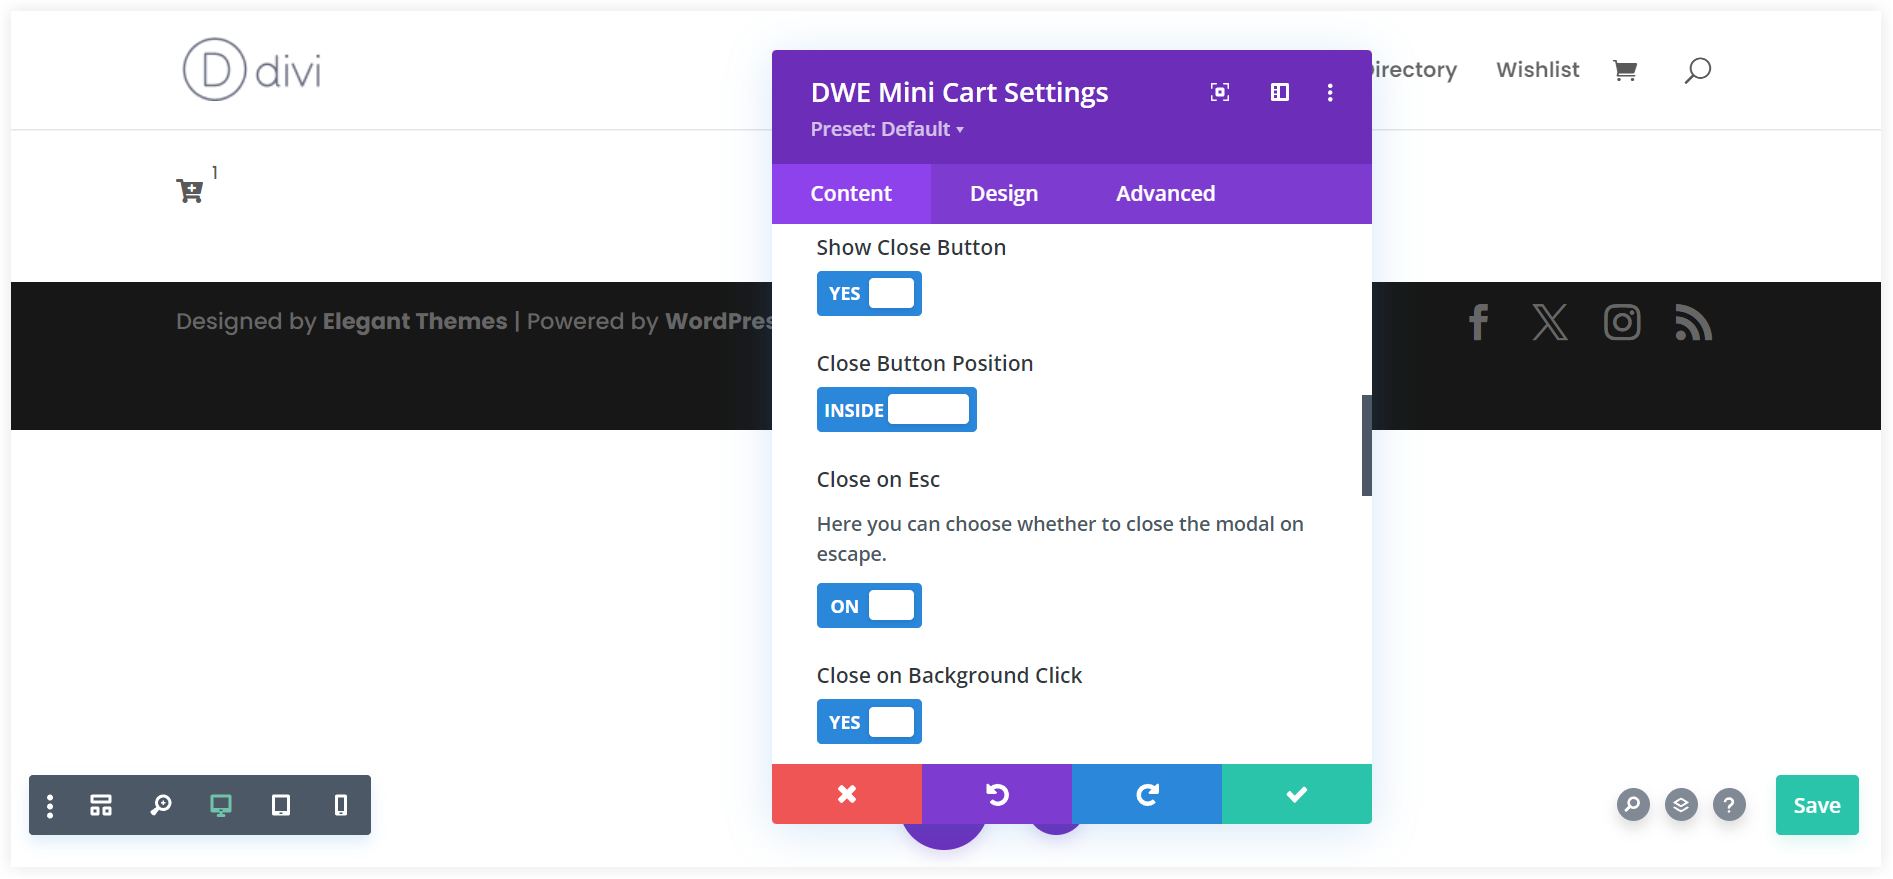
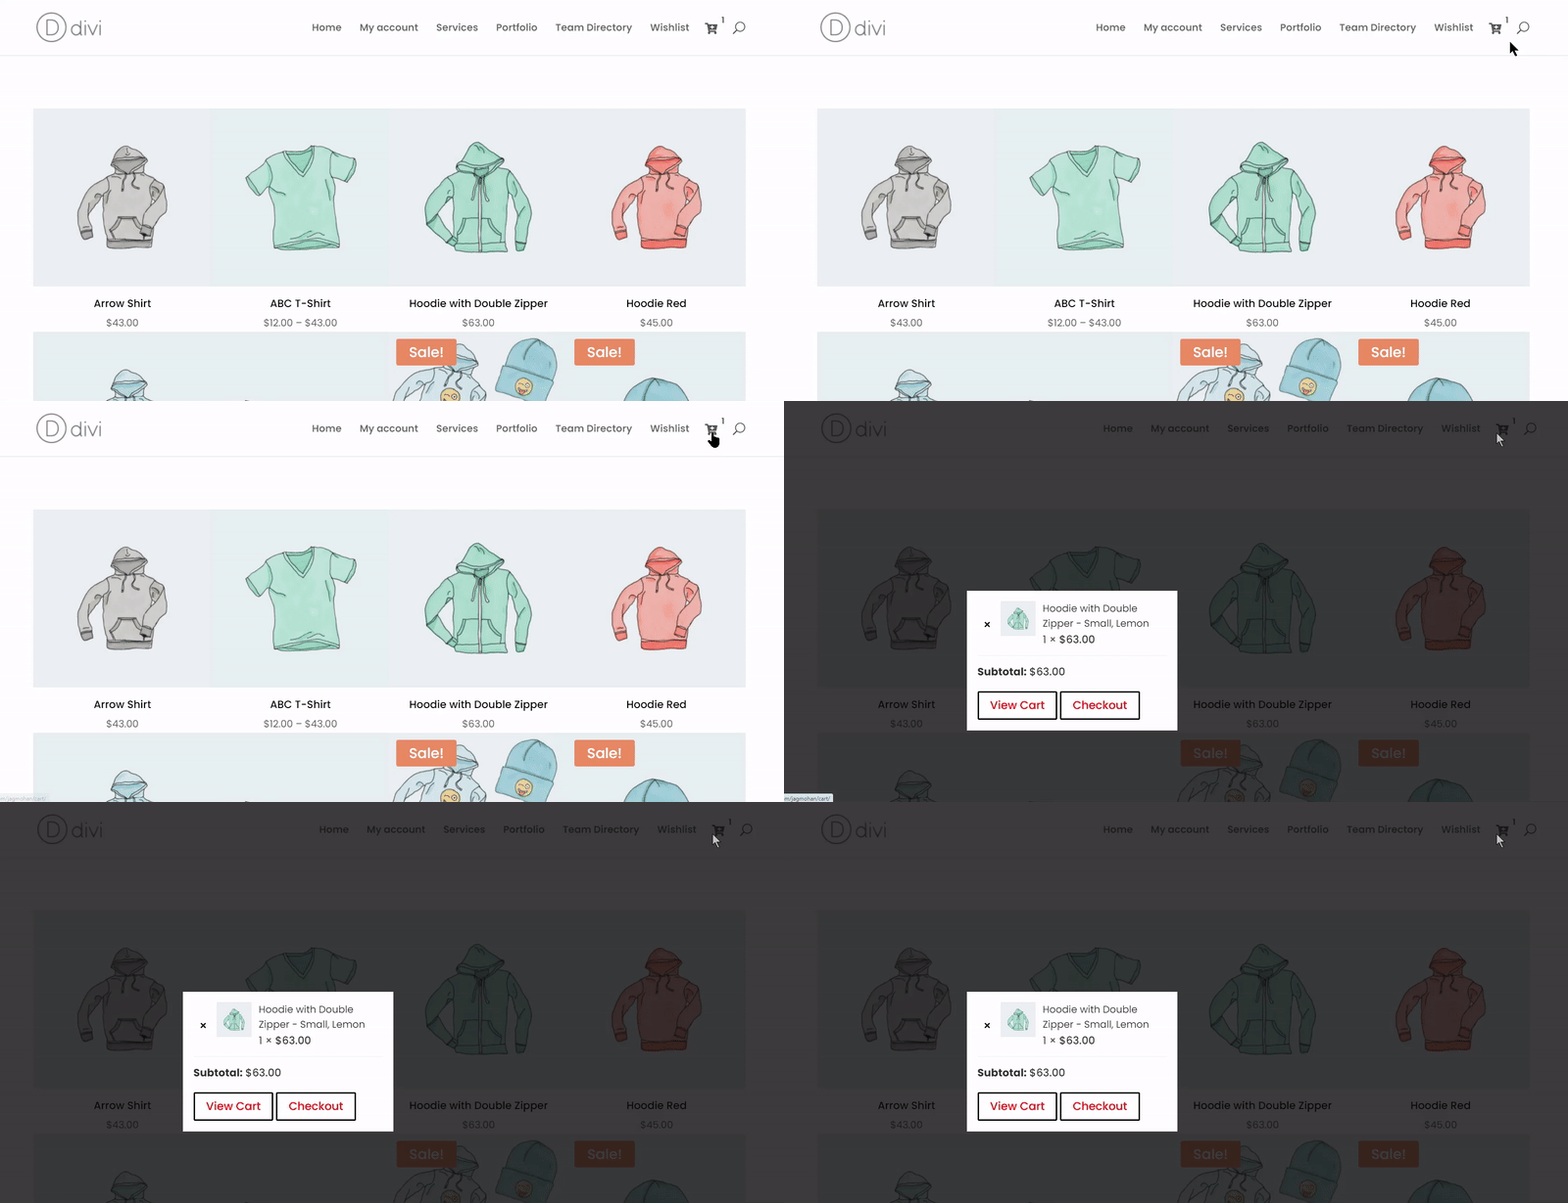
The modal style comes with options to Show Close Button, Close Button Position, Close on Escape, and Background Click. These options let you decide, how customers can close the mini cart after viewing it.
Take a quick look at how modal style works.
3. Choose What to Display
The Mini Cart module by Divi Extended gives you the freedom to choose the information displayed in the mini cart as per your needs.
Start by inserting an appropriate title.
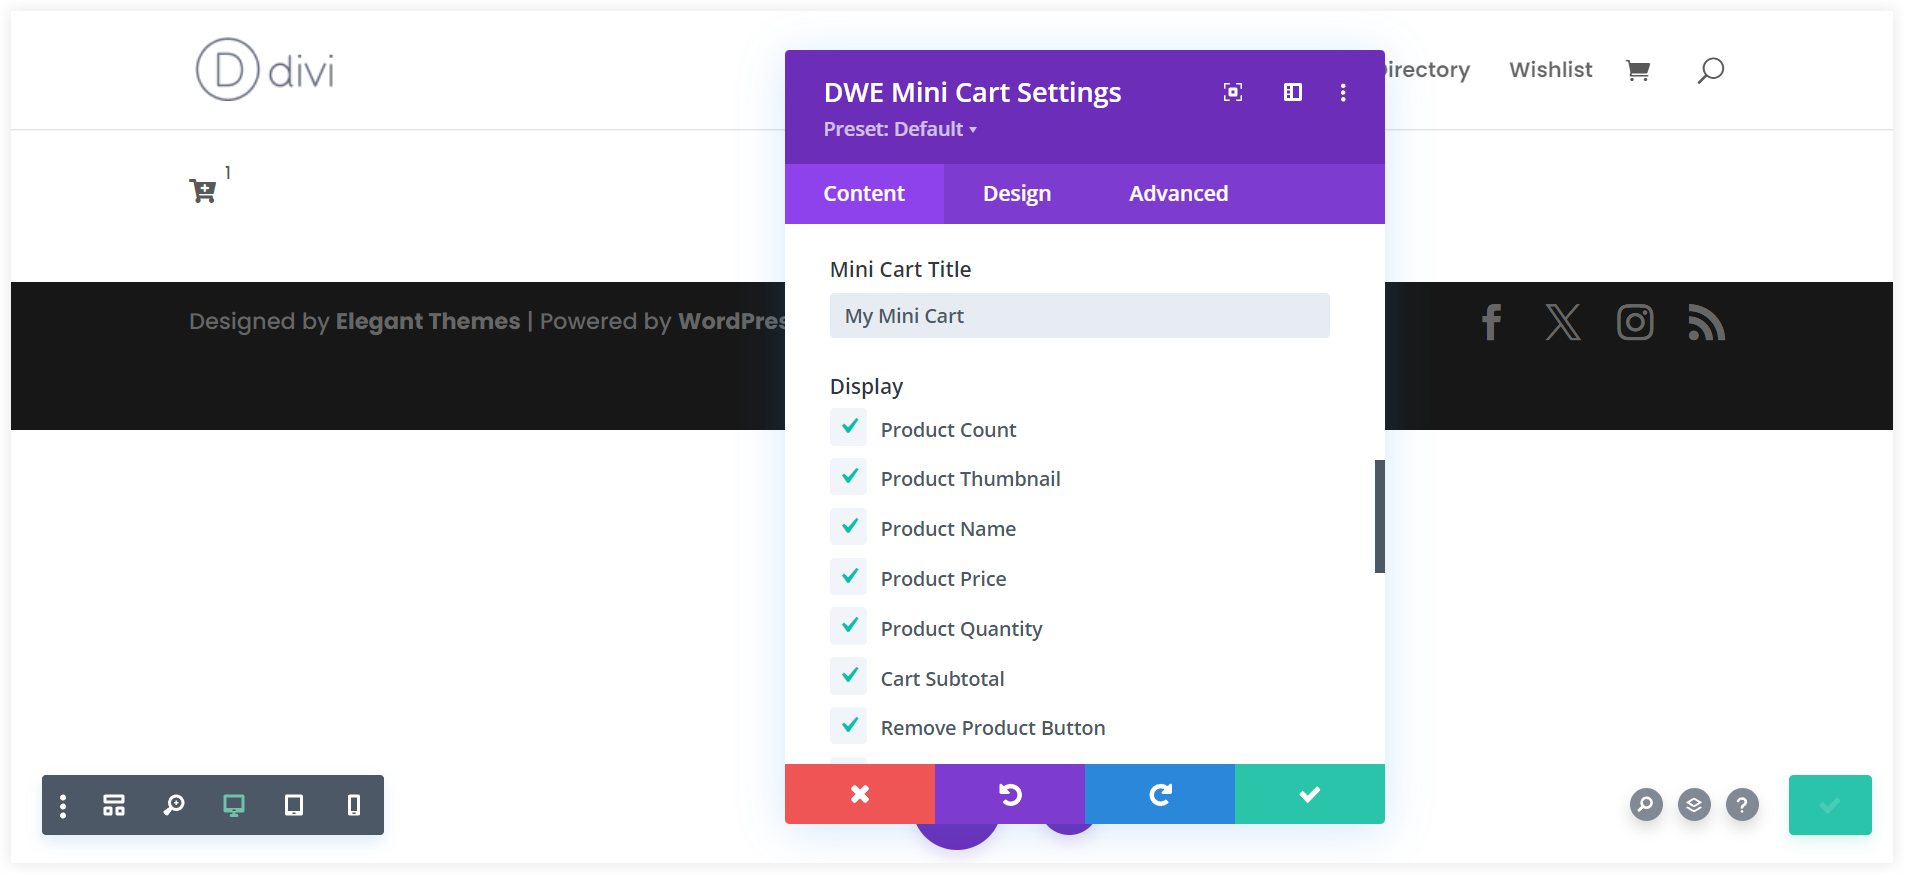
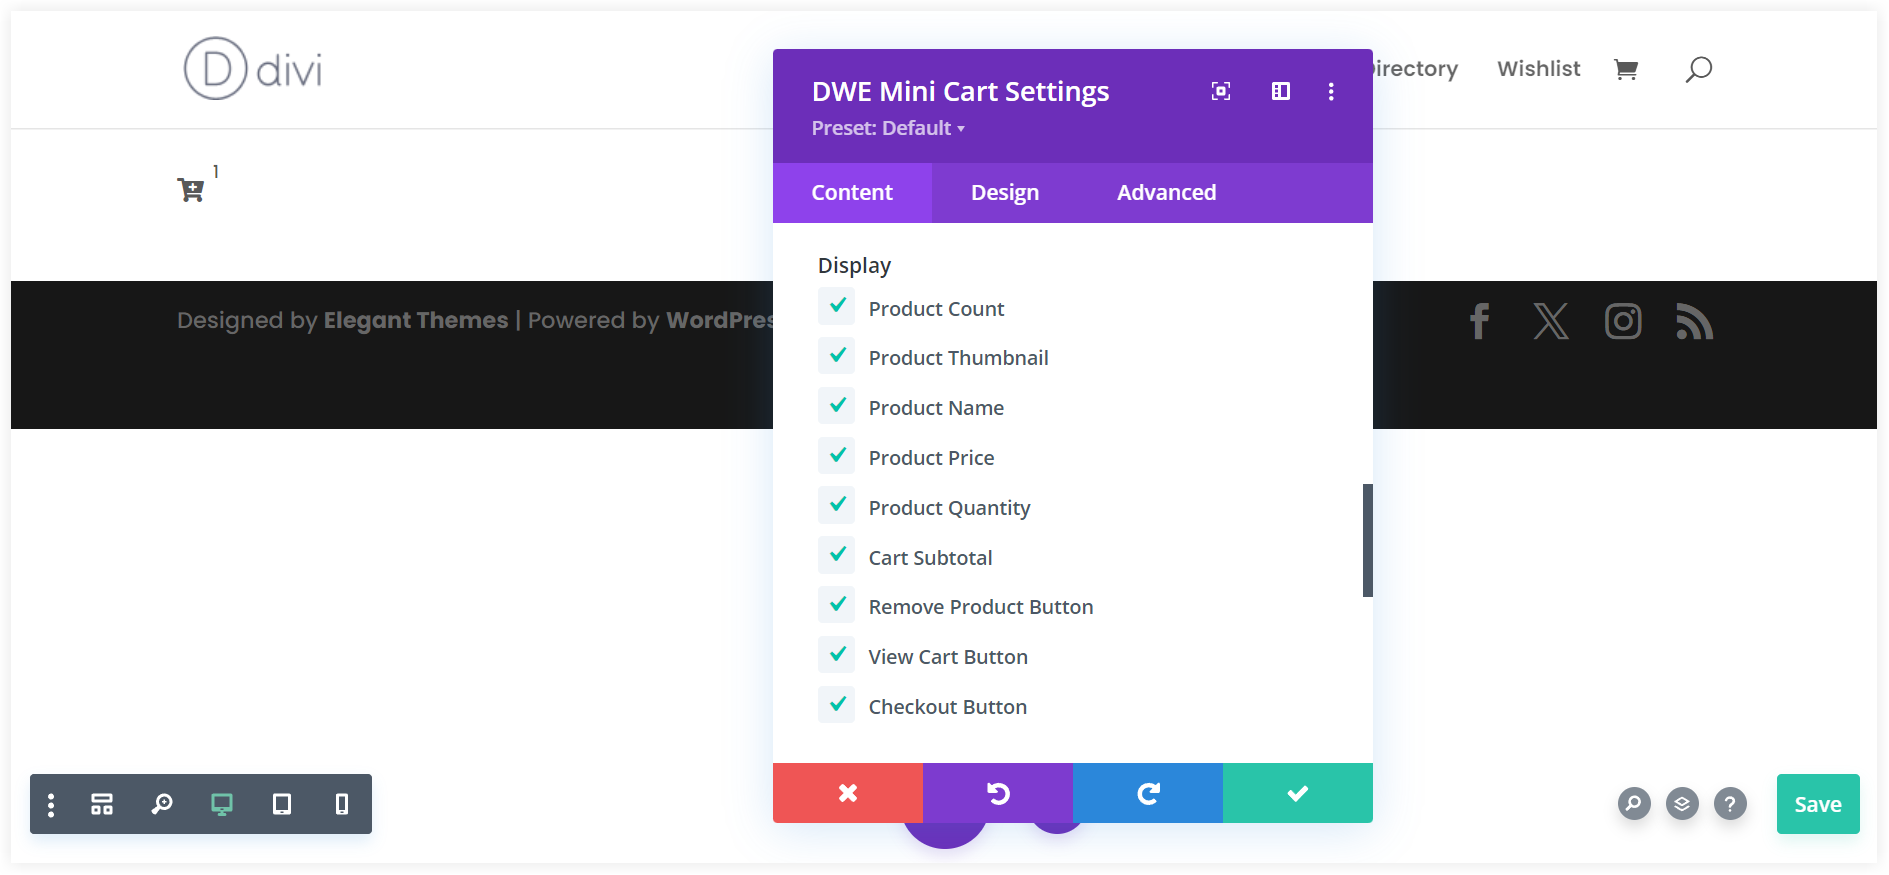
Next comes the important configuration that lets you configure the product information that is going to be displayed in the mini cart.
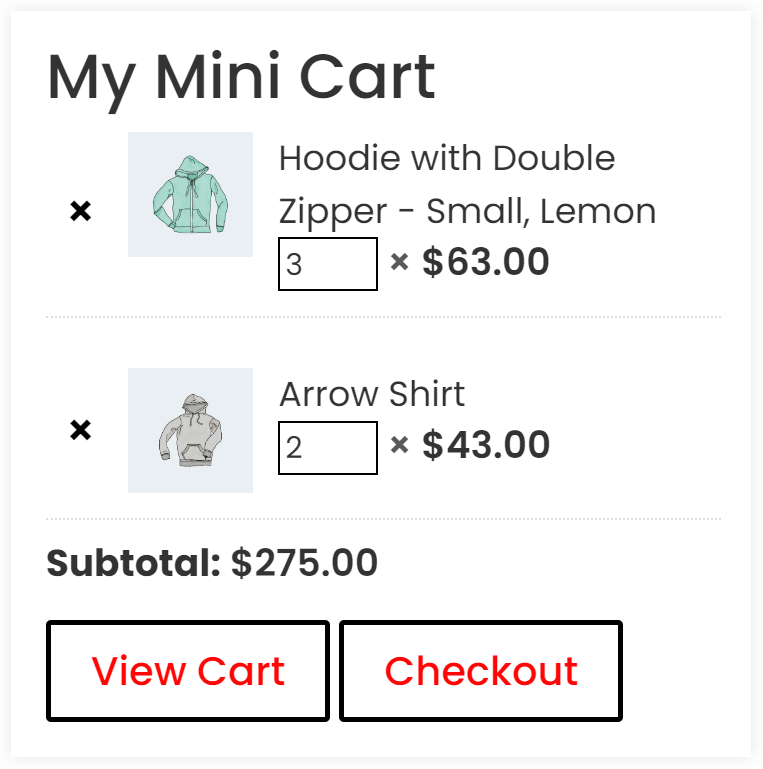
Just take a look at below settings and configuration options offered by the module, which you can use to display the product details and information in a mini cart.
This is a superb feature that allows you to increase or decrease the quantity of an existing product in the cart without going to the cart or product page.
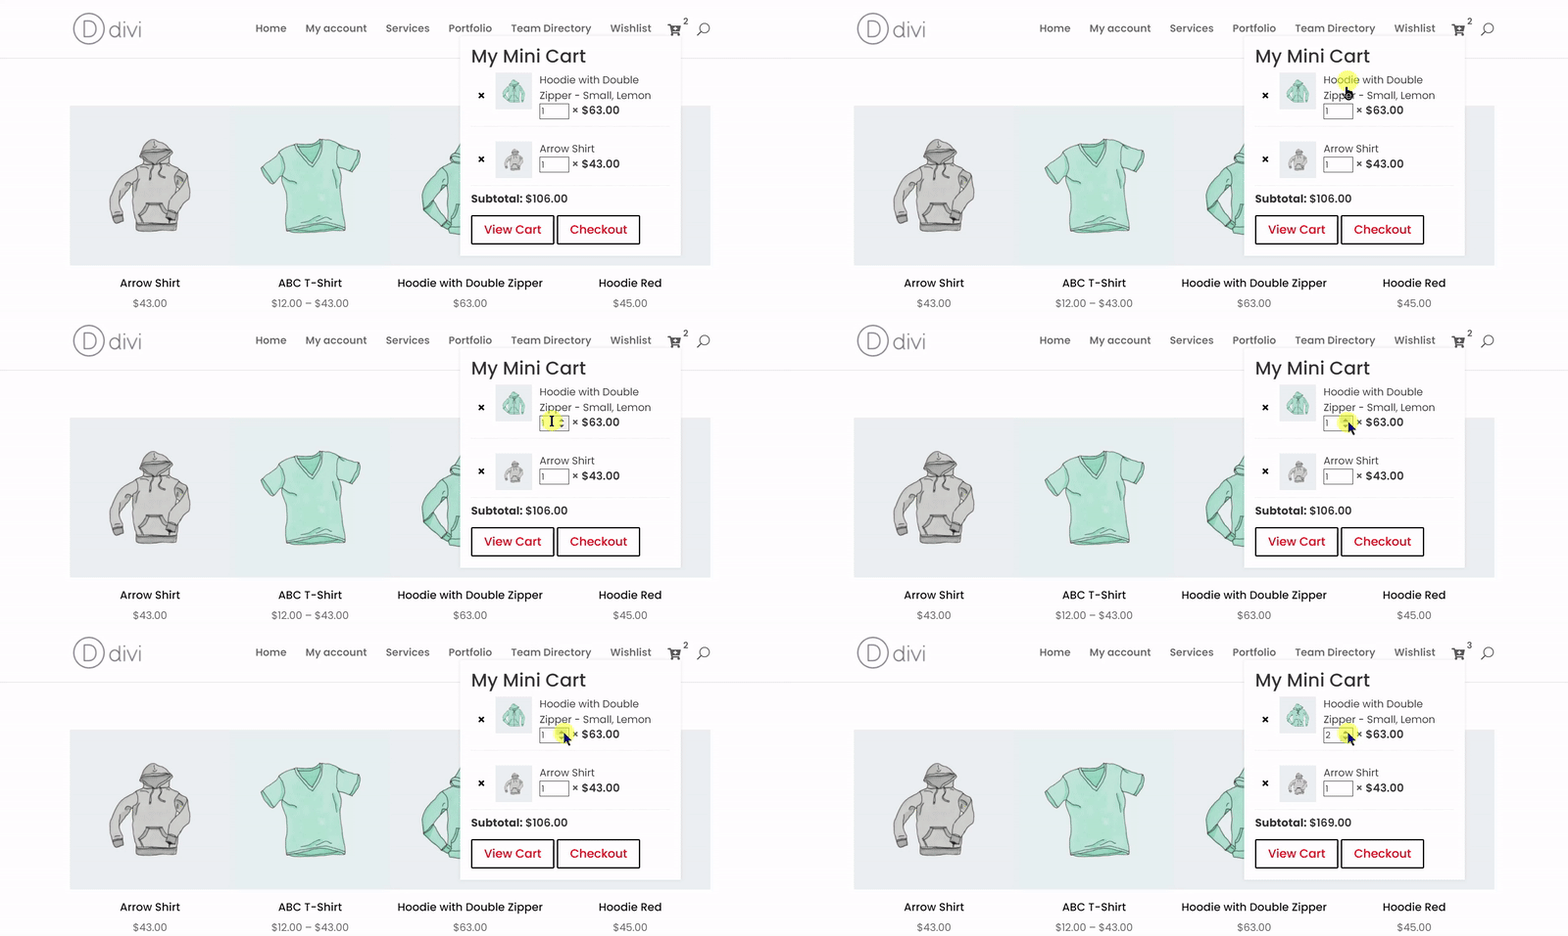
To include this functionality you only need to switch on the Enable Quantity Textfield.
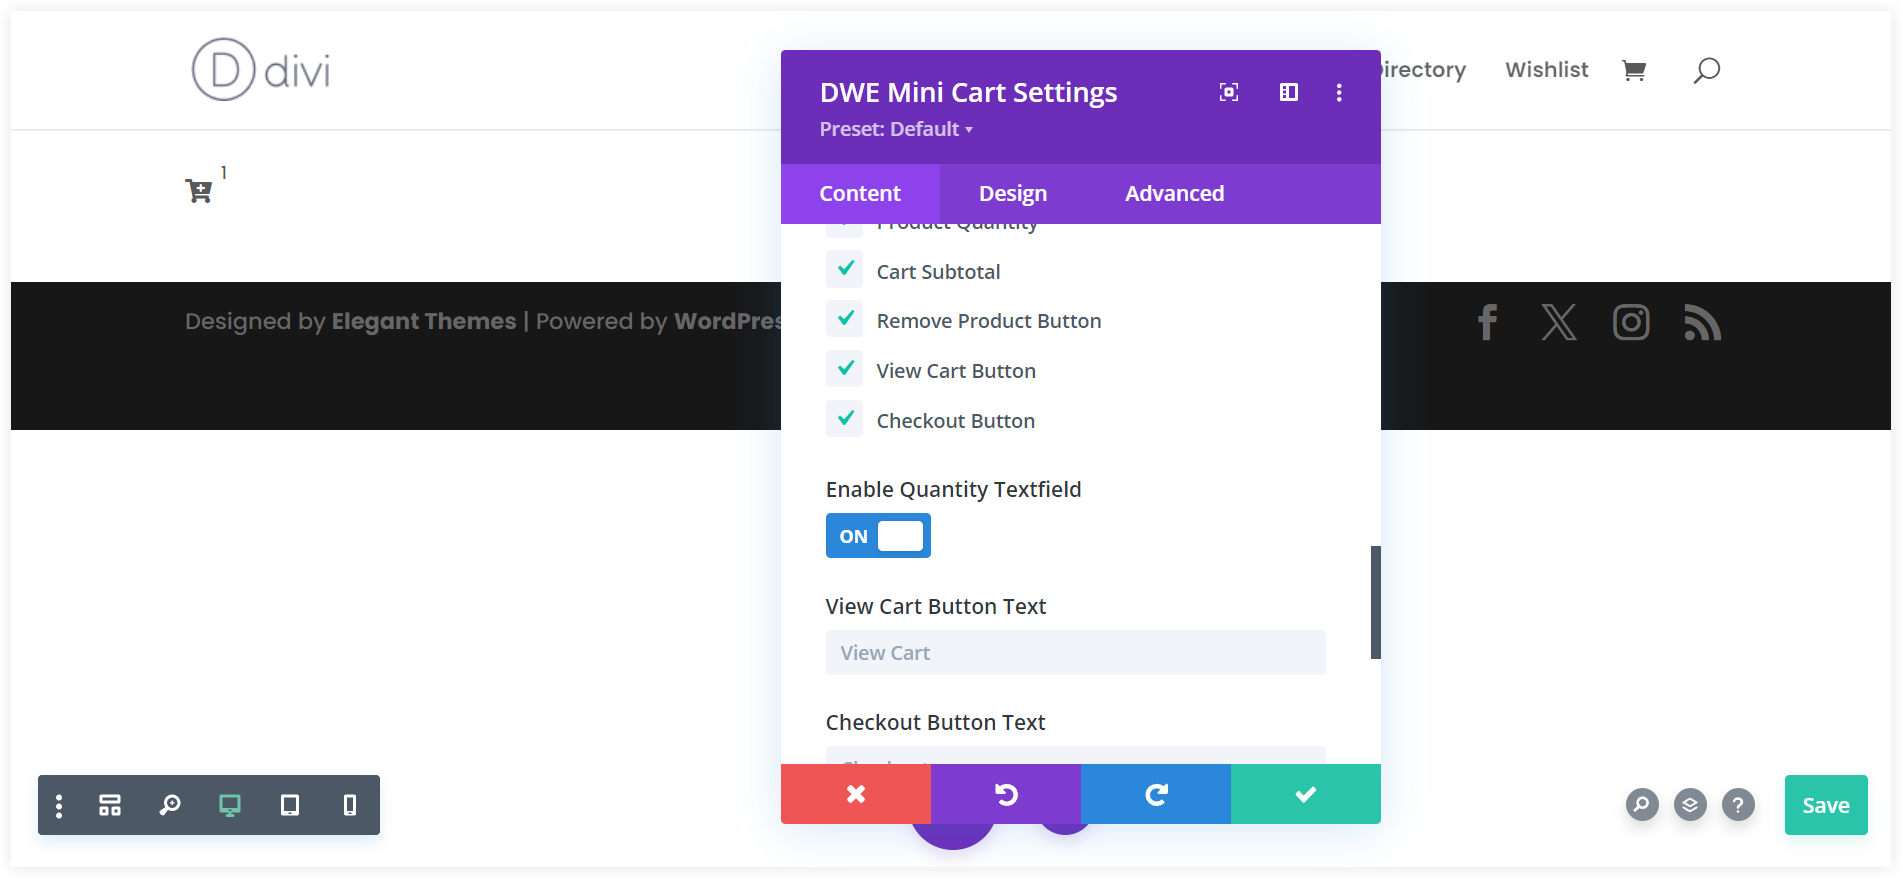
As you can see this Mini cart module has View Cart and Checkout Buttons that redirect you to the Cart and the Shop pages of your store. You can also use custom text on both of these buttons. Similarly, you can also use a custom text to notify the customer about an empty cart.
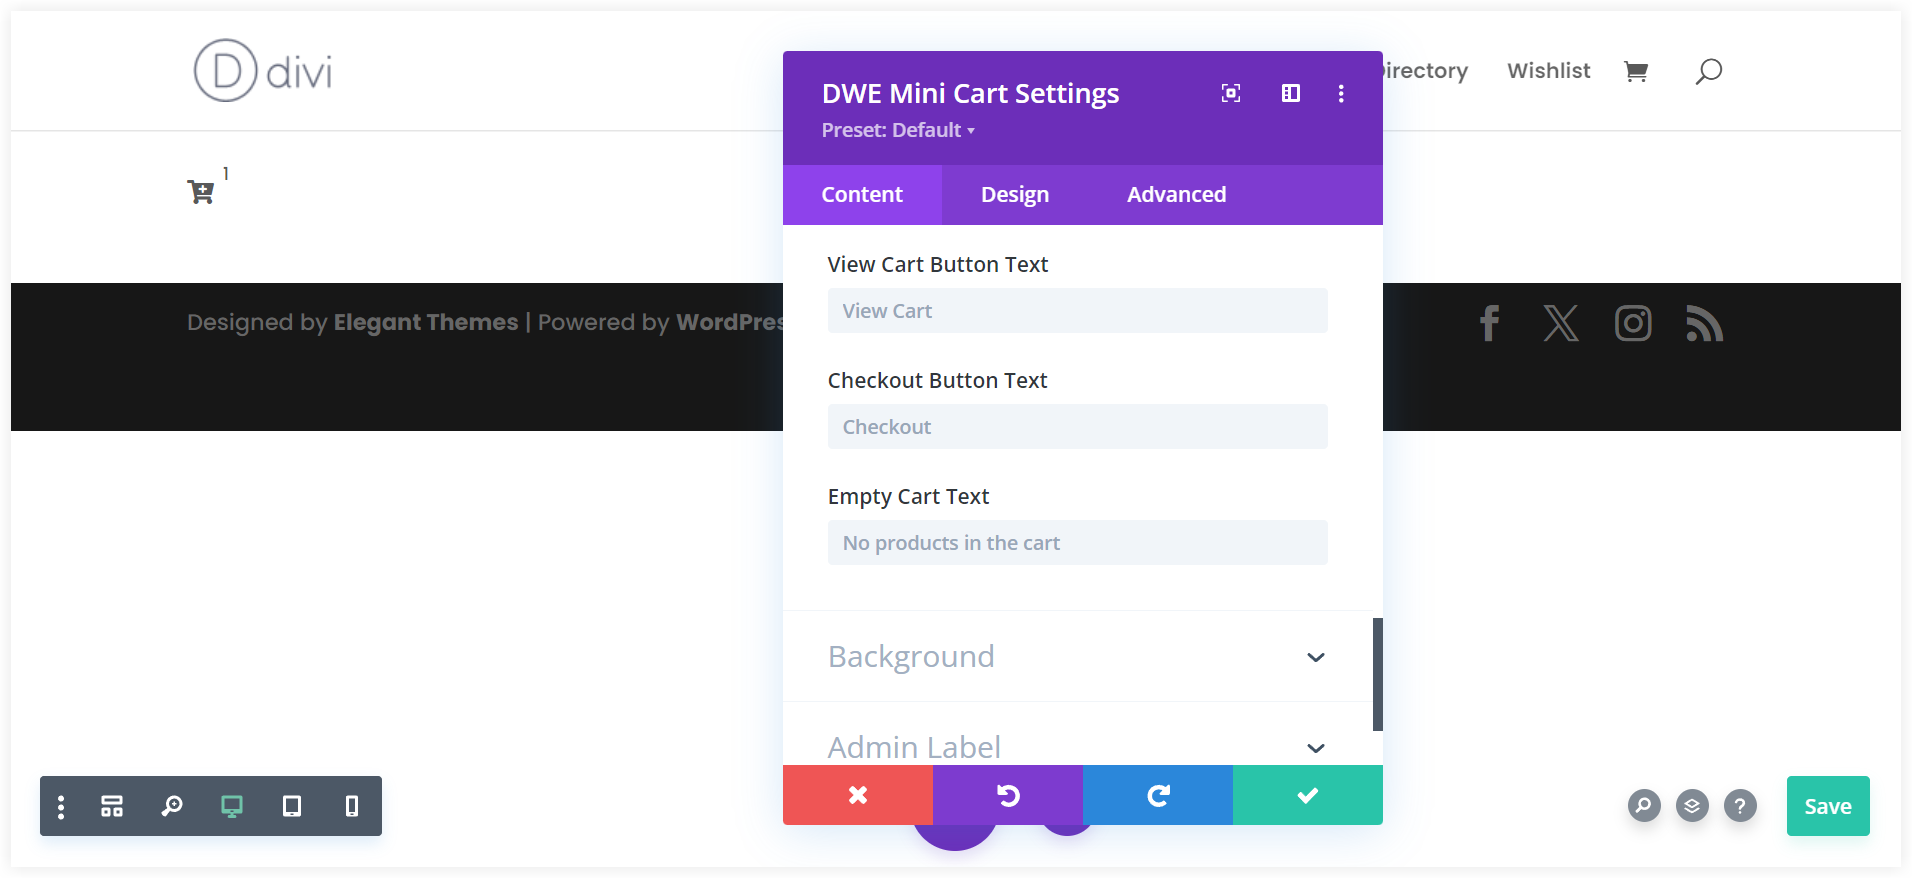
4. Design Options for Every Element
The mini cart should look clear and differentiated. For that, you can use the extensive customization options provided in the Mini Cart module of the Divi WooCommerce Extended plugin. It lets you personalize almost every element of the mini cart in your own way.
Take a look at the elements that you can personalize.
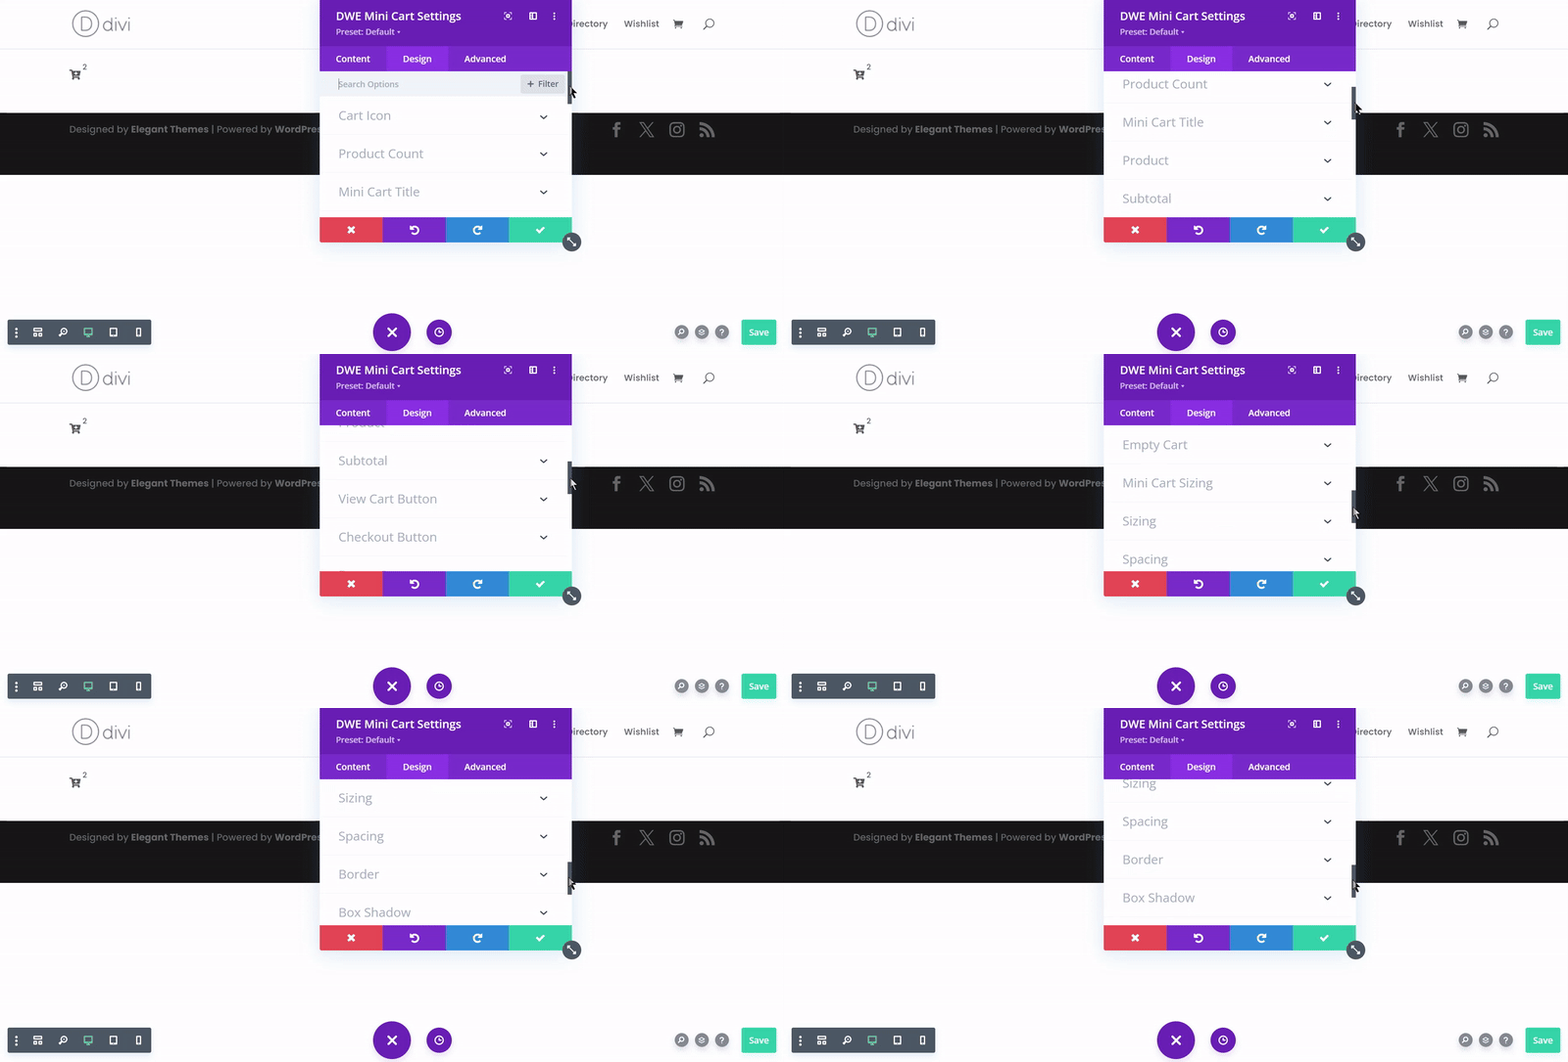
Each mini cart element in this list can be styled separately and has various options to uniquely craft your mini cart.
- Cart Icon
- Product Count
- Mini Cart title
- Subtotal
- View Cart and Checkout button
- Mini Cart sizing
- And so on
How to Set up a Mini Cart on Your WooCommerce Store
There are many ways to set up a mini cart. In this post, we are using the Divi WooCommerce Extended plugin and it has two ways to set up a mini cart on your Woo store. You can choose one of the two ways depending on your needs.
1. Show Mini Cart On Default Header
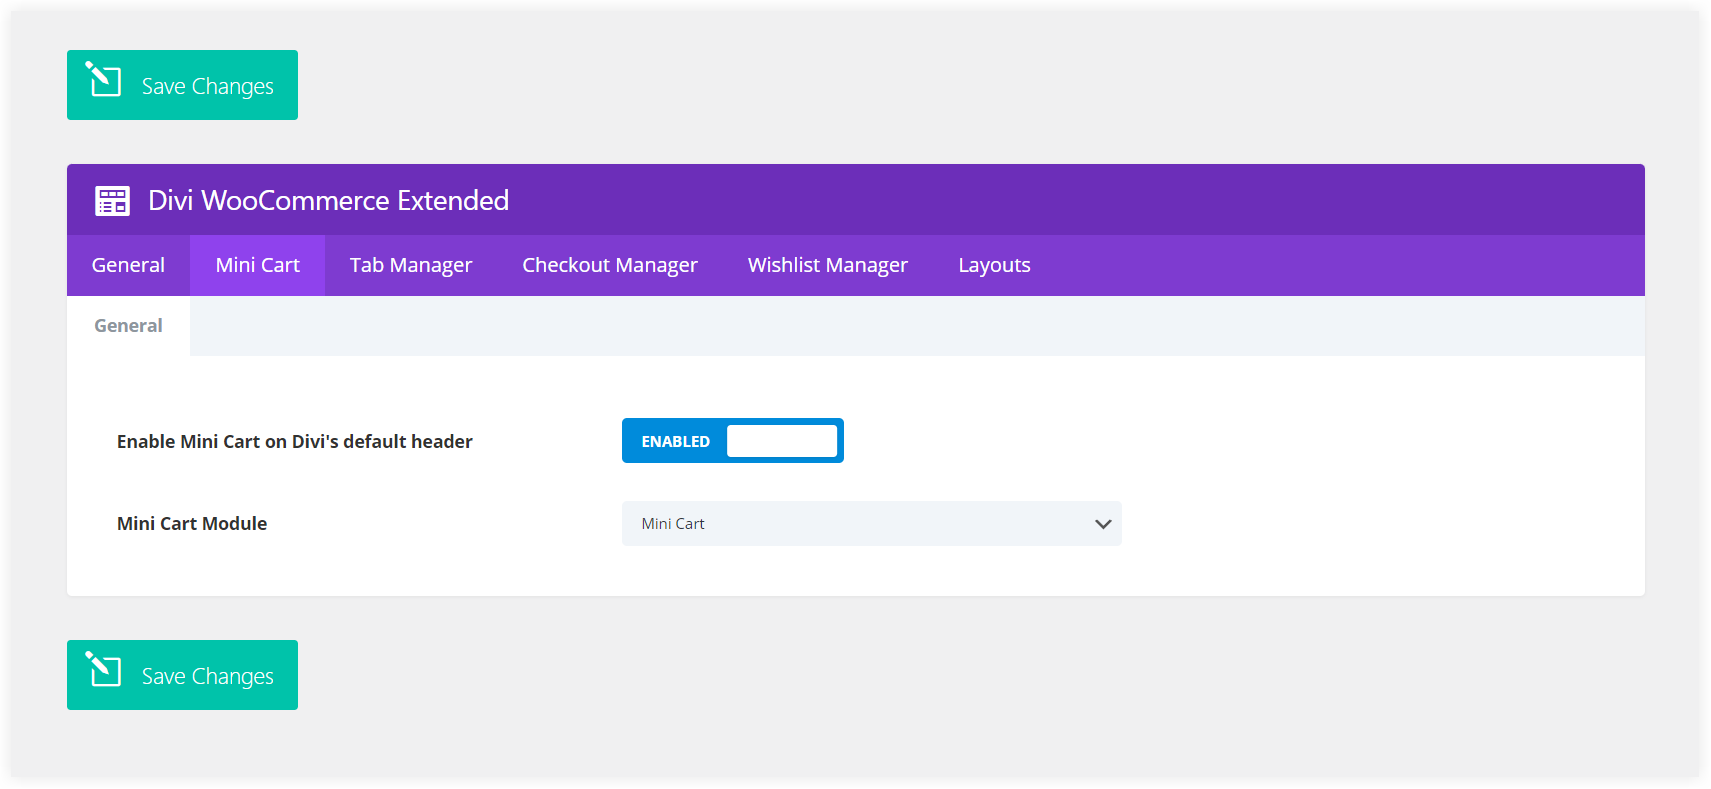
If you want to show and place the mini cart on the default header you can create a layout in Divi Library and craft it using the mini cart module. This layout will always be used to display it on the default header of your website. You can also create multiple layouts and switch them to refresh the cart look. You only need to enable the mini cart from the Divi WooCommerce settings and select the cart layout that you want to use.
2. Create Mini Cart Templates
The second way gives you immense customization freedom. You can use the Mini Cart module on any page, section, or element which can be edited with Divi builder. This helps you to design it in different styles and display it on various pages of your store. You can create cart templates and can reuse them on several pages of your store.
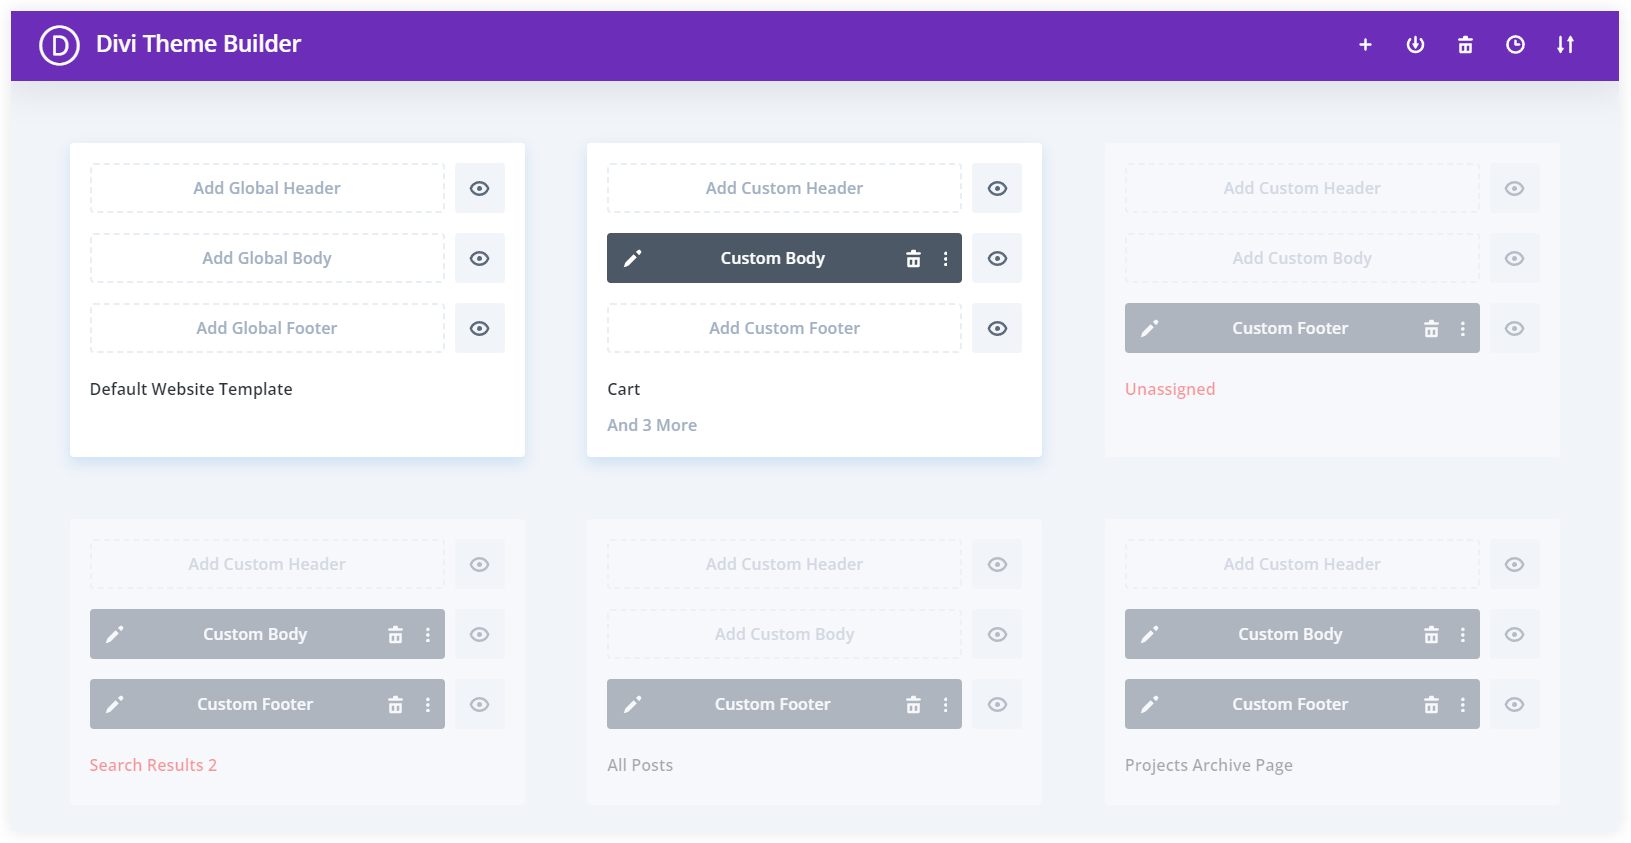
You need to edit the Body of the template, place the Mini Cart module in it, and personalize it to display the details of the cart. It is so simple. Configuring a mini cart on your online store is a straightforward process and its integration with Divi is seamless.
If you are using the Divi theme, We recommend the use Divi WooCommerce Extended plugin as it not only gives you Mini cart module but also offers 7 other useful features such as checkout manager, ajax search, tab manager, carousel, etc to make your store stand out in the competition.
If you are looking for a dedicated Divi carousel plugin, You can also check out All in One Carousel for Divi.
After reading this post, you have developed a clear understanding that a mini cart is an essential tool that helps Divi WooCommerce stores improve customer experience and simplify the checkout process. Store owners can manage sales and transactions more effectively, and visitors can browse the online store seamlessly. That’s why you should integrate mini cart functionality into your WooCommerce to boost its accessibility and add a convenience factor.



0 Comments