
If you are a content creator, you understand the importance of providing valuable information to the audience. What will you do, if you want to share your valuable content with the registered members only? In that case, you can create a member-exclusive blog with the help of built-in Divi conditions, which encourage users to subscribe to the blog and become its regular readers, contributing to developing a sizable blog community.
The registered users can access the full content of all the posts whereas the unregistered users can read the excerpt along with the subscribe option to access the full content. Divi conditions make it so easy that you don’t need any third-party plugin to do that. Just define your conditions in the Divi Builder and show or hide content to certain users based on them.
In this post, we will explain how to create a blog accessible only to subscribed members.
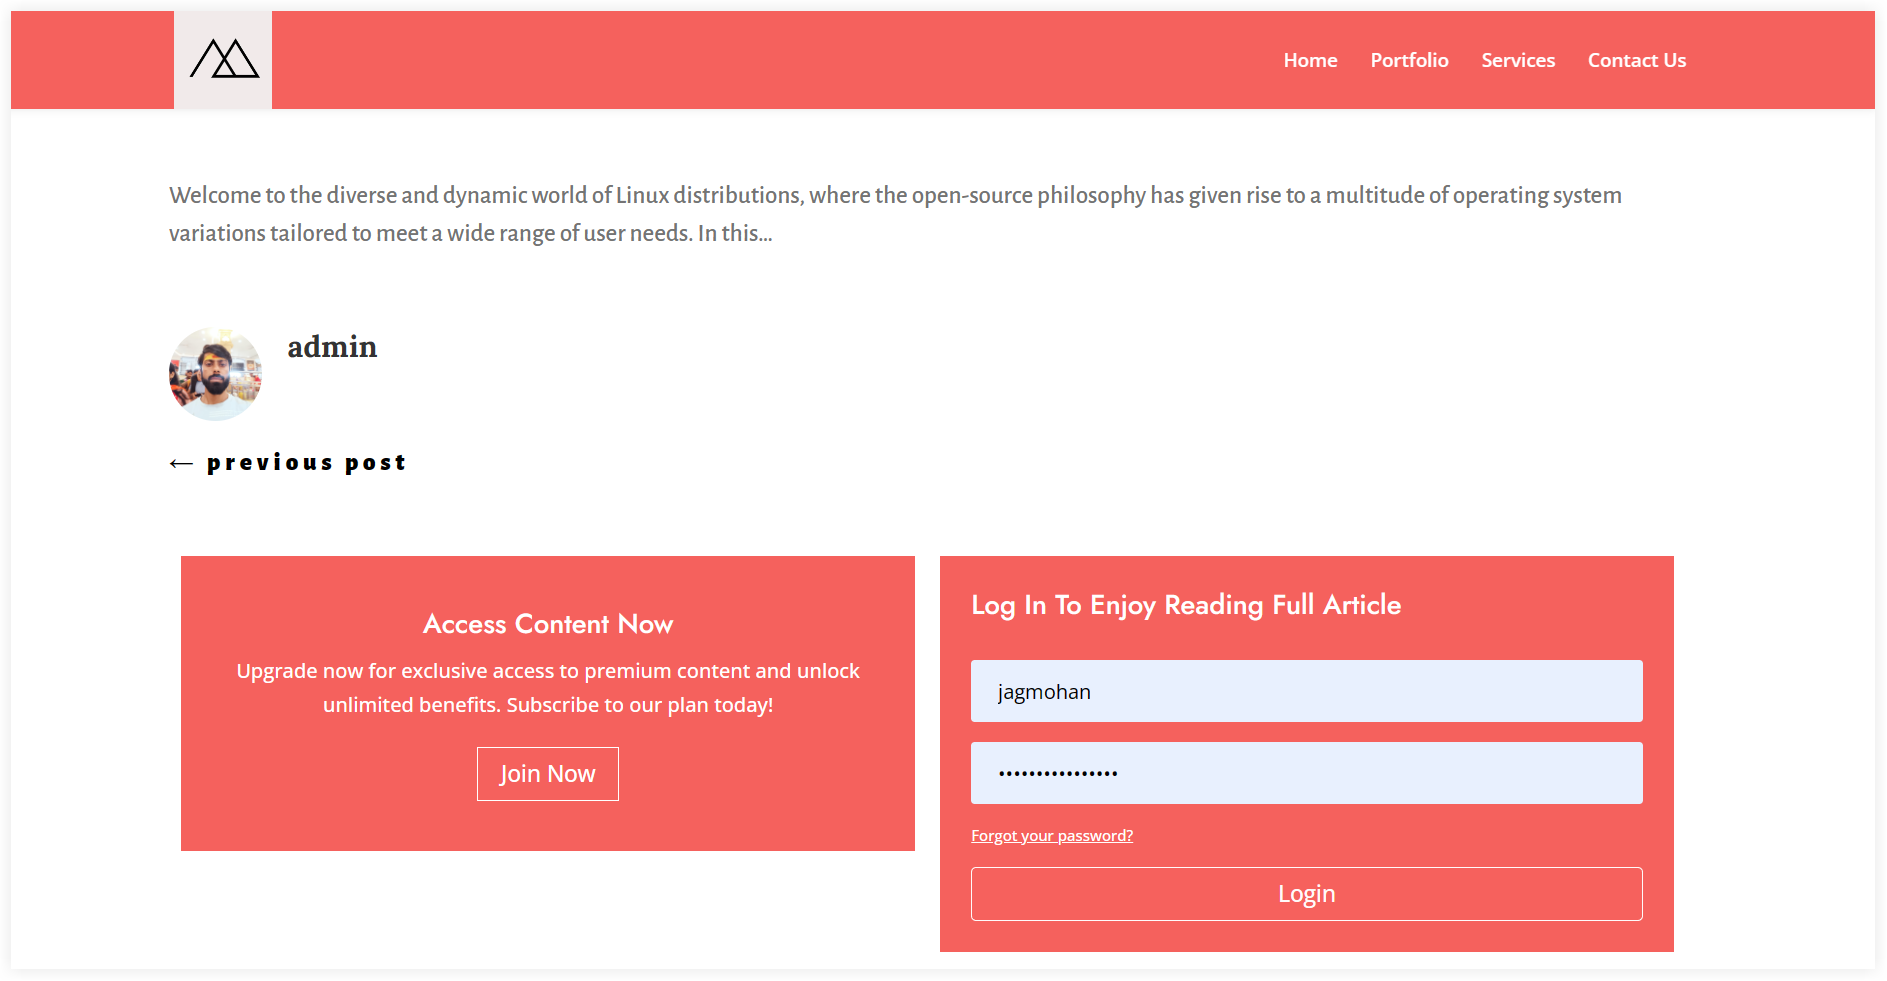
Let’s take a look at how a member exclusive blog post appears.
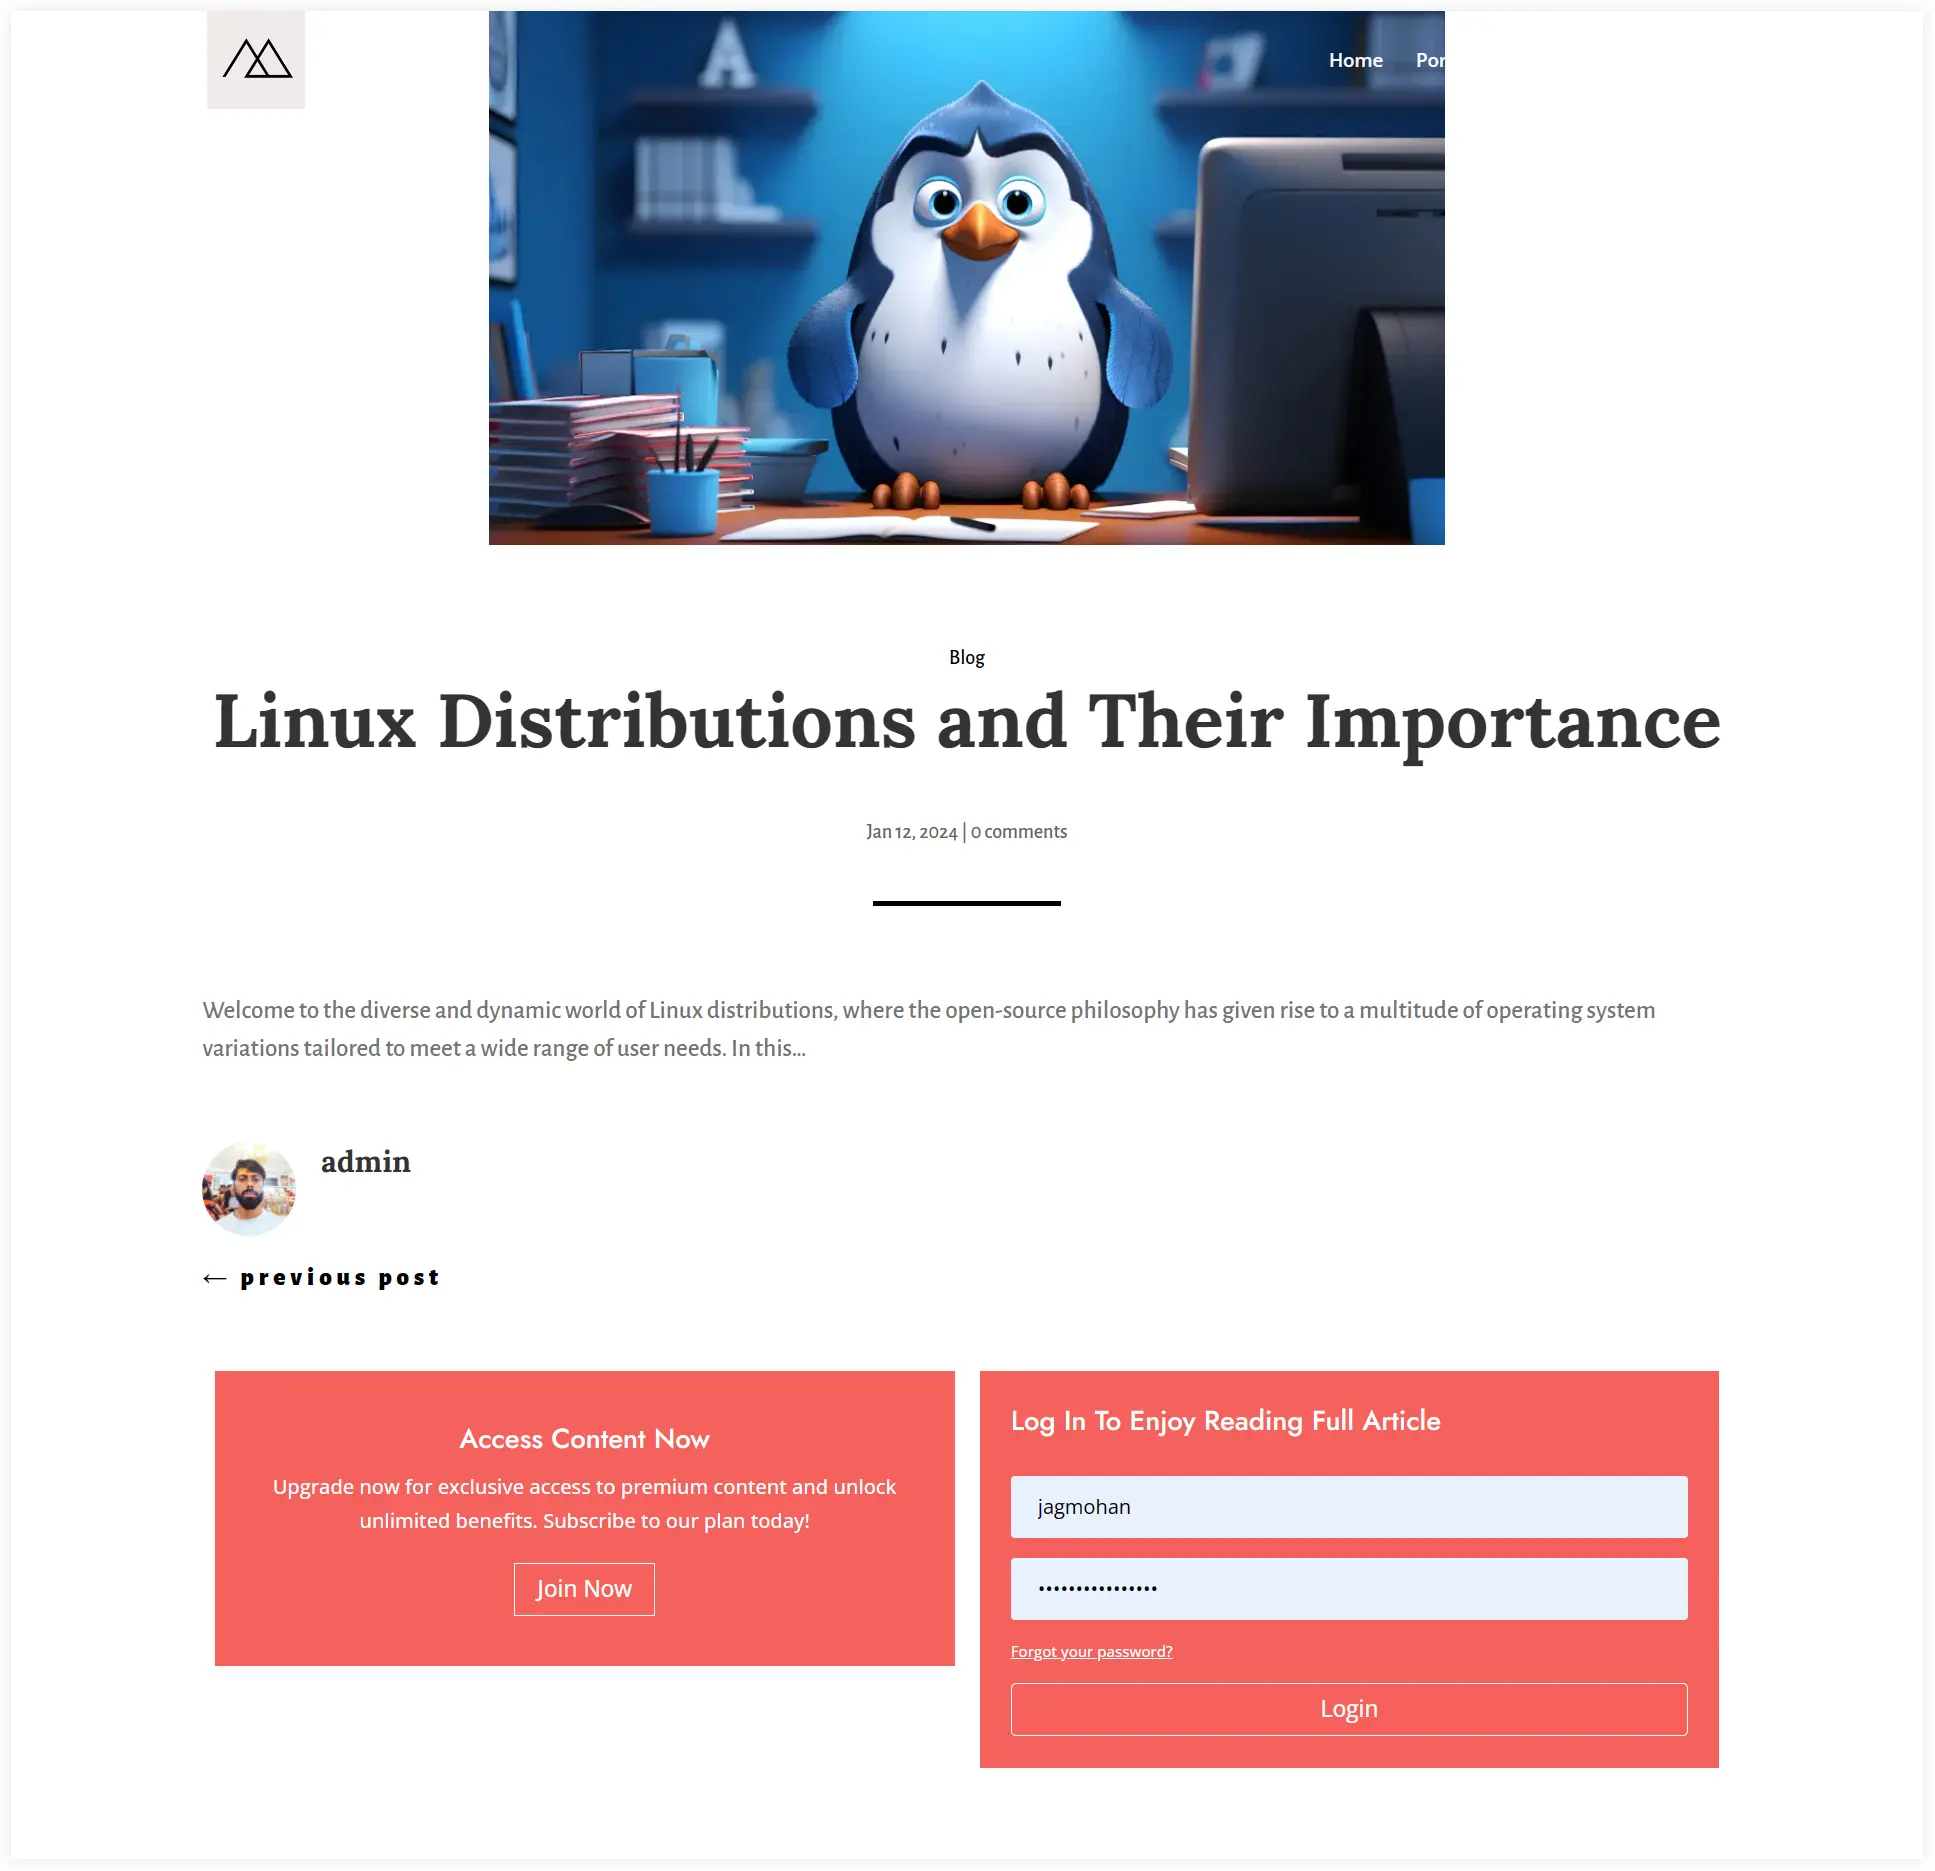
Registered users can log in to read the blog posts. Other users can join the member community to enjoy reading the blog posts.
Note: Before starting, make sure you have added some words in the excerpt section of each post so that we can modify the excerpt length according to our needs.

Let’s see how to create it.
1. Get a Divi Blog Post Template
In the process of creating a member-exclusive blog post, the first step is to download a built-in Divi post template that can be further customized with Divi conditions.
Blogy is a wonderful blog layout pack with 70 pre-built Divi blog page layouts, 20 Divi post layouts, and 02 search result templates for all such requirements.
You can download this pack and pick a suitable post layout that suits your requirements. Here we have used one of the Divi templates from the blogy pack to create a beautiful member-exclusive blog.
2. Upload the Divi Blog Post Template
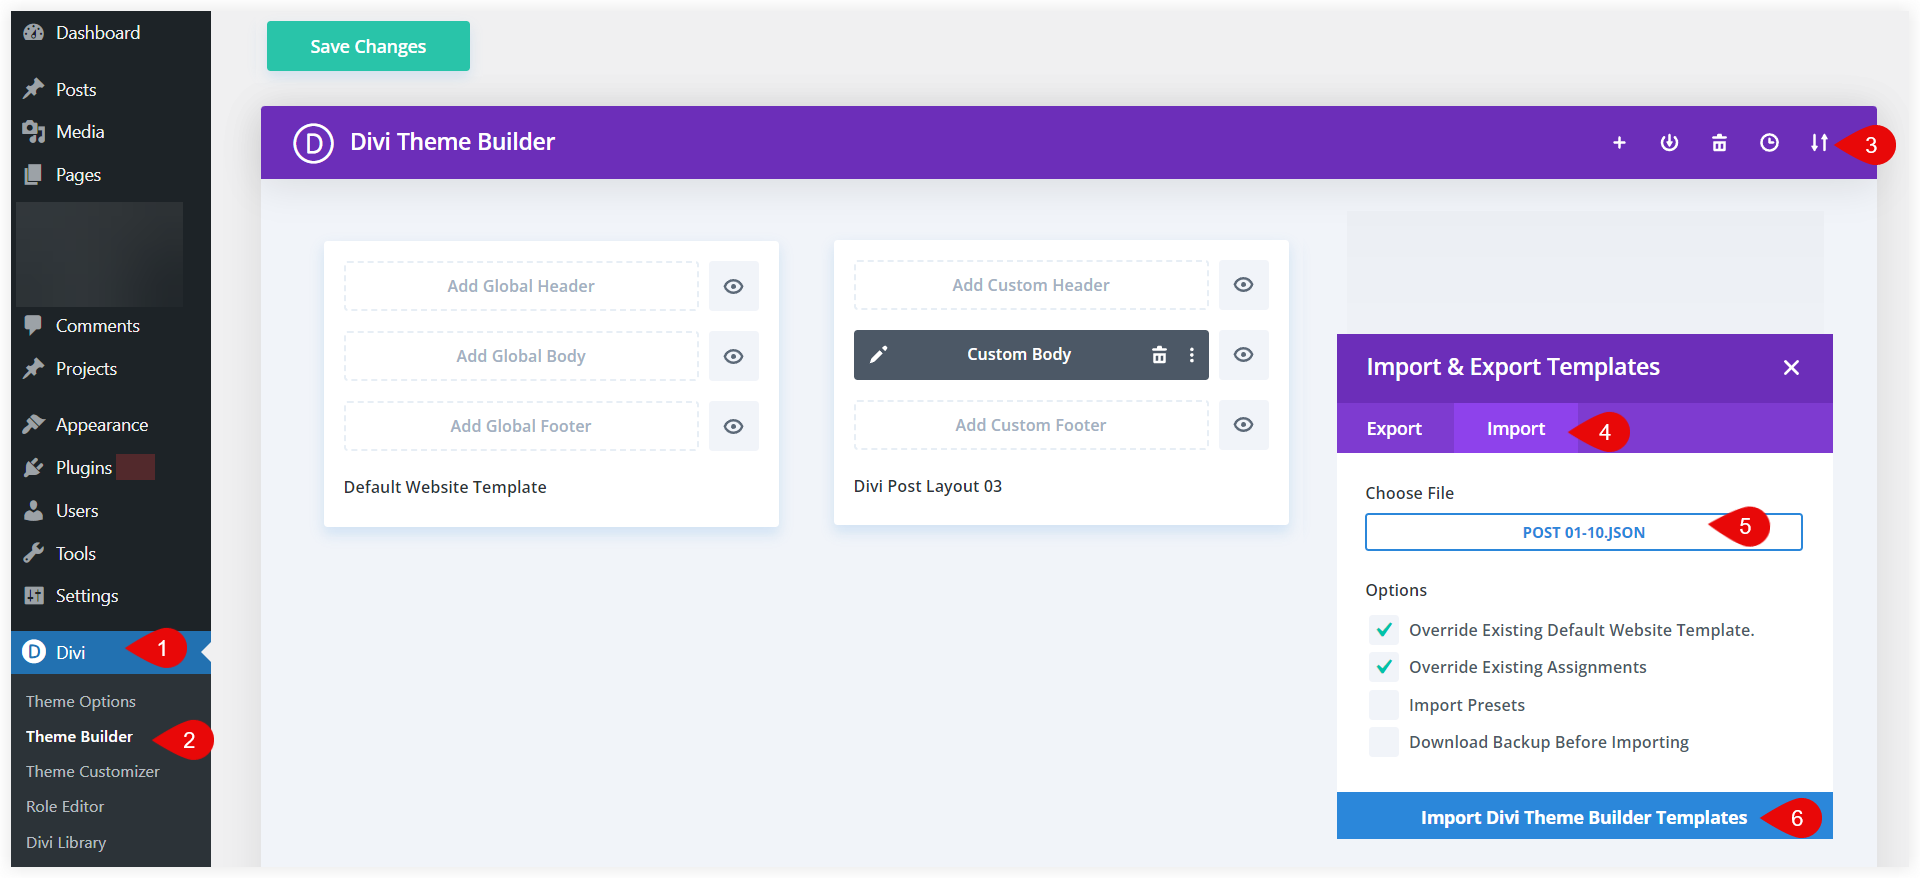
When you have downloaded the Divi post template, it’s time to upload it to your blog using Divi Theme Builder.
- Navigate to the Divi Theme builder and click on the portability icon.
- Select the import tab and choose the JSON file of the post template that you want to use.
- Click on ‘Import Divi Theme Builder templates’.
- After the completion of the import process, you can find the template in the Divi Theme Builder.
- If you are using blogy post templates, you can import 10 post templates with a single JSON file. Then select the one you want to use.
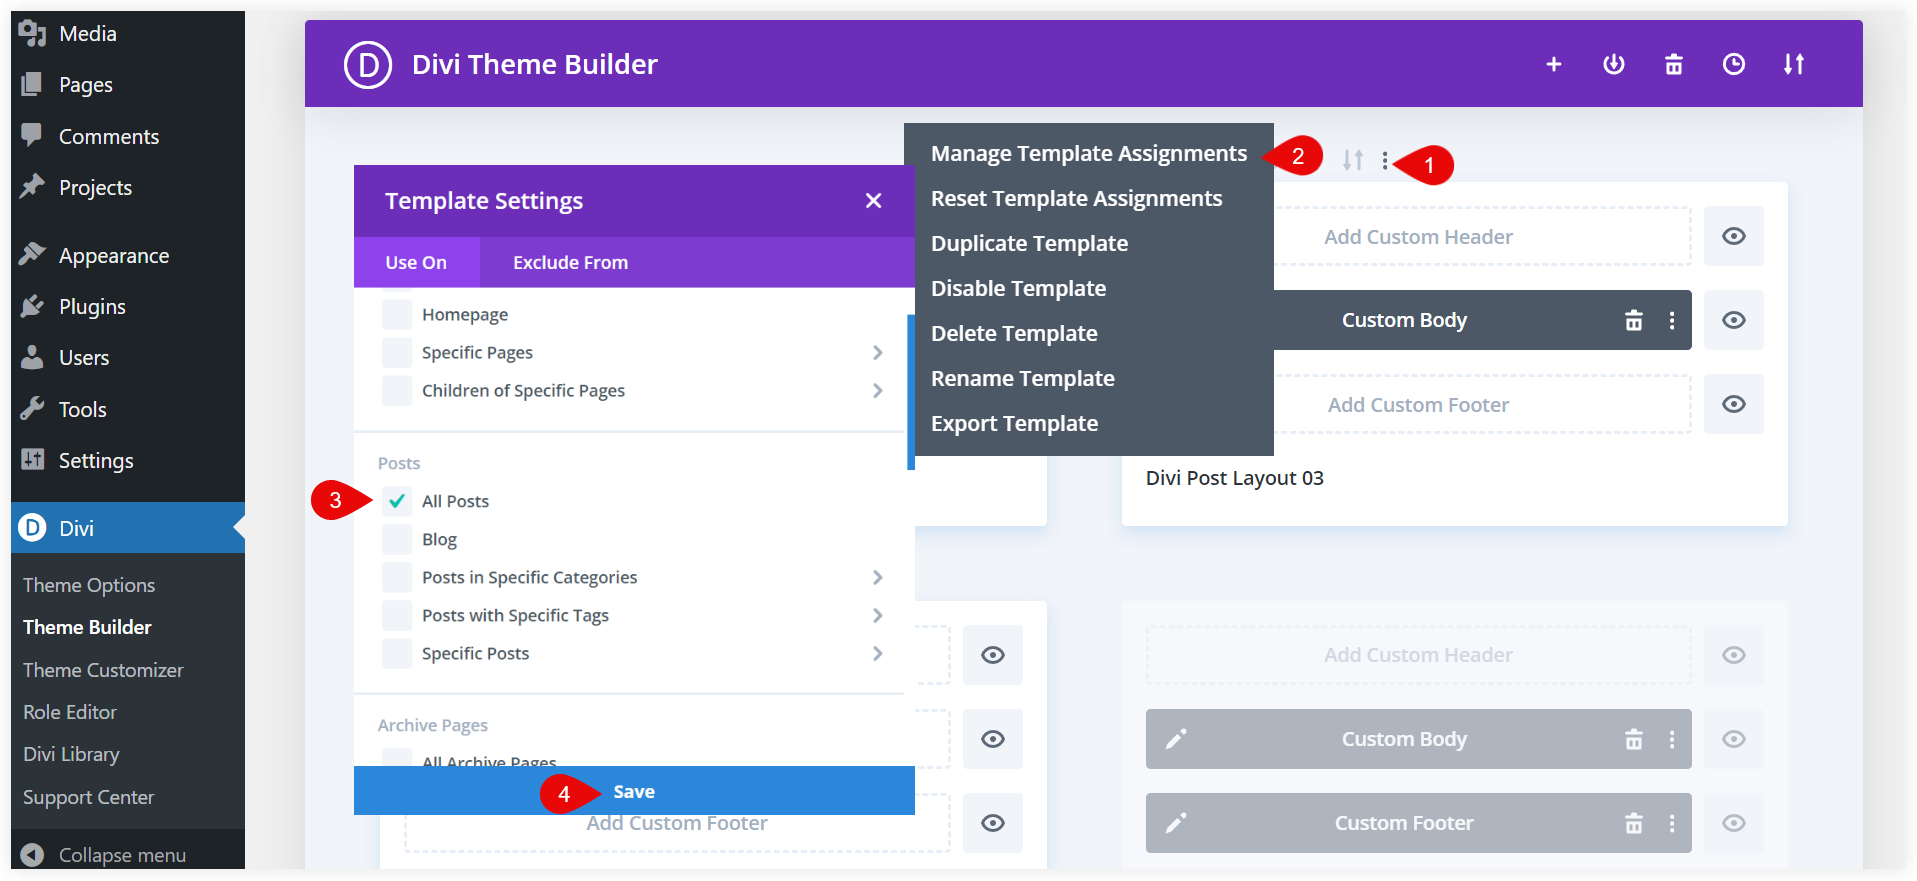
After uploading it make sure you have assigned the template in the theme builder to use it for all the blog posts on your website.
3. Customize Post Template to Work with Divi Conditions
Edit the selected post layout in the Divi Theme Builder. Now we want to hide the content for the logged-out users. For that purpose, Post Excerpt using dynamic content is a perfect solution. It can preview the post content to the logged-out users by hiding the entire content and showing the excerpt only.
Follow these steps to customize the post template using Divi conditions.
A. Create a Post Excerpt
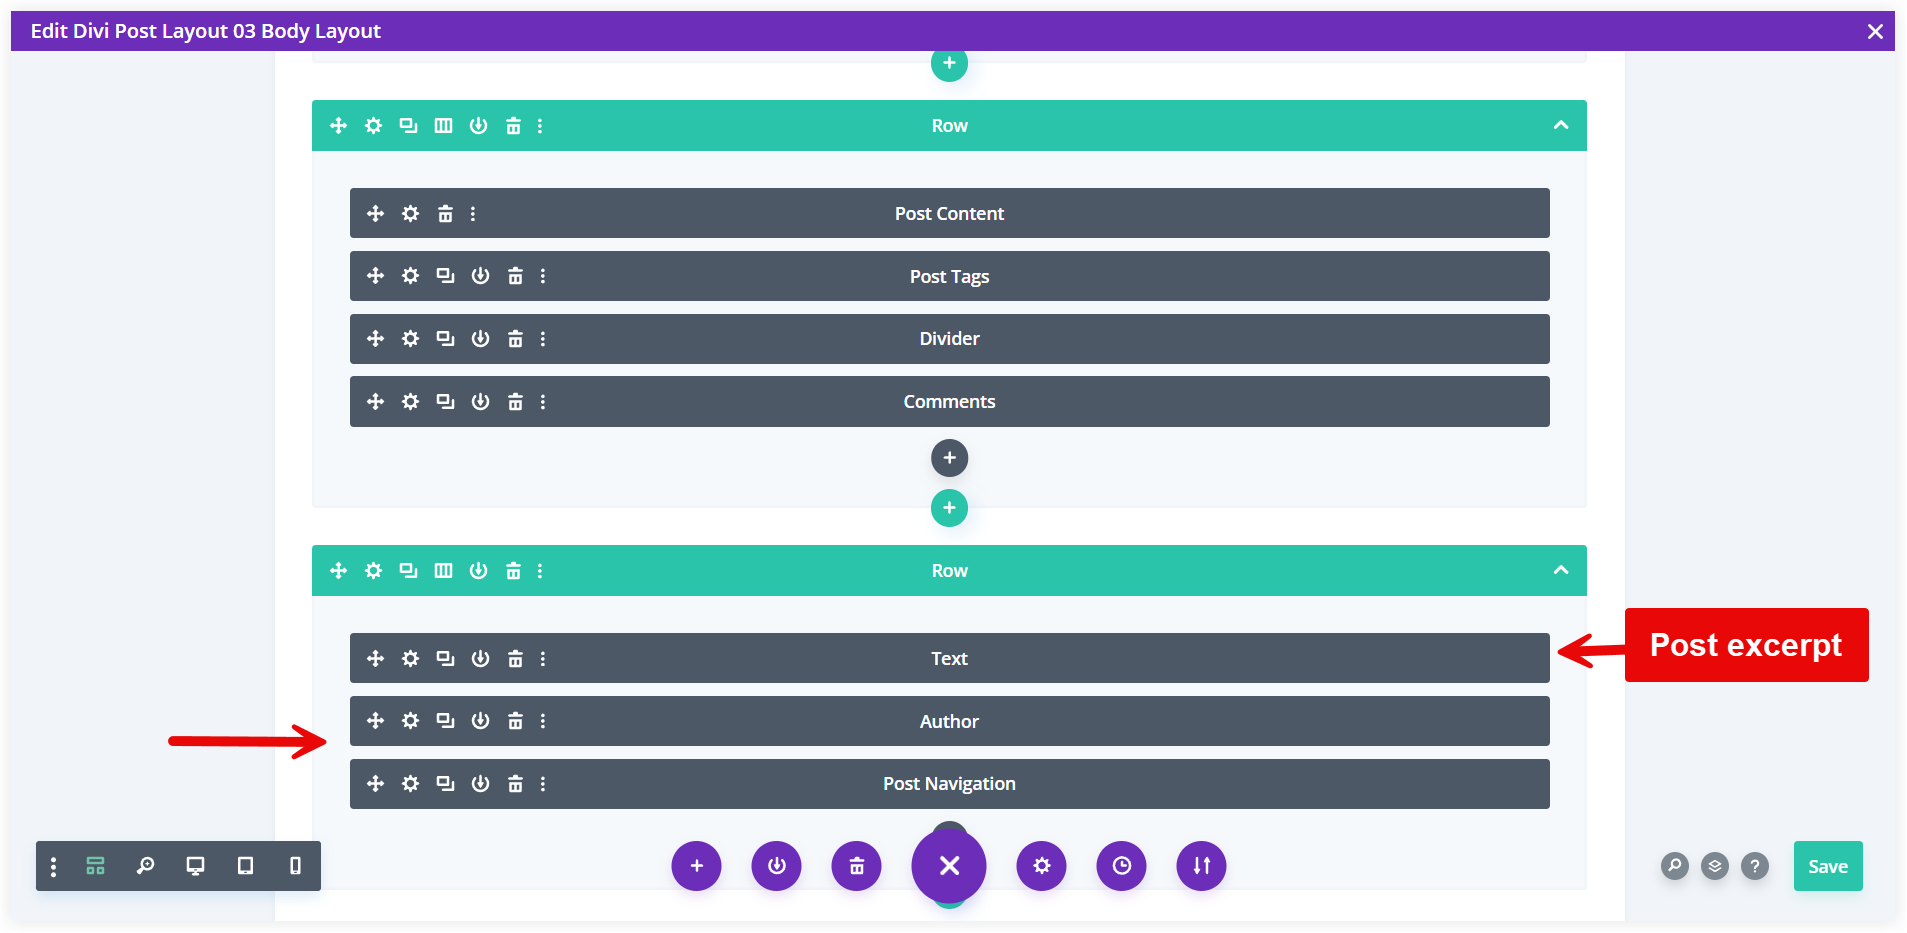
Add a new row under the row containing the Post Content, Author, Post Navigation, and Comments. All these are Divi text modules configured to show various dynamic content.
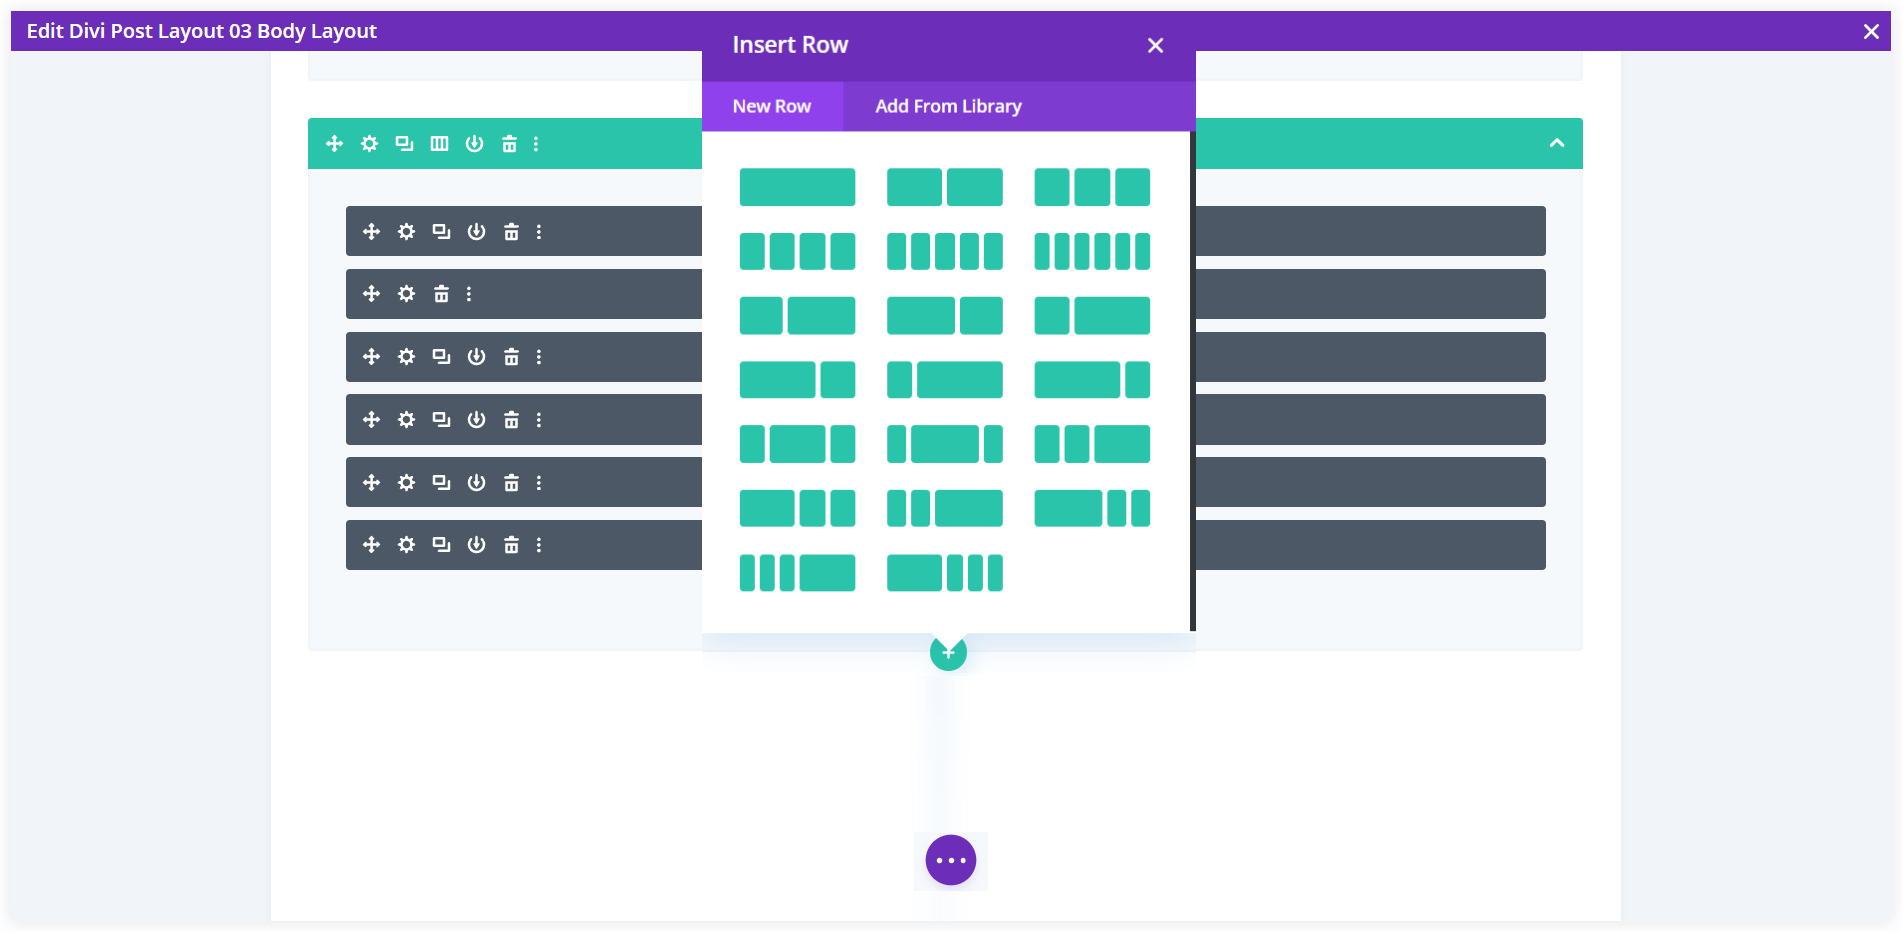
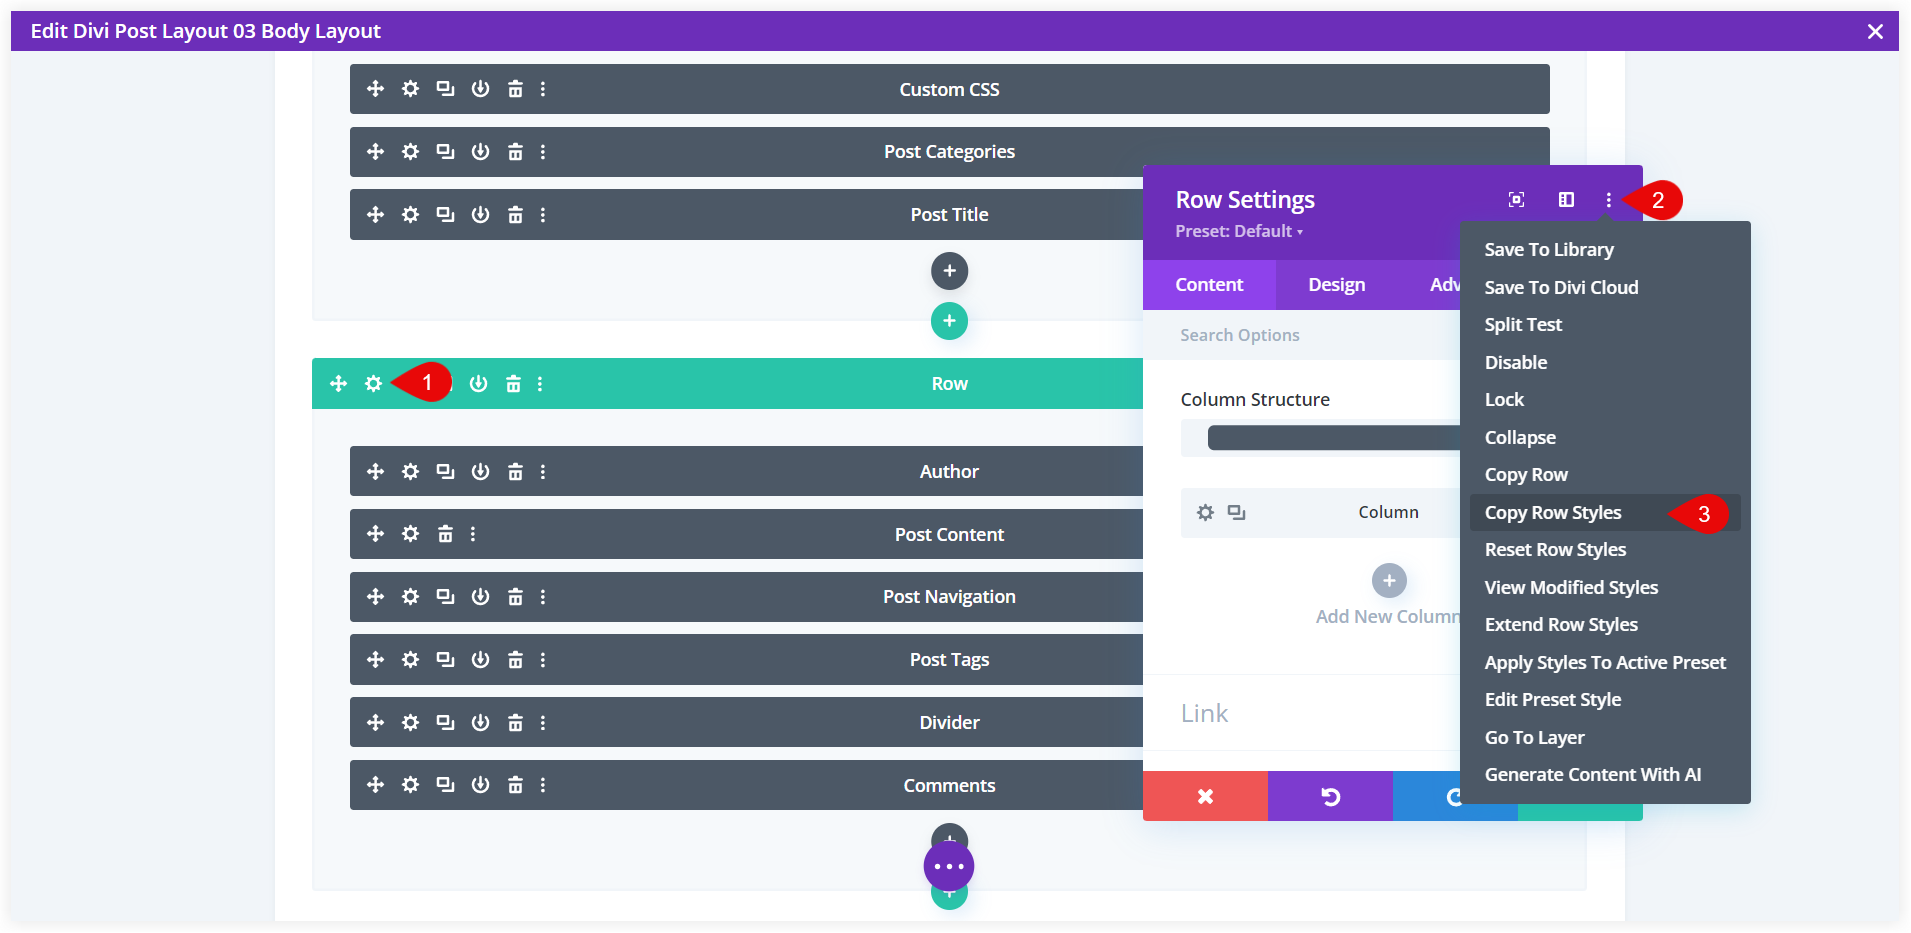
To complement its look with the existing blog post template copy the row style containing the post content and paste it into this new row.
Add a new text module in the row and click the Dynamic Content option. Select Post Excerpt and fill in any prefix and suffix you want to display before and after the post excerpt. The important thing here is the Number of Words option that lets you define a custom excerpt length. You also have the option to put a custom Read More link. In our case, we are leaving it blank.
The styling of this text module should match with other elements of the blog post template. To do that, copy the text styling of the Post Content module and paste it into this text module.
In the same way, you can copy the Heading Text styling of the Post Content module and paste it into the Heading Text section of this new text module.
The post view for the logged-out users should look tidy and organized. For that, you need to drag and position the Author and Post Navigation text modules just below the post excerpt for an organized appearance.
B. Create a Login and Subscription Section
We have to provide a Login form to the existing users to access the full content of the posts and a CTA section for new users to sign up for the blog.
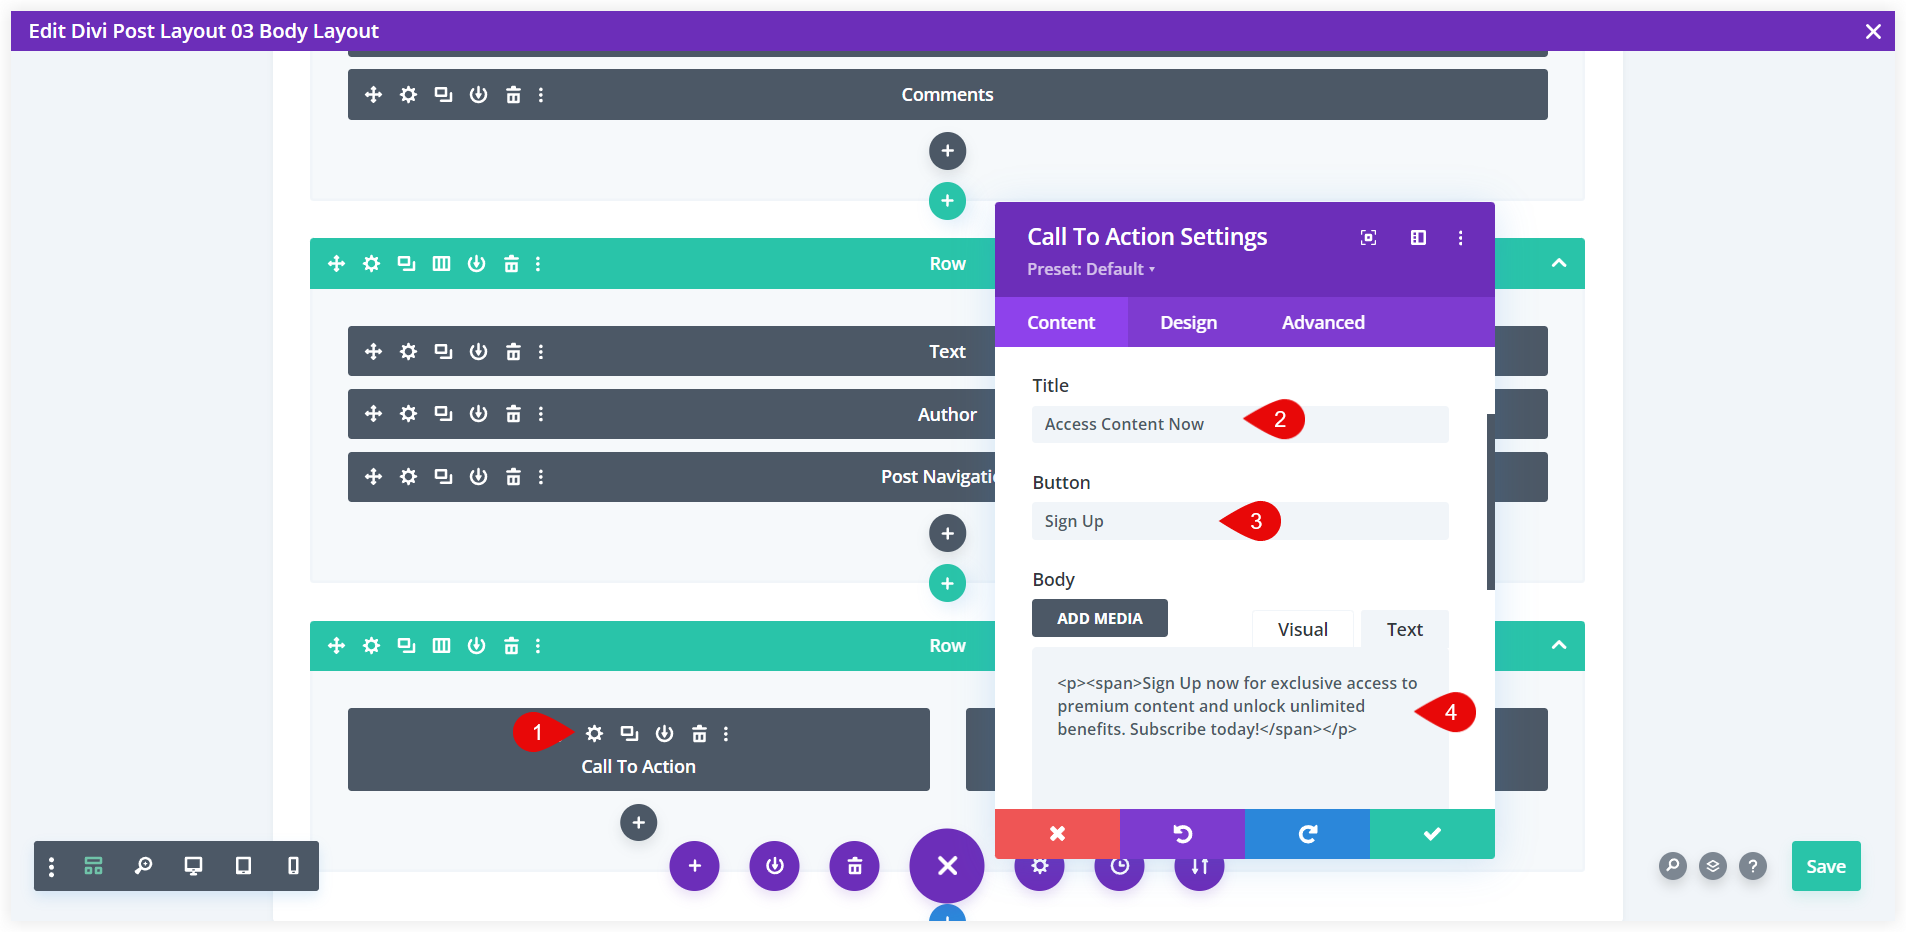
Add a new row with two columns right below the row containing the post excerpt. In the first column, place a Call to Action module. This would be helpful for new users to sign up for the blog. Put a relevant Title, Button Text, and a few lines encouraging users to sign up for the blog.
The second column will accommodate the Login module to allow the existing users to log in and read the entire blog post. Mention an appropriate title in this sign up section.

C. Apply Divi Conditions Based on Logged In Status
After creating those CTA sections now is time to play with the Divi’s built-in conditions to display or hide the post content based on the logged-in status of the users.
Show Full Content to the Logged In Users
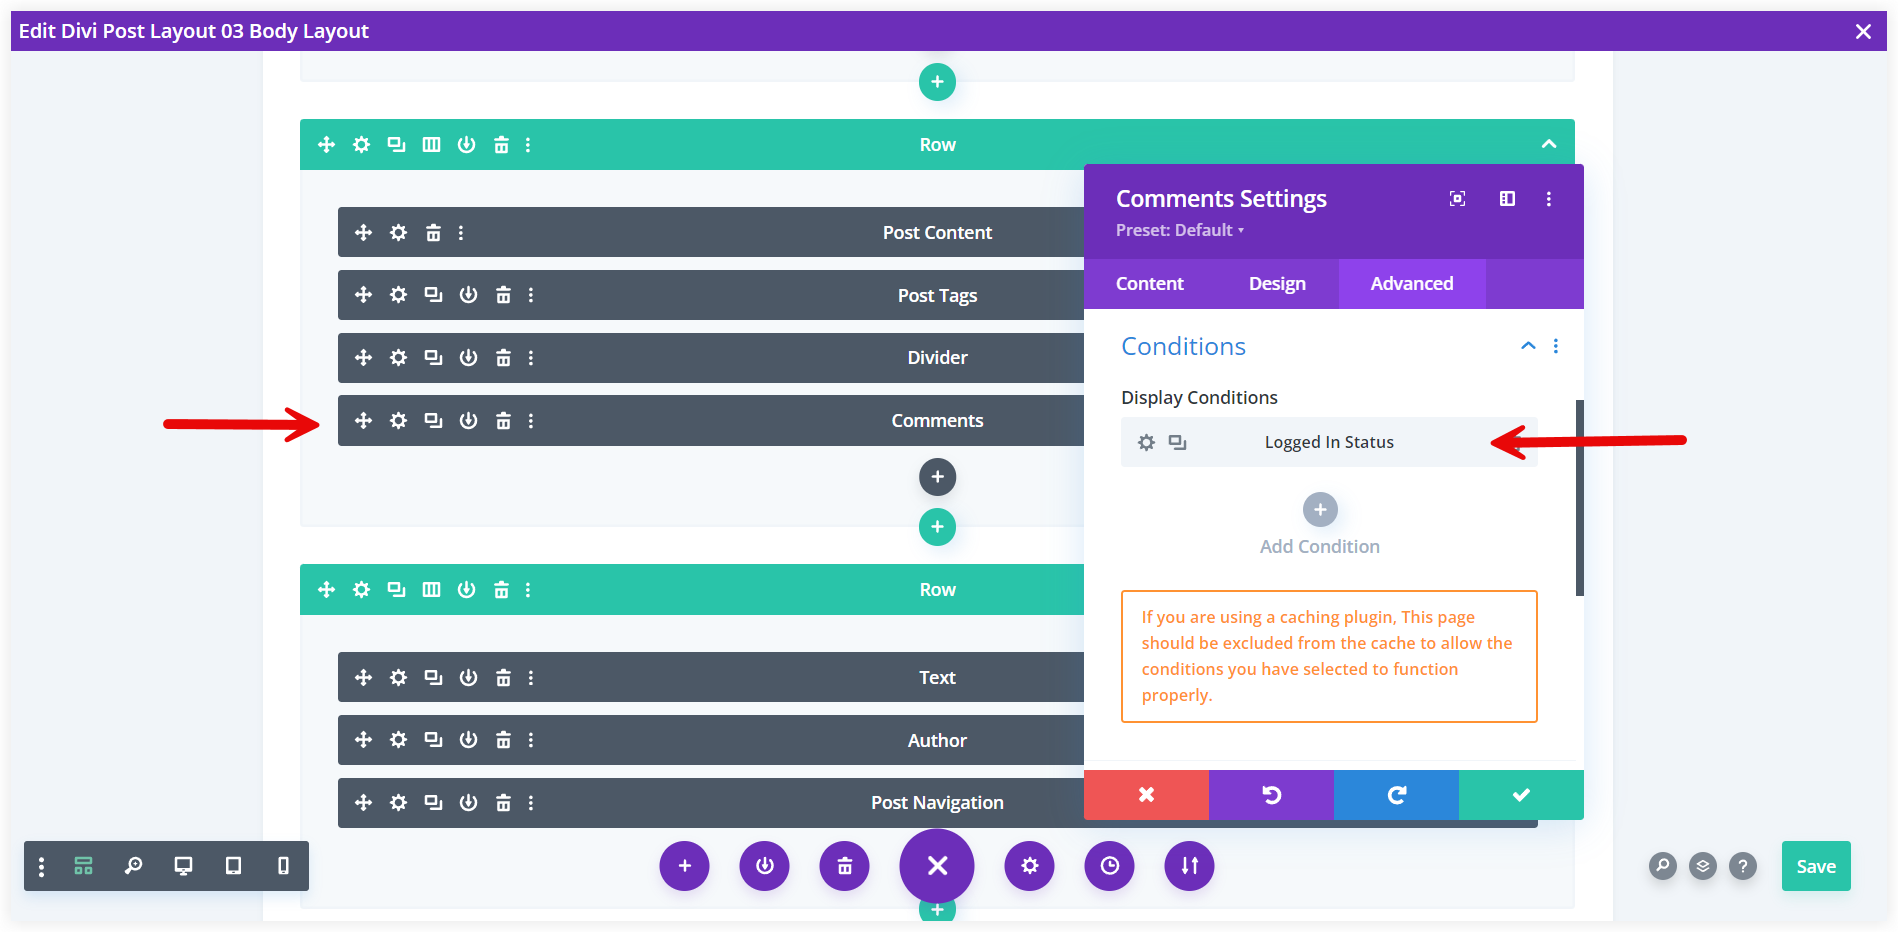
First, we will display the entire post content to the logged-in users. To do that, navigate to the Post content module settings. Go to the Advanced tab and add a new ‘Logged-in Status’ condition for the user from the drop-down. Select ‘User is Logged In’.
This would make the post content visible to the logged-in users only.
In the same way, Divi conditions would be applied to the Comments module to restrict the logged-out users from commenting. Only the logged-in users would be able to comment on a particular post.
Display Post Excerpt to Logged Out Users
When we talk about the content restriction for the logged-out users, only the post excerpt and CTA section would be displayed to them instead of the full post content.
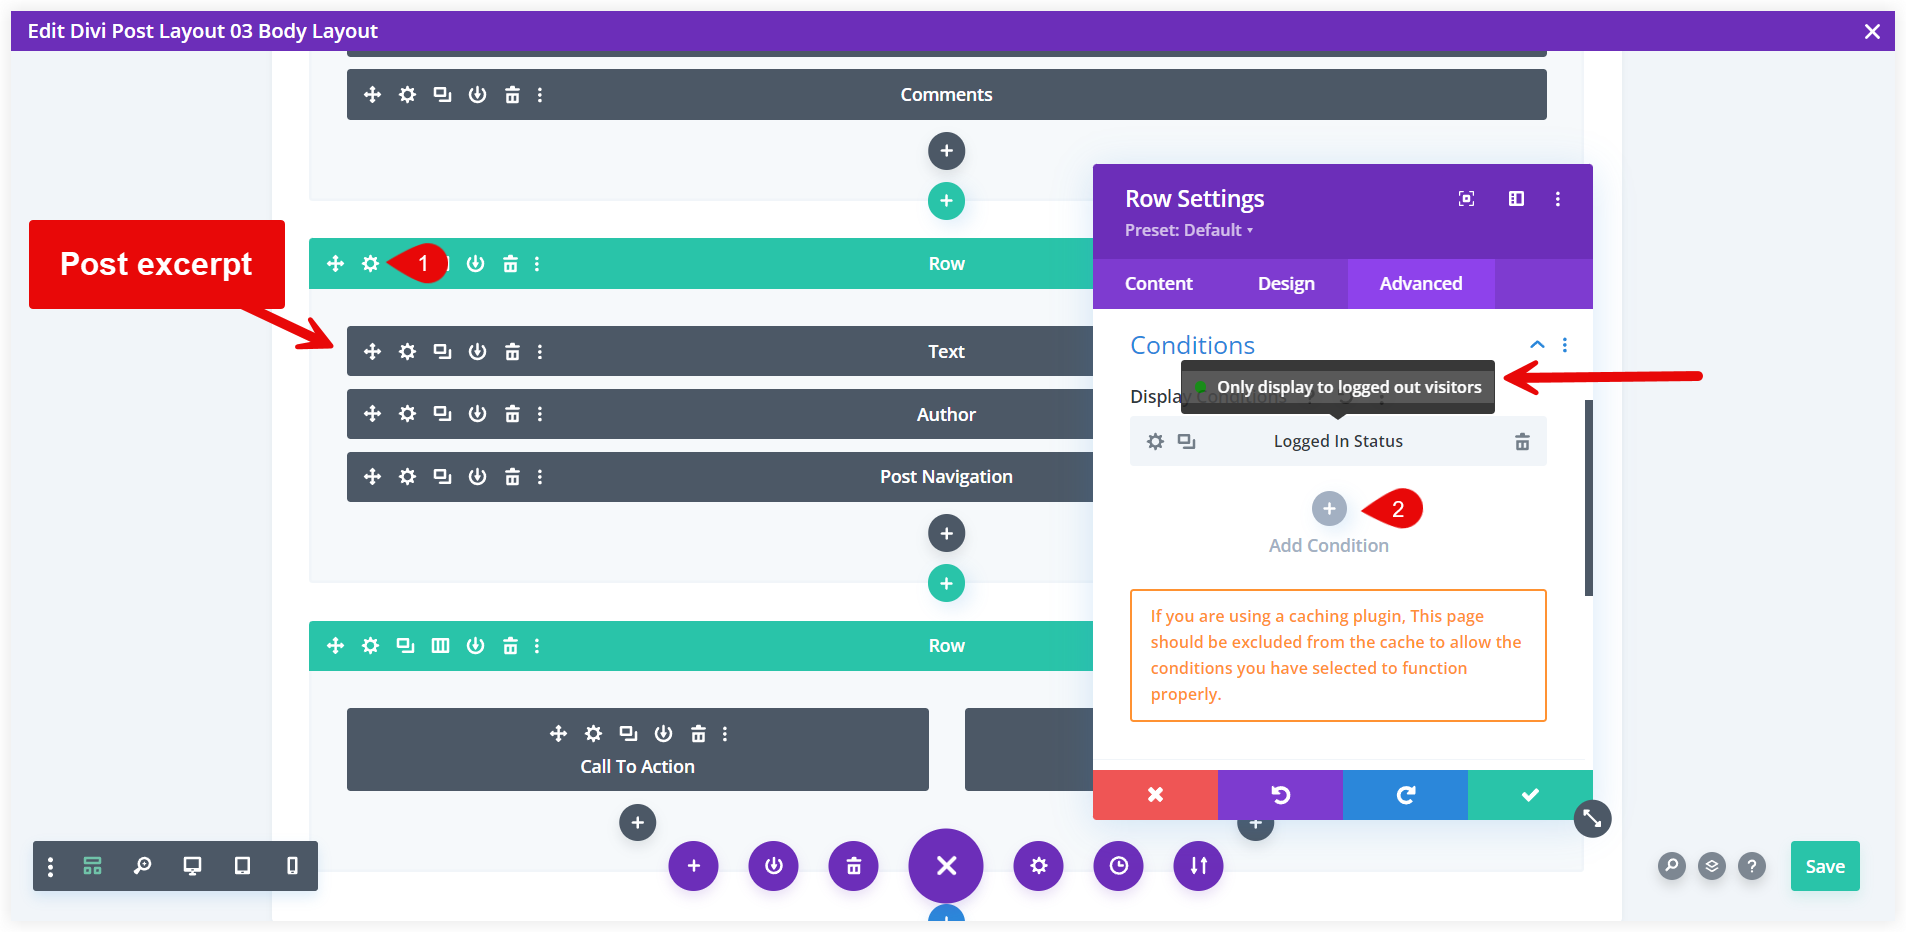
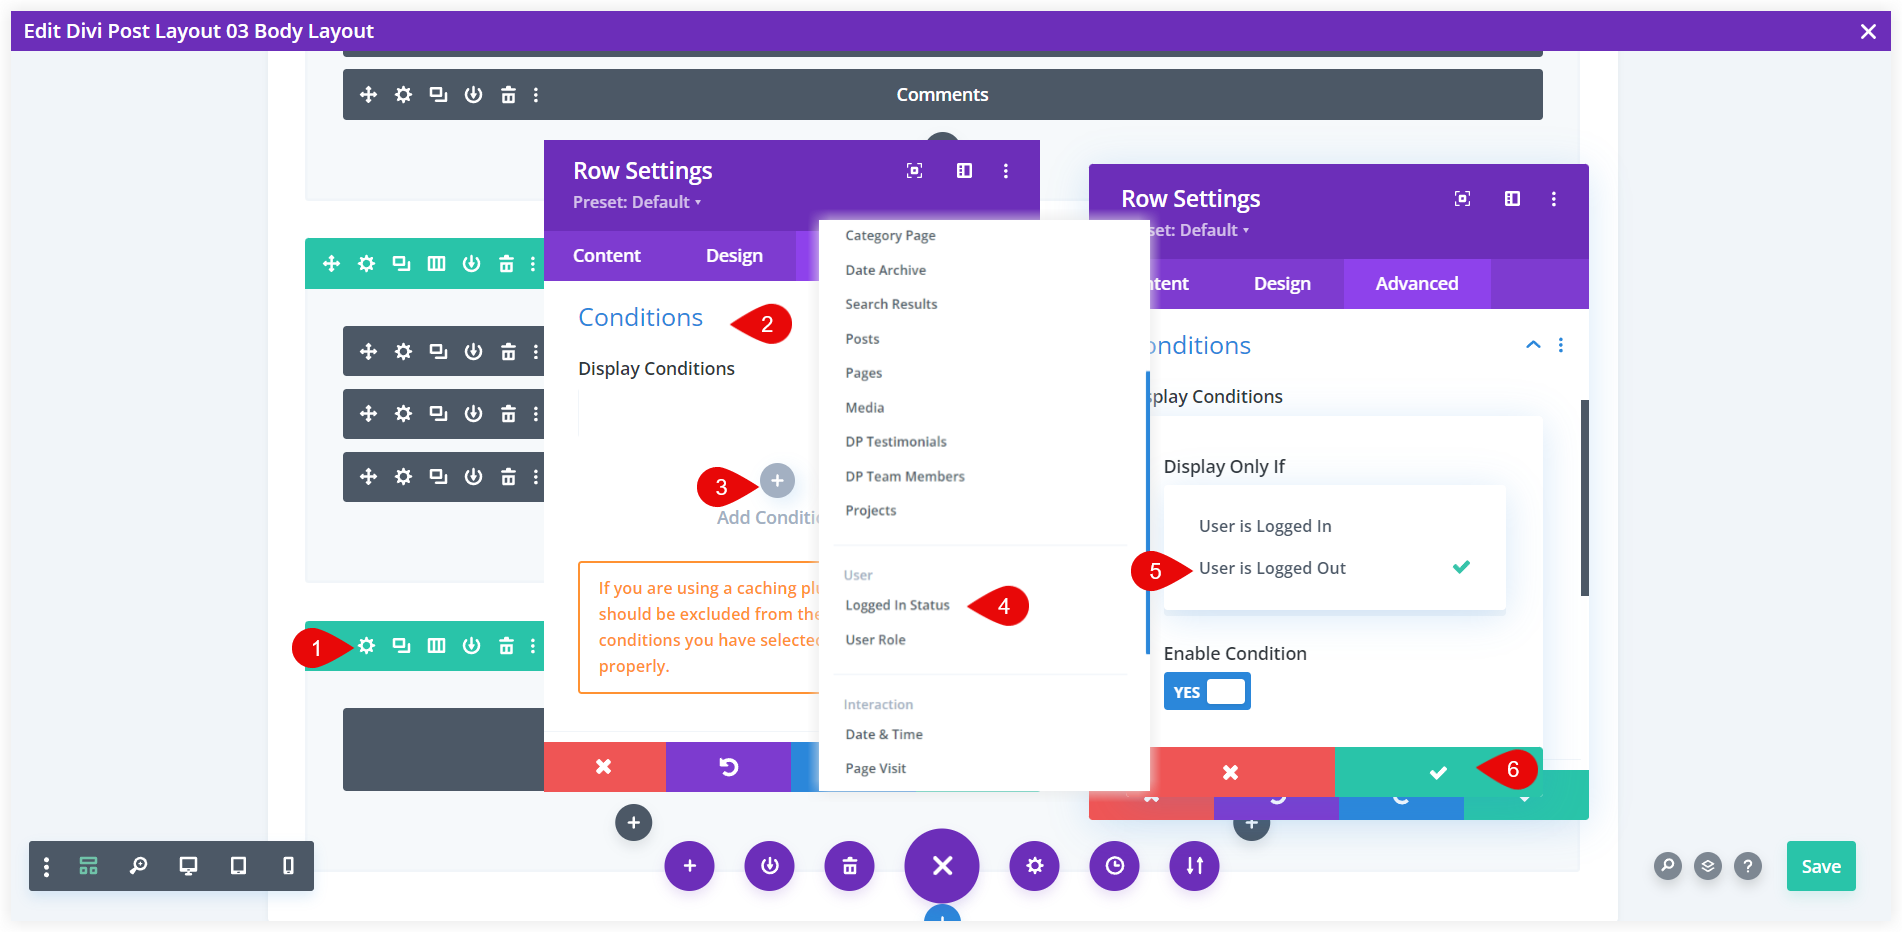
Navigate to the row’s settings where the text module with the post excerpt is located. Add a Divi condition for Logged In Status as ‘User is logged out’ that will cause the logged-out users to see an excerpt of the post rather than the entire post.
Show the CTA section to Logged Out Users
The CTA section with the call to action and login form should also be visible to the logged-out users. This would make it easier for new users to register for the blog and for existing users to log in and view the entire content of the posts.
Go to the row settings of the CTA section and apply the Divi condition for Logged In status as ‘User is logged out’.
That’s done. Save the template and now your blog is ready to restrict the full content access to the logged-out users.
If you don’t use Divi and want to create a member-exclusive blog in WordPress, you can read our post – How to create a simple members only blog in WordPress.
Finally, we can conclude that delivering content to the registered members of your blog with the help of Divi conditions is so easy and you don’t need to use any additional plugins for that purpose. Utilizing Divi conditions with some easy settings and customization in the post template using the Theme builder can make it easily possible. This outstanding feature of Divi helps content creators build their brand community by imposing content restrictions. A large audience base excel in the blog’s growth and will open up new opportunities.


0 Comments