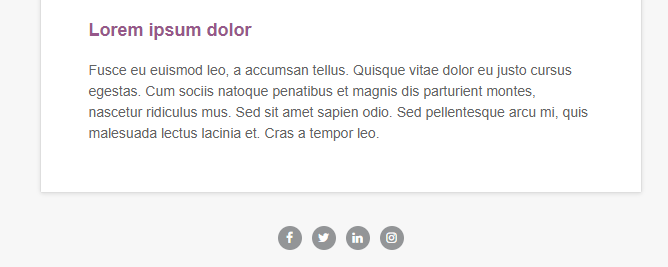
Having the presence of your business at social networks helps to reach a wider audience and do better marketing. If you talk about marketing, primarily digital, then email marketing is an essential task. And if we combine these both, then your email marketing performs even better. Following this technique, many business owners embed social link icons in their newsletters to run effective campaigns. You may have noticed that some WooCommerce emails that you receive have social icons in them. And if you want to do the same, then inside this blog post, I’ll share with you the method of How to add social icons to WooCommerce emails. Before we move forward in this post, checkout our new Divi WooCommerce layouts pack.

Therefore, without taking a further minute, let’s get right to it.
Step 1: Add right code in the right file
To get social link icons in WooCommerce emails, first paste the below code in your child theme’s function file i.e., function.php
<?php

if ( ! function_exists( 'de_woo_email_social_icons' ) ) {
    function de_woo_email_social_icons( $icons ) {
        echo '<ul class="de-social-icons">
        <li><a href="#" target="_blank"><i class="fa fa-facebook" aria-hidden="true"></i></a></li>
        <li><a href="#" target="_blank"><i class="fa fa-twitter" aria-hidden="true"></i></a></li>
        <li><a href="#" target="_blank"><i class="fa fa-linkedin" aria-hidden="true"></i></a></li>
        <li><a href="#" target="_blank"><i class="fa fa-instagram" aria-hidden="true"></i></a></li>
        </ul>
        <link rel="stylesheet" href="https://cdnjs.cloudflare.com/ajax/libs/font-awesome/4.7.0/css/font-awesome.min.css">
        <style>
            .de-social-icons {
                list-style: none;
                display: flex;
                align-items: center;
                justify-content: center;
                padding-left: 10px;
            }
            .de-social-icons li:not(last-child) {
                margin-right: 10px;
            }
            .de-social-icons li a {
                background: #939597;
                padding: 5px 2px;
                border-radius: 50%;
                color: #ffffff !important;
            }
            .de-social-icons .fa {
                width: 20px;
                height: 20px;
            }
        </style>';
        return $icons;
    }
    add_action( 'woocommerce_email_footer_text', 'de_woo_email_social_icons' );
}
Step 2: Insert social media links
By default, above code add social media icons of Facebook, Twitter, LinkedIn, and Instagram to WooCommerce emails. Now, to send users to your social media accounts when they click on the icons. All you have to do is, insert your social media accounts’ link inside href attribute of the <a> tag, replacing the #. Same as the following example,
<li><a href=”https://www.facebook.com/diviextended/” target=”_blank”><i class=”fa fa-facebook” aria-hidden=”true”></i></a></li>
As you can see in the above example, I have replaced the # by the link i.e., https://www.facebook.com/diviextended/.
Step 3: Add more social media icons
If you want to add social media icons other than the icons available with the code. First copy the complete <li></li> tag from the above code, and paste it under the existing <li> tag code. Then, go to https://fontawesome.com/v4.7.0/icons/, and search your desired social media icon.

Then, choose your desired icon. As in the above image, I’ve searched for the Pinterest and selected its very first icon. Now, copy the code altogether with the <i> tag.

Now paste this code inside the <li> tag that you have copied before to replace the existing <i> tag. Thus, in return you’ll get the code as the following,
<li><a href=”#” target=”_blank”><i class=”fa fa-pinterest” aria-hidden=”true”></i></a></li>
After this, insert your social media link inside href attribute, replacing the #, same as below.
<li><a href=”https://in.pinterest.com/diviextended/” target=”_blank”><i class=”fa fa-pinterest” aria-hidden=”true”></i></a></li>
Then save changes, and you’ve successfully added social media links to your WooCommerce emails.
Summary
In this blog post, I’ve shown you how you can add social media icons to your WooCommerce emails. If this post was helpful to you, then please share it to help other users.
Also, we want to hear from you to know whether this method worked for you or not. Therefore, please share your views inside the comment section below. Or subscribe to our newsletter to stay updated with useful posts like this one.


I pasted the code into the child theme’s function.php file. After I checked the wc emails I realised the social icons are not displaying properly. I only see a flat shape that is clickable, but definitely not reminds of the icons. The links are working. What could be the problem?