
Adding custom fonts to WordPress can be beneficial to your website, brand, business, or marketing strategies. At times, the default system fonts may not work across all devices and browsers, which can be disappointing to users and lead to increased bounce rates.
Therefore, you can opt for custom fonts that can enhance your website’s typography and user experience. Ultimately, they will help to improve readability, strengthen your brand, and increase your conversion rates.
In this article, we will provide more information on the importance of adding custom fonts to WordPress, how to add custom fonts to WordPress, licensing of commercial & free custom fonts on WordPress, best practices for choosing fonts for a WordPress site, and much more.
Importance of Adding Custom Fonts to WordPress
Using custom fonts on WordPress can make your website look more appealing and attractive. Here are some benefits of adding custom fonts to WordPress:
1. Make Your Brand Stand Out
When using custom fonts on WordPress, you can easily enhance its brand identity.
Your audience or site’s customers can get a visual understanding of your brand. Indeed, it will make it stand out from its competitors and boost recognition.
Simply, the custom fonts add a little touch to the website.
2. Improve Aesthetics
Adding custom fonts to the WordPress website also helps to improve its aesthetics.
Other than just using the default fonts set by WordPress, you can opt to use custom ones tailored to your brand. The overall website design will stand out and be more appealing due to the unique style.
3. Boost User Experience
You may have chosen a specific WordPress theme that comes with a font that leads to readability issues; therefore, it can even lead to an increased bounce rate.
Instead of losing out, you can consider using a free custom font that enhances the user experience.
The right font will also ensure that mobile users do not strain while reading. Additionally, it will offer greater control over the visual presentation of the text, based on the font style, weight, and size you choose.
4. Improve SEO
If the content is easy to read on the website, it will attract more visitors. The longer the target audience stays on the site, the better for SEO, and the website can even be ranked higher. Lower bounce rates = More conversion rates.
5. Boost Creativity
WordPress themes can come with limited font options; however, you can choose to use custom fonts that can help make your website stand out and blend with your brand perfectly. You can choose fonts for the different pages and sections.
Ultimately, your website will look professional and make customers trust it more.
How to Add Custom Fonts to WordPress
We will provide three good methods that you can use to add custom fonts to WordPress:
Method 1: Add Custom Fonts Directly to the WordPress Library
In this method, we will show you how to add custom fonts to WordPress directly; therefore, you can always access them through the fonts’ library.
Step 1: Log In to Your WordPress Dashboard
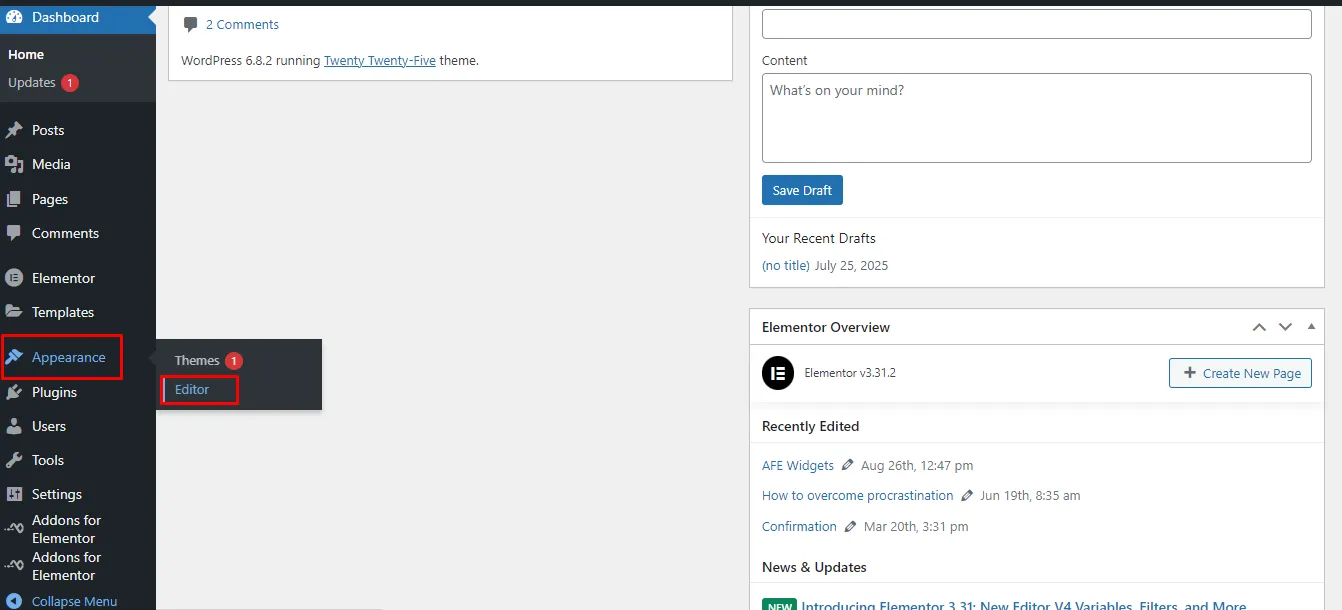
First, you will need to log in to your WordPress dashboard.
On the left side menu, click on the Appearance option, then choose Editor. You will be redirected to the editor page.
Step 2: Select the Styles Option
While on the Editor page, choose the styles option, a sidebar will appear, and on it, select typography.

In the typography section, you will get an overview of the fonts.
Step 3: Upload Your Custom Fonts
On the next sidebar page, select the manage font icon. On the next page, choose to check the library with your installed fonts, upload fonts, or install from Google Fonts.
Step 4: Connect to Google Fonts
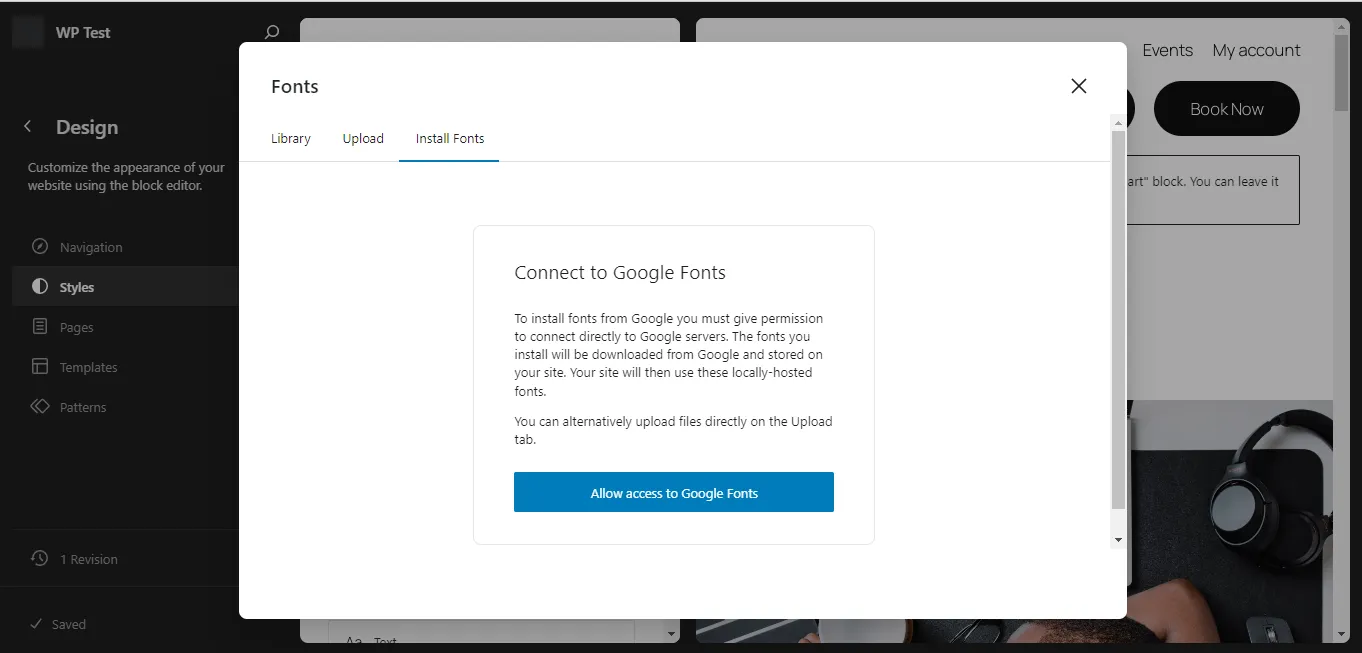
If you opt to install custom fonts, you will need to connect to Google Fonts. Once connected, proceed to choose a font of your choice to install.
Step 5: Choose Your Desired Font
In the font library, choose a font that you would want to install. Also, remember to choose the variant you want. Some come with one variant, while some come with up to 4 variants.
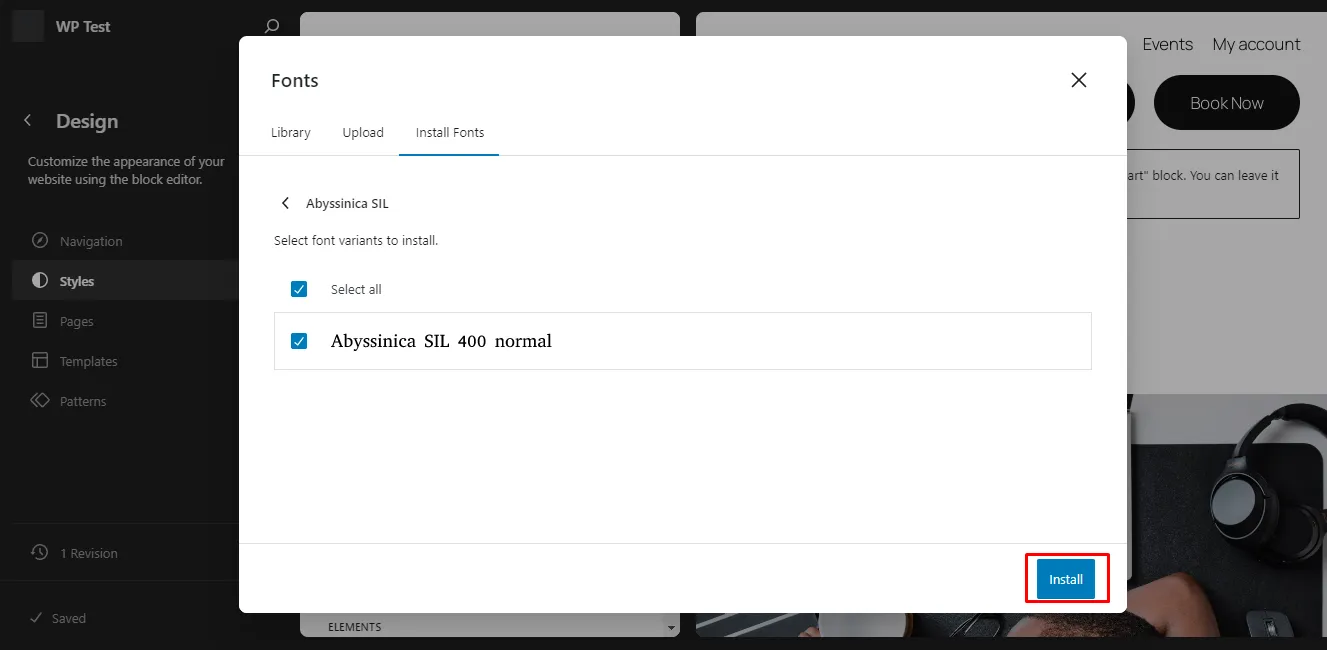
The choice is yours! Once done, click the install option.
Step 6: Check Your Fonts Library
On the top menu bar, select the library option, which features all the fonts you can use on the website. You will see the custom font(s) under the custom option.
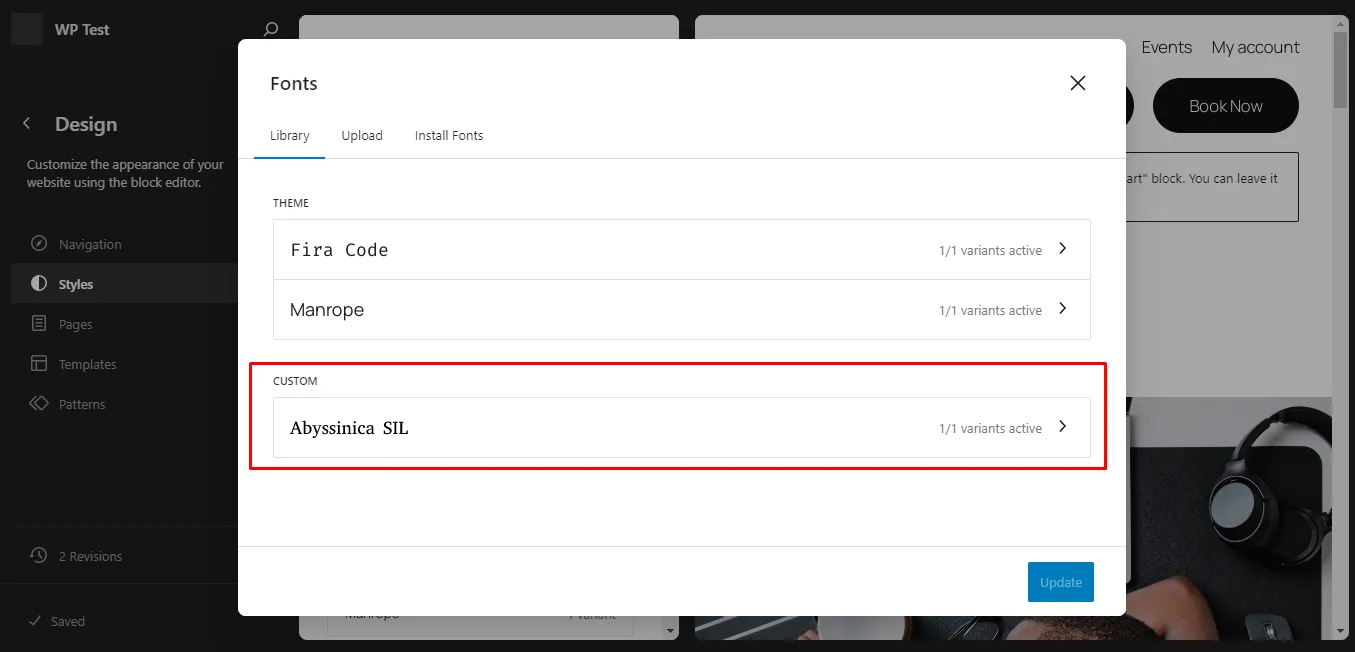
It will now be among your font choices! You can add as many as you wish.
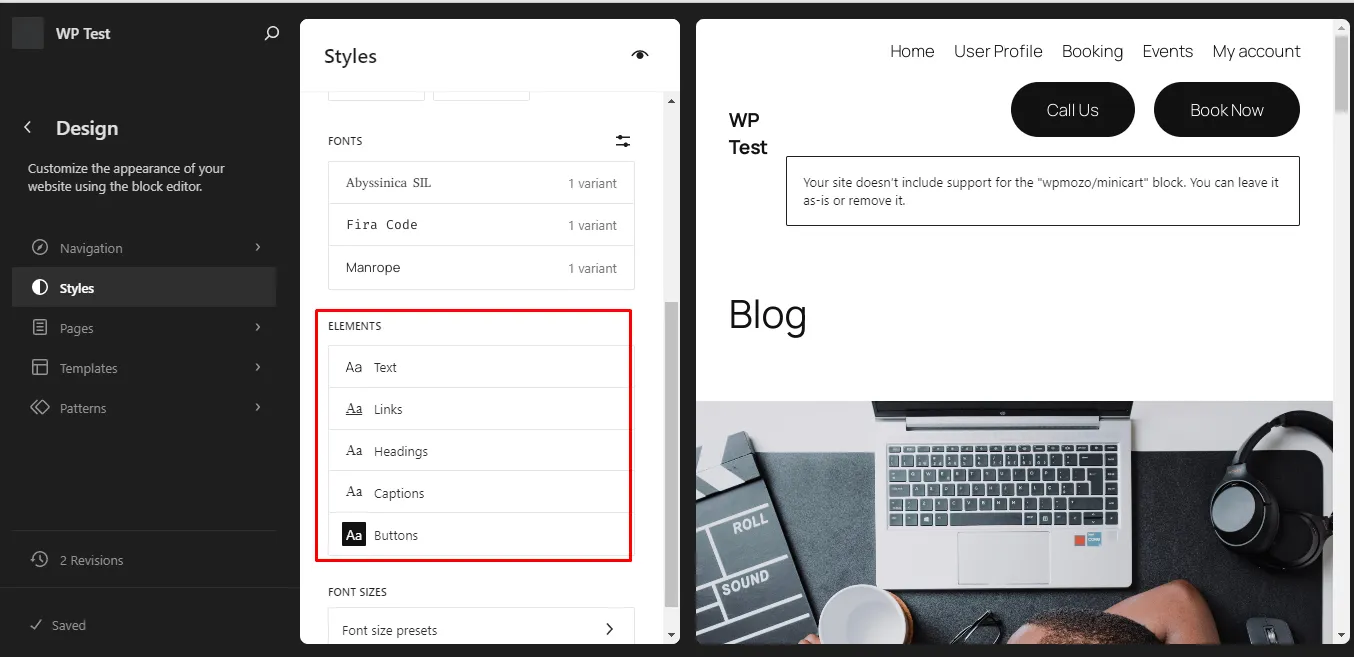
Step 7: Modify the Fonts for the Different Page Elements
After installing your desired fonts, you can proceed to change the fonts for the different elements like text, links, headings, captions, and buttons.
On the typography page, scroll till you find the elements section, where you will find the various elements whose font types you can change. Click on each and modify as needed.
For instance, you can modify the text element:
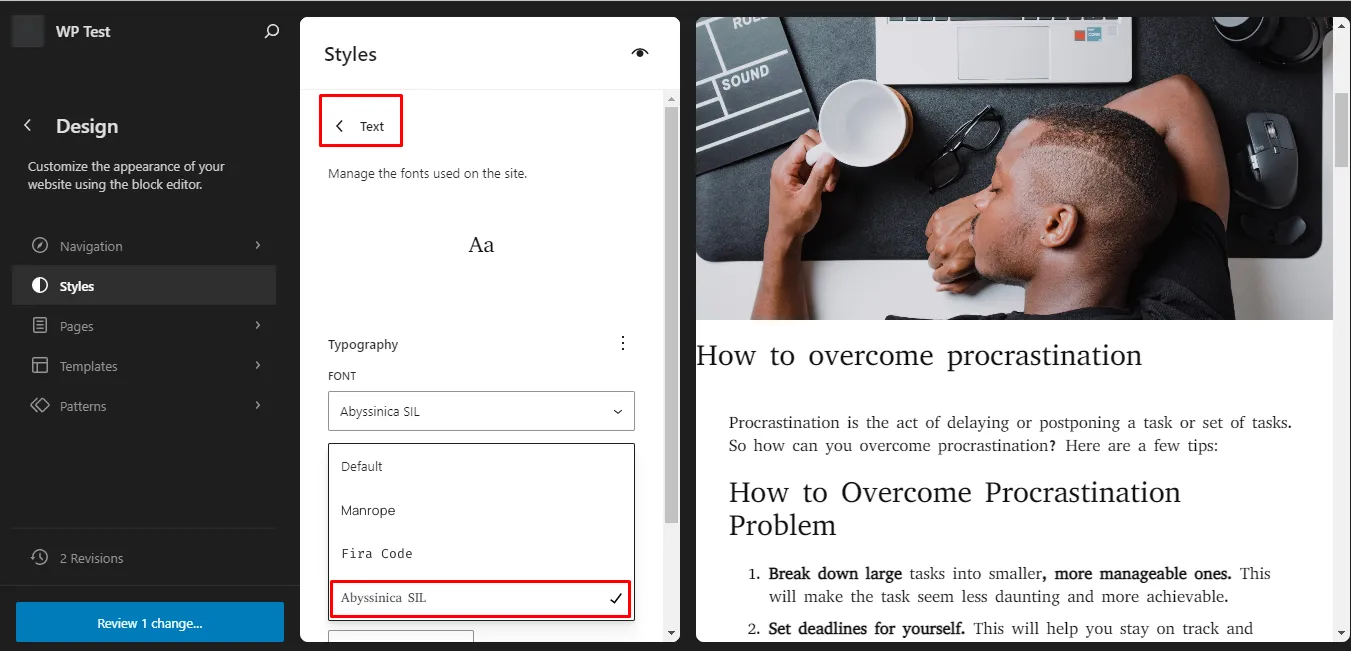
You can modify each element as needed. Remember to save the changes.
Step 8: Change the Font Size
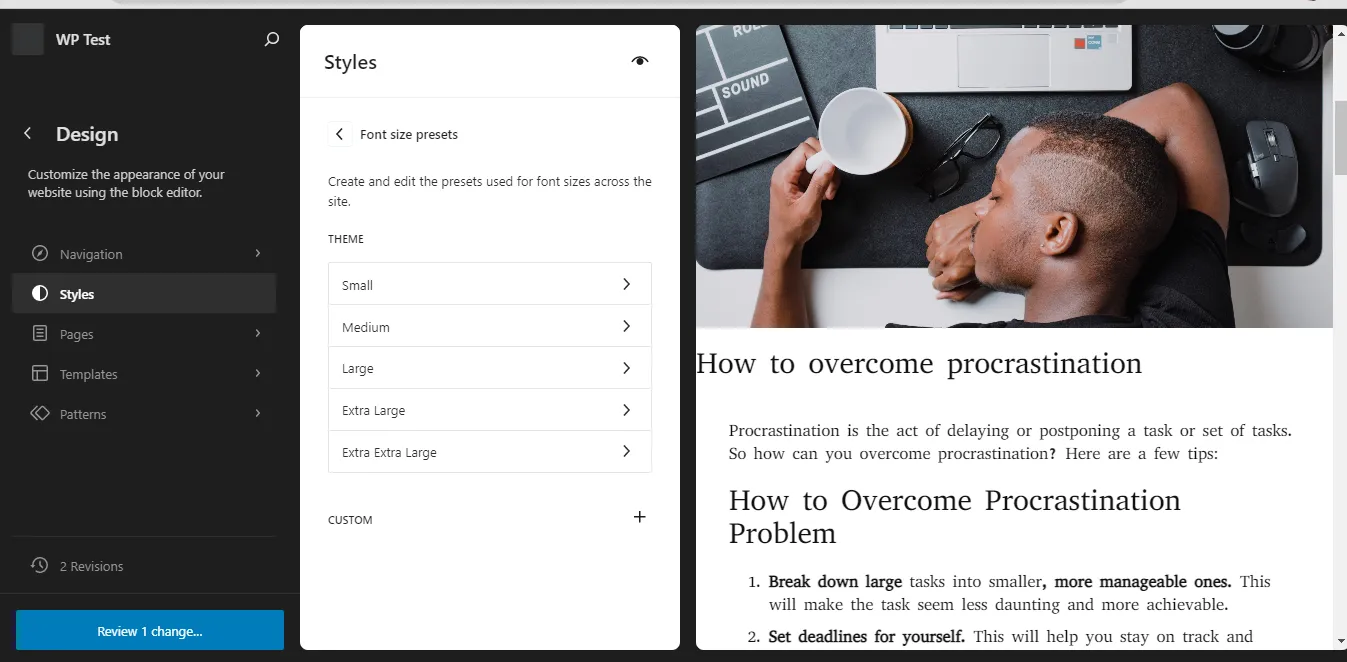
While still on the typography page, scroll down to the font size preset and change it as needed; it is that simple to modify the font!
Method 2: Add Custom Fonts through the Theme Customizer
You can also add custom fonts through your chosen Theme’s customizer. This depends on the theme you are using. Once added, they will now become among the WordPress custom fonts.
Step 1: Log In to Your WordPress Admin Dashboard
First, log in to your WordPress dashboard.

Since we are using the Divi theme, click on the Divi option in the left sidebar, then select Theme Options, to enable custom fonts.
Step 2: Allow Google Fonts Through Divi Theme Options
On the next page, click on General, and on the same page, you will see the option to use Google fonts. Toggle on the option if it is off.
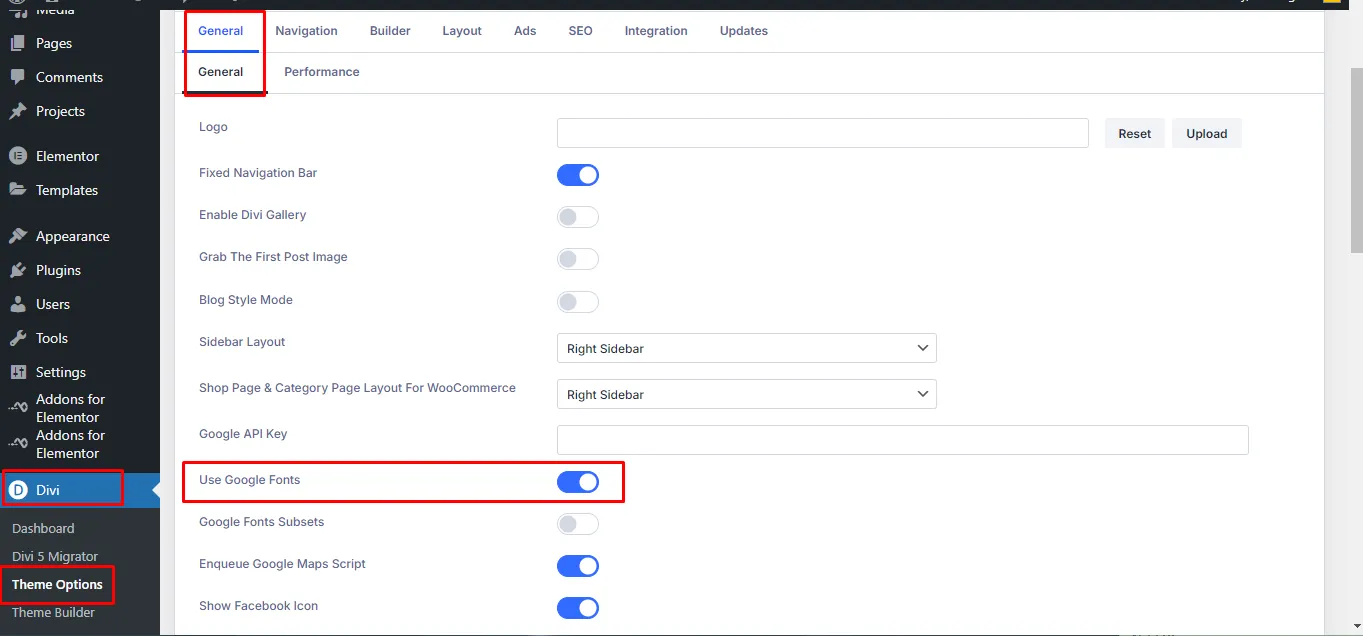
Remember to save the changes. Then you can proceed with the next steps.
Step 3: Choose the Theme Customizer
On your left sidebar menu, click on Appearance, then Customizer. This action will take you to your Theme customizer. We are using the Divi theme; therefore, the settings may differ based on your chosen theme.
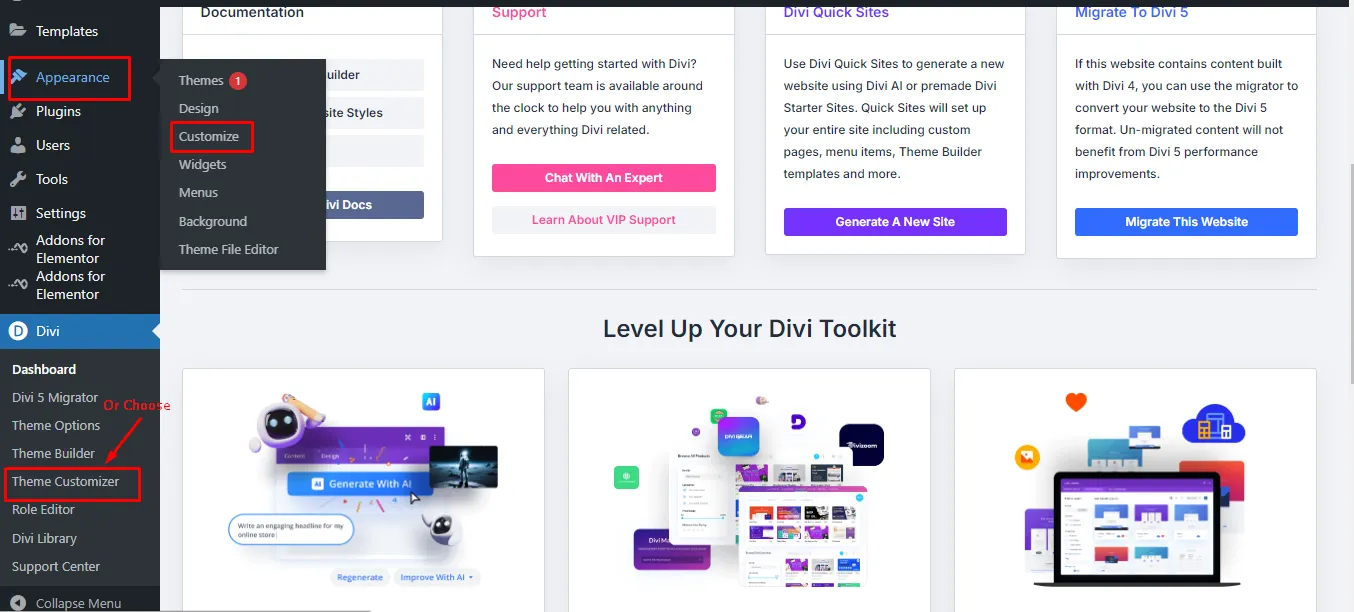
Alternatively, click on the Divi option and select Theme Customizer. However, regardless of the theme you are using, the customizer will allow you to modify the font style.
Step 4: Select the General Settings Option
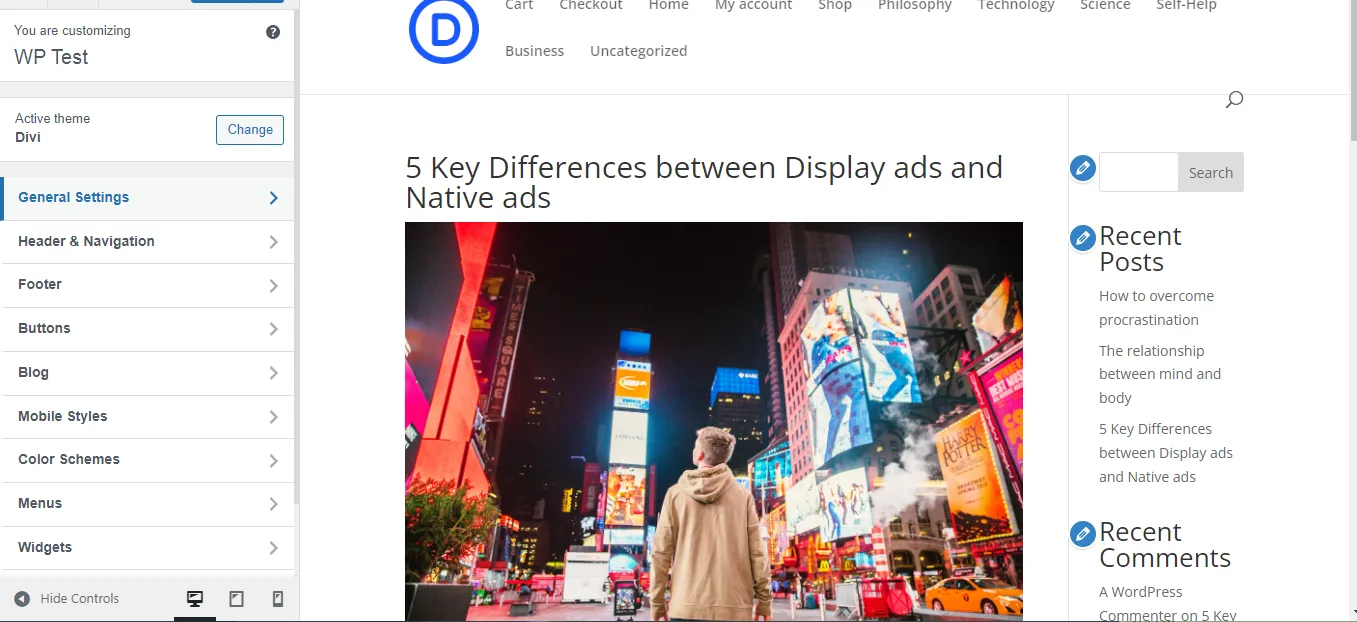
Proceed to select the General Settings option, and then choose typography. The typography option allows you to modify the fonts as needed.
Step 5: Change the Font Style and Settings
On the next page, you have the freedom to change the header font type, body font type, font color, font size, and much more. Since Google Fonts is enabled, in the drop-down, you will find a wide variety of fonts that you can use without limitations.
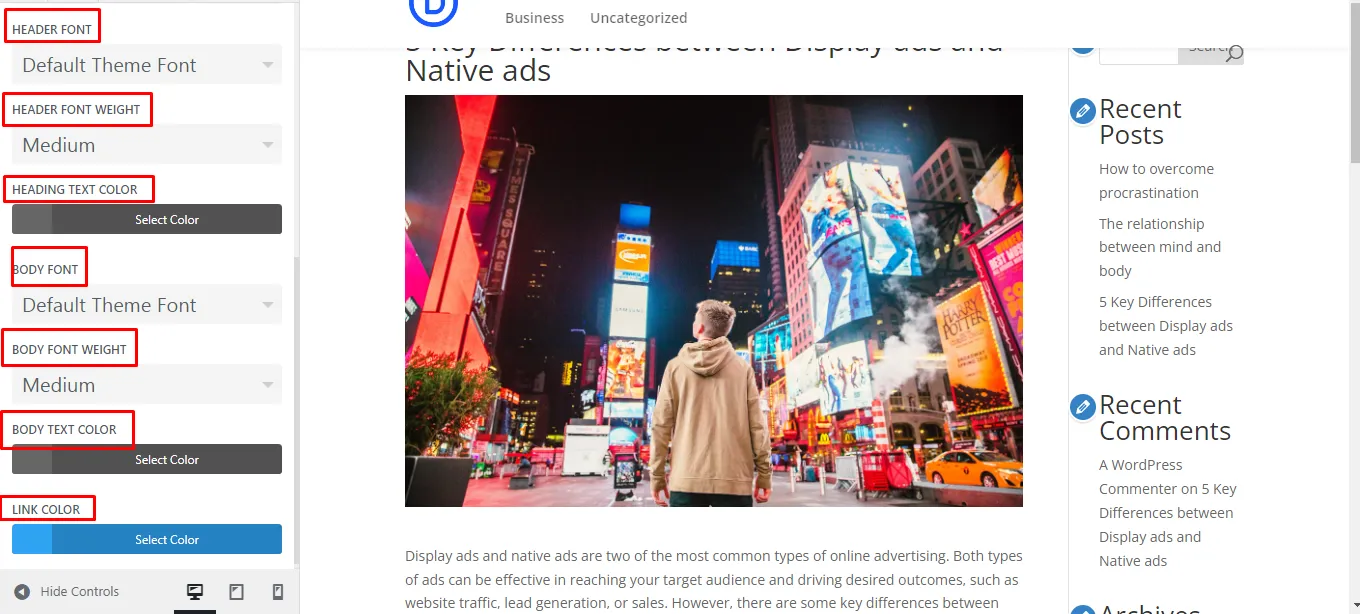
You can modify the font types to fit your brand identity. Remember to save the changes and preview your site. That’s it.
Method 3: Use a Plugin to Add WordPress Custom Fonts
Also, there is a wide variety of WordPress plugins that you can use to add custom fonts to your website. You can utilize Custom Fonts, Use Any Fonts, Olympus Google Fonts, etc.
They all function similarly; it all depends on your preference. For our illustration, we will use the Custom Fonts plugin.
There is a wide variety of free custom fonts available for you to take advantage of.
Step 1: Log In to Your WordPress Website
First, log in to your WordPress website. On the left sidebar menu, select the Plugins option, then Add Plugin.
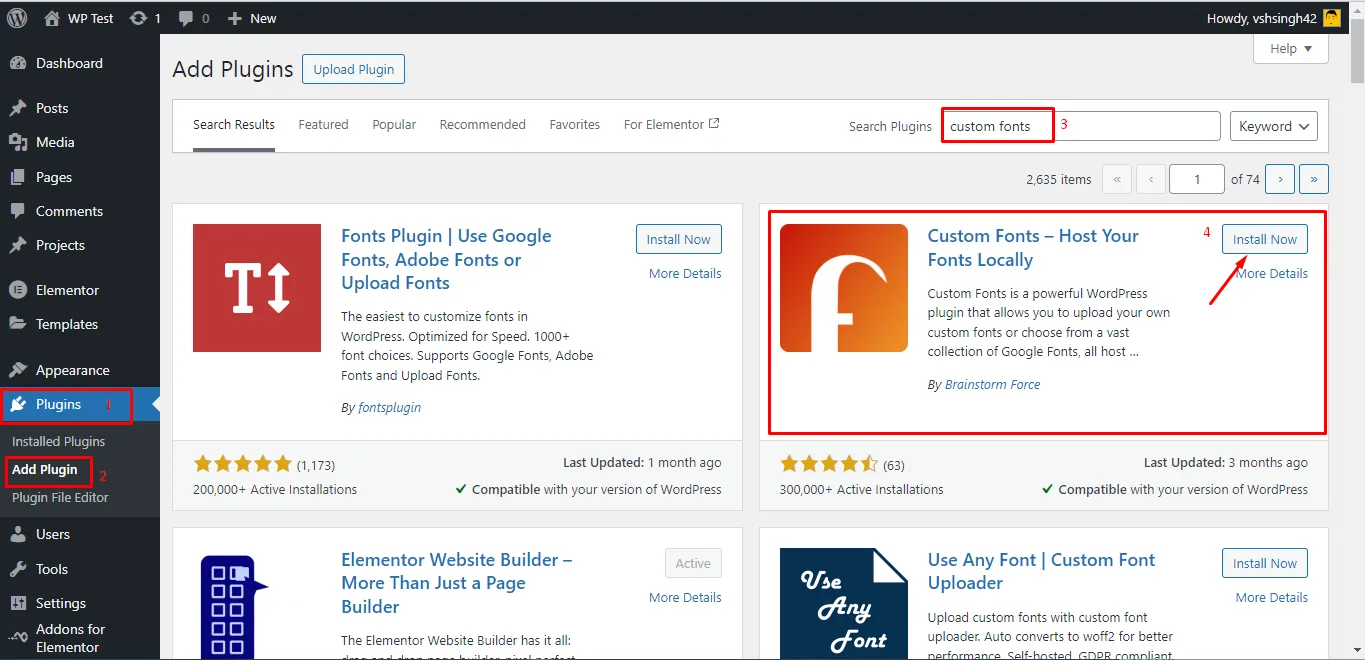
On the next page, type in custom fonts to find the plugin in the plugin library. Once you locate it, click “Install Now.”
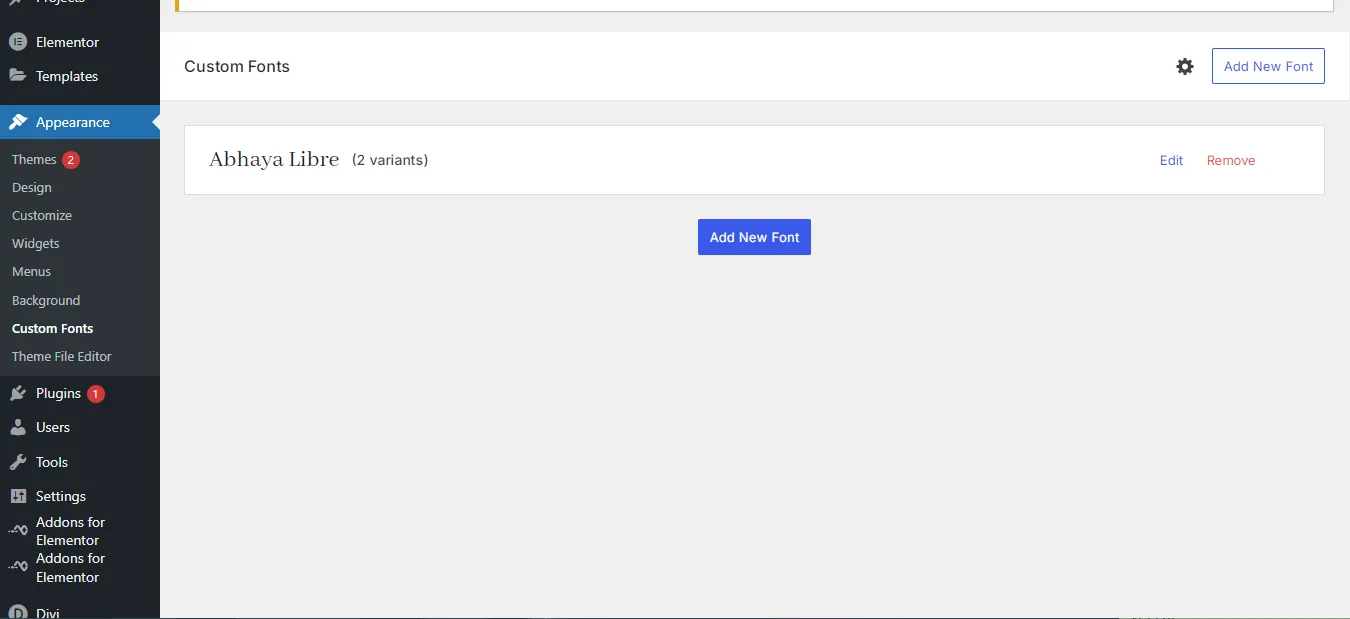
Step 2: Click the Custom Fonts Plugin’s Settings
You will then be redirected to the plugins page. Select the settings option under the Custom font plugin.
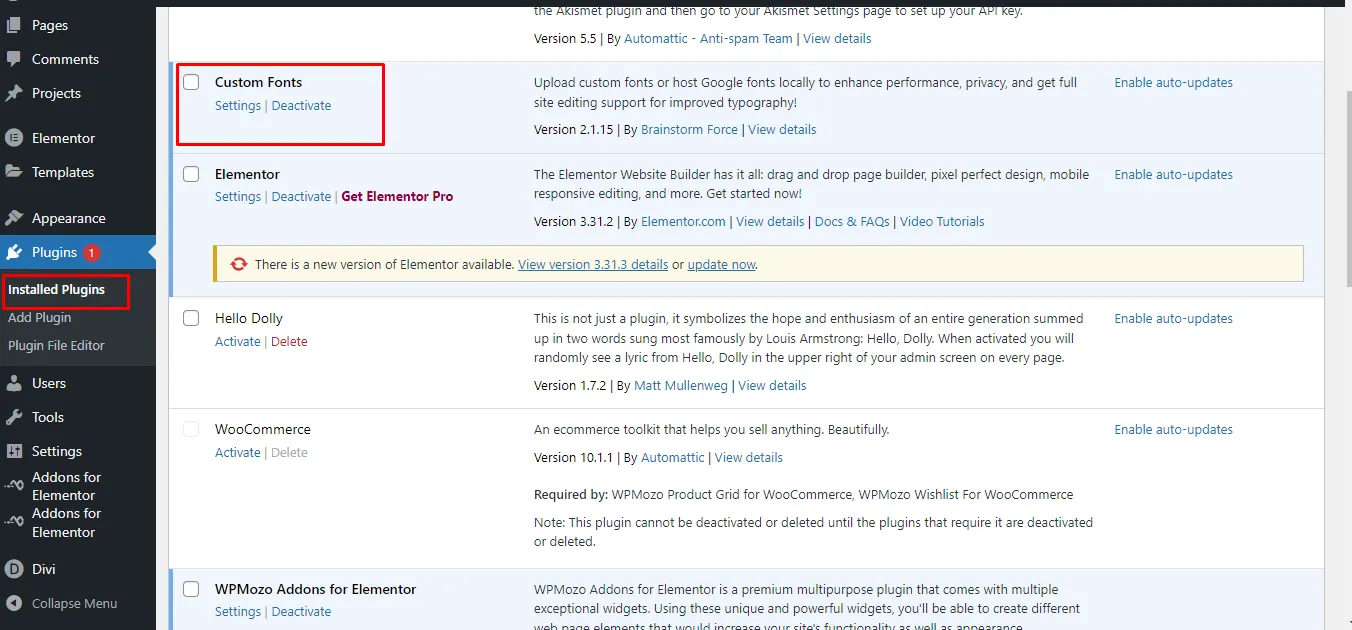
Alternatively, after activating the plugin, you will easily access it through Appearance, then custom fonts.
Step 3: Add a New Font
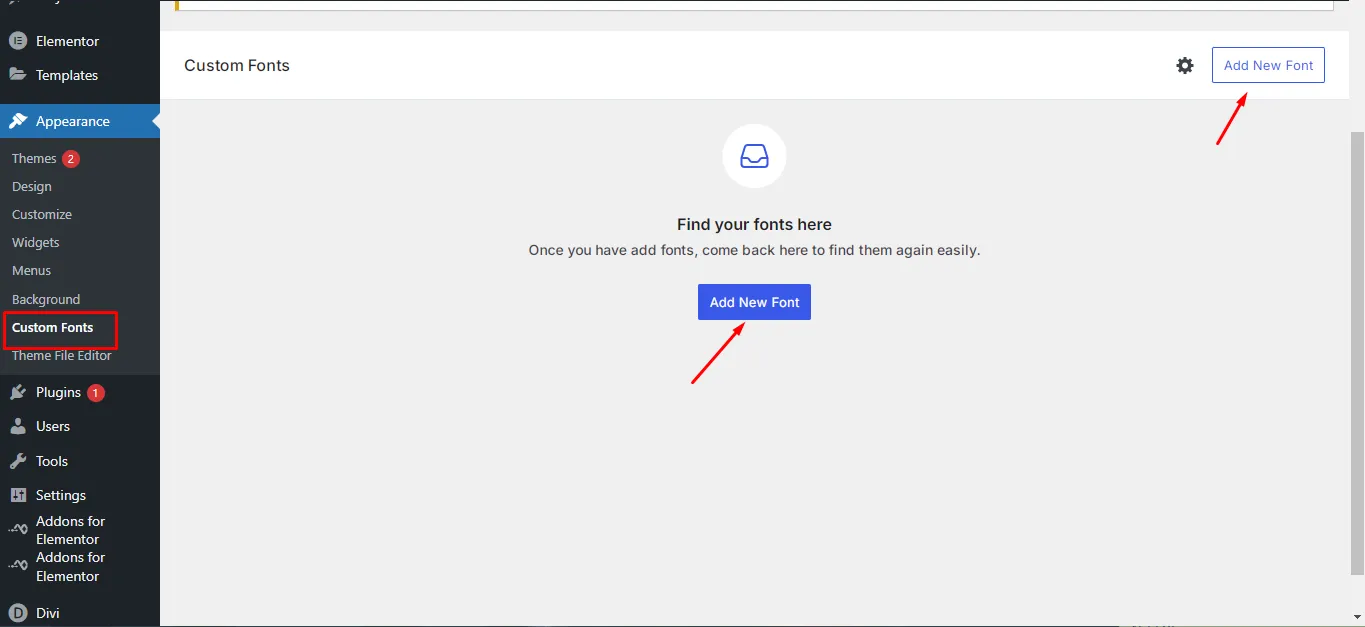
You can now easily add new fonts that you can use to modify your website as desired to give it a stronger brand identity.
Step 4: Choose to Either Upload a New Font or Get from Google Fonts
You can choose to either upload a new font from your local storage or get it from Google Fonts.
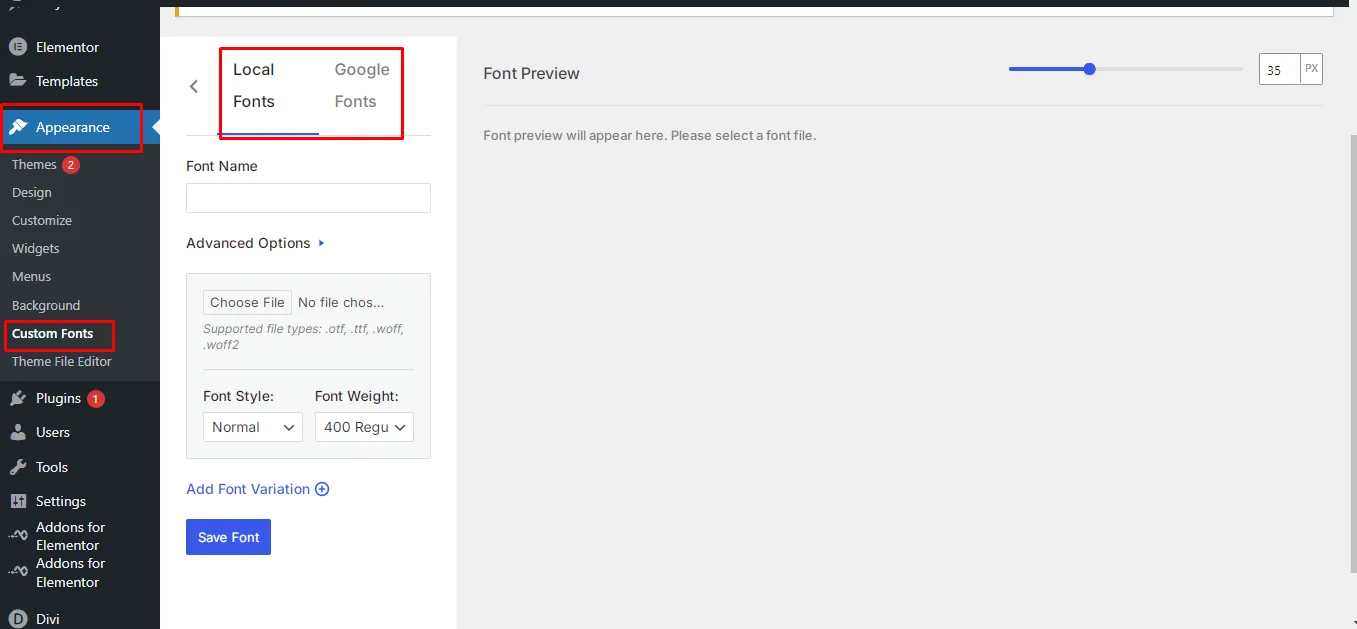
For a local font, you will need to upload a file from your computer.
Step 5: Add Custom Font Through Google Fonts
However, for the Google font option, you will just need to choose a font from the font types provided. If you hadn’t previously connected to Google fonts, you will need to do so.
Luckily, when you choose a font, you get a preview of how the font looks with different sizes and weight variations, so you can choose which one you would prefer to add first. Add as many as possible.
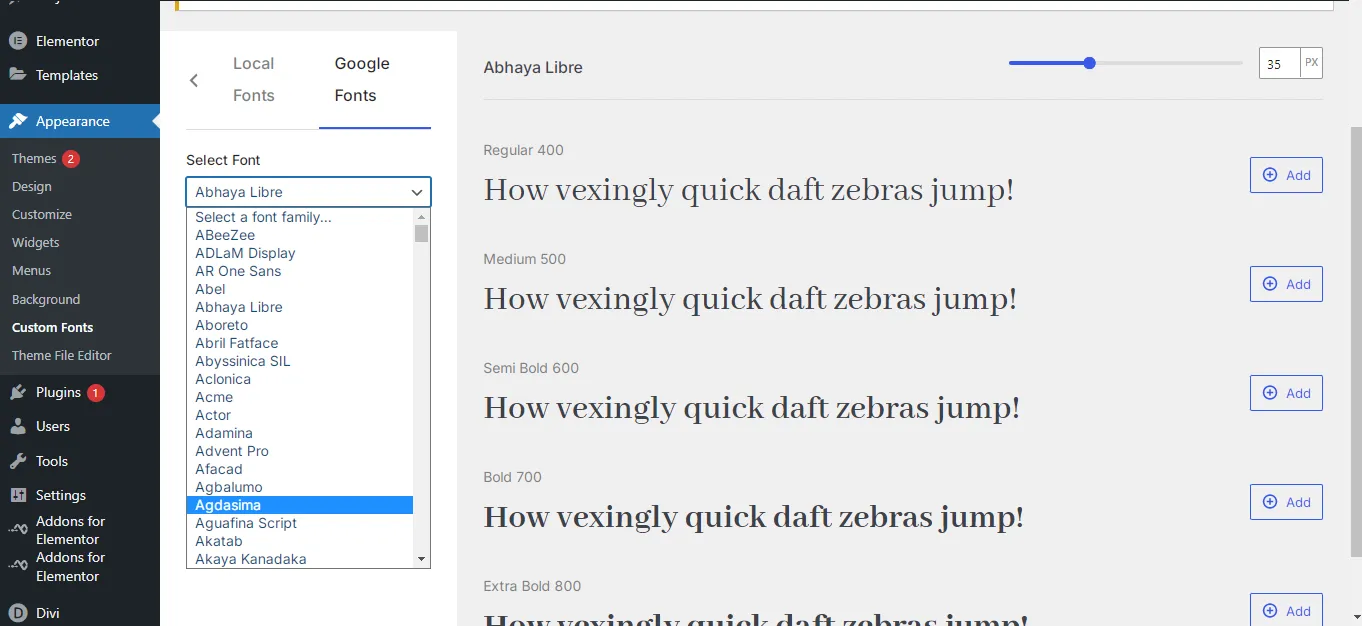
Once done, you will see all your added custom fonts in the initial interface.
As easy as that!
Best Practices for Choosing Fonts for a WordPress Site
Whether you want to use commercial or free custom fonts, here are some best practices for you:
- Choose the best WordPress fonts that are easy to read on all devices (desktop, mobile, tablet, etc.)
- Don’t overdecorate or use complex fonts in the body section.
- Use two to three fonts maximum to reduce clutter or slow down the website.
- Ensure a good contrast between the background and font color.
- Match the best WordPress fonts with your brand identity.
- Test the fonts across different browsers to ensure easy readability and accessibility.
- Ensure the font size and line spacing comply with each other.
- Make sure the fonts are legible for visually impaired users.
- Use bold or italics in your text when necessary.
- Ensure sufficient font size for comfortable reading.
- Choose web-optimized fonts like Google fonts.
What Is The Importance of Font Licensing?
Font licensing can be useful for both personal and commercial font use. For personal use, it is when you use fonts for projects that aren’t meant to generate income, e.g., personal blogs, etc.
However, for commercial use, it is the scenario of using the fonts for business purposes to generate income.
Therefore, consider obtaining a font license if you are using it for commercial purposes to avoid potential legal issues. Thus, if you use a commercial font, be sure to get its licensing; if it’s free, then no problem.
FAQs
1. What are the types of custom fonts?
Serif fonts, sans serif fonts, display fonts, and script fonts.
2. Where can you find custom fonts?
You can find custom fonts on Google Fonts, Adobe Fonts, Font Squirrel, Fontesk, Creativemarket, and independent designers.
3. Who can benefit from custom fonts?
Web designers, web developers, e-commerce store owners, bloggers, content creators, and SEO experts.
Conclusion
Adding custom fonts to your WordPress website can be beneficial to ensure your brand stands out.
Additionally, some default fonts may not be easily readable; however, using a custom font can ensure you don’t lose customers or your audience simply because they can’t read your content.
Luckily, you can easily add custom fonts directly to WordPress, add a custom font through your website’s theme customizer, or use a plugin. The choice is yours when it comes to choosing the best WordPress fonts!


0 Comments