
Are you here to take your WordPress to new heights by embedding podcasts? Do you want to learn how to add a podcast to your WordPress blog? Then, you are on the right page; we have got you covered on this.
The popularity of podcasts is on another level nowadays, as they have a huge audience listening to them. It is reported that there are more than 546.7 million podcast listeners around the globe, which has seen growth since 2019. That is a huge number indeed!
According to another report, around 49% of podcast listeners use the search engine to find new podcasts. So, adding a podcast to your blog is an excellent means to increase your target audience. This can also become a great opportunity to convert these podcast listeners to your dedicated followers if you start embedding podcasts on your blog site.
Whether you are a seasoned podcaster or just starting out now, you should first learn how to do a podcast session and then how to embed it on your site. Let’s get you through both of these things in this article.
How to Start a Podcast on Your WordPress Website?
Starting a podcast is not a big deal if you have an interest in finding new concepts and know how to communicate. To get started as a podcaster, these are the steps you should follow:
Step 1: Finalize Your Topic and Format
The foremost thing to start a podcast is the topic on which you are going to talk about. This is easy for you since you are running a blog website. So, your podcast should align with the niche of your website.
Step 2: Buy Equipment for the Podcast
After deciding on the concept and format of your podcast, the next thing to look for is the equipment that will help you capture high-quality visuals and audio.
For professional audio, you need a top-quality microphone and headphones and if you are recording the video as well, you also need a good-quality camera. The recording can be done using any recording and editing software such as Audacity to edit the raw recording.
Step 3: Record Your 1st Podcast Episode
If you are new to podcasting, it can be quite intimidating for you to sit behind the mic for the first time. With a bit of practice, you will get used to it after recording the first episode. You can start with writing the script for the podcast and if it’s an interview prepare your questions beforehand and you are good to go.
Step 4: Upload Your Podcast to Your Blog
This is the most crucial step and we will going to discuss how to add a podcast to your WordPress blog in detail later in this article. But for a teaser, you can syndicate the episode of the podcast to your WordPress Website using the RSS feed link.
Read the next section to know more about this:
How to Add a Podcast to Your WordPress Blog
Here you are going to learn the step-by-step guide to add a podcast to your WordPress blog.
1. Look for a Dedicated Media Hosting Service
If you already have a WordPress blog, you must have a reliable hosting service too, like BlueHost. But one episode of a podcast is at least a 15-20-minute-long audio file, which is quite a large file. So, if we upload it to your web hosting service it will going to affect the speed and performance of our blog. That’s why we are in need of a dedicated media hosting service.
It is always better and recommended to use a separate podcast hosting service that can integrate well with your WordPress Blog. You have two options for media hosting providers:
- Castos
- Blubrry
Castos has a relatively simple podcasting plugin, while Blubrry comes with a PowerPress plugin, which is more effective.
2. Download the Podcast Plugin for WordPress
To add the Podcast to your WordPress, you need to install the Plugin first. The podcasting plugin is helpful in two ways:
- First, it will be associated with the media hosting service, in our case Blubrry, where the audio files are going to stay safe and it will now slow down your WordPress website this way.
- Secondly, the plugin will allow you to directly upload your podcast episodes from the WordPress dashboard and also view analytics.
You can download the PowerPress plugin from the internet in the zip file and then go to the WordPress dashboard to find the Plugins option, then click on Add New Plugin to add PowerPress.
- On the Plugins page, click on the Upload Plugin button at the top left corner of the page.
- Choose your zip file of PowerPress downloaded earlier and click on Install now.
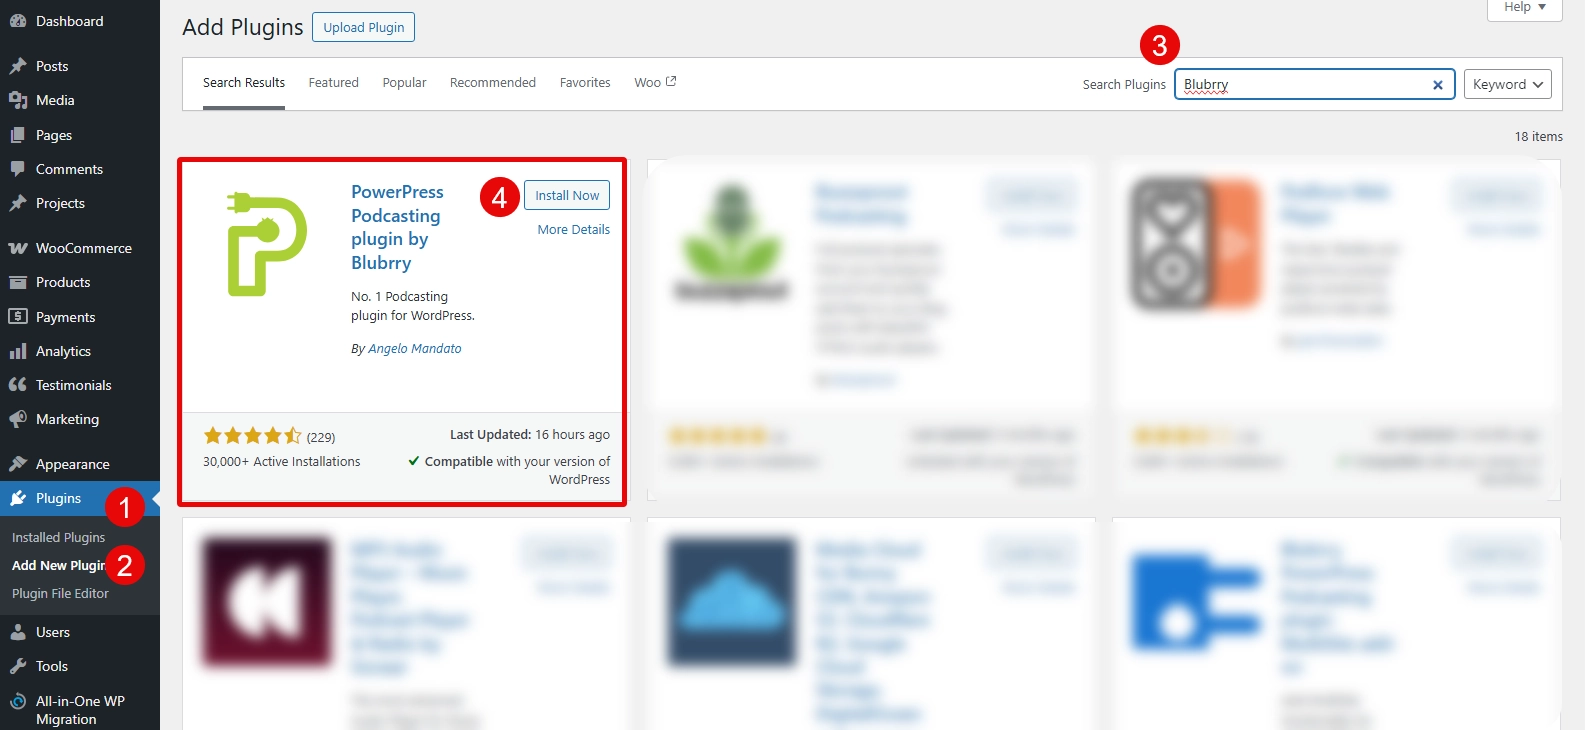
- Alternatively, install the plugin directly from your WordPress Dashboard: Go to Plugins → Add New Plugin → search for Blubrry, and the following one:
- By now, your plugin has been installed but not activated. For that, click on Activate Plugin.
- Once your plugin is activated, it will appear in the left menu with other dashboard items. Find it and open the plugin.
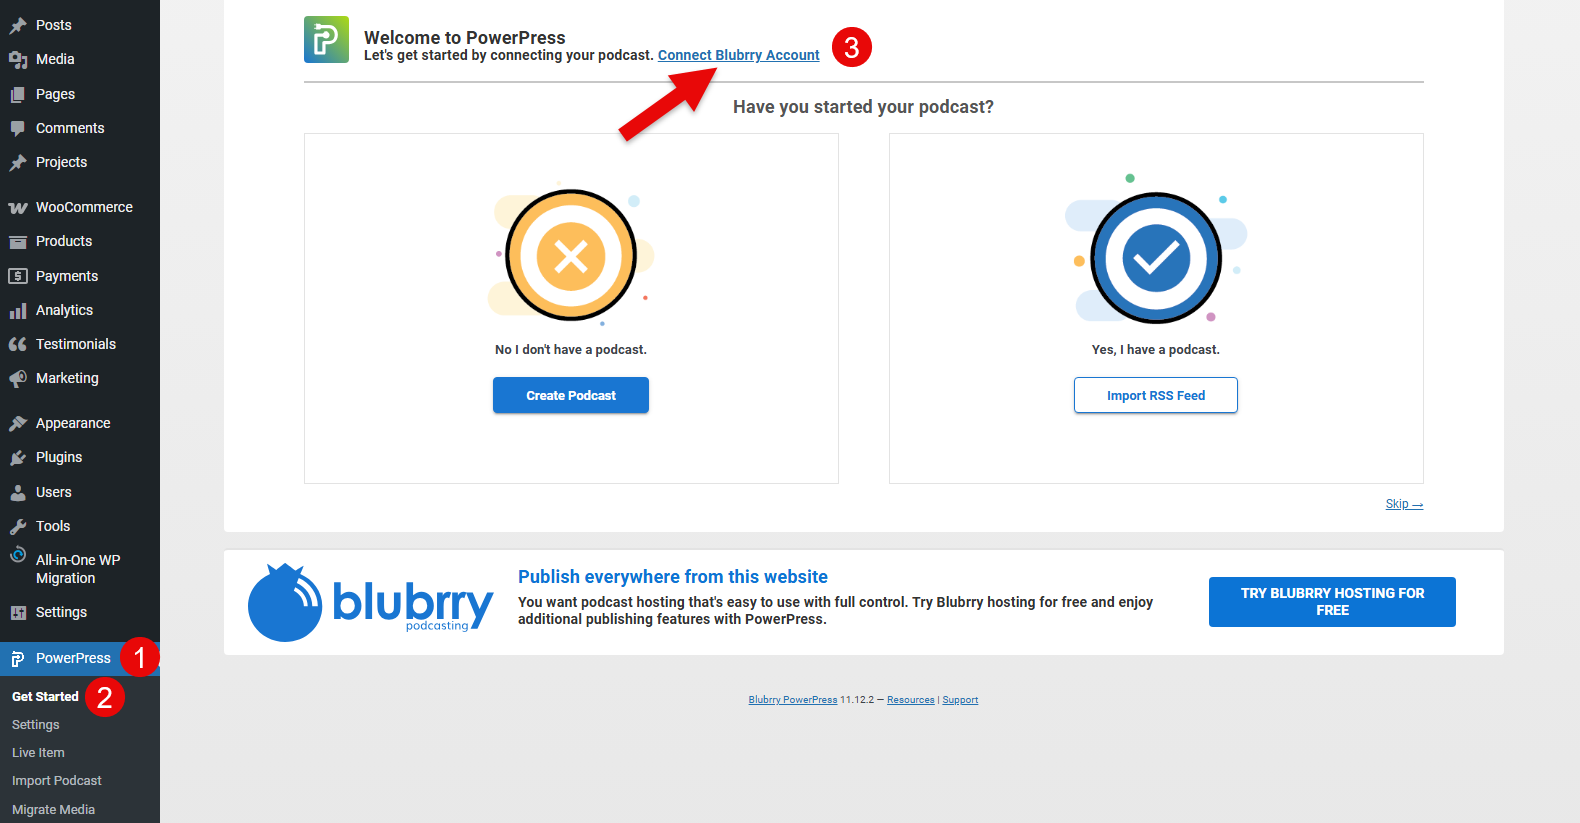
- The next step is to configure the plugin with the hosting service. For that, head to the Get Started option. Then, click on the Connect Blubrry Account to access more functions.
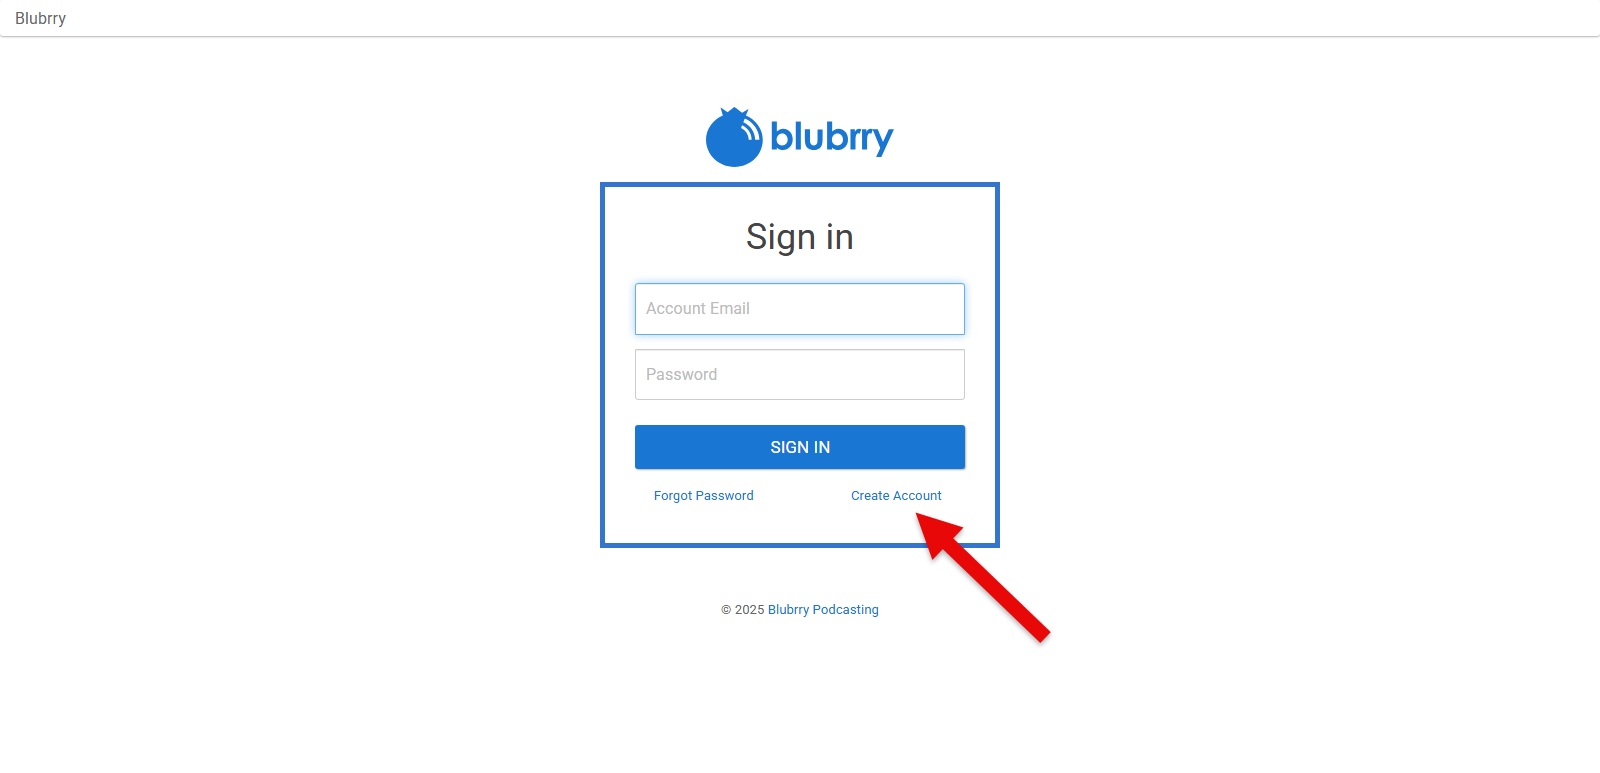
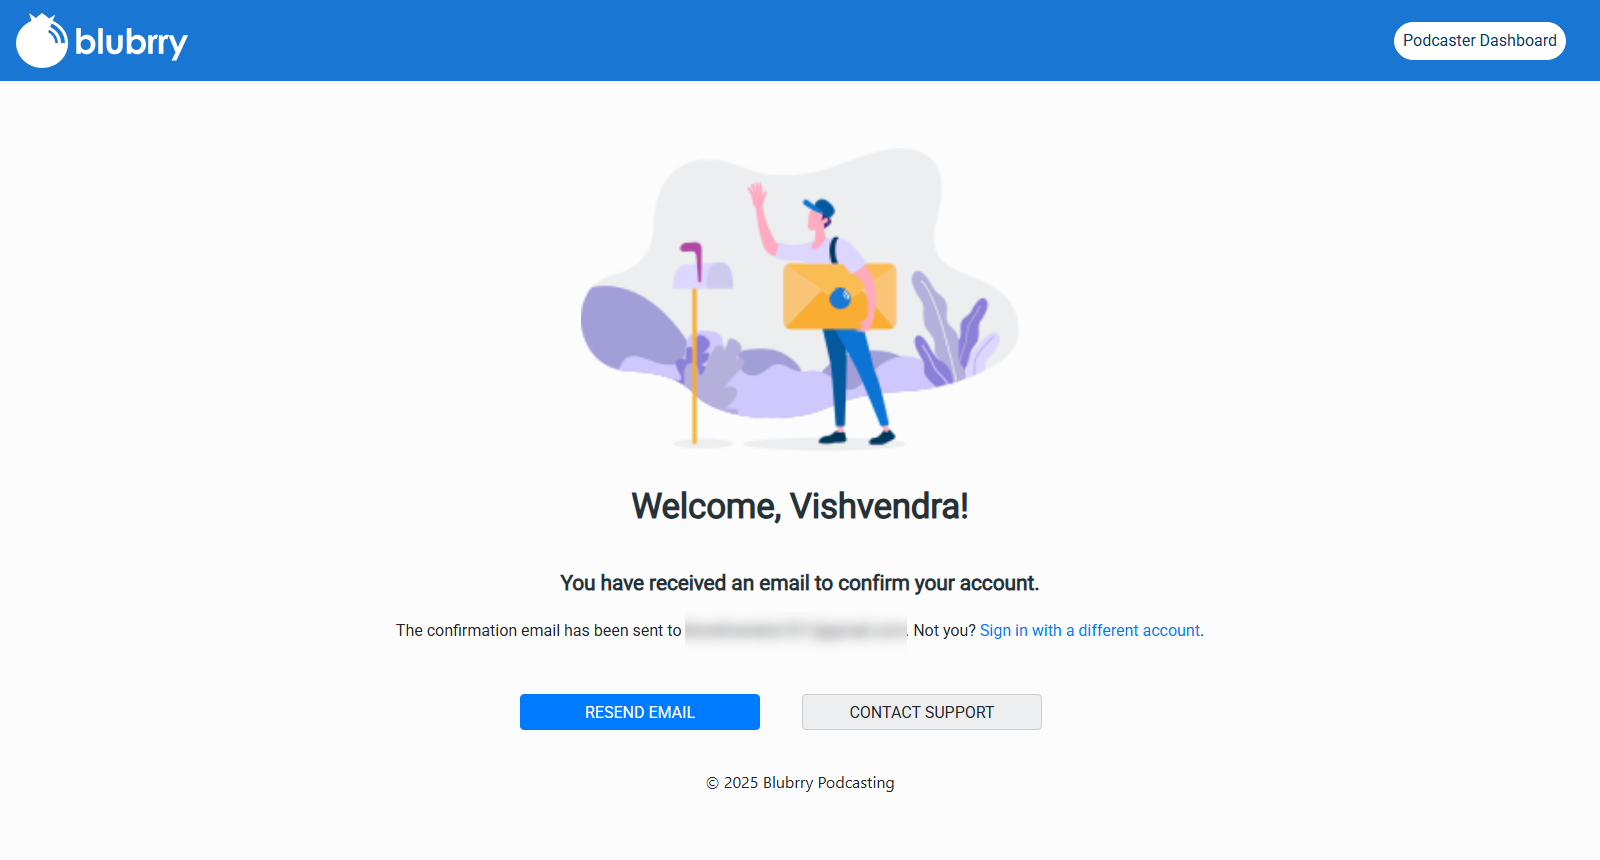
- You will be redirected to the Blubrry website, where create a new account.
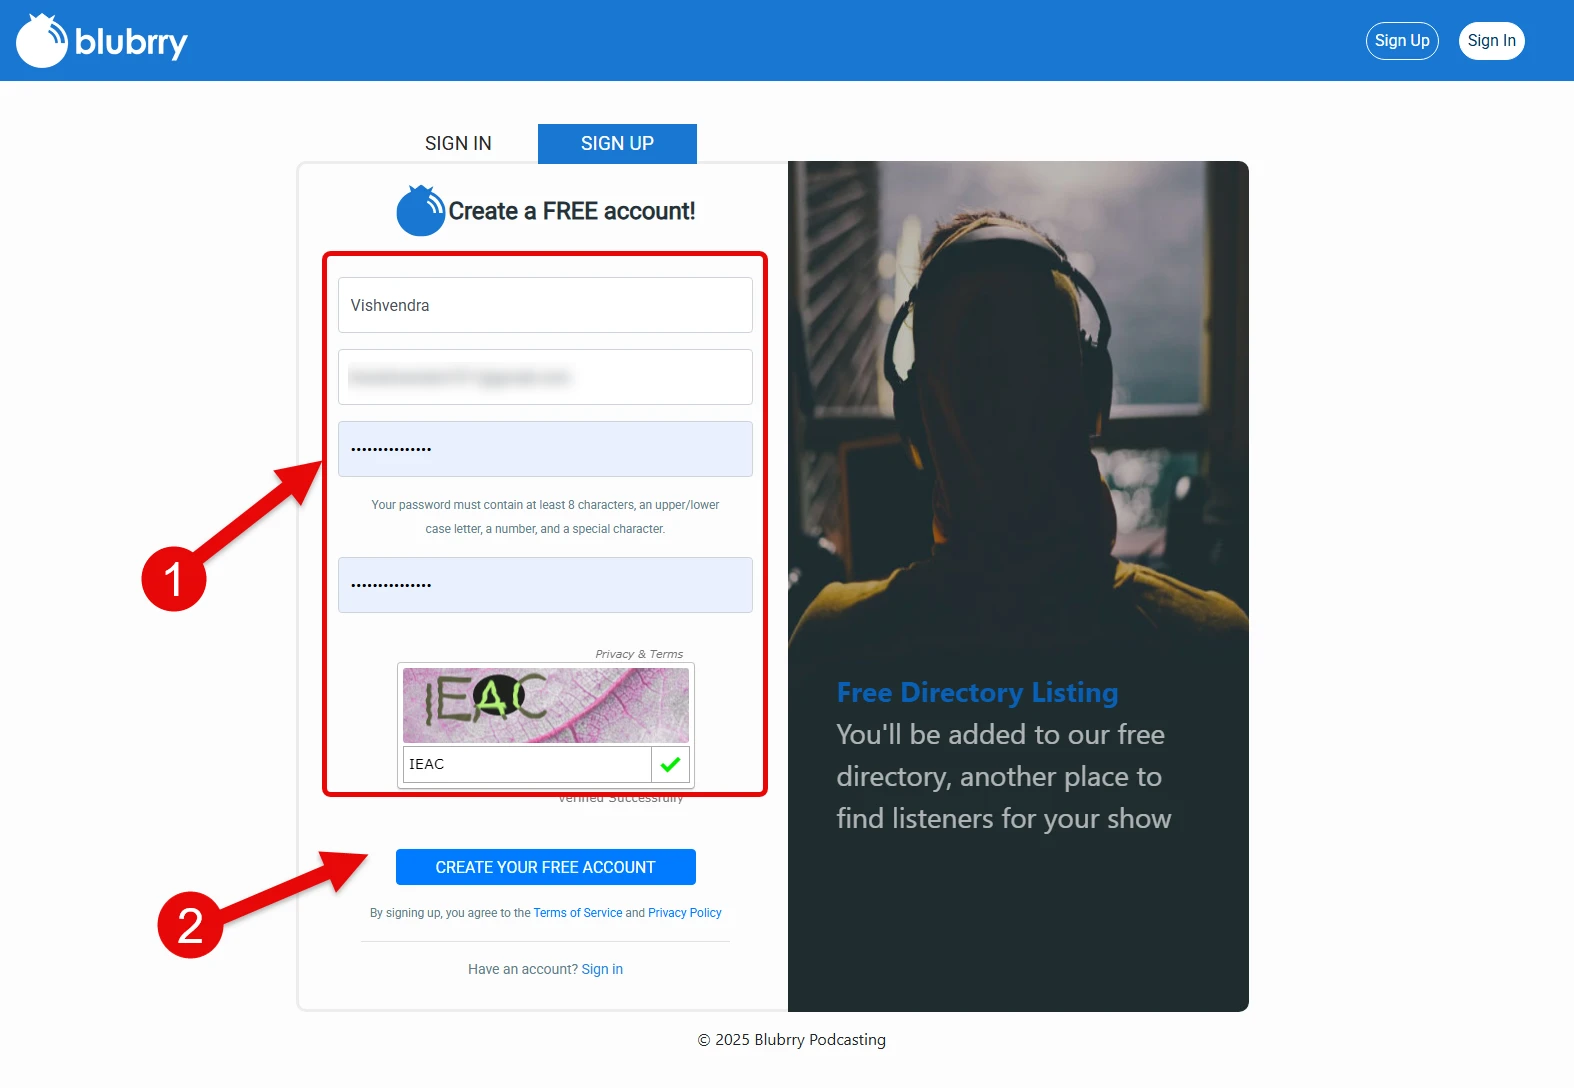
- Enter your details and sign up for the Blubrry free account. After the signup, you need to verify your email, so do that as well.
- Once the verification has been done, return to your WordPress Dashboard → PowerPress → Settings.
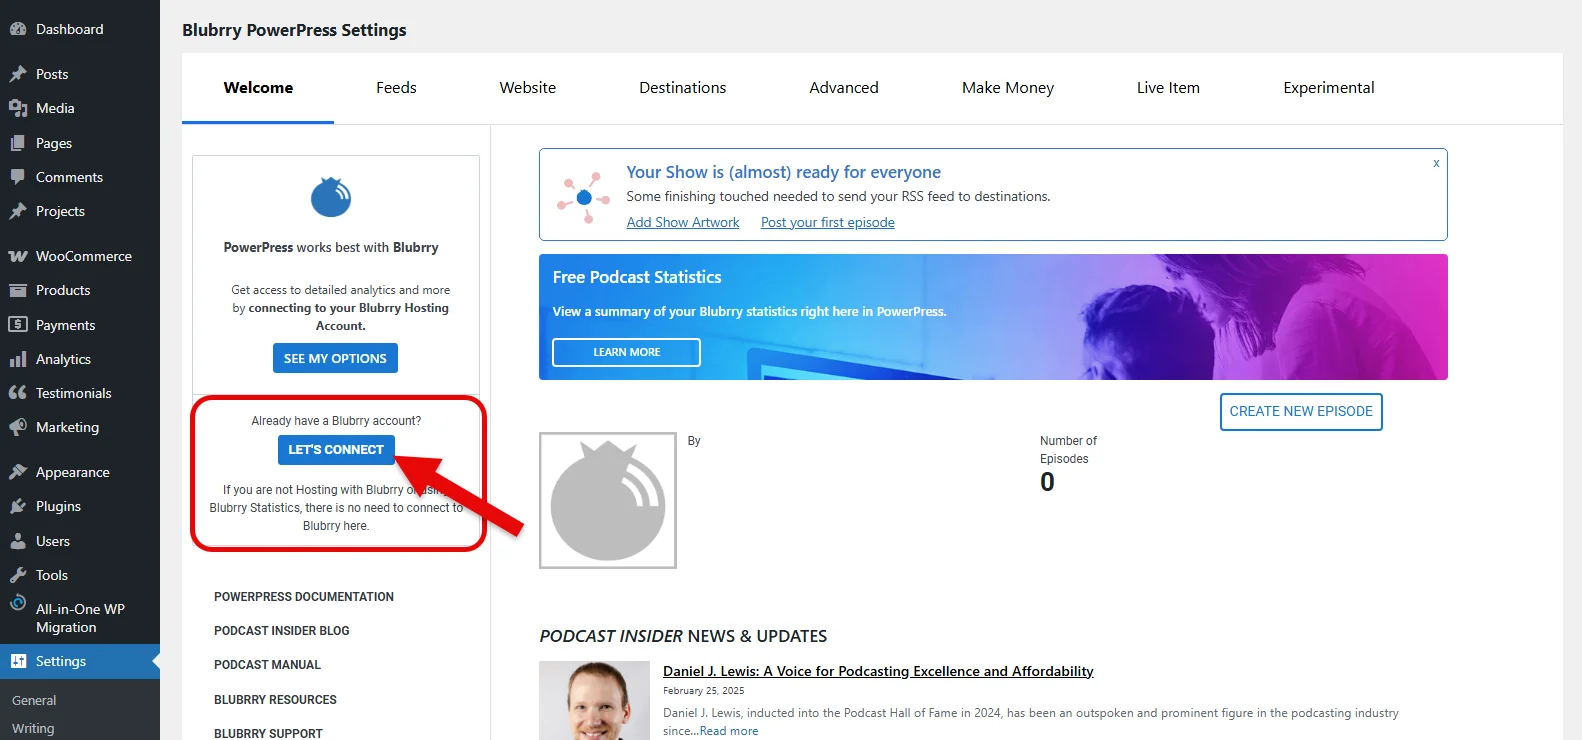
- On this page, click on the LET’S CONNECT. Then, Authorize your account to access the features.
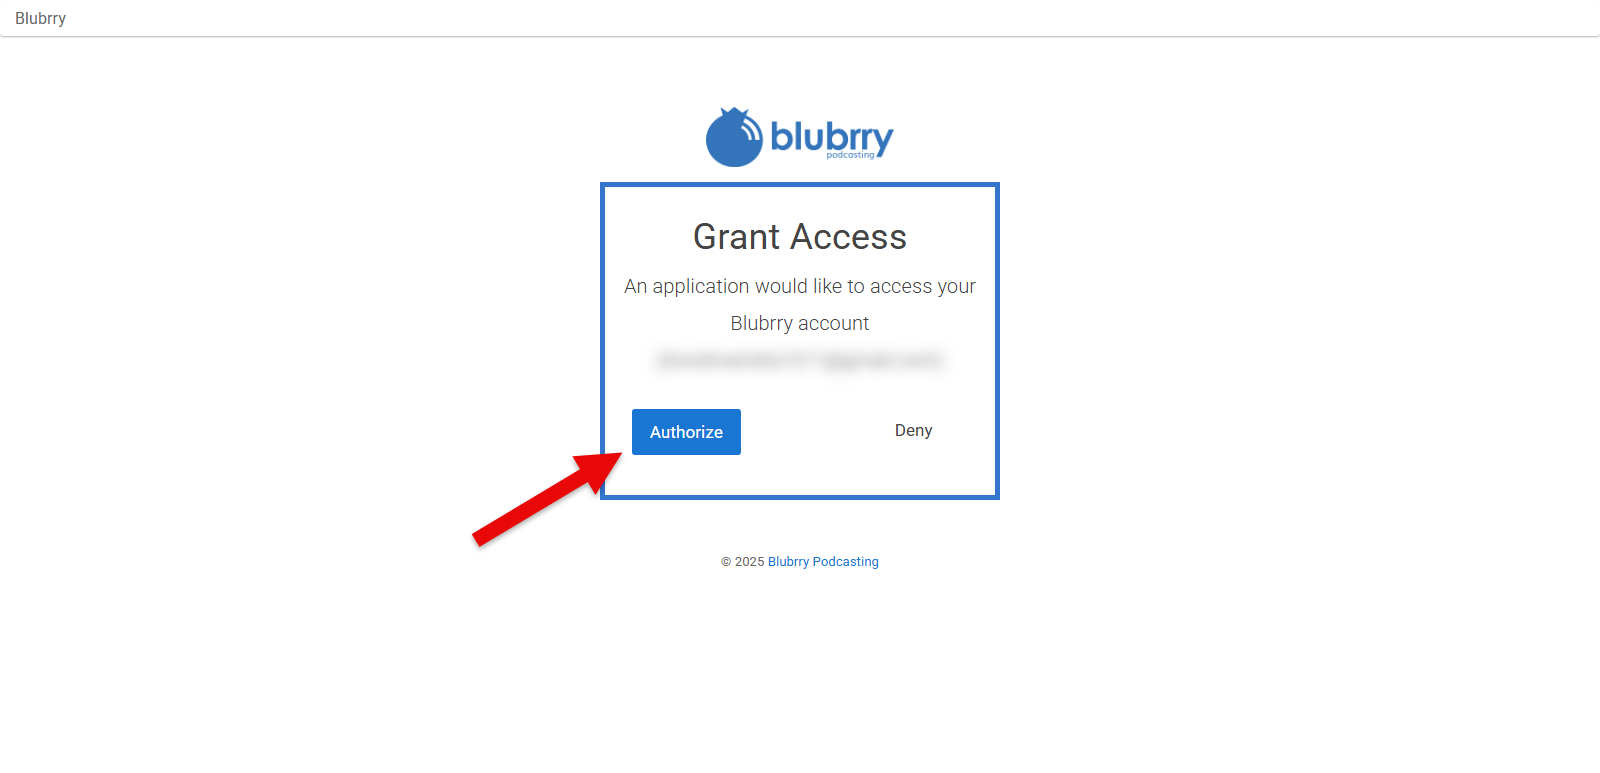
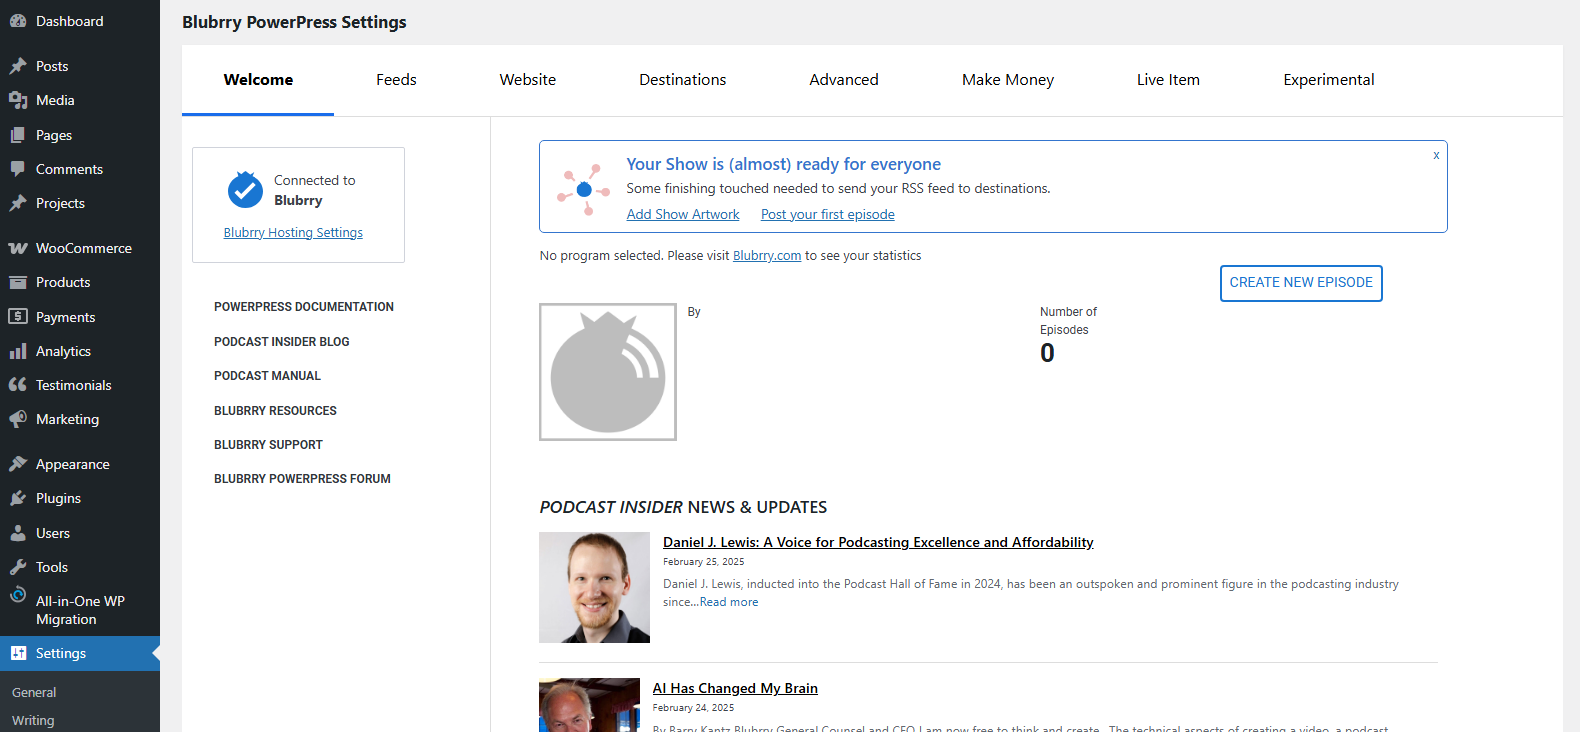
- Once it’s Authorized, you are able to host your Podcasts through Blubrry. All you need to do is now, configure other settings and create the podcasts.
3. Publish Your First Podcast
After you are done with the configuration and integration step, now is the time to publish your very first podcast episode on your blog.
Create a Podcast Category
You do want to differentiate your Podcasts from other content on the website. So, for that, you need to create a category. And for that, go to Posts → Categories.
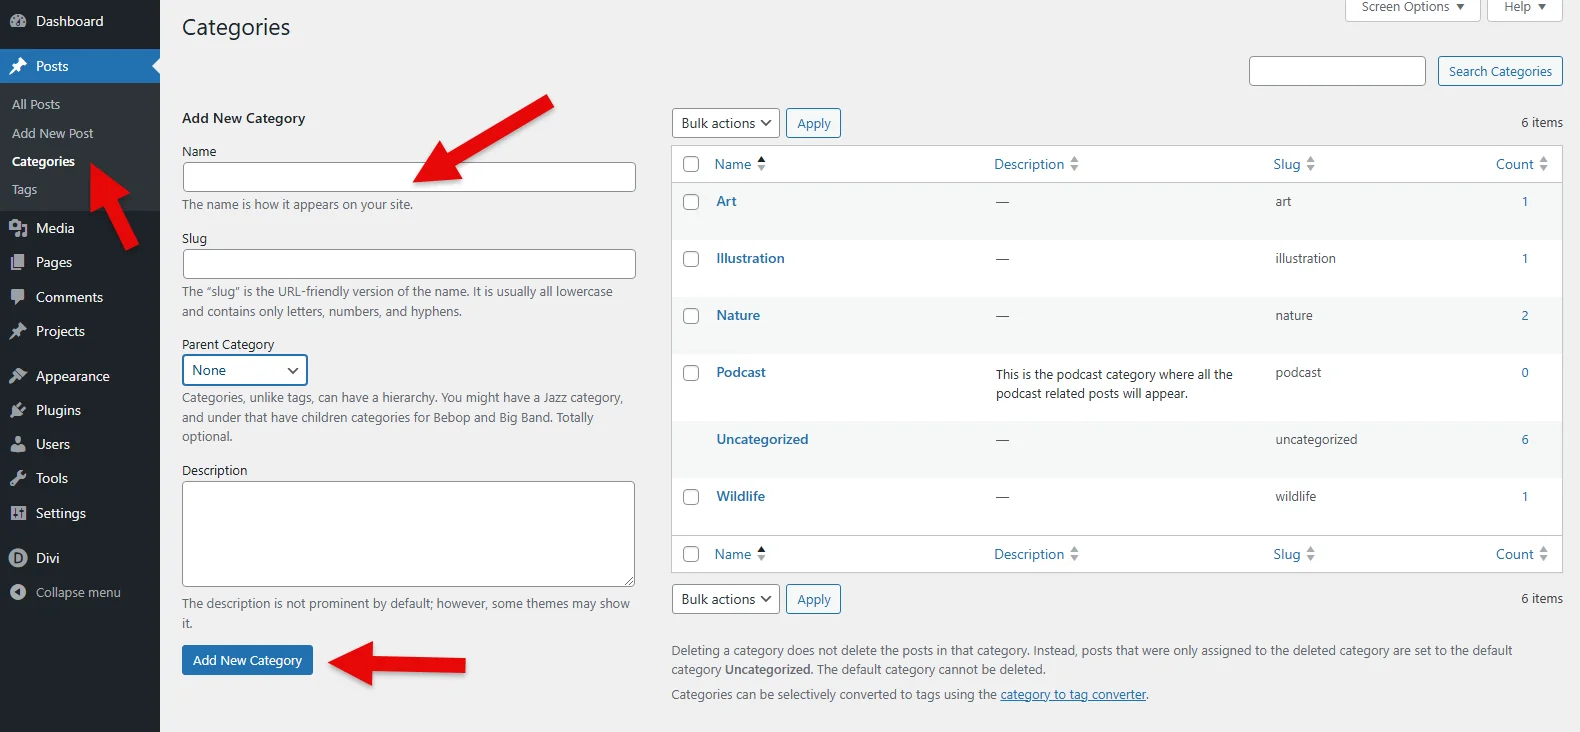
Here, simply name your category as Podcast or something else you prefer. Once done, click Add New Category. Now, move to the next step to create your first podcast.
Create a Podcast Post
To create your podcast post, navigate back to the WordPress dashboard and click on Posts. Now add the title and other things the same way as you add in your blog post.
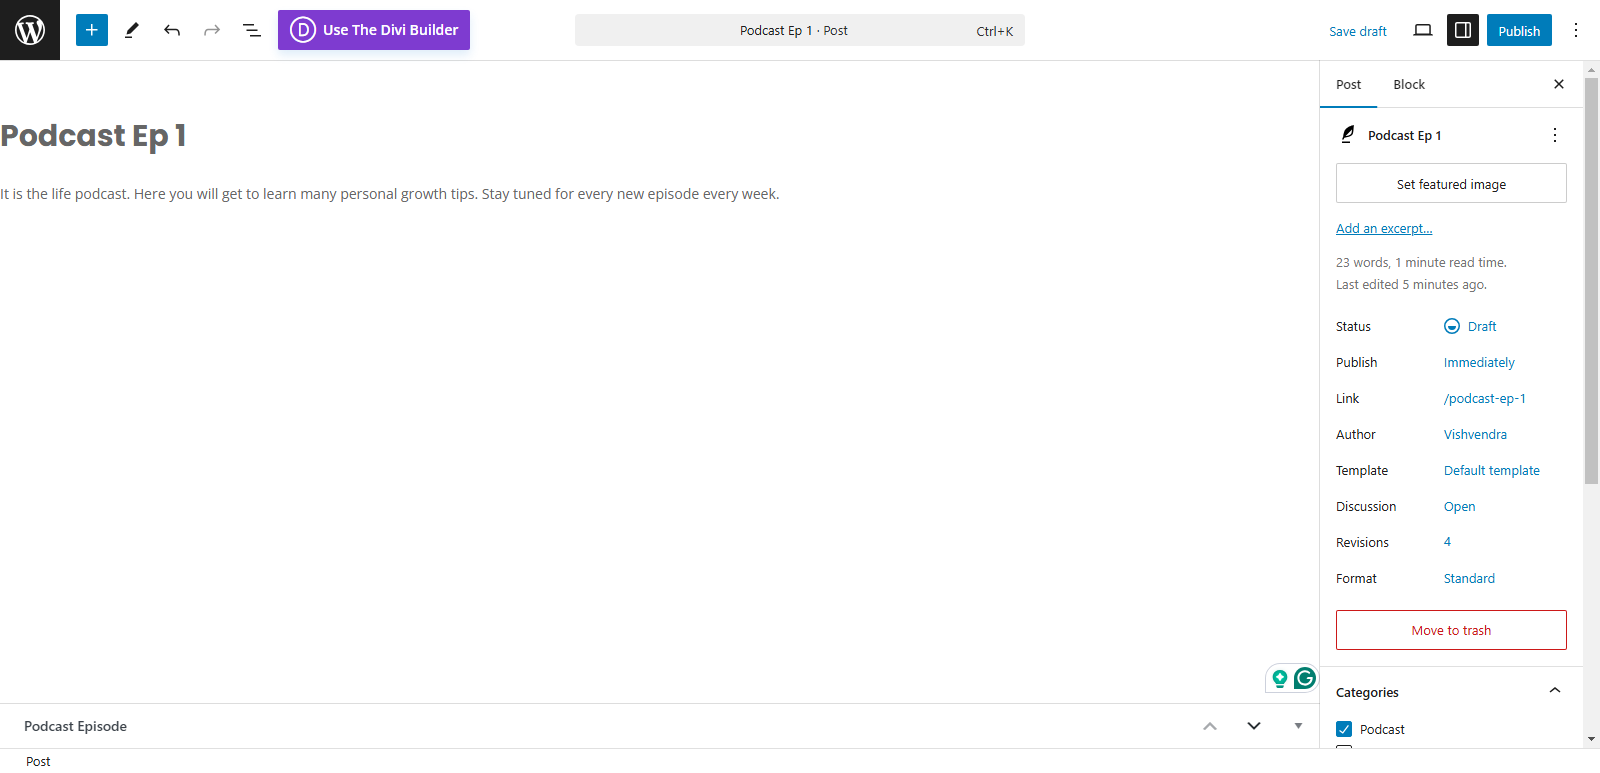
- The most important thing is the audio file of your podcast episode. To add it, scroll down a bit until you find this section:
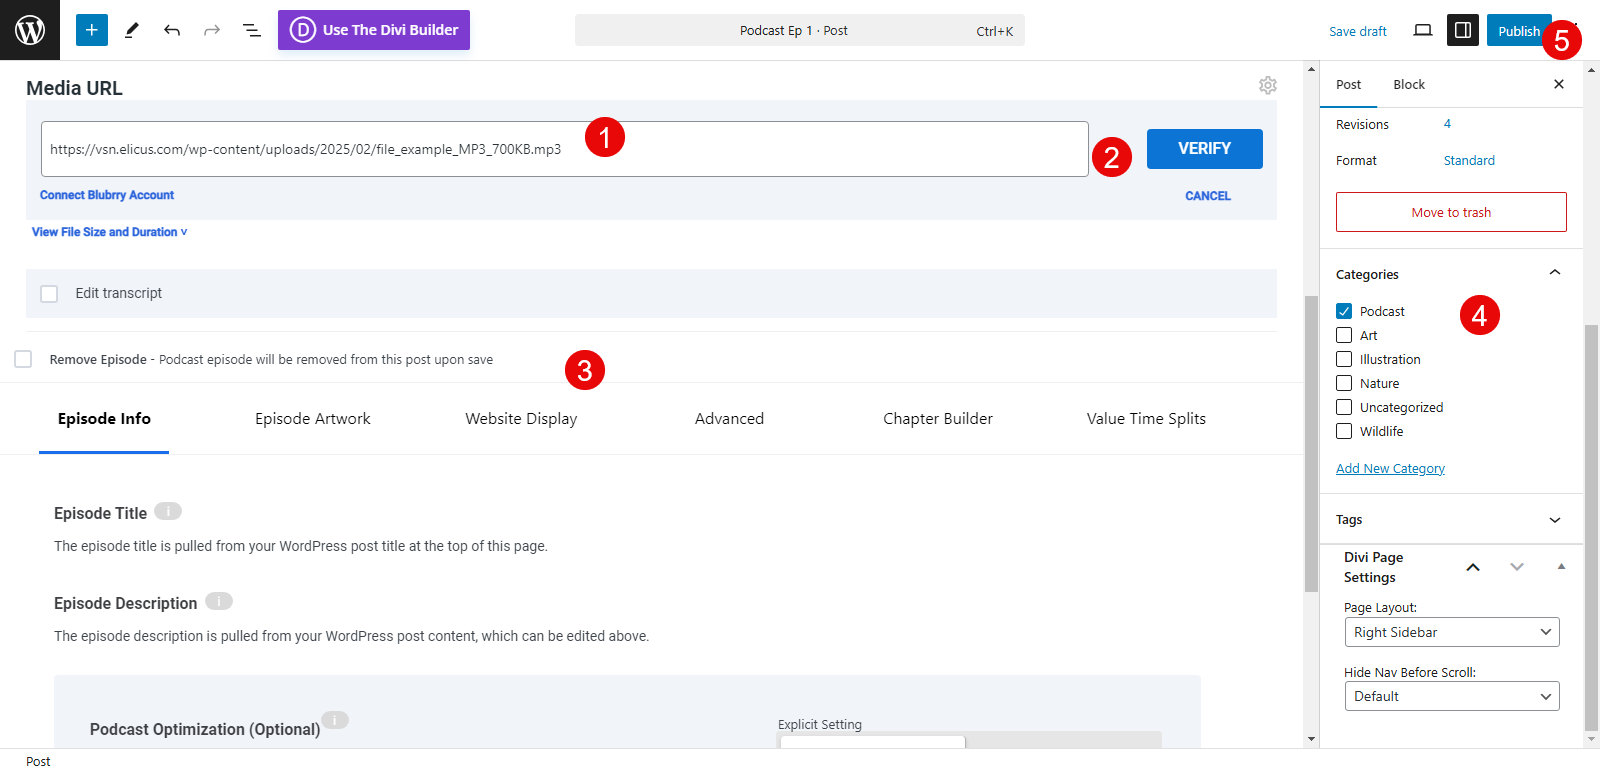
- Now you will need to first upload the recorded audio file to your media hosting.
Coming back to the WP post, paste the URL of the media file you just uploaded in the space given as “Media URL” in the above screenshot. Then, select Podcast as the category.
Adjust the settings available. Then, Now double-check one last time and then hit the Publish button. Congrats! Your podcast is all set to go live!
Benefits of Adding a Podcast to Your WordPress Blog
In today’s competitive digital era, being up-to-date is extremely important. You will fall behind if you don’t use what is trendy and latest. So, adding a podcast to your WordPress blog will help you in many good ways:
- Increase web traffic: Your podcast will drive more organic traffic to the website. The listeners will come by often to listen to new episodes you post occasionally.
- Improves SEO: A podcast will also help you improve the SEO of your WordPress blog. You don’t need to be an SEO expert to leverage SEO. Your listeners will tune in to Google or other search engines to discover new podcasts, and they trust whatever Google suggests more than the podcast directories.
- Help in monetization: Your podcast can play a huge role when it comes to monetizing your podcast. You can promote your products or services, run ads, and even create subscriptions for premium content.
In simple words, a podcast is simply a game changer for your blog, and if you manage to run it smoothly, it will only benefit you.
Using Divi as Your WordPress Theme? Try This Then
If you’re using the Divi theme on your WordPress website, you can try its different options to have a much more engaging podcast archive and page. Its visual builder and pre-made layouts make it super easy to build a website with podcasts.
Create a Podcast Archive Template
Your published podcasts will have archive pages on the website. And you probably don’t want to present them as the general posts on the website. So, in that case, you can use Divi’s Theme Builder and create highly novel archive pages for Podcasts.
Follow the steps below to learn how to do that:
Step 1 – Access Theme Builder and Create a Template
From your WordPress Dashboard, go to Divi → select Theme Builder.
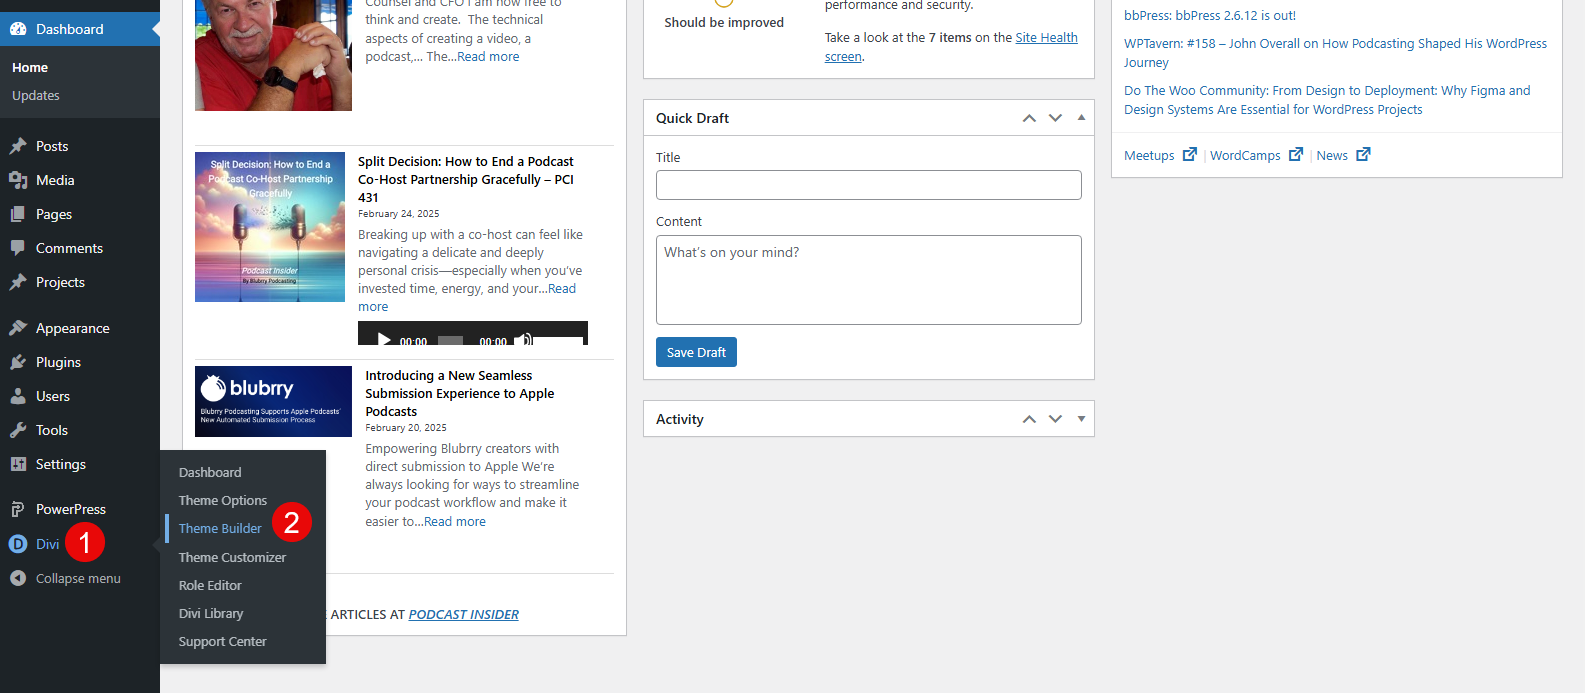
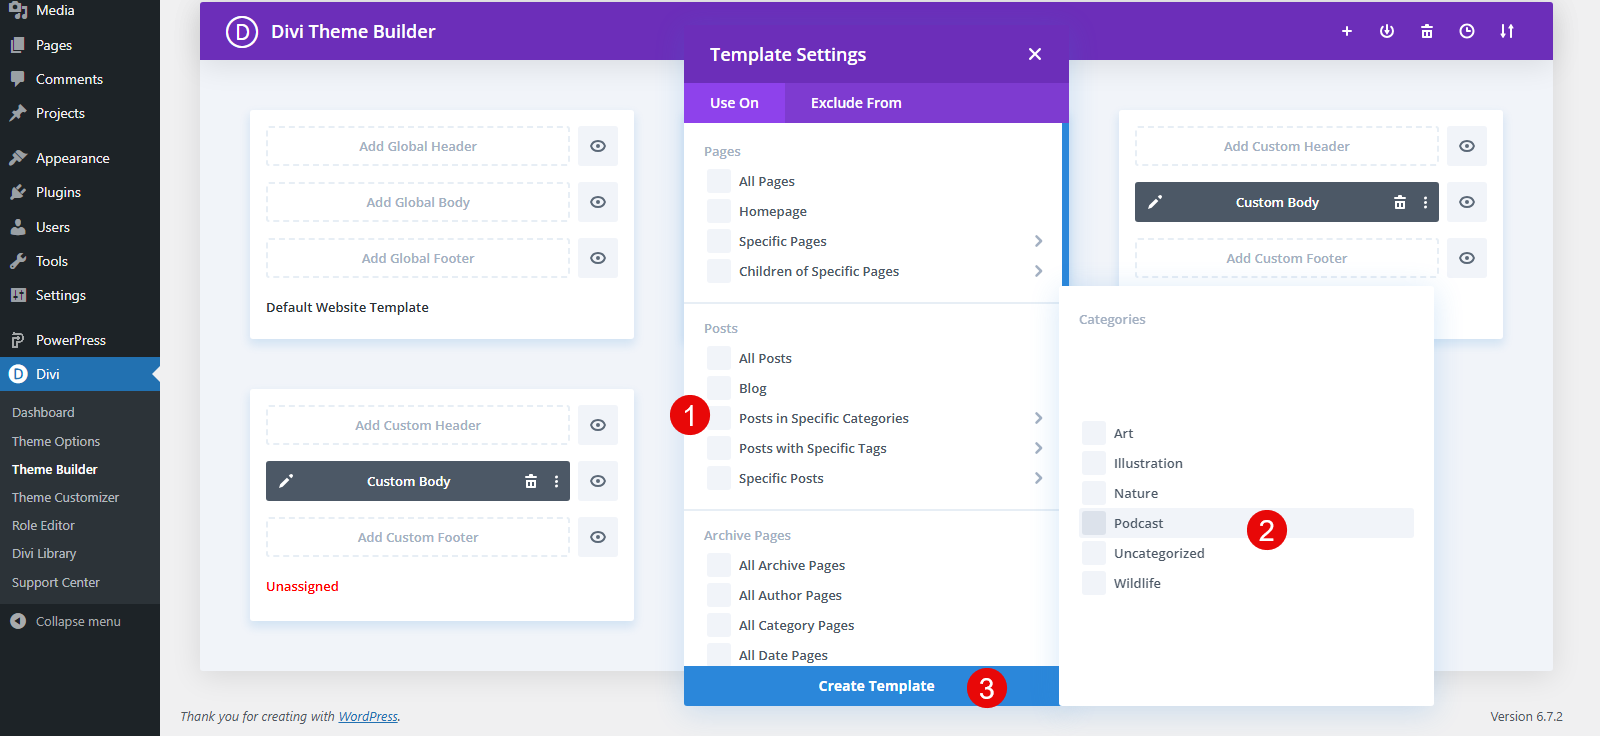
There, click on the Add New Template, → Build New Template. Then, in the options open, scroll down to Archive Pages, select the Specific Category Pages → Podcast, and click Create Template.
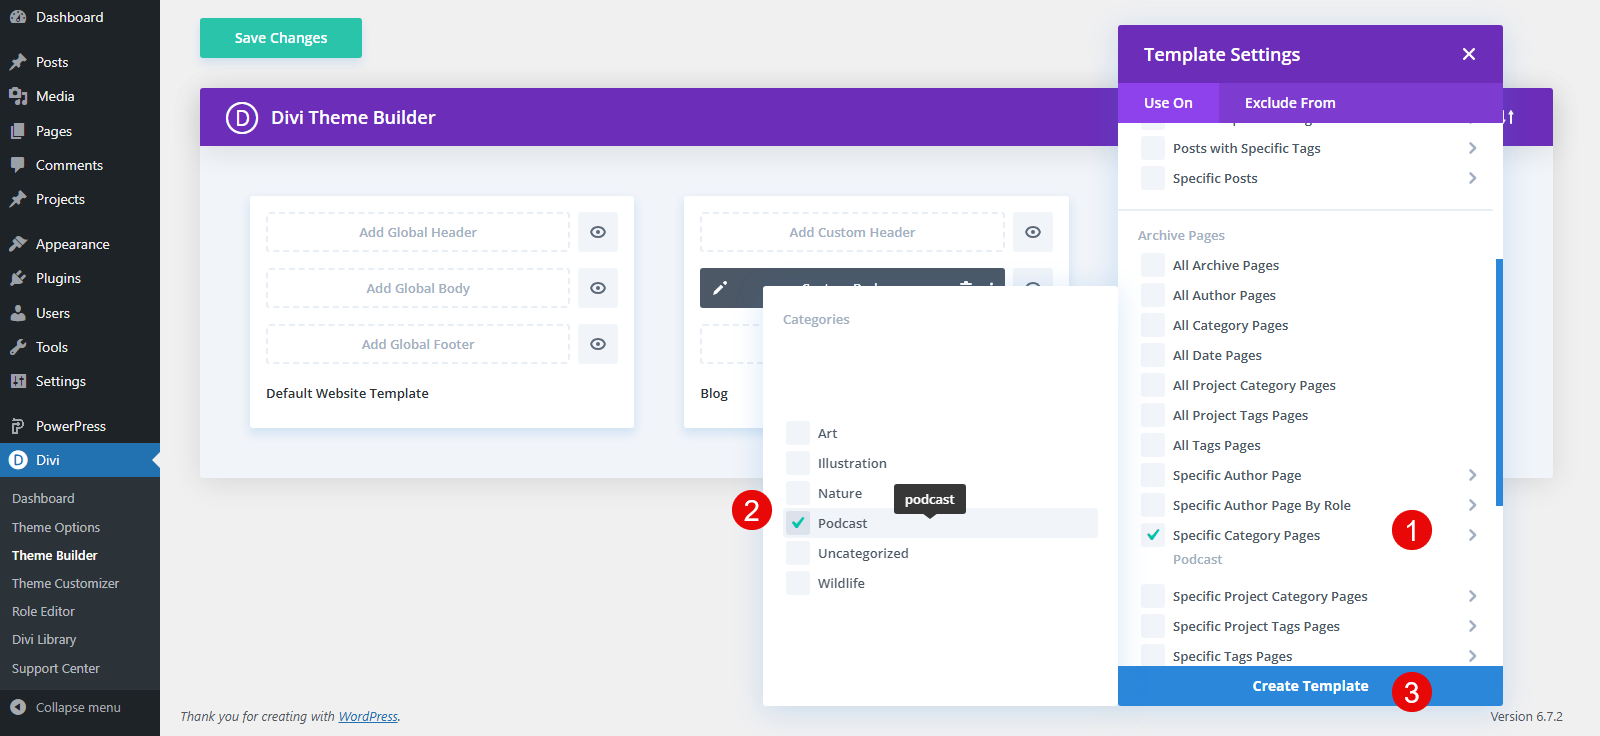
Once the template field has been created, you can now build your podcast archive.
Step 2 – Build Podcast Archive
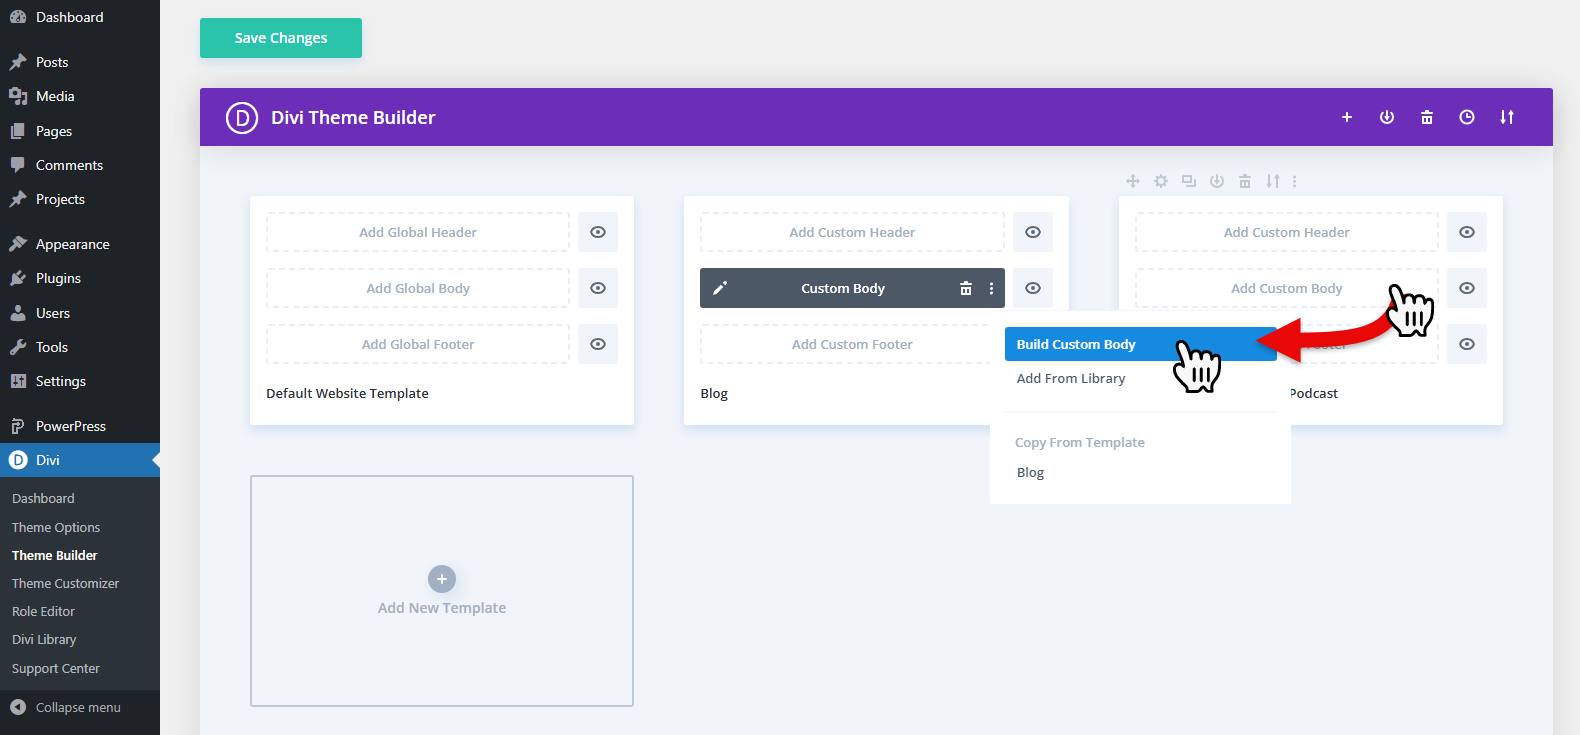
In the Theme Builder, click on the Add Custom Body for the podcast template. Then, select Build Custom Body.
This will launch the Divi Visual Builder, here you can add different elements to the archive page using the modules available. We will add the adding and stable structure to the podcast archive page using the templates.
So, for that, first:
- Click on the more icon, ‘…’
- Subsequently, click the ‘+’
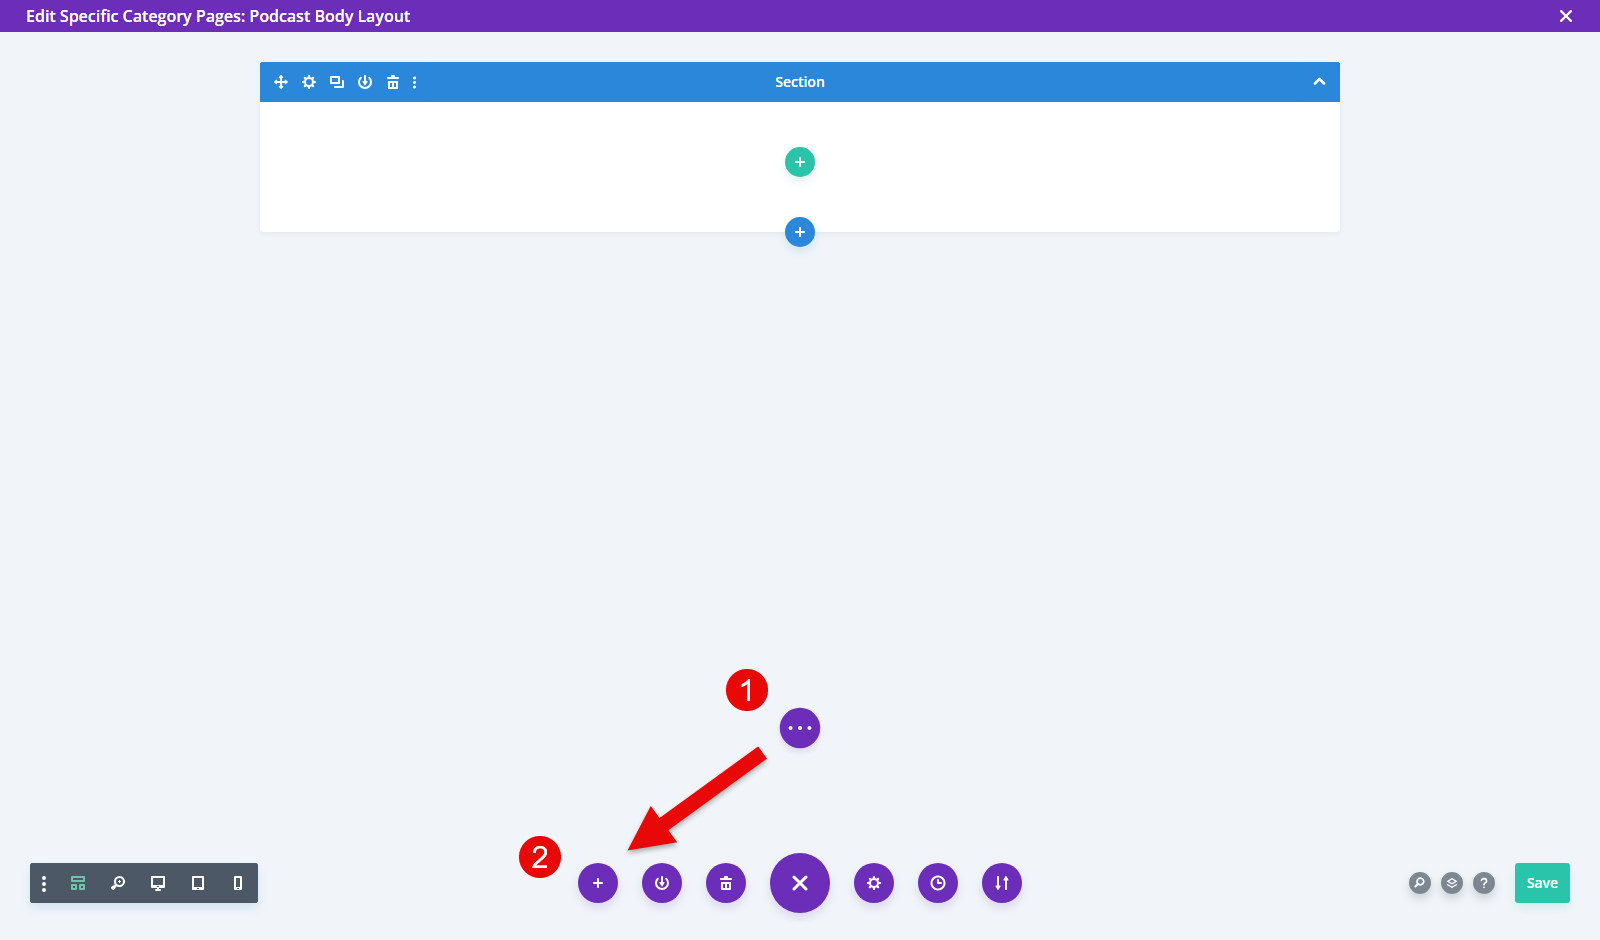
This will open options to access the templates.
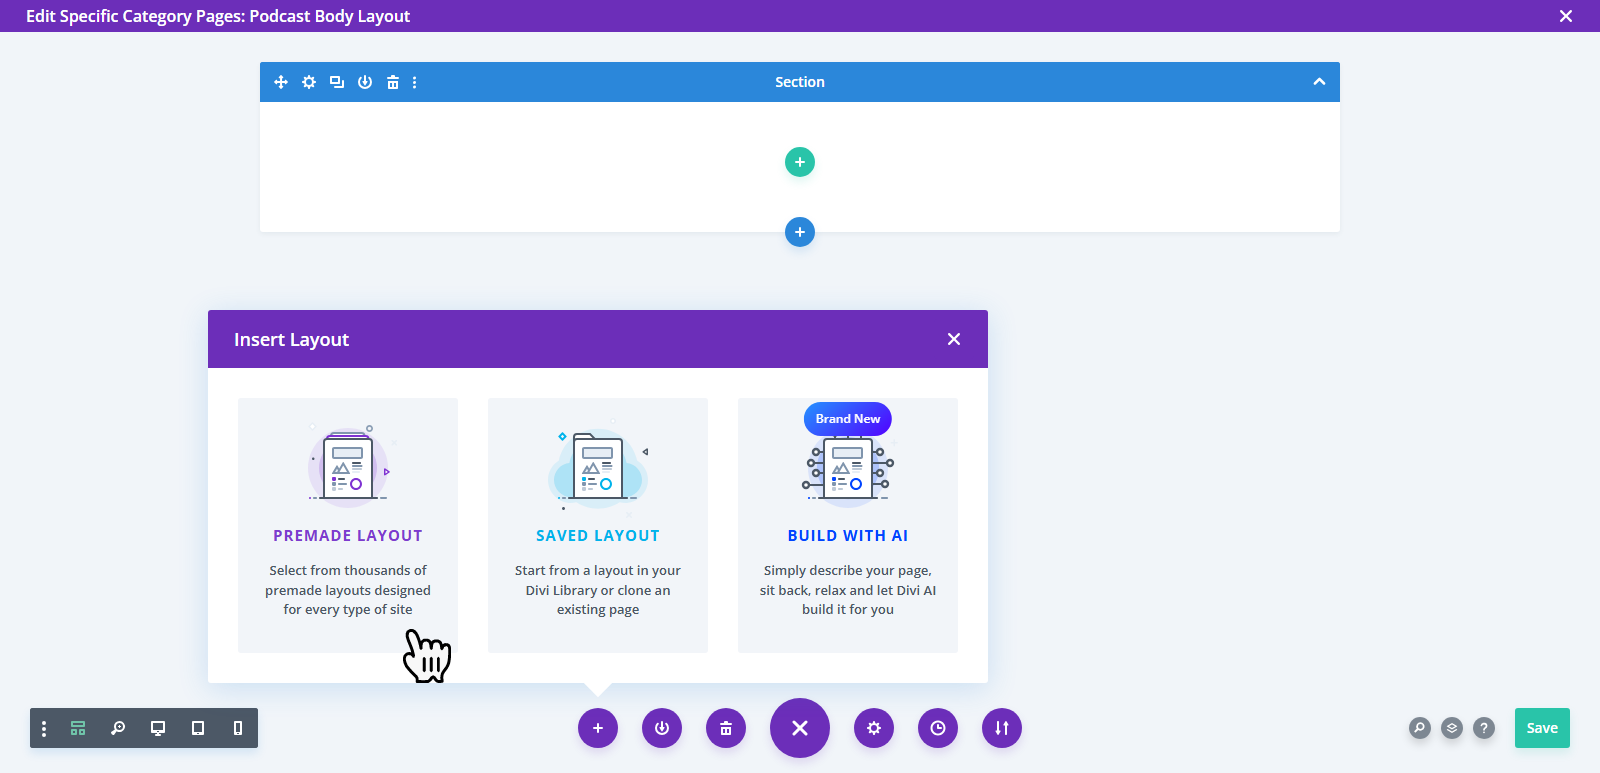
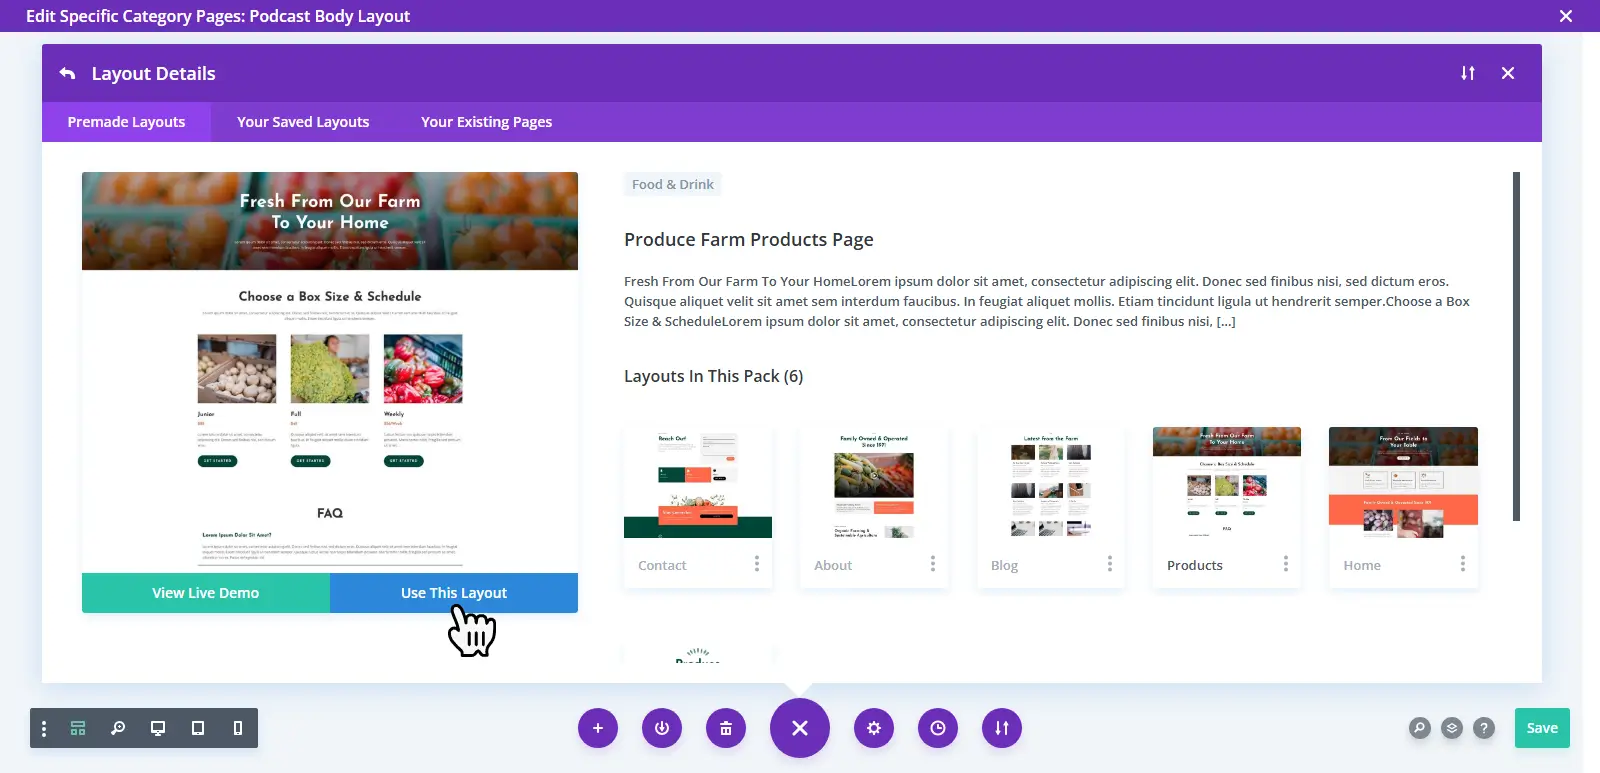
Click on the PREMADE LAYOUT, and then, search for the Produce Farm Products Page.
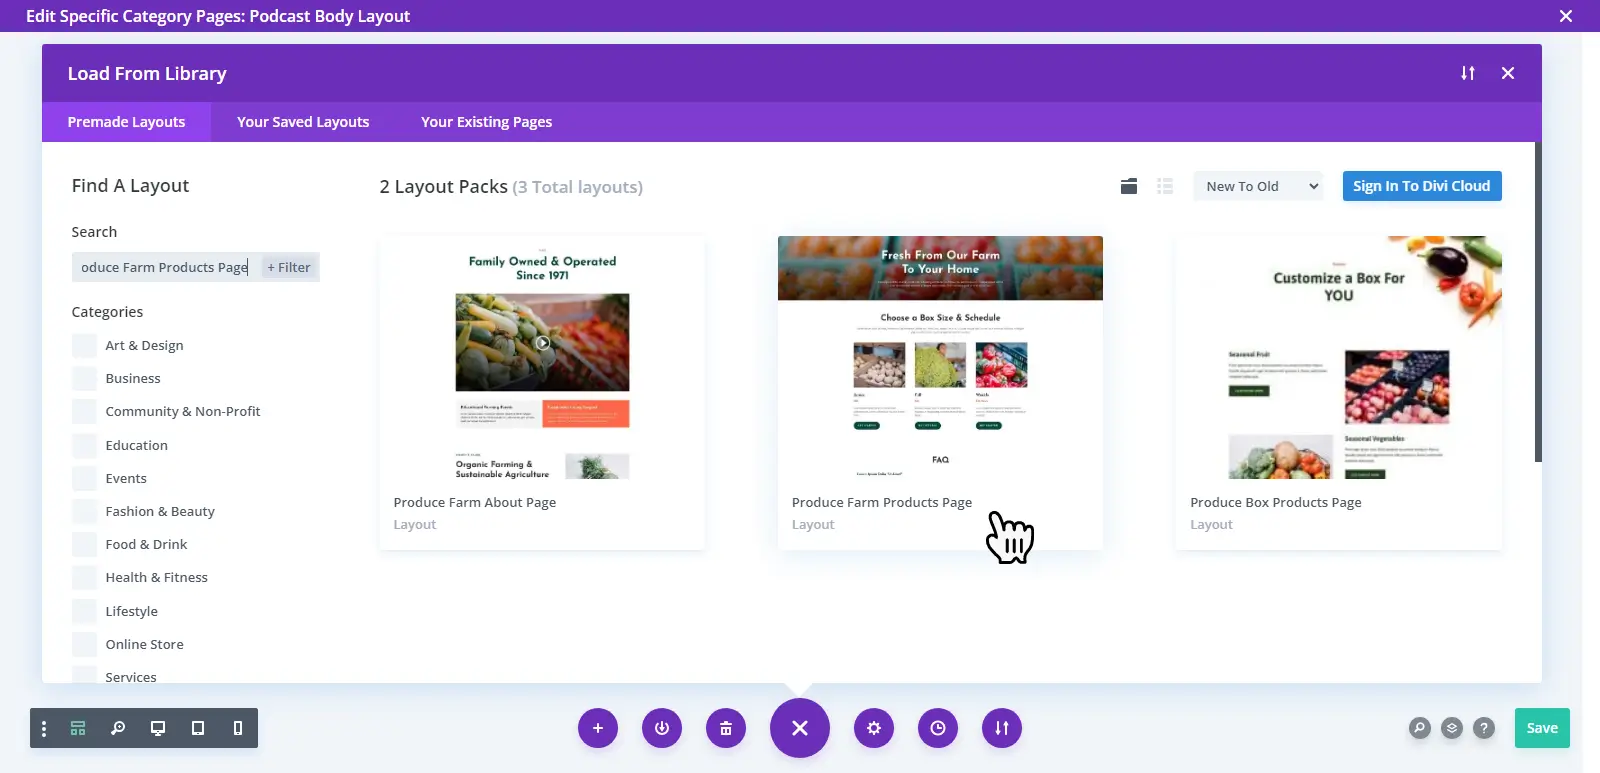
Click on the above, and then, to insert it, simply click the Use This Layout.
As the layout deploys on the builder, it will also insert the demo content with the Products. So, you need to first remove the Products module, then, remove the background image from the header. And apply other customizations as needed.
Step 3 – Insert the Blog Module With Podcast Category
You need to match the copy and the content of the archive to your brand’s. Once, you have done that, insert the Blog module in the place of Products.

Then, in the Blog module’s settings, select Podcast as the category. After this, move to the Design tab → Layout → select Grid.
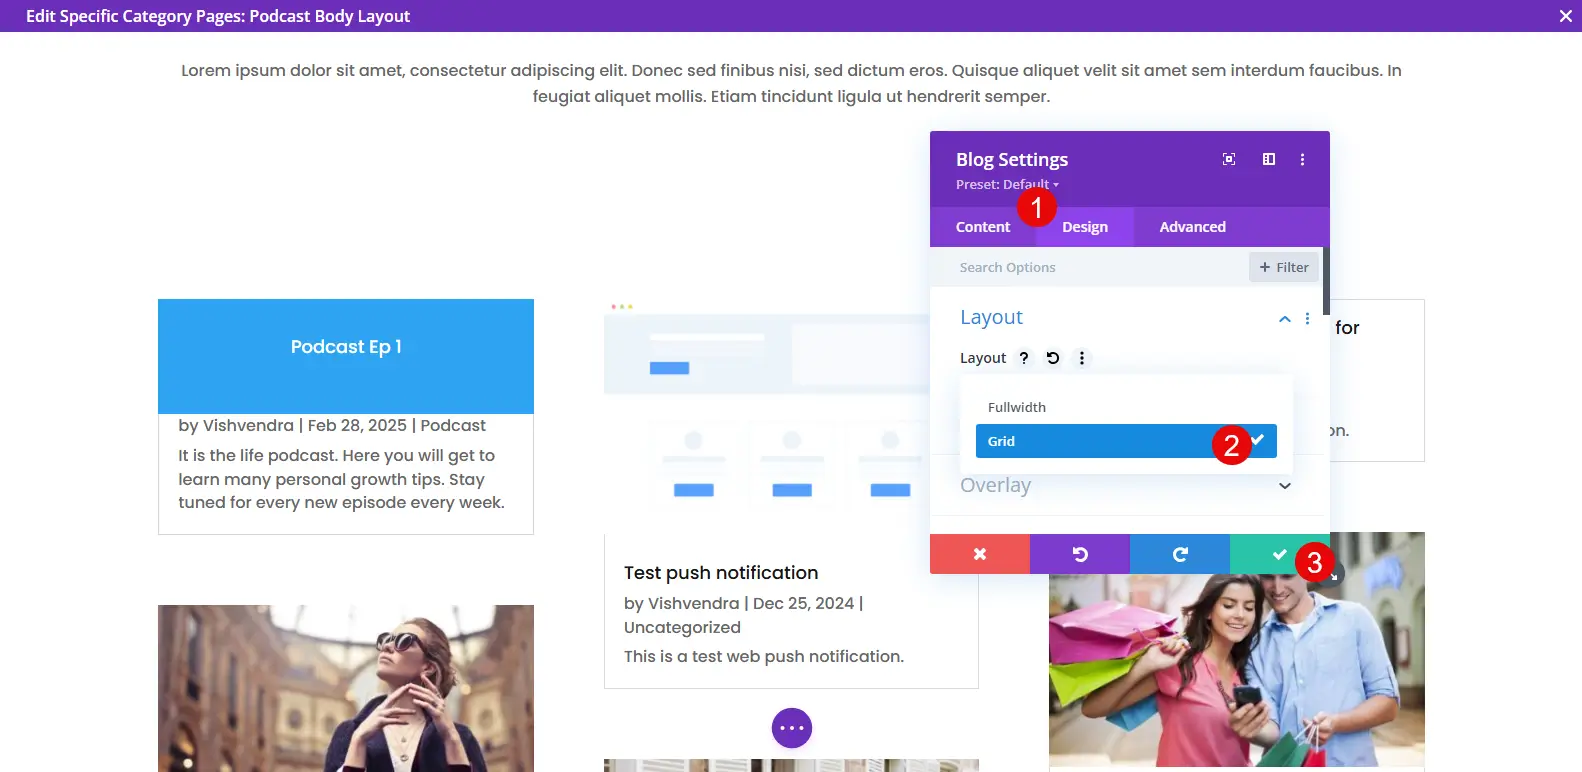
As you do that, your Podcast archive page will look like the following:
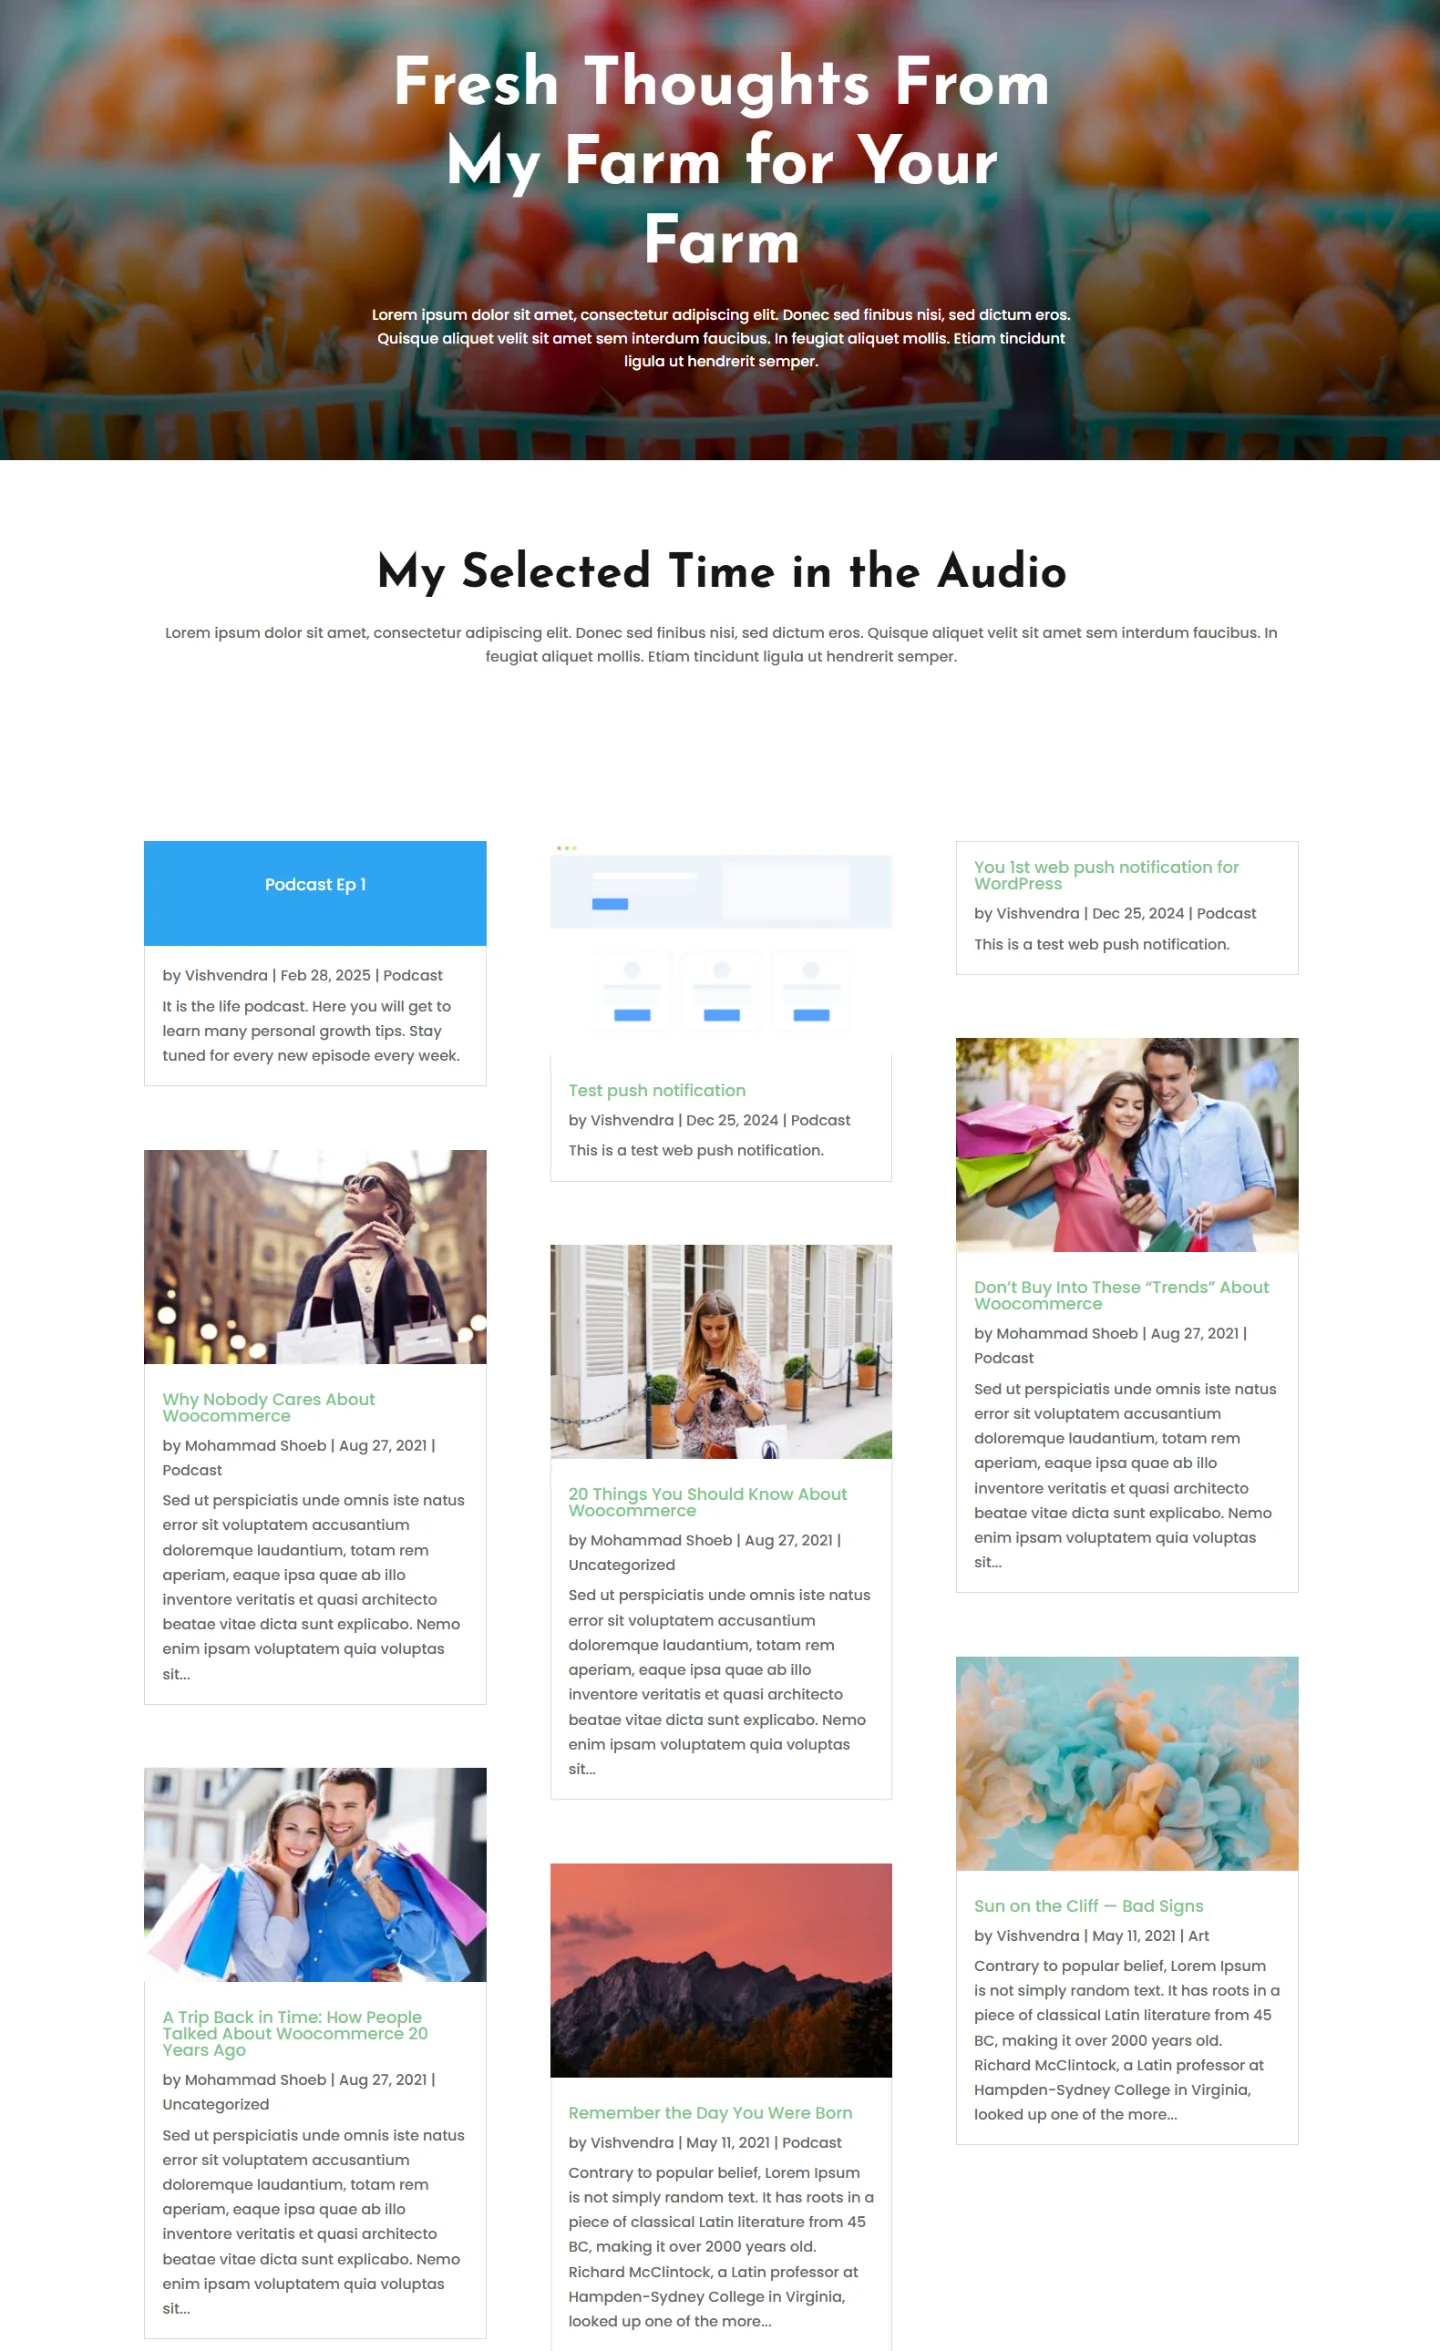
You have created the Podcast archive page successfully. Apply additional changes as you like. Then save them and save them again once you have exited the Theme Builder.
Now, what’s remaining is that you add the Podcast Category link to the Main or Navigation.
For that, simply do the following:
- On WordPress Dashboard → Appearance → Menus
- Select the menu to edit
- Scroll down to Categories → Choose Podcast → Add to Menu
- Save Menu
That’s it. Now, the visitor will open the link, and they will directed to the Podcast archive.
Create a Template for Podcast Single Pages
You probably don’t want to display the podcast content on the default Divi post page. Moreover, if you’re styling the archive, keeping the single page generic won’t engage the listener. Therefore, it’s better that you customize the single pages of the podcast.
To do that, simply access the Divi Theme Builder, and then create a new Template for Posts → Posts in Specific Categories → select Podcast.
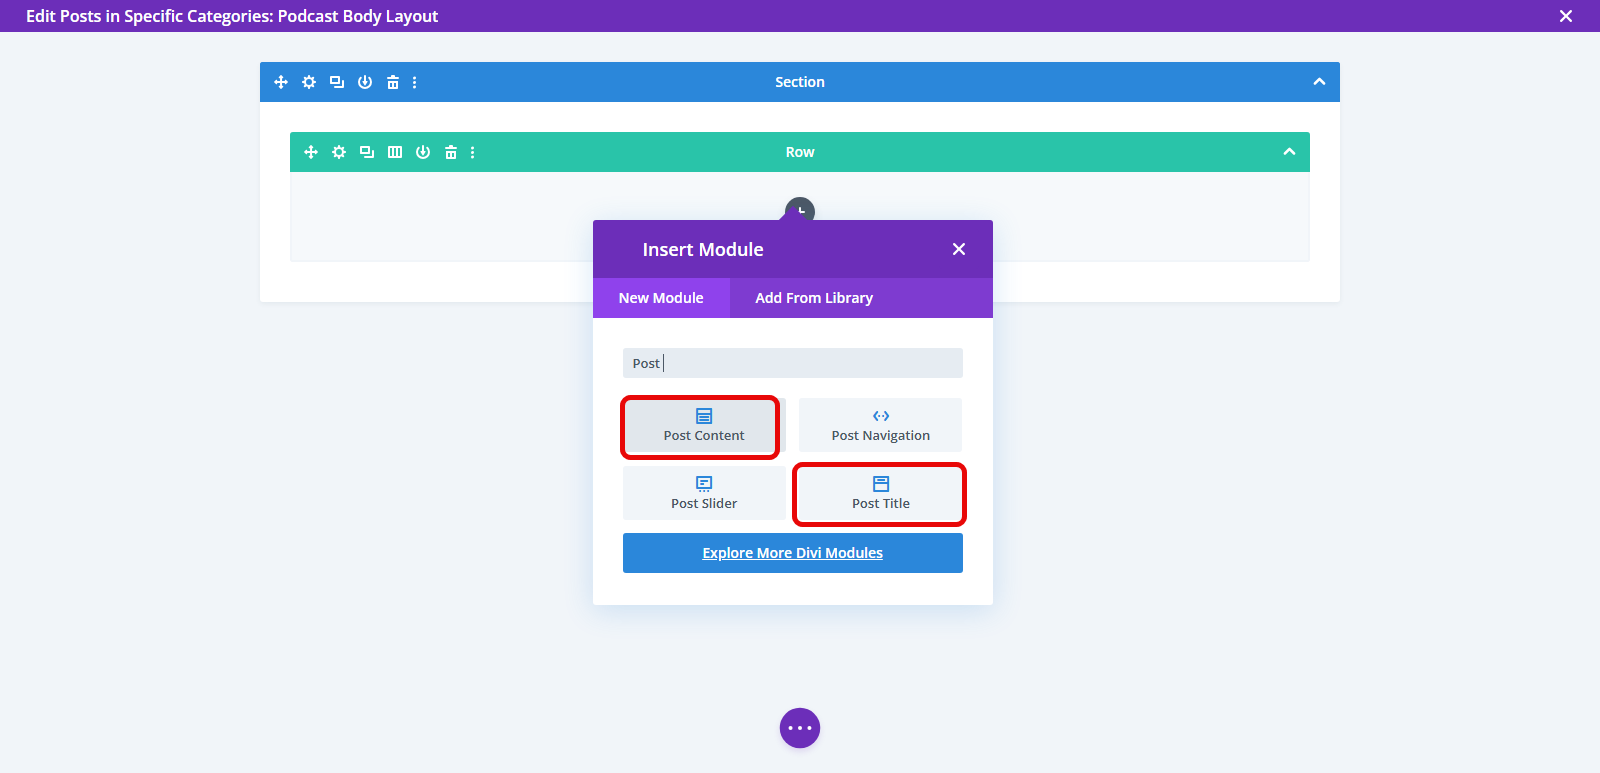
After this, follow the same approach, to add template files, or add content on your own using the available modules. In the Archive case, we used Blog as the primary module. For the post, you need to select the Post Title and Post Content module.
If you want to use the template, then in the Templates library, you can select any post template from available various options.
Simply click on the more icon ‘…’ icon → then choose the ‘+’ → PRE MADE LAYOUT → search for Post → and pick any.
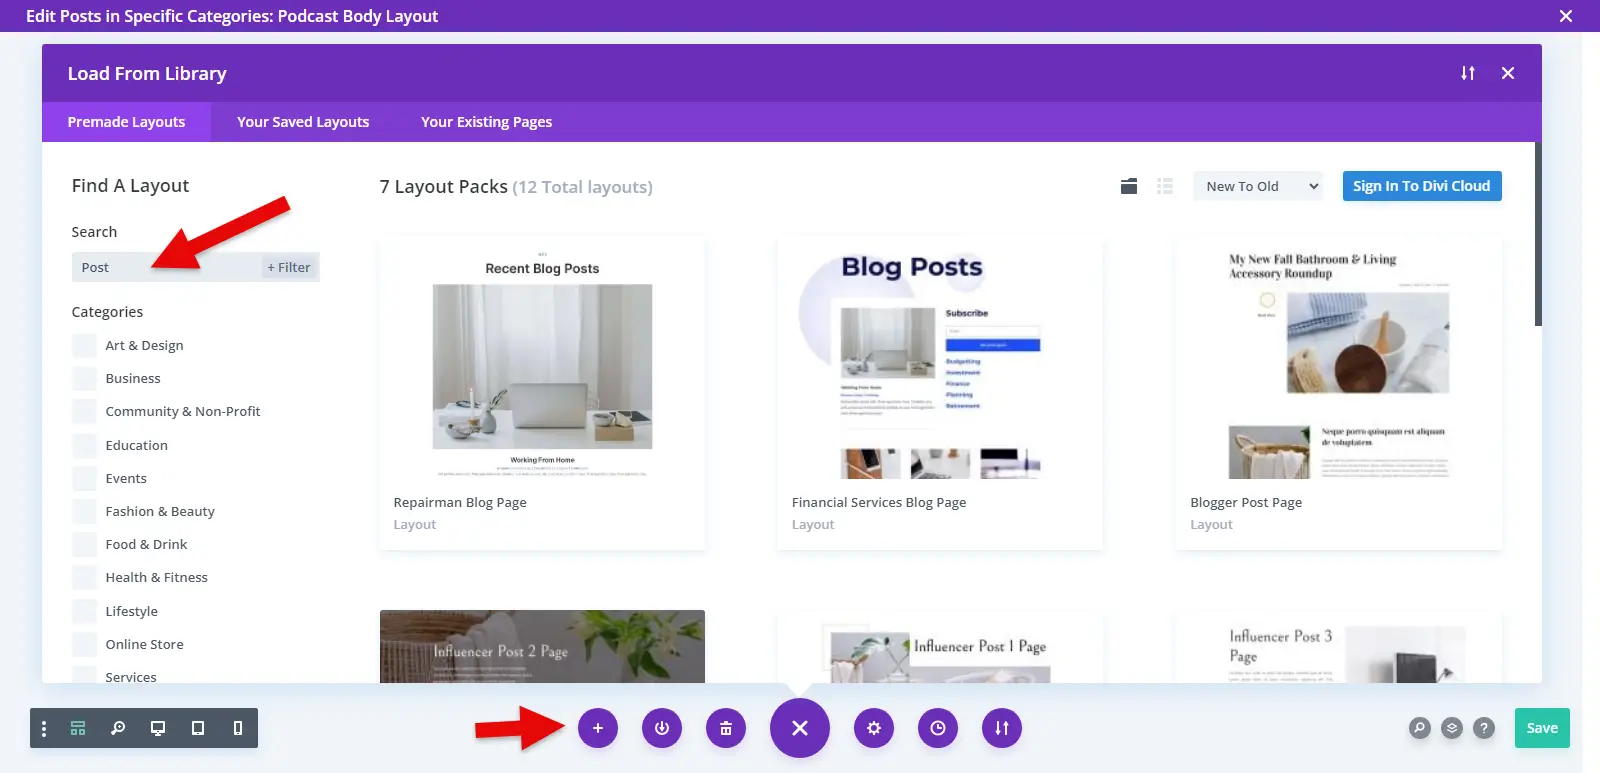
As a suggestion, go with Influencer Post 1 Page as it matches the archive layout’s context.
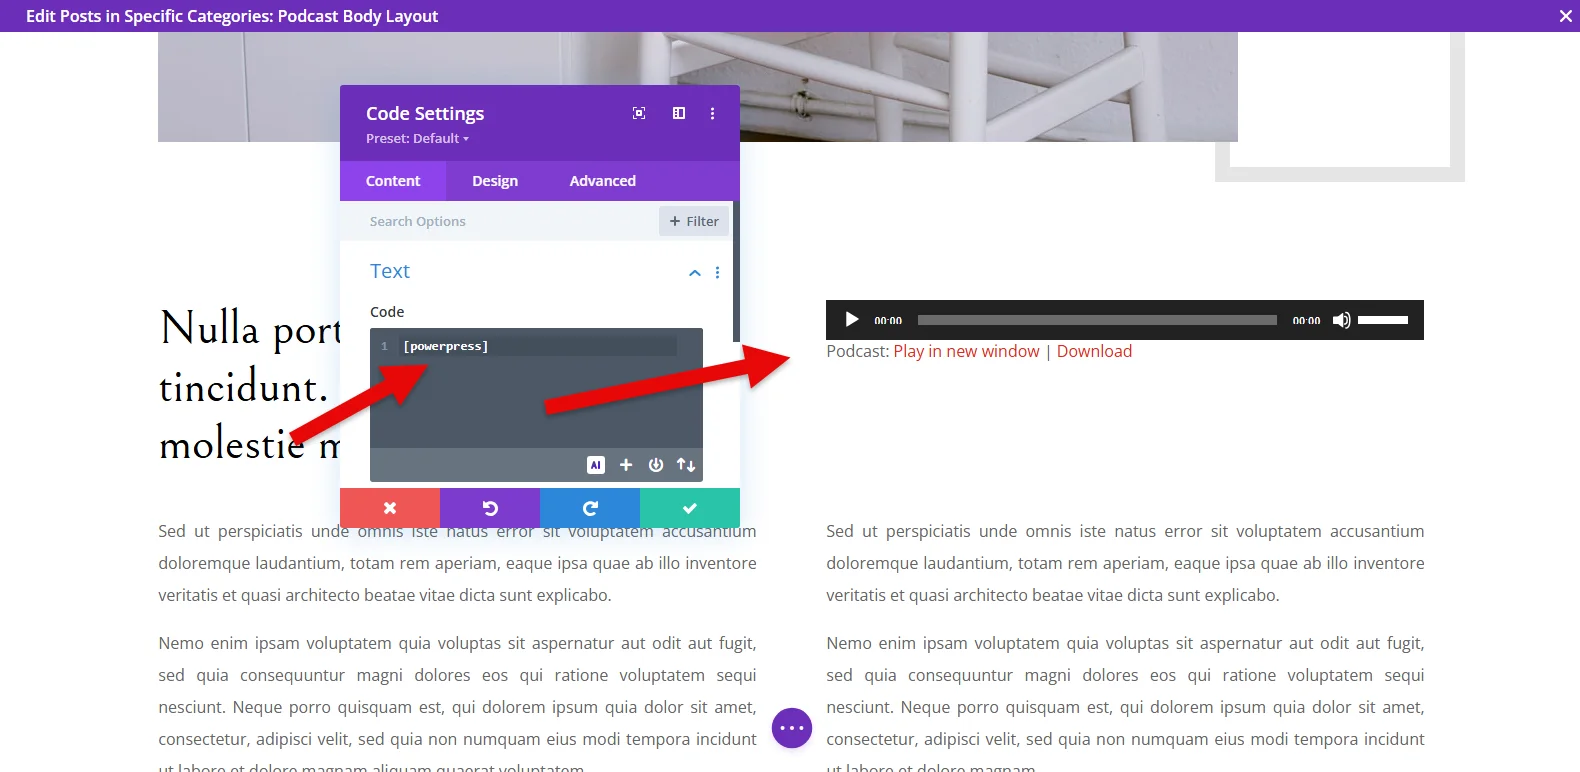
Once it’s on the builder, it will automatically add all the relevant modules. You can make small changes if you like; otherwise, save the layout. Then, copy the [powerpress] shortcode and paste it in the Divi code module to display the podcast player.
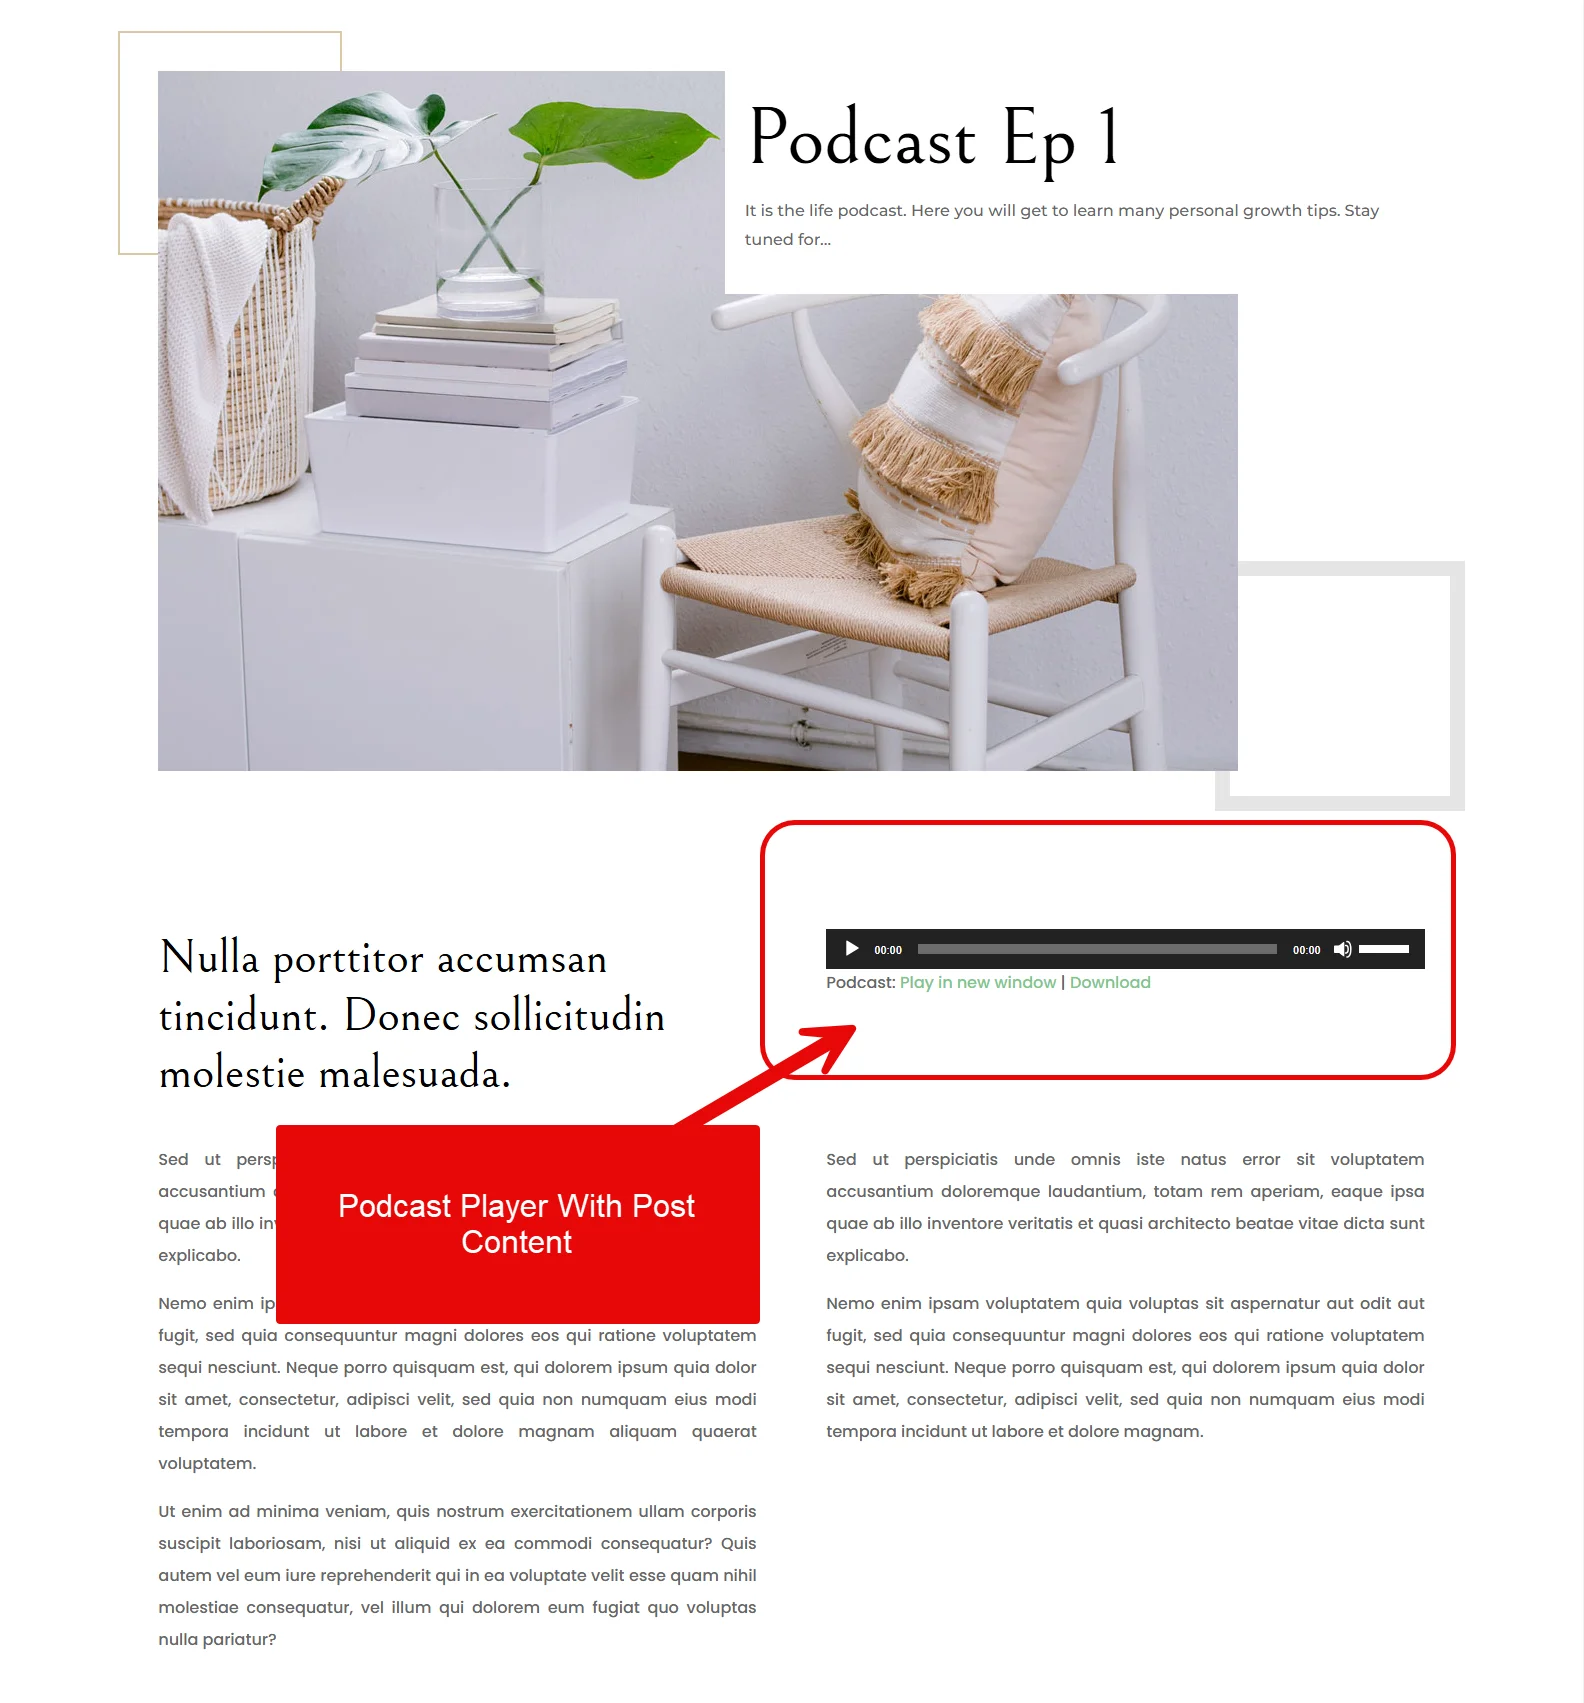
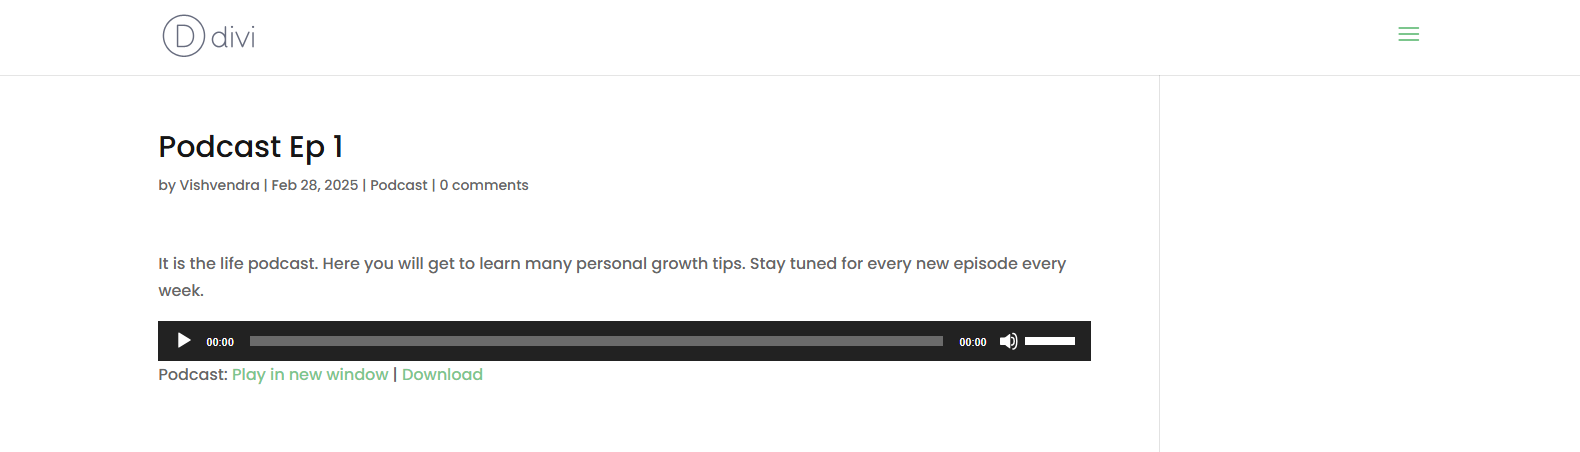
After you publish the podcast, this is how it will look.
Use Pre-built Divi Podcast Child Theme
If you don’t want to get involved in the building of your podcast page and layout from scratch, you can use a Divi Child Theme. In our store, you can find one as Divi Girl. A feminine Divi Child theme with a dedicated page for the Podcasts archive and podcast single pages.
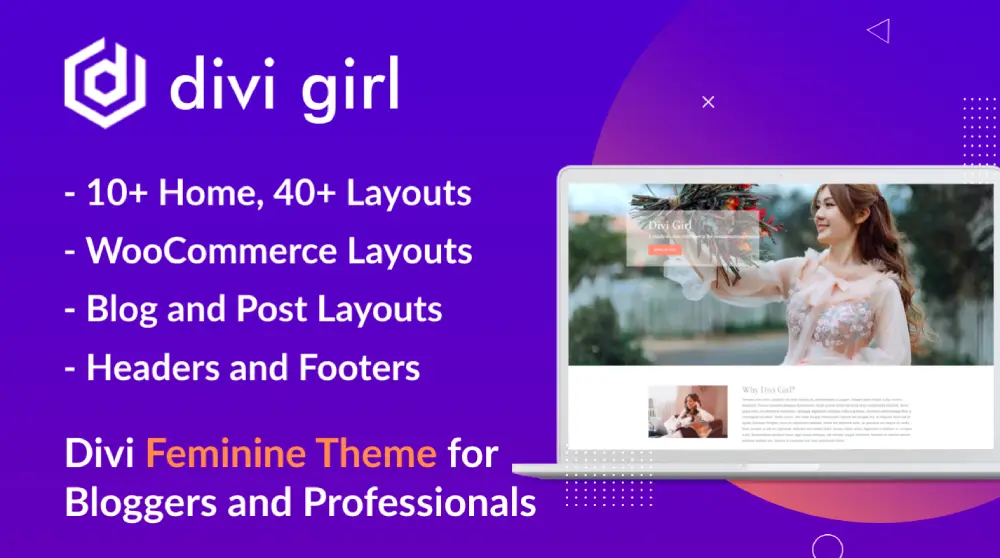
It’s a full-fledged Divi Child Theme that supports showcasing Podcasts. You simply have to import it and replace the demo content with yours. The podcast page includes:
- Subscribers form
- Single player
- Client logos
Likewise, the single podcast page effectively holds the area for the audio file of the podcast. So that visitors can easily listen to it without getting distracted.
Hence, if you want a quick solution as well as an effective one, try Divi Girl for your podcast.
Final Words
Podcasting can prove an effective and fast way to leverage your online business, especially your blog. If you have a well-established blog website, adding a podcast to it will give it a new life. It is a unique and trendy way to reach out to the target audience and also to enhance your audience. It also helps you establish your blog’s authority and build a community of loyal followers.
Moreover, it is an excellent way to promote and monetize your blog. With Blubrry as the podcast host, you can reach listeners on different platforms such as Apple Podcasts, Spotify, and YouTube. With Divi as your WordPress theme, you can improve the engagement of your podcast archives and podcast page. Overall, it becomes fruitful when you record and publish them on your website.
Above, I have shared the steps and points that will be helpful to you to add a podcast to your WordPress blog.
I hope this article will be your setup guide for a podcast effectively to take your blog to the next height.


0 Comments