Search Divi Gallery Extended Documentation
Search for answers or browse our knowledge base.
Installation
You can install the Divi Gallery Extended plugin using 2 methods.
From the WordPress Dashboard
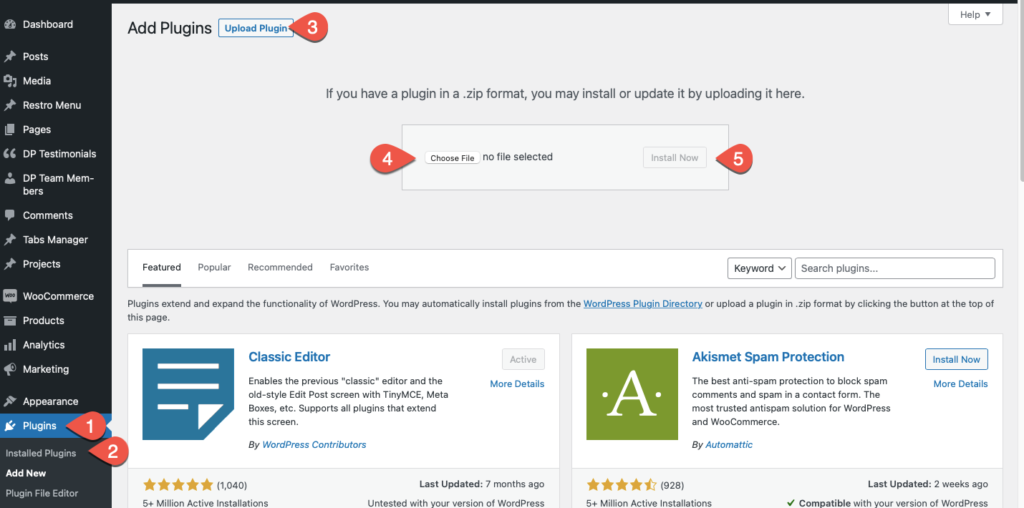
- First, go to the WordPress Dashboard >> Plugins >> and click Add New
- Then Upload Plugin >> Choose File and browse the divi-gallery-extended.1.0.0.zip file. (Version number may not be part of the file name if purchased from other marketplaces).
- Once located the file, select it and then click Install Now.
- Once the plugin installed, on the next window click Activate Plugin.
Manually uploading via FTP
To install the Divi Gallery Extended plugin on your website using the FTP client method,
-
Extract the divi-gallery-extended.zip file.
-
And then connect to your server using an FTP application.
-
Now, navigate to the wp-content/plugins/ directory and upload the divi-gallery-extended folder you’ve extracted earlier.
-
After the upload, go to the WordPress Dashboard >> Plugins >> Installed Plugins
-
Then scroll to find the Divi Gallery Extended and click Activate to enable it.
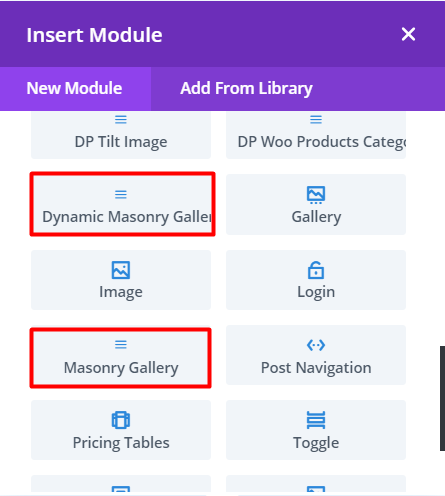
This plugin comes with 2 modules
- Masonry Gallery
- Dynamic Masonry Gallery