Search Divi Testimonial Extended Documentation
Search for answers or browse our knowledge base.
Add testimonials
Adding a Testimonial From Back-End
Before you use the Divi Testimonial Extended module to show testimonials on your page, you need to add some testimonials first. It can be done from the back-end.
The back-end method is more like the native WordPress approach for creating a page or post using WordPress editor.
- Click on Testimonials.
- Click on Add New.
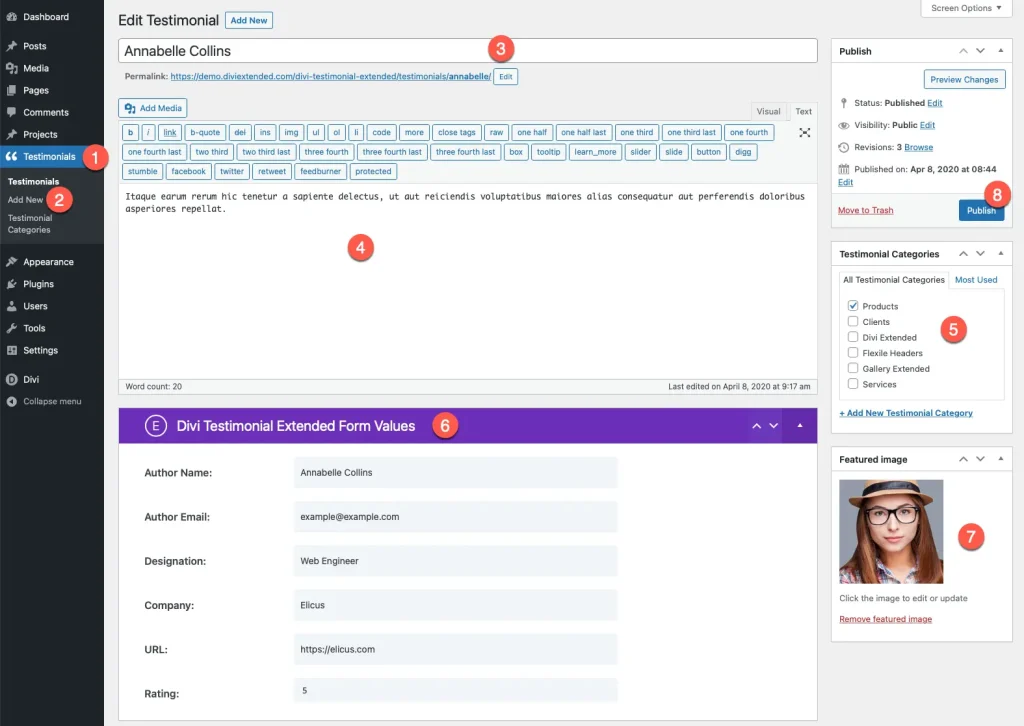
- When the editor opens, add the title of your testimonial.
- Enter the content of the testimonial in the post content area.
- Select a category for testimonials. If there is no category, add a new category.
- Enter author details like name, email, designation, company, URL etc.
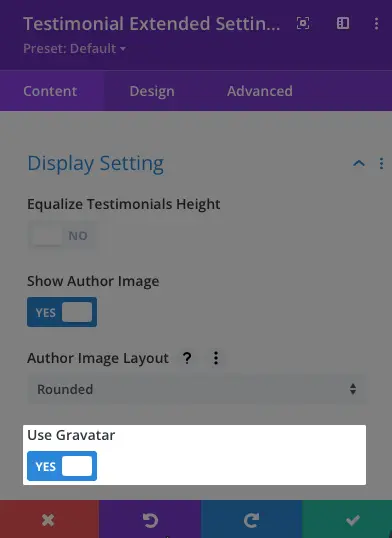
- Add a featured image. *
- Publish the page.
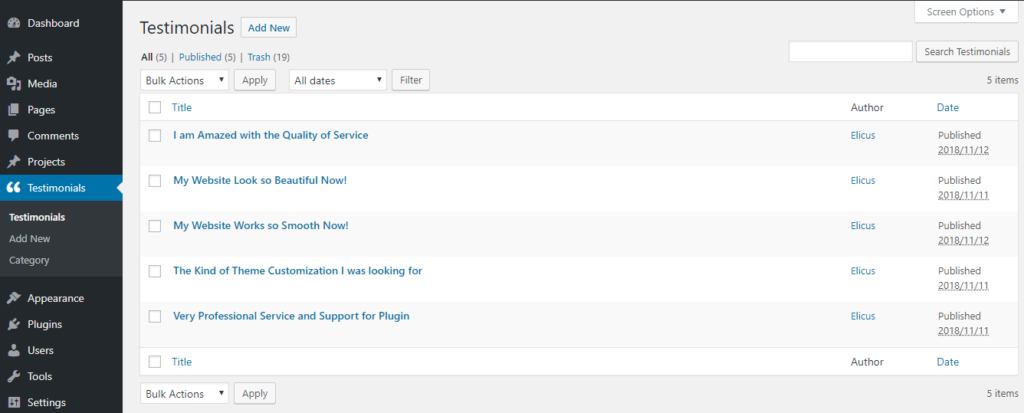
Once there are testimonials added, they can be viewed/edited/deleted like a standard WordPress post. Here is how the list of testimonials appears.
*If you wish to use Gravatar image associated with the testimonials author’s email address, enable the following setting. (This feature will override the image that you upload while creating the testimonial)