
Search Divi Cart Pro Documentation
Search for answers or browse our knowledge base.
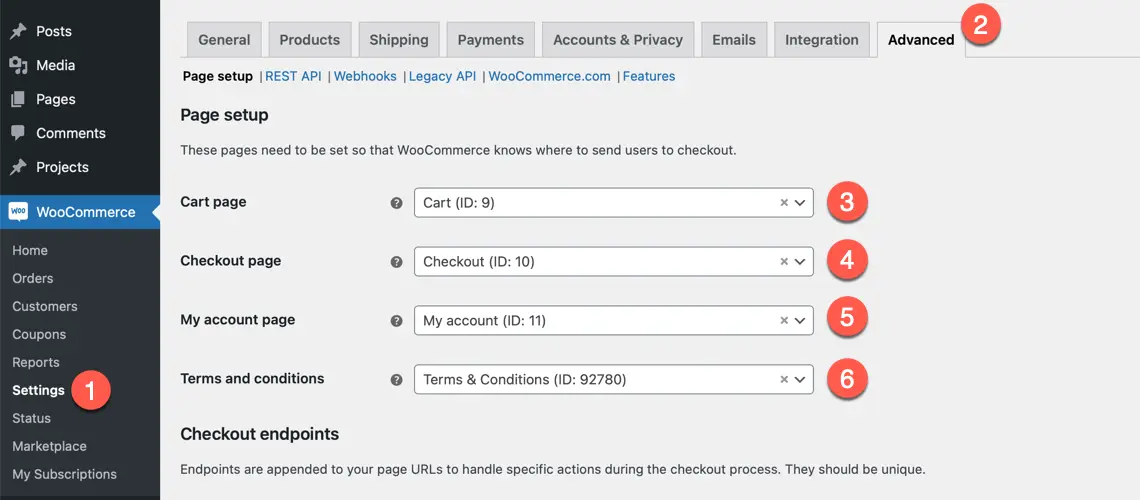
Assign WooCommerce pages
Once you have activated the Divi Cart Pro child theme and have imported the demo using the one-click demo import, follow the following steps to assign the WooCommerce pages.
- Go to WooCommerce >> Settings
- Go to Advanced Tab
- Under page setup sub tab, define Cart page, Checkout page, My Account page and Terms and Conditions page as per the screenshot below.
Shop page
The shop page is created during one-click demo import. This will be your main page to show all the products. You need to define this page using the following steps to start showing all your products on your shop page.
Go to WooCommerce >> Settings >> Products >> General >> Shop page and select your shop page.
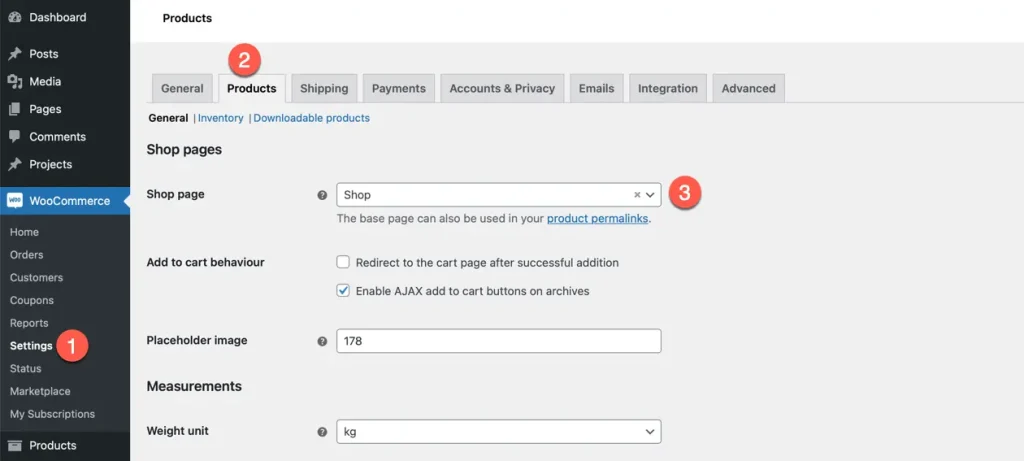
You can add this page to your navigation menu.
💡The content of the shop page is rendered from the Divi Theme Builder. Don’t create your shop page content manually as any content on this page will be disregarded.