
Note: This post was first published in Dec 2019, and has been updated for accuracy and comprehensiveness.
Divi 4 has brought many amazing features, one of those is the new Theme Builder. It allows the user to create a beautiful website without much effort. Using the Theme Builder, users can create a custom section on the website. Like, custom header and footer section, a custom search result page, and more. All without writing a single line of code. Furthermore, users have the ability to apply each custom section to their desired page. And to achieve that they have to set each section as custom or global in the Theme Builder library. That is to say, with the new Divi theme, we have the freedom to design.
And if you’re wondering how to create a blog post template with the Divi builder. Then, in this blog post, we’re going to discuss the topic, how you can create a beautiful custom Divi blog post template. Before we move on to the steps to create a custom Divi single post layout, I would like to introduce you to our Grace- Divi Blog Post Layout Pack that you can use with the same Divi 4 feature. It includes multiple stylish Divi article layouts that are suitable for any business or niche.
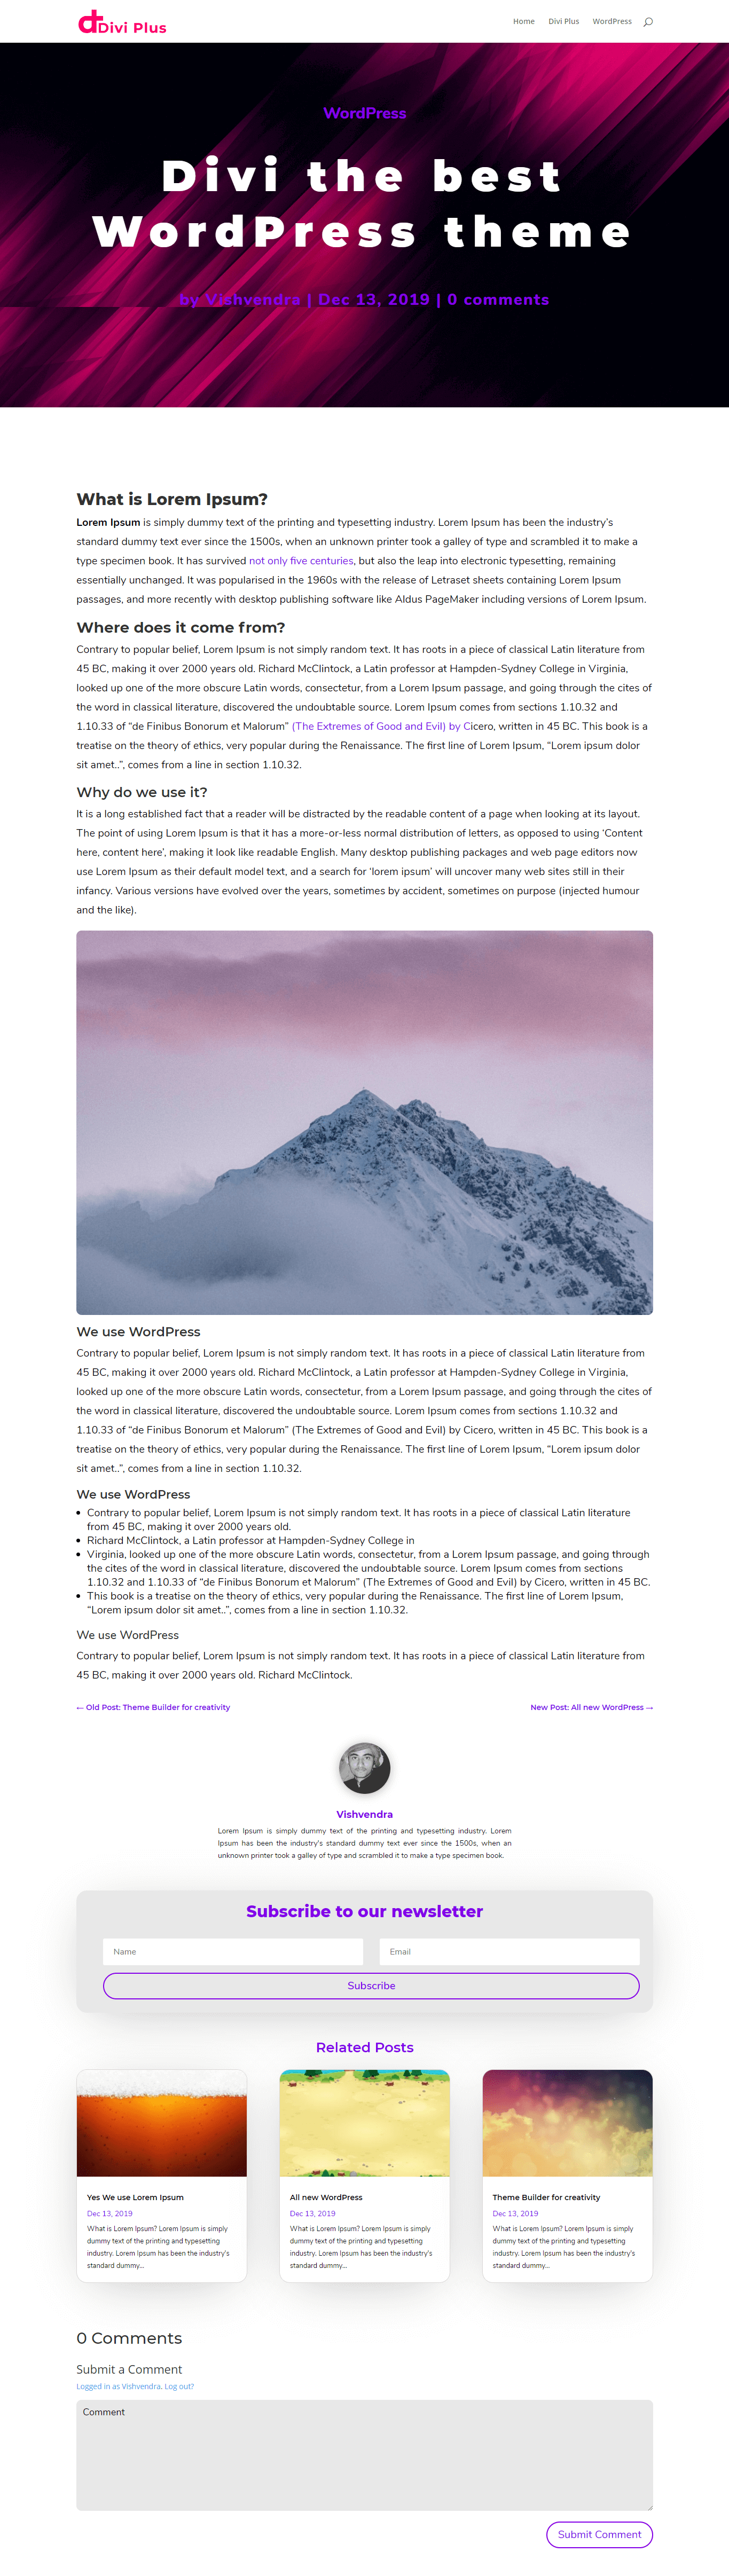
This step by step article is to help you create an amazing Divi blog post template of your own. However, you can also have this custom single post layout by joining our newsletter. And if you want to create more beautiful blog posts fast and easy, then you may want to check out our premium Divi blog post template plugin.
Adding a new template for custom blog post template inside Theme Builder
Step 1:
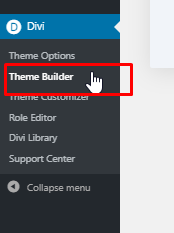
Head to the Divi Theme Builder.
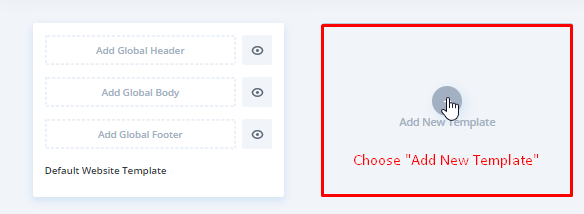
Then inside Theme Builder add new template.
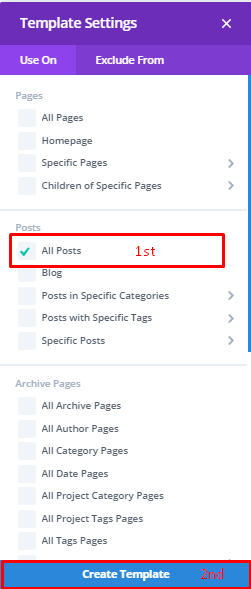
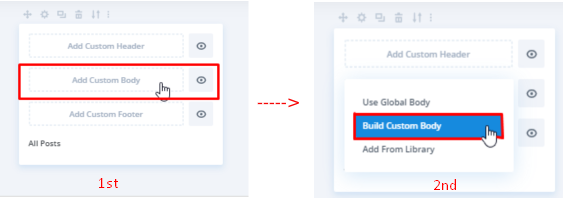
Inside template settings, head over to the posts, and choose “All Posts”
After creating a template, click on the “Add custom body,” then choose “Build Custom Body.”
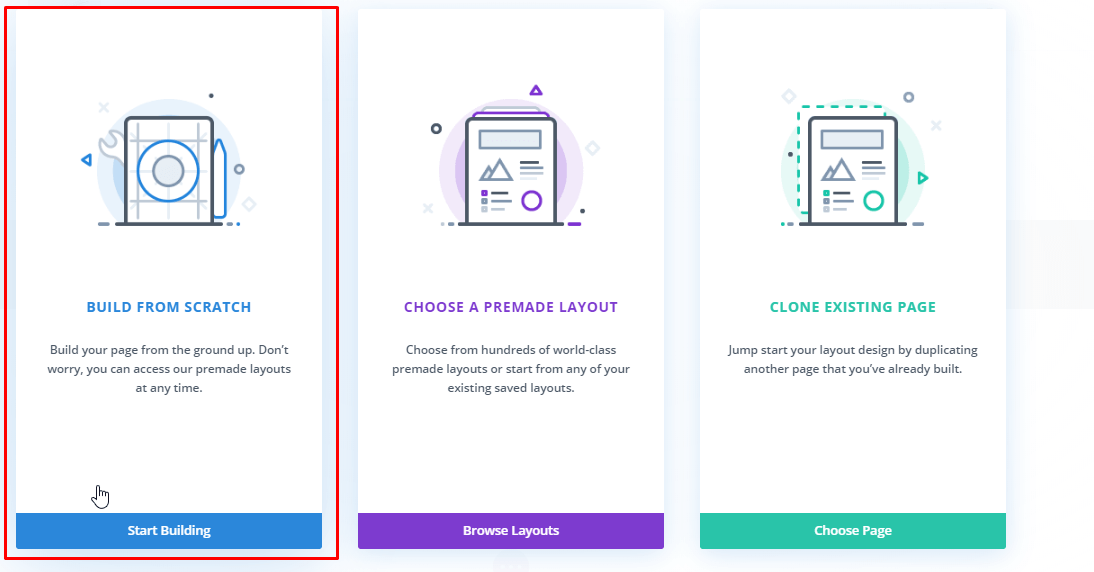
Inside the custom body, choose “Build From Scratch.”
Creating a featured image for a custom blog post template
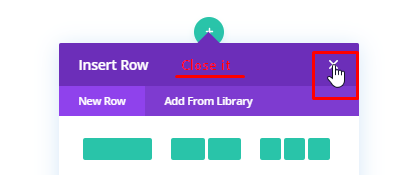
First, don’t select the insert row section because we’ll do some edits to the regular sections.
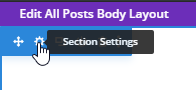
Then move to the section settings.
Inside sections settings, head to the Background settings. Choose an image and then click on the “Use Dynamic Content,” then use choose featured image. In this way, we’re giving Divi theme direction to fetch featured image from the blog post.

After doing this head to the design tab. Choose sizing and then height. First, click on the mobile icon to give a custom size for all the devices.
![]()
Desktop: 50vw;
Table: 50vw;
Phone: 60vw.
After this save changes.
Add Title, category, and meta to the Divi custom blog post template
For category,
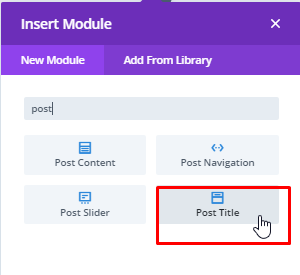
Add a new row, then insert the Post Title module.
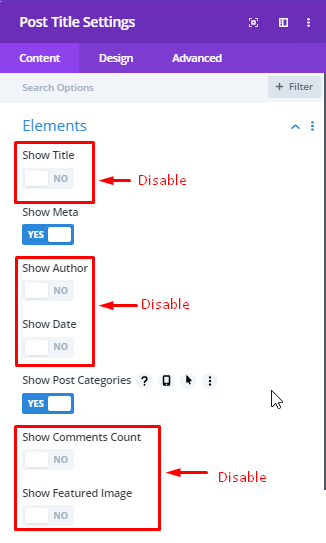
Go to elements, and disable “Show title, author, date, comments and featured image.”
After this, navigate to the design tab and select “Meta Text,”
Set Meta Font: Nunito
Font weight: Ultra Bold
Meta Text Alignment: Center
Text Color: #8300E9
Check “Mobile Icon” for Meta Text size, Desktop: 30px; Tablet: 28px; Phone: 26px.
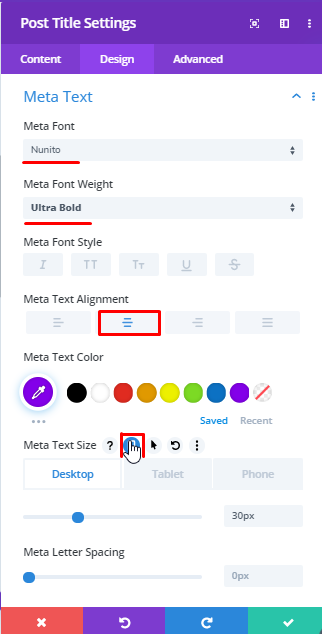
Save changes.
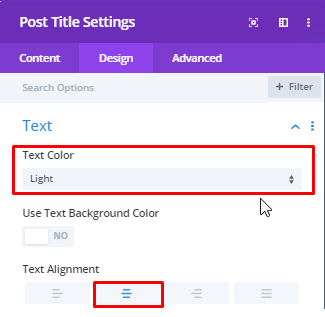
For Post Title-
Add a new row and post title module. Go to elements and disable: Show Meta and Featured Image.
Then navigate to the design tab and in the text menu, choose text as “Light.” Further, set text alignment to center.
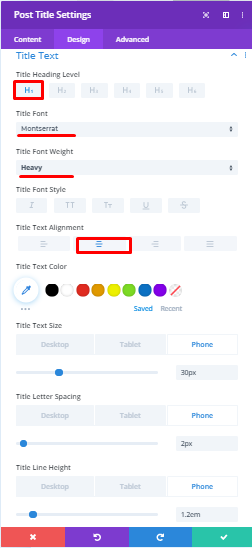
Similarly, move to the Title Text menu, and customize settings as follows.
Heading Level: H1
Title Font: Montserrat
Font weight: Heavy
Title Text Alignment: Center
Check “Mobile Icon” for Title Text Size, Desktop: 70px; Tablet: 45px; Phone: 30px.
Similarly, Title Letter Spacing, Desktop: 16px; Tablet: 4px; Phone: 2px.
Title Line Height, Desktop: 1.3em; Phone: 1.2em.
After doing this, move to the Spacing menu, and set Top Margin for the phone to -64px.
Save Changes.
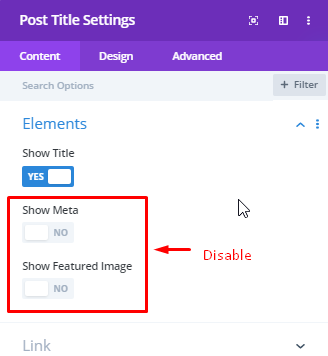
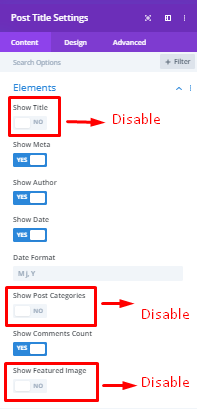
Add another row and post title module. Go to elements and disable Show Title, Post Categories, and Featured Image.
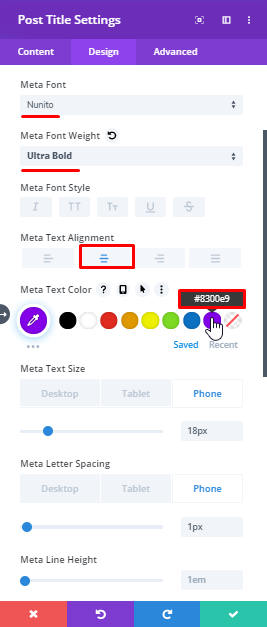
Further, move to the design tab and go to Meta Text. And set fields as follows.
Meta Font: Nunito
Font weight: Ultra Bold
Meta Text Alignment: Center
Text Color: #8300E9
Check mobile icon for Meta Text Size, Desktop: 30px, Table: 20px; Phone: 16px.
Similarly, Meta Letter Spacing, Desktop: 2px; Phone: 1px.
After doing this, move to the Spacing menu, and set Top Margin for Tablet to 23px, and for Phone set it to -10px.
Save Changes.
Adding post content in custom blog post template using Divi’s Theme Builder
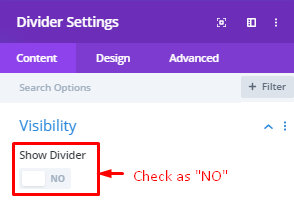
Now, before we design our body area of our custom blog post. Add a divider to keep a healthy gap in between pot content and featured image.
Add new row > divider module > disable show divider.
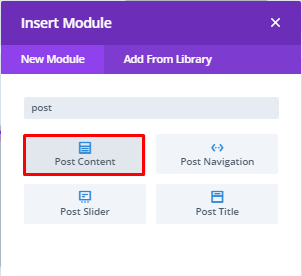
Then add a new row and insert the post content module.
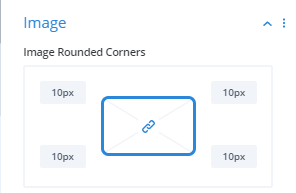
Inside Post Content module settings, navigate to the design tab and then to the image settings.
Set Image Rounded Corners to 10px.
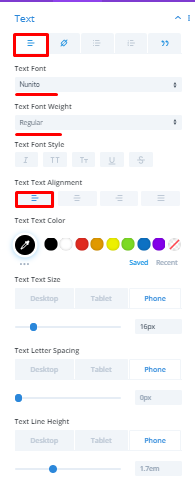
After making this change, further, move to the Text Settings, and apply customizations as follows.
For Text-
Text Font: Nunito
Font Weight: Regular
Text Text Alignment: Left
Check mobile icon for Text Text Size, Desktop: 20px; Tablet 20px; Phone 16px.
Similarly, check the mobile icon for Text Line height, Desktop: 1.8em, and 1.7em for Tablet and Phone.
For Links- Same settings as the Normal Text. Only change link color to #8300E9.
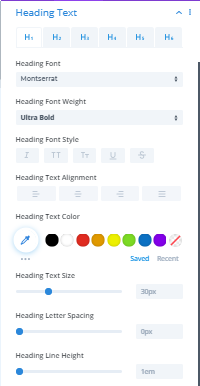
Now, move to the Heading Text Settings. Follow the below for heading text customization.
H1 Heading Text-
Heading Font: Montserrat
Font Weight: Ultra Bold
Heading Text Size: 30px
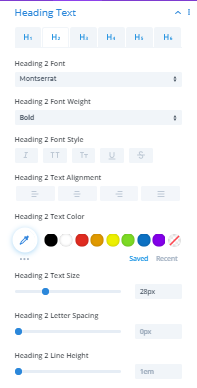
H2 Heading Text-
Heading Font: Montserrat
Font Weight: Bold
Heading Text Size: 28px
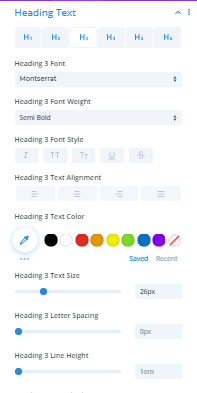
H3 Heading Text-
Heading Font: Montserrat
Font Weight: Semi Bold
Heading Text Size: 26px
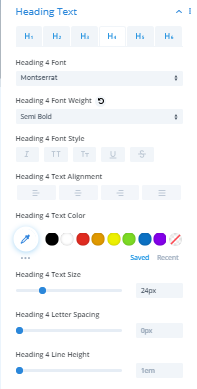
H4 Heading Text-
Heading Font: Montserrat
Font Weight: Semi Bold
Heading Text Size: 24px
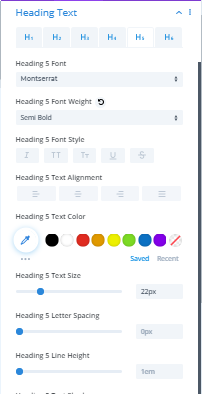
H5 Heading Text-
Heading Font: Montserrat
Font Weight: Semi Bold
Heading Text Size: 22px
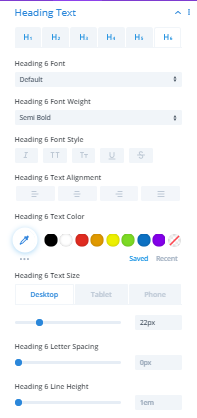
H6 Heading Text-
Heading Font: Montserrat
Font Weight: Semi Bold
Heading Text Size: Desktop-22px; Phone-18px.
Save changes.
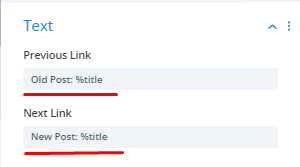
Add post navigation in the custom blog post template
After customizing the post content area, insert the post navigation module.
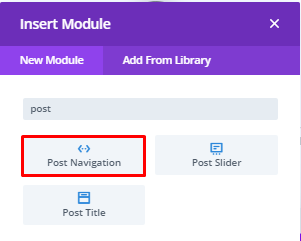
Inserting a module is easy, just like opening the cap of a pen. Okay, now inside post navigation text settings, type “Old Post: %title” in Previous Link field, and “New Post: %title” in Next Link field.
Move to the design tab, customize links text as follows.
Links Font: Montserrat
Font weight: Semi Bold
Links Text Color: #8300E9
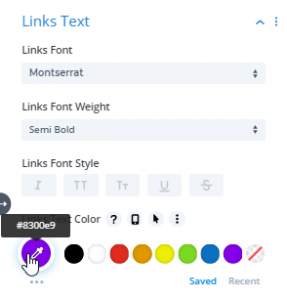
Save Changes.
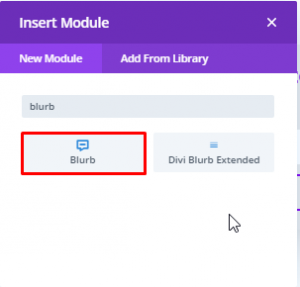
Designing author area with Divi Blurb
Add a new row and insert the blurb module.
In the content setting, customize the blurb as follows.
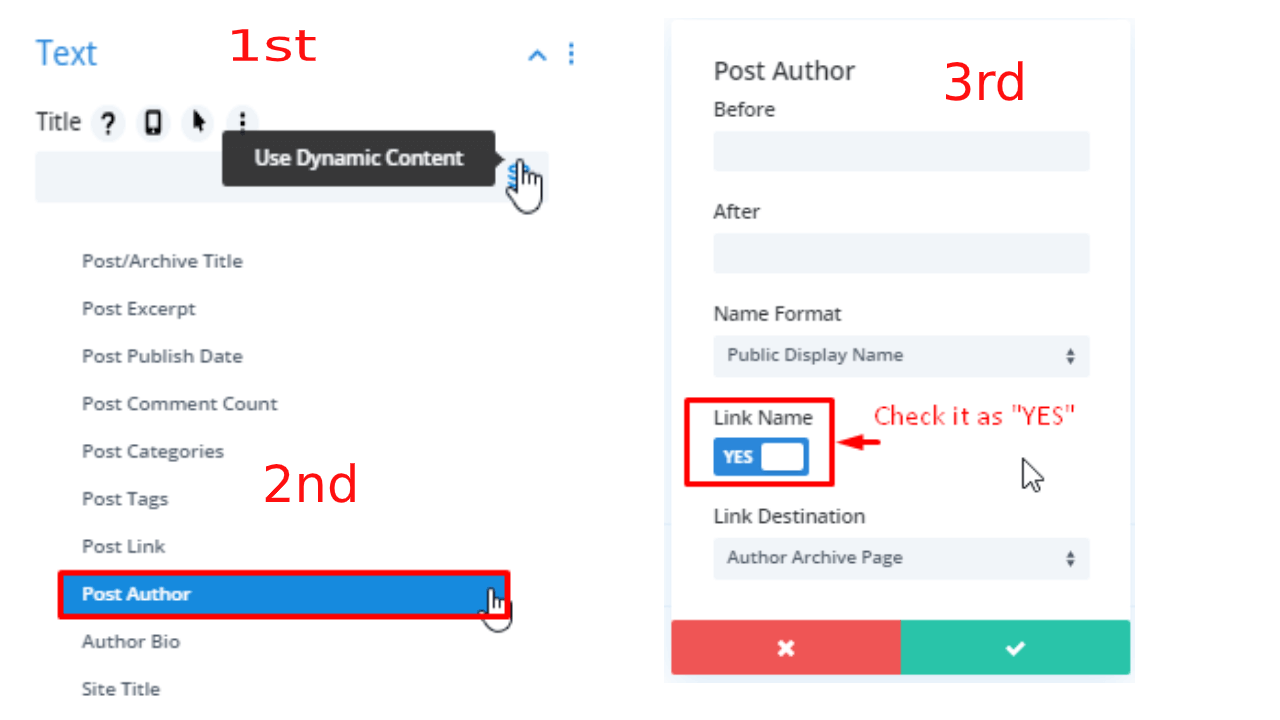
Title: Use Dynamic Content > choose Post Author > then check Link Name as “Yes.”
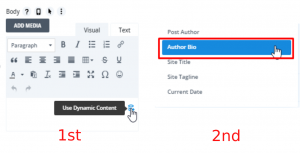
For the author bio,
Go to Body > Use Dynamic Content > choose Author Bio
Move to Image & Icon settings,
Use Dynamic Content > Author Profile Picture
Now, head over to the Design tab, and customize as follows.
Image & Icon-
Image/Icon Placement: Top
Rounded Corners: 50px for each side.
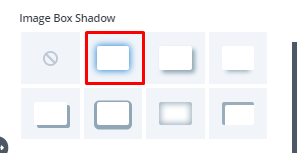
Image Box Shadow: Look in the screenshot
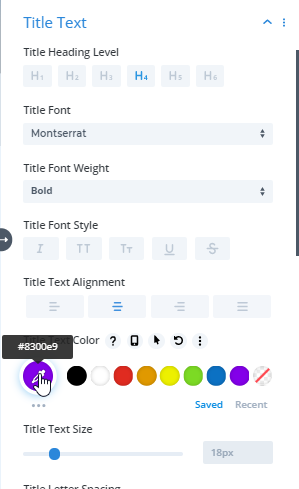
Title Text-
Title Heading Level: H4
Font: Montserrat
Title Font weight: Bold
Text Alignment: Center
Title Text Color: #8300E9
Title Text Size: 18px
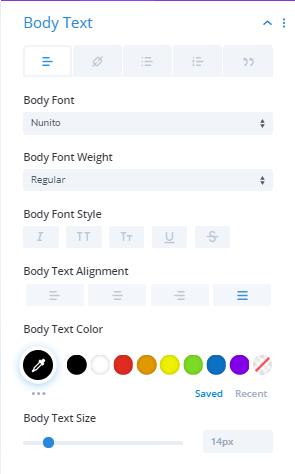
Body Text-
Body Font: Nunito
Font Weight: Regular
Body Text Alignment: Justified
Body Text Color: #000000
Text Size: 14px
Save changes.
Creating an opt-in form in a custom blog post template in Divi 4 Theme Builder
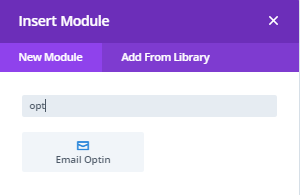
Opt-in forms are crucial for blogs. Therefore, we’re going to add a subscription form, so you can create a subscriber list for the email marketing campaigns. Likewise, the above steps, add a new row. And then insert an opt-in module.
In the content menu, give your subscription form title. And add some content to the body area if you want to.
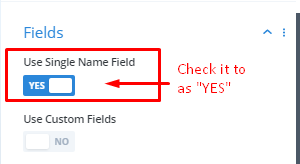
Further, in an email account, add your email marketing account like Mailchimp or Salesforce. Then in Fields settings, check “Use Single Name Field” as “Yes”.
Add Success Action if you want to, else move to the Background settings.
Background settings: Background > Choose gradient > set both color to #E8E8E8
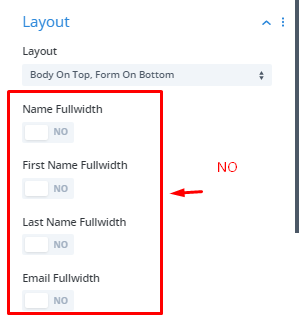
Proceed to the design tab. Customize layout settings as follows,
Layout: Body On Top, Form On Bottom
Name Fullwidth: NO
First Name Fullwidth: NO
Last Name Fullwidth: NO
Email Fullwidth: NO
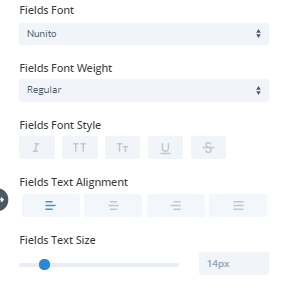
Field settings-
Leave color settings as they are.
Fields Font: Nunito
Font weight: Regular
Text Alignment: Left
Text Size: 14px for each device
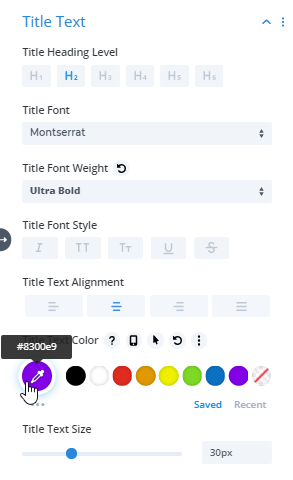
Title Text settings-
Title Heading Level: H2
Font: Montserrat
Title Font Weight: Ultra Bold
Text Alignment: Center
Title Text Color: #8300E9
Title Text Size: 30px for each device
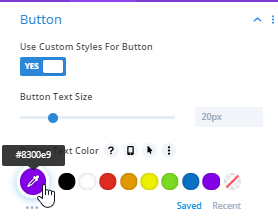
Button settings-
Check “Use Custom Styles For Button” as “YES.”
Button Text Size: 20px
Text Color: #8300E9
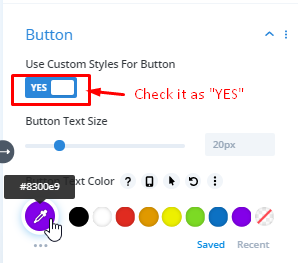
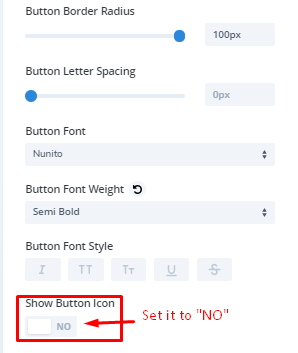
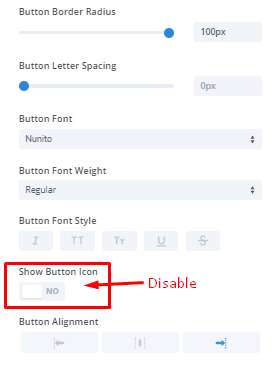
Button Border Radius: 100px
Button Font: Nunito
Font Weight: Semi Bold
Check “Show Button Icon” to “NO”
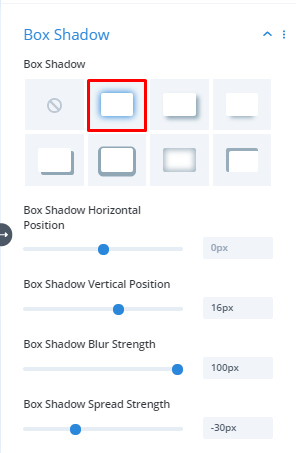
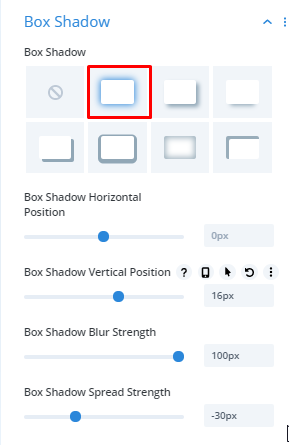
In addition to make the opt-in form more beautiful, do some box-shadow customization.
Box Shadow: See screenshot
Box Shadow Vertical Position: 16px
Shadow Blur Strength: 100px
Box Shadow Spread Strength: -30px
Save changes.
Related posts section
Similar posts in an article are something that makes the blog template favorable for the user to see glimpses of some other works by the author, and navigate the blog archive with ease.
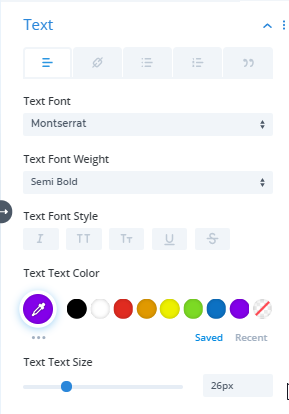
Therefore, to achieve our related post section, add a new row and insert text module. Write some text in the body and then move to the design tab and customize the text as follows.
Text Font: Montserrat
Font Weight: Semi Bold
Text Color: #8300E9
Text Text Size: 26px
Save Changes.
Add a new module blog.
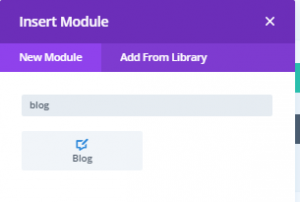
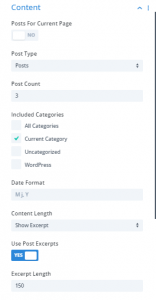
In Content settings, customize as follows,
Post Count: 3
Included Categories: Current Category
Excerpt Length: 150
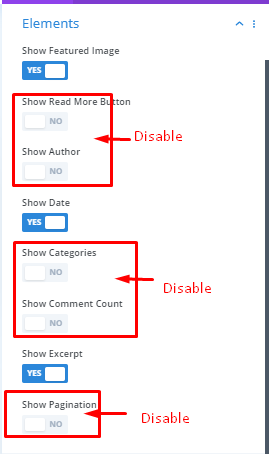
Move to elements settings, and customize as shown in the picture,
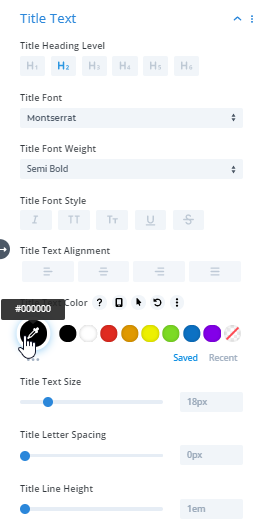
In order to make related posts appearance similar to the opt-in form, move to the design tab, and choose Grid layout. After that move to the title text settings, and customize as follows.
Title Heading Level: H2
Title Font: Montserrat
Font Weight: Semi Bold
Title Text Color: #000000
Body Text Settings-
Body Font: Nunito
Font Weight: Regular
Body Text Color: #000000
Body Text Size: 14px
Meta Text Settings-
Meta Font: Nunito
Font Weight: Regular
Meta Text Color: #8300E9
Body Text Size: 14px
Border Settings-
Rounded Corners: 20px
Box Shadow Settings-
Save changes.
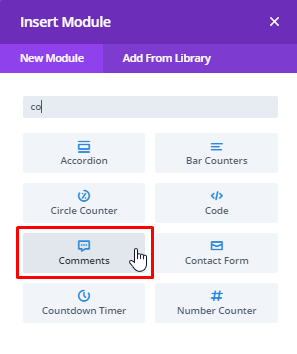
Designing comment box for custom Divi blog post template
We have almost done with our custom blog post template. It’s time to get reactions from visiting readers. So, let’s make a comment box.
Likewise, all the other steps, add a new row and insert comment module.
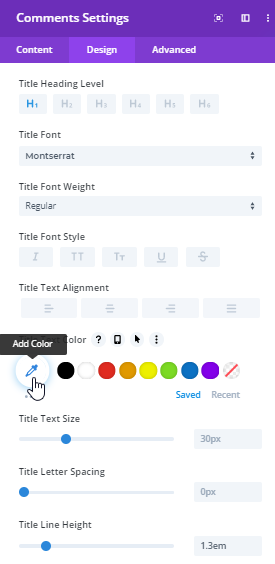
After adding the module, jump ahead to the design tab, and customize fields settings.
Fields Background Color: #E8E8E8
Fields Text Color: #000000
Font: Nunito
Font Weight: Regular
Fields Line Height: 1.3em
Fields Rounded Corners: 10px
Image settings-
Rounded Corners: 50px
Title Text Settings-
Meta Text Settings-
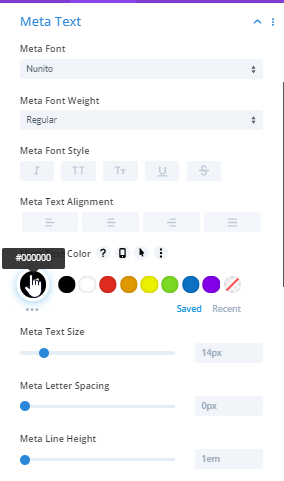
Same settings for the comment text but don’t add color.
Button settings-
Check “Use Custom Styles For Button” as “YES.”
Button Text Size: 20px
Button Text Color: #8300E9
Border Radius: 100px
Button Font: Nunito
Font Weight: Regular
Disable “Show Button Icon”
Button Alignment: Left
Save Changes. And we’re done with our Divi custom blog post template made in Theme Builder.
Final result
For Computer-
For Tablet and Phone versions,


I hope following these step by step instructions, you can create a custom Divi blog post template of your own. However, you can also try our premium blog post template plugin or Grace- Divi Blog Post Layout Pack for more beautiful Divi article layouts.


Hi, thanks for this tuto ! I’m looking for a way to make modal image for DIVI Post Content module. Someone know if it is possible and how please?
I want to create a custom blog page with [Image][Post title] like structure, but i cant find a way to do it in divi builder can you help?
hello. how do you use it ? I created a new post, choosing form existing pages the one I’ve built as template in (Divi Theme builder) following your recommendations. but the layout duplicate the layout… the header is correct but it is duplicated inside the content area …. can you help ?