Divi Extended Documentation
Search for answers or browse our knowledge base.
How to add custom CSS class to a menu item in WordPress
If you want to format a specific menu item on your website in a different way and want to a CSS class to that specific item, this is how you could do that.
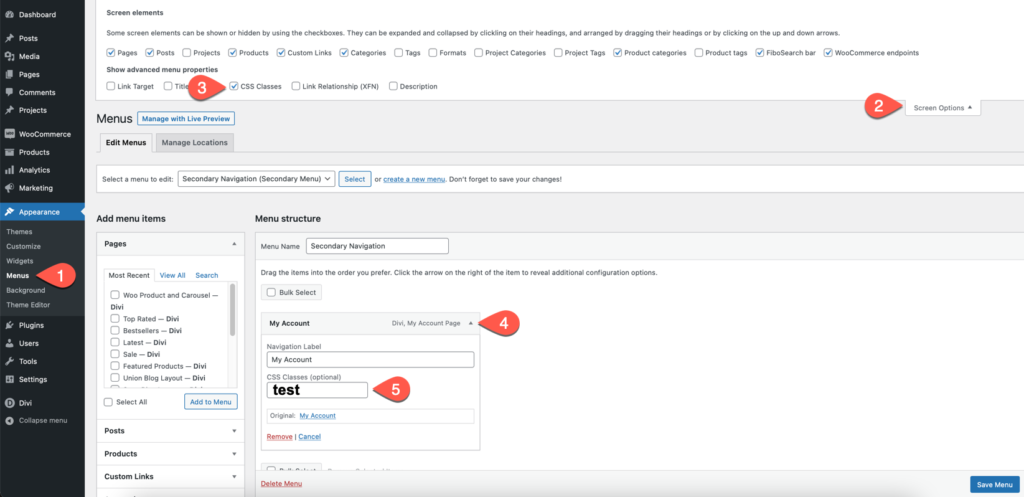
- Go to Appearance > Menus in your WordPress dashboard.
- Open Screen Options by clicking the dropdown in the top-right corner.Check the box for CSS Classes to enable the option.
- Expand the menu item where you want to add a custom CSS class.Enter the class name in the “CSS Classes (optional)” field (e.g.,
test).- You can specify any class name you like, but avoid using spaces between letters.

This is how this class will be appended to the specific menu item when you look at the HTML code rendered on the page. You can write your custom CSS based on this class.

For example, to change the color of this specific menu item, you could use the following CSS snippet in the Divi Theme Options Custom CSS area.
.test a{
 color: red;
}
How to add custom CSS class to a block in the Block Editor
If you want to apply custom styling to a specific block in the WordPress Block Editor, follow these simple steps to add a custom CSS class:
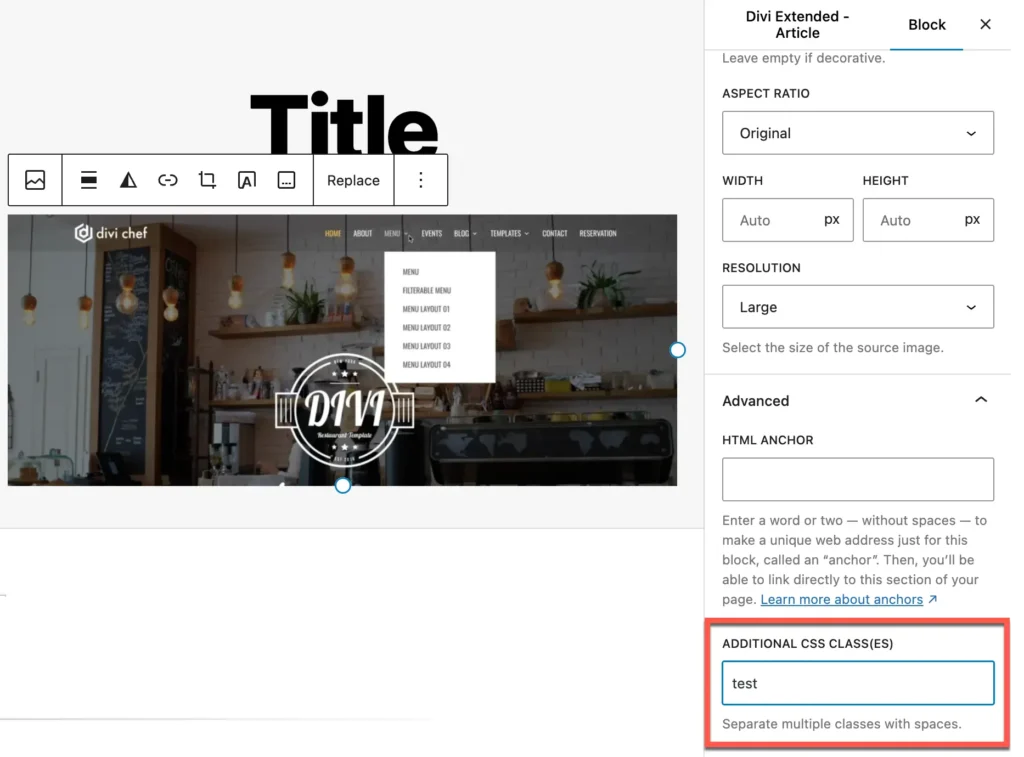
- Select the Block to Customize: In the WordPress Block Editor, click on the block you want to style with custom CSS.
- Access Block Settings: Look to the right-hand sidebar and click on the Block tab to open the settings for the selected block.
- Scroll to the Advanced Section: Scroll down until you reach the Advanced section.
- Add Your Custom CSS Class: In the field labeled Additional CSS Class(es), enter your desired CSS class name(eg: test). Avoid using spaces in the class name.
- Save Your Changes: After adding the class, make sure to save or update your page or post to apply the custom styles.

