Divi Extended Documentation
Search for answers or browse our knowledge base.
How can I assign a custom class to a Divi module to apply specific CSS styling?
Assigning a custom class to a Divi module allows you to target that module specifically with custom CSS. Here’s how you can do it:
Steps to Assign a Custom Class in Divi
- Enable the Visual Builder:
Open the page where the module is located and enable the Visual Builder. - Select the Module:
Click on the module you want to style to open its settings. - Navigate to the Advanced Tab:
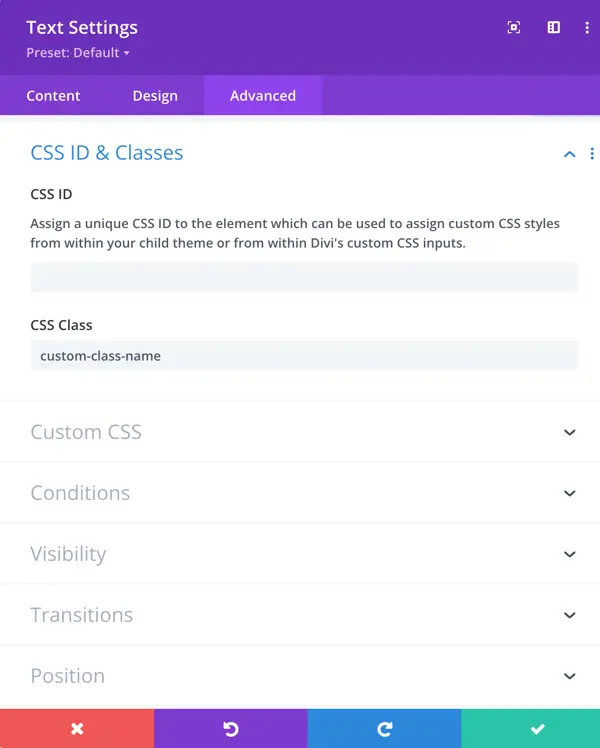
- In the module settings, go to the Advanced tab.
- Under the CSS ID & Classes section, you’ll find the CSS Class field.
- Add the Class Name:
- Enter your desired class name in the CSS Class field.
Example:custom-class-name
- Enter your desired class name in the CSS Class field.
- Save Your Changes:
Save the changes and exit the Visual Builder.

Adding CSS for the Custom Class
Once you’ve assigned the class, you can use it to write custom CSS:
- Go to Theme Options:
Navigate to Divi > Theme Options > Custom CSS in your WordPress dashboard. - Write Your CSS:
Use the class name to target the module. For example: - Save Changes.
.custom-class-name {
    background-color: #f0f0f0;
    padding: 20px;
    border: 1px solid #ccc;
}
Note:
- Ensure the class name is unique to avoid conflicts with other modules or styles.
- For more advanced styling, you can use browser developer tools to inspect the module and refine your CSS.
